

rotork IQ Range, IQ Multi-Turn, IQT Part-Turn Full Configuration, Status And Monitoring User Manual
Page 1

IQ Range
IQ and IQT full configuration,
status and monitoring user manual
Keeping the World Flowing
IQ Multi-Turn and IQT Part-Turn
Electric Valve Actuators
Page 2

2
Page 3

Table of Contents
1. Introduction
1. Introduction __________________________3
ACTUATOR
SETTING TOOL
1.1 Using the Rotork Setting Tool ___________4
1.2 Connecting to the actuator _____________6
1.3 Password Security _____________________7
2. Settings ______________________________8
2.1 Settings – Limits _______________________8
2.2 Settings – Indication __________________11
2.3 Settings – Control ___________________ 14
2.4 Settings – ESD ______________________ 32
2.5 Settings – Security ___________________ 34
2.6 Settings – Defaults ___________________ 35
3. Status ______________________________ 36
3.1 Status – Control _____________________ 36
3.2 Status – Alarms _____________________ 40
3.3 Status – Movement ___________________41
3.4 Status – Indication ___________________ 42
3.5 Status – Diagnostics __________________ 43
4. Data Log ___________________________ 44
4.1 Data Log – Torque Logs ______________ 45
4.2 Data Log – Event Logs ________________ 47
4.3 Data Log – Trend Logs ________________51
4.4 Data Log – Operation Logs ____________ 54
4.5 Data Log – Partial Stroke Logs _________ 58
4.6 Data Log – Set Log Date ______________ 59
This manual provides instruction on the
setup and analysis of the actuator.
It is structured so that instruction on using the
Setting Tool, navigation and password security
is contained in Section 1. This must then be
applied when changing settings and viewing
information as set out in Sections 2 - 5.
The user must therefore be familiar with the
operations contained in Section 1 before
proceeding.
This manual should be read in conjunction with
PUB002-039 IQ Range Instructions for Safe Use,
Installation, Basic Setup and Maintenance and
PUB002-065 IQT Range Instructions for Safe
Use, Installation, Basic Setup and Maintenance
supplied with the actuator.
5. Assets ______________________________ 60
5.1 Assets – Actuator ___________________ 61
5.2 Assets – Valve _______________________ 64
5.3 Assets – 2nd Stage Gear Box __________ 64
5.4 Assets – Service History ______________ 65
5.5 Assets – Service Alarms ______________ 65
5.6 Assets – NAMUR 107 ________________ 66
5.7 Assets – Online Help _________________ 67
IQ3 Full Confi guration Man ual – Secti on: Introduc tion 3
Page 4

ACTUATOR
SETTING TOOL
1.1 Using the Rotork Setting Tool
The Setting Tool is used to connect to the actuator, navigate
through menus, change settings and view information presented
on the actuator display.
1
9
4
7
8
5
11
3
6
2
10
Name General Operation
1. Key Scroll up.
2. Key Scroll down / Connect via Bluetooth®.
3. Key Decrease value / Toggle setting / Scroll left.
4. Key Increase value / Toggle setting / Scroll right.
5. Key Select the highlighted item.
Save the highlighted setting.
Stop actuator running (when Setting Tool
control is enabled, refer to 2.3.1).
6. Key Return to previous menu.
7. Key Cycle between standard and zoom view on data
logger torque graphs.
8. Key Actions the pre-configured mission stored on
the Rotork Bluetooth® Setting Tool Pro.
9. Infrared transmitter window.
10. Key Send a close command to the connected
actuator (when enabled refer to 2.3.1).
11. Key Send an open command to the connected
actuator (when enabled refer to 2.3.1).
Navigation
To navigate through screens, menus and pages, the
and keys are used. A single key press results in one
movement. Holding the key will result multiple movements in
succession. Menus, pages and dropdowns wrap round. This
means that an item at the bottom of a screen can be accessed by
pressing while at the top.
Shorthand Instructions
This manual uses shorthand instruction (example):
(meaning select, edit setting, save) to prompt the user with the
key operations required. The display will also indicate the relevant
keys at the bottom left.
Pages, Functions and Index
The display indicates the number of each function as it is
highlighted along with the total number of functions on that
page. In the example below, Action is function 2 out of a total of
15 functions on that page:
2/15
This manual uses the display function number as reference
for instructions.
Action (highlighted) is function 2 out of a total 15
on the LIMITS page.
Selection
The key is used to select a main menu item, menu items or
instruction buttons. For a setting, is used to select when a
change is required. The first time this occurs in a communication
session, a password will be requested, refer to 1.3. Subsequent
changes within the same session will not require the entry of
a password. When selected, a menu item will be opened or a
setting or function will be highlighted.
Information, instruction and password entry screens require an
or button to be selected. Navigate to highlight
the required button using or and press to select.
Setting controls
There are four types of setting control used. When a function is
selected, the ability to change the function, setting or value is
made available using drop down list boxes, check boxes, slider
controls or numerical values.
Drop down list boxes
Drop down list boxes are indicated by .
Contacts
Monitor Relay
Mode Available
S1
Function Closed Limit
Contact
Position 0%
Function Open Limit
Contact
Position 0%
2/37
The example of the S1 indication contact Function (highlighted)
dropdown list box is shown on the next page. When selected
(password entered if applicable, refer to 1.3), the current set
function will be highlighted within the drop down list.
N/O N/C
S2
N/O N/C
4 IQ3 Full Co nfiguration M anual – Sec tion: Introd uction
Page 5

1.1 Using the Rotork Setting Tool
continued
ACTUATOR
SETTING TOOL
Contacts
Monitor Relay
Mode Available
Function Closed Limit
Contact
Position 0%
Function Open Limit
Contact
Position 0%
2/37
Disabled
S1
Closed Limit
Open Limit
N/O N/C
End Position
Pos. % Open
S2
Mid Travel
Motor Running
N/O N/C
Closing
The symbol in the drop down box indicates more functions
are available by scrolling or .
Use or to scroll through the list until the required function
is highlighted. Press to select. The drop down list box will
close and the selected function will be saved and shown on the
page.
To exit the drop down list without saving a new setting
press to return to the previous page.
Checkboxes
Check boxes are indicated by or .
Contacts
Monitor Relay
Mode Available
S1
Function Closed Limit
Contact
Position 0%
Function Open Limit
Contact
Position 0%
3/37
An example for the S1 indication contact type check box is
shown above.
Mode Available
Function Closed Limit
Contact
Position 0%
Function Open Limit
Contact
Position 0%
3/37
When selected (password entered if applicable, refer to 1.3), the
current mode will be highlighted.
Use either the or to toggle between modes.
Once the required mode is checked, press to select. The
selected mode will be saved and shown as checked on the page.
To exit the checkbox without saving a new setting, press
to return to the page.
N/O N/C
S2
N/O N/C
Contacts
Monitor Relay
S1
N/O N/C
S2
N/O N/C
Slider controls
Slider controls graphically indicate the set value followed by the
exact numerical value, for example:
Position 35%
The range covered by the slider is fixed and is determined by
its function.
Contacts
Monitor Relay
Mode Available
S1
Function Pos % Open
Contact
Position 35%
Function Open Limit
Contact
Position 0%
4/37
N/O N/C
S2
N/O N/C
An example of the S1 indication position value is shown above.
The S1 contact function of Pos.% Open indication will show the
valve position at which the contact will change state.
Press (enter password if applicable, refer to 1.3).
Use or to decrease or increase the value.
Slider controls wrap round so a key press on a minimum value
will wrap round and indicate the maximum value. The value step
changes increase as or is held down.
Once the required value is set press to select. The selected
value will be saved and shown on the page.
To exit the slider control without saving a new setting,
press to return to the page.
Numerical values
Numerical values relate to fields such as time or address - shown
in the example below.
Stopped
Pakscan
Address 3
Baud Rate 2400
Position
Update Times (s)
Deviation 5%
Update Times (s) 5
Press (enter the password if applicable, refer to 1.3).
Use or to decrease/increase the numerical value.
Press to select.
To exit the numerical value control without saving a new
value, press to return to the previous page.
1
Torque
1/8
IQ3 Full Confi guration Man ual – Secti on: Introduc tion 5
Page 6

ACTUATOR
SETTING TOOL
1.2 Connecting to the actuator
The Rotork Bluetooth® Setting Tool Pro incorporating Bluetooth
wireless technology is shown below. It is identified by the key
symbols and a clear band between the top and bottom casings
being transparent.
The Rotork Infrared Setting Tool Pro is identified by solid yellow
keys and a yellow band between casings:
Yellow: Rotork Infrared Setting Tool Pro
Clear: Rotork Blueto oth® Setting Tool Pro
Connecting to the actuator using Bluetooth
The actuator must be powered up to connect using Bluetooth. The
default security set in the actuator for Bluetooth connection is by
initiation using an infrared command. This means that the user must
be in close proximity and in direct line of sight of the actuator.
Point the Setting Tool at the infrared sensor located at the lower
right of actuator display window within a range of 0.25 m (10 in)
and press until the key flashes blue.
The screen will change to the Main Menu screen.
Open Limit
The Setting Tool will automatically connect using
Bluetooth which takes up to 5 seconds.
Connection is indicated by a blue light on the tool and in the
actuator display window. Once connected, the tool can be used
without pointing it at the actuator display window.
Bluetooth connection will be maintained while Setting Tool key
commands are made. After a period of 6 minutes with no key
commands, Bluetooth connection will be turned off and the
Setting Tool and display blue lights will go out. To manually
disconnect Bluetooth at any time, press and together.
Connecting to the actuator using Infrared
Infrared communication is used when:
• Bluetooth communication has been disabled
(refer to 2.5).
• configuration is required without power being applied to
the actuator.
• legacy infrared only Rotork Setting Tool is used
(yellow banded tool).
The Infrared only tool has solid yellow keys and a yellow band
between casings.
Communication is by direct line of site infrared commands within
a range of 0.25 m (10 in). Keys have the same function as shown
in this manual. Each key press sends a discreet infrared command
and therefore the tool must be in range.
6 IQ3 Full Co nfiguration M anual – Sec tion: Introd uction
Page 7

1.3 Password Security
ACTUATOR
SETTING TOOL
Menus, pages and settings may be viewed when the actuator is
set to Remote, Stop or Local. To change a setting, the actuator
must be selected to Local or Stop using the red selector and the
correct password must be entered.
The password will be requested the first time a function
is selected. Once correctly entered, other changes can be
made without re-entering the password for the duration
of the Setting Tool session with the actuator.
If the actuator is selected to Remote and a setting is selected, the
following information screen will be displayed:
Press to return to the page. Set the red selector to Local or
Stop to proceed with setting.
With the actuator selected to Local or Stop and when any setting
function is selected, the Password screen will be displayed:
If the user has set their own password the following screen will
be displayed:
Enter user selected Password:
Use to highlight new password entry box and press
Use
to scroll through alphanumeric values to display
required character.
Use to move to the next character.
Use to delete the highlighted character.
Use when selected password is complete.
Navigate to the OK button using
.
Press
The factory set default password ROTORK is displayed and the
OK button is highlighted.
Press . The setting page from which the function was
selected will be displayed with the function highlighted.
IQ3 Full Confi guration Man ual – Secti on: Introduc tion 7
Page 8

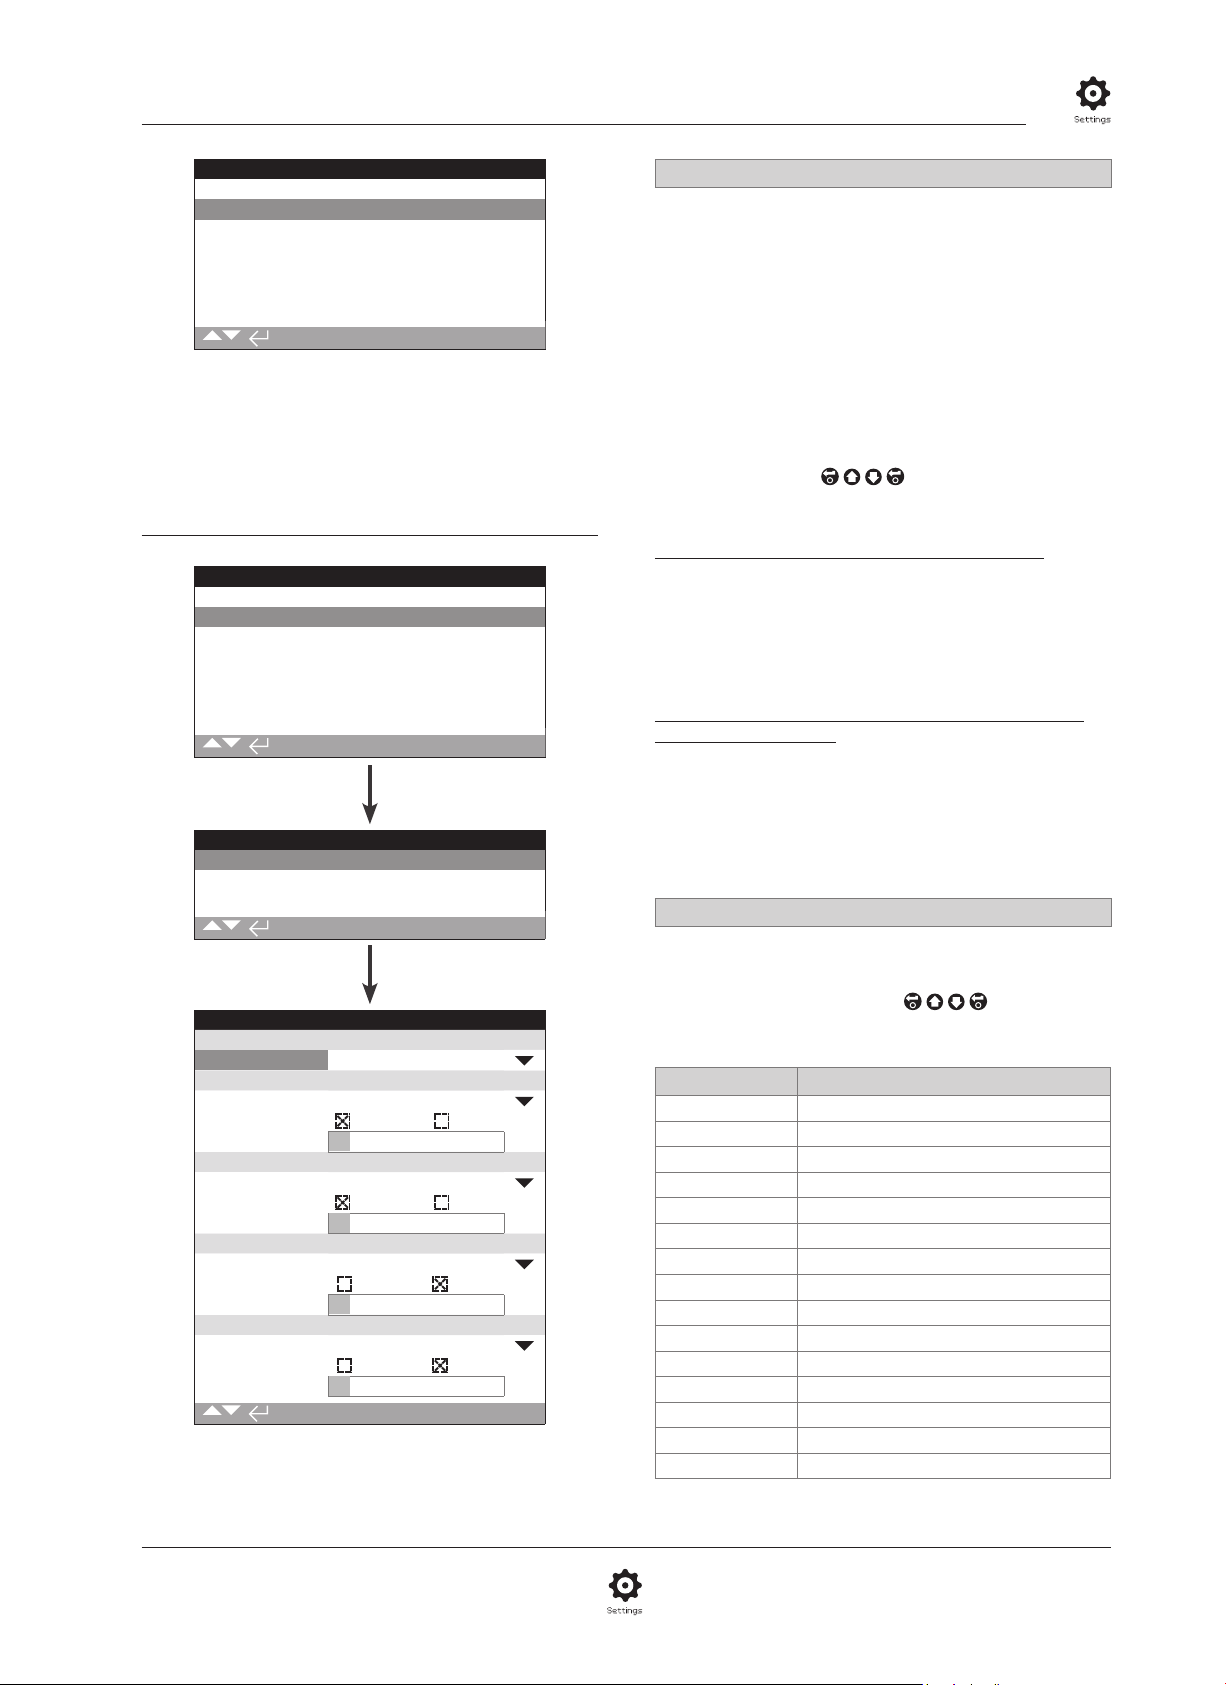
2. Settings 2.1 Settings – Limits
Limits
Indication
Control
ESD
Security
Defaults
2. Settings Menu Page
2.1 Limits 8
2.2 Indication 11
2.2.1 Contacts 11
2.2.2 Local Display 12
2.2.3 Analogue 14
2.3 Control 14
2.3.1 Local Control 15
2.3.2 Remote Control 16
2.3.3 Interrupter Timer 31
2.4 ESD 32
2.5 Security 34
2.6 Defaults 35
Settings
Limits
Settings
Indication
Control
ESD
Security
Defaults
Close Settings
Direction Clock Anti
Action
Torque 40%
Set Limit
Action
Torque 40%
Set Limit
Turns 14.9
Position
*
Speed
Opening
OP Bypass Pos 5%
Closing On Off
CL Bypass Pos 95%
1/15
Limit Torque
Open Settings
Limit Torque
49.6
90%
Torque Limit Bypass
On Off
* IQT builds only
The Limits page is shown above with the default settings.
Close Settings
1/15 Close Direction
Sets the output rotation direction required to close the valve.
Using the handwheel, manually operate the actuator to establish
valve closing direction.
Clock (default) – clockwise rotation of the actuator closes the
valve.
Anti – anti-clockwise (counter clockwise) rotation of the actuator
closes the valve.
To change,
closing direction.
2/15 Close Action
The actuator can be configured to close on torque for seating
valve types or limit for non-seating valve types.
Refer to Valve manufacturer for recommended setting.
In the absence of valvemaker instruction refer to the
following table:
. The checkbox will indicate the set
8 IQ3 Full Co nfiguration M anual – Sec tion: Setti ngs
Page 9

2.1 Settings – Limits
continued
Valve Type
Close Action
Open Action
Wedge gate Torque Limit
Globe Torque Limit
Butterfly Limit Limit
Through conduit Limit Limit
Ball Limit Limit
Plug Limit Limit
Sluice gate Limit Limit
Penstock Limit Limit
Parallel slide Limit Limit
Limit (default) – The actuator will move the valve to the set
Closed Limit position and stop.
Tor que – The actuator will move the valve to the set Closed
Limit position and then apply the set torque (3/15) to seat the
valve.
To change,
closing action.
3/15 Close Torque
The value of torque available to close the valve can be limited
between 40% and 100% of its nameplate rated torque. If the
actuator experiences the set torque when closing between the
limits, it will stop and must then be reversed before it will move
closed again. Operational torque can be monitored using the
data log (refer to 4) and using the torque-position home screen
(refer to 2.2.2).
The default setting for closed torque limit is 40%. If a
value of torque was specified at time of order, the %
value equating to the specified torque will have been set
by Rotork.
If the actuator was delivered complete with valve, the
valvemaker may have set the closed torque limit based on
testing and/or design requirements.
In the absence of valvemaker instruction, set the minimum
value required to close the valve under process conditions.
To change,
closing torque value.
4/15 Close Limit
Limits must only be set when the actuator is coupled to the valve.
The minimum number of output turns between set Closed and
Open Limits is 2.5 or 30º (IQT). A Closed Limit position cannot
be set if the actuator is at its set Open Limit or within 2.5 (30º)
turns of an Open Limit position. Should a condition arise where
this occurs, for example where an actuator at its Closed Limit
position is coupled to a valve at its open position, refer to 2.6
Defaults - Limits.
If the actuator was delivered complete with valve, the
valvemaker should have set the Closed and Open limit
position, refer to testing below.
The Closed Limit position must be set by moving the actuator to
the valve Closed Limit position and pressing
The actuator will display the following Instruction:
. The checkbox will indicate the set
. The slider will indicate the set
.
Move the actuator and valve to the close position. Allow for
overrun by winding open by ½ to 1 output turn.
Press to select OK.
The Closed Limit will be set at the current valve position. If not
previously illuminated, the closed indication LED (default green,
refer to 2.2.2) will be turned on.
Testing: The limit position can be confirmed by opening the
actuator until the indication LED changes colour and then
moving closed until the Closed Limit indication LED colour is
turned on at the set Closed Limit position.
Open Settings
5/15 Open Action
The actuator can be configured to open on torque for backseating valve types or limit for non back-seating valve types.
Refer to valve manufacturer for recommended setting.
In the absence of valvemaker instruction set open action
to Limit.
Limit (default) – The actuator will move the valve to the set
Open Limit position and stop.
Tor que – The actuator will move the valve to the set Open Limit
position and then apply the set torque (6/15) to back-seat the
valve.
To change,
opening action.
6/15 O pen Torq ue
The value of torque available to open the valve can be limited
between 40% and 100% of its nameplate rated torque. If the
actuator experiences the set torque when opening between the
limits, it will stop and must then be reversed before it will move
open again. Operational torque can be monitored using the data
log (refer to 4) and using the torque-position home screen (refer
to 2.2.2).
The default setting for open torque limit is 40%. If a value
of torque was specified at time of order, the % value
equating to the specified torque will have been set by
Rotork.
If the actuator was delivered complete with valve, the
valvemaker may have set the closed torque limit based on
testing and/or design requirements.
In the absence of valvemaker instruction, set the minimum
value required to open the valve under process conditions
but higher than that set for closed torque.
To change,
of opening torque value.
. The checkbox will indicate the set
. The slider will indicate the set limit
IQ3 Full Confi guration Man ual – Secti on: Setting s 9
Page 10

2.1 Settings – Limits
continued
7/15 Set Open Limit
Limits must only be set when the actuator is coupled to the
valve.
The minimum number of output turns between set Open and
Closed Limits is 2.5. An Open Limit position cannot be set if
the actuator is at a set Closed Limit position or within 2.5 turns
of a Closed Limit position. Should a condition arise where this
occurs, for example where an actuator at its Open Limit position
is coupled to a valve at its closed position, refer to 2.6 Defaults
- Limits.
If the actuator was delivered complete with valve, the
valvemaker should have set the Closed and Open limit
positions, refer to testing below.
The Open Limit position must be set by moving the actuator to
the valve Open Limit position and pressing
The actuator will display the following Instruction:
Move the actuator and valve to the open position. Allow for
overrun by winding closed by ½ to 1 output turn.
Press to select OK.
The Open Limit will be set at the current valve position. If not
previously illuminated, the open indication LED (default red, refer
to 2.2.2) will be turned on.
Testing: The limit position can be confirmed by closing the
actuator until the indication LED changes colour and then
moving open until the Open Limit indication LED is turned on at
the set Open Limit position.
8/15 Tu rns
Shows the actuator output turns between the set Closed and
Open Limit positions.
9/15 Position (non-editable)
Shows the actuator current position on 0-100%.
10/15 Speed (IQT only)
The default speed for a standard IQT is 100% (rated) or 50% for
IQTM. Speed can be adjusted to suit operation/process needs.
To cha nge ,
set speed.
. The slider will indicate the current
.
Torque Limit Bypass
The default setting for opening and closing torque limit bypass is
Off (torque protection active at all times). Bypassing the torque
protection allows torque up to approximately 150% of rated to
be available.
The valve maker or integrator should be consulted to
confirm the valve structure and interface components can
withstand the additional torque/thrust.
11/15 Opening
Opening torque limit protection can be bypassed over a portion
of the opening stroke, refer to 12/15. When set to On, torque
of up to approximately 150% of rated is available for opening
"sticky" valves.
To cha nge ,
opening torque limit bypass status.
12/15 Opening Bypass position
When opening torque limit bypass is set to On (refer to
11/15), the position over the opening stroke where torque
limit protection is bypassed can be set. If torque limit bypass
open is set to Off, the opening bypass position control will be
greyed out.
The available position range over which torque limit protection
is bypassed is 0% (Closed Limit) to 95% open. Outside the set
bypass position, torque switch protection will revert to that set
for 6 /15.
To cha nge ,
set position range over which opening torque limit is
bypassed.
13/15 Closing
Closing torque limit protection can be bypassed over a portion of
the closing stroke, refer to 14/15. When set to On, torque of up
to approximately 150% of rated is available for closing the valve.
To cha nge ,
closing torque limit bypass status.
14/15 Closing Bypass position
When closing torque limit bypass is set to On (refer to 13/15), the
position over the closing stroke where torque limit protection is
bypassed can be set. If torque limit bypass closed is set to Off,
the closing bypass position control will be greyed out.
The available position range over which torque limit protection
is bypassed is 100% (Open Limit) to 5% open. Outside the set
bypass position, torque switch protection will revert to that set
for 3 /15.
To cha nge ,
position range over which closing torque limit is bypassed.
. The checkbox will indicate the set
. The slider will indicate the
. The checkbox will indicate the set
. The slider will indicate the set
10 IQ3 Full Co nfiguratio n Manual – Sec tion: Sett ings
15/15 Auto Limit Setting
Sets the open and close limits automatically. Then end of travel
for the lower and upper limits is established when 40% torque
has been reached in each direction. The Actuator must be in
Local to complete this function.
Page 11
2.2 Settings – Indication
Limits
Indication
Control
ESD
Security
Defaults
Instruction is provided on:
2.2.1 Contacts
2.2.2 Local display
2.3.3 Analogue
2.2.1 Indication – Contacts
Settings
Limits
Indication
Control
ESD
Security
Defaults
Contacts
Local Display
Analogue
Mode Available
Function Closed Limit
Contact
Position 0%
Function Open Limit
Contact
Position 0%
Function Closed Limit
Contact
Position 0%
Function Open Limit
Contact
Position 0%
1/37
The Monitor Relay and S contact settings page is shown in
their default setting.
Refer to actuator wiring diagram for available contacts.
Settings
Indication
Contacts
Monitor Relay
S1
N/O N/C
S2
N/O N/C
S3
N/O N/C
S4
N/O N/C
1/37 Monitor Relay – Mode
The monitor relay provides remote indication of actuator status.
It provides a volt free change over contact, refer to actuator
circuit diagram. There are 2 modes that can be set:
Available (default) – Actuator available for remote control.
Monitors power supplies, motor thermostat, detected internal
fault and remote control selected. A loss in one or more will
cause the monitor relay to de-energise indicating "not available"
for remote control.
Fault – Actuator fault. Monitors power supplies, motor
thermostat and detected internal fault. A loss in one or more
will cause the monitor relay to de-energise indicating "actuator
fault".
To change the mode,
will close and the selected mode will be shown:
. The drop down list box
S Contact function, contact type and position
Each relay contact can be set to one of the functions shown
in the table below and its contact type can be set as Normally
Open (NO) or Normally Closed (NC). If Pos % Open function is
selected, the position at which the relay operates can be set. For
all other functions the position control slider will be greyed out.
Standard Contacts S1-S4, Option S5-S8 and S9-S12
Contacts when fitted
The method for setting all S contacts is the same. S1 to S4 are
fitted as standard. A further 8 extra contacts are available as
options grouped: S5 to S8 and S9 to S12, refer to actuator wiring
diagram. If extra contacts are fitted their configuration screens
are accessed by scrolling down. If not fitted their configuration
settings will be greyed out.
2/37 Contact Function
The available contact functions included in the drop down list
box are shown below.
To change the contact function,
down list box will close and the selected function will be
shown:
Function Indication:
Disabled Contact disabled
Closed Limit Closed limit position (exact)
Open Limit Open limit position (exact)
End Position Both Closed and Open Limit positions
Pos % open Set position mid-travel – opening and closing
Mid Travel Not at Closed or Open Limits
Motor Running Motor running
Closing Travelling in the close direction - motor or handwheel
Opening Travelling in the open direction - motor or handwheel
Moving Travelling – motor or handwheel
Handwheel During handwheel operation
Blinker Travelling (make/break at 1 second intervals)
Valve Alarm On torque trip mid-travel or motor stall condition
Torque Trip CL Torque trip closing - any position
Torque Trip OP Torque trip opening - any position
. The drop
Continued over page
IQ3 Full Confi guration Man ual – Secti on: Setting s 11
Page 12

2.2.1 Indication – Contacts
continued
2.2.2 Indication – Local Display
Function Indication:
Torque Trip Torque trip closing or opening - any position
Torque Trip Mid Torque trip mid-travel, closing or opening
Motor Stall
Mid Travel Stall
Stop Selected Red selector set to STOP
Local Selected Red selector set to Local
Remote Selected Red selector set to Remote
Control Alarm ESD signal and/or interlock active
Monitor Monitor relay de-energised
ESD Active ESD signal applied
OP Interlock Active Open Interlock active
CL Interlock Active Close interlock active
Interlock Active Open and/or closed interlock active
Actuator Alarm Internal fault detected
Motor Over Temp Motor thermostat has tripped
Lost Phase 3-phase only: monitored phase 3 lost
24 V Supply Fail Internal 24 VDC supply failed (Terminals 4 & 5)
P Stroke Active Partial stroke underway
P Stroke Fail Partial stroke not completed
P Stroke Pass Partial stroke completed
Bluetooth Bluetooth communication in progress
Battery Low Battery low
Battery Discharged Battery discharged or missing
Digital Output Network option controlled
Maintenance Scheduled maintenance due
Hi Torque Alarm Set Hi torque value reached
Hi Hi Torque Alarm Set Hi-Hi torque value reached
Src 1 Coms Loss Communication failure with option 1 card
Src 2 Coms Loss Communication failure with option 2 card
NAMUR Maint. A NAMUR maintenance condition is active
NAMUR Out Of Spec. A NAMUR out of specification condition is active
NAMUR Func. Check A NAMUR function check condition is active
NAMUR Failure A NAMUR failure condition is active
Over Modulation Starts per hour has been exceeded
Motor Enable
Maintain Enabled Open/Close signals are maintained
HMI Loss HMI will not be lit up
General alarm
Bat Backup Avail
Bat Backup Ctrl Checks if the battery is in control
At limit, motor energised – no output movement
detected
Not at limit, motor energised – no output movement
detected
Active when motor enable is inhibiting electrical
operation
Anything which constitutes an alarm out of the
‘function’ list triggers this alarm
Checks availability of battery, checks if battery is
charged
4/37 Position
If the relay function relates to an actuator position, for example
Pos % Open, this setting will become available to edit. Range
0% - 100%.
To change use
the set position value.
Limits
Indication
Control
ESD
Security
Defaults
Contacts
Local Display
Analogue
Home Screen Position
Power Save On Off
Close LED Green Red
Mid Travel LED Off
Alarm LED Alarms
LCD / LED Test
1/7
. The slider control will indicate
Settings
Indication
Local Display
LCD
LED
The Local Display settings page is shown in its default
setting.
LCD
The displayed home screen language can be selected and power
save mode can be activated.
1/7 Home Screen
If NAMUR 107 relay functions are used, refer to 5.6 for NAMUR
107 condition settings.
3/37 Contact
Each relay contact output can be configured as normally open
(make on condition) or normally closed (break on condition).
N/O - The contact will complete the circuit when the set function
is present, normally open, refer to 2/37 Contact Function.
N/C - The contact will break the relay circuit when the set function
is present, normally closed, refer to 2/37 Contact Function.
To change use
selected contact type.
. The checkbox will indicate the
12 IQ3 Ful l Configurati on Manual – Se ction: Set tings
Refer also to PUB002-039 (IQ) or PUB002-065 (IQT)
Available Home screens included in the drop down list box:
Position (default) - Display indicates the current valve position
to one decimal place. Icons are used for closed and open
limit positions.
Torque (A) + Pos – Display indicates current valve position
to one decimal place as Position (above) plus analogue torque
indication scaled 0% to 100% of rated torque, shown at the top
of the display.
Torque (D) + Pos – Display indicates current valve position
to one decimal place as Position (above) plus digital torque
indication scaled 0% to 99% of rated torque. If the actuator
develops torque greater than 99% then "Hi" will be displayed.
Page 13

2.2.2 Indication – Local Display
continued
Positioner – Used only with analogue or network position
control. Display indicates current valve position ( ) to one
decimal place plus the position equating to the applied demand
signal ( ). In addition, an analogue indication of demand and
position is provided scaled 0% to 100% of valve position.
To set the home screen,
list box will close and the selected home screen will be
indicated.
2/7 Power Save
The LCD has a white backlight to maximise contrast of the
segment display and matrix characters. It may be switched off
when not required if a bright display is disruptive within its
environment.
Off (default) - The display backlight is permanently illuminated
when the actuator is powered up.
On - The display backlight automatically switches off when the
actuator is not operating. The segments/matrix remain on. The
display backlight will switch on when the local control selectors
are moved, electrical or handwheel operation takes place or
when the Setting Tool is communicating with the actuator. The
backlight will switch off again approximately 30 seconds after
the above events have taken place.
To change the power save mode,
will indicate the selected mode.
. The drop down
. The checkbox
LED
The function of the display green, red and yellow LED lights can
be set.
3/7 Close Colour
Green (default) – The green lights illuminate at the Closed Limit
position, red at open.
Red – The red lights illuminate at the Closed Limit position,
green at open.
To change the Closed Limit position indication light,
colour.
4/7 Mid Travel LED
. The checkbox will indicate the selected closed
5/7 Alarm LED
Alarm LED Function will be greyed out unless 4/7 Mid Travel LED
is set to On/Alarm or Off/Alarm.
Disabled (default) – The yellow lights do not indicate an
active alarm.
Alarms – The yellow lights indicate active alarms.
Service – The yellow lights indicate active service alarms only.
A service alarm indicates the actuator requires service due to set
duty parameters being met. Refer to Section 5.5.
Service/Alarms – The yellow lights indicate active alarms and
active service alarms. A service alarm indicates the actuator
requires service due to set duty parameters being met. Refer to
Section 5.5.
Information regarding the nature of the alarm(s) will be shown at
the top of the display.
To change the Alarm LED Mode,
down list box will close and the selected mode
will be shown.
6/7 LCD / LED Test
The LCD/LED test function operates a test procedure to check all
of the local display functions. It will cycle periodically between
screen and LED functions to provide visual indication that the
display is in fully working order.
Press
local display menu once the test is complete.
7/7 Language
The language used on the display can be selected.
English (default), French, German and Spanish are available
as standard. Other available languages may be downloaded from
the Rotork website, loaded into the Setting Tool using Insight2
and uploaded into the actuator. Visit www.rotork.com
To change the display language,
down list box will close and the selected language will be
active for all screens and pages.
Available for actuators with a build date after December 2013
(12/13).
to begin the test. The screen will return to the
. The drop
. The drop
On (default) – The yellow lights are on when mid-travel.
Off – The yellow lights are off when mid-travel.
Blinker – The yellow lights flash at approximately 0.5 second
intervals when travelling in mid-travel (electric or handwheel
operation). When stationary, the lights will remain on.
On/Alarm – The yellow lights are on when mid-travel. If an
alarm is active the yellow lights flash alternately at approximately
0.5 second intervals. Refer to 5/7 Alarm LED.
Off/Alarm – The yellow lights are off when mid-travel. If an
alarm is active the yellow lights flash alternately at approximately
0.5 second intervals. Refer to 5/7 Alarm LED.
Information regarding the nature of the alarm(s) will be shown at
the top of the display.
To change the mid-travel LED Mode,
down list box will close and the selected mode will be
shown.
. The drop
IQ3 Full Confi guration Man ual – Secti on: Setting s 13
Page 14

2.2.3 Indication – Analogue
2.3 Settings – Control
Limits
Indication
Control
ESD
Security
Defaults
Indication
Contacts
Local Display
Analogue
Analogue
Analogue
Invert On Off
1/1
Settings
Limits
Indication
Control
ESD
Security
Defaults
Instruction is provided on:
2.3.1 Local control
Settings for vandal resistant build, Setting Tool control,
maintained local control, delay control and action on
loss of actuator user interface.
2.3.2 Remote control
Settings for control source; hardwired, networks,
analogue and partial stroke setup.
2.3.3 Interrupter Timer
The Interrupter Timer is an optional extra, check circuit
diagram for inclusion. If it is not enabled it will not be
included in the display menu. It is used to control
closing and/or opening operating time under both
local and remote control.
Settings
Analogue position indication screen is shown above with
its default setting.
Analogue position indication (4-20 mA) is an optional extra, refer
to circuit diagram for inclusion. If the option is not fitted the
Analogue menu item will not be present in the Indication menu.
The analogue output signal auto ranges to the set limits and
cannot be calibrated.
1/1 Invert
Off (default) – 4 mA output at Closed Limit position / 20 mA
output at Open Limit position.
On – 4 mA output at Open Limit position / 20 mA output at
Closed Limit position.
To change the analogue output mode,
checkbox will indicate the selected mode.
. The
14 IQ3 Ful l Configurati on Manual – Se ction: Set tings
Page 15

2.3.1 Control – Local
Limits
Indication
Control
ESD
Security
Defaults
Settings
Local
Remote
Interrupter Timer
Control
Local Control
Vandal Disabled
Setting Tool Yes No
Maintained Yes No
Delay Control Yes No
Loss Of HMI Stayput Remote
Remote Hand Station
Enabled On Off
1/6
The local control configuration page is shown with the
default settings.
1/6 Vandal
Actuators built as vandal resistant type 1 do not have the black
and red control selectors fitted. Selection of Local control (using
the Setting Tool open, close and stop keys) and Remote control is
made using the vandal setting:
Disabled (default) – Actuator is not vandal resistant build and
control selectors are present.
Local – Actuator selected for Local control using the Setting Tool
(Bluetooth or infrared), refer to 1.1. Infrared local control has a
range of approximately 0.25 m (10") and must be in direct line of
site. Bluetooth Local control has a range up to approximately 10 m
(30 ft) depending on environment.
Remote – Actuator selected for Remote control. Setting Tool
control keys are inactive and the actuator responds only to
remote control signals.
Switched – This option is available with an external PCB (i.e.
DIO), the actuator uses the input to switch the vandal between
local and remote.
To change,
the selected control mode will be indicated.
. The drop down list will close and
2/6 Setting Tool
With control selectors fitted to the actuator, the Setting Tool
close, open and stop control keys can be used to operate the
actuator:
Yes – Setting Tool control keys active, control is possible only
when the red selector is set to Local, refer to 1.1 – using the
Setting Tool. Infrared local control has a range of approximately
0.25 m (10") and must be in direct line of site. Bluetooth Local
control has a range up to approximately 10 m (30 ft) depending
on environment. The black close/open selector remains active.
No (default) – Setting Tool close, open and stop control keys
disabled. Local control is by close/open/ stop selectors fitted to
the actuator.
To change,
selected Setting Tool control mode.
. The checkbox will indicate the
3/6 Maintained
Sets the action as a response to local open or close control
signals:
Yes (default) – The actuator will self-maintain as a response
to a fleeting local open or close control signal. It will run until it
receives a stop command, it reaches a travel limit or is reversed –
Maintained control.
No – The actuator will run only while an open or close control
signal is applied – Push to run local control.
To change,
selected action.
. The checkbox will indicate the
4/6 Delay Control
If there is a risk of a local close or open control signal being
applied due to the selector moving inadvertently or by being hit
momentarily, a delay can be set to help prevent an unintended
operation:
Yes – A local close or open signal must be held for approximately
2 seconds before the actuator responds.
No (default) – The actuator responds immediately to a local
close or open control signal.
To change,
selected local selector response.
. The checkbox will indicate the
5/6 Loss of HMI
The Human Machine Interface consists of the actuator display
and red and black selectors. If for any reason the HMI stops
responding, the response of the actuator can be set.
Stayput (default) – The actuator will stayput and alarm using
the monitor relay. It will not respond to remote control signals.
Remote – The actuator will alarm using the monitor relay. It will
continue to respond to remote control signals.
To change,
selected HMI failure response.
. The checkbox will indicate the
6/6 Remote Hand Station
When fitted, the Remote Hand Station (RHS) can be enabled by
this setting.
Off (default) – RHS not activated and the sub-menus will be
hidden.
On – RHS enabled and the sub-menus will appear in the main
Control menu. Refer to PUB002-059 for full setup.
IQ3 Full Confi guration Man ual – Secti on: Setting s 15
Page 16

2.3.2 Control – Remote
Limits
Indication
Control
ESD
Security
Defaults
Local
Remote
Interrupter Timer
Hardwired
Control Source
Partial Stroke
Positioning
Auxiliary Mask
Analogue
Pakscan
Profibus
HART
Modbus
Extra I/O
Settings
Control
Remote Control
The Remote Control menu is shown left listing all possible
entries. Some menu items shown are optional remote control
forms requiring additional hardware to be fitted in the actuator
(see table below). The menu list displayed on the actuator will
show only the option(s) fitted. Options not fitted will not be
included in the menu list, check wiring diagram for option
inclusion.
The table below lists the available standard and option
remote control forms, their type and the section of this
manual where instruction is provided.
Remote Control Form Included as: Type Section
Hardwired Standard Hardwired
Control Source Standard Software
Partial Stroke Standard Hardwired
Positioning Option See Note
Auxiliary Mask Option See Note
Analogue Option Analogue
Pakscan Option Network
Profibus Option Network
HART Option Analogue
Modbus Option Network
Extra I/O* Option Hardwired
Foundation Fieldbus* Option Network
* When Foundation Fieldbus is fitted it will be included in the remote
control menu for information only. The Foundation Fieldbus option is
configured remotely over the Fieldbus network and therefore does not
have a setup page. Control Source, Positioning and Auxiliary Mask pages
will be included to allow associated setting to be made when Foundation
Fieldbus is fitted.
Extra I /O is an option card providing additional digital inputs to the
standard build. Inputs may be control or indication (configurable).
2.3.2-1
2.3.2-2
2.3.2-3
2.3.2-4
2.3.2-5
2.3.2-6
2.3.2-7
2.3.2-8
2.3.2-9
2.3.2-10
2. 3 . 2 -11
N/A
Instruction is provided on the setup of standard hardwired
and remote control options.
Note: When any of the analogue or network remote
control options are fitted, Auxiliary Mask and Positioning are
automatically included in the remote control menu. These items
allow access to settings that are common to all fitted options.
See Examples below.
Example 1: For a basic actuator with no control options fitted,
the remote control menu is shown below.
Hardwired
Control Source
Partial Stroke
Remote Control
Example 2: For an actuator with a remote control option, the
remote control menu will automatically display the appropriate
items relating to that option. The example below shows the
menu for an actuator including the Profibus option with the
associated Positioning and Auxiliary Mask items.
Hardwired
Control Source
Partial Stroke
Positioning
Auxiliary Mask
Profibus
Remote Control
16 IQ3 Full Co nfiguratio n Manual – Sec tion: Sett ings
Page 17

2.3.2-1 Control – Remote – Hardwired
Hardwired
Control Source
Partial Stroke
Remote Control
Remote Control
2-Wire Priority Stop
Interlocks
Mode Disabled
Motor Enable
Motor Enable Disabled
1/3
Hardwired Control is a standard feature. The default
settings are shown above.
Hardwired Control is a standard remote control form
available on all actuators. It allows settings for hardwired
2-wire priority control and interlocks.
1/3 2-Wire Priority
Sets the action the actuator perform when a close and open
signal are applied simultaneously. Hardwired remote control
form C uses the priority action (open or closed) to set the
actuator response when 2 signals are applied. Refer to the
wiring diagram and its referenced RWS control diagram.
On applying hardwired close and open signals together, the
actuator will:
Open – The actuator will move open.
Stop (default)
–
The actuator will not move, or will stop if running.
Close – The actuator will move closed.
To change,
the selected 2-wire control mode will be indicated.
. The drop down list will close and
Conditional – Close and open interlock inputs are enabled,
interlocking is available and will be active in remote control
only. The actuator will not run under remote control unless
interlock signals are applied to the closed control and closed
interlock input or the open control and open interlock input.
Remote control is conditional on 2 signals being applied
simultaneously and therefore integrity of operation due to
spurious control signals is increased. Local control is available
without interlock inputs.
Partial Stroke – Partial stroke testing demonstrates the
operational integrity of the valve and actuator by moving them
for a set portion of stroke. A remote "partial stroke" hardwired
signal applied to the open interlock input is used to initiate a
partial stroke test. For setting the partial stroke test parameters,
refer to 2.3.2-3. When set to partial stroke, the closed interlock
is disabled. Partial stroke initiated via a network command (with
a network option fitted), does not require the interlocks to be
configured for partial stroke.
To change the settings use
list will close and the selected interlock mode will be
. The drop down
indicated.
3/3 Motor Enable
Sets the remote control maintain function when the motor
enable feature is used. When using motor enable, the maintain
line on terminal 34 becomes the permissive input.
Disabled (default) – Maintain function is controlled by applying
a signal to terminal 34.
Push to Run – Remote controls are push to run. On removal of
the remote open or close command, movement will stop.
Maintained – Remote controls are self maintained so only a
pulse is required. Removal of the remote open or close signal will
not stop operations. To stop movement, you must remove the
motor enabled signal.
2/3 Interlocks
Sets the mode for the interlock inputs, refer to wiring diagram.
External interlocks can be used to prevent operation of the
actuator until a certain process condition is met. An example is a
main and bypass valve system. The main valve is interlocked with
the bypass valve such that it cannot be opened until the bypass
valve is fully open.
Disabled (default) – The interlock inputs are disabled,
interlocking is not available.
Enabled – Close and open interlock inputs are enabled,
interlocking is available and will be active in both local and
remote control. The actuator will not run in local or remote
control unless interlock signals are applied to the closed or the
open interlock input. If only one interlock is required, for example
an interlock to prevent closed operation, the open interlock must
be linked out.
IQ3 Full Confi guration Man ual – Secti on: Setting s 17
Page 18

2.3.2-2 Control – Remote – Control Source
Hardwired
Control Source
Partial Stroke
Positioning
Auxiliary Mask
Analogue
Remote Control
Option Control
Ctrl Source 1 Analogue
Ctrl Source 2 Disabled
Ctrl Selection Source 1
Options Fitted
Analogue
Disabled
Disabled
Disabled
Analogue
Lost Sig Time (s) 0
Lost Signal Act.
Signal Loss Pos. 0%
1/20
Off
The Control Source setting page shown above is an
example of an actuator with the Analogue remote control
option.
The actuator display will indicate fitted options.
Refer to wiring diagram for options fitted.
Introduction
In addition to standard hardwired control, the actuator can have
up to two remote control options fitted. For most remote control
systems employed by end-users, only one control option is used.
For control systems using Analogue control only or where
Analogue and Network (such as Modbus) control is used,
control (Hardwired/Analogue or Analogue/ Network) can be
switched by the user using the Manual/Auto input available with
the analogue option and the settings made in Control Source.
When Analogue and Network options are fitted and Analogue
is switched to control, the Network option cannot control the
actuator but will continue to report actuator status.
The control source will be set by Rotork to the defaults
required for the option(s) fitted. Refer to Table: Control
Source Settings.
For analogue control, if both Manual (hardwired control
inputs) and Auto (analogue control) is to be used, the
control selection will require re-setting. If only analogue
control is required, the default settings for Control Source
will be correct. Refer also to 2.3.2-6.
The control source is used to:
• Control Source 1/Source 2 - Associate fitted control option(s)
to a source of control (source 1 or source 2).
• Control Selection - Set which control source (1 or 2) has
priority when Manual/Auto input is used to switch between
Analogue and Network option sources.
• Lost Signal - Determines the actuator response to a lost
analogue signal or network communication.
Table: Control Source Settings
Options Control
Settings
Hardwired
(no options)
Analogue Only
Ctrl Source 1 Disabled Analogue Analogue Network Analogue
Ctrl Source 2 Disabled Disabled Disabled Disabled Network
Ctrl Selection Hardwired Source 1
Options Fitted
Disabled Analogue Analogue Network Network
Disabled Disabled Disabled Disabled Analogue
Disabled Disabled Disabled Disabled Disabled
Disabled Disabled Disabled Disabled Disabled
Analogue and
Hardwired
Hardwired /
Source 1
Network Only
Analogue
and Network
Source 1 Src1 (Ang) / Source 2
KEY: For "Network", display will indicate the fitted option(s): Pakscan/Profibus/Modbus/Foundation Fieldbus (FF)/HART.
18 IQ3 Full Co nfiguratio n Manual – Sec tion: Sett ings
Page 19

2.3.2-2 Control – Remote – Control Source
continued
1/20 Control Source 1
Control Source 1 will be set by Rotork for the fitted remote
Analogue or Network control option(s). Refer to Table: Control
Source Settings.
2/20 Control Source 2
Control Source 2 will be set by Rotork for the fitted remote
Analogue or Network control option(s). Refer to Table: Control
Source Settings.
3/20 Ctrl Selection
Control Selection is used to select the control source and if
required, for Analogue option or Analogue with Network
options, allow hardwired switching between sources using the
Manual/Auto input.
Disabled – All remote control disabled. The actuator can only be
operated using the local controls.
Hardwired – Remote control by hardwired inputs only. This
setting is the default for actuators with no option cards fitted.
If a Network option is fitted but is not required for
control,
to select Hardwired.
Source1 – Control by the option listed for Control Source 1.
If Control Source 1 is a Network option, control will be via its
auxiliary mask inputs, refer to 2.3.2-5.
Hardwired / Source1 – Control available only when Analogue
option is fitted. This mode enables the user to select between
control by hardwired inputs or source 1 (Analogue) control by
applying or removing a signal to the Manual/Auto input, refer to
wiring diagram. Manual will enable hardwired control and Auto
will enable Source1 control.
If an Analogue option is fitted and Manual/Auto switching
is required,
to select Hardwired/Source 1.
Source 1 (Ang) / Source 2 – Control by Analogue and a
Network option only. This mode enables the user to select
between Source 1 (Analogue) and Source 2 (Network) control, by
applying or removing a signal to the Manual/Auto input available
with the Analogue option, refer to wiring diagram. Manual will
enable source 2 and Auto will enable source 1, refer to 2.3.2-6.
Source 1 / Source 2 – For future use with two Network control
options.
If Analogue and Network options are fitted and Manual/
Auto switching is required,
(Ang) / Source 2.
to select Source 1
4/19 to 7/19 Options Fitted
Not editable. Factory set for the control options fitted. Up to 4
options can be fitted and will be indicated in the list. Unused
allocations will be set to Disabled.
If a control option is fitted after manufacture, the allocation will
be set to the fitted option type by Rotork Service. Where the
user upgrades an actuator to include a new control option using
a kit supplied by Rotork, this must be set before the control
mode settings can be made. Contact Rotork for access.
8/20 to 19/20 Lost Signal
Sets the actuator response for when the analogue signal
or Network communications of the control source
are lost.
There are 3 settings for determining the actuator response on
loss of signal and these are common for all option types fitted.
Each group of 3 will be headed with the applicable option type
- example Analogue. For actuators including one control option,
settings 8/20 to 10/20 will be available and settings 11/20 to
20/20 will be greyed out. For 2 options fitted, 8/20 to 13/20
will be available and so on up to 4 options. This instruction is
therefore common for as many options as are fitted.
8/19 Lost Signal Time
Sets the amount of time in seconds that a signal must be lost
before the set lost signal action is performed. Range 0 to 65
seconds:
For the analogue option, time must be set to 0 seconds.
To change,
signal action will be implemented and indicated.
. The time set after which the lost
9/19 Lost Signal Action
Sets the action performed when the signal is lost:
Off (default) – The lost signal feature is disabled. An actuator
with Analogue control will run to the set low signal position. An
actuator with Network Control will stay at its current position
when communication is lost.
Stayput – If the actuator is not moving it will Stayput, if it is
moving it will Stop.
Close – The actuator will run to the Close Limit.
Open – The actuator will run to the Open Limit.
Position – The actuator will run to the mid-travel position set for
Signal Loss Position, refer to 10/19.
To change,
the selected action will be indicated.
. The drop down list will close and
10/19 Lost Signal Position
When the lost signal action is set to Position the actuator will
run to the mid-travel position set. Range is 0% (Closed Limit) to
100% (Open Limit). This control should be used if a lost signal
position in mid-travel is required.
Whenever the actuator is running under positioning mode, the
parameters in the Positioning menu will apply. Refer to 2.3.2-4.
To change,
mid-travel position the actuator will move to when the
. The slider control will indicate the
control/network signal is lost.
IQ3 Full Confi guration Man ual – Secti on: Setting s 19
Page 20

2.3.2-3 Control – Remote – Partial Stroke
Hardwired
Control Source
Partial Stroke
Positioning
Auxiliary Mask
Analogue
Remote Control
Partial Stroke
Enable No Yes
From Limit
To Position 95%
Out Time (s)
Return Time (s) 60
Test
1/6
Open Close
60
Partial Stroke is a standard feature. The default settings
are shown above.
Partial stroke testing is used to demonstrate the operational
integrity of the valve and actuator by moving over a set portion
of valve stroke. In addition, partial stroking may be used
to exercise infrequently operated valves to help keep them
mechanically free. Partial stroke test can only be initiated when
the actuator is at the set From Limit position.
A partial stroke test may be initiated by a remote partial stroke
signal applied to the open interlock*, a network command
(network option fitted) or using the test control on the partial
stroke page.
*Interlocks must be set to partial stroke, refer to 2.3.2-1.
Partial stroke test results (torque and pass/ failure status) are
captured by the data log.
Partial stroke operation, pass and failure can be indicated by the
S contacts, refer to 2.2.1.
1/6 Enable
No (default) – Partial stroking testing is disabled
Yes – Partial stroke testing is enabled.
To change,
stroke test status.
. The checkbox will indicate partial
2/6 From Limit
Selects the start/finish limit position for the partial stroke test.
Open (default) – The partial stroke test will start from the Open
Limit position, move close to the position set for 3/6 To Position
and then return to the Open Limit position.
Close – The partial stroke test will start from the Closed limit
position, move open to the position set for 3/6 To Position and
then return to the Close Limit position.
To change,
stroke start/finish position.
. The checkbox will indicate partial
3/6 To Position
Range 0% (closed) to 97% Open
Selects the intermediate position for the partial stroke test.
Sets the position in valve stroke to where the actuator will move
when a partial stroke test is initiated. For example a test starting
at Open Limit with a To Position of 70% set, will move from
Open Limit to 70% open and then return to the Open Limit. A
minimum of 3% travel is required to adequately perform the
partial stroke test.
To change,
position the actuator will move to for the partial stroke
. The slider control will indicate the
test.
4/6 - 5/6 Out Time - Return Time
Range 0 to 3600 seconds.
For IQ actuators, out time and return time must be set to the
same value. They are used to ensure that the partial stroke test
is completed in a quantified period of time. Alarms can be set
to indicate a failure in meeting the set time, indicating a valve
problem.
Measure or calculate the time to complete the set partial stroke
test. Add 10% to this value then half it. The resulting time should
be entered into both Out Time and Return Time.
To change,
time will be indicated.
. The set partial stroke out/return
6/6 Test
To initiate a partial stroke test using the Setting Tool, the
actuator must be set to Local control using the red selector and
at the limit position set for 2/6 From Limit.
To initiate a partial stroke test, . The partial stroke test
will be initiated as set.
20 IQ3 Full Confi guration Ma nual – Sect ion: Settin gs
Page 21

2.3.2-4 Control – Remote – Positioning
Hardwired
Control Source
Partial Stroke
Positioning
Auxiliary Mask
Analogue
Remote Control
Positioning
Deadband 5%
Hysteresis 2%
Inhibit Time (s)
Low Signal Pos. 0%
High Signal Pos. 100%
1/5
2
The Positioning option settings page with its default
settings is shown above.
Applicable for Analogue and HART control options
and for all Network control options where positioning
control is required. Settings are used to tune the actuator
positioning response.
• Deadband and Hysteresis are combined to set positioning
accuracy.
• Inhibit Time is used to set a dwell in the actuators response.
• Low/High Signal Position sets the range of the valve stroke
where positioning is required.
1/5 Deadband
Range 0% - 25.5%. Default setting: 5%.
Affects positioning accuracy as a response to the process
control system desired value (DV) signal position. A smaller
deadband increases accuracy, however the widest deadband
should be set whilst maintaining good control in order to protect
the mechanical valve from excessive wear and/or to keep the
actuator within its electrical rating.
Deadband setting should be combined with 2/5 Hysteresis
setting. The actuator will run towards the DV position until the
actual position is within the set deadband minus the hysteresis
setting. This has the effect of the actuator stopping nearer to the
DV position. The actuator will not restart unless it overshoots and
runs outside the deadband or a new command places the new
desired position outside the deadband. Refer to figure 2.3-1.
To change,
deadband setting.
. The slider control will indicate the
2/5 Hysteresis
Range 0% - 25.5%. Default setting: 2%.
Affects positioning accuracy as a response to the process control
system desired value (DV) signal position. A larger Hysteresis
setting will increase accuracy but the value set must not be
greater than that set for Deadband.
Hysteresis setting should be combined with 1/5 Deadband
setting. The actuator will run towards the DV position until the
actual position is within the set deadband minus the hysteresis
setting. This has the effect of the actuator stopping nearer to the
DV position. The actuator will not restart unless it overshoots and
runs outside the deadband or a new command places the new
desired position outside the deadband. Refer to figure 2.3-1.
To change,
hysteresis setting.
. The slider control will indicate the
3/5 Inhibit Time
Range 0 – 255 seconds. Default setting: 5 seconds.
Sets a delay after the actuator stops as a result of reaching a
position consistent with a new DV position. For the period set,
the actuator will not respond to a change in DV. Inhibit time
is used to prevent unwanted operation as a result of a rapidly
oscillating or fluctuating DV signal or to slow actuator response
in order to protect the mechanical valve from excessive wear
and/or maintain actuator within its electrical rating.
To change,
. The time set will be indicated.
IQ3 Full Confi guration Man ual – Secti on: Setting s 21
Page 22

2.3.2-4 Control – Remote – Positioning
continued
4/5 Low Signal Pos
Range 0% to 100% open positions.
Used to set the position the actuator will move to when the
low analogue signal is applied for Analogue control or for a 0%
position command for Network options. Normally this will be set
at Closed Limit position (0%), unless positioning is required over
a reduced portion of full valve travel, for example, to prevent full
closure where valve throttling is required.
To change,
position the actuator will move to when the low signal is
applied.
. The slider control will indicate the
5/5 High Signal Pos
Range 0% to 100% open positions.
Used to set the position the actuator will move to when the High
analogue signal is applied for Analogue control or for a 100%
position command for Network options. Normally this will be set
at Open Limit position (100%), unless positioning is required over
a reduced portion of full valve travel, for example, to increase
positioning resolution for a butterfly valve where positioning is
required from Closed Limit position to 60% open position.
To change,
position the actuator will move to when the high signal is
applied.
. The slider control will indicate the
DV
47% 48% 49% 50% 51% 52% 53%
Hysteresis = 1%
Deadband = 3%
Figure 2.3-1 Example of Hysteresis and Deadband
Example: An actuator set with a 3% deadband and a 1%
hysteresis and a control system new Desired Value (DV) of 50%
will come to rest between 48% and 53% when moving from
a position less than 47%, and between 52% and 47% when
moving from a position greater than 53%.
OpenClose
The Deadband setting will be determined by the accuracy of
control required and valve overrun. Overrun is a factor of valve
and actuator inertia dependent on mass, speed, valve stiffness
and friction
22 IQ3 Full Confi guration Ma nual – Sect ion: Settin gs
Page 23

2.3.2-5 Control – Remote – Auxiliary Mask
Hardwired
Control Source
Partial Stroke
Positioning
Auxiliary Mask
Analogue
Remote Control
Auxiliary Mask
Auxiliary 1 Dig In Open
Contact 1 N/O N/C
Auxiliary 2 Dig In Close
Contact 2 N/O N/C
Auxiliary 3 Dig In Maint.
Contact 3 N/O N/C
Auxiliary 4 Dig In ESD
Contact 4
1/8
N/O N/C
The Auxiliary Mask settings page is shown above with
default settings visible.
Introduction
When a Network option is fitted (Pakscan/Profibus/Modbus /
Foundation Fieldbus or HART) a facility to accept 4 Auxiliary
inputs is available. Auxiliary inputs can be set as supplementar y
control for the actuator (open, close, stop/maintain or ESD) or
as digital indication inputs whose status is reported over the
option network. It is also possible to have a combination of both
supplementary remote control and digital inputs to provide, for
example, open and close control as well as a high and low tank
level alarm indication from external level transducers.
Auxiliary inputs are in addition to the standard control and
feedback features incorporated into a Network option. Auxiliary
inputs are connected to the standard Open, Close, Stop/maintain
and ESD inputs. Refer to wiring diagram.
NOTE: If an Analogue option and a Network option are
fitted and hardwired ESD control is required (Auxiliar y 4 set to
ESD), ensure Auxiliary contact 4 setup is matched to the ESD
configuration when signal setting. Refer to 2.4.
The Auxiliary Mask page allows the user to setup the 4 Auxiliary
inputs as supplementary control, indication or a combination
of both. Each Auxiliary input can be set for the type of contact
connected. Refer to Auxiliary input setup.
Auxiliary Input Setup
Input Auxiliary 1 Auxiliary 2 Auxiliary 3 Auxiliary 4
Control Open Close
Indication Dig Dig Dig Dig
Contact Type Contact 1 Contact 2 Contact 3 Contact 4
Normally
Open
Normally
Closed
N/O N/O N/O N/O
N/C N/C N/C N/C
Stop/
Maintain
ESD
A normally open contact is considered to be in the active
state when the contact is closed. A normally closed contact is
considered to be in the active state when the contact is open.
Using Auxiliary 1 and Contact 1 as an example:
1/8 Auxiliary 1
Refer to Auxiliary input setup.
Dig in (default) – Network option will report digital input
status: 1 or 0
Open – Hardwired open command signal is required. Use
Auxiliary 2 to 4 for close, stop/maintain and ESD.
To change the settings use,
indicate the set Auxiliary 1 input function.
. The checkbox will
2/8 Contact 1
Refer to Auxiliary input setup.
N/O (default) – A normally open contact is used to derive input.
N/C – A normally closed contact is used to derive input.
To change the settings use,
indicate the set Contact 1 input type.
. The checkbox will
IQ3 Full Confi guration Man ual – Secti on: Setting s 23
Page 24

2.3.2-6 Control – Remote – Analogue Option
Hardwired
Control Source
Partial Stroke
Positioning
Auxiliary Mask
Analogue
Remote Control
Analogue
Signal Type mA Volts
Signal Range 20mA
Invert On Off
Manual-Auto On Off
Set Low Signal
Set High Signal
1/6
The Analogue option settings page is shown above with
its default settings. Analogue is a control option.
The Analogue menu item and its associated settings page will
only be shown when the Analogue option is fitted. Refer to
wiring diagram. The Analogue option setting page allows the
option to be set for the applied signal type and range. Signal low
and high values can also be calibrated.
For Analogue option; deadband, hysteresis and
positioning settings, refer to 2.3.2-4.
4/6 Manual-Auto
With the Analogue control option it is possible to have Manual/
Auto control by a user supplied remote switch selection:
Analogue Option
Fitted
Manual Hardwired Network
Auto Analogue Analogue
Analogue and
Network Options
fitted
When Analogue and Network options are fitted and Auto is
selected, the Network option fitted will continue to report
actuator status.
Hardwired ESD is available in both Manual and Auto.
When applied, ESD will override all other control signals.
Refer to 2.4 ESD.
For Manual Auto control, refer to wiring diagram and
referenced RWS diagram.
OFF (default) – Manual/Auto control is not used. Actuator will
be controlled by the Analogue signal. Where a Network option is
also fitted, the Network option will report actuator status only.
On – Actuator can be controlled by hardwired contacts or the
Network (as applicable) or by the Analogue signal.
To change the settings use,
indicate the set Manual/Auto mode.
. The checkbox will
5/6 Set Low Signal
1/6 Signal Type
mA (default) – Set for current (mA) Analogue control signal.
Volts – Set for voltage Analogue control signal.
To change,
Analogue signal type.
. The checkbox will indicate the set
2/6 Signal Range
Available ranges: 5 mA, 10 mA or 20 mA (default) or 5 V, 10 V
or 20 V range for voltage control. For Analogue signal using a
4 mA to 20 mA range, set 20 mA.
To change,
the selected range will be indicated.
. The drop down list will close and
3/6 Invert
Off (default) – Low Analogue signal will move the actuator in
the close direction.
On - High Analogue signal will move the actuator in the close
direction.
To change,
Analogue signal action.
. The checkbox will indicate the set
The actuator must be calibrated to the Low Analogue signal
value. By measuring this signal it will then be able to control the
actuator by moving it to the Set Low Signal position, refer to
2.3.2-4.
APPLY THE LOW ANALOGUE SIGNAL and select .
The signal will be measured and set as the Low signal
position value.
6/6 Set High Signal
The actuator must be calibrated to the High Analogue signal
value. By measuring this signal it will then be able to control the
actuator by moving it to the Set High Signal position, refer to
2.3.2-4.
APPLY THE HIGH ANALOGUE SIGNAL and select .
The signal will be measured and set as the High signal
position value.
24 IQ3 Full Confi guration Ma nual – Secti on: Setting s
Page 25

2.3.2-7 Control – Remote – Pakscan
Analogue
Pakscan
Profibus
HART
Modbus
Extra I/O
Remote Control
Pakscan
Address 1
Baud Rate 1200
Position
Update Time (s) Disabled
Deviation Disabled
Torque
Update Time (m) 1
Deviation Disabled
Filter Manual Auto
Valve Travel Time 1000
1/8
The Pakscan Control option settings page is shown above
with its default settings. Pakscan is a control option, refer
to wiring diagram.
Depending on the Pakscan control scheme, other related settings
may be required, refer also to:
2.3.2-4 Positioning
2.3.2-5 Auxiliary Mask
1/8 Address
The Pakscan Field Control Unit option must be allocated a unique
loop node address. Changes made to the address will take effect
immediately. The range of address is 1 – 240.
To change,
. The set address will be indicated.
2/8 Baud rate
The actuator Pakscan Field Control Unit option must be set
to the loop baud rate. For a Pakscan 2-wire control loop the
selected baud rate must be common in the master station and all
the field units included in the loop. Changes made to baud rate
will take effect immediately. The baud rate is selectable using the
drop down list box are 110, 300, 600, 1200, 2400.
To change,
the selected baud rate will be indicated.
. The drop down list will close and
Position
3/8 Update Time(s)
Range 0 (Disabled) to 255 seconds.
Set when mid-travel positioning control is required. Update Time
in seconds is the set period for updating the master station with
position data. Refer also to 4/8 Deviation. The valve position will
be reported at time intervals equating to the set Update Time. If
the FCU updates on deviation whilst the valve is moving then the
update time should be set to approximately 10 times the loop
scan time. If the actuator is not used for mid-travel positioning
(i.e. isolating duty), then the Update Time should be turned off
by setting it to zero (Disabled).
To change,
seconds will be indicated.
. The set Position Update time in
4/8 Deviation (%)
Range 5% to 99%. Setting below 5% will indicate
Disabled.
Set when mid-travel positioning control is required. Deviation is
the set amount of change that has to occur before the position
data is reported to the master station. Whilst the valve is in
motion, reports about its position will be made each time
the position changes by more than the Deviation setting. The
recommended value is 5% where positioning data is required. If
the actuator is not used for mid-travel positioning (i.e. isolating
duty), then the Deviation should be turned off by setting it to
zero (Disabled).
To change,
be indicated.
. The set Position Deviation % will
IQ3 Full Confi guration Man ual – Secti on: Setting s 25
Page 26

2.3.2-7 Control – Remote – Pakscan
continued
Tor que
5/8 Update Time (m)
Range 5 to 255 minutes. Setting below 5 will indicate
Disabled.
Torque update time (minutes) value is refreshed from a stationary
actuator. If torque data is not required then its update time
should be disabled.
To change,
minutes will be indicated.
6/8 Deviation
Range 5% to 99%. Setting below 5% will indicate
Disabled.
Set for the amount of change in actuator measured torque that
has to occur before torque data is reported to the master station.
During valve travel, torque reporting will be made each time
the torque changes by more than the Deviation setting. Where
continuous torque data is required the recommended value is
5%. If torque data is not being used then the deviation should
be set to Disabled.
To change,
indicated.
. The set Torque Update time in
. The set Torque Deviation % will be
7/8 Filter
Set to enable or disable auto reporting of the historical torque
logs.
Auto - The Pakscan option will automatically report the 6
historical torque logs for each direction once the actuator
has stopped at a limit. The historical log will contain the
instantaneous value of torque for both closing and opening
torque logs.
Manual – The historical torque logs are not automatically
updated. Historical logs are read on demand using a master
station command. In Manual, the historical logs will contain the
averaged (or filtered) torque logs i.e. the data from the actuator
average torque logs.
To change,
Torque Log Filter mode.
8/8 Valve Travel Time
Range 0 to 18000 seconds.
Valve travel Time should be set to a value 10% greater than the
actual valve travel stroke time (i.e. open to close). If the valve
travel time is exceeded, an alarm will be raised via the Pakscan
Network.
To change,
indicated.
. The checkbox will indicate the set
. The set Valve Travel Time will be
26 IQ3 Full Conf iguration M anual – Section: Settin gs
Page 27

2.3.2-8 Control – Remote – Profibus
Analogue
Pakscan
Profibus
HART
Modbus
Extra I/O
Remote Control
Profibus
Address 126
GSD Param. Yes No
Termination1 On Off
Termination2 On Off
Redundancy Flying System
Extended Diag. Yes No
1/6
The Profibus Control option settings page is shown above
with its default settings. Profibus is a control option and
is available in single or dual versions, refer to wiring
diagram.
Depending on the Profibus control scheme, other related settings
may be required, refer also to:
2.3.2-4 Positioning
2.3.2-5 Auxiliary Mask
1/6 Address
The actuator Profibus module must be allocated a unique
address in the Profibus system. Changes made to the address will
take effect immediately. The range of address is 1 – 126 (default
126). Refer also to 5/6 Redundancy.
To change,
. The set address will be indicated.
2/6 GSD Parameter
If the user parameterisation data is to be setup using FDT, EDDL
or the actuators menu, setting this menu item to No will ensure
that the user parameterisation data sent to the Profibus card
during the parameterisation of the Profibus network with the
GSD file will be ignored. The settings previously made will not
be overwritten. As default this is Yes to ensure that the Profibus
card will be parameterised by the GSD user parameterisation
data.
Yes (default) – Parameterisation by GSD file is enabled.
No – Parameterisation by GSD file is disabled.
3/6 - 4/6 Termination 1 - Termination 2
Profibus networks require active termination at each end of the
highway. Profibus option has active termination (2 sets for dual)
built in, which can be switched in or out of the circuit.
Off (default) - Termination resistors switched out.
On – Termination resistors switched in.
To change,
termination mode.
. The checkbox will indicate the set
5/6 Redundancy
Used for dual Profibus option (redundant) only. Refer to wiring
diagram.
System (default) - System redundancy means that there are 2
completely separate Profibus highways in the network system
and that each highway is connected to one of the Profibus
channels. In this mode the address of both Profibus channels are
identical.
Flying - Flying redundancy means that there is 1 highway that is
connected to both channels, in this mode the addresses of the
channels must be different to avoid both channels responding to
the same message. In flying redundancy channel 2 address will
be channel 1 address plus 64.
If flying redundancy is used, the address for 1/6 must not
be set higher than 62.
To change,
redundancy.
. The checkbox will indicate the set
6/6 Extended Diagnostics
Used for dual Profibus option (redundant) only. Refer to wiring
diagram.
The slave redundancy specification from the PNO describes
extended diagnostics that are available in the redundant card.
These messages describe, for example, the state of the backup
channel. Diagnostics messages can be turned on and off
depending on the capabilities of the PLC to which the module is
connected.
No (default) - Diagnostic messages turned off.
Yes - Diagnostic messaging turned on.
To change,
extended diagnostic mode.
. The checkbox will indicate the set
IQ3 Full Confi guration Man ual – Secti on: Setting s 27
Page 28

2.3.2-9 Control – Remote – HART
Analogue
Pakscan
Profibus
HART
Modbus
Extra I/O
Remote Control
HART
Address 0
Set Low Signal
Set High Signal
Lower Range 0
Upper Range 10000
1/5
The HART Control option settings page is shown above
with its default settings. HART is a control option, refer to
wiring diagram.
For HART control option, other related settings are required,
refer also to:
2.3.2-4 Positioning
2.3.2-5 Auxiliary Mask
4/5 Lower range
Range 0% to 100% open positions.
Used to set the position the actuator will move to when the
low analogue signal is applied for HART control. Normally this
will be set at Closed Limit position (0%), unless positioning is
required over a reduced portion of full valve travel, for example,
to prevent full closure where valve throttling is required.
To change,
position the actuator will move to when the HART low
. The slider control will indicate the
signal is applied.
5/5 Upper Range
Range 0% to 100% open positions.
Used to set the position the actuator will move to when the
High analogue signal is applied for HART control. Normally this
will be set at Open Limit position (100%), unless positioning is
required over a reduced portion of full valve travel, for example,
to increase positioning resolution for a butterfly valve where
positioning is required from Closed Limit position to 60% open
position.
To change,
position the actuator will move to when the HART high
. The slider control will indicate the
signal is applied.
1/5 Address
The HART option must be allocated a unique address in the
HART system. Changes made to this parameter will take effect
immediately. The range of address is 0 – 63 (default 0).
To change,
. The set address will be indicated.
2/5 Set Low Signal
The actuator must be calibrated to the Low analogue signal
value. By measuring this signal it will then be able to control the
actuator by moving it to the Set Low Signal position, refer to
2.3.2-4 Positioning.
APPLY THE LOW ANALOGUE SIGNAL and select the
signal will be measured and used to send the actuator to
the set Low signal position.
3/5 Set High Signal
The actuator must be calibrated to the High analogue signal
value. By measuring this signal it will then be able to control the
actuator by moving it to the Set High Signal position, refer to
2.3.2-4 Positioning.
APPLY THE HIGH ANALOGUE SIGNAL and select the
signal will be measured and used to send the actuator to
the set High signal position.
28 IQ3 Full Confi guration Ma nual – Sect ion: Settin gs
Page 29

2.3.2-10 Control – Remote – Modbus
Analogue
Pakscan
Profibus
HART
Modbus
Extra I/O
Remote Control
Modbus
Address 247
Termination On Off
Baud Rate 9600
Parity/Stop None/1 stop
Second Address 247
Control CH1 Ctrl Ch2 Ctrl
1/6
The Modbus Control option settings page is shown above
with its default settings. Modbus is a control option and is
available in single or dual channel versions, refer to wiring
diagram.
Depending on the Modbus control scheme, other related settings
may be required, refer also to:
2.3.2-4 Positioning
2.3.2-5 Auxiliary Mask
1/6 Address
The Modbus option must be allocated a unique address in the
system to which it is attached. Changes made to this parameter
will take effect immediately. The address range is 1 – 247
(default 247).
To change,
. The set address will be indicated.
3/6 Baud Rate
The Modbus option must be set to the RS485 highway
baud rate. Changes made to this parameter will take effect
immediately. The baud rates selectable using the drop down box
are 110, 300, 600, 1200, 2400, 4800, 9600, 19200, 38400,
57600, 115200.
To change,
the selected baud rate will be indicated.
. The drop down list will close and
4/6 Parity/Stop
Where Modbus parity bit detection is used, the module must
be set with the same parity settings as the host. The choices of
parity are None, Even, Odd. This item also allows selection for
the number of stop bits as 1 or 2. The drop down box requires
selection of the parity and stop bits together.
To change,
the selected parity and stop bit will be indicated.
. The drop down list will close and
5/6 Second Address
Used for dual Modbus option (redundant) only. Refer to wiring
diagram.
A dual Modbus card has 2 channels available for connection to
separate or the same highway(s). The second channel address
is set up with this setting. It may be identical or different to the
first channel depending on the requirement of the system.
To change,
indicated.
. The set second address will be
6/6 Control
Not editable. For dual Modbus option (redundant) Only.
Refer to wiring diagram.
Setting will indicate that control is available on both channels
1 and 2.
2/6 Termination
Modbus networks require termination resistors at each end
of the highway. The Modbus option has a passive (120 Ohm)
termination resistor (2 for dual) built in, which can be switched in
or out of the circuit.
Off (default) - Termination resistor(s) switched out.
On – Termination resistor(s) switched in. In a dual channel
Modbus option, when On is selected the termination resistors
will be switched in for both channels.
To change,
termination mode.
. The checkbox will indicate the set
IQ3 Full Confi guration Man ual – Secti on: Setting s 29
Page 30

2.3.2-11 Control – Remote – Extra I/O
Hardwired
Control Source
Partial Stroke
Positioning
Auxiliary Mask
Analogue
Pakscan
Profibus
HART
Modbus
Extra I/O
Fast Remotes Disabled
Function Disabled
Contact N/O N/C
Function Disabled
Contact N/O N/C
Remote Control
Close Limit
Extra I/O
D17
D18
1/9
The DIO adds additional digital inputs and outputs to the
actuator.
Fast Remotes
Fast remotes are for modulating applications (24 VDC signals only)
Disabled
Enabled
Functions
Below is a list of functions available for each I/O:
Disabled
Remote Open
Remote Closed
Remote Maintain
Remote ESD
Open Interlock
Close Interlock
Net Disable
Partial Stroke
HandAuto
VelanReset
ConditionalOpen
ConditionalClose
Contacts
These are the default positions for the contacts which the user
can set
N/O – Normally Open Contact
N/C – Normally Closed Contact
30 IQ3 Full Confi guration Manual – Secti on: Setting s
Page 31

2.3.3 Control – Interrupter Timer
Limits
Indication
Control
ESD
Security
Defaults
Settings
Local
Remote
Interrupter Timer
Control
Positioning
Start
Closing 30%
Opening 70%
On Time (s)
Off Time (s) 2
Effct. Speed % 50
1/6
Open Close
2
The Interrupter Timer is an optional extra. When enabled,
it will be included in the control menu.
To enable the Interrupter Timer contact Rotork.
Introduction
The Interrupter Timer allows the valve operating time to be
increased. This is used, for example, to prevent hydraulic shock
("water hammer") when closing or to prevent surges when
opening a valve. The Interrupter Timer is active in both local and
remote control. It may be overridden during an ESD operation,
refer to 2.4
The IQ is a single speed machine so to increase the valve
operating time the timer stops and starts the actuator
automatically – timed operation. The timer can be set to operate
over all, or a portion of the closing and/or opening strokes.
1/6 Start
Timed operation start position.
Close (Default) – Timed operation to and from the Closed
Limit. The Interrupter Timer will start timed operation, in the
close direction, at the position set for Closing. It will stop timed
operation, in the open direction, at the position set for Opening.
Open – Timed operation to and from the Open Limit. The
Interrupter Timer will start timed operation, in the open
direction, at the position set for Opening. It will stop timed
operation, in the close direction, at the position set for Closing.
To change the settings use,
indicate the selected Interrupter Timer start limit.
. The checkbox will
PLEASE NOTE the shaded area of the slider control for
Closing and Opening will be the timed section. If timed
operation is no longer required, Closing and Opening
positions should both be set to 0% or 100% depending on
the Start setting value.
2/6 Closing
The position where the Interrupter Timer will start/stop timed
operation in the close direction. If timed operation is not required
in the close direction (actuator runs at normal speed), set to 0%
when 1/6 is set to Close and 100% when 1/6 is set to Open.
3/6 Opening
The position where the Interrupter Timer will start/stop timed
operation in the open direction. If timed operation is not
required in the open direction (actuator runs at normal speed),
set to 0% when 1/6 is set to Close and 100% when 1/6 is set to
Open.
To change the settings use,
will indicate the selected start/stop.
. The slider control
Example: To prevent hydraulic shock the valve must be closed
slowly and therefore timed operation is required from the 25%
open position to Closed Limit. Timed operation is not required at
all when opening, the actuator will run at normal speed for the
complete opening valve stroke.
Set:
Start – Close
Closing – 25%
Opening – 0%.
4/6 On Time (s)
This is the actuator run time during timed operation. Range 2 to
100 seconds.
5/6 Off Time (s)
This is the actuator pause time during timed operation. Range 2
to 3600 seconds.
To change the settings use,
set will be indicated.
. The on/off times
WARNING! To minimise wear to the actuator, it is
advisable to limit the number of start/stops set with the
Interrupter Timer function. Using longer durations for On
and Off times can achieve the specified valve operating
time whilst reducing the number of starts required to
achieve it.
6/6 Effective speed
Non-editable. Automatically indicates the effective speed of the
actuator over the timed portion(s) for the set on and off times.
IQ3 Full Confi guration Man ual – Secti on: Setting s 31
Page 32

2.4 Settings – ESD
Limits
Indication
Control
ESD
Security
Defaults
Direction Off
ESD when signal Applied
Net Disable On Off
Stop Yes No
Interlocks Yes No
Timer Yes No
Thermostat Yes No
1/7
Settings
ESD Action
ESD Network Disable
ESD Override
Emergency Shut Down (ESD) is a standard feature.
Refer to actuator wiring diagram.
Control under an ESD control signal has higher priority than local
or remote open/closed signals. For ESD, the control signal must be
maintained for the duration of the ESD action required.
ESD control will operate under both the Local and Remote control
selection. ESD can also be set to operate an actuator selected to
Local Stop, refer to ESD Override - 4/7.
ESD Action
1/7 Direction
Close – Under ESD control the actuator will close. It will not
respond to local or remote open or closed signals.
Stayput (default) – Under ESD control the actuator will Stop if
running or Stayput in its current position. It will not respond to
local or remote open or closed signals.
Open – Under ESD control the actuator will open. It will not
respond to local or remote open or closed signals.
Off – ESD input is disabled. ESD is not available
To change,
the selected ESD action will be indicated.
. The drop down list will close and
2/7 ESD when signal
Applied (default) – ESD will be active when the control signal is
applied to the ESD input – Normally Open (N/O) contact making.
Removed – ESD will be active when the signal is removed from
the ESD input - Normally Closed (N/C) contact breaking.
Note: If the analogue option and a Network option are
fitted and hardwired ESD control is required, ensure the
ESD when signal set matches that set for Auxiliary contact
4. Refer to 2.3.2-5.
ESD Network Disable
3/7 Net Disable
When a Network option is fitted, refer to 2.3.2, the ESD input can
be set to disable Network control. The Network option fitted will
report status only.
Off (default) – The ESD input is set for ESD control.
On – The ESD input is set for Network disable.
To change,
Network Disable status.
. The checkbox will indicate ESD/
32 IQ3 Full Conf iguration M anual – Sec tion: Settings
ESD Override
ESD can be set to override Local Stop selection, Active Interlocks,
Interrupter Timer and Motor Thermostats.
4/7 Stop
ESD override Local Stop selection.
No (default) – ESD action is not available when the actuator is
selected to stop using the local/stop/remote selector.
Yes – ESD action is available when the actuator is selected to stop
on the local/stop/remote selector.
WARNING: In this mode, when under ESD control,
setting Stop on the red selector will not prevent operation
under ESD control. The valve and actuator can operate.
Consideration should be given to providing warning signs
and control system information. In all circumstances, Stop
selection cannot be considered as a safety lockout – always
isolate the electrical supply to the actuator during valve or
actuator maintenance.
To change,
override Local Stop status.
. The checkbox will indicate ESD
Page 33

2.4 Settings – ESD continued
5/7 Interlocks
External interlocks can be used to prevent operation of the
actuator until a certain process condition is met. Refer to 2.3.2-1
If interlocks are being used, ESD can be set to override them.
No (default) – ESD action cannot override active interlocks.
Yes – ESD action will override active interlocks.
WARNING: In this mode, when under ESD control,
the process or safety interlocks may be overridden.
Consideration should be given to providing warning signs
and control system information. In all circumstances, active
interlocks on cannot be considered as a safety lockout –
always isolate the electrical supply to the actuator during
valve or actuator maintenance.
To change,
override interlock status.
. The checkbox will indicate ESD
6/7 Timer
ESD will override the Interrupter Timer (if enabled).
The Interrupter Timer option allows the valve operating time to
be increased. This is used, for example, to prevent hydraulic shock
(water hammer) when closing or to prevent surges when opening
a valve. The Interrupter Timer is active in both local and remote
control, refer to 2.3.3.
No (default) – ESD action cannot override the Interrupter Timer.
Under ESD control, the timer will remain active and the valve
operating time, as controlled by the Interrupter Timer, is set.
Yes – ESD overrides the Interrupter Timer. Under ESD control, the
timer will be overridden and the actuator will run continuously to
the set ESD position at normal speed.
WARNING: In this mode when under ESD control,
process conditions requiring slow operation may be
compromised. Consideration should be given to providing
warning signs and control system information.
To change,
override Interrupter Timer status.
. The checkbox will indicate ESD
7/7 Thermostat
The IQ motor includes two embedded thermostats. Should
the duty cycle of the actuator be exceeded and the motor
temperature rises to that of the thermostat trip temperature, the
motor will be de-energised and the actuator will stop. On cooling,
the thermostats will automatically reset and the actuator can be
returned to operation.
WARNING - Actuators certified for use in Hazardous
Areas. If the thermostats are bypassed during ESD,
hazardous area certification is invalid. Users must carry
out their own risk assessment. Due to this requirement,
an internal physical link must also be set to bypass
thermostats. Setting 7/7 alone to Yes will not bypass the
thermostats. Contact Rotork.
ESD action can be set to override tripped thermostats
providing an internal physical link is also set:
No (default) – ESD action cannot override the thermostats.
Yes – ESD overrides tripped thermostats. Under ESD control,
should the motor temperature rise and trip the thermostats, ESD
operation will continue.
To change,
override thermostats status.
. The checkbox will indicate ESD
IQ3 Full Confi guration Man ual – Secti on: Setting s 33
Page 34

2.5 Settings – Security
Limits
Indication
Control
ESD
Security
Defaults
Change Default
Lost Code L81L18
Re-Enter
1/5
Settings
Bluetooth
High: Infrared Initiation only
Password
Sets Bluetooth communication and Password security
levels. The default settings are shown above.
1/5 Bluetooth
Low: Discover always – The actuator is available for Bluetooth
communication using a PC running Insight2 at all times. This
setting provides convenient connection when Insight2 is used.
Communication with the Bluetooth® Setting Tool Pro is available.
Medium: Discover in Local and Stop – The actuator is available
for Bluetooth communication using a PC running Insight2 when
it is selected to Local or Stop using the red selector. Connection
is unavailable in Remote. The Local/Stop/Remote selector can
be padlocked in all three positions. Communication with the
Bluetooth® Setting Tool Pro is available.
High: Infrared Initiation only (default) – The actuator is
not available for Bluetooth communication using a PC running
Insight2. Communication with the Bluetooth® Setting Tool Pro is
available using the quick connect method. Refer to 1.2.
Very High: Disabled. Infrared only – All Bluetooth
communication is disabled. Communication is by infrared
commands from the Bluetooth® Setting Tool Pro only.
Refer to 1.2.
Note. If requested, the user required Bluetooth security
level can be set and made non-editable by Rotork.
Contact Rotork.
To change,
the selected Bluetooth security level will be indicated.
. The drop down list will close and
2/5 Change
The default password is ROTORK, 2/5 Change password will
indicate: Default.
This can be changed to a new password selected by the user.
To set a user selected Password press . The Change password
display will be shown.
Enter user selected Password:
Use to highlight new password entry box and press
Use
to scroll through alphanumerical values to display
required character.
Use to move to next character.
Use to delete the previous character.
Use when selected password is complete.
Navigate to the OK button using . Press
.
The user selected password is now active. Refer to 1.3.
2/4 Change password will then indicate: User.
The Lost Code characters will change. Refer to 3/5.
3/5 Lost Code
Non editable. Lost Code is used if a user password has been set
and then lost or forgotten.
Contact Rotork quoting the code as read from the display. After
caller verification, Rotork can then provide the user set password.
4/5 Re-Enter
The Re-enter password control is used when high level access is
required by Rotork Service or by a user requiring high level access
in order to make other settings available. Contact Rotork for user
high level password.
Enter the provided higher access level password, refer to 1.3.
Once correctly entered, access to high level settings as indicated
in this manual will be made available.
34 IQ3 Full Confi guration Man ual – Secti on: Setting s
Refer to PUB002- 059 for information on the Remote
Hand Station.
Page 35

2.6 Settings –
Defaults
Limits
Indication
Control
ESD
Security
Defaults
Restore Default Settings
Copy Current to Default
Restore Factory Limits
3/3
Settings
Settings
Limits
Allows default settings and factory set limits to be restored.
Settings
1/3 Restore
2/3 Copy
High level access only. Refer to 2.5 Security.
Once satisfactorily commissioned and tested, the current
settings can be copied to become the new default settings. In
future, restoring the default settings will return the actuator
configuration to its site commissioned setup. Refer to 1/3
Restore. If Rotork are contracted to commission the actuator, on
completion and agreement, current settings will be copied to
defaults.
After entering the High level password, .
A warning will be given, to continue .
The current settings shown on each setting page will be
copied to defaults.
Limits
3/3 Restore
This setting will restore the factory set limit positions and position
the actuator at 50% open. Factory limits: 25 output turns (or
quarter-turn for IQT) between Closed and Open Limit positions.
To restore the default Limits, .
A warning will be given, to continue .
Closed and Open Limits must be reset to the valve.
Refer to 2.1
All IQ functions are configured to Rotork default settings before
despatch. If requested at time of order, alternative user specified
settings will be set.
When valve maker and site commissioning takes place, any
settings entered will overwrite the factory default settings and
will be the current settings used in operation along with the
remaining unadjusted defaults.
Should difficulty be encountered during commissioning
the default settings can be restored, returning the actuator
configuration to its default settings.
Standard default settings are indicated in this manual.
To restore the default settings, .
A warning will be given, to continue .
All settings must then be checked/set as required for
valve operation and process control/indication.
IQ3 Full Confi guration Man ual – Secti on: Setting s 35
Page 36

3. Status
3.1 Status – Control
Status screens on the IQ3 display are provided to assist
diagnostics. The displayed information is live data taken from the
main data log processor and can be used to view control signals,
alarms, movement and internal diagnostic data.
Refer to section 1.2 for connecting to the actuator. Once
connected, navigate to the main icon menu and using the four
directional arrows, highlight and select the Status Icon:
Open Limit
3. Status menu Page
3.1 Control 36
3.1.1 Local 37
3.1.2 Remote Hardwired 38
3.1.3 Remote Source 1 39
3.1.4 Remote Source 2 39
3.2 Alarms 40
3.3 Movement 41
3.4 Indication 42
3.5 Diagnostics 43
Control
Alarms
Movement
Indication
Diagnostics
Local
Remote Hardwired
Remote Source 1
Remote Source 2
Status
Control
36 IQ3 Full Confi guration Ma nual – Sect ion: Status
Page 37

3.1.1 Control – Local
Local
Remote Hardwired
Remote Source 1
Remote Source 2
Control
Open
Close
Stop
Local
Remote
Field Sense
Local
Local Control Status
This screen displays the signal statuses from each of the local
controls. As the local controls are operated the corresponding
signals are produced. The checkbox indicates a signal is being
received, which is useful in testing the operation of the local
controls. Movement may occur during testing of the local
controls. If this is not desired, select STOP on the local selectors.
To scroll through this information use
.
4/6 Local
Displays the current Local signal status. When active, this indicates
the local controls have been set to local and a local control signal
is being received.
When the local controls have been set to local the open/close
control will operate the actuator, which will run to its limits unless
interrupted by selecting Local Stop. Any remote control signals
received will not operate the actuator while the local controls are
set to local.
An ESD signal will still trigger the emergency shutdown action in
Local.
5/6 Remote
Displays the current Remote signal status. When active, this
indicates that the local controls have been set to remote and a
signal is being received.
When the local controls have been set to remote, the control
signals from remote hardwired controls and remote sources 1
and 2 will operate the actuator. Any local control signals received
will not operate the actuator while the local controls are set to
remote.
6/6 Field Sense
Field Sense is activated whenever an excessive magnetic field is
detected in addition to the control selector magnets. This could
indicate a high magnetic field in the near vicinity, which may
affect local control operation.
1/6 Open
Displays the current Local Open signal status. When active, this
indicates the local controls have been turned to open and a local
control open signal is being received.
2/6 Close
Displays the current Local Close signal status. When active, this
indicates the local controls have been turned to close and a local
control close signal is being received.
3/6 Stop
Displays the current Local Stop signal status. When active, this
indicates the local controls have been set to stop and a local
control stop signal is being received.
When the local controls have been set to stop, the actuator will
not move to position regardless of the local or remote control
signals it receives.
The ESD function has the ability to override Local Stop.
Refer to 2.4.
IQ3 Full Confi guration Man ual – Secti on: Status 37
Page 38

3.1.2 Control – Remote Hardwired
Local
Remote Hardwired
Remote Source 1
Remote Source 2
Control
Open
Close
ESD
Maintained
Open Interlock
Close Interlock
Remote Hardwired
1/6
Remote Hardwired Status
This screen displays the signal statuses from the remote hardwired
controls. As the remote hardwired controls are operated, the
corresponding signals are produced. The checkbox indicates a
signal is being received, which is useful in testing the operation
of the remote control signals. Valve movement may occur during
testing. If this is not desirable, select STOP on the local controls.
To scroll through this information use
.
4/6 Maintained
Displays the current Remote Hardwired Maintained signal status.
When active, this indicates that a maintained signal is being
received from the remote hardwired control.
If a signal is present the actuator will self-maintain as a response
to a fleeting open or close control signal and will run until the
maintain line is broken, it reaches a limit or is reversed.
5/6 Open Interlock
Displays the current Remote Hardwired Open Interlock signal
status. When active, this indicates that an open interlock signal is
being received from the remote hardwired control.
The actuator will not run in the open direction until a signal
is applied to the open interlock and a remote hardwired open
control signal is received.
6/6 Close Interlock
Displays the current Remote Hardwired Close Interlock signal
status. When active, this indicates that a close interlock signal is
being received from the remote hardwired control.
The actuator will not run in the close direction until a signal
is applied to the close interlock and a remote hardwired close
control signal is received.
1/6 Open
Displays the current Remote Hardwired Open signal status. When
active, this indicates that an open signal is being received from
the remote hardwired control.
2/6 Close
Displays the current Remote Hardwired Close signal status. When
active, this indicates that a close signal is being received from the
remote hardwired control.
3/6 ESD
Displays the current Remote Hardwired ESD signal status. When
active, this indicates that an ESD (Emergency Shut Down) signal is
being applied from the remote hardwired control.
ESD can be set to open, close or stayput. ESD signals are higher
priority than local or remote signals and will operate under both
local and remote control selection. ESD can also be set to operate
an actuator selected to Local Stop. Refer to 2.4.
38 IQ3 Full Confi guration Man ual – Secti on: Status
Page 39

3.1.3 Control – Remote Source 1
3.1.4 Control – Remote Source 2
Local
Remote Hardwired
Remote Source 1
Remote Source 2
Control
Open
Close
Stopped
ESD
Remote Source 1
Remote Source 1 Status
This screen displays the signal statuses from remote source 1;
refer to 2.3.2-2 for details of the Source 1 control. The checkbox
indicates a signal is being received.
Note: only digital remote control options are able to
report a control status. For Analogue control, please use
the Positioner home screen to view demand and position
values. Refer to 2.2.2.
To scroll through this information use
1/4 Open
.
Local
Remote Hardwired
Remote Source 1
Remote Source 2
Control
Open
Close
Stopped
ESD
Remote Source 2
Remote Source 2 Status
This screen displays the signal statuses from remote source 2;
refer to 2.3.2-2 for details of the Source 2 control. The checkbox
indicates a signal is being received.
To scroll through this information use
1/4 Open
Displays the current Remote Source 2 Open signal status. When
active, this indicates that an open signal is being received from
remote source 2.
.
Displays the current Remote Source 1 Open signal status. When
active, this indicates that an open signal is being received from
remote source 1.
2/4 Close
Displays the current Remote Source 1 Close signal status. When
active, this indicates that a close signal is being received from
remote source 1.
3/4 Stopped
Displays the current Remote Source 1 Stopped signal status.
When active, this indicates that remote source 1 has been set to
stop.
4/4 ESD
Displays the current Remote Source 1 ESD signal status. When
active, this indicates that an ESD (Emergency Shut Down) signal is
being received from remote source 1.
ESD can be set to open, close or stayput. ESD signals are higher
priority than local or remote signals and will operate under both
local and remote control selection. ESD can also be set to operate
an actuator selected to Local Stop. Refer to 2.4.
2/4 Close
Displays the current Remote Source 2 Close signal status. When
active, this indicates that a close signal is being received from
remote source 2.
3/4 Stopped
Displays the current Remote Source 2 Stopped signal status.
When active, this indicates that remote source 2 is set to stop.
4/4 ESD
Displays the current Remote Source 2 ESD signal status. When
active, this indicates that an ESD (Emergency Shut Down) signal is
being received from remote source 2.
ESD can be set to open, close or stayput. ESD signals are higher
priority than local or remote signals and will operate under both
local and remote control selection. ESD can also be set to operate
an actuator selected to Local Stop. Refer to 2.4.
IQ3 Full Confi guration Man ual – Secti on: Status 39
Page 40

3.2 Status – Alarms
Control
Alarms
Movement
Indication
Diagnostics
Status
Valve Obstructed
Motor Stall
Valve Jammed
Motor Over Temp.
Control Contention
Inter Timer Inhb.
Battery Discharged
PStroke Error
1/8
Alarms
Actuator Alarms
This screen displays the current status of the actuator alarms; the
checkbox indicates that the alarm is currently active.
To scroll through this information use
.
6/8 Inter Timer Inhb.
Displays the Interrupter Timer Inhibit alarm status. When active,
this alarm indicates that the Interrupter Timer is actively inhibiting
actuator movement.
The Interrupter Timer is used to increase the valve operating time,
the timer stops and starts the actuator automatically. The timer
can be set to operate over all, or a portion of the closing and/or
opening strokes.
7/8 Battery Discharged
Displays the Battery Discharged alarm status. When active, this
alarm indicates that the battery is fully discharged and needs to
be replaced.
8/8 PStroke Error
Displays the Partial Stroke Error alarm status. When active, this
alarm indicates that the partial stroke was unable to be completed
in the specified time.
1/8 Valve Obstructed
Displays the Valve Obstruction alarm status. When active, this
alarm indicates that the valve is obstructed or has reached the
torque limit set. Check that the valve is free of any obstruction
and is operating correctly.
2/8 Motor Stall
Displays the Motor Stall alarm status. When active, this alarm
indicates that the actuator has received a valid command, but has
not detected any movement within 5 seconds.
3/8 Valve Jammed
Displays the Valve Jammed alarm status. When active, this alarm
indicates that the valve has jammed in either the open or closed
position. Check valve operation by hand.
4/8 Motor Over Temp.
Displays the Motor Over Temperature alarm status. When active,
this alarm indicates that the motor is over temperature and the
thermostat has tripped. Check that operating conditions are
within specification.
5/8 Control Contention
Displays the Control Contention alarm status. When active,
this alarm indicates that more than one control signal is being
received. In this event the actuator will remain in position or stop
if already travelling.
40 IQ3 Full Config uration Manu al – Sectio n: Status
Page 41

3.3 Status – Movement
Control
Alarms
Movement
Indication
Diagnostics
Status
Moving Open
Moving Closed
Contactor CW
Contactor ACW
Open Limit
Closed Limit
PStroke Active
Inhibit Timer
Movement
Movement status
This screen displays the current movement status of the actuator.
The checkbox indicates that the status is active.
To scroll through this information use
.
7/8 PStroke Active
Displays the Partial Stroke status. When active, this status
indicates that the actuator is carrying out partial stroke
movements.
Partial Stroking is used to demonstrate the operational integrity
of the valve and actuator by moving over a set portion of valve
stroke. In addition, partial stroking may be used to exercise
infrequently operated valves to help keep them mechanically free.
8/8 Inhibit Timer
Displays the Inhibit Timer status. When active, this status indicates
that the inhibit timer is counting to the set time. Range 0-255
seconds, default 5 seconds.
The Inhibit Timer sets a delay after the actuator stops as a result
of reaching a position consistent with a new desired value
position. For the period set, the actuator will not respond to a
change in the desired value. The inhibit timer is used to prevent
unwanted operation as a result of rapidly oscillating or fluctuating
desired position signal, or to slow actuator response in order to
protect the mechanical valve from excessive wear and/or maintain
actuator within its electrical rating. Refer to 2.3.2-4.
1/8 Moving Open
Displays the actuator Moving Open status. When active, this
status indicates that the actuator is moving open.
2/8 Moving Closed
Displays the actuator Moving Closed status. When active, this
status indicates that the actuator is moving closed.
3/8 Contactor CW
Displays the Clockwise Contactor energised status. When active,
this status indicates that the clockwise contactor is energised.
4/8 Contactor ACW
Displays the Anticlockwise Contactor energised status. When
active, this status indicates that the anticlockwise contactor is
energised.
5/8 Open Limit
Displays the Open Limit status. When active, this status indicates
that the actuator is at the open limit.
6/8 Closed Limit
Displays the Closed Limit status. When active, this status indicates
that the actuator is at the closed limit.
IQ3 Full Confi guration Man ual – Secti on: Status 41
Page 42

3.4 Status – Indication
Control
Alarms
Movement
Indication
Diagnostics
Status
Monitor Relay
S1
S2
S3
S4
S5
S6
1/13
Indication
Indication status
This screen displays the indication relays statuses. The checkbox
indicates that the relay is energised.
The Monitor Relay and relays S1-S4 are provided as standard,
relays S5-S8 and relays S9-S12 are available options that are
greyed out if the options are not present.
To scroll through this information use
1/13 Monitor Relay
.
5/13 S4
Displays the S4 relay status. When active, this indicates that relay
S4 is energised.
6/13 S5
Displays the S5 relay status. When active, this indicates that relay
S5 is energised.
7/13 S6
Displays the S6 relay status. When active, this indicates that relay
S6 is energised.
8/13 S7
Displays the S7 relay status. When active, this indicates that relay
S7 is energised.
9/13 S8
Displays the S8 relay status. When active, this indicates that relay
S8 is energised.
10/13 S9
Displays the S9 relay status. When active, this indicates that relay
S9 is energised.
11/13 S10
Displays the S10 relay status. When active, this indicates that relay
S10 is energised.
Displays the Monitor Relay status. A checked checkbox shows
the relay is active, whilst an unchecked checkbox represents
inactive.
When the monitor relay is used in availability mode; an inactive
relay status indicates that the actuator is set to remote control,
there are no detected internal failures and the actuator is
powered. An active relay status indicates the actuator is not
available for remote control.
When the monitor relay is used in fault mode; an inactive relay
status indicates that there are no detected internal failures and
the actuator is powered. An active relay status indicates the
actuator has a fault present and the actuator is not available for
remote control.
For each relay function, please refer to 2.2.1.
2/13 S1
Displays the S1 relay status. When active, this indicates that relay
S1 is energised.
3/13 S2
Displays the S2 relay status. When active, this indicates that relay
S2 is energised.
4/13 S3
12/13 S11
Displays the S11 relay status. When active, this indicates that relay
S11 is energised.
13/13 S12
Displays the S12 relay status. When active, this indicates that relay
S12 is energised.
Displays the S3 relay status. When active, this indicates that relay
S3 is energised.
42 IQ3 Full Config uration Manual – Secti on: Status
Page 43

3.5 Status – Diagnostics
Control
Alarms
Movement
Indication
Diagnostics
Status
Mains Fail
Phase Loss
Position Sensor
Hardware Option
Torque Sensor
Network Alarm
Config Error
MEM Missing
1/8
Diagnostics
Diagnostics status
This screen displays the actuators diagnostics status. The checkbox
indicates that the fault is present.
To scroll through this information use
.
6/8 Network Alarm
Displays the network fault status. When active, this status
indicates that a fault has occurred in the network. Check all field
connections for continuity and correct connection.
7/8 Config Error
Displays the EEPROM fault status. When active, this status
indicates that a fault with the EEPROM has occurred. Check all
configuration settings.
8/8 MEM Missing
Displays the EEPROM missing status. When active, this status
indicates that the EEPROM is missing. The EEEPROM stores all the
actuators settings and calibration. If the EEEPROM is physically
missing, please contact Rotork for further advice.
1/8 Mains Fail
Displays the power supply failure status. When active, this status
indicates a power supply failure has occurred. If the backlight is
still present it is likely that the third phase has been lost. Check all
incoming phases.
2/8 Phase Loss
Displays the Phase Loss status. When active, this status indicates
that one or more phases have been lost. Only the third phase
is monitored so if the backlight is present then check the third
phase is present. If the backlight is not present, check all phases.
3/8 Position Sensor
Displays the absolute encoder fault status. When active, this
status indicates that a fault with the absolute encoder has
occurred. Check the encoder operation and loom.
4/8 Hardware Option
Displays the communication fault status between the main control
board and the option board. When active, this status indicates
that a communication error has occurred. Check all connections
between the option PCB and the main controller PCB.
5/8 Torque Sensor
Displays the fault status of the Torque Sensor. When active, this
status indicates that a fault has occurred with the torque sensor.
Check the torque sensor and loom.
IQ3 Full Confi guration Man ual – Secti on: Status 43
Page 44

4. Data Log
Data logs, which are able to store vast amounts of operational
and environmental information, are provided as standard on the
IQ. Due to the nature of the graphical display, information can
be displayed locally at the actuator using the supplied Rotork
Bluetooth® Setting Tool Pro.
The stored information can be used to view, diagnose and trend
any type of operational condition that may affect the valve,
actuator or process. With asset management becoming preferred,
the data log helps to achieve goals set out by process conditions.
Refer to section 1.2 for connecting to the actuator. Once
connected, use the four directional arrows to navigate to the
main icon menu. From here you can highlight and select the Data
log icon:
Open Limit
Main Menu
The first time you enter the data log menu, you will be given the
opportunity to set the current time and date. This time and date
is ONLY for the local display and does not affect the dates when
you download the data log for viewing in Insight2. If you want
to set the current time and date, please refer to section 4.6 for
details.
4 Data Log menu structure Page
4.1 Torque Logs 45
4.1.1 Valve Torque Live 45
4.1.2 Valve Torque Profile 46
4.1.3 Valve Torque Reference 46
4.2 Event Logs 47
4.2.1 Control Event Log 47
4.2.1-1 Event Log Filter 48
4.2.1-2 Control Event Log 50
4.2.2 Error Event Log 51
4.3 Trend Logs 51
4.3.1 Temperature 52
4.3.2 Battery 52
4.3.3 Vibration Average 53
4.3.4 Vibration Peak 53
4.4 Operation Logs 54
4.4.1 Starts Profile 54
4.4.2 Statistics 55
4.4.3 Service Log 56
4.4.4 Bluetooth Log 57
4.5 Partial Stroke 58
4.5.1 Partial Stroke Results 58
4.5.2 Partial Stroke Torque 59
Open Limit
Set Date
Hour
Day
9
23
Minute
14
Month
5
Second
44
Year
2013
Check the current time and press enter . You will now be
shown the main Data log menu below:
Stopped
Data log Menu
Torque Logs
Event Logs
Trend Logs
Operation Logs
Partial Stroke
Set Log Date
4.6 Set Log Date 59
44 IQ3 Full Configu ration Manua l – Section: D ata Log
Page 45

4.1 Data Log – Torque Logs
4.1.1 Valve Torque Live – Graph
Open Limit
Valve Torque Profile
Valve Torque Live
Valve Torque Profile
Valve Torque Reference
Torque Menu
Press to view the selected Valve Torque graph.
Torque Live
100
%T
0
100
%T
0
Close
0 100Position
Pos: 36 %T: 12
Pos = Position, T = Torque
Valve Torque Live
This screen displays two torque graphs, showing live torque
percentage output against the actuator position for open and
close directions.
Pressing the and arrows moves the cursor between
the open and close graphs.
Pressing the and arrows moves the cursor along at
1% position increments.
The torque graph will update as the actuator is moving so that
the profile can be viewed live during the actuator stroke. Each
time the actuator moves from limit to limit the graph will be
overwritten with the new data. No data is permanently stored on
this page.
IQ3 Full Confi guration Man ual – Secti on: Data Log 45
Page 46

4.1.2 Torque Logs – Valve Torque Profile
4.1.3 Torque Logs – Valve Torque Reference
Torque Profile
Close Ave.
100
%T
0
100
%T
0
Pos: 36 %T: 8
0 100Position
Pos = Position, T = Torque
Valve Torque Profile
The graph displays two torque profiles detailing the average
opening and closing torque as a percentage of rated torque by
valve position. The data is averaged from the beginning of the
log time to the last operation. It is overlaid with a torque graph
of the last operation (solid line) for comparison with the average
(shaded area).
The Torque Profile graph is useful when determining the amount
of torque required to operate the valve throughout stoke. Excess
valve torque and tight spots can be diagnosed using this graph
to allow for relevant action to be taken.
Key presses
Pressing the and arrows cycles the cursor through
the following graphs:
• Open - Selects the percentage torque graph in the
open direction.
• Close - Selects the percentage torque graph in the
close direction.
• Open Ave. - Selects the average torque graph in the
open direction.
• Close Ave. - Selects the average torque graph in the
close direction.
Reference
100
%T
0
100
%T
0
Close Ref
0 100Position
Pos: 36 %T: 100
Pos = Position, T = Torque
Valve Torque Reference
The graph displays two torque profiles detailing the opening
and closing torque as a percentage of rated torque by valve
position. The data is derived from a previously saved valve torque
reference (shaded area) and is overlaid with the torque profile
(solid line) from the last operation for comparison.
To save a torque profile as a torque reference, first make sure
you commission the actuator and valve as per section 2.1. Once
commissioned and with full operating conditions present, stroke
the valve using either local or remote control through its full
limits to collect the data. Once this has been done, navigate
to the Torque Reference screen and press . The following
message will appear:
Save live log as
?
If the reference is required press when OK is selected.
The profile will now be stored.
log reference?
Pressing the and arrows moves the cursor along at
each 1% position increments.
Pressing the key allows you to zoom in on an area to
see further detail. Pressing the key cycles through: 0 –
100%, -14 – 10%, and 90 – 115% position views.
Key presses
Pressing the and arrows cycles through the
following:
• Open - Selects the percentage torque graph in the
open direction.
• Close - Selects the percentage torque graph in the
close direction.
• Open Ref - Selects the previously saved torque profile
graph in the open direction.
• Close Ref - Selects the previously saved torque profile
graph in the close direction.
Pressing the and arrows moves the cursor along at
each 1% position increments.
Pressing the key allows you to zoom in on an area to
see further detail. Pressing the key cycles through: 0 –
100%, -14 – 10%, and 90 – 115% position views.
To save the valve torque reference, press the key. A
prompt will appear asking to confirm OK / Cancel.
Use and to select a response and press .
46 IQ3 Full Config uration Manu al – Sectio n: Data Log
Page 47

4.2 Data Log – Event Logs
4.2.1 Event Logs – Control Event Log
Stopped
Event Logs
Control Event Log
Error Event Log
Event Logs
Press to view the selected Event Log.
Stopped
Control Event Log
Event Log Filter
Control Event Log
IQ3 Full Confi guration Man ual – Secti on: Data Log 47
Page 48

4.2.1-1 Event Logs – Control Event Log – Event Log Filter
Clear All
Select All
Local Open
Local Close
Stop
Local
Remote
1/59
Stopped
User Interface
Event Log Filter
This screen contains a list of all the possible control parameters
that can be shown in the Control Event log. In order to make
viewing easier, the user can select the parameters they are
interested in viewing. Once selected, these parameters will be
listed in the Control Event Log screen.
The checkbox indicates the parameter will be displayed.
To scroll and highlight the control parameters use
and arrows.
To toggle between show/hide parameter press
List of Control parameters
1/59 Clear All - Clears all selected options.
2/59 Select All - Selects all options.
User Interface
3/59 Local Open - Shows/hides local open events.
4/59 Local Close - Shows/hides local close events.
5/59 Stop - Shows/hides stop events.
6/59 Local - Shows/hides local events.
7/59 Remote - Shows/hides remote events.
Remote Hardwired Control
8/59 Open - Shows/hides remote hardwired control
open events.
9/59 Close - Shows /hides remote hardwired control
close events.
10/59 ESD - Shows/hides remote hardwired control ESD events.
.
11/59 Maintained - Shows/hides remote hardwired control
maintained events.
12/59 Close Interlock - Shows/hides remote hardwired control
close interlock events.
13/59 Open Interlock - Shows/hides remote hardwired control
open interlock events.
Remote Source 1 Control
14/59 Open - Shows/hides remote source 1 control
open events.
15/59 Close - Shows/hides remote source 1 control
close events.
16/59 ESD - Shows/hides remote source 1 control ESD events.
17/59 Maintained - Shows/hides remote source 1 control
maintained events.
Remote Source 2 Control
18/59 Open - Shows/hides remote source 2 control
open events.
19/59 Close - Shows/hides remote source 2 control close
events.
20/59 ESD - Shows/hides remote source 2 control ESD events.
21/59 Maintained - Shows/hides remote source 2 control
maintained events.
48 IQ3 Full Config uration Manu al – Sectio n: Data Log
Page 49

4.2.1-1 Event Logs – Control Event Log – Event Log Filter
continued
Alarms
22/59 Thermostat - Shows/hides thermostat alarm events.
23/59 Torque Trip OP - Shows/hides torque trip in the open
direction alarm events.
24/59 Torque Trip CL - Shows/hides torque trip in the closing
direction alarm events.
25/59 Int.Timer Active - Shows/hides Interrupter Timer
alarm events.
26/59 Motor Stall - Shows/hides motor stall alarm events.
27/59 Inhibit Time - Shows/hides inhibit time alarm events.
28/59 Monitor Relay - Shows/hides monitor relay alarm events.
29/59 PStroke Fail - Shows/hides partial stroke failure
alarm events.
30/59 ControlContention - Shows/hides control contention
alarm events.
31/59 Comms Loss - Shows/hides communications loss
alarm events.
32/59 Phase Loss - Shows/hides phase loss alarm events.
33/59 Mains Restart - Shows/hides mains restart alarm events.
34/59 Phase Rotation - Shows/hides phase rotation
alarm events.
Contacts (Checkbox indicates contact made)
43/59 S1 - Shows/hides contact S1 status.
44/59 S2 - Shows/hides contact S2 status.
45/59 S3 - Shows/hides contact S3 status.
46/59 S4 - Shows/hides contact S4 status.
47/59 S5 - Shows/hides contact S5 status.
48/59 S6 - Shows/hides contact S6 status.
49/59 S7 - Shows/hides contact S7 status.
50/59 S8 - Shows/hides contact S8 status.
51/59 S9 - Shows/hides contact S9 status.
52/59 S10 - Shows/hides contact S10 status.
53/59 S11 - Shows/hides contact S11 status.
54/59 S12 - Shows/hides contact S12 status.
Refer to PUB002- 059 for information on the Remote
Hand Station.
Status
35/59 Moving Open - Shows/hides moving open status events.
36/59 Moving Closed - Shows/hides moving closed
status events.
37/59 Contactor CW - Shows/hides clockwise contactor
energised status events.
38/59 Contactor ACW - Shows/hides anti-clockwise contactor
energised status events.
39/59 Open Limit - Shows/hides actuator open limit
status events.
40/59 Closed Limit - Shows/hides actuator closed limit
status events.
41/59 Manual - Shows/hides manual engaged status events.
42/59 PStroke Active - Shows/hides partial stroke active
status events.
IQ3 Full Confi guration Man ual – Secti on: Data Log 49
Page 50

4.2.1-2 Event Logs – Control Event Log
Stopped
Control Event Log
Event Log Filter
Control Event Log
Even t
Stopped
1/22
Time: 10:28:13 20/05/2013 Event:2999
Pos: 100 Dem:0 T 0 Tmp27
Local Open Local Close
Local Stop Local
Remote HW Ctrl Close
HW Ctrl Open HW Ctrl Maint
HW Ctrl ESD Open Interlock
Close Interlock Primary Close
Scroll
Control Event Log
This screen displays a date and time stamped log of actuator"s
control events. The parameters that are displayed in this screen
are determined by the selections made in the control event filter.
To view each event, first select the parameters that are required
as per section 4.2.1-1 and then scroll through each event.
As each event is viewed, the parameters selected will report
its status along with the current position, demand, torque and
temperature:
Key Parameter
Pos: xxx = Position in %
Dem: xxx = Demand in %
T: xxx = Torque in %
Tmp: xxx = Temperature in Deg C
The checkbox indicates the event has occurred.
To scroll through the control parameters use and .
To scroll through the event logs use and .
50 IQ3 Full Confi guration Ma nual – Section: Data Log
Page 51

4.2.2 Event Logs – Error Event Log
4.3 Data Log – Trend Logs
Even t
Stopped
1/5
Time: 20:21:20 22/05/2013 Event:150
Battery Mains Fail
Cust. Sup. Fail Phase Loss
TrqTrip Mid OP TrqTrip Mid CL
Trq Hi Alarm Trq HiHi Alarm
Motor Stall Control Alarm
Actuator Alarm Valve Alarm
Encoder Alarm Network Alarm
Scroll
Error Event Log
This screen displays the parameters of any events classed as
an error or alarm. The parameters are not selectable and are
displayed by scrolling down. The parameters show both internal
and external alarms related to power supplies, valve torque and
motor stall events and can be used to diagnose a range of issues.
The checkbox indicates the condition or error has occurred.
To scroll through the error parameters use and .
To scroll through the error events use and .
Battery - Displays the battery status.
Mains Fail - Displays the mains power failure
status.
Cust. Sup. Fail - Displays the customer supply status.
Phase Loss - Displays the phase loss status.
TrqTrip Mid OP - Displays the open torque trip status.
TrqTrip Mid CL - Displays the close torque trip status.
Trq Hi Alarm - Displays the Hi alarm status.
Trq HiHi Alarm - Displays the Hi-Hi alarm status.
Motor Stall - Displays the motor stall status.
Control Alarm - Displays the control alarm status.
Actuator Alarm - Displays the actuator alarm status.
Valve Alarm - Displays the valve alarm status.
Encoder Alarm - Displays the encoder alarm status.
Network Alarm - Displays the network alarm status.
Hardwired Fail - Displays the hardwired control status.
Comms Loss - Displays the communications loss
status.
ChkSum Err - Displays the check sum error status.
MEM Missing - Displays the EEPROM missing status.
Opt Not Detect - Displays the option not detected
status.
Trq Sensor Fail - Displays the torque sensor status.
PStroke Fail - Displays the partial stroke status.
Warm Reset - Displays the software reset status.
Limp Home - Displays the Limp Home Status.
Status - Internal use only.
Stopped
Trend Logs
Temperature
Battery
Vibration Average
Vibration Peak
Trend Logs
Press to view the selected Trend Log.
IQ3 Full Confi guration Man ual – Secti on: Data Log 51
Page 52

4.3.1 Trend Logs – Temperature 4.3.2 Trend Logs – Battery
02
02
Open Limit
Trend Logs
Temperature
Battery
Vibration Average
Vibration Peak
Temperature
Temperature Hr:0 Deg C:27
150
C
-60
4Hours
Actuator Temperature
This graph displays a temperature reading over the last 24
hours/30 days/12 months/10 years. The temperature is taken
from an internal sensor on the circuit board and can be affected
by the heating effect of internal components. It may not reflect
external ambient temperature. It can be used to monitor
changes in temperature which may have an effect on operational
conditions.
Pressing the or arrows moves the cursor along the
graph by 1 hour/1 day/1 month/1 year increments.
Pressing the key cycles through the timescales of 24
hours/30 days/12 months/10 years.
Open Limit
Trend Logs
Temperature
Battery
Vibration Average
Vibration Peak
Battery Hr:14 mV:8850
15000
mV
0
Battery
4Hours
Battery Charge
This screen displays a battery level graph in mV over the last 24
hours/30 days/12 months/10 years. Effects on battery life include
environmental conditions and usage. Refer to PUB0020-39 for
further details on battery types and replacement procedures.
Pressing the or arrows moves the cursor along the
graph by 1 hour/1 day/1 month/1 year increments.
Pressing the key cycles through the timescales of 24
hours/30 days/12 months/10 years.
52 IQ3 Full Conf iguration M anual – Section: Data Log
Page 53

4.3.3 Trend Logs – Vibration Average
02
02
4.3.4 Trend Logs – Vibration Peak
Open Limit
Trend Logs
Temperature
Battery
Vibration Average
Vibration Peak
Vibration Average
X Axis Hr:0 mG:0
8000
mG
0
4Hours
Vibration Average
This screen displays average vibration levels (in mG) over the
last 24 hours/30 days/12 months/10 years. The sensor is located
on the circuit board and can detect vibration (forces) in three
axes. In normal mounting position (handwheel pointing up) you
could expect to see around 980 mG constantly acting in the Y
axis. With other mounting orientations, the forces measured
(nominally) will be different*. Vibration analysis graphs may help
the user understand how plant induced vibration affects actuator
/ valve operation.
* The average vibration graph is intended to measure the vibrational
forces over time in order to assist in identifying problematic vibration and
is not intended for accurate vibration analysis.
Pressing the and arrows cycles through the X, Y and
Z axis.
Pressing the or arrows moves the cursor along the
graph by 1 hour/1 day/1 month/1 year increments.
Pressing the key cycles through the timescales of 24
hours/30 days/12 months/10 years.
Open Limit
Trend Logs
Temperature
Battery
Vibration Average
Vibration Peak
Vibration Peak
Peak X Hr:0 mG:400
8000
mG
0
4Hours
Peak Vibration
This screen displays peak vibration levels over the last 24
hours/30 days/12 months/10 years. The levels shown will be the
highest recorded for that period*.
* The peak vibration graph is intended to measure the highest vibrational
forces over time in order to assist in identifying problematic vibration and
is not intended for accurate vibration analysis.
Pressing the and arrows cycles through the X, Y and
Z axis.
Pressing the or arrows moves the cursor along the
graph by 1 hour/1 day/1 month/1 year increments.
Pressing the key cycles through the timescales of 24
hours/30 days/12 months/10 years.
IQ3 Full Confi guration Man ual – Secti on: Data Log 53
Page 54

4.4 Data Log – Operation Logs
4.4.1 Operation Logs – Starts Profile
Stopped
Operation Logs
Starts Profile
Statistics
Service Log
Bluetooth Log
Operation Logs
Press to view the selected Operation Logs.
Open Limit
Operation Logs
Starts Profile
Statistics
Service Log
Bluetooth Log
Starts Profile
100
%
0
100
%
0
Open
0 100Position
Pos: 36 %T: 4
Starts Profile
This screen displays two graphs showing the percentage of
total motor starts against the actuator position in the open and
close directions. Due to the screen resolution, the percentages
can only be displayed in 1% increments. For isolating duty it
is normal to see 100% of starts at each end of travel but for
modulating duty the graph will be spread as in the example
above. To prevent the scaling of the display exceeding the LCD
capability, all percentages of starts are referenced to the highest
number of starts for any given position and all other positions
will show a percentage of the peak. This means however,
for repeated equal pulsing throughout travel (i.e. regulating
0%-25%-50%-75%-100%) the percentage of starts will be
100% for each position. The graph is designed to give the user a
quick visual indication of the starts profile. For accurate number
of starts, please refer to section 4.4.2 Statistics.
54 IQ3 Full Config uration Manu al – Secti on: Data Log
Pressing the and arrows moves the cursor between
the open and close graphs.
Pressing the and arrows moves the cursor along at
1% position increments.
Page 55

4.4.2 Operation Logs – Statistics
Open Limit
Operation Logs
Starts Profile
Statistics
Service Log
Bluetooth Log
Stopped
Temperature
Maximum C 32
Date 16:35:03 22/04/2013
Minimum C 0
Minimum Time 13:14:07 22/04/2013
Torque
Max Opening 18
Date 16:57:33 20/03/2013
1/24
Statistics
This screen displays statistics of actuator operation. Date and
times are only accurate if the date/time is set locally as per
section 4.6.
Power
10/24 Motor Run Time - Displays the total motor running time.
11/24 On Battery - Displays the total time the actuator has
been on battery power.
12/24 Max On Time - Displays the maximum time the actuator
has been powered on.
13/24 Max Off Time - Displays the maximum time the actuator
has been powered off.
14/24 Power Ups - Displays the total number of times the
actuator has been powered up.
Counts
15/24 Clock - Displays the current date and time (if set locally as
in section 4.6).
16/24 Total Turns - Displays the total number of actuator turns.
17/24 Max Starts/Hr - Displays the maximum number of motor
starts that occurred in an hour.
18/24 Date - Displays the date and time that the maximum
number of motor starts occurred.
19/24 Open Starts - Displays the total number of motor starts
in the open direction.
20/24 Close Starts - Displays the total number of motor starts
in the closed direction.
To scroll through the statistics log use and .
Temperature
1/24 Maximum C - Displays the maximum temperature the
internal enclosure has reached in degrees Celsius.
2/24 Date - Displays the date and time that the internal
enclosure reached the maximum temperature.
3/24 Minimum C - Displays the minimum temperature the
internal enclosure has reached in degrees Celsius.
4/24 Date - Displays the date and time that the internal
enclosure reached the minimum temperature.
Tor que
5/24 Max Opening - Displays the maximum opening torque the
actuator has reached.
6/24 Date - Displays the date and time that the actuators
maximum opening torque was reached.
7/24 Max Closing - Displays the maximum closing torque the
actuator has reached.
8/24 Date - Displays the date and time that the actuators
maximum closing torque was reached.
9/24 Ave. Torque % - Displays the actuators average torque as
a percentage.
Trips
21/24 Last Open Limit - Displays the date and time the
actuator last reached its open limit.
22/24 Last Close Limit - Displays the date and time the
actuator last reached its closed limit.
23/24 Open Reset Time - Displays the date and time the
actuator last moved away from the open limit.
24/24 Cls. Reset Time - Displays the date and time the actuator
last moved away from the closed limit.
IQ3 Full Confi guration Man ual – Secti on: Data Log 55
Page 56

4.4.3 Operation Logs – Service Log
Open Limit
Operation Logs
Starts Profile
Statistics
Service Log
Bluetooth Log
Stopped
Operation
Total Turns 1821
Ave. Torque % 2
Close Starts 2
Open Starts 318
Motor Run Time 0:00:20:59
Max Starts/Hr 51
Date 09:58:38 29/07/2013
1/28
Actuator Service Log
This screen displays the operational data of the actuator. This
section is primarily oriented towards operations that affect
the servicing of the actuator; therefore some parameters may
be repeated from the Statistics Log. Date and times are only
accurate if set locally as per section 4.6.
Close Torque
10/28 Max Value % - Displays the maximum applied close
torque as a percentage of rated torque.
11/28 Da te - Displays the time and date that the maximum
applied close torque percentage was recorded. Hours: Minutes:
Seconds Day/Month/Year
12/28 Last Torque Trip - Displays the time and date of the last
instance the actuator"s torque trip was activated in the close
direction. Hours: Minutes: Seconds: Day/Month/Year
13/28 Hi Alarm Count - Displays the number of times the Hi
alarm has been triggered in the close direction.
14/28 HiHi Alarm Count - Displays the number of times the Hi/
Hi alarm has been triggered in the close direction.
Op en Torqu e
15/28 Max Value % - Displays the maximum applied open
torque as a percentage of rated torque.
16/28 Date - Displays the time and date that the maximum
applied open torque percentage was recorded. Hours: Minutes:
Seconds: Day/Month/Year
17/28 Last Torque Trip - Displays the time and date of the last
instance the actuator"s torque trip was activated in the open
direction. Hours: Minutes: Seconds Day/Month/ Year
18/28 Hi Alarm Count - Displays the number of times the Hi
alarm has been triggered in the open direction.
19/28 HiHi Alarm Count - Displays the number of times the Hi/
Hi alarm has been triggered in the open direction.
To scroll through the statistics log use and .
Operation
1/28 Total Turns - Displays the total number of actuator turns.
2/28 Ave. Torque % - Displays the average actuator torque as a
percentage of rated torque.
3/28 Close Starts - Displays the number of times the actuator
has started to move in the close direction.
4/28 Open Starts - Displays the number of times the actuator
has started to move in the open direction.
5/28 Motor Run Time - Displays the total motor run time. Days:
Hours: Minutes: Seconds
6/28 Max Starts/Hr - Displays the maximum number of motor
starts that have occurred in an hour.
7/28 Date - Displays the time and date that the maximum starts
in an hour was recorded. Hours: Minutes: Seconds Day/Month/
Yea r
8/28 Last Close Limit - Displays the last time and date the
actuator reached its closed limit. Hours: Minutes: Seconds Day/
Mo nth / Year
9/28 Last Open Limit - Displays the last time and date the
actuator reached its open limit. Hours: Minutes: Seconds Day/
Mo nth / Year.
Temperature
20/28 Maximum C - Displays the maximum internal actuator
temperature in degrees Celsius.
21/28 Date - Displays the time and date stamp when the
maximum reached actuator temperature was recorded. Hours:
Minutes: Seconds: Day/Month/Year
22/28 Minimum C - Displays the minimum internal actuator
temperature in degrees Celsius.
23/28 Date - Displays the time and date stamp when the
minimum reached actuator temperature was recorded. Hours:
Minutes: Seconds: Day/Month/Year.
Power
24/28 On Battery - Displays the total time the actuator has
been awake on battery power. Days: Hours: Minutes: Seconds
25/28 Power Ups - Displays the total number of actuator power
ups.
26/28 Max On Time - Displays the longest time that the
actuator has been powered on in one instance. Days: Hours:
Minutes: Seconds:
27/28 Max Off Time - Displays the longest time that the
actuator has been powered off in one instance. Days: Hours:
Minutes: Seconds:
56 IQ3 Full Confi guration Ma nual – Sect ion: Data Log
Service
28/28 Last Service - Displays the time and date of the actuators
last service. Hours: Minutes: Seconds: Day/Month/ Year.
Page 57

4.4.4 Operation Logs – Bluetooth Log
Open Limit
Operation Logs
Starts Profile
Statistics
Service Log
Bluetooth Log
Time Name
15:36:24 09/05/2013 BST 100E86D24.10
15:46:33 09/05/2013 BST 100E86D24.10
15:49:15 09/05/2013 BST 100E86D24.10
07:56:33 10/05/2013 BST 100E86D24.10
08:06:27 10/05/2013 BST 100E86D24.10
08:26:26 10/05/2013 BST 100E86D24.10
Bluetooth Log
This screen displays a log of all Bluetooth device connections.
Each device that has successfully connected leaves a footprint of
its device name, MAC address and access level, along with a time
and date stamp (if set locally as per section 4.6).
Stopped
To scroll through the Bluetooth log use
and .
IQ3 Full Confi guration Man ual – Secti on: Data Log 57
Page 58

4.5 Data Log – Partial Stroke Logs
4.5 .1 Partial Stroke Logs – Partial Stroke Results
Open Limit
Partial Stroke
Partial Stroke Results
Partial Stroke Torque
Partial Stroke Logs
Press to view the selected Partial Stroke Log.
Open Limit
Partial Stroke
Partial Stroke Results
Partial Stroke Torque
Time Result
09:10:56 02/01/2013
10:05:02 14/02/2013
10:23:24 16/02/2013
12:24:43 19/03/2013
14:38:57 20/05/2013-
15:02:23 26/05-/2013
Stopped
Partial Stroke Results
This screen displays the results of the Partial Stroke movements
that have taken place. The results are displayed as a simple pass
or fail next to the date and time stamp of each partial stroke (if
set locally as per section 4.6).
To scroll through the Partial Stroke Logs use
and .
58 IQ3 Full Confi guration Ma nual – Section: Data Log
Page 59

4.5.2 Partial Stroke Logs – Partial Stroke Torque
4.6 Data Log – Set Log Date
Open Limit
Partial Stroke
Partial Stroke Results
Partial Stroke Torque
Partial Stroke
100
%
0
100
%
0
Open
0 100Position
Pos: 51 %: 0
Partial Stroke Torque
This screen displays a torque graph of the last partial stroke
movement. This graph is used to plot the torque required to
operate the valve during the last partial stroke operation and may
help to analyse problems with the valve and its condition.
Stopped
Set Date
Hour
Day
9
23
Minute
14
Month
5
Second
44
Year
2013
Set Log Date
This screen allows the user to locally set the current date and
time for the data log. This time and date is only used for local
indication and does not affect the stored data when downloaded
to a PC device when viewing within Rotork Insight2 software.
To select the date and time fields use and arrows.
To change the selected date and time fields use and
arrows.
To confirm the changes select OK and press .
Pressing the and arrows moves the cursor between
the open and close graphs.
Pressing the and arrows moves the cursor along at
1% position increments.
IQ3 Full Confi guration Man ual – Secti on: Data Log 59
Page 60

5. Assets
Asset management is an increasingly desirable requirement
in process industries and can be used to manage valve asset
performance, availability and maintenance schedules. Information
regarding the process, valve and actuator can be stored in the
IQ3. In addition to this the installation and commissioning dates
along with the service history of the actuator can be recorded.
Asset management alarms can also be set to indicate possible
maintenance required.
Stored asset information can be shown on the actuator display
using the supplied Rotork Bluetooth® Setting Tool Pro. When the
actuator configuration file is downloaded, using the Bluetooth®
Setting Tool Pro or directly with a PC running Insight 2, asset
data is appended along with the actuator build and configuration
data. The actuator configuration and asset data can be exported
as a CSV file from Insight 2.
It is therefore important that data regarding the valve-actuator
tag, valve details and process information are populated by
the user or their agent. Rotork will populate actuator build
data automatically on manufacture. Other applicable data will
be populated when contracted to commission or service the
actuator.
Open Limit
Open Limit
Assets
Actuator
Valve
2nd Stage Gear Box
Service History
Service Alarms
Namur 107
Online Help
Main Menu
The asset menu is split into different categories for each type of
data. The full assets menu structure is shown below:
5.0 Assets menu structure Page
5.1 Actuator –
data regarding the actuator and its build 61
5.1.1 Actuator Name Plate 61
5.1.2 Actuator Std Build 63
5.1.3 Actuator Opt Build 63
5.2 Valve – 64
data regarding the valve and process
5.3 2nd Stage Gear Box – 64
data regarding the second stage gearbox
(when fitted)
5.4 Service History – 65
dates of FAT, commissioning and
last service
5.5 Service Alarms – 65
sets alarms for indicating that valve and
actuator service is due
5.6 NAMUR 107 – 66
configure monitored valve and actuator
status alarms for standard NAMUR 107
diagnostic system indication
5.7 Online Help – 67
QR code link
60 IQ3 Full Confi guration Man ual – Secti on: Assets
Page 61

5.1 Assets – Actuator
5.1.1 Actuator – Actuator Nameplate
Open Limit
Actuator
Actuator NamePlate
Actuator Std Build
Actuator Opt Build
Stopped
Actuator NamePlate
Tag (-o-) [-O-] (-o-)
Serial No Dans Demo
Size IQS12
Base F10
Coupling A
Wiring Diag 123B0000
Speed 24.0
1/11
Actuator Name Plate Information
This screen displays the nameplate information of the actuator.
Should the physical nameplate become damaged or lost,
the information for the actuator will remain accessible. The
information shown is read only with the exception of the
actuator Tag which can be edited by the user after entering a
valid password.
To change, press to select the highlighted field.
Use and to scroll through alphabetic and numerical
figures to display the required character.
to move to the next character.
Use
Use to delete the previous character.
Use to save the information.
1/11 Tag
The tag entry in Actuator Nameplate will be shown on the
actuators set home screen display. The tag name entered should
be the valve and/or actuator reference that identifies the asset
within the site process control scheme. If the tag was supplied at
time of order, Rotork will populate the entry automatically.
The user may edit the tag after a valid password has been
entered.
2/11 Serial No
Displays the actuator serial number. This should always be
quoted when making any enquiry to Rotork or our agents.
3/11 Size
Displays the actuator model and size, for example "IQ25" or
"IQT125".
4/11 Base
Displays the actuator base size according to standard ISO 5210
/ 5211 for metric bases and MSS SP-101 / SP-102 for imperial
bases, for example "F14".
5/11 Coupling
Displays the actuator drive coupling type and designation
according to standard ISO5210 / 5211. The drive couplings
available are A, Z3*, B1, B3, B4 (B only for IQT).
*Z3 coupling is an extended length version of an "A" coupling but with
the same stem acceptance dimension. It is a Rotork standard and is not
referenced in standard ISO5210.
IQ3 Full Confi guration Man ual – Secti on: Asset s 61
Page 62

5.1.1 Actuator – Actuator Nameplate
continued
6/11 WiringDiag
Displays the actuator Wiring Diagram number. Standard wiring
diagrams can be downloaded from http://wiring.rotork.com
using the wiring diagram selector link.
Wiring Diagrams prefixed "WD" are non-standard and user
specific. For a copy, contact Rotork.
7/11 Speed
Displays the actuator output speed in RPM. If a 2nd stage
gearbox is used in combination with the actuator, the
combination output speed will be subject to the gearbox ratio.
For multi-turn combinations (gearbox types prefixed "IB", "IS" or
"MTW" refer to 5.3) divide the displayed speed by the gearbox
ratio to obtain the combination output speed in rpm.
For quarter-turn combinations (gearbox types prefixed "IW",
"IWD" or "MOW" refer to 5.3) divide the gearbox ratio by 4
then divide the result by the actuator speed (RPM) and multiply
by 60 to get the 90° operating time in seconds.
For actuator types "IQL" or "IQML", the speed quoted is the
linear output travel in mm/second.
For IQT builds, speed is quoted in seconds per 90º operation at
maximum rated speed.
8/11 Ma xTorq ue
Displays the actuator maximum (catalogue) rated torque in
Newton metres (Nm). The maximum rated torque is that at
100% torque setting. The torque may be set in the range 40%
to 100%, refer to 2.1. Unless specified with order, on despatch,
the torque will be set at 40%.
9/11 Enclosure
Displays the actuator enclosure type. For full details, refer also to
the actuator physical nameplate.
Available enclosures include the following. Others may be shown
depending on certification.
Non Hazardous
(IEC50529)
IP68 IP68 CSA
Hazardous ATEX
(EEA)
II 2 GD EXD IIB T4 IEC EXD IIB T4 FM GRPS C,D,E,F&G
II 2 GD EXD IIC T4 IEC EXD IIC T4
II 2 GD EXDE IIB T4 IEC EXDE IIB T4
II 2 GD EXDE IIC T4 IEC EXDE IIC T4
Hazardous Brazil Hazardous Canada Hazardous Japan
INMETRO EXD IIB T4
INMETRO EXD IIC T4
INMETRO EXDE IIB
T4
INMETRO EXDE IIC
T4
Non Hazardous
(IEC50529) Canada
Hazardous IEC
(regional)
CSA CL1DIV1
GRCD T4
CSA CLI DIV1
GRBCDT4
Hazardous US
(NEC500)
FM GRPS
B,C,D,E,F&G
TIIS (EXDIIBT4X)
10/11 Supply
Displays the actuator power supply build voltage. The build
voltage is that specified by the end user and must be used when
operating the actuator at all times.
For actuators built with 3 phase AC power supplies, the voltage
can be confirmed as three phase if IQ is shown in 3/11.
For actuators built with single phase AC power supplies, the
voltage can be confirmed as single phase if IQS is shown in 3/11.
For actuators built with DC power supplies, the voltage can be
confirmed as DC if IQD is shown in 3/11.
For any power supply queries please contact Rotork quoting the
actuator serial number.
As standard, actuators are specified to operate at their stated
catalogue torque performance with a tolerance of nominal
voltage +/- 10%. Duty performance is specified at nominal
voltage +/- 0%.
Excess or insufficient voltage supply may cause increased motor
heating.
For valve maker FAT purposes, where the actuator is built for
a power supply different to that available at the valve maker"s
or integrator"s site, contact Rotork prior to powering up the
actuator.
62 IQ3 Full Conf iguration Manual – Sect ion: Asset s
11/11 Build Date
Displays the actuator production test date. YearMonthDay
(YYYYMMDD).
Page 63

5.1.2 Actuator – Actuator Std Build
5.1.3 Actuator – Actuator Opt Build
Open Limit
User Interface
Serial No SERIAL USER INTERFACE
Software Version v104 (3708)
BT Mac 00:07:80:5a:80:43
FCC ID: QOQWT12
IC: 5123A-BGTWT12A
Telec R 205 WW 2010067
Control Board
1/22
Actuator Standard Build Information
This screen allows the user to view the standard build details of
the actuator. All information shown is read only.
To scroll through this information use and .
User Interface
1/22 Serial No – Displays the serial number of the user interface
module.
3/22 Software Version – Displays the software version of the
user interface module.
4/22 BT Mac – Displays the Bluetooth MAC address of the user
interface module.
5/22 FCC ID: – Displays the user interface modules Federal
Communications Commission Bluetooth identification.
6/22 IC: – Displays the user interface modules Industry Canada
Bluetooth identification.
7/22 Telec R – Displays the user interface modules Telecom
Engineering Center Bluetooth identification.
Control Board
8/22 Serial No – Displays the serial number of the control board.
10/22 Software Version – Displays the software version of the
control board.
11/22 SIL SW Version – Displays the software version of the
control board for SIL actuators.
Position Sensor
12/22 Serial No – Displays the serial number of the position sensor.
14/22 Software Version – Displays the software version of the
position sensor.
15/22 Hardware Version – Displays the hardware version of
the position sensor of SIL actuators.
16/22 SIL SW Version – Displays the software version of the
position sensor for SIL actuators.
Torque Sensor
17/22 Serial No – Displays the serial number of the torque sensor.
Close Limit
Option1
Type Analogue
Serial No 1227BX0160002901=10
Software Version v105 ( 843)
Option2
Type Relays
Serial No 1216BX0250004802=12
Software Version v102 ( 1919)
1/16
Actuator Option Build Information
This screen allows the user to view the details for any options
fitted to the actuator. Up to four options can be fitted to the IQ3
(this is dependent on number of terminals available and interoption compatibility).
To scroll through this information use and .
Option 1
1/16 Type – Displays the type of option fitted.
2/16 Serial No – Displays the serial number of the option board
fitted.
4/16 Software Version – Displays the software version of the
option fitted.
Option 2
5/16 Type – Displays the type of option fitted.
6/16 Serial No – Displays the serial number of the option board
fitted.
8/16 Software Version – Displays the software version of the
option fitted.
Option 3
9/16 Type – Displays the type of option fitted.
10/16 Serial No – Displays the serial number of the option
board fitted.
12/16 Software Version – Displays the software version of the
option fitted.
Option 4
13/16 Typ e – Displays the type of option fitted.
14/16 Serial No – Displays the serial number of the option
board fitted.
16/16 Software Version – Displays the software version of the
option fitted.
IQT3 Motor Control Board
19/22 Software Version – Displays the software version of the
IQT3 Motor Control Board.
20/22 Serial No – Displays the serial number of the IQT3 Motor
Control Board.
Battery Back Up
22/22 Software Version – Displays the software version of the
Battery Back Up.
IQ3 Full Confi guration Man ual – Secti on: Asset s 63
Page 64

5.2 Assets – Valve
5.3 Assets – 2nd Stage Gear Box
Stopped
Valve
Tag DN150-C
Serial No BV278904
Type Butterfly
Size / DN 4"
Manufacturer Triumph
Service Fluid ProcessOil
Service Temp 130C
1/10
Valve Information
This screen allows the user to view and edit information about
the attached valve, once a valid password has been entered.
This may be useful for displaying the valve details if the valve
tag plate is missing, or for matching a valve to an actuator after
valve/actuator repair.
To edit information, use and to select the highlighted
field.
To change, press to select the field.
Use and to scroll through alphabetic and numerical
figures to display the required character.
Use to move to the next character.
Use to delete the previous character.
Use to save the information.
To escape without saving press .
1/10 Tag – Displays the valve tag.
2/10 Serial No – Displays the serial number of the valve.
3/10 Type – Displays the valve type.
4/10 Size / DN – Displays the valve size.
5/10 Pressure / DN – Displays the pressure of the valve.
6/10 Manufacturer – Displays the valve manufacturer.
7/10 Service Fluid – Displays the valve service fluid.
8/10 Service Temp – Displays the valve service temperature.
9/10 Location – Displays the recorded location of the valve.
10/10 Installation Date – Displays the installation date of the
valve. YearMonthDay (YYY YMMDD).
Stopped
2nd Stage Gear Box
Serial No Z123456789
Type IB12
Ratio 6:1
MA 5.1
1/4
Gearbox Information
This screen allows the user to view information about the
attached gearbox and edit this information once a valid password
has been entered.
To edit information, use and to select the highlighted
field.
To change, press to select the field.
Use and to scroll through alphabetic and numerical
figures to display the required character.
Use to move to the next character.
Use to delete the previous character.
Use to save the information.
To escape without saving press .
1/4 Serial No – Displays the serial number of the gearbox.
2/4 Type – Displays the gearbox type.
3/4 Ratio – Displays the gearbox ratio. This is the number of
actuator output turns required to output one full gearbox turn.
4/4 MA – Displays the gearbox mechanical advantage. This is the
factor that the actuator output torque is multiplied by to give the
actuator/gearbox combination output torque.
64 IQ3 Full Config uration Manu al – Sectio n: Assets
Page 65

5.4 Assets – Service History
5.5 Assets – Service Alarms
Stopped
Service History
FAT Date 20130225
Commission Date 20130319
Inspection Date 20130621
1/3
Service History Information
This screen allows the user to view and edit information about
the actuator"s service history, once a valid password has been
entered.
To edit information, use and to select the highlighted
field.
To change, press to select the field.
Use and to scroll through alphabetic and numerical
figures to display the required character.
Use to move to the next character.
Use to delete the previous character.
Use to save the information.
To escape without saving press .
1/3 FAT Date – Displays the actuator factory acceptance test
date. YearMonthDay (YYYYMMDD).
2/3 Commission Date – Displays the actuator commission date.
YearMonthDay (YYYYMMDD).
3/3 Inspection Date – Displays the actuator inspection date.
YearMonthDay (YYYYMMDD).
Note: the date format for service history attributes may vary
depending on user preference.
Stopped
Open Torque
Hi Alarm % 75%
HiHi Alarm % 80%
Close Torque
Hi Alarm % 50%
HiHi Alarm % 85%
Misc Trip Levels
Max Starts/Hr 1200
1/10
Service Alarms
This screen allows the user to set actuator service alarms if a valid
high level password has been entered. Actuator ser vice alarms
are meant for indication only and will aid the user to schedule
effective maintenance of the actuator/valve. Service torque
alarms will only display a visual alarm and do not act in the same
way as a torque trip alarm.
Alarms can be set to activate when a selected condition has
occurred. This is a visual indication displayed locally at the
actuator. The user can also set the Amber LED to flash when
one or more of the set conditions are in an alarm state. Refer to
2.2.2. In addition, for remote monitoring, an output relay can be
set to indicate when one or more service alarm conditions are
active. Refer to 2.2.1.
Typical use s
Torque level detection: For example, if the application requires a
torque trip level to be set at 80%, but the user wants to know
when the valve torque demand reaches a high level, then the
user can set the Hi Alarm to 70%. If the user also wants to know
when a mid-travel torque trip is imminent, they can set the Hi Hi
Alarm to 75%.
To prevent spurious torque level alarms being generated, the
Hi and Hi Hi Alarms ignore valve seating torque trips. They are
only generated if Mid-travel torque exceeds the levels set for the
service alarms.
To edit the alarms use and to highlight the required
field.
To change, press to select the field.
Use and to scroll through percentage torque or
numbers to display required value.
Use to save the information.
To escape without saving press .
IQ3 Full Confi guration Man ual – Secti on: Asset s 65
Page 66

5.5 Assets – Service Alarms
continued
5.6 Assets – NAMUR 107
Ope n Torque
1/10 Hi Alarm % - Allows the user to set a value for an open
torque alarm. E.g. 70%.
2/10 HiHi Alarm % - Allows the user to set a value for a second
open torque alarm. E.g. 75%.
Close Torque
3/10 Hi Alarm % - Allows the user to set a value for a close
torque alarm. E.g. 70%.
4/10 HiHi Alarm % - Allows the user to set a value for a second
close torque alarm. E.g. 75%.
Misc Trip Levels
5/10 Max Starts/Hr – Allows the user to set a value for the max
starts per hour alarm. E.g. 50 starts.
6/10 Total Starts – Allows the user to set a value for the total
starts alarm. E.g. 5000 starts.
7/10 Total Turns – Allows the user to set a value for the total
turns alarm. E.g 15,000 turns.
8/10 Vibration – If the vibration level, which is set by the
customer, is reached the alarm will trigger. It can be set between
1000mG and 8000mG.
Service
9/10 Interval (Months) – Allows the user to set an alarm for
the next service due. Displays number of months between each
service.
Alarms
NAMUR Level
Battery Low
Local Ctrl Fault
Mains Fail
Thermostat
Serv. Contactor
Service Due
Hi Hi Torq. Alarm
Close Limit
1/24
MAN OOS FNC FAI
NAMUR 107 Settings
This screen allows the user to view alarms for NAMUR 107
recommendations and set these alarms once a valid password
has been entered. The NAMUR 107 diagnostics framework splits
actuator condition statuses into four groups. This is based on the
outcome severity of an active condition or the type of condition
shown. The four settings available for NAMUR 107 diagnostics
are:
NAMUR Allocation Description Alarm
MAN Maintenance required N107 Maintenance
OOS Out of specification N107 Out of Specification
FNC Function check N107 Function Check
FAI Failure N107 Failure
NAMUR 107 alarms are meant for indication only and will alert
the user to potential operational issues with the actuator/valve.
Alarms can be set to activate when a selected condition has
occurred. For remote monitoring, an output relay can be set to
indicate an N107 alarm type is active, refer to 2.2.1. The NAMUR
107 system enables multiple actuator conditions to be monitored
through one relay output remotely. This will initiate further
investigation into the root cause of the problem.
10/10 Clear Active Alarms – Clears all active alarms.
Typical use s
For example, a process controller requires detailed N107
diagnostics to integrate a new process into an existing NAMUR
107 system. Particular actuator conditions will be monitored
and assigned to user specified N107 alarms for monitoring. Each
N107 alarm can be allocated to a relay output to provide remote
diagnostics for various actuator conditions, refer to 2.2.1.
The Battery Low, Service Due and Hi Torque Alarm conditions are
assigned to the N107 Maintenance category. Should one of these
conditions become active, an output relay, correctly configured
for the N107 Maintenance alarm, will indicate a maintenance
issue. The operator will then be able to check the status of the
actuator to determine which of the three allocated conditions are
active and find the appropriate solution.
Other conditions can be configured to the remaining NAMUR
107 categories and integrated into the system appropriately.
To edit information use and to highlight the
required field.
To change, press to select /deselect the field.
66 IQ3 Full Confi guration Ma nual – Secti on: Asset s
Page 67

5.6 Assets – NAMUR 107
1/24 Battery Low – Allows the user to set NAMUR 107
diagnostics for battery charge low.
2/24 Local Ctrl Fault – Allows the user to set NAMUR 107
diagnostics for a fault occurring with the local control.
3/24 Mains Fail – Allows the user to set NAMUR 107
diagnostics for mains power failure.
4/24 Thermostat – Allows the user to set NAMUR 107
diagnostics for a thermostat trip occurring.
5/24 Serv. Contactor – Allows the user to set NAMUR 107
diagnostics for contactor service required.
6/24 Service Due – Allows the user to set NAMUR 107
diagnostics for actuator service due. Refer to 5.5.
7/24 Hi Hi Torq. Alarm – Allows the user to set NAMUR 107
diagnostics for the Hi Hi torque alarm. Refer to 5.5.
8/24 Hi Torque Alarm – Allows the user to set NAMUR 107
diagnostics for the Hi torque alarm. Refer to 5.5.
9/24 Motor Starts – Allows the user to set NAMUR 107
diagnostics for motor starts. Refer to 5.5.
10/24 Total Turns – Allows the user to set NAMUR 107
diagnostics for total turns. Refer to 5.5.
11/24 Monitor Relay – Allows the user to set NAMUR 107
diagnostics for monitor relay. Refer to 2.2.1.
12/24 Control Fail – Allows the user to set NAMUR 107
diagnostics for control failure.
13/24 Actuator Fail – Allows the user to set NAMUR 107
diagnostics for actuator failure.
14/24 Comms Loss – Allows the user to set NAMUR 107
diagnostics for communications loss.
15/24 Opt Not Detect – Allows the user to set NAMUR 107
diagnostics for option card not detected.
16/24 PStroke Fail – Allows the user to set NAMUR 107
diagnostics for partial stroke failure. Refer to 2.3.2-3.
17/24 Valve Obstructed – Allows the user to set NAMUR 107
diagnostics for valve obstructed.
18/24 Valve Jammed – Allows the user to set NAMUR 107
diagnostics for valve jammed.
19/24 Pos. Limp Home – Allows the user to set NAMUR 107
diagnostics for position sensor reduced functionality.
20/24 End Travel Mov. – Allows the user to set NAMUR 107
diagnostics for actuator travel beyond set limits.
21/24 Net. Card Fault – Allows the user to set NAMUR 107
diagnostics for network card fault.
22/24 Cust. Sup. Fail – Allows the user to set NAMUR 107
diagnostics for customer supply failure.
23/24 Valve Travel Time – Allows the user to set NAMUR 107
diagnostics for valve travel time.
24/24 Wrong Dir. Det. – Allows the user to set NAMUR 107
diagnostics for wrong direction detected.
continued
5.7 Assets – Online Help
Rotork Support
This screen displays a QR code to direct users to the support
section of the Rotork website. This page enables the user to
source documentation, software and training resources for
Rotork products.
IQ3 Full Confi guration Man ual – Secti on: Asset s 67
Page 68

www.rotork.com
A full listing of our worldwide sales and
service network is available on our website.
UK
Rotork plc
tel +44 (0)1225 733200
fax +44 (0)1225 333467
email mail@rotork.com
PUB002-040-00
Is sue 12/18
USA
Rotork Controls Inc.
tel +1 (585) 247 2304
fax +1 (585) 247 2308
email info@rotork.com
Rotork is a corporate
member of the Institute
of Asset Management
As part of a process of on-going product development, Rotork reserves the right to amend
and change specifications without prior notice. Published data may be subject to change.
For the very latest version release, visit our website at www.rotork.com
The name Rotork is a registered trademark. Rotork recognises all registered trademarks.
The Bluetooth® word mark and logos are registered trademarks owned by Bluetooth SIG,
Inc. and any use of such marks by Rotork is under license. Published and produced in the
UK by Rotork Controls Limited. POWTG1218
 Loading...