

Page 1
© 2018 Roland Corporation
Data List
* The illustration shows the TD-17.
Page 2

Contents
DRUM KIT . . . . . . . . . . . . . . . . . . . . . . . . . . . . . . . . . . . . . . . . . . . . . . . . . 3
KIT Screen . . . . . . . . . . . . . . . . . . . . . . . . . . . . . . . . . . . . . . . . . . . . . . 3
CLICK . . . . . . . . . . . . . . . . . . . . . . . . . . . . . . . . . . . . . . . . . . . . . . . . . . . . . 3
COACH . . . . . . . . . . . . . . . . . . . . . . . . . . . . . . . . . . . . . . . . . . . . . . . . . . . . 4
TIME CHECK . . . . . . . . . . . . . . . . . . . . . . . . . . . . . . . . . . . . . . . 4
QUIET COUNT . . . . . . . . . . . . . . . . . . . . . . . . . . . . . . . . . . . . . 4
WARM UPS . . . . . . . . . . . . . . . . . . . . . . . . . . . . . . . . . . . . . . . . 4
SONG . . . . . . . . . . . . . . . . . . . . . . . . . . . . . . . . . . . . . . . . . . . . . . . . . . . . . 5
INSTRUMENT . . . . . . . . . . . . . . . . . . . . . . . . . . . . . . . . . . . . . . . . . . . . . 6
ASSIGN . . . . . . . . . . . . . . . . . . . . . . . . . . . . . . . . . . . . . . . . . . . . . . . . . 6
LEVEL . . . . . . . . . . . . . . . . . . . . . . . . . . . . . . . . . . . . . . . . . . . . . . . . . . 7
TUNING . . . . . . . . . . . . . . . . . . . . . . . . . . . . . . . . . . . . . . . . . . . . . . . . 7
MUFFLING . . . . . . . . . . . . . . . . . . . . . . . . . . . . . . . . . . . . . . . . . . . . . . 7
USER SAMPLE . . . . . . . . . . . . . . . . . . . . . . . . . . . . . . . . . . . . . . . . . . . 8
OTHER . . . . . . . . . . . . . . . . . . . . . . . . . . . . . . . . . . . . . . . . . . . . . . . . . 9
AMBIENCE . . . . . . . . . . . . . . . . . . . . . . . . . . . . . . . . . . . . . . . . 9
MULTI FX . . . . . . . . . . . . . . . . . . . . . . . . . . . . . . . . . . . . . . . . . . 10
PAD EQ . . . . . . . . . . . . . . . . . . . . . . . . . . . . . . . . . . . . . . . . . . . 10
VOLUME . . . . . . . . . . . . . . . . . . . . . . . . . . . . . . . . . . . . . . . . . . 10
MIDI NOTE . . . . . . . . . . . . . . . . . . . . . . . . . . . . . . . . . . . . . . . . 11
SETUP . . . . . . . . . . . . . . . . . . . . . . . . . . . . . . . . . . . . . . . . . . . . . . . . . . . . 12
Bass/Treble . . . . . . . . . . . . . . . . . . . . . . . . . . . . . . . . . . . . . . . . 12
Pad Settings . . . . . . . . . . . . . . . . . . . . . . . . . . . . . . . . . . . . . . . 12
Hi-Hat Settings . . . . . . . . . . . . . . . . . . . . . . . . . . . . . . . . . . . . 14
MIDI . . . . . . . . . . . . . . . . . . . . . . . . . . . . . . . . . . . . . . . . . . . . . . 15
LCD . . . . . . . . . . . . . . . . . . . . . . . . . . . . . . . . . . . . . . . . . . . . . . 16
USB . . . . . . . . . . . . . . . . . . . . . . . . . . . . . . . . . . . . . . . . . . . . . . 16
AUTO OFF . . . . . . . . . . . . . . . . . . . . . . . . . . . . . . . . . . . . . . . . . 16
System Info. . . . . . . . . . . . . . . . . . . . . . . . . . . . . . . . . . . . . . . . 16
Multi-Eect Parameters . . . . . . . . . . . . . . . . . . . . . . . . . . . . . . . . . . . 17
DELAY . . . . . . . . . . . . . . . . . . . . . . . . . . . . . . . . . . . . . . . . . . . . 18
TAPE ECHO . . . . . . . . . . . . . . . . . . . . . . . . . . . . . . . . . . . . . . . . 18
REVERSE DELAY . . . . . . . . . . . . . . . . . . . . . . . . . . . . . . . . . . . . 18
3TAP PAN DELAY . . . . . . . . . . . . . . . . . . . . . . . . . . . . . . . . . . . 18
OD0DELAY . . . . . . . . . . . . . . . . . . . . . . . . . . . . . . . . . . . . . . 19
DS0DELAY . . . . . . . . . . . . . . . . . . . . . . . . . . . . . . . . . . . . . . . 19
CHORUS . . . . . . . . . . . . . . . . . . . . . . . . . . . . . . . . . . . . . . . . . . 19
SPACE-D . . . . . . . . . . . . . . . . . . . . . . . . . . . . . . . . . . . . . . . . . . 19
OD0CHORUS . . . . . . . . . . . . . . . . . . . . . . . . . . . . . . . . . . . . 19
DS0CHORUS . . . . . . . . . . . . . . . . . . . . . . . . . . . . . . . . . . . . . 19
PHASER A . . . . . . . . . . . . . . . . . . . . . . . . . . . . . . . . . . . . . . . . . 20
PHASER B . . . . . . . . . . . . . . . . . . . . . . . . . . . . . . . . . . . . . . . . . 20
STEP PHASER . . . . . . . . . . . . . . . . . . . . . . . . . . . . . . . . . . . . . . 20
FLANGER . . . . . . . . . . . . . . . . . . . . . . . . . . . . . . . . . . . . . . . . . . 20
REVERB . . . . . . . . . . . . . . . . . . . . . . . . . . . . . . . . . . . . . . . . . . . 21
LONG REVERB . . . . . . . . . . . . . . . . . . . . . . . . . . . . . . . . . . . . . 21
SUPER FILTER . . . . . . . . . . . . . . . . . . . . . . . . . . . . . . . . . . . . . . 21
FILTER+DRIVE . . . . . . . . . . . . . . . . . . . . . . . . . . . . . . . . . . . . . . 21
AUTO WAH . . . . . . . . . . . . . . . . . . . . . . . . . . . . . . . . . . . . . . . . 22
OD/DS0TWAH . . . . . . . . . . . . . . . . . . . . . . . . . . . . . . . . . . . 22
LOFI COMPRESS . . . . . . . . . . . . . . . . . . . . . . . . . . . . . . . . . . . . 22
DISTORTION . . . . . . . . . . . . . . . . . . . . . . . . . . . . . . . . . . . . . . . 22
OVERDRIVE . . . . . . . . . . . . . . . . . . . . . . . . . . . . . . . . . . . . . . . . 22
SATURATOR . . . . . . . . . . . . . . . . . . . . . . . . . . . . . . . . . . . . . . . 22
T-SCREAM . . . . . . . . . . . . . . . . . . . . . . . . . . . . . . . . . . . . . . . . . 23
BIT CRUSHER . . . . . . . . . . . . . . . . . . . . . . . . . . . . . . . . . . . . . . 23
ISOLATOR . . . . . . . . . . . . . . . . . . . . . . . . . . . . . . . . . . . . . . . . . 23
RING MODULATOR . . . . . . . . . . . . . . . . . . . . . . . . . . . . . . . . . 23
PITCH SHIFTER . . . . . . . . . . . . . . . . . . . . . . . . . . . . . . . . . . . . . 23
AUTO PAN . . . . . . . . . . . . . . . . . . . . . . . . . . . . . . . . . . . . . . . . . 23
Kit List . . . . . . . . . . . . . . . . . . . . . . . . . . . . . . . . . . . . . . . . . . . . . . . . . . . . 24
Kit List (VAD306) . . . . . . . . . . . . . . . . . . . . . . . . . . . . . . . . . . . . . . . . . . 25
Instrument List . . . . . . . . . . . . . . . . . . . . . . . . . . . . . . . . . . . . . . . . . . . 26
User Sample List . . . . . . . . . . . . . . . . . . . . . . . . . . . . . . . . . . . . . . . . . . 31
Song List . . . . . . . . . . . . . . . . . . . . . . . . . . . . . . . . . . . . . . . . . . . . . . . . . . 31
Kit Structure . . . . . . . . . . . . . . . . . . . . . . . . . . . . . . . . . . . . . . . . . . . . . . 32
2
Page 3
DRUM KIT
KIT Screen
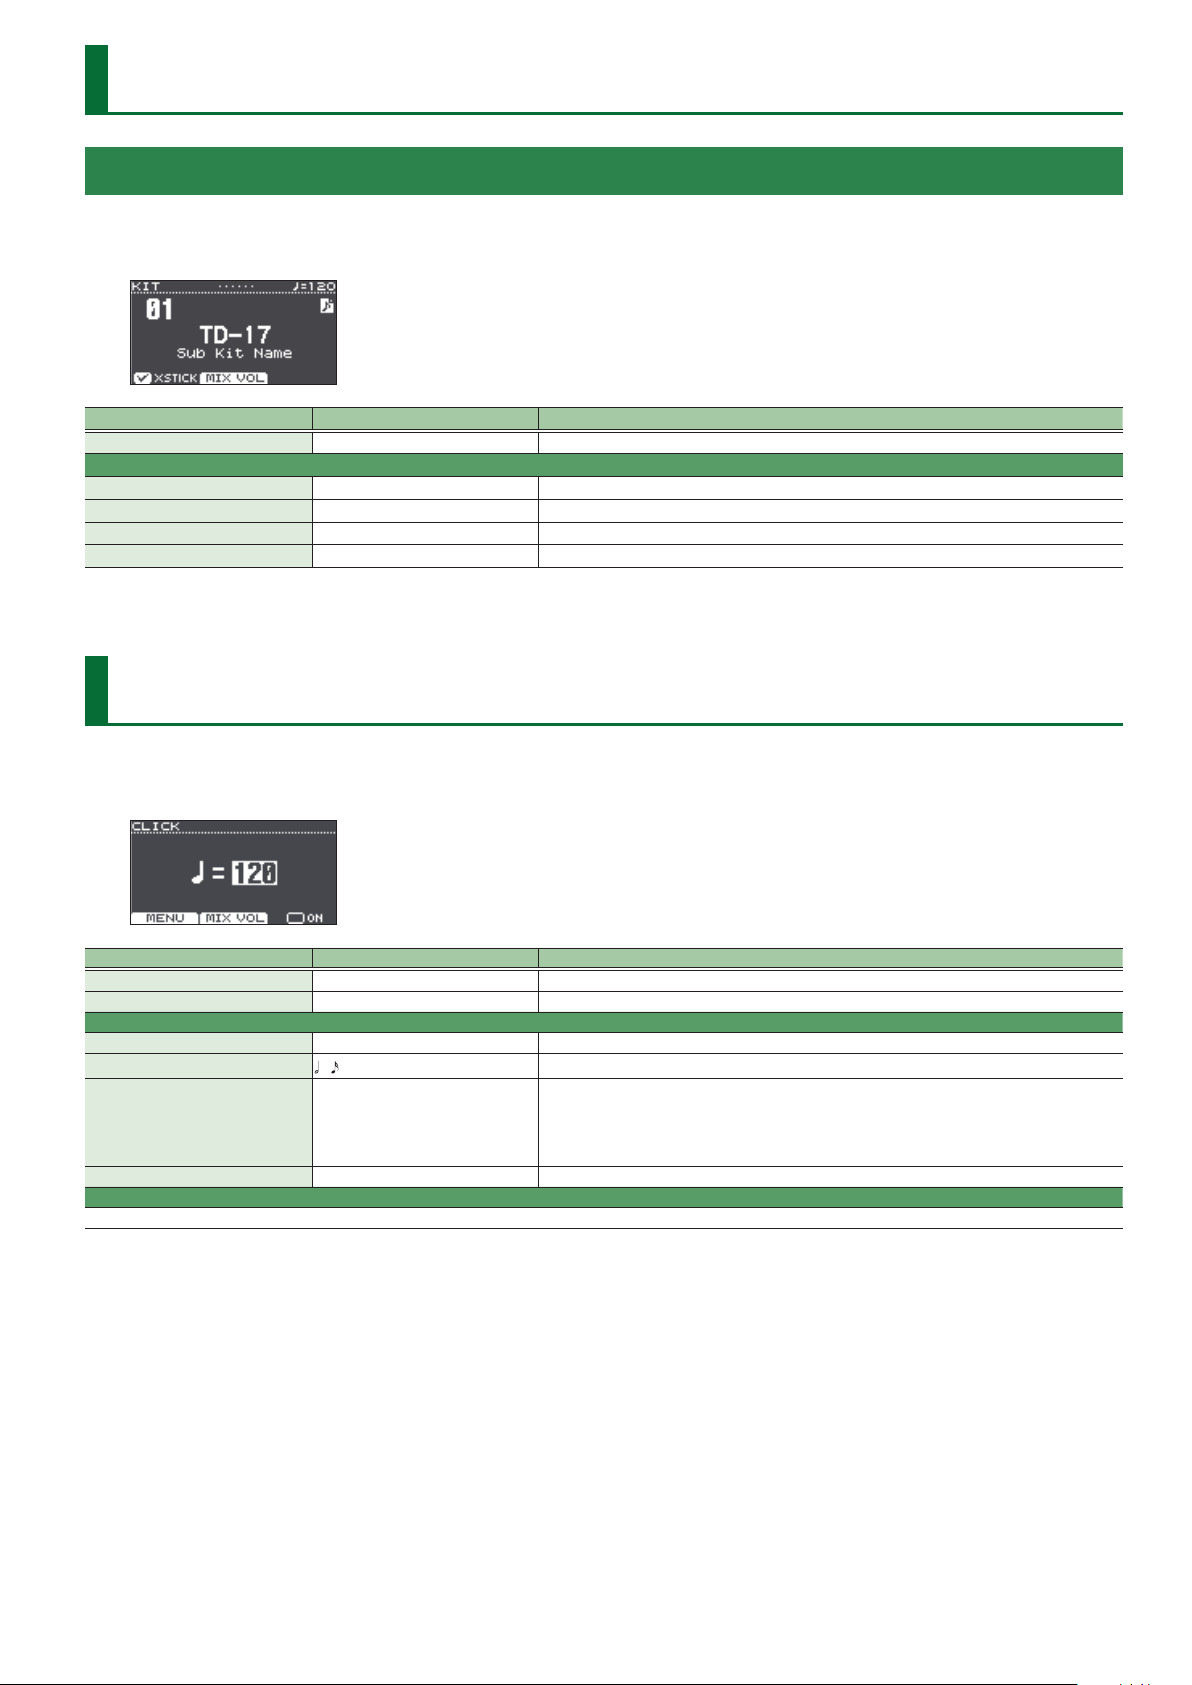
1. Press the [DRUM KIT] button.
The KIT screen appears.
Parameter Value Explanation
XSTICK OFF, ON Species whether a snare pad produces the cross-stick sound (ON) or not (OFF).
MIX VOL ([2] button)
Audio In -INF–+6.0 dB Input volume of the device connected to the MIX IN jack and Bluetooth (*1)
Click -INF–+6.0 dB Volume of the click
Song -INF–+6.0 dB Volume of the song
Guide Track -INF–+6.0 dB Volume of the guide track
*1 TD-17-L excepted
CLICK
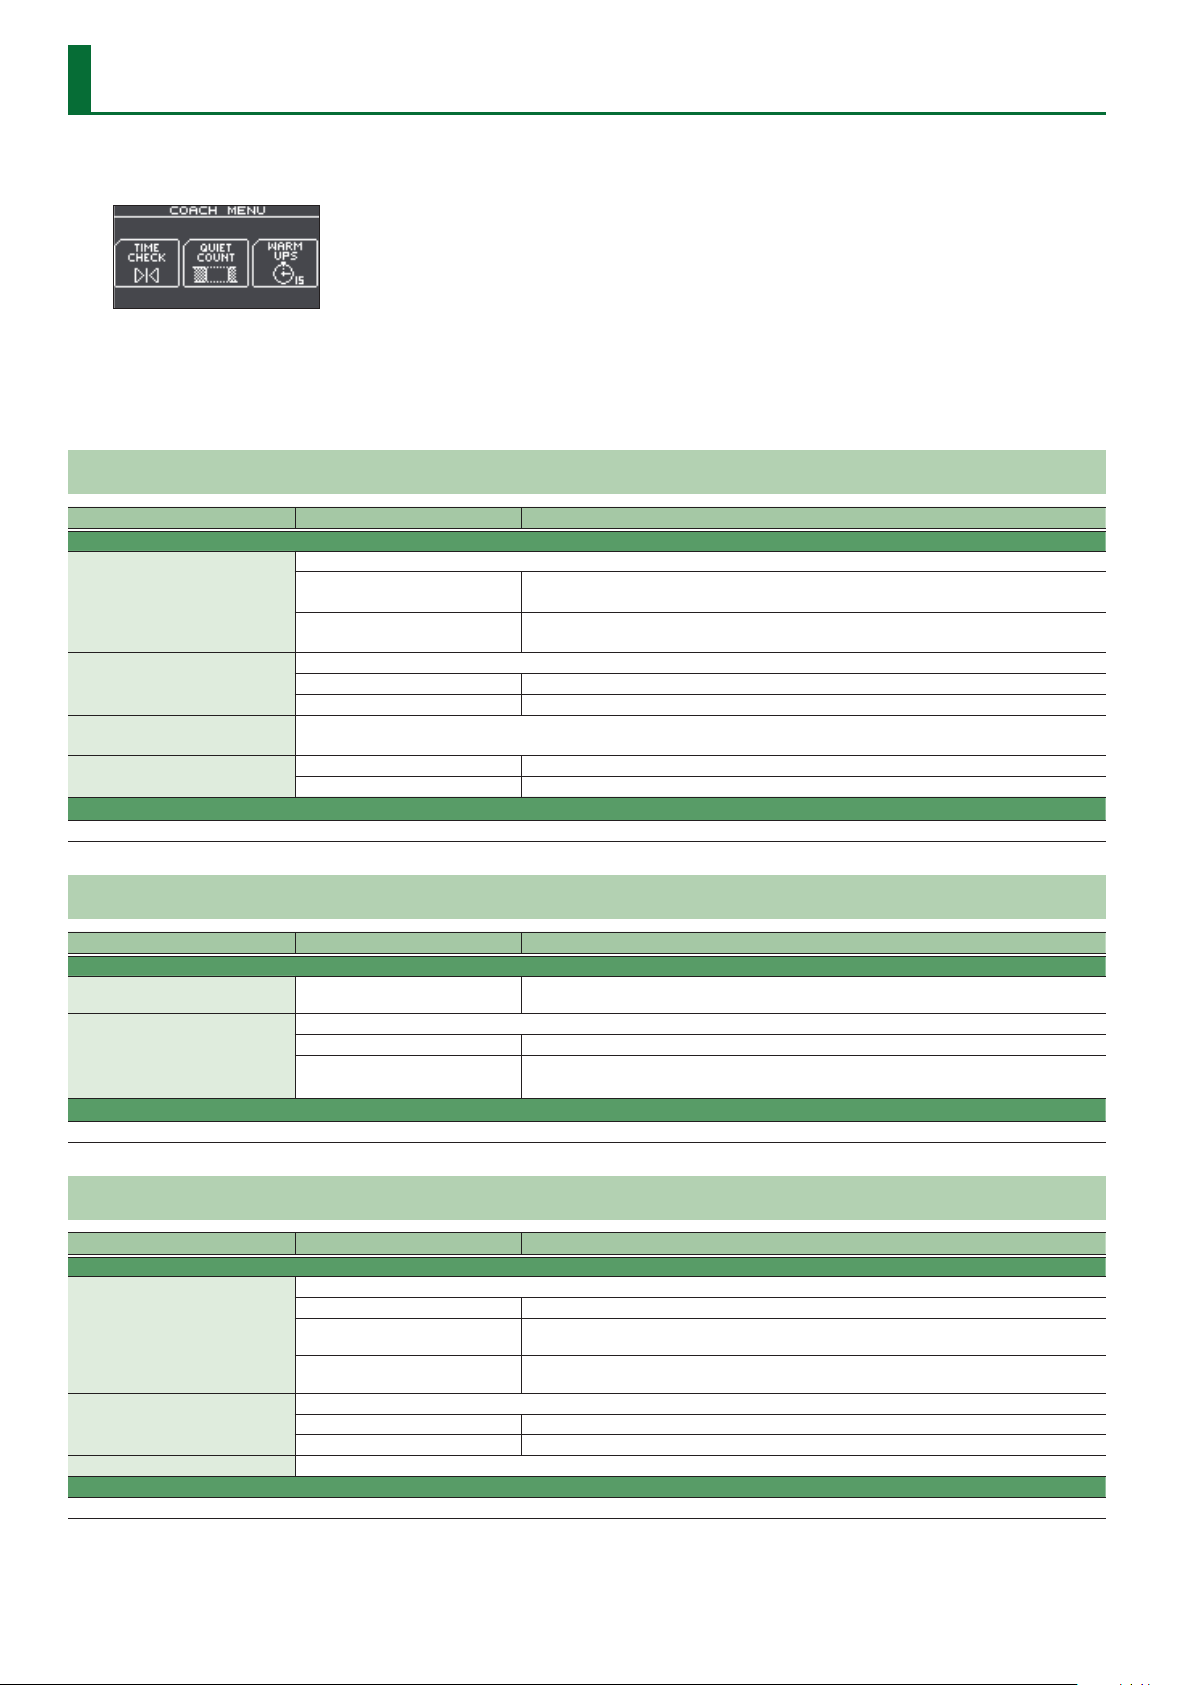
1. Press the [CLICK] button.
The CLICK screen appears.
Parameter Value Explanation
Tempo*1 20–260 Tempo
[F3] button OFF, ON Turns click on/o.
MENU ([F1] button)
Beat*1 1–9 Number of beats per measure
Rhythm Type
Sound
Pan L30–CENTER–R30 Stereo position of the click
MIX VOL ([2] button)
This is the same parameter as the KIT screen’s MIX VOL ([F2] button).
–
METRONOME, CLICK, VOICE, BEEP 1,
BEEP 2, TEK CLICK, STICKS, CLAVES,
WOOD BLOCK, COWBELL, AGOGO,
TRIANGLE, TAMBOURINE, MARACAS,
CABASA
Interval of the click
Sound for the click
3
Page 4
COACH
1. Press the [COACH] button.
The COACH MENU screen appears.
2. Press a function button to select a practice menu.
3. Press the [F2] (MENU) button.
The coach menu settings screen appears.
TIME CHECK
Parameter Value Explanation
SETUP tab
Species whether the score will be shown in the screen.
Score
Grade
Display 1
Display 2
Gauge
CLICK tab
This parameter is in common with the MENU ([1] button) of the CLICK (p. 3).
OFF
ON (4, 8, 16, 32 meas)
Species the strictness of scoring.
EASY Normal
HARD Timing will be checked more strictly.
In the screen, select the pad for which a timing graph will be shown.
LEFT BEHIND The left side of the timing graph is shown as BEHIND (late).
LEFT AHEAD The left side of the timing graph is shown as AHEAD (early).
Your performance will not be scored.
Only the timing will be checked.
The score will be shown in the screen.
You can also specify the number of measures you’ll practice before being scored.
QUIET COUNT
Parameter Value Explanation
SETUP tab
Measures 2, 4, 8, 16 (Measures)
Of the measures specied by “Measures,” this setting species the length of the measures that will be “Quiet.”
Quiet
CLICK tab
This parameter is in common with the MENU ([1] button) of the CLICK (p. 3).
RANDOM The length of the Quiet interval will randomly change each time.
1, 2, 4
Specify the length (measures) of the interval for which the click will alternate between “Sounding”
and “Quiet.”
Species the length (number of measures) of the Quiet interval.
* This setting cannot be longer than half of the Measures value.
WARM UPS
Parameter Value Explanation
SETUP tab
Species the time.
5 MINS Time required: 5 minutes, Change-Up: 2 minutes, Time Check: 3 minutes
Duration
Grade
Max Tempo Species the upper tempo limit during step 2: Auto Up/Down.
CLICK tab
This parameter is in common with the MENU ([1] button) of the CLICK (p. 3).
10 MINS
15 MINS
Species the strictness of scoring.
EASY Normal
HARD Timing will be checked more strictly.
Time required: 10 minutes, Change-Up: 3 minutes, Auto Up/Down: 3 minutes, Time Check: 4
minutes
Time required: 15 minutes, Change-Up: 5 minutes, Auto Up/Down: 5 minutes, Time Check: 5
minutes
4
Page 5
SONG
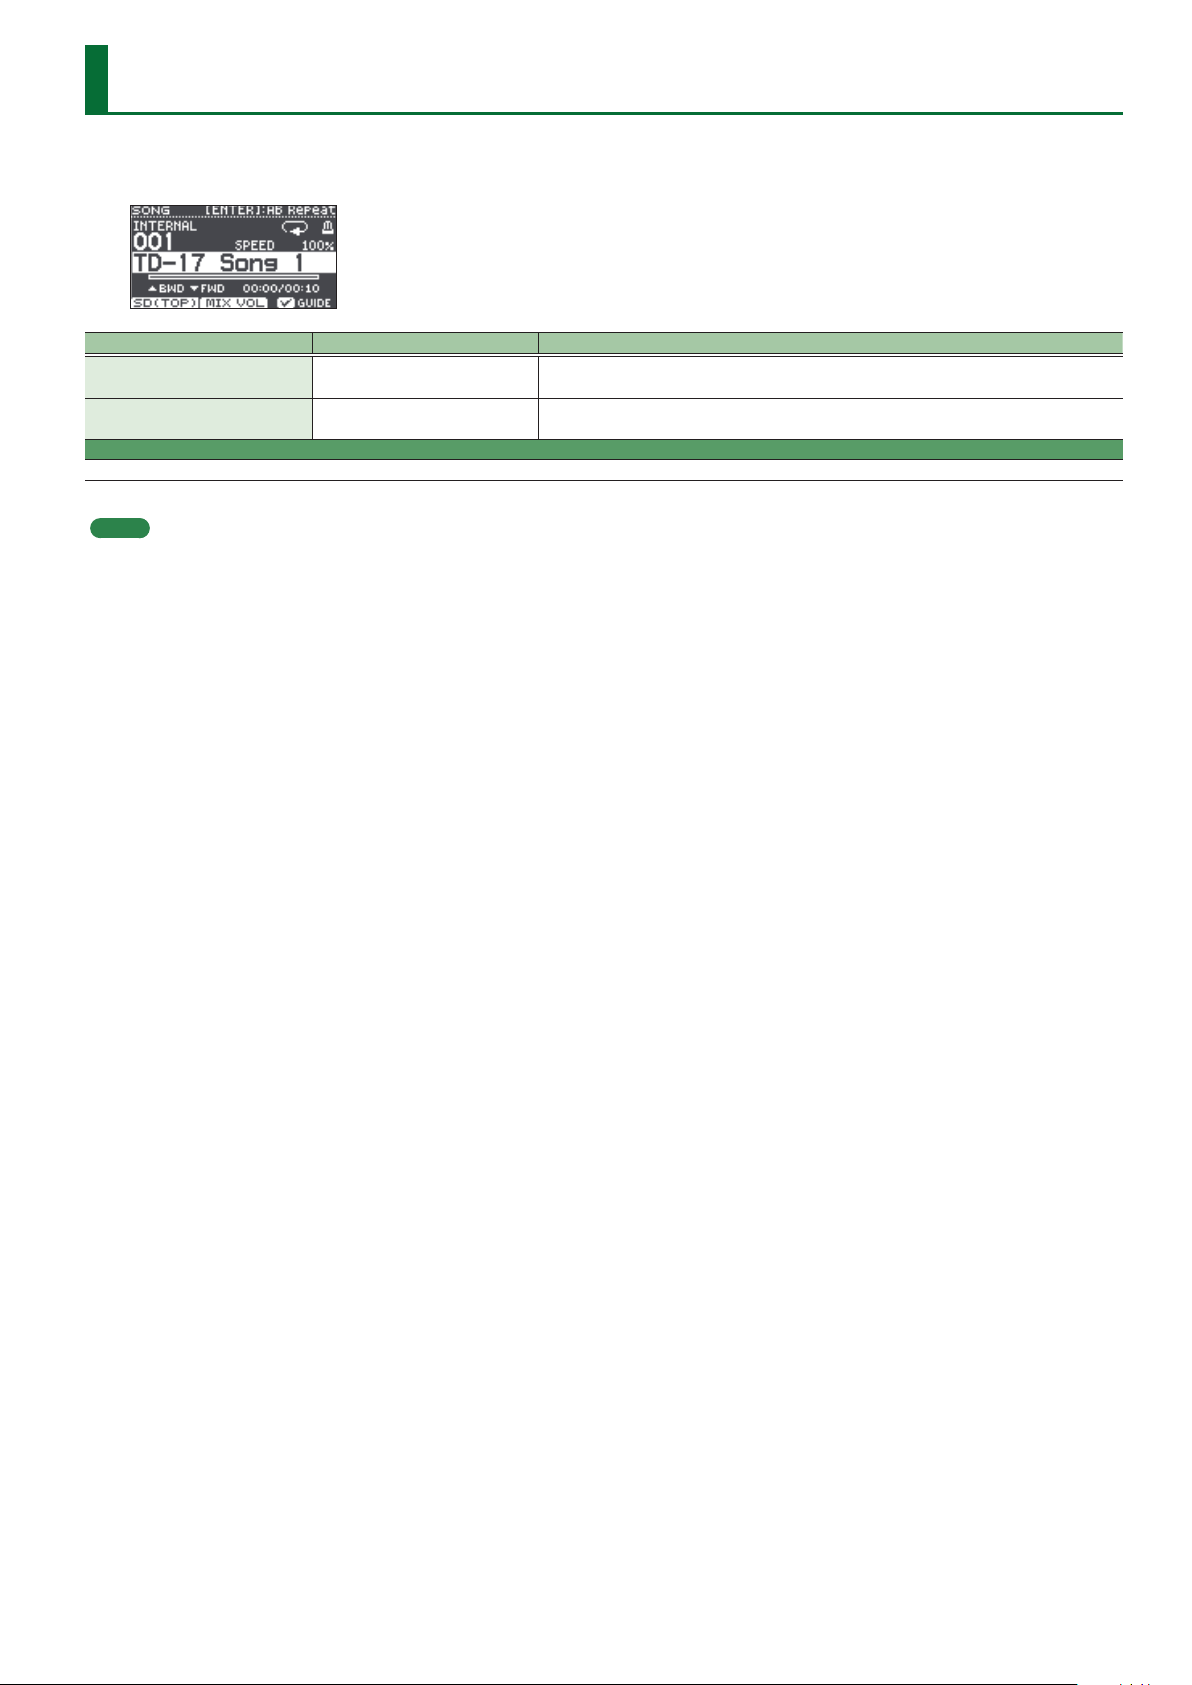
1. Press the [SONG] button.
The SONG screen appears.
Parameter Value Explanation
SPEED ([SLOW] [FAST] button) 50–150%
GUIDE ([F3] button) *1 OFF, ON
MIX VOL ([2] button)
This is the same parameter as the KIT screen’s MIX VOL ([F2] button) (p. 3).
*1 Only if there is a guide track for the song
MEMO
Each time you press the [F1] button, you switch between internal songs, audio les on the SD card, and songs recorded on the SD card (recorded data that you exported).
Changes the playback speed of the song (audio le).
* When you switch songs, this returns to 100%.
Plays the guide track.
To mute the guide track, press the [F3] button to clear the check mark.
5
Page 6
INSTRUMENT
ASSIGN
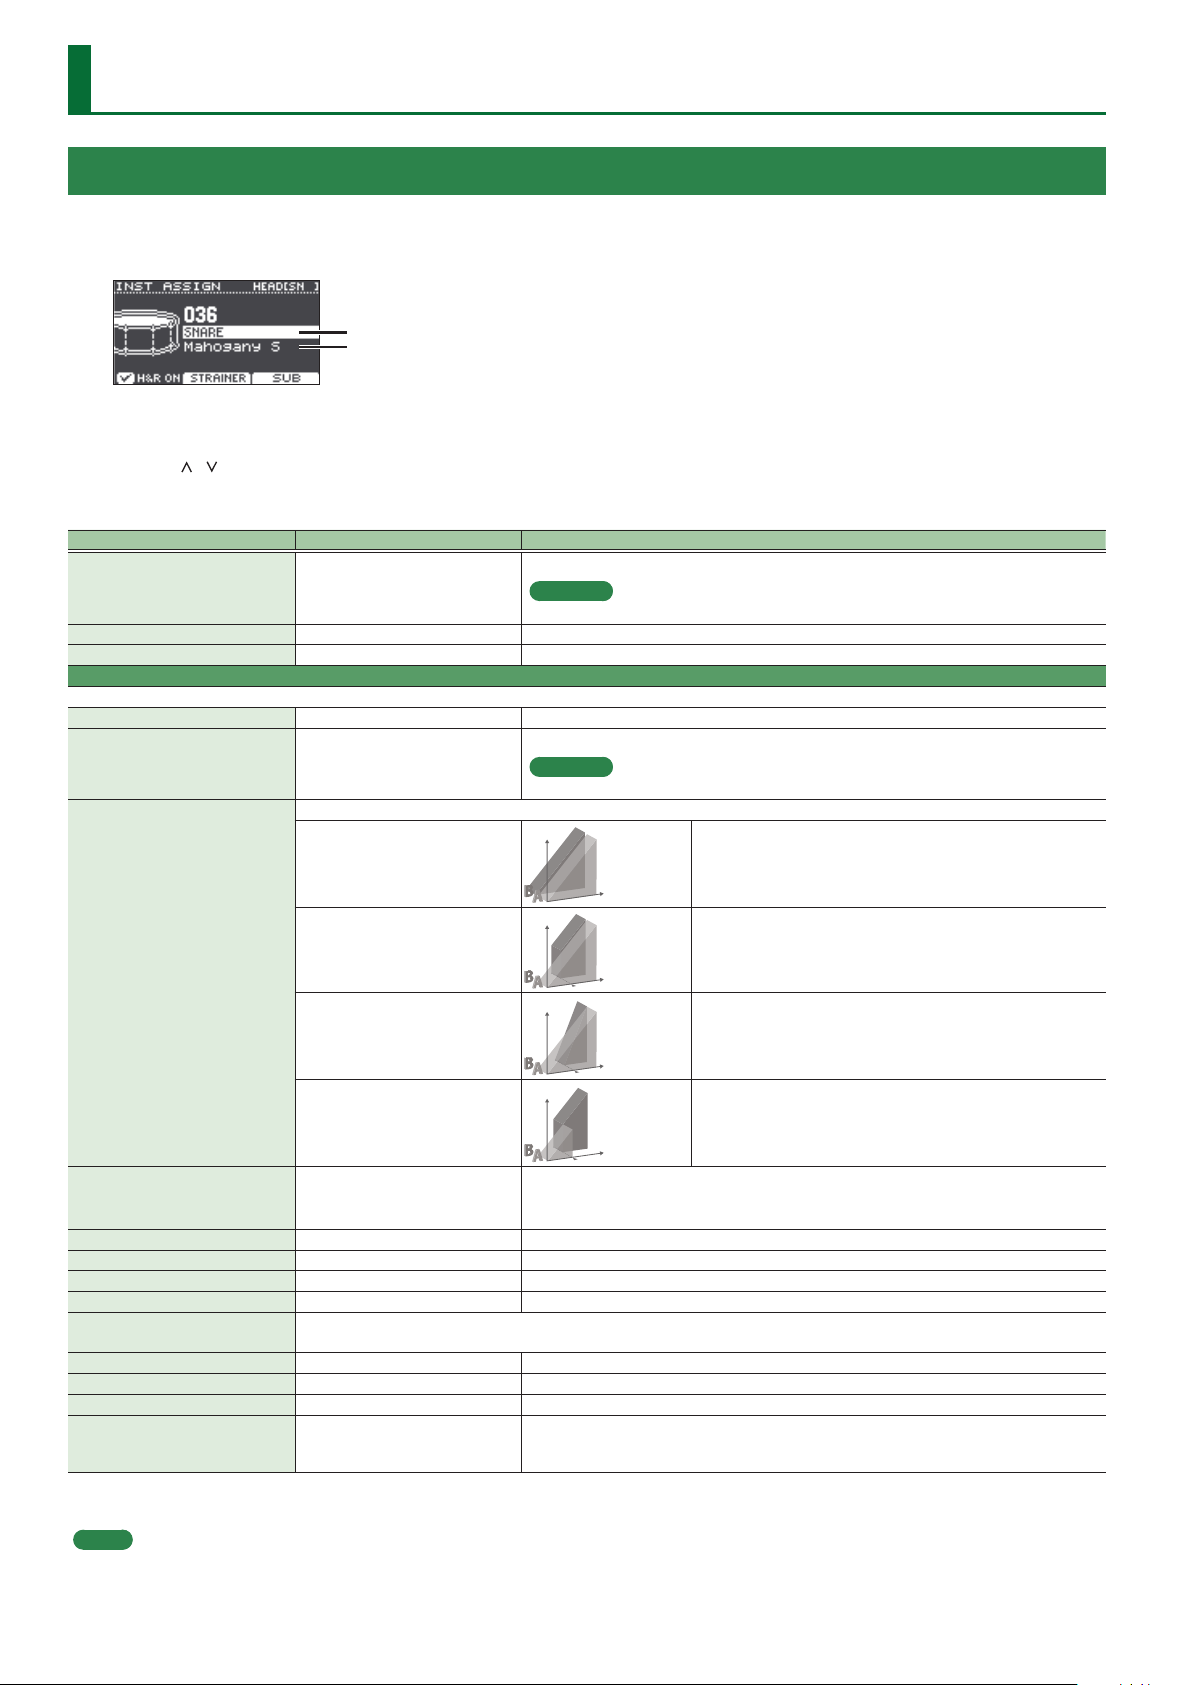
1. Press the [ASSIGN] button.
The INST ASSIGN screen appears.
Instrument group name
Instrument name
2. Select the pad that you want to edit.
3. Use the [ ] [ ] buttons to move the cursor to the instrument group or instrument, and use the dial to select an instrument.
4. Press the [DRUM KIT] button to return to the KIT screen.
Parameter Value Explanation
Instrument
Snare Buzz (F2 button) *1 OFF, 1–8 Resonance to the snare
Strainer Adj. (F2 button) *1 LOOSE1–3, MEDIUM1–3, TIGHT1–3 Tension of the strainer (resonating cords)
SUB ([F3] button)
You can select a sub-instrument (layer) and edit its settings.
SUB ON ([F2] button) OFF, ON Turns the sub-instrument on/o.
SUB INST
Layer Type
Fade Point 1–127
InstVolume -INF–+6.0 dB Volume of the sub-instrument
Pitch*1 -4800–4800 Instrument pitch (units of one cent)
Decay*1 1–100 Length of decay
Tuning*1 -100–100 Tuning of the head
Muing*1
Snare Buzz*1 OFF, 1–8 Resonance to the snare
Strainer Adj.*1 LOOSE1–3, MEDIUM1–3, TIGHT1–3 Tension of the strainer (resonating cords)
Size*1 1.0–40.0 Hi-hat/Cymbal diameter
Fixed*1 NORMAL, FIXED1–4
*1 This parameter can be specied only for instruments that support it. For details, refer to “Instrument List” (p. 26).
000–310 (preset)
U001–U100
000–310 (preset)
U001–U100 (user sample)
These parameters specify how the sub instrument will be sounded.
MIX
FADE1
FADE2
SWITCH
Muing (muting) setting
For the values of this setting, refer to MUFFLING (p. 7).
(user sample)
Instrument number
Reference
For more about instruments, refer to “Instrument List” (p. 26).
Sub-instrument number
Reference
For more about instruments, refer to “Instrument List” (p. 26).
Volume
The main instrument (A) and sub instrument (B) always sound
Playing
Volume
Volume
Volume
Species the force of the strike at which the sub instrument begins to be sounded.
If this is “1,” the sub instrument is sounded by a strike of any force.
* This is not available if Layer Type is “MIX.”
Openness of the hi-hat
If something other than “NORMAL” is selected, the openness of the hi-hat does not change,
regardless of how you press the hi-hat pedal.
Dynamics
Playing
Dynamics
Playing
Dynamics
Playing
Dynamics
together as a layer.
The sub instrument (B) is added as a layer only if the strike is stronger
than “Fade Point.”
If the strike is stronger than “Fade Point,” the sub instrument (B) is
added as a layer according to the strength of that strike.
At 127 or higher, the main instrument (A) and sub instrument (B) are
the same volume.
Strikes weaker than “Fade Point” sound the main instrument (A), and
strikes stronger than “Fade Point” switch to sound the sub instrument
(B).
MEMO
If the [F1] (H&R ON) button shows a check mark, the instruments for the head and rim etc. can be selected as a set. According to the instrument that you select, the
recommended instruments are selected as a set.
6
Page 7
LEVEL
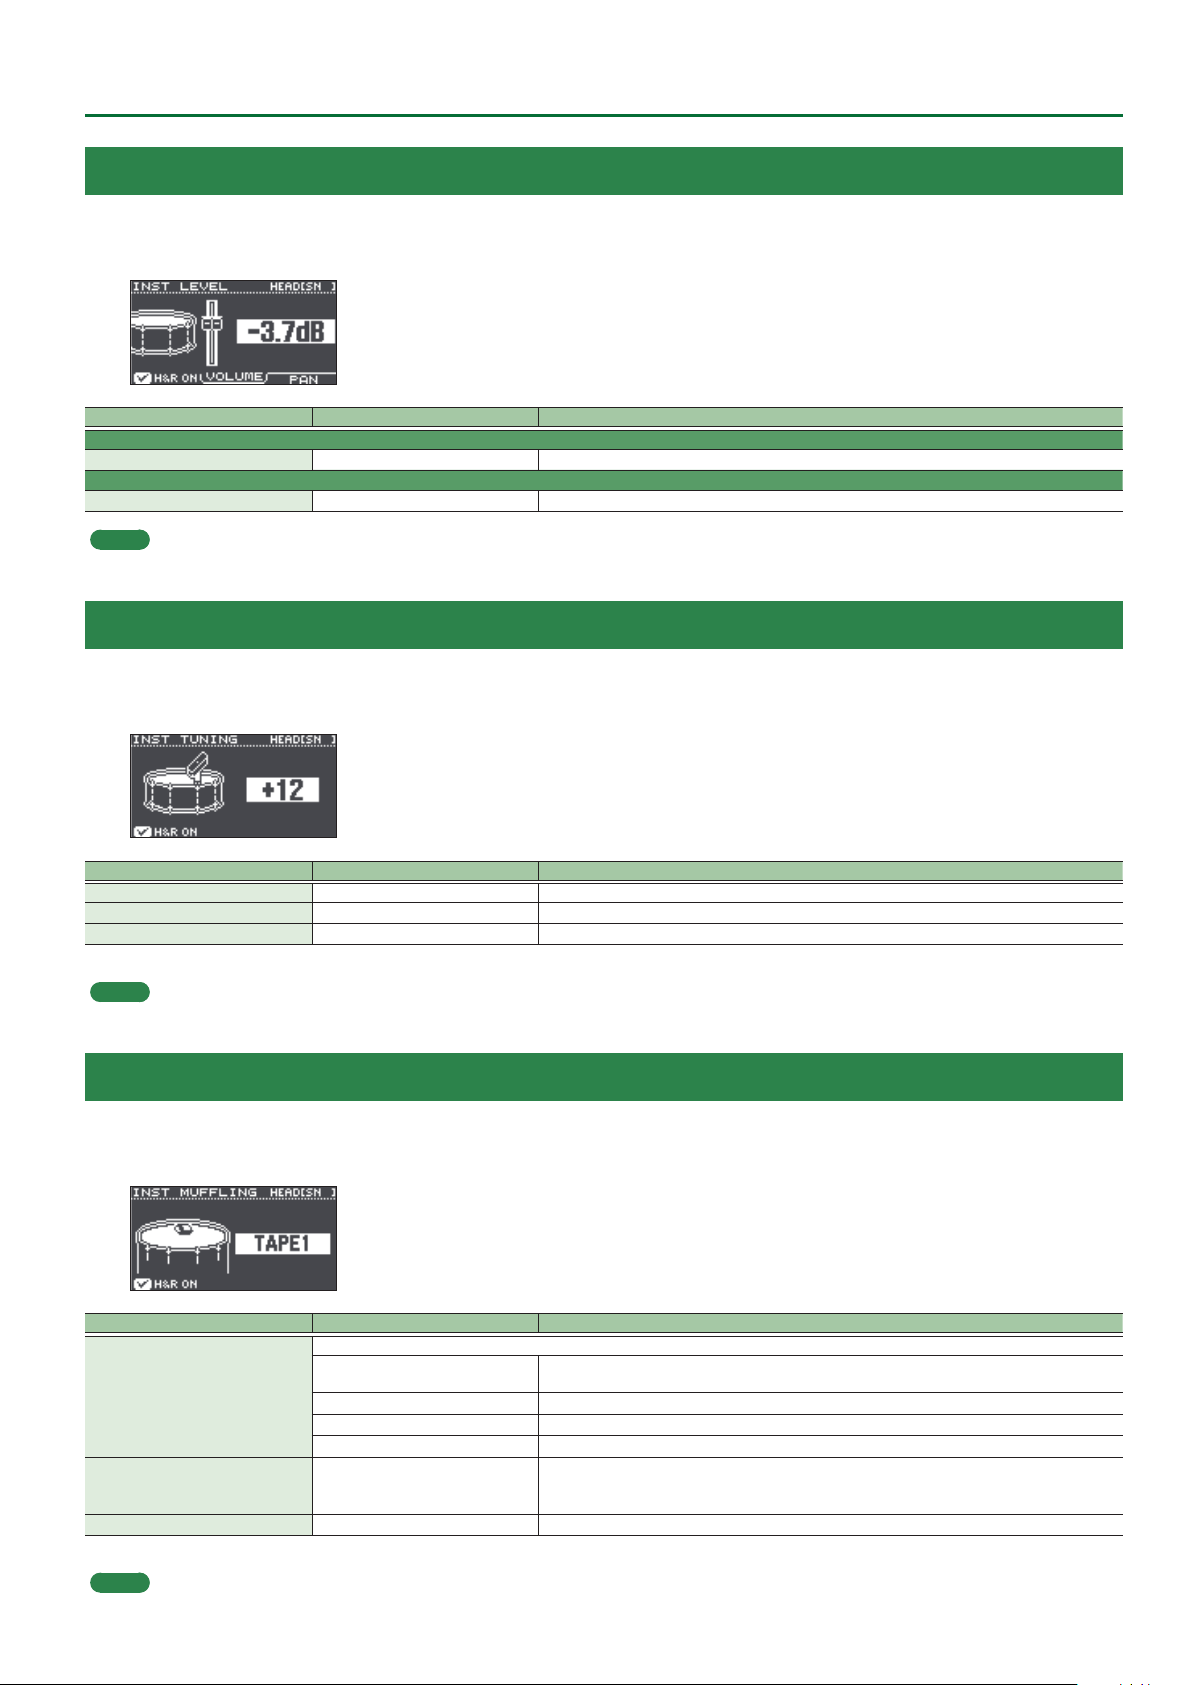
1. Press the [LEVEL] button.
The INST LEVEL screen appears.
Parameter Value Explanation
VOLUME tab
Volume -INF–+6.0 dB Volume of each pad
PAN tab
Pan L30–CTR–R30 Stereo position of each pad
MEMO
If you press the [F1] (H&R ON) button to turn it “ON,” you can simultaneously make settings for the head area and rim area, etc.
TUNING
INSTRUMENT
1. Press the [TUNING] button.
The INST TUNING screen appears.
Parameter Value Explanation
TUNING*1 -100–100 Tuning of the head
SIZE*1 1.0–40.0 Hi-hat/Cymbal diameter
PITCH*1 -4800–4800 Instrument pitch (units of one cent)
*1 This parameter can be specied only for instruments that support it. For details, refer to “Instrument List” (p. 26).
MEMO
If you press the [F1] (H&R ON) button to turn it “ON,” you can simultaneously make settings for the head area and rim area, etc.
MUFFLING
1. Press the [MUFFLING] button.
The INST MUFFLING screen appears.
Parameter Value Explanation
Muing (muting) setting
OFF, TAPE1–4, BLANKET1–3,
MUFFLING*1
FIXED*1 NORMAL, FIXED1–4
DECAY*1 1–100 Length of decay
*1 This parameter can be specied only for instruments that support it. For details, refer to “Instrument List” (p. 26).
MEMO
If you press the [F1] (H&R ON) button to turn it “ON,” you can simultaneously make settings for the head area and rim area, etc.
WEIGHT1, 2
OFF, TAPE1–7, DONUT1, 2 When an instrument of the SNARE or CROSS STICK group is selected
OFF, TAPE1–5, FELT1–4 When an instrument of the TOM group is selected
OFF, TAPE1–19 When an instrument of the RIDE, CRASH, or SPLASH/CHINA group is selected
When an instrument of the KICK group is selected
Openness of the hi-hat
If something other than “NORMAL” is selected, the openness of the hi-hat does not change,
regardless of how you press the hi-hat pedal.
7
Page 8

INSTRUMENT
USER SAMPLE
1. Press the [USER SAMPLE] button.
2. Turn the dial to move the cursor to the user sample that you want to edit.
3. Press the [F2] (MENU) button.
The USER SAMPLE MENU screen appears.
4. Use the dial to select the menu, and press the [ENTER] button.
Menu Explanation
Import Here’s how to import an audio le into this unit as a user sample.
Play Type Specifying how the user sample is sounded.
Adjust Start/End Specifying the sounded region of a user sample.
Rename Renaming a user sample.
Delete Deleting a user sample.
Renumber Packing user sample numbers forward.
Optimize Optimizing the user sample area.
Delete All Deleting all user samples.
Reference
For details on the operations of each menu, refer to “Owner’s Manual.”
Parameter Value Explanation
Play Type
Specifying how the user sample is sounded.
ONESHOT MONO
Play Type
Adjust Start/End
ZOOM ([
] [ ] button)
START (dial) *1 0–07937742
END (dial) *1 257–07937999
*1 You can’t set the end point earlier than the start point.
You can’t set the start point and end point to the same value.
For both start point and end point, you can’t specify a value that exceeds the length of the user sample waveform.
ONESHOT POLY When you strike the drum trigger repeatedly, the sounds of the notes are heard overlapping (poly).
LOOP ALT
–
When you strike the drum trigger, the currently-heard sound is silenced before the new sound is
heard. Notes do not overlap (mono).
The user sample plays repeatedly (loop).
Each time you strike the drum trigger, the sound alternately plays or stops.
Zooms the waveform display in or out.
Press the [F3] button to select “X” (“ZOOM-X” is shown), and use the [
on the horizontal axis.
Press the [F3] button to select “Y” (“ZOOM-Y” is shown), and use the [
on the vertical axis.
Adjusts the start point (the location at which the user sample starts playing).
Press the [F2] button to select “S” (“START” is shown), and turn the dial.
Adjusts the end point (the location at which the user sample stops playing).
Press the [F2] button to select “E” (“END” is shown), and turn the dial.
] [ ] buttons to zoom-in/out
] [ ] buttons to zoom-in/out
8
Page 9
OTHER
1. Press the [OTHER] button.
The OTHER MENU screen appears.
2. Use the [ ] [ ] buttons and the function buttons to select a menu item.
3. Make settings as appropriate for the menu item that you selected.
Menu Explanation
AMBIENCE Adjusts the reverberation.
MULTI FX Species an eect for the entire kit.
PAD EQ Adjusts the pad equalizer.
VOLUME Species the volume of the entire kit.
NAME Edits the name of the kit.
MIDI NOTE Species MIDI settings for the kit.
COPY Copy a kit’s settings, or restore the factory-set kit settings.
SAVE/LOAD Save a kit’s settings to an SD card (backed up), or write (load) them back into this unit.
Reference
For details on the operations of each menu, refer to “Owner’s Manual.”
INSTRUMENT
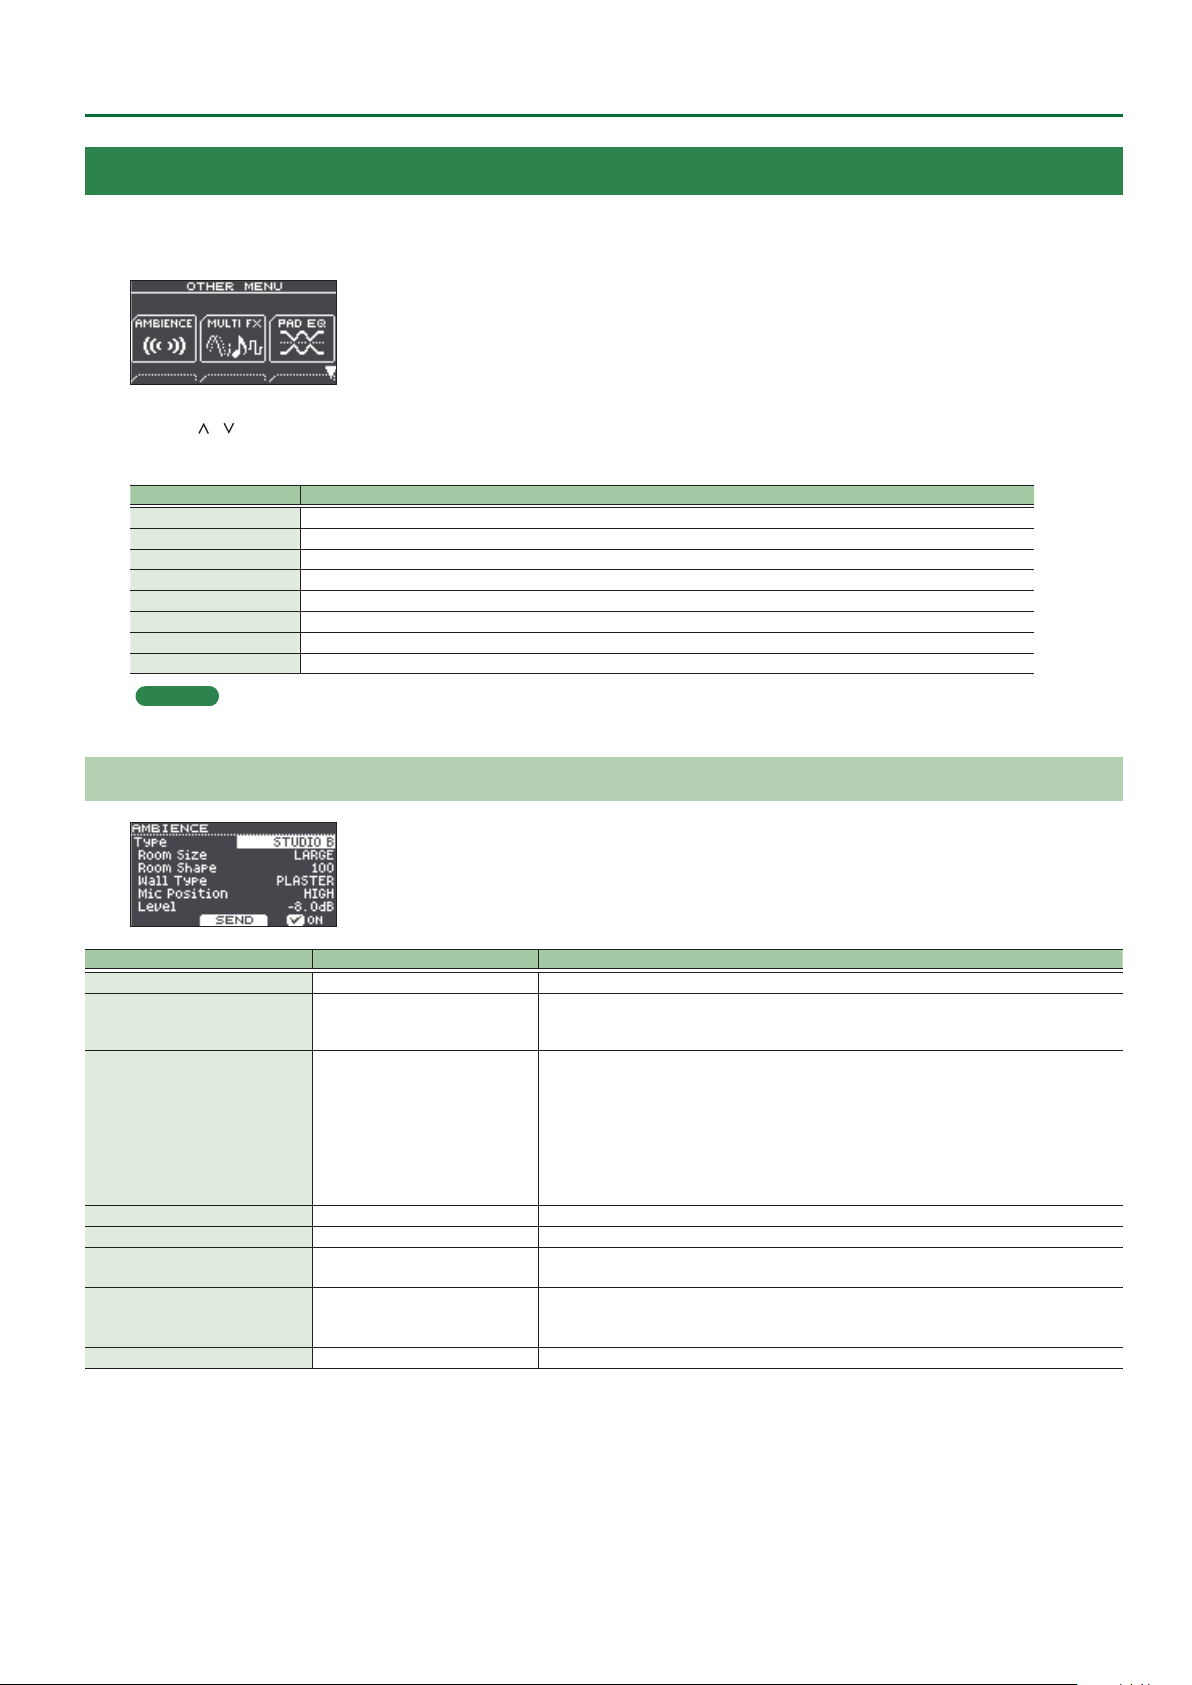
AMBIENCE
Parameter Value Explanation
[F3] button OFF, ON Turns room ambience on/o.
SEND ([F2] button) -INF–+6.0dB
BEACH, LIVING ROOM, BATH ROOM,
STUDIO, GARAGE, LOCKER ROOM,
THEATER, CAVE, GYMNASIUM,
Type
Room Size TINY, SMALL, MEDIUM, LARGE, HUGE Size of the room
Room Shape 0–100 Room shape and reverberation length
Wall Type
Mic Position
Level -INF–+6.0dB Volume of room ambience
DOME STADIUM, BOOTH A, BOOTH
B, STUDIO A, STUDIO B, BASEMENT,
JAZZ CLUB, ROCK CLUB, BALLROOM,
GATE, CONCERT HALL, SPORTS
ARENA, EXPO HALL, BOTTLE, CITY,
SPIRAL
CURTAIN, CLOTH, WOOD,
PLASTER, CONCRETE, GLASS
NEXT DOOR, LOW FLOOR,
LOW, MID LOW, MID,
MID HIGH, HIGH, CEILING A, CEILING B
Moves to a screen where you can specify the amount of room ambience for each pad.
If you press the [F1] (H&R ON) button to turn it “ON,” you can simultaneously make settings for the
head area and rim area, etc.
Type of room reverberation
Wall material
Tonal change caused by mic position
9
Page 10
INSTRUMENT
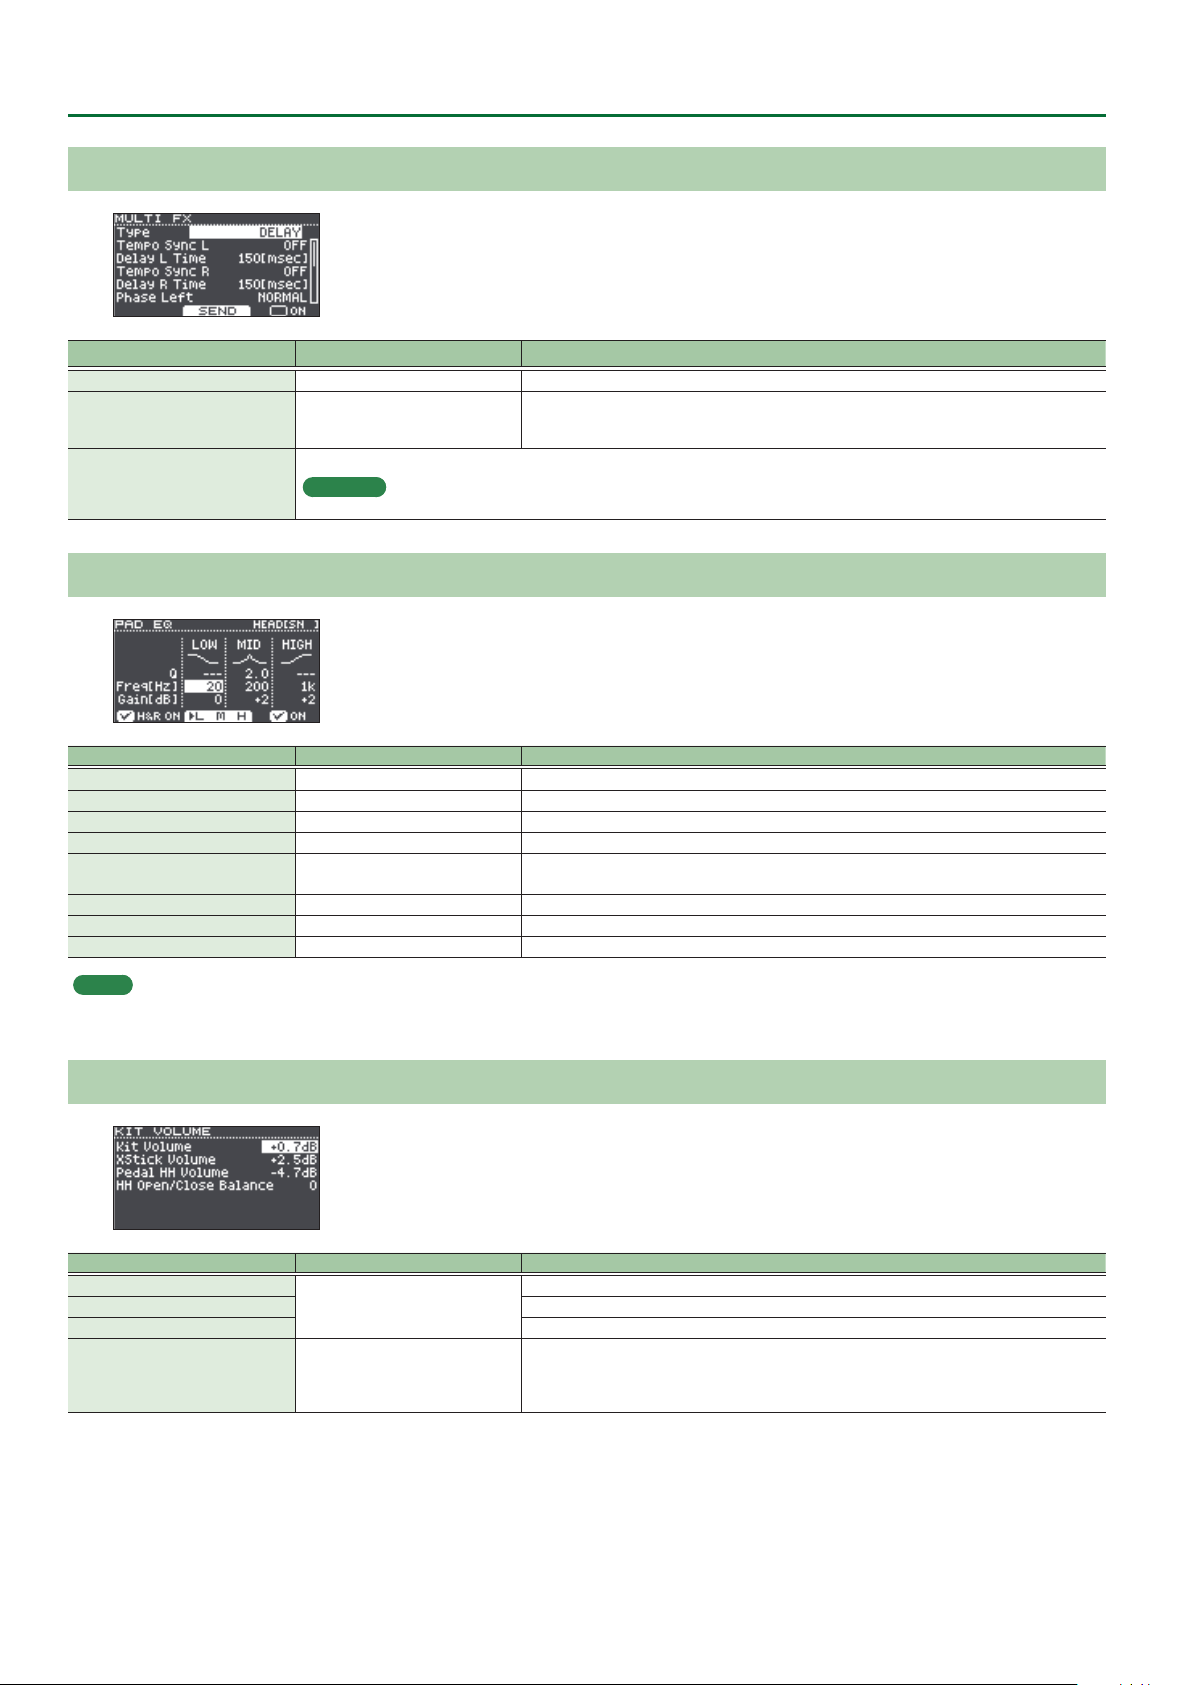
MULTI FX
Parameter Value Explanation
[F3] button OFF, ON Turns on/o the multi-eect.
SEND ([F2] button) -INF–+6.0dB
Type of multi-eect
Type, parameter
Reference
For more about multi-eects, refer to “Multi-Eect Parameters” (p. 17).
Moves to a screen where you can specify the eect depth for each pad.
If you press the [F1] (H&R ON) button to turn it “ON,” you can simultaneously make settings for the
head area and rim area, etc.
PAD EQ
Parameter Value Explanation
[F3] button OFF, ON Turns pad equalizer on/o.
LOW Freq 20Hz–1kHz Center frequency of the low range
LOW Gain -15–+15dB Amount of boost/cut for the low range
MID Freq 20Hz–16kHz Center frequency of the mid range
MID Q 0.5–8.0
MID Gain -15–+15dB Amount of boost/cut for the mid range
HIGH Freq 1kHz–16kHz Center frequency of the high range
HIGH Gain -15–+15dB Amount of boost/cut for the high range
MEMO
5 If you press the [F1] (H&R ON) button to turn it “ON,” you can simultaneously make settings for the head area and rim area, etc.
5 Each time you press the [F2] button, the selection alternates between LOW/MID/HIGH.
Width of the frequency range
A higher Mid Q narrows the aected area.
VOLUME
Parameter Value Explanation
Kit Volume
Xstick Volume Cross-stick volume
Pedal HH Volume Pedal hi-hat volume
HH Open/Close Balance -5–+5
-INF–+6.0dB
Kit volume
Open/close volume balance
If this value is lowered, playing the hi-hat when it is open produces a lower volume than playing
it when closed. If this value is raised, playing the hi-hat when it is open produces a higher volume
than playing it when closed.
10
Page 11

MIDI NOTE
Parameter Value Explanation
Note No.
* An asterisk (*) appears at the right of the note number for trigger inputs that are not sounded.
MEMO
If you press the [F3] (DEFAULT) button, all values return to their default value.
MIDI note numbers transmitted and received by the hi-hat
Item Explanation
HI-HAT OPEN <BOW>
HI-HAT OPEN <EDGE>
HI-HAT CLOSE <BOW>
HI-HAT CLOSE <EDGE>
HI-HAT PEDAL MIDI note number transmitted and received by pedal hi-hat
0(C -)–127(G 9) MIDI note number transmitted and received by each pad
OFF Note messages are not transmitted or received
MIDI note number transmitted and received by open hi-hat (bow, edge)
MIDI note number transmitted and received by closed hi-hat (bow, edge)
INSTRUMENT
MIDI note numbers transmitted and received by the snare
Item Explanation
SNARE <HEAD>
SNARE <RIM>
SNARE <XSTICK> MIDI note number transmitted and received by cross stick
MIDI note number transmitted and received by head shot and rim shot
When setting multiple pads to the same note number
If you are playing the internal sound engine of the TD-17 from an external MIDI device, and if a received note number is assigned to more than one
pad, you’ll hear the instrument of the pad that is shown at the highest position in the MIDI NOTE No. screen. If the note number overlaps between the
head and rim, the head instrument is heard. If the same note number is assigned to both the head and the rim, the head instrument is sounded.
MEMO
An asterisk (*) appears at the right of the note number for trigger inputs that are not sounded.
Example:
If “38 (D 2)” is assigned to the SNARE’s <HEAD> and <RIM>, and “38 (D 2) is assigned to TOM3 <HEAD>, and note number 38 (D 2) is received, you’ll
hear the SNARE <HEAD> instrument.
11
Page 12

SETUP
Here’s how to make settings for the overall tonal character or pads of the entire unit.
1. Press the [SETUP] button.
The SETUP MENU screen appears.
2. Use the dial to select the menu, and press the [ENTER] button.
3. Make settings as appropriate for the menu item that you selected.
Menu Explanation
Bluetooth*1 Make Bluetooth settings.
SD Card Backing up data to an sd card.
Bass/Treble Adjusts how the low and high frequency ranges are controlled.
Pad Settings Editing the pad settings.
Hi-Hat Settings Making hi-hat settings.
MIDI Edit the MIDI settings for the entire unit.
LCD Adjust the contrast of the display.
USB Specify the USB settings.
AUTO OFF Specify the AUTO OFF setting.
System Info Displays the program version.
Factory Reset Return to the factory settings.
*1 This cannot be specied for the TD-17-L.
Reference
For details on the operations of each menu, refer to “Owner’s Manual.”
Bass/Treble
Parameter Value Explanation
BASS tab, TREBLE tab
Type SHELV (Shelving), PEAK Type of equalizer
Q
Freq
MEMO
Use the [BASS]/[TREBLE] knobs to adjust the depth of BASS/TREBLE.
0.5–8.0 (only when Type is set to
“PEAK”)
20Hz–1kHz (BASS)
1kHz–16kHz (TREBLE)
Width of the frequency range
A higher Q narrows the aected area.
Center frequency
Pad Settings
Parameter Value Explanation
TYPE tab
Pad Type Refer to “Pad Type list” (p. 15)
Selects the type of pad that is connected.
* When you change the type, the various Pad Settings parameters change to values that are
suitable for the type (except for XTalk Cancel and XStick Adj).
12
Page 13

Parameter Value Explanation
LINEAR
EXP2EXP1
EXP2EXP1
LOG2
SPLINE
LOUD2LOUD1
LOUD2LOUD1
BASIC tab
Pad Type Refer to “Pad Type list” (p. 15)
You can adjust the sensitivity of the pads to accommodate your personal playing style.
Sensitivity 1–32
Threshold 0–31
Volume change in response to pad strike strength
LINEAR
EXP1, EXP2
Curve
ADVANCED ([F3] button)
SCAN tab
Pad Type Refer to “Pad Type list” (p. 15)
Scan Time 0–4.0 ms
Retrig Cancel 1–16
LOG1, LOG2
SPLINE
LOUD1, LOUD2
Increasing this value increases the sensitivity, so that even soft strikes on the pad are sounded at
high volume. Decreasing this value decreases the sensitivity, so that even strong strikes on the pad
are sounded at low volume.
Minimum sensitivity of the pad
This setting allows a trigger signal to be received
only when the pad is above a determined force level
(velocity). This can be used to prevent a pad from
sounding because of vibrations from other pads. In the
example, B will sound but A and C will not sound.
Check this and adjust accordingly. Repeat this process
until you get the perfect setting for your playing style.
Volume
Volume Volume
Volume Volume
LOG1 LOG2
Volume
Volume Volume
Trigger signal detection time
Since the rise time of the trigger signal waveform may dier
slightly depending on the characteristics of each pad or acoustic
drum trigger (drum pickup), you may notice that identical hits
(velocity) may produce sound at dierent volumes. If this occurs,
you can adjust the “Scan Time” so that your way of playing can be
detected more precisely.
While repeatedly hitting the pad at a constant force, gradually
raise the Scan Time value from 0 msec, until the resulting volume stabilizes at the loudest level. At
this setting, try both soft and loud strikes, and make sure that the volume changes appropriately.
* As the value is set higher, the time it takes for the sound to be played increases. Set this to the
lowest value possible.
Detecting trigger signal attenuation
Important if you are using acoustic drum triggers. Such
triggers can produce altered waveforms, which may also
cause inadvertent sounding at Point A in the following gure
(Retrigger).
This occurs in particular at the decaying edge of the waveform.
Retrig Cancel detects such distortion in and prevents
retriggering from occurring.
While repeatedly striking the pad, raise the “Retrig Cancel” value until retriggering no longer occurs.
Although setting this to a high value prevents retriggering, it then becomes easy for sounds to
be omitted when the drums played fast (roll etc.). Set this to the lowest value possible while still
ensuring that there is no retriggering.
MEMO
You can also eliminate this problem of retriggering with the Mask Time setting. Mask Time does
not detect trigger signals if they occur within the specied amount of time after the previous
trigger signal was received. Retrig Cancel detects the attenuation of the trigger signal level, and
triggers the sound after internally determining which trigger signals were actually generated
when the head was struck, while weeding out the other false trigger signals that need not
trigger a sound.
Playing
dynamics
Playing
dynamics
Playing
dynamics
Playing
dynamics
Playing
dynamics
Playing
dynamics
Playing
dynamics
Playing
dynamics
SETUP
Threshold
The standard setting. This produces
the most natural correspondence
between playing dynamics and
volume change.
Compared to “LINEAR,” strong
dynamics produce a greater change.
Compared to “LINEAR,” a soft playing
produces a greater change.
Extreme changes are made in
response to playing dynamics.
Very little dynamic response, making
it easy to maintain strong volume
levels. If you’re using a drum trigger
as an external pad, these settings will
produce reliable triggering.
Scan Time
Time
Time
13
Page 14

SETUP
Parameter Value Explanation
Double triggering prevention
When playing a kick trigger the beater can bounce back
and hit the head a second time immediately after the
intended note—with acoustic drums sometimes the
beater stays against the head—this causes a single hit to
“double trigger” (two sounds instead of one). The Mask
Time setting helps to prevent this. Once a pad has been
Mask Time 0–64 ms
XTalk Cancel 1–80
RIM tab*1
Pad Type Refer to “Pad Type list” (p. 15)
Rim Gain 0–3.2
Head/Rim Adj 0–80
XStick Adj*2 0–127
ExtNoiseCancel OFF, 1–5
*1 This parameter can be specied only for pad types that support it. For details, refer to “Pad Type list” (p. 15).
*2 This parameter can be specied only for a pad that is connected to “SNR.”
hit, any additional trigger signals occurring within the
specied “Mask Time” will be ignored.
Adjust the “Mask Time” value while playing the pad. When
using a kick trigger, try to let the beater bounce back and hit the head very quickly, then raise the
“Mask Time” value until there are no more sounds made by the beater rebound.
MEMO
If two or more sounds are being produced when you strike the head just once, then adjust Retrig
Cancel.
When multiple pads (or acoustic drums equipped with drum triggers) are attached to the same
stand, this Crosstalk Cancel setting prevents vibrations produced by a strike from falsely triggering
other pads (or drum triggers). For example if pad B is falsely triggered when you strike pad A, you
should increase the XTalk Cancel value of pad B until crosstalk no longer occurs. If this value is too
high, a note played on pad B might be omitted when pad A and pad B are played simultaneously.
Adjusts the balance between the force of striking the rim or edge and the loudness of the sound.
If you increase this value, even soft strikes on the rim are sounded at high volume. If you decrease
this value, even strong strikes on the rim are sounded at low volume.
This is available for pads that support rim shots.
If the rim sound is heard when you strike the head strongly, increase this value. If the head sound
is heard when you play an open rim shot, decrease this value. If the head sound is heard when you
softly play a rim shot, decrease this value.
MEMO
If the rim shot sound is heard when you play a head shot, or if a head shot sound is heard when
you play a rim shot, make small changes to the Head/Rim Adj values while you continue trying
out the results. Extreme changes to the values will cause the wrong sound to be heard when you
strike the pad, for example producing the rim shot sound when you play a head shot.
For a pad that is connected to a TRIGGER IN jack, this species the force at which to switch between
the cross stick sound and open rim shot sound.
Setting this to a higher value makes it easier to get cross
stick sounds. When set to “0,” playing a cross stick produces
the open rim shot sound.
For a digitally connected pad that allows cross stick
technique, playing a cross stick with a strike that is
stronger than the value of this setting produces the open
rim shot sound.
* For a pad that is connected to a TRIGGER IN jack, be
aware that if this value is raised excessively, the cross
stick sound will also be heard when you play an open rim shot.
This setting prevents a drum trigger from being falsely triggered by the sound of a drum that is not
equipped with a drum trigger, or by sound or vibration from an external source (Noise Cancel).
This noise cancel function can be used when a RT-30K or RT-30HR drum trigger is connected to
SNR, TOM1, TOM2, or TOM3 of the dedicated connection cable or to the TRIGGER IN jack (AUX) via a
Roland-recommended stereo cable.
* The “RT-30H” does not support the Noise Cancel function
High
Low
Volume
Mask Time
Sound not produced
Rim Shot
Sound
Cross Stick
Sound
XStick Adj
HardSoft
Time
Playing
dynamics
Hi-Hat Settings
Parameter Value Explanation
Pad Type Refer to “Pad Type list” (p. 15)
Pedal HH Sens -10–+10 Amount of how easy to make the foot splash
14
Page 15

Pad Type list
SETUP
Pad used Pad Type Rim shot Bell shot Choke play
KD-A22 KDA22
KD-180L KD180L
KD-140 KD140
KD-120 KD120
KD-85 KD85
KD-10 KD10
KD-9 KD9
KD-8 KD8
KD-7 KD7
KT-10 KT10
KT- 9 KT9
PDA120L PDA120L
PDA100L PDA100L
PD-128 PD128
PD-125X PD125X
PD-125 PD125
PD-108 PD108
PD-105X PD105X
PD-105 PD105
PD-85 PD85
PDX-100 PDX100
PDX-12 PDX12
PDX-8 PDX8
PDX-6 PDX6
PD-8 PD8
VH-11 VH11
(
(
(
(
(
(
(
(
(
(
(
(
(
( (
( (
MIDI
Pad used Pad Type Rim shot Bell shot Choke play
VH-10 VH10
CY-16R-T CY16RT
CY-15R CY15R
CY-14C-T CY14CT
CY-14C CY14C
CY-13R CY13R
CY-12C CY12C
CY-12R/C CY12R/C
CY- 8 CY8
CY- 5 CY5
BT-1
RT-30K RT30K
RT-30HR RT30HR
RT-30H
RT-10K RT10K
RT-10S RT10S
RT-10T RT10T
*1
When using the BT-1, it is possible to further increase the sensitivity for
BT1
BT1 SENS*1
RT30H SN*2
RT30H TM*3
( (
( ( (
( ( (
( (
( (
( ( (
( (
( ( (
( (
( (
(
(
soft strikes, but this increases the possibility of unwanted triggering by
vibration from the surroundings.
*2 Select this if you attach an RT-30H to the snare.
*3 Select this if you attach an RT-30H to a tom.
Parameter Value Explanation
BASIC tab
MIDI Channel 1–16Ch Transmit and receive channel.
MIDI Tx/Rx Sw OFF, ON Turns the transmitting and receiving MIDI messages on/o.
Program Change Tx OFF, ON Turns program change transmission on/o
Program Change Rx OFF, ON Turns program change reception on/o
Turns on/o the connection between the performance data from the pads and this unit’s sound
Local Control OFF, ON
Cymbal Choke Shot OFF, ON
SYS EX tab
Device ID 17–32
Transmit Edit Data OFF, ON
Receive Exclusive OFF, ON Species whether system exclusive messages are received (ON) or not received (OFF).
THRU tab
Bluetooth*1 OFF, ON(MIDI OUT)
USB OFF, ON(MIDI OUT)
*1 This cannot be specied for the TD-17-L.
generator section
Normally you’ll leave this “ON.” If this is “OFF,” the per formance data from the pads is not connected
to this unit’s sound generator section.
Switches support for the performance technique of striking a pad while choking it.
If this is “ON,” striking a pad while choking it immediately mutes the sound after it begins. If this is
“OFF,” the sound is not muted immediately even if you strike a pad while choking it.
Device ID setting
The setting described here is necessary only when you wish to transmit separate data to two or
more this units at the same time. Do not change this setting in any other case.
Species whether changes in this unit’s settings are transmitted as system exclusive messages (ON)
or not transmitted (OFF).
Species whether performance data received via Bluetooth MIDI is transmitted to the MIDI OUT
connector (ON (MIDI OUT)) or is not transmitted (OFF).
Species whether performance data received via this unit’s USB COMPUTER port is transmitted to
the MIDI OUT connector (ON (MIDI OUT)) or is not transmitted (OFF).
Using the Local Control setting
If you’re using a DAW with the performance data from the pads and this unit’s sound generator section, you
should turn the Local Control “OFF.” Here’s why.
DAW
We need to connect these sections in the following order: the performance data from the pads
a DAW0this unit’s sound generator section.
Since the performance data from the pads and this unit’s sound generator section are connected
internally, such a connection order would normally be impossible. However, if the Local Control is “OFF,” the
performance data from the pads and this unit’s sound generator section will be independent, allowing you
to use a DAW as shown here in the illustration.
0
Pad
Local Control: OFF
This unit
Sound generator
section
15
Page 16

SETUP
LCD
Parameter Value Explanation
LCD Contrast 1–16 Display contrast
LCD Brightness 1–16 Display brightness
USB
Parameter Value Explanation
USB Input Gain -36–+12dB Adjusts the input level
USB Output Gain -24–+24dB Adjusts the output level
Switches between this unit’s dedicated USB driver and the driver provided by your operating system.
MEMO
USB Driver Mode
The setting takes eect when this unit is powered o and on again.
GENERIC
VENDOR Use this unit’s dedicated driver provided by Roland. USB MIDI and USB audio can be used.
Use the driver provided by the operating system.
Operation is limited to USB MIDI.
AUTO OFF
Parameter Value Explanation
Auto O OFF, 10 MINS, 30 MINS, 4 HOURS
Species whether the unit will turn o automatically after a certain time has elapsed. If you don’t
want the unit to turn o automatically, choose “OFF” setting
System Info
Parameter Value Explanation
Program Ver. Program version
16
Page 17

Multi-Eect Parameters
The multi-eects feature 30 dierent kinds of eects. Some of the eects consist of two or more dierent eects connected in series.
Eect type Page
DELAY p. 18
TAPE ECHO p. 18
REVERSE DELAY p. 18
3TAP PAN DELAY p. 18
OD0DELAY
DS0DELAY
CHORUS p. 19
SPACE-D p. 19
OD0CHORUS
DS0CHORUS
PHASER A p. 20
PHASER B p. 20
STEP PHASER p. 20
FLANGER p. 20
REVERB p. 21
LONG REVERB p. 21
SUPER FILTER p. 21
FILTER+DRIVE p. 21
AUTO WAH p. 22
OD/DS0TWA H
LOFI COMPRESS p. 22
DISTORTION p. 22
OVERDRIVE p. 22
SATURATOR p. 22
T-SCREAM p. 23
BIT CRUSHER p. 23
ISOLATOR p. 23
RING MODULATOR p. 23
PITCH SHIFTER p. 23
AUTO PAN p. 23
p. 19
p. 19
p. 19
p. 19
p. 22
About note values
Some eect parameters (such as Rate or Delay Time) can be set by using note values.
Sixty-fourth-note triplet Sixty-fourth note Thirty-second-note triplet Thirty-second note
Sixteenth-note triplet Dotted thirty-second note Sixteenth note Eighth-note triplet
Dotted sixteenth note Eighth note Quarter-note triplet Dotted eighth note
Quarter note Half-note triplet Dotted quarter note Half note
Whole-note triplet Dotted half note Whole note Double-note triplet
Dotted whole note Double note
NOTE
If you set the delay time as a note value, slowing down the tempo will not change the delay time beyond a certain length. There is an upper limit
for the delay time so if it is set as a note value and you slow down the tempo until this upper limit is reached, the delay time cannot change any
further. This upper limit is the maximum value that can be specied when setting the delay time as a numerical value.
17
Page 18

Multi-Eect Parameters
DELAY
This is a stereo delay.
Parameter Value Explanation
Species whether the delay time
Tempo Sync L, R OFF, ON
Delay L, R Time 1–1300 ms, note
Phase Left, Right NORMAL, INVERSE Phase of the delay sound
Feedback Mode NORMAL, CROSS
Feedback -98–+98%
HF Damp
Low Gain -15–+15 dB Gain of the low frequency range
High Gain -15–+15 dB Gain of the high frequency range
Level 0–127 Output Level
200–8000
Hz, BYPASS
value of the left/right delay sounds
is specied as a note value (ON) or
not (OFF).
Delay time from the original sound
until the left/right delay sound is
heard
Selects the way in which delay sound
is fed back into the eect
NORMAL: The left/right delay sounds
are fed back without modication.
CROSS: The left/right delay sounds
are alternately exchanged when fed
back.
Adjusts the amount of the delay
sound that’s fed back into the eect.
Negative “-” settings will invert the
phase.
Adjusts the frequency above which
sound fed back to the eect is
ltered out. If you don’t want to lter
out any high frequencies, set this
parameter to BYPASS.
TAPE ECHO
A virtual tape echo that produces a realistic tape delay sound. This
simulates the tape echo section of a Roland RE-201 Space Echo.
Parameter Value Explanation
Combination of playback heads to
use Select from three dierent heads
Mode
Repeat Rate 0–127
Intensity 0–127 Amount of delay repeats
Bass -15–+15 dB
Treble -15–+15 dB
Head S Pan L64–R63
Head M Pan L64–R63
Head L Pan L64–R63
Tape Distortion 0–5
W/F Rate 0–127
W/F Depth 0–127 Depth of wow/utter
Level 0–127 Output level
S, M, L, S+M, S+L,
M+L, S+M+L
with dierent delay times
S: Short
M: Middle
L: Long
Tape speed
Increasing this value will shorten the
spacing of the delayed sounds.
Boost/cut for the lower range of the
echo sound
Boost/cut for the upper range of the
echo sound
Independent stereo location for the
short, middle, and long playback
heads
Amount of tape-dependent
distortion to be added
This simulates the slight tonal
changes that can be detected by
signal-analysis equipment. Increasing
this value will increase the distortion.
Speed of wow/utter (complex
variation in pitch caused by tape
wear and rotational irregularity)
REVERSE DELAY
This is a reverse delay that adds a reversed and delayed sound to
the input sound. A tap delay is connected immediately after the
reverse delay.
Parameter Value Explanation
Threshold 0–127
Tempo Sync Rev OFF, ON
RevDelay Time 1–1300 ms, note
RevDelay
Feedback
RevDelay HF
Damp
Rev Delay Pan L64–63R
Rev Delay Level 0–127 Volume of the reverse delay sound
Tempo Sync
Delay1–3
Delay1–3 Time 1–1300 ms, note
Delay 3 Feedback -98–+98%
Delay HF Damp
Delay 1 Pan,
Delay 2 Pan
Delay 1 Level,
Delay 2 Level
Low Gain -15–+15 dB Gain of the low frequency range
High Gain -15–+15 dB Gain of the high frequency range
Level 0–127 Output Level
-98–+98%
200–8000 Hz,
BYPASS
OFF, ON
200–8000 Hz,
BYPASS
L64–63R
0–127 Volume of the tap delay sounds
Volume at which the reverse delay
will begin to be applied
Species whether the delay time
value of the reverse delay is specied
as a note value (ON) or not (OFF).
Delay time from when sound is input
into the reverse delay until the delay
sound is heard
Proportion of the delay sound that
is to be returned to the input of the
reverse delay.
Negative “-” settings will invert the
phase.
Frequency at which the highfrequency content of the
reverse-delayed sound will be cut
(BYPASS: no cut)
Stereo location of the reverse delay
sound
Species whether the delay time
value of the tap delay is specied as a
note value (ON) or not (OFF).
Delay time from when sound is input
into the tap delay until the delay
sound is heard
Proportion of the delay sound that
is to be returned to the input of the
tap delay (negative values invert the
phase)
Frequency at which the high
frequency content of the tap delay
sound will be cut (BYPASS: no cut)
Stereo location of the tap delay
sounds
3TAP PAN DELAY
Produces three delay sounds; center, left and right.
Parameter Value Explanation
Tempo Sync L, R,
Center
Delay L, R, Ctr
Time
Center Feedback -98–+98%
HF Damp
Left, Right,
Center Level
Low Gain -15–+15 dB Gain of the low frequency range
High Gain -15–+15 dB Gain of the high frequency range
Level 0–127 Output Level
OFF, ON
1–2600 ms, note
200–8000 Hz,
BYPASS
0–127 Volume of each delay
Species whether the delay time
value of the left/right/center delay
sound is specied as a note value
(ON) or not (OFF).
Adjusts the time until the delay
sound is heard.
Adjusts the amount of the delay
sound that’s fed back into the eect.
Negative “-” settings invert the phase.
Adjusts the frequency above which
sound fed back to the eect is
ltered out. If you do not want to
lter out any high frequencies, set
this parameter to BYPASS.
18
Page 19

OD
0
DELAY
Multi-Eect Parameters
SPACE-D
Parameter Value Explanation
Overdrive Drive 0–127
Overdrive Pan L64–63R
Tempo Sync OFF, ON
Delay Time 1–2600 ms, note
Delay Feedback -98–+98%
Delay HF Damp
Delay Balance
Level 0–127 Output Level
0
DS
DELAY
The parameters are essentially the same as in “OD0DELAY” with
the exception of the following two.
Overdrive Drive0Distortion Drive, Overdrive Pan0Distortion Pan
200–8000 Hz,
BYPASS
D100:0W–
D0:100W
Degree of distortion
Also changes the volume.
Stereo location of the overdrive
sound
Species whether the delay time
value of the delay is specied as a
note value (ON) or not (OFF).
Adjusts the delay time from the
direct sound until the delay sound
is heard.
Adjusts the proportion of the delay
sound that is fed back into the eect.
Negative “-” settings will invert the
phase.
Adjusts the frequency above which
sound fed back to the eect will be
cut. If you do not want to cut the
high frequencies, set this parameter
to BYPASS.
Adjusts the volume balance between
the sound that is sent through the
delay (W) and the sound that is not
sent through the delay (D).
CHORUS
This is a stereo chorus. A lter is provided so that you can adjust the
timbre of the chorus sound.
Parameter Value Explanation
Type of lter
OFF: no lter is used
Filter Type OFF, LPF, HPF
Cuto Freq 200–8000 Hz Basic frequency of the lter
Pre Delay 0.0–100.0 ms
Tempo Sync OFF, ON
Rate
Depth 0–127 Depth of modulation
Phase 0–180 deg Spatial spread of the sound
Low Gain -15–+15 dB Gain of the low range
High Gain -15–+15 dB Gain of the high range
Level 0–127 Output Level
0.05–10.00 Hz,
note
LPF: cuts the frequency range above
the Cuto Freq
HPF: cuts the frequency range below
the Cuto Freq
Adjusts the delay time from the
direct sound until the chorus sound
is heard.
Species whether the modulation
rate is specied as a note value (ON)
or not (OFF).
Frequency of modulation
This is a multiple chorus that applies two-phase modulation in
stereo. It gives no impression of modulation, but produces a
transparent chorus eect.
Parameter Value Explanation
Pre Delay 0.0–100.0 ms
Tempo Sync OFF, ON
Rate
Depth 0–127 Depth of modulation
Phase 0–180 deg Spatial spread of the sound
Low Gain -15–+15 dB Gain of the low range
High Gain -15–+15 dB Gain of the high range
Level 0–127 Output Level
0
OD
DS
CHORUS
Parameter Value Explanation
Overdrive Drive 0–127
Overdrive Pan L64–63R
Chorus Pre Delay 0.0–100.0 ms
Tempo Sync OFF, ON
Rate
Chorus Depth 0–127 Depth of modulation
Chorus Balance
Level 0–127 Output Level
0
CHORUS
The parameters are essentially the same as in “OD0CHORUS” with
the exception of the following two.
Overdrive Drive0Distortion Drive, Overdrive Pan0Distortion Pan
0.05–10.00 Hz,
note
0.05–10.00 Hz,
note
D100:0W–
D0:100W
Adjusts the delay time from the
direct sound until the chorus sound
is heard.
Species whether the modulation
rate is specied as a note value (ON)
or not (OFF).
Frequency of modulation
Degree of distortion
Also changes the volume.
Stereo location of the overdrive
sound
Adjusts the delay time from the
direct sound until the chorus sound
is heard.
Species whether the modulation
rate is specied as a note value (ON)
or not (OFF).
Frequency of modulation
Adjusts the volume balance between
the sound that is sent through the
chorus (W) and the sound that is not
sent through the chorus (D).
19
Page 20

Multi-Eect Parameters
PHASER A
A phase-shifted sound is added to the original sound and
modulated.
Parameter Value Explanation
Mode
Manual 0–127
Tempo Sync OFF, ON
Rate
Depth 0–127 Depth of modulation
Polarity
Resonance 0–127 Amount of feedback
Cross Feedback -98–+98%
Low Gain -15–+15 dB Gain of the low range
High Gain -15–+15 dB Gain of the high range
Level 0–127 Output Level
4-STAGE, 8-STAGE,
12-STAGE
0.05–10.00 Hz,
note
INVERSE,
SYNCHRO
Number of stages in the phaser
Adjusts the basic frequency from
which the sound will be modulated.
Species whether the modulation
rate is specied as a note value (ON)
or not (OFF).
Frequency of modulation
Selects whether the left and right
phase of the modulation will be the
same or the opposite.
INVERSE: The left and right phase
will be opposite. When using a mono
source, this spreads the sound.
SYNCHRO: The left and right phase
will be the same. Select this when
inputting a stereo source.
Adjusts the proportion of the phaser
sound that is fed back into the eect.
Negative “-” settings will invert the
phase.
PHASER B
STEP PHASER
The phaser eect will be varied gradually.
Parameter Value Explanation
Mode
Manual 0–127
Tempo Sync
(Rate)
Rate
Depth 0–127 Depth of modulation
Polarity
Resonance 0–127 Amount of feedback
Cross Feedback -98–+98%
Tempo Sync
(Step Rate)
Step Rate
Low Gain -15–+15 dB Gain of the low range
High Gain -15–+15 dB Gain of the high range
Level 0–127 Output Level
4-STAGE, 8-STAGE,
12-STAGE
OFF, ON
0.05–10.00 Hz,
note
INVERSE,
SYNCHRO
OFF, ON
0.10–20.00 Hz,
note
Number of stages in the phaser
Adjusts the basic frequency from
which the sound will be modulated.
Species whether the modulation
rate is specied as a note value (ON)
or not (OFF).
Frequency of modulation
Selects whether the left and right
phase of the modulation will be the
same or the opposite.
INVERSE: The left and right phase
will be opposite. When using a mono
source, this spreads the sound.
SYNCHRO: The left and right phase
will be the same. Select this when
inputting a stereo source.
Adjusts the proportion of the phaser
sound that is fed back into the eect.
Negative “-” settings will invert the
phase.
Species whether the modulation
rate of the phaser eect is specied
as a note value (ON) or not (OFF).
Rate of the step-wise change in the
phaser eect
This simulates a dierent analog phaser than Phaser A.
Parameter Value Explanation
Speed 0–100 Frequency of modulation
Depth 0–127 Depth of modulation
Low Gain -15–+15 dB Gain of the low range
High Gain -15–+15 dB Gain of the high range
Level 0–127 Output Level
FLANGER
This is a stereo anger. (The LFO has the same phase for left and
right.) It produces a metallic resonance that rises and falls like a jet
airplane taking o or landing. A lter is provided so that you can
adjust the timbre of the anged sound.
Parameter Value Explanation
Type of lter
OFF: no lter is used
Filter Type OFF, LPF, HPF
Cuto Freq 200–8000 Hz Basic frequency of the lter
Pre Delay 0.0–100.0 ms
Tempo Sync OFF, ON
Rate
Depth 0–127 Depth of modulation
Phase 0–180 deg Spatial spread of the sound
Feedback -98–+98%
Low Gain -15–+15 dB Gain of the low range
High Gain -15–+15 dB Gain of the high range
Level 0–127 Output Level
0.05–10.00 Hz,
note
LPF: cuts the frequency range above
the Cuto Freq
HPF: cuts the frequency range below
the Cuto Freq
Adjusts the delay time from when the
direct sound begins until the anger
sound is heard.
Species whether the modulation
rate is specied as a note value (ON)
or not (OFF).
Frequency of modulation
Adjusts the proportion of the anger
sound that is fed back into the eect.
Negative “-” settings will invert the
phase.
20
Page 21

Multi-Eect Parameters
SAW1 SAW2
REVERB
Adds reverberation to the direct sound, simulating an acoustic
space.
Parameter Value Explanation
Type
Pre Delay 0.0–100 msec
Time 0–127 Time length of reverberation
HF Damp
Low Gain -15–+15 dB Gain of the low range
High Gain -15–+15 dB Gain of the high range
Level 0–127 Output Level
ROOM1, ROOM2,
STAGE1, STAGE2,
HALL1, HALL2
200–8000 Hz,
BYPASS
Type of reverb
Adjusts the delay time from the
direct sound until the reverb sound
is heard.
Adjusts the frequency above which
the reverberant sound will be cut
(BYPASS: no cut).
LONG REVERB
This is a very rich sounding reverb with a choice of character.
Parameter Value Explanation
Depth 0–127 Depth of the eect
Time 0–127 Time length of reverberation
Pre LPF
Pre HPF
Peaking Freq 200–8000 Hz
Peaking Gain -15–+15 dB
Peaking Q 0.5–8.0
HF Damp
LF Damp
Character 1–6 Type of reverb
EQ Low Freq 200–400 Hz Center frequency of the low region
EQ Low Gain -15–+15 dB Gain of the low range
EQ High Freq 2000–8000 Hz Center frequency of the high region
EQ High Gain -15–+15 dB Gain of the high range
Level 0–127 Output Level
16–15000 Hz,
BYPASS
BYPASS,
16–15000 Hz
16–15000 Hz,
BYPASS
BYPASS,
16–15000 Hz
Frequency of the lter that cuts the
high-frequency content of the input
sound (BYPASS: no cut)
Frequency of the lter that cuts the
low-frequency content of the input
sound (BYPASS: no cut)
Frequency of the lter that boosts/
cuts a specic frequency region of
the input sound
Amount of boost/cut produced by
the lter at the specied frequency
region of the input sound
Bandwidth of the lter that boosts or
cuts the specied frequency region
of the input sound
Frequency at which the highfrequency content of the resonant
sound will be cut (BYPASS: no cut)
Frequency at which the lowfrequency content of the resonant
sound will be cut (BYPASS: no cut)
SUPER FILTER
This is a lter with an extremely sharp slope. The cuto frequency
can be varied cyclically
Parameter Value Explanation
Filter type
Frequency range that will pass through each lter
LPF Frequencies below the cuto
Filter Type
Filter Slope
Filter Cuto 0–127
Filter Resonance 0–127
Filter Gain 0–+12 dB Amount of boost for the lter output
Modulation Sw OFF, ON On/o switch for cyclic change
Modulation Wave
Tempo Sync OFF, ON
Rate
Depth 0–127 Depth of modulation
Attack 0–127
Level 0–127 Output Level
BPF
HPF Frequencies above the cuto
NOTCH
Amount of attenuation per octave
-12 dB Gentle
-24 dB Steep
-36 dB Extremely steep
How the cuto frequency will be modulated
TRI Triangle wave
SQR Square wave
SIN Sine wave
SAW1 Sawtooth wave (upward)
SAW2 Sawtooth wave (downward)
0.05–10.00 Hz,
note
Frequencies in the region of the
cuto
Frequencies other than the region of
the cuto
Cuto frequency of the lter
Increasing this value will raise the
cuto frequency.
Filter resonance level
Increasing this value will emphasize
the region near the cuto frequency.
Species whether the modulation
rate is specied as a note value (ON)
or not (OFF).
Rate of modulation
Speed at which the cuto frequency
will change
This is eective if Modulation Wave is
SQR, SAW1, or SAW2.
FILTER+DRIVE
This is a low-pass lter equipped with overdrive. It cuts the upper
range and adds distortion.
Parameter Value Explanation
Cuto 0–127
Resonance 0–127
Drive 0–127 Amount of distortion
Level 0–127 Output Level
Cuto frequency of the lter
Increasing this value will raise the
cuto frequency.
Filter resonance level
Increasing this value will emphasize
the region near the cuto frequency.
21
Page 22

Multi-Eect Parameters
AUTO WAH
Cyclically controls a lter to create cyclic change in timbre.
Parameter Value Explanation
Type of lter
LPF: The wah eect will be applied
Filter Type LPF, BPF
Manual 0–127
Peak 0–127
Sens 0–127
Polarity UP, DOWN
Tempo Sync OFF, ON
Rate
Depth 0–127 Depth of modulation
Phase 0–180 deg
Low Gain -15–+15 dB Gain of the low range
High Gain -15–+15 dB Gain of the high range
Level 0–127 Output Level
OD/DS
0
Parameter Value Explanation
Drive Switch OFF, ON Turns overdrive/distortion on/o
Drive Type
Drive 0–127
Tone 0–127 Sound quality of the Overdrive eect
Amp Switch OFF, ON Turns the Amp Simulator on/o.
Amp Type
Touch Wah Switch
Touch Wah Mode LPF, BPF
Touch Wah
Polarity
Touch Wah Sens 0–127
Touch Wah
Manual
Touch Wah Peak 0–127
Touch Wah
Balance
Low Gain -15–+15 dB Gain of the low range
High Gain -15–+15 dB Gain of the high range
Level 0–127 Output Level
0.05–10.00 Hz, note
TWAH
OVERDRIVE,
DISTORTION
SMALL, BUILT-IN,
2-STACK, 3-STACK
OFF, ON Wah on/o
DOWN, UP
0–127
D100:0W–
D0:100W
over a wide frequency range.
BPF: The wah eect will be applied
over a narrow frequency range.
Adjusts the center frequency at
which the eect is applied.
Width of the frequency region at
which the wah eect is applied
Increasing this value will make the
frequency region narrower.
Adjusts the sensitivity with which the
lter is controlled.
Direction in which the lter will move
UP: Move toward a higher frequency
DOWN: Move toward a lower
frequency
Species whether the modulation
rate is specied as a note value (ON)
or not (OFF).
Frequency of modulation
Adjusts the degree of phase shift of
the left and right sounds when the
wah eect is applied.
Type of distortion
Degree of distortion
Also changes the volume.
Type of guitar amp
SMALL: small amp
BUILT-IN: single-unit type amp
2-STACK: large double stack amp
3-STACK: large triple stack amp
Type of lter
LPF: Produces a wah eect in a broad
frequency range.
BPF: Produces a wah eect in a
narrow frequency range.
Direction in which the lter will move
UP: Move toward a higher frequency
DOWN: Move toward a lower
frequency
Sensitivity with which the lter is
modied
Center frequency at which the wah
eect is applied
Width of the frequency region at
which the wah eect is applied
Increasing this value will make the
frequency region narrower.
Volume balance of the sound that
passes through the wah (W) and the
unprocessed sound (D)
LOFI COMPRESS
This is an eect that intentionally degrades the tone character for
creative purposes.
Parameter Value Explanation
Selects the type of lter applied to
the sound before it passes through
Pre Filter Type 1–6
LoFi Type 1–9
Post Filter Type OFF, LPF, HPF
Post Filter Cuto 200–8000 Hz Basic frequency of the Post Filter
Low Gain -15–+15 dB Gain of the low range
High Gain -15–+15 dB Gain of the high range
Level 0–127 Output Level
the Lo-Fi eect.
1: Compressor o
2–6: Compressor on
Degrades the tone character. The
tone character grows poorer as this
value is increased.
Selects the type of lter applied to
the sound after it passes through the
Lo-Fi eect.
OFF: no lter is used
LPF: cuts the frequency range above
the Cuto
HPF: cuts the frequency range below
the Cuto
DISTORTION
This is a distortion eect that provides heavy distortion.
Parameter Value Explanation
Drive 0–127
Tone 0–127 Sound quality of the Overdrive eect
Amp Sw OFF, ON Turns the Amp Simulator on/o.
Amp Type
Low Gain -15–+15 dB Gain of the low range
High Gain -15–+15 dB Gain of the high range
Pan L64–63R Stereo location of the output sound
Level 0–127 Output Level
SMALL, BUILT-IN,
2-STACK, 3-STACK
Degree of distortion
Also changes the volume.
Type of guitar amp
SMALL: small amp
BUILT-IN: single-unit type amp
2-STACK: large double stack amp
3-STACK: large triple stack amp
OVERDRIVE
This is an overdrive that provides heavy distortion. The parameters
are the same as for “DISTORTION.”
SATURATOR
A saturator which distorts the sound is connected in parallel with
a compressor, producing a rougher tonal character and boosting
the loudness. This also cuts the low-frequency region of the input
audio.
Parameter Value Explanation
Saturator Gain 0–127 Input volume to the saturator
Saturator Drive 0–127 Degree of distortion
Saturator Level 0–127 Output volume of the saturator
Comp Depth 0–127 Amount of compression
Comp Level 0–127 Output volume of the compressor
Hi Gain -12–+6 dB Gain of the high range
Level 0–127 Output Level
22
Page 23

Multi-Eect Parameters
T-SCREAM
This models the analog overdrive of the past.
It adds a nice amount of overtones without dirtying the sound.
Parameter Value Explanation
Distortion 0–127
Tone 0–127 Sound quality of the Overdrive eect
Level 0–127 Output Level
Degree of distortion
Also changes the volume.
BIT CRUSHER
This creates a lo- sound.
Parameter Value Explanation
Sample Rate 0–127 Adjusts the sample rate.
Bit Down 0–18 Adjusts the bit depth.
Filter 0–127 Adjusts the lter depth.
Low Gain -15–+15 dB Gain of the low range
High Gain -15–+15 dB Gain of the high range
Level 0–127 Output Level
ISOLATOR
This is an equalizer which cuts the volume greatly, allowing you to
add a special eect to the sound by cutting the volume in varying
ranges.
Parameter Value Explanation
Boost/Cut Low
Boost/Cut Mid
Boost/Cut High
Anti Phase Low
Sw
Anti Phase Low
Level
Anti Phase Mid
Sw
Anti Phase Mid
Level
Low Boost Sw OFF, ON
Low Boost Level 0–127
Level 0–127 Output Level
-60–+4 dB
OFF, ON
0–127
OFF, ON
0–127
These boost and cut each of the
High, Middle, and Low frequency
ranges
At -60 dB, the sound becomes
inaudible. 0 dB is equivalent to the
input level of the sound.
Turns the Anti-Phase function on/o
for the Low frequency ranges
When turned on, the counterchannel of stereo sound is inverted
and added to the signal.
Adjusts the level settings for the Low
frequency ranges
Adjusting this level for certain
frequencies allows you to lend
emphasis to specic parts (This is
eective only for stereo source.).
Settings of the Anti-Phase function
for the Middle frequency ranges
The parameters are the same as for
the Low frequency ranges.
Turns Low Booster on/o
This emphasizes the bottom to create
a heavy bass sound.
Increasing this value gives you a
heavier low end
* Depending on the Isolator and
lter settings this eect may be
hard to distinguish.
RING MODULATOR
This is an eect that applies amplitude modulation (AM) to the
input signal, producing bell-like sounds. You can also change the
modulation frequency in response to changes in the volume of the
sound sent into the eect.
Parameter Value Explanation
Frequency 0–127
Sens 0–127
Polarity UP, DOWN
Low Gain -15–+15 dB Gain of the low range
High Gain -15–+15 dB Gain of the high range
Level 0–127 Output Level
Adjusts the frequency at which
modulation is applied.
Adjusts the amount of frequency
modulation applied.
Direction in which the frequency
modulation will move
UP: Towards higher frequencies
DOWN: Towards lower frequencies
PITCH SHIFTER
A stereo pitch shifter.
Parameter Value Explanation
Coarse -24–+12 semi
Fine -100–+100 cent
Tempo Sync OFF, ON
Delay Time 1–1300 ms, note
Feedback -98–+98%
Low Gain -15–+15 dB Gain of the low range
High Gain -15–+15 dB Gain of the high range
Level 0–127 Output Level
Adjusts the pitch of the pitch shifted
sound in semitone steps.
Adjusts the pitch of the pitch shifted
sound in 2-cent steps.
Species whether the delay time
value of the delay is specied as a
note value (ON) or not (OFF).
Adjusts the delay time from the
direct sound until the pitch shifted
sound is heard.
Adjusts the proportion of the pitch
shifted sound that is fed back into
the eect. Negative “-” settings will
invert the phase.
AUTO PAN
Cyclically modulates the stereo location of the sound.
Parameter Value Explanation
Modulation wave
TRI: Triangle wave
TRI, SQR, SIN,
SAW1, SAW2, TRP
Mod Wave
SAW1 SAW2
R R
L L
Tempo Sync OFF, ON
Rate
Depth 0–127 Depth to which the eect is applied
Low Gain -15–+15 dB Gain of the low range
High Gain -15–+15 dB Gain of the high range
Level 0–127 Output Level
0.05–10.00 Hz,
note
SQR: Square wave
SIN: Sine wave
SAW1: Sawtooth wave (upward)
SAW2: Sawtooth wave (downward)
TRP: Trapezoidal wave
Species whether the rate of
modulation applied to the eect is
specied as a note value (ON) or not
(OFF).
Frequency of the change
23
Page 24

Kit List
No. Kit name Sub name Category
1 Acoustic All Wood Acoustic/Pop
2 Fat Rock Power Toms Rock
3 Compact Jazz Combo Jazz/Blues
4 Speed Metal* Metal
5 Tight Prog Rock
6 Compact Lite w/ Tambourine HH Acoustic/Pop
7 Elec tro Wah Electro
8 Deep Daft* Processed/Eective
9 Nu RnB Funk/RnB
10 JingleStacks 2nd Hi-Hat Funk/RnB
11 Studio Live Room Acoustic/Pop
12 Classic Rock Rock
13 Jazz Funk Jazz/Blues
14 Classic Metal 80-90s Metal
15 60s Rock Rock
16 Modern Funk Funk/RnB
17 Dark Hybrid Electro
18 Big Room* Layered Processed/Eective
19 Raw DnB Layered Hybrid Processed/Eective
20 Unplugged +Percussion World/Percussive
21 Pop-Rock Studio Acoustic/Pop
22 Dry & Heavy Folk Rock Rock
23 Second Line Jazz/Blues
24 Heavy Metal Metal
25 Arena Stage Rock
26 Warmer Funk Funk/RnB
27 Alternative POP Acoustic/Pop
28 Super Boom Layered Processed/Eective
29 Retro House +Percussion Processed/Eective
30 Bottle Phaser Entertainment/SE
31 More Cowbell Pop-Rock Acoustic/Pop
32 Live Rock Rock
33 Shue Blues Jazz/Blues
34 Alternative METAL Metal
35 Rockin' Gate 80s Rock
36 West Coast FUNK Funk/RnB
37 Live Fusion Jazz/Blues
38 Dark Breaks Electro-Acoustic Electro
39 Sharp Stick Drum'n'Bass Processed/Eective
40 Super Filter Processed/Eective
41 Cassette Lo-Fi Compress Acoustic/Pop
42 Bigga Bop Jazz Jazz/Blues
43 Funk Rock Rock
44 Alternative ROCK Rock
45 Dance Pop Processed/Eective
46 Ele-DRUM Classic Electro
47 808 Electro
48 909 Electro
49 Deep Groove +Percussion World/Percussive
50 Ambient Spiral Entertainment/SE
51–100 (User Kit)
*
Kits in which user samples are assigned to instruments
Listed by category
Category No. Kit name Sub name
1 Acoustic All Wood
6 Compact Lite w/ Tambourine HH
11 Studio Live Room
Acoustic/Pop
Electro
Entertainment/SE
Funk/RnB
Jazz/Blues
Metal
Processed/Eective
Rock
World/Percussive
– 51–100 (User Kit)
* Kits in which user samples are assigned to instruments
21 Pop-Rock Studio
27 Alternative POP
31 More Cowbell Pop-Rock
41 Cassette Lo-Fi Compress
7 Electro Wah
17 Dark Hybrid
38 Dark Breaks Electro-Acoustic
46 Ele-DRUM Classic
47 808
48 909
30 Bottle Phaser
50 Ambient Spiral
9 Nu RnB
10 JingleStacks 2nd Hi-Hat
16 Modern Funk
26 Warmer Funk
36 West Coast FUNK
3 Compact Jazz Combo
13 Jazz Funk
23 Second Line
33 Shue Blues
37 Live Fusion
42 Bigga Bop Jazz
4 Speed Metal*
14 Classic Metal 80-90s
24 Heavy Metal
34 Alternative METAL
8 Deep Daft*
18 Big Room* Layered
19 Raw DnB Layered Hybrid
28 Super Boom Layered
29 Retro House +Percussion
39 Sharp Stick Drum'n'Bass
40 Super Filter
45 Dance Pop
2 Fat Rock Power Toms
5 Tight Prog
12 Classic Rock
15 60s Rock
22 Dry & Heavy Folk Rock
25 Arena Stage
32 Live Rock
35 Rockin' Gate 80s
43 Funk Rock
44 Alternative ROCK
20 Unplugged +Percussion
49 Deep Groove +Percussion
24
Page 25

Kit List (VAD306)
No. Kit name Sub name Category
1 Studio Jam All Wood Acoustic / Pop
2 Rock Aggressive Rock
3 Warm Jazz Jazz / Blues
4 HipHop Funk Funk / RnB
5 Laidback Funk / RnB
6 Shallow Mini at Cafe Acoustic / Pop
7 Speed Metal* Metal
8 Tight Prog Rock
9 Impact R&B Layered Funk / RnB
10 Acoustic All Wood Acoustic / Pop
11 Compact Jazz Combo Jazz / Blues
12 Rock Studio Ambient Rock
13 AmbiFunk Duo Layered Funk / RnB
14 Studio Live Room Acoustic / Pop
15 ClassicMetal 80-90s Metal
16 60s Rock Rock
17 Modern Funk Funk / RnB
18 Compact Lite w/ Tambourine HH Acoustic / Pop
19 Fat Rock Power Toms Rock
20 Unplugged +Percussion World / Percussive
21 Pop Hybrid* w/ Clap Processed / Eective
22 Electro Wah Electro
23 Jazz Funk Jazz / Blues
24 Deep Daft* Processed / Eective
25 Nu RnB Funk / RnB
26 JingleStacks 2nd Hi-Hat Funk / RnB
27 Dark Hybrid Electro
28 Big Room* Layered Processed / Eective
29 Classic Rock Rock
30 Raw DnB Layered Hybrid Processed / Eective
31 Pop-Rock Studio Acoustic / Pop
32 Dry & Heavy Folk Rock Rock
33 Second Line Jazz / Blues
34 Heavy Metal Metal
35 Arena Stage Rock
36 Warmer Funk Funk / RnB
37 Alternative POP Acoustic / Pop
38 Super Boom Layered Processed / Eective
39 Retro House +Percussion Processed / Eective
40 Bottle Phaser Entertainment / SE
41 More Cowbell Pop-Rock Acoustic / Pop
42 Live Rock Rock
43 Shue Blues Jazz / Blues
44 Alternative METAL Metal
45 Rockin' Gate 80s Rock
46 West Coast FUNK Funk / RnB
47 Live Fusion Jazz / Blues
48 Dark Breaks Electro-Acoustic Electro
49 Sharp Stick Drum'n'Bass Processed / Eective
50 Super Filter Processed / Eective
51 Cassette Lo-Fi Compress Acoustic / Pop
52 Bigga Bop Jazz Jazz / Blues
53 Funk Rock Rock
54 Alternative ROCK Rock
55 Dance Pop Processed / Eective
56 Ele-DRUM Classic Electro
57 808 Electro
58 909 Electro
59 Deep Groove +Percussion World / Percussive
60 Ambient Spiral Entertainment / SE
61–
(User Kit)
100
*
Kits in which user samples are assigned to instruments
Listed by category
Category No. Kit name Sub name
1 Studio Jam All Wood
6 Shallow Mini at Cafe
10 Acoustic All Wood
14 Studio Live Room
Acoustic / Pop
Electro
Entertainment / SE
Funk / RnB
Jazz / Blues
Metal
Processed / Eective
Rock
World / Percussive
–
* Kits in which user samples are assigned to instruments
18 Compact Lite w/ Tambourine HH
31 Pop-Rock Studio
37 Alternative POP
41 More Cowbell Pop-Rock
51 Cassette Lo-Fi Compress
22 Electro Wah
27 Dark Hybrid
48 Dark Breaks Electro-Acoustic
56 Ele-DRUM Classic
57 808
58 909
40 Bottle Phaser
60 Ambient Spiral
4 HipHop Funk
5 Laidback
9 Impact R&B Layered
13 AmbiFunk Duo Layered
17 Modern Funk
25 Nu RnB
26 JingleStacks 2nd Hi-Hat
36 Warmer Funk
46 West Coast FUNK
3 Warm Jazz
11 Compact Jazz Combo
23 Jazz Funk
33 Second Line
43 Shue Blues
47 Live Fusion
52 Bigga Bop Jazz
7 Speed Metal*
15 ClassicMetal 80-90s
34 Heavy Metal
44 Alternative METAL
21 Pop Hybrid* w/ Clap
24 Deep Daft*
28 Big Room* Layered
30 Raw DnB Layered Hybrid
38 Super Boom Layered
39 Retro House +Percussion
49 Sharp Stick Drum'n'Bass
50 Super Filter
55 Dance Pop
2 Rock Aggressive
8 Tight Prog
12 Rock Studio Ambient
16 60s Rock
19 Fat Rock Power Toms
29 Classic Rock
32 Dry & Heavy Folk Rock
35 Arena Stage
42 Live Rock
45 Rockin' Gate 80s
53 Funk Rock
54 Alternative ROCK
20 Unplugged +Percussion
59 Deep Groove +Percussion
61–
(User Kit)
100
25
Page 26

Instrument List
No. Instrument name Instrument group
000 OFF OFF
001 Maple K KICK
002 Birch K KICK
003 Beech K KICK
004 Deep Shell K KICK
005 Solid K KICK
006 18"Maple K KICK
007 18"Open K KICK
008 20"Solid K KICK
009 24"Open K KICK
010 PlasticBeaterK KICK
011 WoodenBeater K KICK
012 Soft Beater K KICK
013 Resonance K KICK
014 Close Mic 1 K KICK
015 Close Mic 2 K KICK
016 Close Mic 3 K KICK
017 O Mic K KICK
018 Half-Proc 1 K KICK
019 Half-Proc 2 K KICK
020 Tight K KICK PROC/ELEC
021 Tight Cut K KICK PROC/ELEC
022 Retro Dance K KICK PROC/ELEC
023 House K KICK PROC/ELEC
024 Drum'n Bass K KICK PROC/ELEC
025 Break Beats K KICK PROC/ELEC
026 Impact K KICK PROC/ELEC
027 Tronic K KICK PROC/ELEC
028 ElectroKnock K KICK PROC/ELEC
029 Lo-Fi K KICK PROC/ELEC
030 Reverse K KICK PROC/ELEC
031 R-8 Low K KICK PROC/ELEC
032 TR-808 K KICK PROC/ELEC
033 TR-909 K KICK PROC/ELEC
034 TR-909 Wood K KICK PROC/ELEC
035 Analog K KICK PROC/ELEC
036 Mahogany S SNARE
037 Mahogany SR SNARE
038 Maple S SNARE
039 Maple SR SNARE
040 Steel S SNARE
041 Steel SR SNARE
042 Brass S SNARE
043 Brass SR SNARE
044 Aluminium S SNARE
045 Aluminium SR SNARE
046 Deep Shell S SNARE
047 Deep Shell SR SNARE
048 MaplePiccolo S SNARE
049 MaplePiccoloSR SNARE
050 Brush S SNARE
051 Brush SR SNARE
052 Cross Stick 1 CROSS STICK
053 Cross Stick 2 CROSS STICK
054 Cross Stick 3 CROSS STICK
055 Cross Stick 4 CROSS STICK
056 Cross Stick 5 CROSS STICK
057 Cross Stick 6 CROSS STICK
058 Cross Stick 7 CROSS STICK
059 Cross Stick 8 CROSS STICK
060 Cross Stick 9 CROSS STICK
061 Cross Stick 10 CROSS STICK
062 Radio S SNR PROC/ELEC
063 Short Buzz S SNR PROC/ELEC
064 Dense Click S SNR PROC/ELEC
065 Drum'n Bass S SNR PROC/ELEC
066 House S SNR PROC/ELEC
067 House Low S SNR PROC/ELEC
068 Hip Hop S SNR PROC/ELEC
26
Corresponding instrument parameter
Tuning Muing
( ( (
( ( (
( ( (
( ( (
( ( (
( ( (
( ( (
( ( (
( ( (
( ( (
( ( (
( ( (
( ( (
( ( (
( ( (
( ( (
( ( (
( ( (
( ( (
( ( (
( ( (
( ( (
( ( (
( ( (
( ( (
( ( (
( ( (
( ( (
( ( (
( ( (
( ( (
( ( (
( ( (
( ( (
( ( (
( (
( (
( (
( (
( (
( (
( (
( (
( (
( (
Snare
Buzz
Strainer
Adj.
Size Fixed Pitch Decay
( (
( (
( (
( (
( (
( (
( (
( (
( (
( (
( (
( (
( (
( (
( (
( (
( (
( (
( (
( (
( (
( (
(
(
Remarks
*R
*R
*R
*R
*R
*R
*R
*R
Page 27

Instrument List
No. Instrument name Instrument group
069 Hop S SNR PROC/ELEC
070 Ambient Snap S SNR PROC/ELEC
071 Clap S SNR PROC/ELEC
072 Dirty Clap S SNR PROC/ELEC
073 Retro Dance S SNR PROC/ELEC
074 TR-808 S SNR PROC/ELEC
075 TR-808 SR SNR PROC/ELEC
076 TR-909 S SNR PROC/ELEC
077 TR-909 SR SNR PROC/ELEC
078 Analog 1 S SNR PROC/ELEC
079 Analog 2 S SNR PROC/ELEC
080 TR-808 X Stick SNR PROC/ELEC
081 TR-909 X Stick SNR PROC/ELEC
082 10"Maple T1 TOM
083 10"Maple T1R TOM
084 12"Maple T2 TOM
085 12"Maple T2R TOM
086 13"Maple T3 TOM
087 13"Maple T3R TOM
088 16"Maple T4 TOM
089 16"Maple T4R TOM
090 12"Birch T1 TOM
091 12"Birch T1R TOM
092 14"Birch T2 TOM
093 14"Birch T2R TOM
094 16"Birch T3 TOM
095 16"Birch T3R TOM
096 18"Birch T4 TOM
097 18"Birch T4R TOM
098 10"Beech T1 TOM
099 10"Beech T1R TOM
100 12"Beech T2 TOM
101 12"Beech T2R TOM
102 13"Beech T3 TOM
103 13"Beech T3R TOM
104 16"Beech T4 TOM
105 16"Beech T4R TOM
106 10"Shallow T1 TOM
107 10"Shallow T1R TOM
108 12"Shallow T2 TOM
109 12"Shallow T2R TOM
110 13"Shallow T3 TOM
111 13"Shallow T3R TOM
112 16"Shallow T4 TOM
113 16"Shallow T4R TOM
114 10"Brush T1 TOM
115 10"TomRimClick TOM
116 12"Brush T2 TOM
117 12"TomRimClick TOM
118 13"Brush T3 TOM
119 13"TomRimClick TOM
120 16"Brush T4 TOM
121 16"TomRimClick TOM
122 TR-808 T1 TOM PROC/ELEC
123 TR-808 T2 TOM PROC/ELEC
124 TR-808 T3 TOM PROC/ELEC
125 TR-808 T4 TOM PROC/ELEC
126 TR-909 T1 TOM PROC/ELEC
127 TR-909 T2 TOM PROC/ELEC
128 TR-909 T3 TOM PROC/ELEC
129 TR-909 T4 TOM PROC/ELEC
130 Analog T1 TOM PROC/ELEC
131 Analog T2 TOM PROC/ELEC
132 Analog T3 TOM PROC/ELEC
133 Analog T4 TOM PROC/ELEC
134 Elec Bend T1 TOM PROC/ELEC
135 Elec Bend T2 TOM PROC/ELEC
136 Elec Bend T3 TOM PROC/ELEC
137 Elec Bend T4 TOM PROC/ELEC
Tuning Muing
( ( (
( ( (
( ( (
( ( (
( ( (
( ( (
( ( (
( ( (
( ( (
( ( (
( ( (
( ( (
( ( (
( ( (
( ( (
( ( (
( ( (
( ( (
( ( (
( ( (
( ( (
( ( (
( ( (
( ( (
( ( (
( ( (
( ( (
( ( (
( ( (
( ( (
( ( (
( ( (
( ( (
( ( (
( ( (
( ( (
( ( (
( ( (
( ( (
( ( (
Corresponding instrument parameter
Snare
Buzz
Strainer
Adj.
Size Fixed Pitch Decay
( (
( (
( (
( (
( (
( (
( (
( (
( (
( (
( (
( (
( (
( (
( (
( (
( (
( (
( (
( (
( (
( (
( (
( (
( (
( (
( (
( (
( (
Remarks
*R
*R
*R
*R
*R
*R
*R
*R
*R
*R
*R
*R
*R
*R
*R
*R
*R
*R
*R
*R
*R
*R
27
Page 28

Instrument List
No. Instrument name Instrument group
138 14"Session HH HI-HAT
139 14"Session HHE HI-HAT
140 13"Bright HH HI-HAT
141 13"Bright HHE HI-HAT
142 15"Heavy HH HI-HAT
143 15"Heavy HHE HI-HAT
144 14"Brush HH HI-HAT
145 14"Brush HHE HI-HAT
146 Tambourine HH HI-HAT
147 Tambourine HHE HI-HAT
148 Drum'n Bass HH HH PROC/ELEC
149 House HH HH PROC/ELEC
150 Sharp House HH HH PROC/ELEC
151 Low Step HH HH PROC/ELEC
152 Jingle HH HH PROC/ELEC
153 TR-808 HH HH PROC/ELEC
154 TR-909 HH HH PROC/ELEC
155 CR-78 HH HH PROC/ELEC
156 CR-78 Metal HH HH PROC/ELEC
157 20"Dark Rd RIDE
158 20"Dark RdE RIDE
159 20"Dark RdB RIDE
160 20"Bright Rd RIDE
161 20"Bright RdE RIDE
162 20"Bright RdB RIDE
163 19"Light Rd RIDE
164 19"Light RdE RIDE
165 19"Light RdB RIDE
166 21"Dry Dark Rd RIDE
167 21"DryDark RdE RIDE
168 21"DryDark RdB RIDE
169 20"Brush Rd RIDE
170 20"Brush RdE RIDE
171 20"Brush RdB RIDE
172 22"Sizzle Rd RIDE
173 22"Sizzle RdE RIDE
174 22"Sizzle RdB RIDE
175 16"Dark Cr CRASH
176 16"Dark CrE CRASH
177 18"Dark Cr CRASH
178 18"Dark CrE CRASH
179 16"Bright Cr CRASH
180 16"Bright CrE CRASH
181 18"Bright Cr CRASH
182 18"Bright CrE CRASH
183 16"Thin Cr CRASH
184 16"Thin CrE CRASH
185 18"Thin Cr CRASH
186 18"Thin CrE CRASH
187 16"Heavy Cr CRASH
188 16"Heavy CrE CRASH
189 19"Heavy Cr CRASH
190 19"Heavy CrE CRASH
191 17"Brush Cr CRASH
192 17"Brush CrE CRASH
193 19"Brush Cr CRASH
194 19"Brush CrE CRASH
195 6"Thin Splash SPLASH/CHINA
196 6"ThinSplash E SPLASH/CHINA
197 12"Thin Splash SPLASH/CHINA
198 12"ThinSplashE SPLASH/CHINA
199 8"Med Splash SPLASH/CHINA
200 8"Med Splash E SPLASH/CHINA
201 12"Med Splash SPLASH/CHINA
202 12"MedSplash E SPLASH/CHINA
203 16"China SPLASH/CHINA
204 16"China E SPLASH/CHINA
205 20"China SPLASH/CHINA
206 20"China E SPLASH/CHINA
207 14"Trash SPLASH/CHINA
28
Tuning Muing
( (
( (
( (
( (
( (
( (
( (
( (
( (
( (
( (
( (
( (
( (
( (
( (
( (
( (
( (
( (
( (
( (
( (
( (
( (
( (
( (
( (
( (
( (
( (
( (
( (
( (
( (
( (
( (
( (
( (
( (
( (
( (
( (
( (
( (
( (
( (
( (
( (
( (
( (
Corresponding instrument parameter
Snare
Buzz
Strainer
Adj.
Size Fixed Pitch Decay
( (
( (
( (
( (
( (
( (
( (
( (
( (
( (
Remarks
*E
*E
*E
*E
*E
( (
( (
( (
( (
( (
( (
( (
( (
( (
*E
*B
*E
*B
*E
*B
*E
*B
*E
*B
*E
*B
*E
*E
*E
*E
*E
*E
*E
*E
*E
*E
*E
*E
*E
*E
*E
*E
Page 29

Instrument List
No. Instrument name Instrument group
208 14"Trash E SPLASH/CHINA
209 17"Trash Cr SPLASH/CHINA
210 17"Trash CrE SPLASH/CHINA
211 Drum'n Bass Rd CYMBAL OTHERS
212 Mainly Bell Rd CYMBAL OTHERS
213 Short&Dirty Rd CYMBAL OTHERS
214 Reverse Rd CYMBAL OTHERS
215 Sweep Cr CYMBAL OTHERS
216 Lo-Fi Cr CYMBAL OTHERS
217 Phase Cr CYMBAL OTHERS
218 Ambient Cr CYMBAL OTHERS
219 TR-808 Cr CYMBAL OTHERS
220 Analog Cr CYMBAL OTHERS
221 Reverse Cr
222 Reverse Trash
223 Bongo Hi Open
224 Bongo Hi Slap
225 Bongo Lo Open
226 Conga Hi Open
227 Conga Hi Slap
228 Conga Lo Open
229 TimbaleHi Open
230 Timbale Hi Rim
231 TimbaleLo Open
232 Timbale Paila PERCUSSION
233 Cajon Open PERCUSSION
234 Cajon Slap PERCUSSION
235 Cajon Bass PERCUSSION
236 Cowbell 1 PERCUSSION
237 Cowbell 1 Tip PERCUSSION
238 Cowbell 2 PERCUSSION
239 Cowbell 3 PERCUSSION
240 Claves PERCUSSION
241 Maracas PERCUSSION
242 Shaker PERCUSSION
243 Tambourine 1 PERCUSSION
244 Tambourine 2 PERCUSSION
245 Rain Stick PERCUSSION
246 Vibra-Slap PERCUSSION
247 Cabasa PERCUSSION
248 Surdo Open PERCUSSION
249 Surdo Mute PERCUSSION
250 Surdo Rim PERCUSSION
251 Pandeiro Thumb PERCUSSION
252 Pandeiro Slap PERCUSSION
253 PandeiroJingle PERCUSSION
254 Agogo Hi PERCUSSION
255 Agogo Lo PERCUSSION
256 Caxixi PERCUSSION
257 Cuica Hi PERCUSSION
258 Cuica Lo PERCUSSION
259 Djembe Open PERCUSSION
260 Djembe Slap PERCUSSION
261 Djembe Bass PERCUSSION
262 Pot Drum Side PERCUSSION
263 Pot Drum Mute PERCUSSION
264 Pot Drum Bass PERCUSSION
265 PotDrumRelease PERCUSSION
266 Tabla Na PERCUSSION
267 Tabla Tin PERCUSSION
268 Tabla Tun PERCUSSION
269 Tabla Ge PERCUSSION
270 Tabla Ka PERCUSSION
271 Tabla Ge Slide PERCUSSION
272 Timpani G PERCUSSION
273 Timpani C PERCUSSION
274 Wood Block Hi PERCUSSION
275 Wood Block Lo PERCUSSION
276 Triangle Open PERCUSSION
CYMBAL OTHERS
CYMBAL OTHERS
PERCUSSION
PERCUSSION
PERCUSSION
PERCUSSION
PERCUSSION
PERCUSSION
PERCUSSION
PERCUSSION
PERCUSSION
Tuning Muing
( (
( (
( (
Corresponding instrument parameter
Snare
Buzz
Strainer
Adj.
Size Fixed Pitch Decay
Remarks
*E
*E
( (
( (
( (
( (
( (
( (
( (
( (
( (
( (
( (
( (
( (
( (
( (
( (
( (
( (
( (
( (
( (
( (
( (
( (
( (
( (
( (
( (
( (
( (
( (
( (
( (
( (
( (
( (
( (
( (
( (
( (
( (
( (
( (
( (
( (
( (
( (
( (
( (
( (
( (
( (
( (
( (
( (
( (
( (
( (
( (
( (
( (
( (
( (
( (
( (
( (
29
Page 30

Instrument List
No. Instrument name Instrument group
277 Triangle Close PERCUSSION
278 Crotale PERCUSSION
279 Sleigh Bells PERCUSSION
280 Tree Chimes PERCUSSION
281 Gong PERCUSSION
282 TR-808Cowbell1 PERC PROC/ELEC
283 TR-808Cowbell2 PERC PROC/ELEC
284 TR-808 Maracas PERC PROC/ELEC
285 TR-808 Claves PERC PROC/ELEC
286 TR-808 Conga PERC PROC/ELEC
287 CR-78 Cowbell PERC PROC/ELEC
288 CR-78 Guiro PERC PROC/ELEC
289 CR-78 Maracas PERC PROC/ELEC
290 CR-78 Tamb PERC PROC/ELEC
291 CR-78 Bongo PERC PROC/ELEC
292 CR-78 Claves PERC PROC/ELEC
293 CR-78MetalBeat PERC PROC/ELEC
294 Clap SOUND FX
295 House Clap SOUND FX
296 Fat Clap SOUND FX
297 TechHouse Clap SOUND FX
298 Noize Clap SOUND FX
299 TR-808 Clap SOUND FX
300 TR-909 Clap SOUND FX
301 Snaps SOUND FX
302 Snappin' SOUND FX
303 Beep SOUND FX
304 Afro Stomp SOUND FX
305 Discovery SOUND FX
306 Super Low SOUND FX
307 ReectiveBell SOUND FX
308 Reverse&Phase SOUND FX
309 Voice-Haaa SOUND FX
310 Sin 440Hz SOUND FX
*R Rim sound
*E Cymbal edge sound
*B Cymbal bell sound
Tuning Muing
Corresponding instrument parameter
Snare
Buzz
Strainer
Adj.
Size Fixed Pitch Decay
Remarks
( (
( (
( (
( (
( (
( (
( (
( (
( (
( (
( (
( (
( (
( (
( (
( (
( (
( (
( (
( (
( (
( (
( (
( (
( (
( (
( (
( (
( (
( (
( (
( (
( (
( (
30
Page 31

User Sample List
No. User sample name Assigned kit
U001 SpeedMetal_K Speed Metal
U002 InYourFace_K
U003 BigRoom_K
U004 BigRoom_S
U005 BigRoom SR
U006 DeepDraft_K
U007 DeepDraft_S
U008–100 (Empty) –
Big Room
Pop Hybrid, Deep Daft
Song List
No. Song name
001 Rock1
002 Dance1
003 Funk
004 Rock2
005 Jazz
006 Latin
007 Dance2
31
Page 32

Kit Structure
Kit 100
Kit 1
Pads
KICK
Head
SNARE
Head
Rim
TOM 1
Head
Rim
TOM 2
Head
Rim
TOM 3
Head
Rim
Pad settings
Instrument (instrumental sound, user sample), tuning,
muing, equalizer, volume, etc.
HI-HAT
Head
Rim
AUX
Head
Rim
CRASH 1
Head
Rim
CRASH 2
Head
Rim
Ambience settings
Performance location, wall material, depth, etc.
Multi-eect settings
Overall kit settings
Volume, kit name, etc.
RIDE
Head
Rim
Bell
32
02
 Loading...