

Page 1
~Roland
l~ll•ll
SYNC
aOX/CONVEFtTEi=t
sax-10
Owner's Manual
~='=Ro
sax-10
••
ii
iii-ii,.,_
SYNC
aox
. !
.
~
M",!,im
'CONVEMTErt
1:1
Page 2
-·
------
Radio and television interference
"Warning
pursuant
is
likely
The
uses
properly, that is, in
it
may
tion.
This
the
with
Rules. These rules are designed
tection
tion.
However, there
not
cause
can be determined
the user
by
the
•Disconnect
one
either the
These devices usually require Roland designated shielded
1/0
shielded cable
contact
- This equipment
to
Subpart J,
to
result in interference
equipment
radio-frequency energy.
cause interference
equipment
limits
the
against such an interference in a residential ins
occur in a
interference
following
at
cables.
the
described in this manual generates and
strict
accordance
has been tested and
for a Class B computing
specifications in Subpart J,
is
no
guarantee
particular
is
encouraged
other
time.
other
For
from
manufacturer
installation.
to
radio
by
turning
to
measure:
devices and
If
the interference stops,
device
or
Roland devices,
your
or
has
been
of
Part 15,
If
it
with
radio ai'ld television recep-
to
that
or
television reception,
the
try
to
their
its I
/0
cable.
you
dealer.
For
dealer
of
to
radio
is
not
installed and used
with
our
found
to
device
of
Part 15,
provide reasonable pro-
the interference
If
this
equipment
equipment
correct the interference
input/output
it
can obtain the proper
non Roland devices,
for
assistance.
verified
FCC
and
instructions.
comply
i.n
on and
is
to
comply
with
the limits for a
Class
8 computing device,
rules. Operation with non-certified or non-verified equipment
TV
reception."
If
your
with
accordance
of
FCC
ta I la-
will
does
which
off,
cables
caused
by
television reception,
by
•Turn
•Move
•Move
•Plug
•Consider
If
perienced radio/television technician
tions. You
by
"How
Problems"
This
Office,
00345-4.
equipment
using one
the
TV
the
or
circuit
e
quipment
controlled
coaxial cable lead-in between the antenna and
equipment
radio.
the
equipment
the
equipment
than the
by
instal I
necessary,
may
the Federal Communications Commission
to
Identify
booklet
Washington, D
does
cause
you
or
more
of
or
and the radio
you
is
the
radio antenna
to
father away
into
TV
or
different
circuit
ing a rooftop
should consult
find
helpful
and Resolve Radio-T V Interference
avilable
from
C..
interference to radio
can
try
to
correct the interference
following
one side
an
radio .
or
the
20402, Stock No. 004-000-
measures·
unti
I the interference stops.
or
the
from
outlet
that
(That
is,
television set are on circuits
breakers or fuses.I
television antenna
your
for
following
the U.S. Government Printing
other
of
the
the
TV
or
on a
TV.
radio.
different
or
an
sugges-
prepared
with
is
make certain the
dealer
additional
booklet
or
TV
ex-
CONTENTS
OJ
PANEL DESCRIPTION
[3J
OUTLINE ....................................................
1.
Using
the
SBX-10 as a
2.
Using
the
SBX-10 as a
3.
Sync'ing
sequencers
[I]
Using the SBX-10 as a master device ....... 6
1.
Manual
a.
b.
c.
2.
Internal
a.
b.
c.
rhythm
to a multi-track
Mode
Start/Stop
Tempo
Setting
Remote
Mode
Tempo
(by
Tempo
(by
Programming
tapping
Programming
modifying
Start/Stop
........................................... 7
........................................... 7
Control
........................................... 9
in
...........................................
Please read the separate volume
master
converter
machines
device
......... .
and
recorder
................................... 8
...............................
real
time}
.................. 9
the
basic
tempo) .....
....
.
..
.... 5
..
10
11
3
4
5
5
8
"MIDI",
[TI
Syncing the sequencers and rhythm
machines featuring different Sync
Modes ................
1.
MIDI
Mode
2.
DIN SYNC
3.
TIME BASE
..
..........................................
................................................ 13
Mode
..................
Mode
.................................... 14
...
m MTR Mode ...................................................... 15
1.
Tempo
Button
2.
Playing
3.
Tempo
Additional
1.
TIME BASE .......................................
2.
Ignoring
3.
Battery
[I]
SPECIFICATIONS ........................................... 20
before reading this
Programming
and
making
the
system
Programming
Explanation
MIDI
messages
with
a Click Track ........... 16
.................................. 17
using
................................. 18
Backup ...................
owner's
manual.
the
click 17
......................... 18
...
.................
..
12
................. 13
Tap
......... 18
..
19
Copyright©
All
rights
any
form
reserved.
without
the
1985
No
part
written
by
ROLAND
of
this
publication
permission
CORPORATION
may
be
of
ROLAND
CORPORATION.
reproduced
in
Page 3

ITJ
Panel Description
<Front Panel>
l@Roland
8
Display----+--
OMode
0Play
@Program
Button-+----
Button---t-------__J
Button+----------~
<Rear Panel>
---Ell---·~l~K~
~-------+---«D
Metronome
Indicator
~--------+---@Metronome
~--
Die
~;;;~~f:::f:®:~©~lt.1~:~;:~~:~:~:~~~j:[~~
•*Eii
1
CiIHEiM'r:l:l·I·
-
----+--@Start/Stop
~
===="---+---@Tap
0
-m!:
1i11·
--
Level Knob
Button
Button
8Time
©Time
OMetronome
1lM\ISWllllHEtMISIORltlASS8
ClM'\llN;{l(VQJUISl.IAA'TlO~IJ
lf"""ll!l!JfCCIU.ES
Base
Out
@Time
Base
Out
Jack
"
®DIN
Base
In
Out
Jack
1
Jack
2
000000
METRONOME
OUT 2 OUT 1 IN
--TIMEBASE--
()DIN
Sync
Connector
Sync
Out
Jack
In
OMIDI
@Start/Stop
OClick
IN___J
~
0C
IN
CL1CI(
iJ
@)MIDI
Out
In
Connector
Remote
In
©Click
POWER
D-::-~.-+--~
0
AC
Jack
Adaptor
Jack
In
Switch
Power
Switch
Jack
Connector
Connector
3
Page 4

[I] OUTLINE
IMPORTANT NOTE
• Please use the appropriate line voltage
is
shown
• This
there is
•
Avoid
or
• Use
solvents such
• Please avoid placing
heavy on
• Operating the
lamp
change
•
If
the
time,
* Please
unplugging.
• The
immediately
simply
about
on
unit
may
nothing
using
where
it
mild
detergent
the
may
the
unit
is
unplug
do
not
unit
may
turn
five seconds.
the
name plate.
get
hot
while
operating,
to
worry
about.
the
unit
may
as
power
unit
in extreme heat,
be affected
for
cleaning. Do
thinner.
or
dropping
cable.
near a neon
by
humidity
dust. ·
anything
or
fluorescent
cause noise interference.
angle
of
the SBX-10.
not
to
be
used
for
a long period
the cord
pull the cord
not
after
from
operate
turned
the socket.
but
the plug
properly
if
turned on
off. If this happens,
it off, then turn it on again in after
which
not
If
when
but
use
so,
of
The Roland SYNC Box SBX-10 has three
functions
1)
as
follows.
Master device* to which rhythm machines
and sequencers synchronize
2)
Converter that enables rhythm machines
and sequencers featuring different Sync
Modes* to sync each other.
that
3) Interface
enables rhythm machines
and sequencers to sync to the multi-track
recorder
* The device
synchronization is called "Master" and the
other "Slave" .
* The Sync
with
are;
which
Modes
decides the
which
the SBX-10 can cope
tempo
1) MIDI
2) DIN SYNC
3) Time
The
function.
Base
following
48, 96 and 120
are
further
explanation on each
main
of
the
• Please do
breaks
down
Hi
ermit
..........
(Gerat.
in
Obereinstimmung
......................
(Amtsblattverfligung)
fun
Der
angezeigt
der
Name
not
disassemble the
unit
even
.
Bescheinigung des Herstellers /lmporteurs
wird
bescheinigt
ROLAND SYNC BOX / CONVERTER SB
......
...........
Typ
. Bezeichnung)
.....
k·entstort
Besti
Deutschen
und
mmungen
ist.
Ro
des
Herstellers/ l
.
da~
der/die/das
mit den Best i
~rT1~~~
Bundespost
die Berecht igung
eingeriiumt.
-
I.
Vf
wurde
mmungen
g 1
046
das
zur
Oberpriifung
land Corporation Osaka / Japan
mpo
rteurs
if it
der
I 1 984
lnverkehrbringen
der
Serie
X-10
dieses
Gerates
auf Einhaltung
4
Page 5
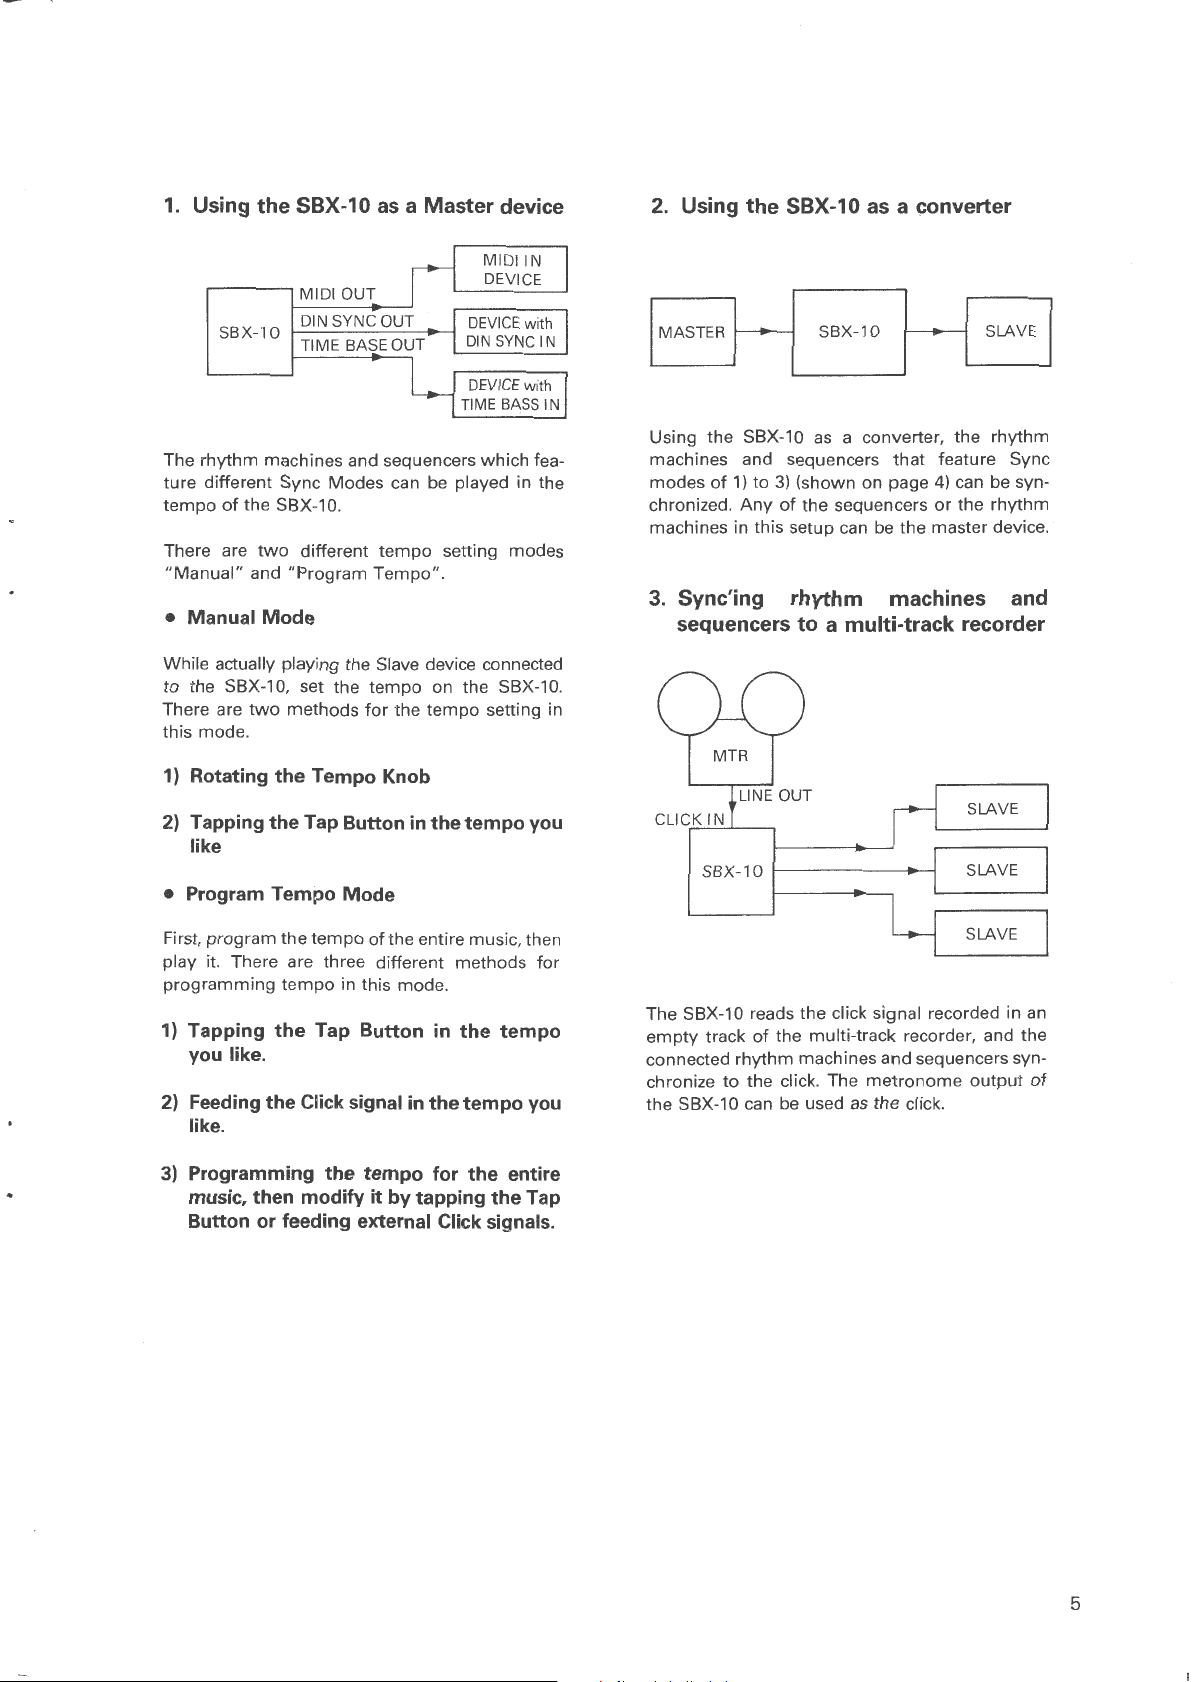
1. Using the SBX-10
MIDI
SBX-10
The
rhythm
ture different Sync
tempo
of
There are
"Manual"
• Manual
While actually playing the Slave device connected
to
the SBX-10, set
There are
this mode.
1)
Rotating the Tempo Knob
2)
Tapping the Tap Button
DIN SYNC OUT
machines and sequencers
the SBX-10.
two
different
and
"Program
Mode
two
methods
OUT
Modes
the
tempo
for
as
a Master device
MIDI
DEVICE
DEVICE
DIN
SYNC
DEVICE
TIME
BASS
which
can be played in the
tempo
Tempo".
setting
on the SBX-
the
tempo
in
the tempo you
modes
setting in
IN
with
IN
with
IN
fea-
10.
like
• Program Tempo Mode
2.
Using the SBX-10
I
MASTIR
Using the SBX-10
machines and sequencers
modes
chronized.
machines in this setup can be
H.__s_s_x_-_1
of
1)
to
3)
Any
of
(shown on page
the sequencers
as
a converter
o_:-
as
a converter, the
that
the
..
--1.__s_LA_v_E_,
rhythm
feature Sync
4)
can be syn-
or
the
rhythm
master device.
3. Sync'ing rhythm machines and
sequencers to a multi-track recorder
SLAVE
SLAVE
..
First,
program
play it. There are three different methods
programming
1)
Tapping
the
tempo
tempo
the
Tap Button
of
the entire music, then
in this mode.
in
the
tempo
you like.
2) Feeding the Click signal
in
the tempo
like.
3)
Programming the tempo for the entire
music, then modify it by tapping the Tap
Button or feeding external Click signals.
for
you
The SBX-1 O reads
empty
track
of
the multi-track recorder, and the
connected
chronize
the SBX-10 can
rhythm
to
the click. The
be
SLAVE
the
click signal recorded in
machines and sequencers syn-
metronome
used
as
the
click.
an
output
of
5
Page 6
!I]
Using the SBX-10
The
SBX-10
machines
There are
controls
and
sequencers in
two
different
the
methods
tempo
this
of
system.
for
tempo
as
a master device
the
rhythm
control.
1)
Manual
In
this
music
mode
is
being
Mode
the
played.
• Connection
tempo
can be
Device with
Base
Time
Device with
Time
Base
changed
EXT.
IN
EXT.
IN
as
the
CLOCK
CLOCK
IN
IN
2) Internal
In
this
mode,
you
have
previously
r--(
Mode
the
music
is
played
programmed.
Pedal
Switch
DP-2
(Optional)
[Amplifie~
)-CJ8
in
the
tempo
Microphone
Device with
DIN
Sync IN
"
COMPl.IES
WllH HI"
UMllS
ClWf'Ul!M;DEVCfl'\IRSUANITOSlllf\IJllJ
Drf'lRll!>IJIC(RUl.ES
l
IOR A CLASS
---DIN
000
Device with
DIN
Bl
SYNC---
OUT
•
Sync IN
000000
METRONOME
OUT 2
OUT 1 IN
-···o
IN
Device with
MIDI
OUT
•
IN
REMOTE
CLICK
IN
____J
o o
OUT
•
Device with
MIDI
IN
*
When
connecting a microphone
~'
Jack
position.
same
set
When
switch
1
~
@~a;~.
to
the
Click In
the
Click In
connecting
to
the
Switch © to
LINE
position.
an
amplifier,
the
set
MIC
the
6
Page 7
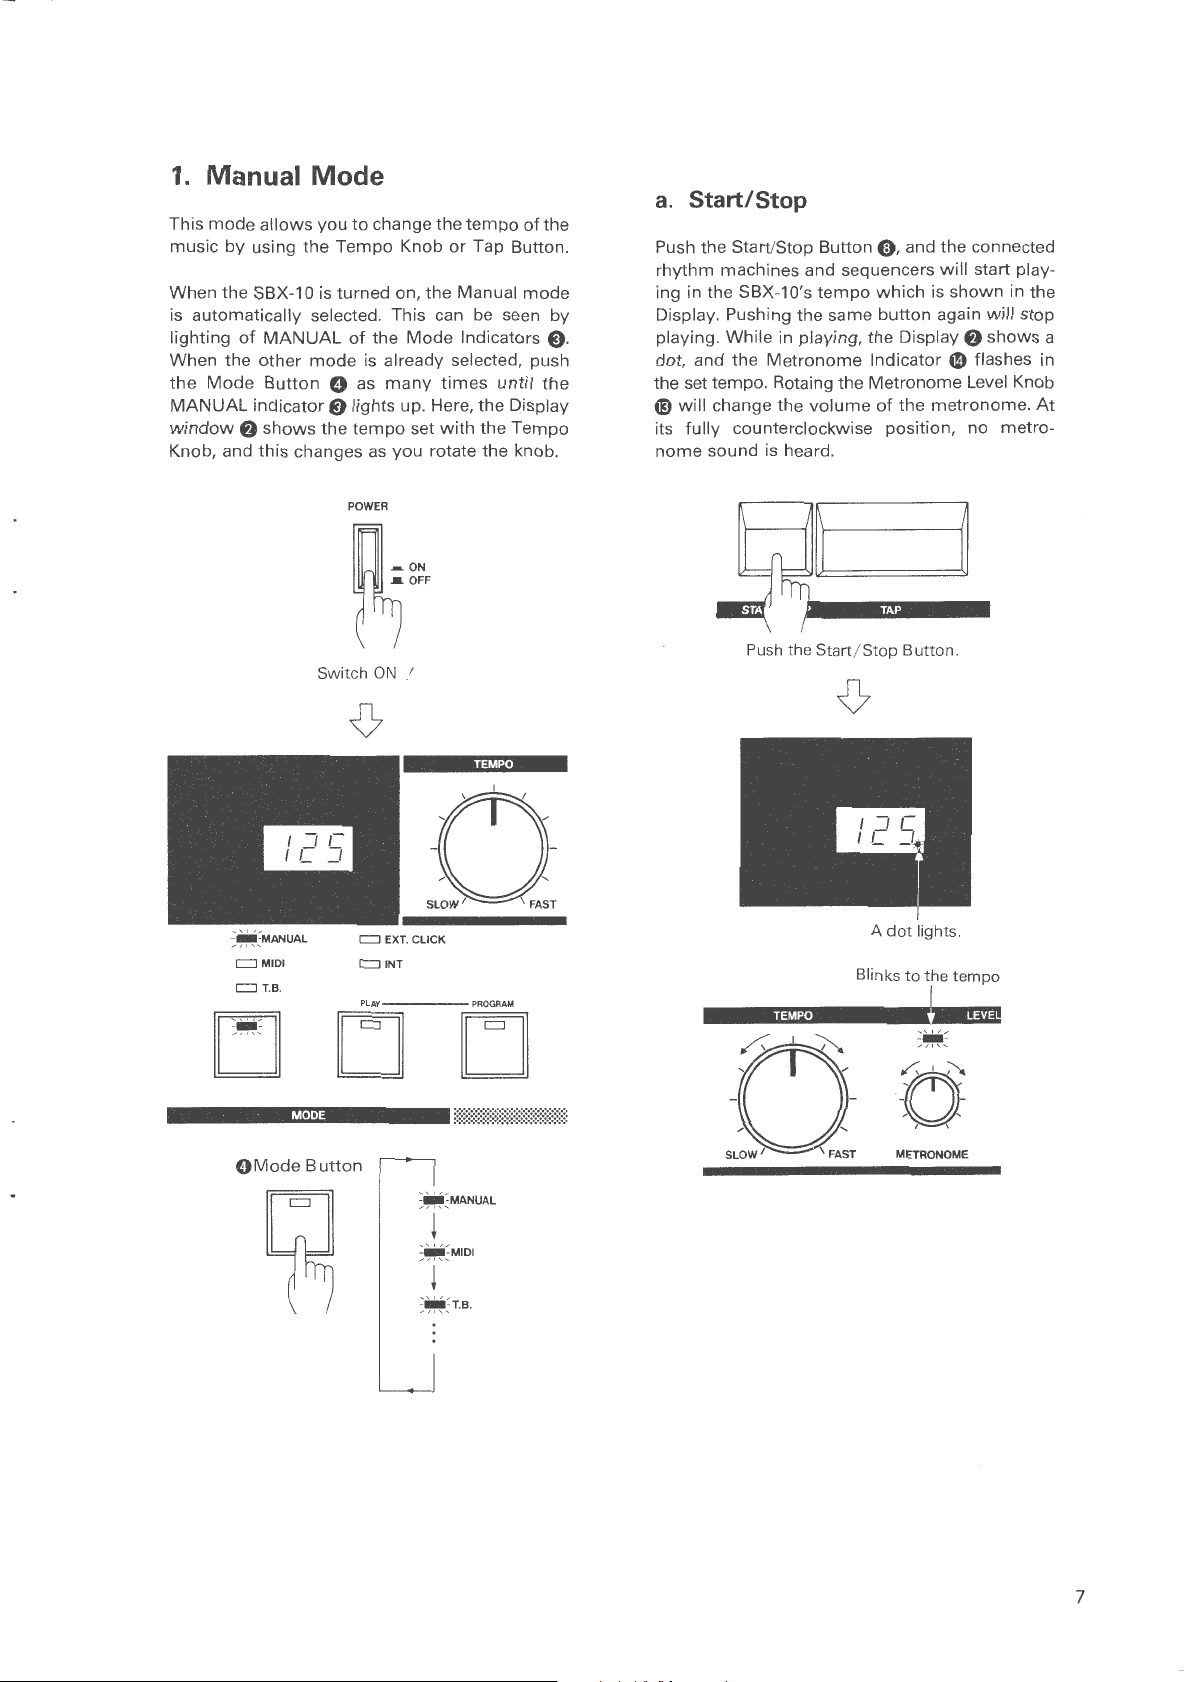
1.
Manual Mode
This
mode
allows
you
to
music
by
using
the
Tempo
the
of
Mode
f)
SBX-10 is
MANUAL
other
Button
indicator
shows
When
is
automatically
lighting
When the
the
MANUAL
window
Knob, and this changes as
turned
selected. This can be seen
of
the
mode
is already selected, push
O as
8 lights up. Here,
the
tempo
POWER
Switch
change the
Knob
or
on,
the
Mode
many
times
set
with
you
rotate
ON
I
tempo
of
the
Tap Button.
Manual
Indicators E).
the
the
the
mode
until
Display
Tempo
knob.
the
by
a.
Start/Stop
Push the Start/Stop Button
rhythm
ing in the SBX-10's
Display. Pushing
playing.
dot, and the
the set tempo. Rotaing the
4i)
its
nome
machines and sequencers
tempo
the
same
While
in playing, the Display
Metronome
will
change the
fully
counterclockwise position, no
sound is heard.
Push
volume
the
Start /
Ci)
, and the connected
will
start play-
which
is
shown
button
again
Indicator G) flashes in
Metronome
of
the
metronome.
Stop
Button.
in the
will
stop
f)
shows
Level Knob
metro-
a
At
::~~MANUAL
c:J
MIDI
c:J
T.B.
LJ
OM
ode
LJ
MODE
Button
=
c:J
c:JINT
PLAY
- -
0
SLOW
EXT.
CLICK
::~~
MANUAL
~~~
TEMPO
1
1
\FAST
PROGRAM
LJ
T.B.
....
/
A
dot
light
s.
Blinks
to
the
tempo
TEMPO f LEVE
I
;-...,.
_
'rr'\
-D
AO'
/
SLOW
A_-
O
....
1
\FAST
METRONOME
_
,LJ,
'
7
Page 8

b.
Tempo Setting
1)
Tempo Setting with the Tempo Knob
By rotating
(from 20
set
tempo.
to
the
250)
Tempo
you
Knob
like. The Display
Q,
set
the
tempo
shows
2) Tempo Setting with the Tap Button
While
the
music
in
the
tempo
tempo
tempo.
ping. The
and
of
Now,
J = 20
to
the
one quicker than 250
you
the
tapping
the
250 is
tapping
is playing,
music
the
slower
tap the
like. The SBX-10 reads
and
the
will
tempo
that
than 20
Tap Button O
Display
play in
will
that
can be set
will
be
be read as 250.
shows
tempo.
by
ignored
the
the
the
tap-
c.
Remote Control
By using
stopped
to
the
DP-2,
with
the
the
Start/Stop Remote
IN
the
system
pedal. Connect
Jack@.
REMOTE CLICK IN
can be started
the
pedal switch
or
Pedal
Switch
DP-2
(Optional)
8
Page 9

2.
Internal Mode
The Internal
ming
will
be
tempo
methods
using
the
ing
the
of
each
a.
Tempo Programming (by tapping
To
program a tempo
Button
nal click.
OPERATION
<D
Press
ton
mode
allows
of
the
entire
music
automatically
throughout.
for
tempo
Tap
Button
basic
tempo
. The followi11g are
method.
O in
the
tempo
the
Play Button 0 and the Program But-
O
at a time
.
PLAY----
the
tempo
. Therefore,
played in the
There are
programming;
and
the
other
for
each beat,
you
like
or
PROGRAM
programmed
two
one
is
by
the
tap the
use
program-
the
music
different
is
modify-
details
Tap
the
exter-
by
in
real time)
When
feeding the external click
Click
In
Jack
ca.
When
programming
Button
Q,
do
ca
on
Jack
the
@ When you have completed the
gramming, push
the
not
connect
rear panel.
the
sound,
tempo
Play Button 0 twice .
by
anything
use the
using
the
to
the Click In
tempo
Tap
pro-
The
indicator
up
showing
programming.
* Set
the
both
Click
of
that
the
In
Level Knob
@ To program a
Tap Button
the click sound.
Tempo
not
the
the
sume
new
data.
can be set
tap the
SBX-10
tempo
tapping,
tempo
O
Tap
will
programming.
the
data,
Press
both
buttons
the
Program
the
SBX-10 is ready
Metronome
tempo
in
the tempo you like or feed
from J =20
Button
regard
SBX-10
clearing
Button O
Level Knob © and
4D
to
the
for each beat, tap the
to
250.
for
more
than
that
you
have
Therefore,
will
regard
the
previous
will
light
for
tempo
maximum.
If
you
do
3 seconds,
completed
if
you
re-
this
as
the
tempo
The
INT
of
the
indicator 0 will
r::=J
EXT. CLICK
~
~~NT
PLAY---
light
up.
9
Page 10

b.
Tempo Programming (by modifying the basic tempo)
This
method
ming
may
want
(ritardando)
music.
of
may
be adopted
the
music
in a consistent
to
quicken (accelerando)
the
basic
tempo
for
in
tempo
the
tempo
or
middle
program-
. You
slower
of
the
First, enter
the
needed.
*
When
( 1022 beats)
tempo
music
that
pushing
(See page
OPERATION
CD
Press
ton
The
showing
gramming.
* Set
Level
0
By
tempo.
the
basic
tempo
into
SBX-
10.
Then change
this
method
programming,
cannot
you
have
the
11
the Play Button 0 and the Program But-
O at a
indicator
of
that
the
the
Metronome
Knob4Dto
rotating the Tempo Knob, set the basic
is taken,
of
the
be
programmed.
to
stop
Start/Stop Button).
C. Start/Stop)
time
.
=EXT.CLICK
=INT
PLAY----
the
Program Button O lights up
SBX-10 is ready
the
the
the
SBX-10 is used
therefore,
the
music
PROGRAM
Knob © and
maximum.
the
memory
tempo
entire
memory
for
the
end
This means
manually
for
tempo
the
Click
of
where
the
of
the
(by
pro-
In
® Hold the Program Button O
seconds.
down
-00''
~
SLOW
=MANUAL
c::J
MIDI
c::J
T.B.
LJ
The Display
When
ing
of
Now,
wherever
© Make sure that the indicator of
Button
Button«!).
window
the
programming
the
Display stops.
you
can quicken
you
like as
O
is
c:::JEXT.CLICK
=INT
PLAY----
LJ
Hold the
for
3 seconds
flashes.
is
completed,
or
slower
follows.
lighted and push the Start/Stop
for about 3
TEMPO
1
PROGRAM
Button
the
the
tempo
the
Program
'_
'
\FAST
down
flash-
10
The connected
start playing in
grammed.
the
Metronome
metronome
of
the
Program Button O flashes.
rhythm
the
Here,
the
Indicator does
sound is heard. Instead,
machines
basic
Display
and sequencers
tempo
f)
you
shows
not
have proa dot,
flash and
the
indicator
but
no
Page 11
®
As
you listen to the music, change the tempo
the
by tapping
nal click sound.
When
programming
Button
f),
do
Jack
Ci
on
While
in above operation,
machines and sequencers stop playing, and
indicator
* The
When
Program Button (l) lights up.
Now,
change
the
steps © and @.
tempo
will
tempo
the
the
original
of
be
for
tempo
tempo
the
Tap Button O or feeding exter-
the
tempo
by
using
not
connect
the
rear panel.
the Program Button O goes out.
of
the
automatically
the
rest
programming
has been modified. If
tempo
tempo
last
of
again,
from
anything
the
tapping
programmed
the
for
ritardando, repeat
to
connected
or
music
.
is completed,
instance
the
click sound
you
to
return
the
Click
rhythm
as
wish
Tap
In
the
the
the
to
to
the
c.
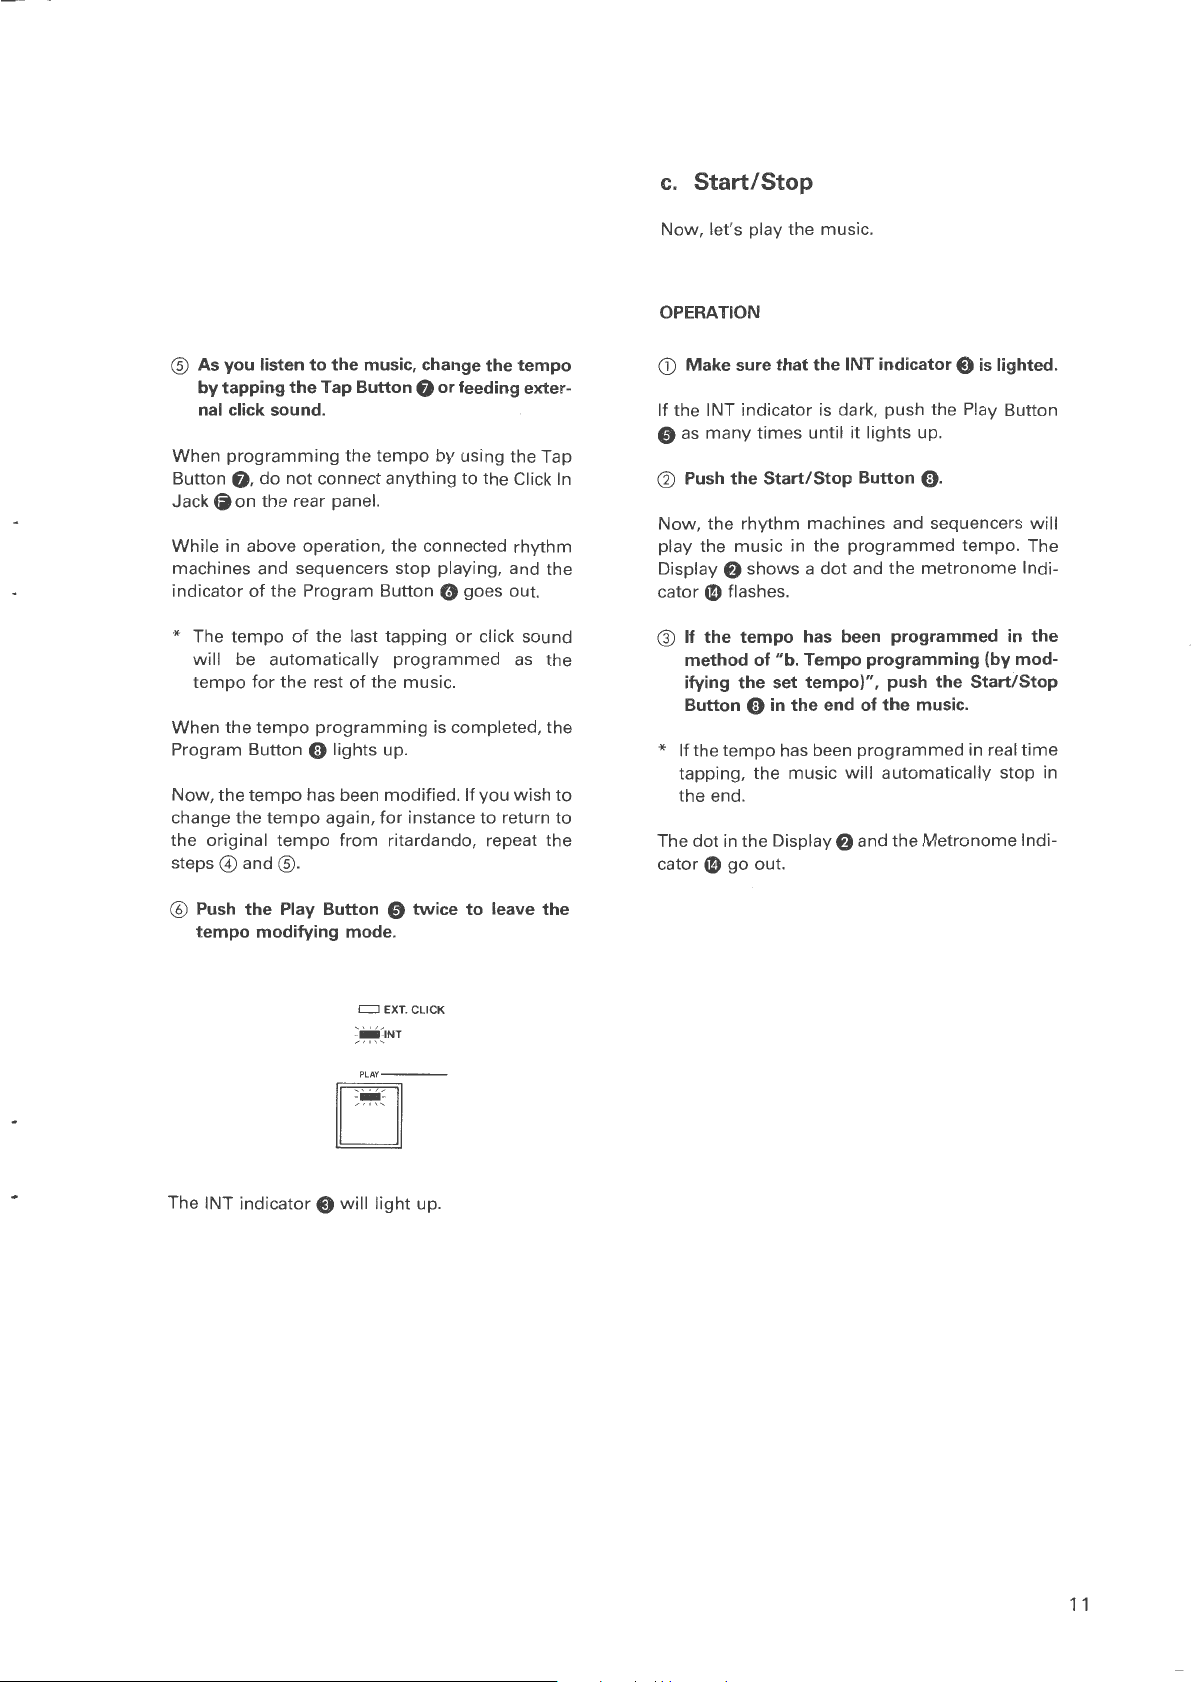
Start/Stop
Now,
let's play the music.
OPERATION
CD
Make
the
If
0 as
@
Push
Now,
play
the
Display
cator
sure that the INT indicator e
INT
indicator
many
the
the
rhythm
music
8
shows a dot
4D
flashes.
times
is dark, push the Play Button
until
it
lights
Start/Stop
in
Button (l).
machines and sequencers
the
programmed
and
the
up.
is
tempo.
metronome
® If the tempo has been programmed
method of "b. Tempo programming (by modifying the set tempo)", push the Start/Stop
(l)
in
Button
* If
tapping,
the
The
cator
the
dot
4D
tempo
end.
in
go
the end of
has been
the
music
the
Display 8 and
out
.
the
music.
programmed
will
automatically
the
Metronome
in real
lighted.
will
The
Indi-
in
the
time
stop
in
Indi-
@
Push
the Play Button 0 twice to leave the
tempo modifying mode.
The INT
indicator
C)
=EXT
. CLICK
~~:
INT
PLAY---
~
LJ
will
light
up.
11
Page 12

[}]
Sync'ing the sequencers and rhythm machines featuring
different Sync Modes
Start
the
The
SBX-10
machines
Sync
Modes
pending
the
SBX-10
Sync
or
works
as a
converter
and
sequencers
(MIDI, DIN SYNC, TIME BASE). De-
on
the
Sync
should
Time
Base
mode
be
turned
mode.
which
of
feature
the
to
for
master
the
the
rhythm
different
device,
MIDI, DIN
master
nected
master. A dot
that
nome
ter
When
devices
to
the
master
Indicator m blinks
device.
the
stop
NOTE
When
the
master
done
with
ceived
(See
except
page
18
the
SBX-10
appears
device
master
playing,
the
SBX-1
for
.)
device,
in
is
device
too.
device
O's
"Ignoring
and
will
the
now
in
stops
is
front
other
start
sync'ing
Display
playing.
the
tempo
playing,
running,
panel can be re-
MIDI
devices
no
Messages".
to
f)
to
show
The
Metro-
of
the
mas-
the
other
operation
con-
the
• Connection
J
Device
with
DIN Sync
IN
Device
Time Base IN
Device
Time Base
'""'"~'"'"'~"'~'"'"'
COMP\J11HGDl\IUl'\JRSUANl!OSIJ8Pt<lll.J
(IPARll!i!JfCCRll(S
0 0 0
j_T
J
J
DIN SYNC
OUT
,
~
Device
with
DIN Sync
IN
EXT. CLOCK
with
~
EXT. CLOCK
with
i-1N
IN
0
METRONOME OUT 2
j_
I
I
I
I
I
I
I
I
I
I
I
I
Device with
DIN Sync
Out
(Master)
0 0 0 0
0
OUT 1
--TIME
Device
MIDI
Device w i
IN
Time Base
OUT
i(Master)
'
1--
_J
I
I
I
I
I
REMOTE
'"
BASE--
0 0
OUT
MIDI
OUT
,
with
IN
I
th
CLJCKIN___J
0
l
I
I
I
L - - -
Device
MIDI IN
~
MIC LINE
DC
IN
POWER
®iD-o·
- - - - - - I
l
with
.aOFF
..l
Device
MID
I
I
I
I
I
I
I
I
I
I OUT
(Master)
wit
h
12
* Choose only one master device.
Page 13

r
1.
MIDI Mode
When
a MIDI device is used as a master,
SBX-10
Button
C)
shows"
to
the
MIDI
Oas
many
lights
up. Also, make sure
2
L/"
.
Device
MIDI OUT
(Master)
times
with
mode
MIDI OUT
by
until
pushing
the
MIDI
that
the
the
indicator
Display
....
turn
Mode
the
f)
MIDI IN
SBX-10
....
I
1
Slave Device
Slave Device
c:::J MANUAL
;~;
MIDI
c:::J
T.B.
2.
DIN SYNC Mode
When
the
tem
(Time Base=24).
mode
SYNC
many
times
and
the
Display
DIN Sync OUT
master
Device
device features DIN SYNC sys-
by
pressing
until
the
shows
with
(Master)
turn
the
SBX-10
the
Mode
T.B.
indicator
"
?
L/
".
1
DIN SYNC OUT
to
the
Button O
C)
lights
~
DIN SYNC IN
DIN
as
up
SBX-10
~
LJ
n
l
Slave Device
Slave Device
NOTE
* Keep
the
Time
Base
In
Jack
@free
* The slave devices cannot receive
of
the
DIN SYNC master.
.
"Continue"
c:::J MANUAL
c:::J MIDI
;~~
TB
~
LJ
13
Page 14

3.
TIME
When
48, 96
Bass
many
and
base
the
time
the
master
or
120 system,
mode
times
the
Display
number
base
BASE
by
pushing
until
L/
number
TIME BASE
Device
(Master)
MODE
device features the
turn
the
SBX-10
the
Mode
the
T.B.
indicator
f)
shows
the
appropriate
8 , q b or / 2 0 (depending on
of
the
master device).
TIME BASE OUT
Time
Base
to
the
Time
Button O as
e lights up
time
~T
IME
BASE IN
SBX-10
Slave Device
J
~
~
1
Slave Device
CJ
MANUAL
c::J MIDI
:~
fB.
~
LJ
14
Page 15

II]
MTR Mode
The MTR
sequencers
corder.
mode
to
synchronize
• Connection
allows
the
rhythm
to
Time Base IN
Device
Time Base IN
the
Device
machines and
multi-track re-
with
EXT. CLOCK IN
with
EXT. CLOCK IN
Program
and record
track
the multi-track recorder. The SBX-10 reads
corded click,
machines and sequencers
track recorder.
of
LINE
the
tempo
of
the
music
into
the
the
click
of
the
SBX-10
the
multi-track recorder, then playback
allowing
MTR
IN
LINE
the
to
OUT
on
connected
sync
to
the
the
SBX-10,
empty
the
re-
rhythm
multi-
Device
with
DIN Sync
-CIM'l
lt"S WHH
HI[
L.IMIT
CIM'UllNGOlVICEF'URSUA"llOSlel'AAT
OFP>IRI
l
IN
.S
~OF
fCCR\.US
---DIN
OUT OUT
Device
DIN Sync
FOR A CLASS
e J
J
000000
METRONOME OUT 2 OUT 1
SYNC---
•
with
IN
IN
REMOTE CLICK
IN
___J
--ooo
OUT
Device
with
MIDI IN
*
When
the
the
Click
INT position.
Device
MIDI IN
a multi-track recorder is connected
In
Jack
Ci,
1
~
~a·;~
with
to
set
the
Click
In
Switch©
to
15
Page 16

1.
Tempo programming with the Tap Button and making a Click Track
Program
by
time.
of
track recorder.
CD
The Program
tempo
the
tapping
Meanwhile,
the
SBX-10
Press
the
e
at
ton
programming
the
tempo
of
the
music
into
the
SBX-10
Tap Button beat
record
on
Play Button 0 and the Program But-
the same time.
=EXT.CLICK
=INT
PLAY----
Button(:)
an
empty
lights
is
now
the
by
beat in real
metronome
track
of
PROGRAM
up
showing
possible.
the
output
multi-
that
the
METRONOME
OUT
Tempo
not
the
the
sume
new
data.
can be set
tap the
SBX-10
tempo
tapping,
tempo
Tap Button
SBX-10
from
for
will
regard
that
programming.
the
SBX-10
data,
clearing
.J
=20
to
more
than 3 seconds,
you
have
Therefore,
will
regard
the
previous
250. If
completed
if
this
you
you
as
tempo
© When you have programmed the tempo up
the end of the music, push
;~:EXT.
=INT
PLAY---
the
Play Button
CLICK
do
re-
the
to
9.
@ Set the multi-track recorder
mode.
Set
the
Knob
Metronome
4D
to
the
Knob G) and
maximum
to
the
positions.
@ Program the tempo by tapping
O
in
real
time
ton
If
music
is already recoreded on
multi-track recorder,
music
up
to
the
Tap Button,
sound
track recorder. The appropriate level
is
"-3"
which
to "O"
the
you
dB
.
tap the
end
of
SBX-10 generates
should
on
the
the
record
VU
Tap Button
music.
meter
other
onto
of
NOTE
* Do
not
touch
the
Start/Stop Button
*
When
tapping
programming,
the
Tap Button O
keep
the
Click
In
the recording
Click
In
Level
the
Tap But-
track
of
to
As
you
tap the
metronome
the
multi-
for
recording
the
recorder.
Ci).
for
tempo
Jack
4i
free.
the
that
~
LJ
The EXT. CLICK
® Stop the multi-track recorder and rewind the
tape up to the beginning of
indicator
E)
lights up.
the
music.
16
Page 17

2.
Playing the System
Now
that
the
tempo
track making are completed, you can sync the
rhythm
track recorder.
OPERATION
machines and sequencers
programming
and the click
to
the
multi-
CLICKIN
Slave Device
SBX-10
~---~
Slave Device
CD
Make
sure
that
the EXT. CLICK indicator 8
lighted, set
maximum, and push the Start/Stop Button
The Display
f)
the
Click
shows
In
Level Knob G
a dot.
to
the
fi).
@ Start the multi-track recorder a little before
the music begins.
3.
Tempo Programming using click
Cowbell etc.
OPERATION
CD
Through the Click
To feed click
set the Click In switch
when
corder, set it
sound
connecting an
to
In
Jack
directly
©to
amplifier
the
LINE position.
O.
feed
click
sounds.
from
the
microphone,
the MIC position.
or
multi-track re-
And
is
When the first beat
corded is fed into the SBX-10, the connected
rhythm
When the music ends, the
goes out.
@ Using
Click
Indicator
machines and sequencers start playing.
the
input level
blink
in
the tempo of the click sounds.
of
the click
Click In Level Knob
so
that
the
sound
dot
in the Display
Click Indicator
you have re-
$.
adjust the
f)
will
f)
sound
Click
When you have completed
tempo
using the click signal, make
and play it back in exactly
"1"
and
"2".
programming
the
the
same
the
click track
method
as
17
Page 18

Additional Explanation
1.
TIME
The TIME BASE OUT jacks
send
120 pulses per J can be selected
Base Switch.
2.
Ignoring MIDI Messages
When
other
below,
MIDI signal's oscillation, etc. This happens be-
cause
MIDI IN are sent
same shape.
BASE
out
the
pulse waves
the
SBX-10 is setup
devices in a ring
you
may
be annoyed
some
of
the
MIDI signals fed
from
on
the rear panel
of 0 to
with a computer
junction
the MIDI OUT in exactly
by
troubles
5V. 48, 96
with
the
way
as
through
Time
shown
such as
and
the
the
or
TIME BASE
OUT1
* Change the positions
on the
time
base
of
To avoid such troubles,
tion
of
ignoring
all MIDI messages.
OUT2
of
this
switch
the
connected device.
the
SBX-10 has
depending
the
func-
l
'
SBX-10
OPERATION
While
holding
both
the
Gata
time
Play Button 0 and
light
up. This
ignored.
While
holding
the
Start/Stop Button 0 and
. The indicators
shows
the
button
1
Computer
Mode
Button O
of
the
the
Program Button Q
that
all MIDI messages are
lndi
c~ators
MODE
down
down,
the
Tap Button
Mode
Button
1]1:Jight
up PROGRAM
------------------
l
press
0,
will
__ :
....
~'
'
,.
...
J~
~
'rr;_
\
Press
h_
r
both
1
MIDI
..
buttons
Keyboard
~
l
1
MIDI
Module
Sound
...
18
Page 19

To leave
Button
SBX-1 O is
this
Ignore Messege
while
holding
then
returned
receives MIDI messages.
MODE
While
holding
3.
Battery Backup
mode,
push
the
Play Button 0-The
to
the usual
the
mode
button
the
down
Tap
that
Press
the
button
The SBX-10 features
retains
turned
which
on
was
Roland dealer
the
off. This is
is
to
how
many
purchased.
tempo
last
more
months
do
Also,
the
battery
data in
fully
than 5 years, but
backup system
memory
supported
even wheri
by a battery
it
depends
had been passed before it
please have
your
job.
that
local
19
Page 20

~
SPECIFICATIONS
Memory Capacity:
Playing Time (when the memory
MM
= 120): Approx. 8 minutes
Buttons and Switches
Mode
Button
Play Button
Program Button
Start/Stop Button
Tap Button
Time
Base Out Switch 1
Time Base Out Switch 2
Click In Level Knob
Metronome
Tempo Knob
Click
Power Switch
Display and Indicators
Mode
Metronome
Click Indicator
Display
Level Knob
In
Switch (MIC/LINE)
Indicators ( x
Indicator
(7
segments, 3 figures)
Max
5)
. 1022
(48
/96/120)
(48
/96/120)
is
full used,
Connectors
Click
In
Jack
-20dBm/Mic:
(Line:
Metronome
Time
Time
Time
MIDI
MIDI OUT Connector
DIN Sync
DIN Sync Out Connector
AC Adaptor Jack
Start/Stop Remote Jack
Dimensions: 226(W) x 225(D) x
Out Jack
Base In Jack
Base Out Jack 1 (5V)
Base Out Jack 2 (5V)
IN
Connector
In
Connector
87/a" x 87/a"
Weight: 1.5
Accessories
MIDI/SYNC Cable
Connection Cord LP-25
AC Adapto r (9V, specific
kg
/3 lb
(0
(1
to
50
-5dBm,
Vp-p Max)
5V)
x 23/a"
oz
for
SBX-10)
10k!1)
61
(H)
mm
20
Page 21

SYNC BOX/CONVERTER
Basic
Channel
Mode
Note
Number
Velocity
After
Touch
Pitch Bender
SBX-10
Function
Default
Changed
Default
Messaged
Altered
True
Note
Note
Key's
Ch's
.....
voice
ON
OFF
0 -121
.....
.
MIDI
Transmitted
MIDI
x x x
x
x x
x
Implementation
OTHER
x x
x x
**************
x
x
**************
x x x
x
x
x
x
x
x
x
x
x
x
x
x
Recognized
MIDI
x x
x x
x x
x
x x
x
x
OTHER
x
x
x
x
x
x
x
x
x
Chart
Remarks
*
*
*
*
*
*
*
*
Control
Change
Program
Change
System
System
Common
System
Real Time
Aux
Messages
Exclusive
True
#
Song Pos
Song Sel
Tune
Clock
Commands
Local ON/ OFF
All Notes OFF
Active Sense
Reset
x
**************
x
x
x
x
x
x
x
x
x
x
0
0
x x
x
x
x
x
x
x
x
x
0
0
x
x
x
x
x
x
x
x
x
x
x
x
x
x
x
x
x
x
x
*
*
*
*
*
* *
**
*
*
*
*
Notes
Mode 1
\11
ode 3
Function
OMNI ON, POLY
OMNI OFF, POLY
Messages received from MIDI IN are directly
*
transmitted to MIDI OUT.
While
in
* *
MIDI
Mode
Mode 4
MIDI MOOE, messages received from
IN
are transmitted to MIDI OUT.
2
OMNI ON,
OMNI OFF,
MONO
MONO
0
x
Yes
No
Page 22

SYNC
BOX/CONVERTER
1.
TRANSMITTED
l.
1
While
MTR m
Status
1111
1000
1111
1010
1111 1011
1111
1100
1 2
While
2.
RECOGNIZED
2.
While
MTR
2. 2 While
Status
1111
1000
l 111 1010
11 I I
1011
1111
1100
3.
TRANSMITTED
3. 1
While
MTR
transmitted
Status
---------
100X
1010
101
1
l l 0X
I I
10
1111
0010
Jill
0011
0110
1111
1111
0000
1111
0111
1111
Jill
3
.2
messages
Status
11 11
1000
1111
1010
1111 1011
1111
1100
No
mode
No
mode
The
While
The
ode
in MIDI
messages
messages
DATA
in
MANUAL,
Second
RECEIVE
in
MANUAL.DIN
in MIDI
Second
DATA
in
MANUAL,
following
Second
---------
0kkk
0kkk
0ccc
0vvv
0vvv
0ppp
0ss
s
in
MIDI
following
described
Second
SBX-10
DIN
SYNC,
TIME
BASE
Thi
rd
Timing
Start
Cont
Stop
mode
are
transmitted.
DATA
to
kkkk
kkkk
pp pp
are
mode
DIN
messages
MIDI
mode
messag
SYNC, TIME
recognized
Thi
SYNC,
OUT .
Thi
0vvv
0vvv
0vvv
0vvv
0ppp
in
Thi
rd
TIME
received
rd
PPPP
es
received
3. l are
rd
BASE
for
BASE
directly transmitt
48,
96,
120, INTE
Description
Clock
inu~
48,96,120,INTERNAL
its
internal
D
escription
Timing
Clock
Start
Continue
Stop
48,
96.
120,
from
MIDI
Description
Note
ON/OFF
Key
pressure
Control
change.Mode
Program
change,Channel
Pit
ch
bender
Song
Position
Song
Select
Tune
request
Exclusive
EOX
System
reset
from
MIDI
Description
Timing
clock
Sta
rt
Continue
Stop
MIDI
RNAL
or
function.
INTERNAL
IN
IN
are
Pointer
in
ed
directly
message
addition
to
or
pressure
MIDI
Implementation
to
OUT.
"
Page 23

en
m
><
I
...
0
~Roland
cx:i
",
""
Cll
w
 Loading...