

Page 1
®ÂØÒňÎ
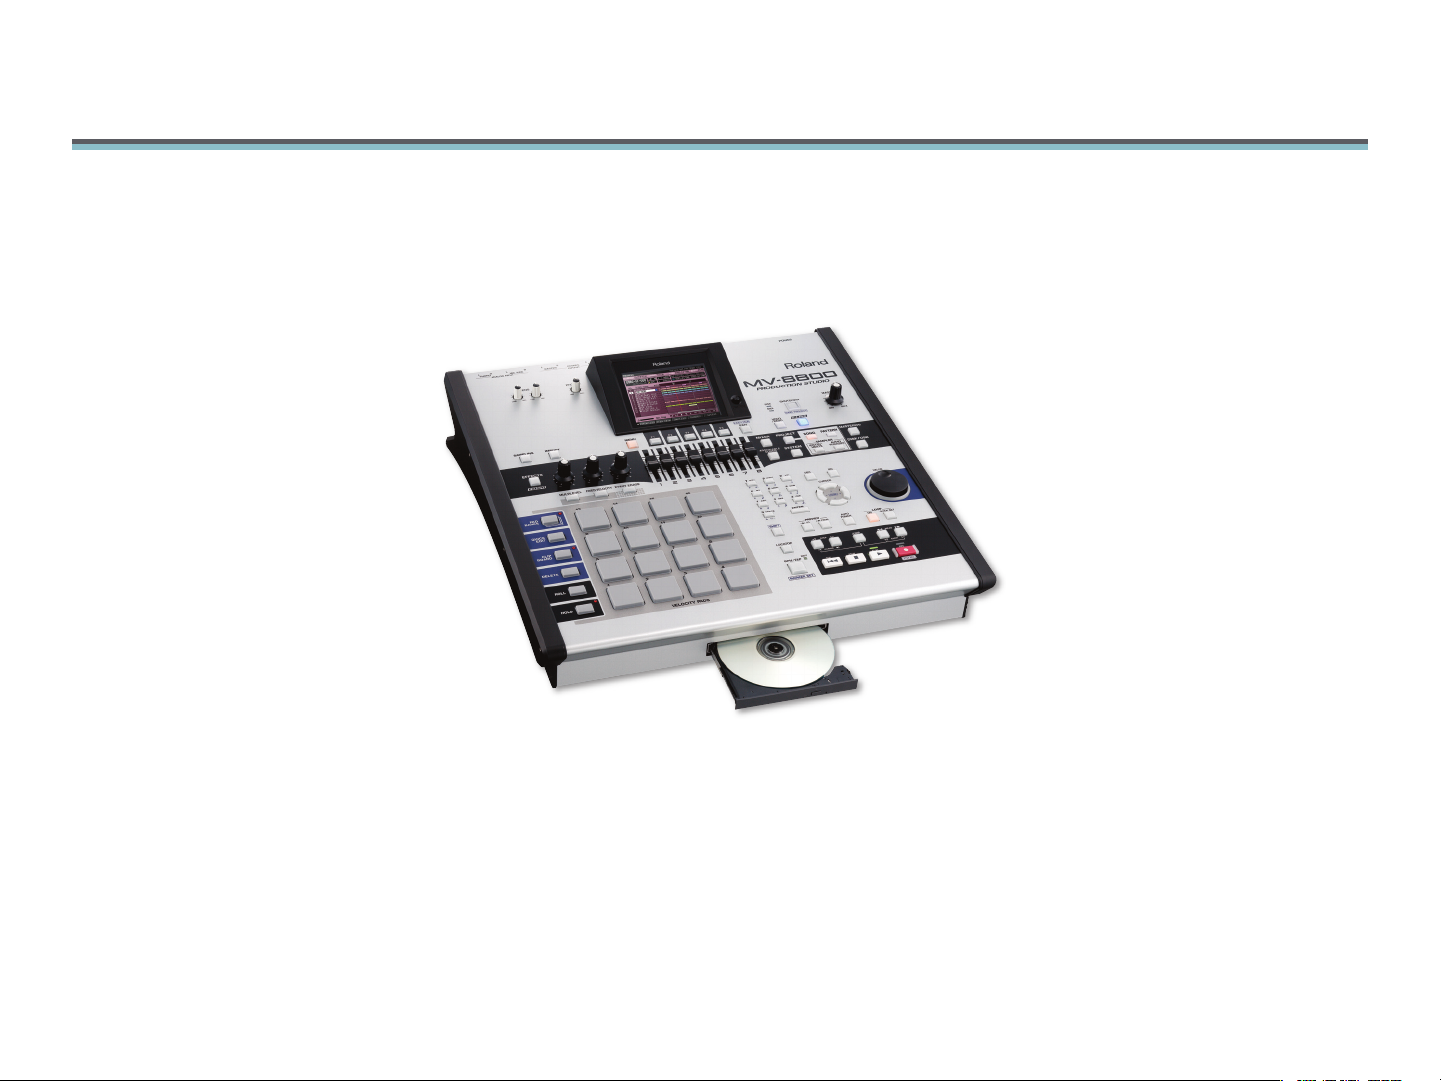
MV-8800 Production Studio
®
Workshop
Auto Chop
© 2007 Roland Corporation U.S.
All rights reserved. No part of this publication may be reproduced in any form without the
written permission of Roland Corporation U.S.
MV8800WS04
Page 2
About the MV-8800 Workshop Series
Roland’s MV-8800 Production Studio is packed with features for making
music. It’s a heavy-duty sampler that can do all sorts of things with sounds
you sample or import. Its sequencer has 136 tracks for MIDI sequencing and
playing back audio, and its set of editing tools is deep. It’s a great box for
performing—using its pads or an attached MIDI keyboard—and, of course,
it can even burn a CD of your final master mix.
Each MV-8800 Workshop Series booklet focuses on one MV-8800 topic, and
is intended as a companion to your MV-8800 Owner’s Manuals.
About This Booklet
Auto Chop carves up a sample containing multiple sounds
to help you quickly make a new patch with each sound on
its own pad. It’s great for throwing together a drum kit patch
from a bunch of sounds in a single sample, or for slicing up a
sampled loop. This booklet explains how to use Auto Chop.
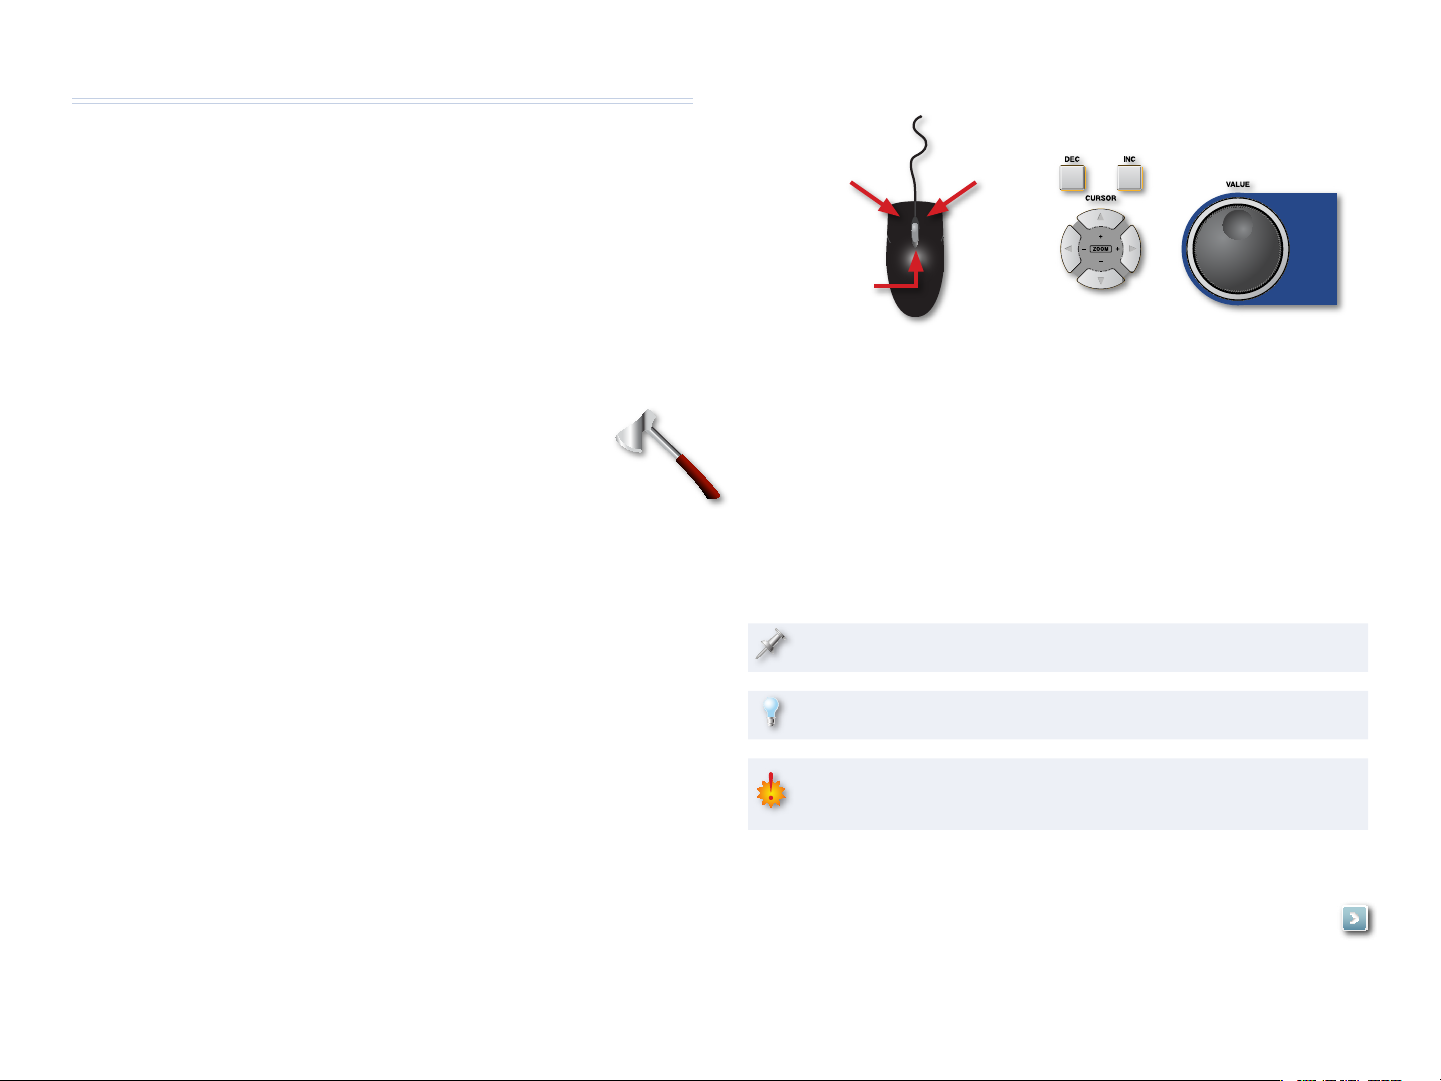
If you’re using a mouse: If you’re using the MV-8800’s buttons:
Left click Right click
Scroll
wheel
You select parameters and objects with
a left click. You change the selected
parameter’s value by turning the scroll
wheel. You can display an object’s menu by
right-clicking the object.
You select parameters and objects with
the 3, 4, 5, and 6 CURSOR buttons.
Change a selected parameter’s value by
turning the VALUE dial or by pressing DEC
and INC.
Understanding the Symbols in This Booklet
The Buttons, the LCD, or a VGA?
On the MV-8800, you can work on the built-in LCD or on an optional color
VGA monitor. You can use the MV-8800’s front-panel controls, or a mouse on
your VGA screen. No matter how you like to work, there’s an easy way to get
things done.
Probably the best idea is to work primarily with a mouse
on a VGA, using the MV-8800’s buttons to quickly get in and out of
MV-8800 screens. The procedures in this booklet typically assume you’ll be
working this way.
If you’re not, don’t worry, because the VGA windows and LCD screens are
essentially the same. There are clickable VGA icons for all of the MV-8800’s
buttons. You can also press an onscreen button by clicking your mouse or
by pressing an F button on the MV-8800. The main difference has to do with
how you deal with settings—or “parameters”—and how you select objects.
Throughout this booklet, you’ll come across information that deserves
special attention—that’s the reason it’s labeled with one of the following
symbols.
A note is something that adds information about the topic at hand.
A tip offers suggestions for using the feature being discussed.
Warnings contain important information that can help you avoid
possible damage to your equipment, your data, or yourself.
Hot Links
Each Workshop booklet is meant to be read in order from
beginning to end. However, if we mention an upcoming
section—and you see this arrow—you can click the arrow to
jump there immediately.
Page 3
Auto Chop
How Auto Chop Works
You can Auto Chop a new sample, an already-existing audio phrase, or an
unused sample from the project SAMPLE folder.
Auto Chop analyzes a sample, looking for places it can slice its sounds into
separate samples, placing a “chop point” marker at each of these locations.
If you like the chop points Auto Chop finds, it slices up the sample for you. If
you don’t, you can change your Auto Chop settings and have it try again.
For the pictures in this booklet, we’re working in a new, blank
project—things may look a little different in your project.
Using Auto Chop
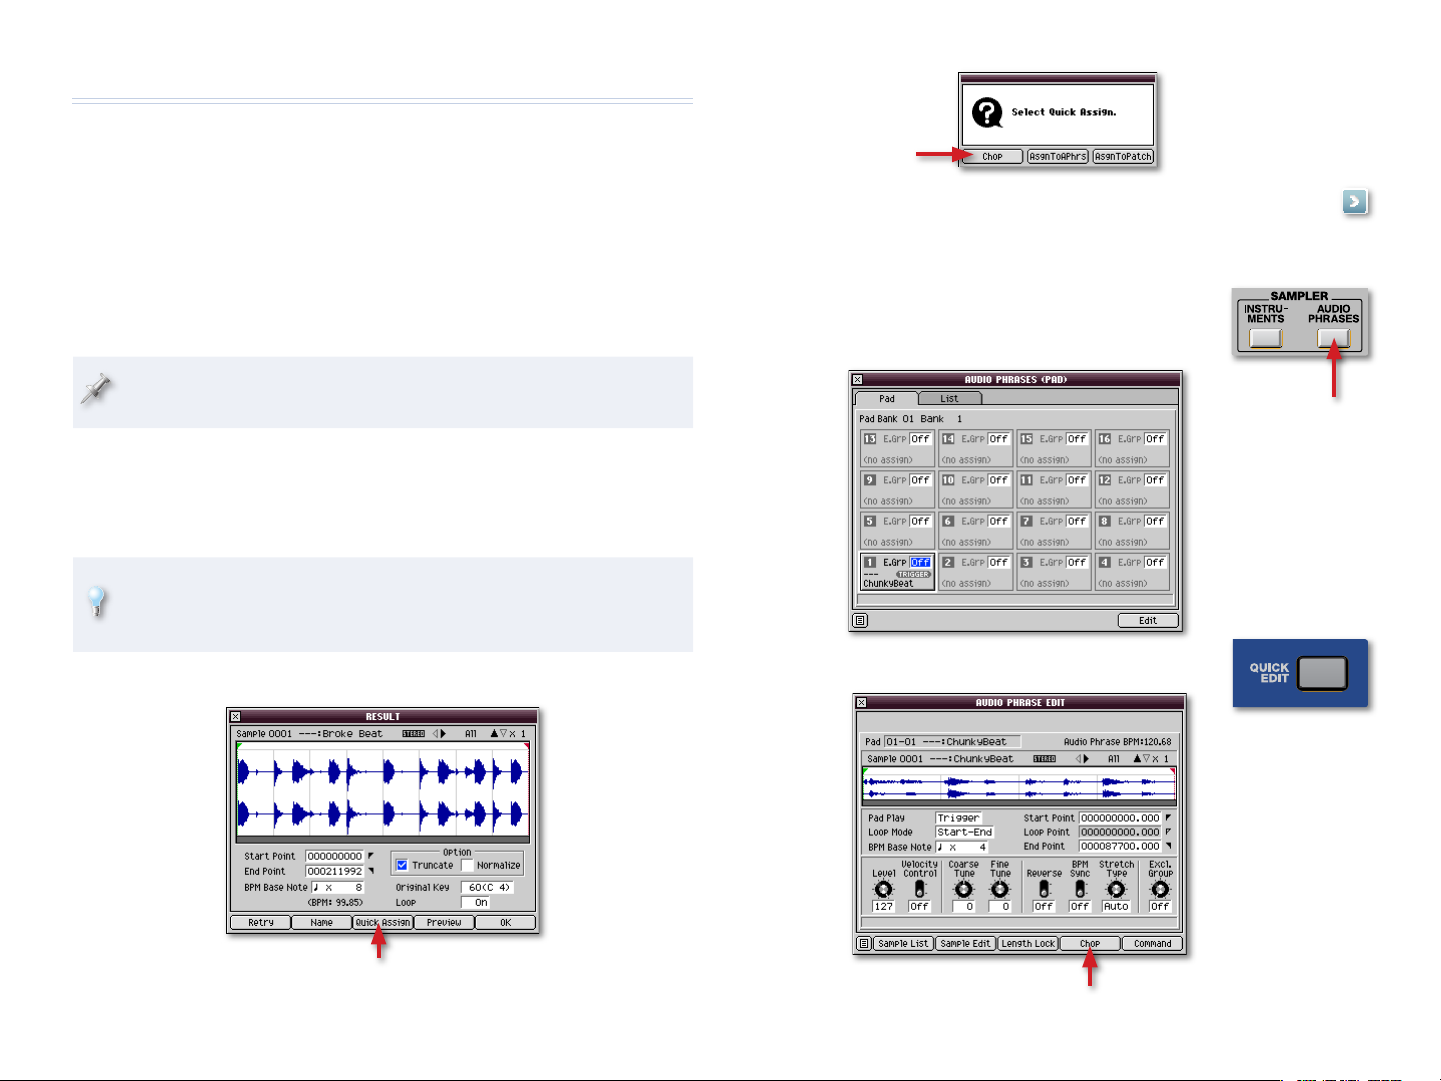
To Auto Chop a New Sample
To learn how to sample, see the MV-8800 Sampling Workshop booklet.
Once you’ve set the Start and End Point parameters in the RESULT
window—and checkmarked Truncate—you’re ready to use Auto Chop.
In the RESULT window, click Quick Assign.
�
Skip ahead to “Chop Shop” on Page 4.
�
To Auto Chop an Existing Audio Phrase
Press AUDIO PHRASES to show the AUDIO
�
PHRASES (PAD) window, and play your audio
phrase.
Press QUICK EDIT, and then click Chop.
�
When you strike a
pad, its E.Grp value
highlights in blue. We
hit Pad 1 here.
In the Select Quick Assign window, click Chop.
�
Page 4

To Auto Chop an Unused Sample
As noted in the MV-8800 Sampling Workshop booklet, you can sample
something and stash it away for later use without assigning it to a patch or
as an audio phrase right away. Samples like this simply go into their project’s
SAMPLE folder.
To grab one of these samples and Auto Chop it:
Go to the PROJECT menu and select Sample Manager—this opens the
�
Sample Manager window.
Select the sample you’d like to chop.
�
Click Quick Assign to display the Select Quick Assign window.
�
In the Select Quick Assign window, click Chop.
�
Proceed to the next section, “Chop Shop.”
�
Chop Shop
You can use the Chop window manually, placing your own chop points
by hand, but Auto Chop is usually much faster and easier.
Click Auto Chop—the AUTO CHOP pop-up appears.
�
The Chop Type parameter sets the method the MV-8800 uses for
analyzing the sample and placing chop points.
Set Chop Type to one of the following values. Choose:
�
Level—so Auto Chop places a chop point each time the sample’s
•
volume reaches a certain level. This is usually the method that
works best.
Beat—so Auto Chop divides the sample at each beat. If you’re
•
working with a loop generated by a drum machine, and its timing
is perfect, Beat may work well.
During sampling or when you’re importing a loop, you can tell the
MV-8800 how many beats are in the sample so it knows where the beats
are now.
Page 5

Divide X—so Auto Chop divides the sample into the desired
•
number of equal-size slices. In a way, this is similar to Beat, but may
work better for you if you’re not used to thinking in beats. Divide X
works well with drum-machine loops.
For each Chop Type, there’s another parameter to set.
�
If your Chop Type is: Set: To:
Level Level 1-6. A setting of 6 places chop
points at only the loudest spots
in the sample. To dig out quieter
sounds, try lower values.
Beat Beat the type of beat you want to use
for placing chop points.
Divide X Times the desired number of evenly
sized slices, from 2-96
When you’re ready, click Execute. Auto Chop presents you with a set of
�
chop points to try out.
The currently
selected slice
In the lower left-hand corner of the window, you can
see the pads that’ll play your slices—they’re pink. The
MV-8800 automatically uses as many pads as the sounds in your sample
require.
Play each slice’s pad to hear its sound and check out the suggested
�
chop point. As you strike a pad, its slice is selected and the display
shows its location in the sample.
If you like the chop points, proceed to Step 9.
�
If you like what you’ve got but want to make a small adjustment to any
�
slice, strike its pad to select the slice, and then adjust its Chop Point
parameter value.
The Chop Point location is shown as 12-digit number. You can
individually select and change any of its digits to move the chop point.
Change digits to the left to move the chop point by larger amounts, or
use digits to the right to move it by smaller amounts.
If you want to try again completely, click Auto Chop, change your
8�
settings as desired, and then click Execute.
Once you’ve got the chop points the way you want them, click
9�
AssgnToPatch—the CHOP QUICK ASSIGN window appears.
The pads that’ll play the
suggested slices
The number of the
currently selected slice
The outlined
pads pads will
play your slices.
If you want to play the slices from an attached MIDI keyboard, the
gray keys show you the notes to play. These keys use the same MIDI
notes as the slices’ pads.
Page 6

Adjust the Part value to select a part—and its patch—for playing your
0�
fresh-sliced samples. If you want:
• the samples to have their own new patch—select a part that’s
playing a patch labeled “Init Patch.” Init Patches are empty, blank
patches. Any Init Patch will do.
• to add the samples to an already-existing patch—select the part that
plays that patch.
Once you add samples to an Init Patch, we strongly recommend you
name the patch—we’ll show you how to do this in a bit—to make sure
you can tell it apart from still-empty patches. If you don’t, things can
get really confusing when you need to find an empty patch later on.
Playing Your Patch
Press the INSTRUMENTS button to display the
�
INSTRUMENTS window.
Select the part that uses your patch.
�
Strike the pads that play your new samples.
�
Normally, you control the volume of a sample by how hard you hit
its pad. To automatically make your samples loud, light the FIXED
VELOCITY button above the pads. By default, this’ll make your sounds
play at full volume.
The Assign To parameter allows you to change the pads that’ll play the
samples. If you’re:
• making a new patch for the samples—there’s no reason to change
the pads that are already selected unless you’d rather play the
samples from some other pads.
• sending the samples into an already-existing patch—make sure
you’re putting the samples on pads that aren’t already in use.
The CHOP QUICK ASSIGN window shows you any pads that are already
being used—they’re pink instead of white.
Strike the first pad you want to use—the MV-8800 automatically
�
assigns the rest of your slices to the pads that follow it. The CHOP QUICK
ASSIGN window outlines the series of pads you’ve selected.
When you hit a pad now you won’t hear anything—the pads don’t play
your samples until you’ve finished assigning them in this window.
You can quickly jump the Assign To value to another pad bank by
pressing the PAD BANKS button, typing the desired bank’s number on the
MV-8800’s numeric keypad, and then pressing PAD BANKS again.
Click Execute.
�
Setting Up the Behavior of a Sample
Repeat the following process for each sample in the patch that needs
setting-up.
Following the instructions in “Playing Your Patch” above, play a sample you
want to set up. Next, press the QUICK EDIT button to display the PARTIAL
EDIT window.
In this window, you set the behavior of the “partial” that plays the sample.
A partial is a group of up to four samples that are played together from
a pad or a range of pads.
Page 7

Finger on the Trigger
One Shot—Turn this parameter on so that the sample plays all the way
•
through when you strike its pad. This makes the pad act like a trigger:
Just hit it, and the sample plays without your having to hold down the
pad.
If you turn on One Shot and the sample still doesn’t play all the way
through, go down to the Amplifier R (for “Release”) parameter at the
bottom of the window and turn it all the way up.
The How Loud and Where Settings
Level—This parameter sets the volume of the partial that plays the
•
sample.
If you’ve got more than one sample in a patch, use this parameter to
set their volumes relative to each other, and set the sample you want
to be the loudest to 127.
Pan—This sets the stereo location of the partial.
•
If you’re working on a patch that contains drum kit sounds, you can pan
their individual partials to sound like a real-world drum kit.
When you record with a patch, its track has its own Pan setting that
shifts the stereo position of all of the samples in the patch to the left
or right.
Cause of Effects
You can also send related samples to the same Aux bus, allowing you
to change all of their volumes at once in the MIXER (AUX/FX/AUDIO
PHRASE/INPUT) window.
If you’ve installed an optional MP8-OP1 audio expansion board, you can
send the sample to a single output jack (Mlt1-8) or to a stereo pair of
output jacks (M1/2-7/8).
DlyCho Send—sets the amount of delay or chorus you want to add.
•
Rev Send—sets the amount of reverb you want to add.
•
Playing Fast and Playing Rolls
Assign Type—This parameter sets what happens when you play fast
•
notes or rolls. If you set it to:
Mult—the sample plays through each time you hit the pad. This
•
setting produces the most natural sound.
Sngl—each time you hit the pad, it cuts off the previous note,
•
creating a more mechanical sound.
Me. No, Me.
Excl Group—If you assign two or more partials to the same exclusive
•
group, they cut off each others’ notes. In drum-kit patches, the open
and closed hi-hat partials are often set to the same exclusive group so
they can’t play at the same time, just like in the real world.
For Further Study
To learn about the window’s remaining advanced parameters and tools, see
the MV-8800 Owner’s Manual.
Output Assign—sets where the sample’s sound goes. You can select:
•
Mix—so the sample is sent into the main mix as it is.
•
Aux1-4—so the sample is sent to the Aux bus that’s feeding the
•
MFX (for “Multi-Effects”) effect processor. This allows you to add
MFX to the sample.
Page 8

Naming and Saving Your Patch
The End
Now that you’ve made your patch, there’s a little housekeeping to do. As we
noted earlier, you should name your patch so you know it’s no longer empty,
and can easily identify it later. We also suggest you save it into your project
patch library.
Naming Your Patch
Press INSTRUMENTS and make sure the patch that contains your slices
�
is selected.
Click Patch Edit to display the PATCH EDIT window.
�
Press MENU and select Patch Name.
�
Click Select to display the EDIT PATCH NAME screen.
�
Name your patch.
�
Press 3 repeatedly until the SELECT CATEGORY window opens, and
�
then assign the patch to a category to make it even easier to find.
Click Select to confirm your choice, and then OK to exit the naming
�
window.
Saving Your Patch
Press INSTRUMENTS and make sure the patch that contains your slices
�
is selected.
Click Library and select a library location for your patch. You can put
�
it anywhere you want. If you’re saving a new patch, pick an Init Patch
location. If you’ve added your samples to an existing patch, select that
patch’s location to update it with the new version.
Press Write Here, and then Yes to finish the operation.
�
Auto Chop is one of the MV-8800’s handiest tools, and we hope you’ve
found this workshop helpful. Keep an eye out for other MV-8800 Workshop
booklets, all available for downloading at www.RolandUS.com.
For the latest MV-8800 updates and support tools, visit the Roland U.S.
Web site at www.RolandUS.com. If you need personal assistance, call
our amazing Product Support team at 323-890-3745.
When you’re done working on the MV-8800, shut it down properly by
pressing SHUTDOWN, and be sure to save your project. If you haven’t,
your work will be lost when your turn off the MV-8800.
8
 Loading...