

Page 1

MainStage Profile Usage Guide
Introduction
By using the MainStage profile, you can use the JUPITER-X/Xm’s
screen, sliders, knobs and buttons to operate MainStage.
NOTE
This document explains procedures for MainStage version 3.4.3.
Menus and other aspects might differ for other versions.
Preparing to Use the Profile
Preparing the JUPITER-X/Xm
Specify the JUPITER-X/Xm’s USB driver.
* Changes to the USB driver settings take effect when you restart
the unit.
1. Press the [MENU] button.
2. Use the [1] knob to select “SYSTEM,” and then press the
[ENTER] button.
You can also make this selection by using the PAGE [ ] [ ]
buttons instead of the [1] knob.
Installing the Profile
Install the MainStage profile on your Mac.
1. Download the profile from the product support page.
Access the following URL and download the profile.
https://www.roland.com/support/
2. Decompress the downloaded ZIP file.
3. Double- click “JUPITERX_MainStageProfile_1.0.0.pkg.”
Installation begins.
4. Proceed with installation as directed by the screen.
5. When the indication “Installation is completed” appears,
click the [Close] button.
Connecting MainStage
1. Use a USB cable to connect the JUPITER-X/Xm to your
Mac.
3. Use the [1] knob to select “USB Driver,” and use the [2]
knob to specify “VENDOR.”
4. Press the [WRITE] button.
A confirmation message appears.
If you decide to cancel, press the [EXIT] button.
5. To execute, press the [ENTER] button.
6. Turn the JUPITER-X/Xm’s power off and then on again.
Installing the USB Driver
Install the USB driver on your Mac.
1. From the product support page, download the
JUPITER-X/Xm Driver.
To obtain the latest USB driver, access the following URL and
download the driver for the model you’re using.
https://www.roland.com/support/
2. Install the driver as directed by the procedure given on
the download page.
2. Start MainStage.
3. In MainStage, open the concert that you want to use.
4. Hold down the JUPITER-X/Xm’s [SHIFT] button and press
the [MENU] button.
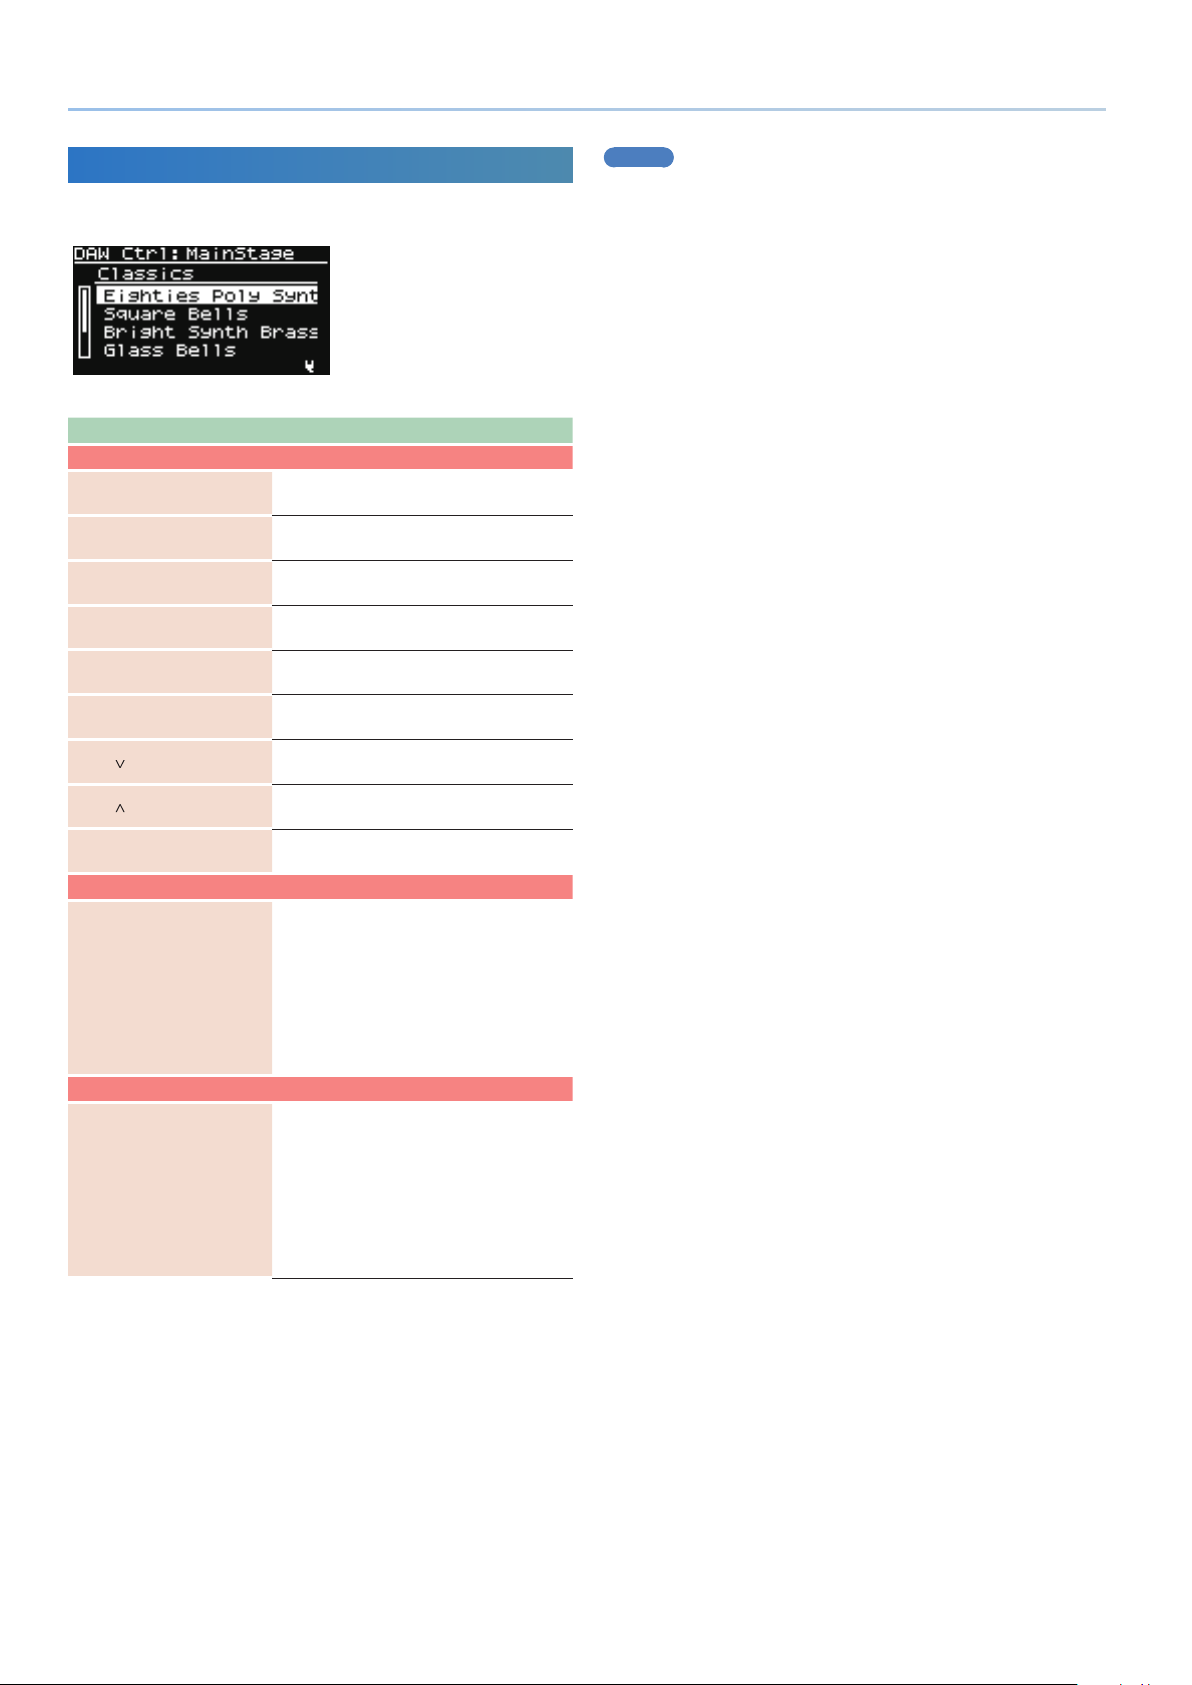
When connection is successful, the DAW CTRL function turns
on, and the JUPITER-X/Xm’s display shows the DAW CTRL screen.
5. When you want to stop using DAW control, press the
[EXIT] button to turn off the DAW CTRL function.
MEMO
When you turn on the DAW CTRL function, there might be cases
in which sound cannot be produced for a short time. This is due
to the processing needed to load the Concert data for MainStage,
and is not a malfunction.
NOTE
If the connection is not correct, a screen like the following appears.
JUPITER-X/Xm
© 2020 Roland Corporation
5
Verify that the USB cable is correctly connected.
5
Check whether the driver is correctly installed.
1
Page 2
MainStage Profile Usage Guide
Controlling MainStage
When the DAW CTRL function is on, you can use the JUPITER-X/Xm’s
sliders, knobs and buttons to operate MainStage.
Controller Function
JUPITER-X/Xm
[SHIFT] + [MENU] button
[EXIT] button
[1] knob
PAGE [>] button
PAGE [<] button
[2] knob
] button
PAGE [
] button
PAGE [
[AMP LEVEL] knob
JUPITER-X
[ENV1 Attack] slider
[ENV1 Decay] slider
[ENV1 Sustain] slider
[ENV1 Release] slider
[ENV2 Attack] slider
[ENV2 Decay] slider
[ENV2 Sustain] slider
[ENV2 Release] slider
JUPITER-Xm
[LFO RATE] knob
[LFO FADE TIME] knob
[LFO DEPTH] knob
[ENV ATTACK] knob
[ENV DELAY] knob
[ENV SUSTAIN] knob
[ENV RELEASE] knob
[ENV DEPTH] knob
Select DAW mode
Switches the MainStage to DAW mode.
Select normal mode
Switches the MainStage to normal mode.
Set Select
Changes the set.
Next Set
Recalls the next set.
Previous Set
Recalls the previous set.
Patch Select
Changes the patch.
Next Patch
Recalls the next patch.
Previous Patch
Recalls the previous patch.
Volume
Adjusts the master volume.
Smart Control
Edit the Smart Control parameters.
Smart Control
Edit the Smart Control parameters.
MEMO
5
Changes made in MainStage to parameter names such as the
Set name, Track name, and Smart Control parameter names
might not be immediately reflected in the JUPITER-X/Xm’s
screen.
5
The Smart Control parameter values change according to
the settings in MainStage. It is not necessarily the case that
operations on the JUPITER-X/Xm will be able to set the
parameter all the way to its minimum value or maximum value.
Make prior settings in MainStage as necessary to reach the
desired range.
5
In case of problem, select the Edit mode “Assignment &
Mappings” tab in the MainStage screen and check if the port is
set as follows.
Assignment: JUPITER-X
0
Pitch Bend, Expression, Sustain, Modulation
Assignment: JUPITER-X DAW CTRL
0
Volume, Smart Knobs
If the MainStage project was already assigned to another
controller, it can happen it takes of setting.
5
When you turn off the DAW CTRL function, the knob indications
return to the function that had been previously selected. You
cannot set these functions when the DAW CTRL function is off.
Mac and MainStage are either registered trademarks or trademarks of Apple Inc.
2
02
 Loading...