

Page 1
スタンドの組み立てかた
組立作業は、必ず2 人で行ってください。
本機を組み立てたり、移動したりする際は、手をはさんだり、足の上に落とさないよう、
十分に注意してください。
本機を移動する際は、水平に持ち上げるようにしてください。
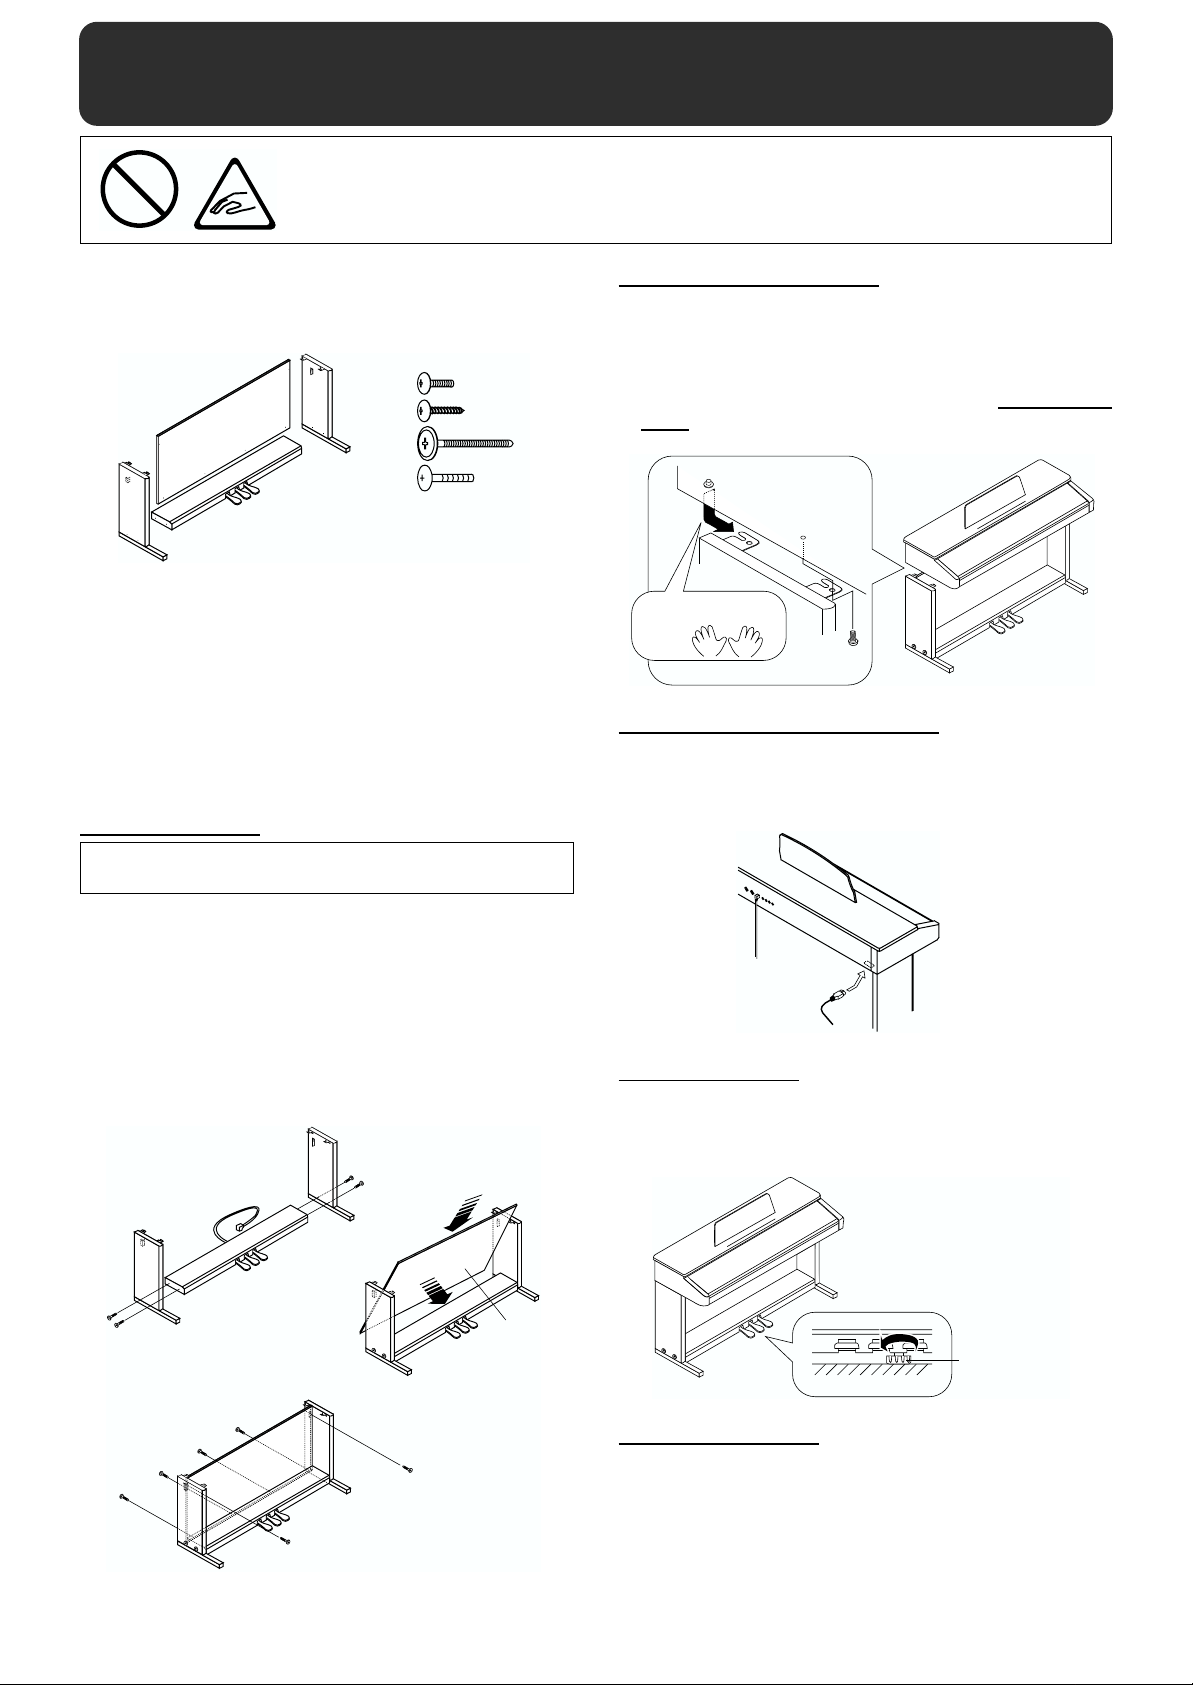
●部品の確認
組み立てる前に、部品が揃っていることを確認してください。
また、プラス・ドライバーをご用意ください。
fig.01
B
D
A
A:サイド・ボード(左) 1:ネジ a(4× 16mm)・・・2 個
B:サイド・ボード(右) 2:ネジ b(4×25mm)・・・4 個
C:ペダル・ボード 3:ネジ c(M6× 60mm)・・・4 個
D:リア・ボード 4:ネジ d(M5 × 20mm)・・・2 個
C
1
2
3
4
a
b
c
d
●組み立て手順
※ 各ネジはしっかり締め付け、安定した水平な場所に設置してくだ
さい。
※ 作業中、ペダル・コードや電源コードをはさまないように注意し
てください。
スタンドの組み立て
最初はネジを緩めに締めて全体を組みます。そして、ゆがみを補
正しながら締め付けるとうまく組み上げることができます。
ピアノとスタンドの組み立て
4.
ピアノの底面にあるネジ(左右各 1本)をサイド・ボードの金具
に合わせ、ピアノを手前に引いてネジを金具に引っかけます。
5.
ネジ d(M5 × 20mm)でピアノとスタンドを固定します(左右
各1本)。
※ ピアノを持つときは、ピアノの前と後をつかみ、手をはさまない
ように注意してください。
fig.03.j
4
5
手を挟まないように
注意!
ネジd
ペダル・コードと電源コードの接続
ペダル・コードを Pedal端子に接続します。
6.
電源コードをピアノの接続端子につなぎ、コンセントに接続し
7.
ます。
fig.04
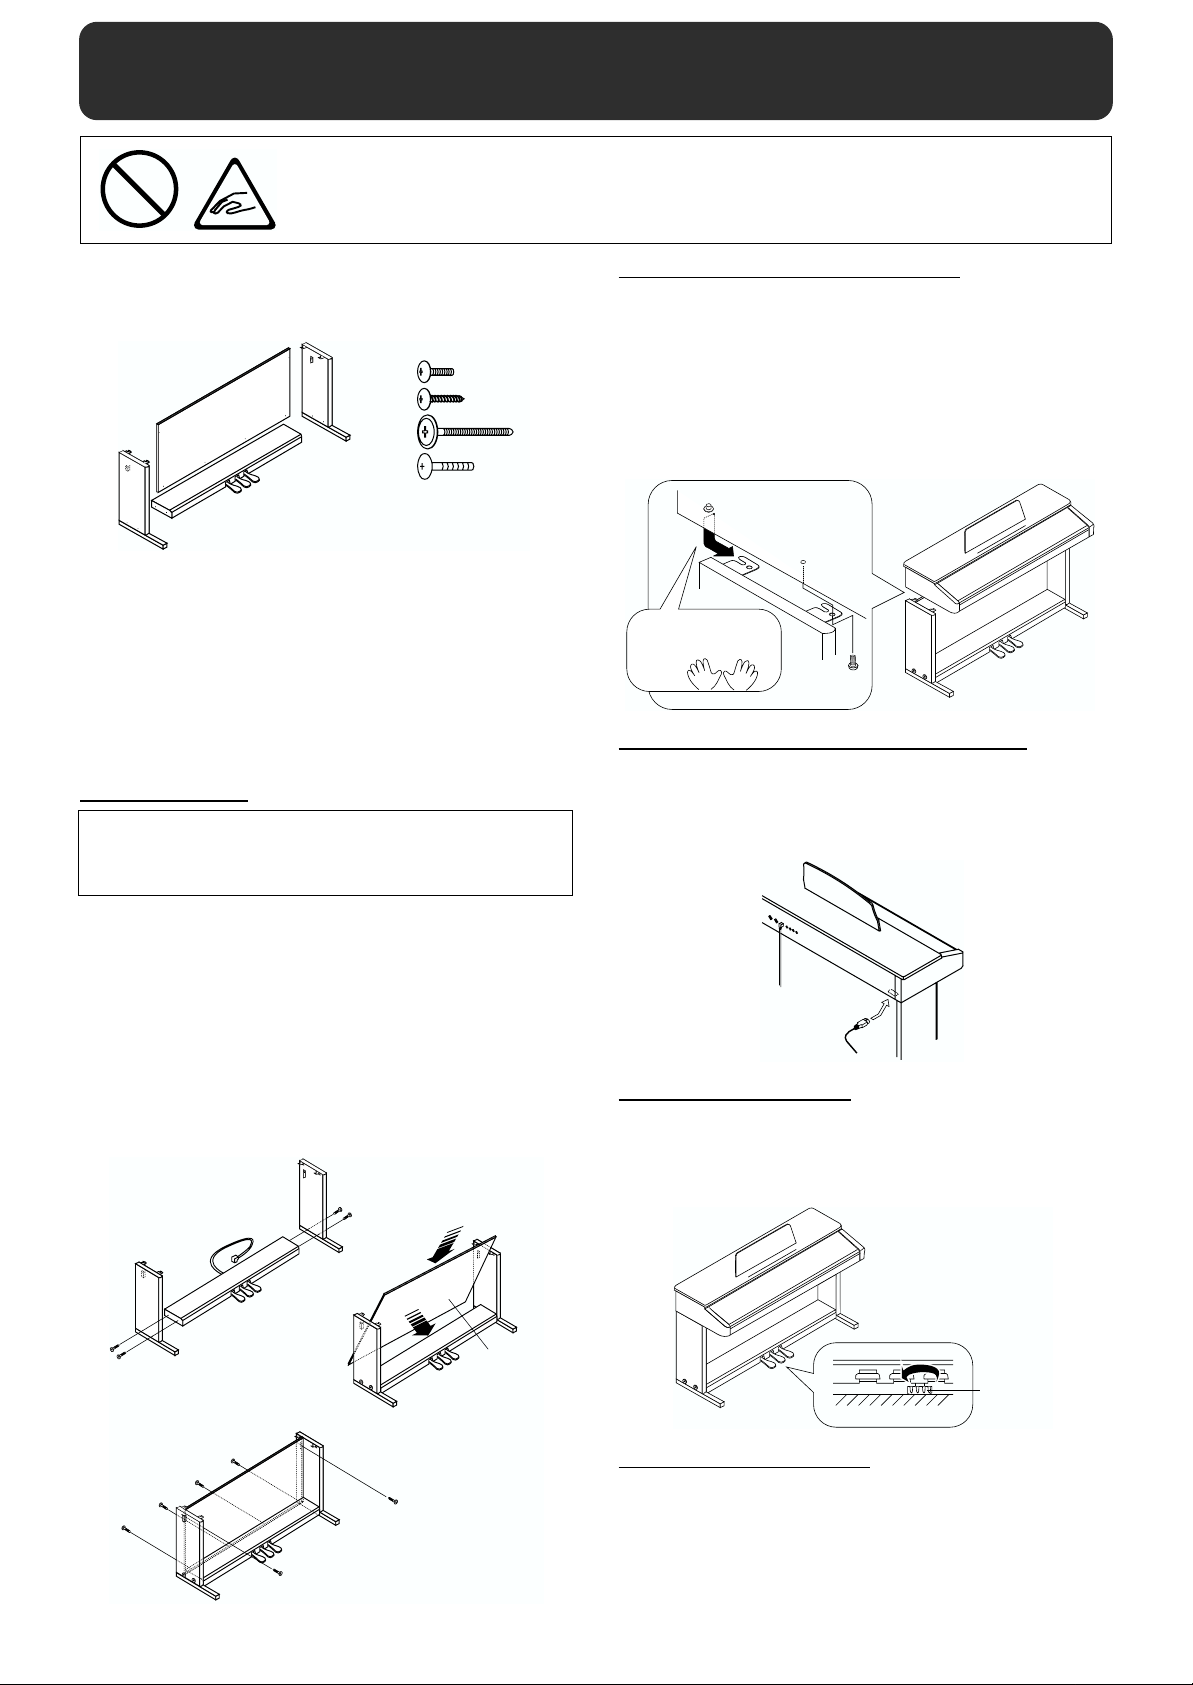
左右のサイド・ボード(金具が内側になるように)をネジ c
1.
(M6 × 60mm)でペダル・ボードに固定します。
リア・ボードの木目面を手前に向けて図のようにセットし、リ
2.
ア・ボードのネジ穴とペダル・ボードのネジ穴の位置を合わせ
ます。
リア・ボードをネジ a(4 × 16mm)でサイド・ボード内側の金
3.
具に前方から固定します。リア・ボードを固定する際はサイ
ド・ボード上部を内側に押さえるようにしてください。さらに、
ネジ b(4 × 25mm)で後方からペダル・ボードに固定します。
fig.02.j
ネジc
1
木目面
2
ネジb
ネジa
6
7
アジャスターの調節
8.
ペダル・ボードの下にあるアジャスターを下げて、床に当るよ
うに調節します。ジュウタンの上などに設置する場合は、床面
を少し強く押しつけるぐらいに下げてください。
fig.05.j
アジャスター
8
本機を移動される場合
電源コードを外し、スタンドのアジャスターを上げます。そして、水
平に持ち上げ、手を挟んだり、足の上に落とさないように注意して運
んでください。
3
KS-307D 40344923 ’00-1-A3-11K
Page 2
STAND ASSEMBLY (KS-307)
Make sure that another person is on hand to help with the assembly and setup.
Be very careful, when you assemble and move the piano, to make sure that you do not
drop it on your hands or feet.
To move the piano, lift it carefully—all the while keeping it level.
Part Check
Before you begin assembling the stand, check that all the parts were
supplied. You will also need to have a Phillips screwdriver.
fig.01
B
D
A
A: Side Board (left) 1: Screw a (4 x 16 mm) x 2
B: Side Board (right) 2: Screw b (4 x 25 mm) x 4
C: Pedal Board 3: Screw c (M6 x 60 mm) x 4
D: Rear Board 4: Screw d (M5 x 20 mm) x 2
C
1
2
3
4
a
b
c
d
Assembly Procedure
* Fasten each screw tightly, then place the stand in a stable and horizontal
place.
* Do not allow the pedal cord or power cable to get twisted or pinched
while assembling the stand.
Stand Assembly
At first, assemble the entire stand in a temporary fashion, without
really tightening the screws. Then, after checking the overall
alignment of the boards (and gently shifting certain parts where
necessary), go around and tightly fasten each of the screws.
Installing the Piano on the Stand
4. Align the protruding screws (one each at right and left) on
the bottom of the piano with the openings in the metal
fittings on the side board, then slide the piano forward until
the screws are held in place.
5. Fasten the piano to the stand with the screw “d” (M5 X 20
mm) (one each for the right and left).
* When handling the piano, firmly grasp it at the front and back. Be
careful, so you do not get your fingers pinched.
fig.03.e
4
5
Please don't get
your fingers pinched
Screw d
Connecting the Pedal and Power Cords
6. Connect the pedal cord to the Pedal jack on the rear of the
piano.
7. Connect the power cord to the power inlet on the piano, then
plug the other end into a wall socket.
fig.04
1. Attach the side boards for the right and left sides to the
pedal board (so that the metal parts face inside) using
screws “c” (M6 x 60 mm).
2. Place the rear board as shown below, with the wood grain
side facing inside, and adjust the screw holes of the rear
board and the pedal board.
3. Attach the rear board to the metal parts on the side boards
from the front using screws “a” (4 x 16 mm). For clamping
the rear board, press each upper portion of both side
boards. Then, fasten it to the pedal board from the back
using screws “b” (4 x 25 mm).
fig.02.e
Screw c
1
Wood grain
side
2
Screw b
Screw a
6
7
Adjusting the Adjuster
8. Lower the adjuster at the bottom of the pedal board (by
rotating it), so that the adjuster touches the floor. If you have
the piano placed on a carpet, lower it until it pushes into the
carpet.
fig.05.e
Adjuster
8
When Moving the Piano
Disconnect the power cord and raise the stand’s adjuster. Then lift the
piano while keeping it level, and move it with care, so that you do not
drop it on your feet, or get your hands caught.
3
KS-307 40344923 ’00-1-A3-11K
 Loading...