

Page 1
®ÂØÒňÎ
™
Workshop
Smart Storage in the Fantom-X
© 2005 Roland Corporation U.S.
All rights reserved. No part of this publication may be reproduced in
any form without the written permission of Roland Corporation U.S.
FXWS07
1
Page 2

About the Fantom-X Workshop Booklets
About This Booklet
The Fantom-X Workshop booklets explain some of the exciting
features of Roland’s Fantom-X family of products. Each
Workshop booklet covers a single topic, and is intended as a
companion to the Fantom-X manuals.
This booklet requires Fantom-X O.S. Version 2 or higher. To
learn about the latest Fantom-X software, visit www.RolandUS.
com, or call Roland U.S. Product Support at 323-890-3745.
Other Fantom-X Workshop Booklets
• The Fantom-X Experience—A quick tour of how the major
Fantom-X creative tools interact.
• The Sounds of the Fantom-X—A tour of the Fantom-X
sounds and Patch mode.
• The Rhythms of the Fantom-X—Exploring the pads, drum
sounds, and rhythms of the Fantom-X.
• The Fantom-X Effects—This booklet helps you get the most
out the powerful effects processing in the Fantom-X.
• Sequencing on the Fantom-X—Learn how to record using
the Fantom-X sounds and its full-featured sequencer.
• Sampling on the Fantom-X—Capture loops, vocals, or any
other sound with the Fantom-X’s built-in sampler.
• Performing with the Fantom-X—Splits, layers, realtime
controllers, and more make the Fantom-X hot onstage.
• Making a CD of Your Fantom-X Music—Learn how to turn
your Fantom-X music into a final audio CD.
• Advanced Fantom-X Sequencing Techniques—Learn how
to use time-based effects, create arpeggios, work with
mastering effects, and record realtime patch tweaks.
• Audio Tracks—This booklet explains how to record live
vocals and instruments in your Fantom-X songs.
The Fantom-X offers a rich assortment of musical tools, from its
patches, rhythm sets and performances, to its songs, samples,
rhythm patterns, arpeggios, and more. To further enhance the
creative flow, the Fantom-X provides a speedy and intuitive
working environment as well as a variety of places in which to
store your work.
As you explore all that the Fantom-X has to offer, you’ll
inevitably want to know how to best preserve and keep track
of your work materials. That’s what this booklet’s all about.
Understanding the Symbols in This Booklet
Throughout this booklet, you’ll come across information that
deserves special attention—that’s the reason it’s labeled with
one of the following symbols.
A note is something that adds information about the topic at hand.
A tip offers suggestions for using the feature being discussed.
Warnings contain important information that can help you avoid possible
damage to your equipment, your data, or yourself.
2
Page 3
Making Memories
This section explains the Fantom-X’s
“memory,” a geeky term for “the place it puts
things.” It’s important to understand how its
memory operates as you develop your own
way of working on the Fantom-X.
Detour—How the Fantom-X Measures Things
The Fantom-X has quite a lot of stuff to hold
onto, from its built-in waveforms on up to
the songs you record. There are:
In the next few sections, we’ll be talking about the sizes of
certain things: memory sizes, song sizes, sample sizes. You’ll
see things described as being so many “K,” “MB,” or “GB” in size.
• things the Fantom-X needs to do its job—such as the PCM
waveforms that provide the basis for patches and rhythm
sets, the factory patches, rhythm sets and performances,
If you know what these abbreviations mean, you can skip
this section and head straight to the next one. If not, take a
moment, and read on.
the Fantom-X demos, their samples, and so on.
• your own materials—such as your patches, rhythm sets,
performances, songs, samples, the user rhythm patterns,
rhythm groups, arpeggios, and your system settings.
The Fantom-X measures objects by their size in bytes, as any
computer-based device does. Even the smallest samples
and songs are thousands of bytes in size, so their sizes are
counted in thousands of bytes to make life easier: kilobytes,
Since these materials are used in different ways, the
Fantom-X utilizes three different types of memory, with each
one perfectly suited to the stuff it holds.
or “KB.” But those are smaller samples and songs. Bigger ones
are thousands of kilobytes in size—that’s a million bytes,
son—and they’re measured in megabytes, or “MB.” One form
of memory in the Fantom-X can be a billion bytes in size, or 1
ROM
“ROM” is the acronym for “Read-Only
GB for “gigabyte.”
Okay? Moving on...
Memory.” It’s called “read-only” because
you can use what it holds, but you can’t
RAM
change, or “re-write” it, yourself. ROM’s
where the Fantom-X keeps its:
• PCM waveforms—These are the built-in sound recordings
that the Fantom-X patches and rhythm sets play when
they aren’t playing samples you’ve captured or imported.
• presets—These are the preset factory patches, rhythm sets,
performances, demos, and demo samples.
“RAM” stands for “Random Access Memory,” though that doesn’t
matter much here (computer historians, look elsewhere). What
matters is what RAM is: lightning fast. Because of this, RAM
makes an ideal place for holding things you’re working with,
or working on. When you play or edit most anything on the
Fantom-X, it’s in RAM.
3
Page 4
While RAM makes a great workspace,
it’s temporary—each time you turn off
the Fantom-X, its RAM is cleared of its
contents. As a result, you can’t actually
store anything there. The Fantom-X
provides a different sort of memory for
permanent storage, as we’ll see.
Audio tracks are a special case. Work RAM holds the audio tracks themselves.
The samples that audio tracks play, however, reside in sample RAM. To
learn more about audio tracks, see the Audio Tracks Workshop booklet.
We haven’t mentioned effects because, technically, an effect is an element
within a patch, rhythm set, or performance. Still, when you edit effects,
that, too, takes place in work RAM.
We’re sorry to repeat ourselves, but we can’t emphasize this enough:
Anything in RAM is there only temporarily. It’s critical that you save your
work to one of the Fantom-X’s permanent storage areas to avoid losing it.
Whenever you edit something you’ve already saved, you’re ac tually
working on a copy it that’s been loaded into RAM. This is great because it
means that you’re free to experiment as wildly as you like, secure in the
knowledge that the original is safe and sound in permanent storage.
While most Fantom-X activities take place in its general-use
RAM—an area we’ll call “work RAM”—sampling has its own
workspace we’ll call “sample RAM.”
In the Fantom-X Owner’s Manual, work RAM is called the “temporar y area.”
Sample RAM is called “temporar y memory.”
What Goes On In Work RAM
Outside of sampling, most everything you select, play, edit,
and record in the Fantom-X is in work RAM while you’re using
it. When you:
• select—patches, rhythm sets, performances, songs, rhythm
patterns, or arpeggios, they’re loaded into work RAM.
• edit—patches, rhythm sets, performances, songs, rhythm
patterns, rhythm groups, arpeggio styles, or chord memory
forms, you do so in work RAM.
• record—sequencer tracks in a song, you do it in work
RAM.
Work RAM has a pre-designated area for each of the items it
holds. The currently selected patch is loaded into its own area,
the current song goes into its own area, and so on.
Preserving Work RAM Work
Each time you select something new for one of these areas,
it replaces what’s currently there. Therefore, If you’ve been
editing or recording, be sure to save your work to a permanent
storage area before selecting something new to play or edit.
The Fantom-X helpfully provides some visual cues that let you
tell at a glance if something you’re viewing has been edited or
recorded but hasn’t yet been saved in its current state.
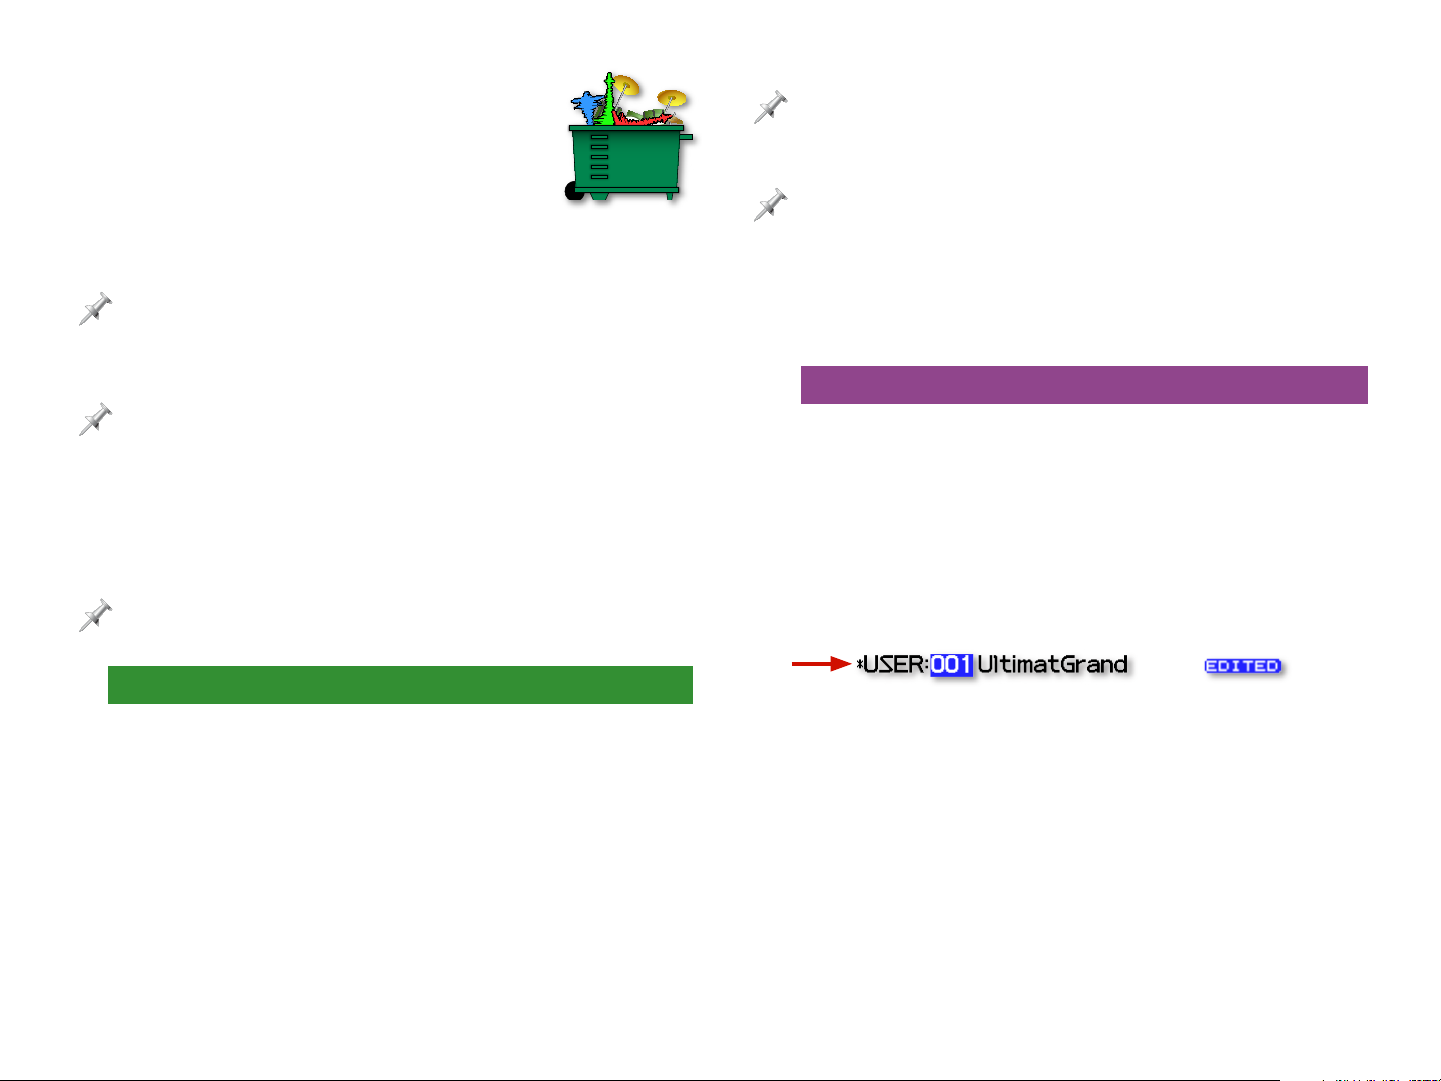
Patches, rhythm sets, and performances
that need to be saved have an asterisk.
In other cases, you’ll see
the word “EDITED.”
Later in this booklet, we’ll tell you where you can learn about
saving and loading all of the things that work RAM can
temporarily hold.
4
Page 5
What Goes On In Sample RAM
-"
-"
Store, Then Play
Sample RAM, logically enough, is where you work with samples
in the Fantom-X. In fact, a sample has to be in sample RAM to
be played or edited. All new samples go straight to sample
RAM when they’re first captured. When you record an audio
track, its samples also go into sample RAM. You can load
samples manually into sample RAM, or the Fantom-X can load
them for you automatically at startup. You also import samples
into sample RAM.
As shipped from the factory, the Fantom-X sample RAM is 32
MB in size, a good size for getting you started.
For more involved sampling work—
and for recording audio tracks—you
can expand sample RAM up to 544
MB by installing SDRAM memory
chips, as explained on Page 244 of
the Fantom-X Owner’s Manual. This
provides ample room for even the
largest samples and longest audio
tracks.
The Sampling on the Fantom-X Workshop booklet discusses the use of
sample RAM in detail, and explains how to capture, edit, play, save, load,
and import samples. It also explains how to set up the Fantom-X to load
samples for you automatically.
When you play a sample on the Fantom-X, you play it in a
patch or rhythm set. Sample-playing patches and rhythm sets
identify their samples by their storage locations, so it doesn’t
make sense to use a sample in a patch or rhythm set until it’s
been stored. Store the patch in permanent memory before
using it in a patch or rhythm set.
Flash: User and Card Memory
For permanent storage of your work, the Fantom-X uses a type
of memory called “flash” memory. Flash provides a very secure
place for the permanent storage of your data. The Fantom-X
offers two kinds of flash memory in which to keep your work:
• user memory—The Fantom-X provides 32 MB of built-in
flash memory, referred to as “user” memory.
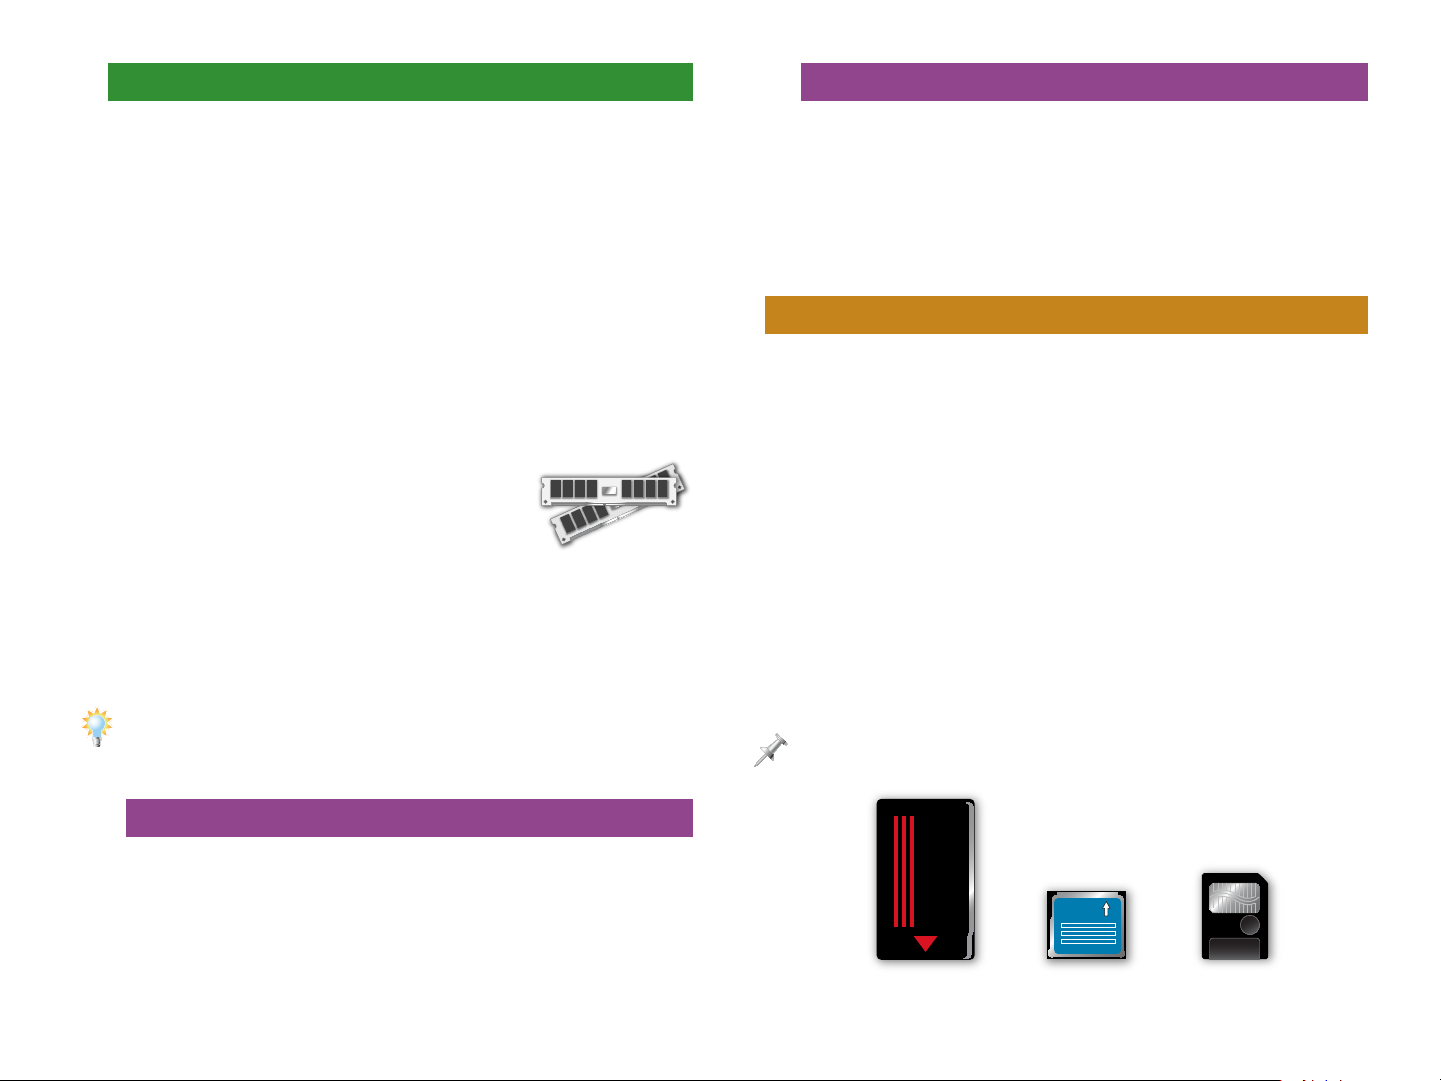
• card memory—You can install a PC card (purchased
separately) in the Fantom-X’s rear-panel PC CARD slot
to add up to 1 GB of additional flash storage space.
You can also use a Compact Flash or Smart Media card
with a Compact Flash-to-PCMCIA or Smart Media-toPCMCIA adaptor. Swapping multiple cards in and out of
the Fantom-X gives you lots of extra storage space.
From now on in this booklet, when we refer to “PC card” or “memory card,”
we mean all three types of cards that can be used in the Fantom-X.
Preserving RAM Samples
Since sample RAM is cleared each time you power-off, it’s
absolutely vital that you save all of the new samples and audio
tracks you want to preserve—as well as any sample you’ve
been editing—to a permanent storage area before turning off
the Fantom-X. Otherwise, they’ll be lost. Yes, this is the third
time we’ve said this—it’s important.
PC Card Compact Flash
card
Smart Media
card
5
Page 6
The Fantom-X Owner’s Manual has details on installing memory cards, and
formatting them for use on the Fantom-X.
When we refer to “card memory” later in this booklet, we’re referring to the
memory on the currently installed PC card.
Um, “Two Types of Flash.” Except for the Third.
The Fantom-X has another—less visible—area of flash memory
that stores “system” settings. On some screens, you’ll see
F8 (System Write), which allows you to store the displayed
settings. Many system settings apply to the Fantom-X’s global
behavior; others are Patch mode settings. Enough said.
Getting Loaded
Whatever’s stored in user or card memory must be loaded into
RAM for use. Most of this occurs pretty much invisibly, though
some items have to be deliberately loaded. To use stored:
• patches, rhythm sets, rhythm patterns and groups, arpeggio
styles, and chord forms—simply select them. The Fantom-X
instantly puts them in work RAM.
• songs—use Load Song or Load Song + Samples on the
Save/Load screen to load a song into work RAM.
• samples—load the desired samples into sample RAM from
the Sample List screen, or let the Fantom-X automatically
load them for you at power-up, as described in Sampling
on the Fantom-X.
You can actually listen to songs—though not their audio tracks—without
loading them into RAM. Use the Quick Play and Chain Play features
described on Page 164 in the Fantom-X Owner’s Manual. To edit or
otherwise work with songs—and to hear their audio tracks—they must
be loaded into RAM.
Saving and Loading User and Card Memory
In this booklet we’re concerned with how memory and storage
in the Fantom-X work. While we’ll get into some key storage
and memory techniques later, we won’t be going into the
actual saving and loading of individual items. To learn how to
save and load:
• patches—see the Workshop booklet The Sounds of the
Fantom-X.
• rhythm sets, rhythm patterns, and groups—see the Workshop
booklet The Rhythms of the Fantom-X.
• performances—see the Workshop booklets Recording
Music on the Fantom-X or Performing with the Fantom-X.
• songs—see the Recording Music on the Fantom-X and Audio
Tracks Workshop booklets.
• samples—see the Sampling on the Fantom-X Workshop
booklet.
• arpeggio styles—see the Advanced Fantom-X Sequencing
Techniques Workshop booklet.
• chord forms—see the Performing with the Fantom-X
Workshop booklet.
What User and Card Memory Can Hold
Here’s what can be stored in user memory and what can be
stored in card memory.
Data Type User memor y Card memory
Patches 256 256
Rhythm sets 32 32
Performances 64 64
Shared space:
samples and songs
up to 32 MB* up to capacity**
6
Page 7
Data Type User memor y Card memory
Rhythm patterns 256 0
Rhythm groups 32 0
Arpeggio patterns 128 0
Chord memory 64 0
* up to 2,000 samples; ** up to 7,000 samples
Snug Fit
Samples can be as small as a few kilobytes, or as large as
your sample RAM can hold—and if your sample RAM’s been
expanded to 544 MB, that’s room for a very large sample.
Likewise, songs can grow from about 200 K to over 4 MB.
Because the Fantom-X has no way to know in advance the
sizes of your own personal samples and songs, it’s simply
impossible for it to set aside pre-sized locations for storing
them. Therefore, most of user and card memory is a big shared
area for the storage of samples and songs.
User and card memory both contain preassigned memory locations for the storage
of 256 patches, 32 rhythm sets, and 64
performances, and user memory also has
locations for holding rhythm patterns,
arpeggio styles, and chord forms.
This is possible because each of these
Like a
hand-in-glove
items is always precisely the same size—it’s a simple matter of
math for the Fantom-X to set aside sufficient space for them in
user and card memory.
Give Me Those Wide-Open Spaces
As you fill up user or card memory, you can see how much
room you need for the samples you’re saving so you can tell if
everything’ll fit. We’ll explain how to do this later.
The Sampling on the Fantom-X Workshop booklet offers some helpful
strategies for storing samples and the patches, rhythm sets, and songs
that use them.
Why You’d, Well, Use User Memory
User memory’s very handy, since it’s built into the
Fantom-X—it’s always there. It doesn’t cost any additional
money, of course, and it frees you from having to remember
where you put your stuff. On the other hand, depending on
how you’ll be using the Fantom-X, the amount of data it can
hold may or may not be enough for you.
The remainder of user memory and card memory is wide-open
space that’s shared by samples and songs. This is because
samples and songs vary in size. A lot.
7
Page 8

Why You’d Use Card Memory
Though a memory card requires an additional expenditure, it
provides some definite benefits:
• It’s removable—When you fill up a card, you can just pop
another one in. This provides you as much Fantom-X
storage space as you can afford.
• It can hold the contents of expanded sample RAM—If your
samples are going to require more space than 32 MB, they
won’t fit in user memory. You’ll simply need a memory
card.
• You can keep data for different projects on different cards—
Simply pop in a card and have access to all the materials
you need in any given situation.
• It can store a backup of the entire contents of user memory—
You can perform a User Backup onto a card that’s 32 MB in
size or larger. We’ll discuss this procedure later on.
Storage and Memory-Related Techniques
The following sections discuss the Fantom-X’s memory
management tools.
Learning How Much Space You Have and Need
In truth, you don’t really have to get too bent out of shape figuring out if
you have enough space for samples, or songs—if you try to save, or load,
something for which you don’t have enough room, the Fantom-X will let
you know. Still, if you don’t like surprises....
The Memory Information Display
The Fantom-X’s Memory Information display shows the amount
of data currently in sample RAM, user memory, and card
memory, and how much free space is available. To get there:
1. Press PATCH/RHYTHM, LAYER/SPLIT, or MIXER.
2. Press MENU.
3. Select System and press ENTER.
4. Press F4 (Info).
5. Press F2 (↓) or F1 (↑) to select the Memory Info tab.
This Fantom-X has a
new 64 MB memory
card installed.
• When you’re saving data—you only need to be concerned
about having enough room for your samples and songs,
since everything else has a fixed, sufficient amount of preallocated space, as we mentioned earlier. And since songs
are usually small enough to fit the available space, it’s
really your samples’ size requirements you’ll need to pay
attention to.
• When you’re loading data—your only concern is having
enough room for your samples, since work RAM always
contains enough room for everything else.
The area labeled “Sample” shows sample RAM’s memor y use.
In each of the three memory areas, you can see:
• how much space is now being used—as a green bar in the
area’s memory gauge.
• how much space is still left—as the dark part of the memory
gauge, and as a memory readout above it.
8
Page 9

Finding Out How Much Space You Need
Using the Fantom-X File Utility
When You’re Storing Your Work
The Fantom-X allows you to check out the size of your samples
before saving them—you can store samples individually or
store everything in sample RAM at once, as described in the
Sampling on the Fantom-X Workshop booklet. To learn the size
of:
• any currently loaded sample—press SAMPLE LIST to display
a list of all of your samples. The size of each currently
loaded sample is displayed to its right.
• the entire contents of sample RAM—consult the Memory
Information display’s Sample readout, as described on
Page 8.
If space is tight in the memory area to which you’re saving your data, it’s
possible you’ll have room for your samples, but not quite enough for your
song—if so, the Fantom-X will display a “Memor y Full” message.
The Fantom-X’s File Utility feature allows you to delete, move
or copy data stored in user and card memory so you can
re-arrange and organize it however you want.
What you’ll see in the File Utility screen are folders and files
that look and act just like folders and files on a computer’s
hard drive.
Getting to the File Utility Screen
1. Press PATCH/RHYTHM, LAYER/SPLIT, or MIXER.
2. Press MENU.
3. Highlight “File Utility.”
4. Press ENTER—the File Utility screen appears.
If you’ve previously
connected the selected
memory area to a
computer running Mac OS
X, you may see additional
items that begin with
a period. Ignore these
files—they’re required by
Mac OS X.
When You’re Loading Your Work
You can view the size of samples you want to load on the
Sample List screen.
5. Press F1 (User) or F2 (Card) to select the area of memory
that contains the data with which you want to work.
9
Page 10

Navigating the File Utility Screen
Moving a File
When you arrive at the File Utility screen, you’re shown the
two top-level folders in the memory area you’ve selected. By
burrowing down into them, you can locate the files you want
to examine, delete, move, or copy.
The simplest way to move in and out of folders—and to select
files—is to use the 3, 4, 5, and 6 CURSOR buttons. Press:
• 4—to view the contents of the currently highlighted
folder. (This opens the folder.)
• 3—to see what’s in the folder that contains the one
whose contents are currently displayed. (This moves you
back up one level in the selected memory area’s directory
structure and closes the current folder.)
• 6—to highlight the next item down in a displayed list.
• 5—to highlight the next item up in a displayed list.
Deleting a File
To delete the currently highlighted file:
1. Press F6 (Delete)—the Fantom-X asks if you’re sure you
want to erase the file.
To move the currently highlighted file to a different memory
location:
1. Press F7 (Move)—the Fantom-X presents you a screen in
which you can select the desired new location for the file.
The file’s current
location
The file’s new
location
2. Use F1 (User), F2 (Card), and the usual File Utility navigation
methods to display the desired new location for your file.
3. Press F8 (Exec)—the Fantom-X asks if you’re sure you want
to move the file.
4. Press F8 (Exec) to move the file, or F7 (Cancel) to abort the
operation.
If you delete a file, it’s gone forever, so move slowly and be sure you’re
ready to proceed.
2. Press F8 (Exec) to delete the file, or F7 (Cancel) to abort the
operation.
Copying a File
When you copy a file, the original remains in its current
location, and a copy of the file is placed in another location
you select during the process.
To copy the currently highlighted file to a different location:
1. Press F8 (Copy)—the Fantom-X presents you a screen
in which you can select the desired location for the file
copy.
10
Page 11

The original file’s
location
The new copy’s
location
4. Press ENTER—the Utility Menu screen appears.
Creating a User Backup
2. Use F1 (User), F2 (Card), and the other File Utility navigation
methods to display the desired location for the file copy.
3. Press F8 (Exec)—the Fantom-X asks if you’re sure you want
to copy the file.
4. Press F8 (Exec) to copy the file, or F7 (Cancel).
Backing Up Your Work on the Fantom-X
You can make a copy of everything that’s in your user memory,
storing it all on a memory card. The procedure is called a “User
Backup,” and it’s a simple way to make a copy of your work for
safekeeping. Should you wish to return the backup to user
memory, simply perform a “User Restore” operation.
A User Backup memory card must have at least 32 MB free space
available.
Each memory card can accommodate a single user backup, regardless of
the card’s capacity.
The User Backup and User Restore operations both take place
on the Fantom-X’s Utility screen. To get there:
1. Press PATCH/RHYTHM, LAYER/SPLIT, or MIXER.
2. Press MENU.
3. Highlight “Utility.”
1. Install the formatted memory card on which you want to
store your backup.
2. Navigate to the Utility screen as described above.
3. Either:
• Use 3, 4, 5, or 6 to select User Backup and press
ENTER, or
• Press F1 (User Backup)—the Fantom-X asks you to
confirm that you’d like to proceed with the operation.
4. Press F8 (Exec) to proceed, or F7 (Cancel).
Restoring a User Backup
1. Install the memory card on which your backup is stored.
2. Navigate to the Utility screen as described above.
3. Either:
• Use 3, 4, 5, or 6 to select User Restore and press
ENTER, or
• Press F2 (User Restre)—the Fantom-X asks you to
confirm that you’d like to proceed with the operation.
11
Page 12

When you restore a user backup, the backup completely replaces the
contents of user memor y. If there’s anything there you wish to preserve,
store it to a memory card before per forming a User Restore operation.
4. Press F8 (Exec) to proceed, or F7 (Cancel).
When your data has been returned to user memory, the
Fantom-X displays, “Please Power Off.”
5. Turn the Fantom-X off and then back on.
Backing Up Your Work On a Computer
When the Fantom-X is connected to a computer via USB, you
can back up your work on the computer’s hard drive. You can
restore this data to the Fantom-X if and when you wish to. The
backup method depends on the type of data. To back up:
2. Press ENTER.
3. Press F1 (↑) and/or F2 (↓) to select the USB tab.
4. Set USB Mode to STORAGE by turning the VALUE
dial counter-clockwise until the Message from the
Fantom-X window appears—press F8 (OK) to proceed.
5. Press F8 (System Write) to store the new setting.
6. Turn off the Fantom-X and start up your computer.
7. Using a USB A/B-type cable, connect the A-type USB plug
to a USB jack on your computer, and the other end to the
B-type USB jack on the Fantom-X.
USB A plug USB B plug
8. Turn on the Fantom-X.
• songs and samples—in card or user memory, copy the songs
and sample files to and from the computer’s desktop.
• everything else—in user memory, use the Fantom-X’s
Version Two (or higher) Librarian software.
Computer Backup for Songs and Samples
Connecting Via USB
This procedure is possible only with USB-supporting computers using the
following operating systems: Windows XP/2000/Me or higher, Mac OS X,
or Mac OS 9.04 or higher.
When USB communication is turned on, do not unplug the USB cables
connecting the Fantom-X and the computer.
Before connecting the Fantom-X to your computer via USB
and activating communication, perform the following steps:
1. Press the MENU button on the Fantom-X, and then turn
the VALUE knob to select System.
To activate the USB connection:
1. Press PATCH/RHYTHM and then the MENU button.
2. Turn VALUE to select USB Storage, and then press ENTER—
the USB Select screen appears.
4. On this screen, you allow your computer access to your
user memory or your card memory. To choose:
• user memory—press F3 (Internal).
• card memory—press F6 (Memory Card).
12
Page 13

The Fantom-X displays “Connected” when communication
SND
TMP
ROLAND
SEQ
SNG
041504.svq
041504.sva
041504.mid
SLEEPY.svq
SMPL
SND
TMP
PNL
ROLAND
SEQ
SMPL
smpl0001.wav
smpl0002.wav
smpl0003.aif
smpl0004.wav
PNL
is established. The Fantom-X’s user or card memory appears
on the computer in a new window or on the desktop as a
removable storage device. User memory appears as “FANX
USER.” Card memory appears as “FANX CARD.”
6. Perform the desired backup or restore procedure.
7. When you’re done, eject the Fantom-X’s memory area from
your computer as you would any removable device.
To Back Up a Song or Samples to the Computer
5. Open FANX USER or FANX CARD on your computer.
Songs files and sample files can be copied from—and
must be restored to—the same specific folders in user and
card memory. Here’s where you’ll find them:
Song files Sample files
There are three types of song-related files. .svq files are Fantom-X song
files, .sva files contain audio track playback events, and .mid files are
Standard MIDI File-format versions of Fantom-X songs. To learn more, see
the Recording Music on the Fantom-X and Audio Tracks booklets.
Sample files can be .wav-format files or .aif-format (AIFF) files.
A sample’s file name reflects its location in user or card memor y, not its
name as shown on the Fantom-X. Therefore, to ensure that it’s restored to
its original memory location in the Fantom-X, don’t rename the file.
When you restore a sample file, it replaces whatever’s currently in its user
memory location—if there’s a sample there you want to keep, save it to
another location before restoring your sample file.
Copy each Fantom-X file you wish to back up from its location
in the Fantom-X memory area mounted on your computer’s
desktop to the desired place on your computer’s hard drive.
To Restore a Song or Sample from the Computer
Copy each Fantom-X file you wish to restore from its location
on the computer’s hard drive to the appropriate folder in the
Fantom-X memory area mounted on the computer’s desktop.
Computer Backup for Everything Else
You can back up the following items from user memory to
your computer’s hard drive using the Fantom-X Version Two
Fantom-X Librarian software program:
• patches • rhythm sets • performances
• rhythm patterns • rhythm groups • arpeggio styles
• chord forms
This form of backup is more customizable than performing
an internal User Backup—described in the previous section—
since you can choose the data you want to back up instead of
always backing up everything.
To learn if your computer can run the Fantom-X Librarian software, see
Page 237 of the Fantom-X Owner’s Manual.
If you want to back up something stored on a memory card, move it to user
memory in order to make it available to the Librarian software.
13
Page 14

Installing the Librarian Software
Use of the Fantom-X Librarian software requires a working knowledge of
your computer. Consult the computer’s documentation to learn more.
Your Fantom-X—or your Version Two upgrade—shipped with
the Fantom X Editor Ver. 2.0 dual-platform CD-ROM. (The latest
version of this software can also be downloaded from the
Roland US Web site.)
When you open the CD-ROM on your computer, you’ll see a
folder called “Fantom-X Editor Installer (E).” Inside this folder is
a program—FantomX Editor Installer—that installs both the
Version Two Fantom-X Editor and Librarian programs on
your computer. Double-click the installer file and follow the
onscreen instructions to install the software.
Librarian Connections
The Librarian software can communicate with the Fantom-X in
either of two ways. Communication can occur through a:
• USB connection—when the Fantom-X’s USB Mode
parameter is set to MIDI.
• MIDI interface—when the computer is correctly configured
for MIDI operations.
4. Follow the instructions for making the necessary
connections.
The Librarian documentation is also available in the Help menu within the
Librarian program.
Librarian Backup Procedure
Once you’ve set everything up, launch the Librarian program—
its Main window opens.
One advantage to using a MIDI interface is that the Librarian program
doesn’t require the Fantom-X to be in Librarian mode when communicating
via MIDI. USB connections require the use of Librarian mode, which
temporarily disables all other functions.
Before launching the Librarian program:
1. Locate the Roland folder on your hard drive and open it.
2. Open the Fantom-X Editor folder.
3. Open the Manual folder and double-click the file to display
the Librarian manual in your Web browser.
The Librarian has a few appearance-related settings in its Setup menu.
Here, we’ve turned on its gridlines and selected a font we like.
It’s in this window that you pass things back and forth between
the Fantom-X and the computer.
14
Page 15

The Mode pop-up menu selects the type of data to be
transferred. You can:
• Read—data from the Fantom-X’s user memory into the
Librarian program.
• Write—data from the computer into the Fantom-X’s user
memory.
Once you’ve selected the type of data you want to read into
the Librarian, you can choose to retrieve:
• data from all user memory locations—by clicking Read All,
or
• data from a specific user location—by clicking the desired
location to highlight it, and then clicking Read Selected.
To read multiple items, Alt-click (Windows) or Command-click (Mac) them
before clicking Read Selected.
3. Repeat the entire procedure for all types of user memory
data you want to back up to your hard drive. You can store
everything in the same Library, or create new Libraries.
4. With the Library window active, select Save (in the File
menu) to store your Fantom-X data on your hard drive.
5. Quit the Librarian program when you’re done.
You can save as many Librar y files of your data as you like. Each Library can
hold whatever you want to put in it. This allows you to create backups of
particular projects’ data, or back up by calendar date, and so on.
The Read Selected button is available only when one or more items are
highlighted in the Main window.
The Librarian reads your data from the Fantom-X and presents
it in the Main window.
To back up your data, select New from the Librarian’s File menu
to open a new Library file and its window. Then:
1. Select any desired items in the Main window, and then
copy them using your computer’s Copy command.
2. Select the desired location in the Library window, and
then paste the selected items into the Library.
Librarian Restore Procedure
1. Launch the Librarian software—its Main window opens.
Set the window to display the type of data you want to
restore to the Fantom-X’s user memory.
2. Open the Library file containing the data you wish to
restore to the Fantom-X.
3. Select data you wish to return to the Fantom-X, and then
copy it into the Main window at the desired locations
using copy-and-paste.
4. To send the Fantom-X:
• data from all currently displayed Main window memory
locations—click Write All, or
• data from a specific user location—click the desired
location to highlight it, and then click Write Selected.
The Write Selected button is available only when one or more items are
highlighted in the Main window.
15
Page 16

The data is restored to the Fantom-X’s user memory.
5. Repeat the procedure for any remaining data you wish to
restore to the Fantom-X’s user memory.
6. Quit the Librarian program when you’re done.
The Librarian has other handy features we haven’t discussed here—check
out its documentation for more information.
The End
We hope you’ve found this guide to the use of the
Fantom-X’s workspaces and storage capabilities informative
and helpful. Check out the other Workshop booklets, as well
your Fantom-X Handbook, Owner’s Manual, and Audio Track
Expansion guide. We’re confident you’ll have a great time with
the exciting, inspiring Fantom-X.
For the latest Fantom-X updates and support tools, visit the Roland U.S.
Web site at www.RolandUS.com. If you need personal assistance, call our
amazing Product Suppor t team at 323-890-3745.
16
 Loading...