

Page 1
English
Page 2

Page 3
Control Map Guide
When shipped from the factory, the A-300PRO/500PRO/800PRO (referred to simply as
“the A-PRO” in the following) contains 19 control maps. By making use of these control
maps, you can easily set up the A-PRO to control your software or hardware.
Control map number
1 Cubase SOLO
2 Cubase MUTE
3 Cubase RECORD
4 Logic SOLO
5 Logic MUTE
6 Logic RECORD
7 Logic GLOBAL
8 Logic INITIALIZE
9 DP (Digital Performer) SOLO
10 DP MUTE
11 DP RECORD
12 Live SOLO
13 Live MUTE
14 Live RECORD
15 GarageBand
16 GM2
17 SD-50
18 Generic MIDI Controller
19 (*1) NO ASSIGN
Corresponding software/hardware
If this list does not contain a control map for the software or hardware you’re using,
check the Roland website to see whether a suitable control map might be available.
Roland website
http://www.rolandus.com/support/
If a suitable control map is available, you can download it and transmit it to the A-PRO.
Refer to “Transmitting a Control Map to the A-PRO” within “Using A-PRO Editor” in the
owner’s manual.
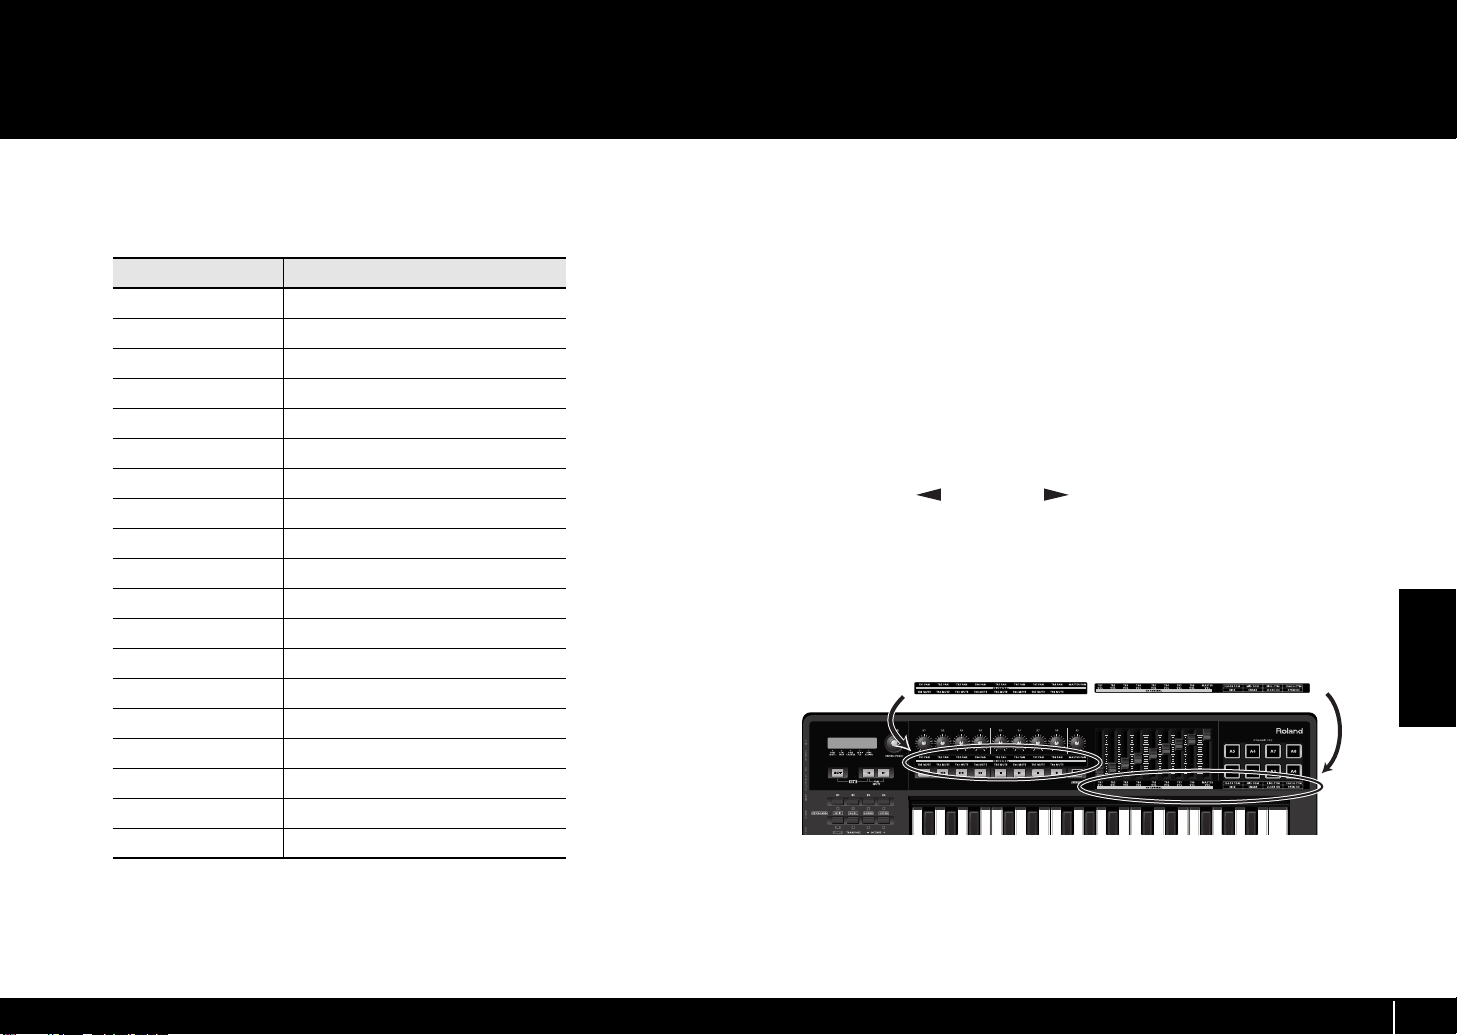
Here’s how to switch between control maps.
1
Choose PLAY mode (see “Performing (Play mode)” in the owner’s
manual.)
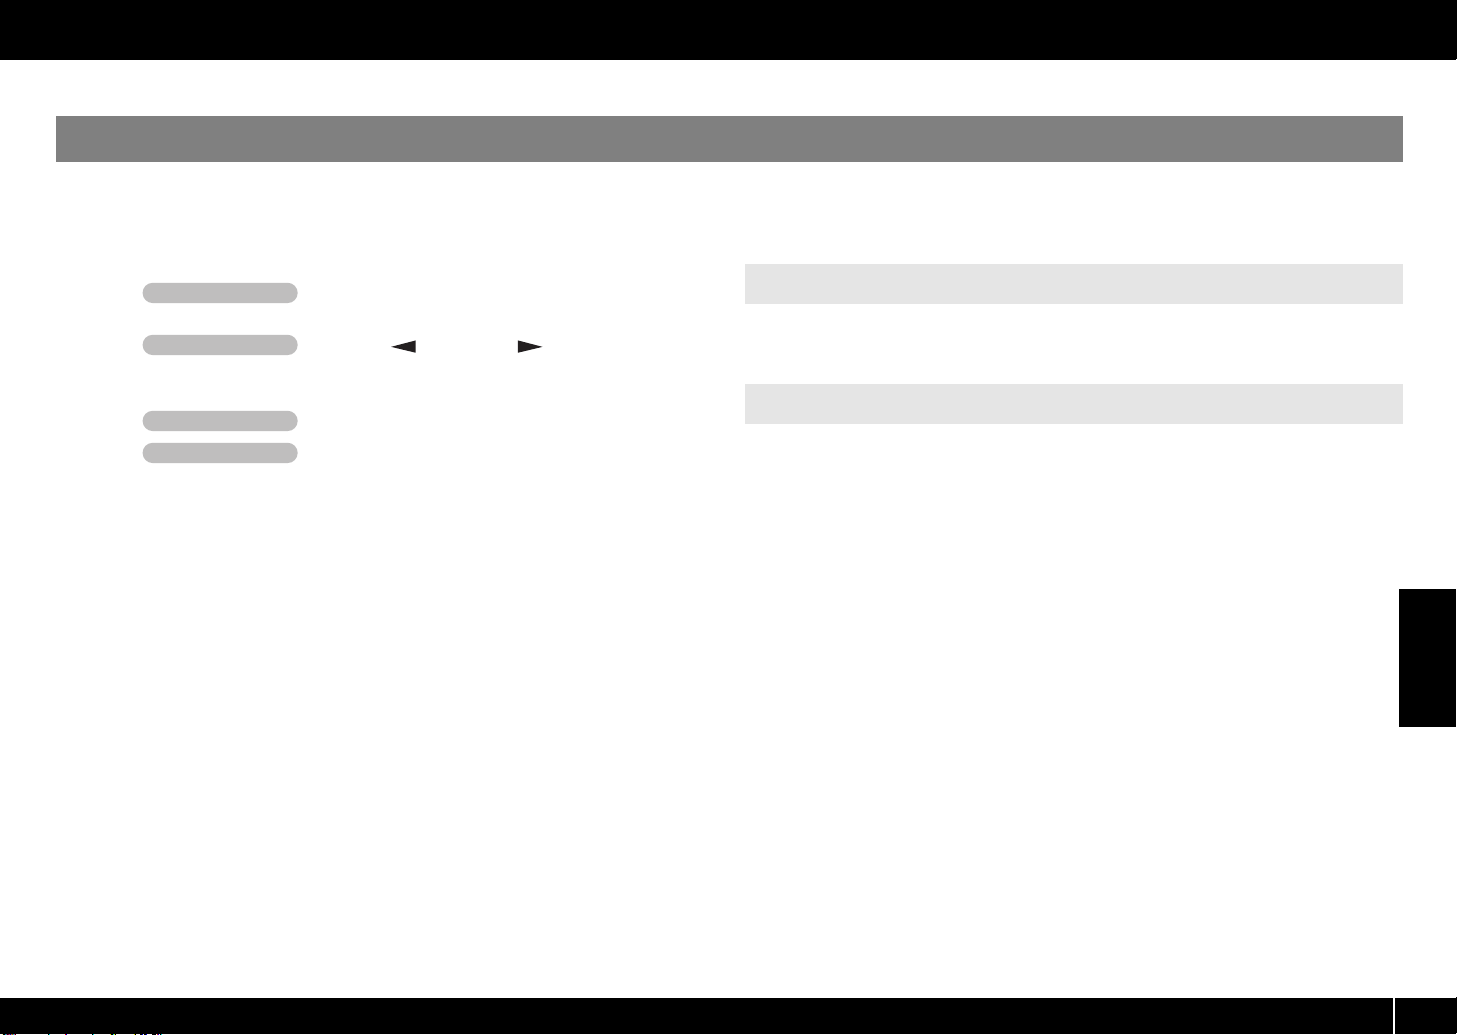
2
Press the [ ] button or [ ] button to move the cursor to “CTRL
MAP” in the display.
The display shows the number of the currently selected control map.
3
Turn the [VALUE] knob to select the desired control map number.
The supplied stickers correspond to control map number16, GM2.
As necessary, affix them in the locations shown below.
English
(*1) Depending on the software you use, the content of a control map may be altered.
Copyright © 2010 ROLAND CORPORATION
All rights reserved. No part of this publication may be reproduced in any form
without the written permission of ROLAND CORPORATION.
3
Page 4

Control Map Guide
Cubase
If you’re using Cubase, make the following settings.
The explanation here uses the Mac OS X version of Cubase 5 as an example. The procedure might differ if you’re using a different version.
Operation of the A-PRO
1
mode)” in the owner’s manual.)
Operation of the A-PRO
2
the cursor to “CTRL MAP” in the display.
The display shows the number of the currently selected control map.
Operation of the A-PRO
3
Start up Cubase 5.
4
5
In the [Devices] menu, click [Device Setup...].
6
At the upper left of the dialog box, click the [+] button, and choose
[Mackie Control] from the pull-down menu.
Choose PLAY mode (see “Performing (Play
Press the [ ] button or [ ] button to move
Turn the [VALUE] knob to select number 1.
Functions Assigned to the Controllers
Refer to p. 9.
Troubleshooting
Values, such as that for pan, change even though you didn’t adjust
them
Make sure that knobs [R1]–[R9] are in the center position.
Encoder Simulate is assigned to Knobs [R1]–[R9]. If knobs [R1]–[R9] are not at the center
position, control messages will continue to be transmitted from the A-PRO.
You can control PLAY or STOP, but not Volume or Pan
Check the track that is set to “channel 1.”
Pressing the [B1] button or [B2] button will switch the tracks that are assigned to sliders
[S1]–[S8] and knobs [R1]–[R8]. It is not necessarily the case that [R1] and [S1] are
As the MIDI input, choose [A-PRO 2], and then click [Apply]. Then
7
click [OK].
assigned to track 1.
4
Page 5
Logic Pro
If you’re using Logic Pro, make the following settings.
The explanation here uses Logic Pro 9 as an example. The procedure might differ if you’re using a different version.
1
Start up Logic Pro 9.
Operation of the A-PRO
2
mode)” in the owner’s manual.)
Operation of the A-PRO
3
the cursor to “CTRL MAP” in the display.
The display shows the number of the currently selected control map.
Operation of the A-PRO
4
Operation of the A-PRO
5
then the [B3] button.
Now you can control Logic Pro 9 from the A-PRO.
6
Close the setup window that’s open in Logic Pro 9.
Choose PLAY mode (see “Performing (Play
Press the [ ] button or [ ] button to move
Turn the [VALUE] knob to select number 8.
Press the [B1] button, then the [B2] button, and
Functions Assigned to the Controllers
Troubleshooting
Values, such as that for pan, change even though you didn’t adjust
them
Control Map Guide
Refer to p. 9 and p. 10.
Make sure that knobs [R1]–[R9] are in the center position.
Encoder Simulate is assigned to Knobs [R1]–[R9]. If knobs [R1]–[R9] are not at the center
position, control messages will continue to be transmitted from the A-PRO.
You can control PLAY or STOP, but not Volume or Pan
Check the track that is set to “channel 1.”
Pressing the [B1] button or [B2] button will switch the tracks that are assigned to sliders
[S1]–[S8] and knobs [R1]–[R8]. It is not necessarily the case that [R1] and [S1] are
assigned to track 1.
If you want to control the channels in the same order as the tracks, turn the GLOBAL
VIEW setting OFF. If GLOBAL VIEW is ON, you’ll be controlling the group specified by
GLOBAL.
* To check the GLOBAL VIEW status, leave the Track Mixer open in Logic.
* If you want to switch GLOBAL VIEW or change GLOBAL, use control map 7.
English
5
Page 6
Control Map Guide
Digital Performer
If you’re using Digital Performer, make the following settings.
The explanation here uses Digital Performer 7 as an example. The procedure might differ if you’re using a different version.
Operation of the A-PRO
1
mode)” in the owner’s manual.)
Operation of the A-PRO
2
the cursor to “CTRL MAP” in the display.
The display shows the number of the currently selected control map.
Operation of the A-PRO
3
Start up Digital Performer 7.
4
5
In the [Setup] menu, click [Control Surface Setup...].
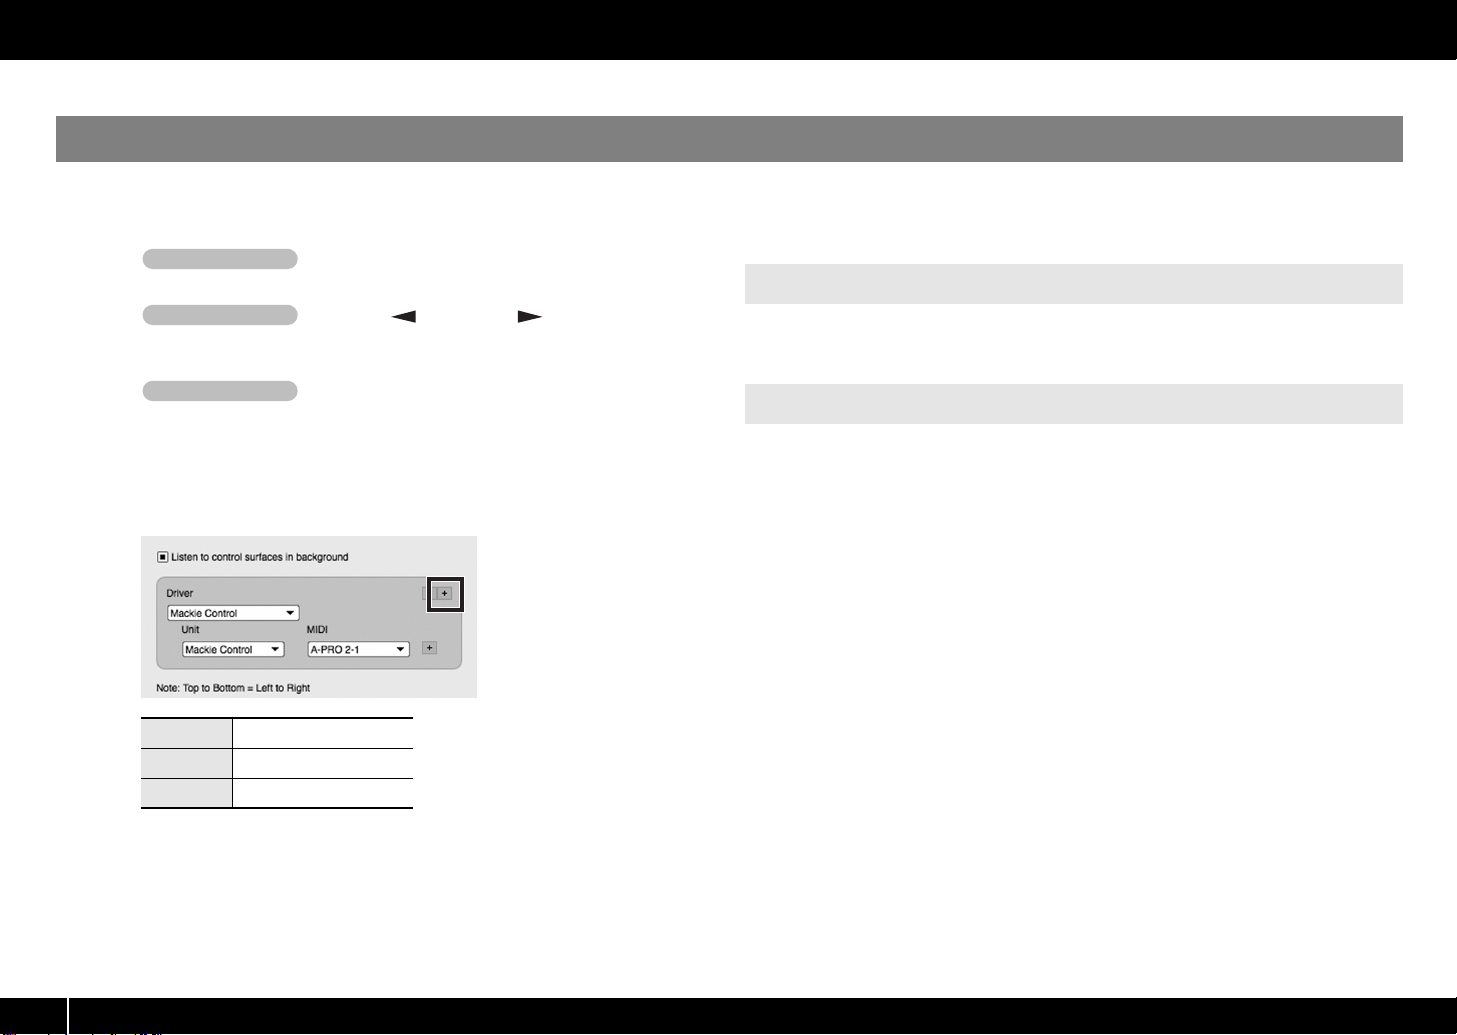
6
In the “Control Surface” dialog box, click the [+] box, and make the
following settings.
Choose PLAY mode (see “Performing (Play
Press the [ ] button or [ ] button to move
Turn the [VALUE] knob to select number 9.
Functions Assigned to the Controllers
Troubleshooting
Values, such as that for pan, change even though you didn’t adjust
them
Refer to p. 10.
Make sure that knobs [R1]–[R9] are in the center position.
Encoder Simulate is assigned to Knobs [R1]–[R9]. If knobs [R1]–[R9] are not at the center
position, control messages will continue to be transmitted from the A-PRO.
You can control PLAY or STOP, but not Volume or Pan
Check the track that is set to “channel 1.”
Pressing the [B1] button or [B2] button will switch the tracks that are assigned to sliders
[S1]–[S8] and knobs [R1]–[R8]. It is not necessarily the case that [R1] and [S1] are
Driver
Unit
MIDI
Mackie Control
Mackie Control
A-PRO 2-1
assigned to track 1.
6
Page 7
Live
If you’re using Live, make the following settings.
The explanation here uses Live 8 as an example. The procedure might differ if you’re using a different version.
Operation of the A-PRO
1
mode)” in the owner’s manual.)
Operation of the A-PRO
2
the cursor to “CTRL MAP” in the display.
The display shows the number of the currently selected control map.
Operation of the A-PRO
3
Start up Live 8.
4
5
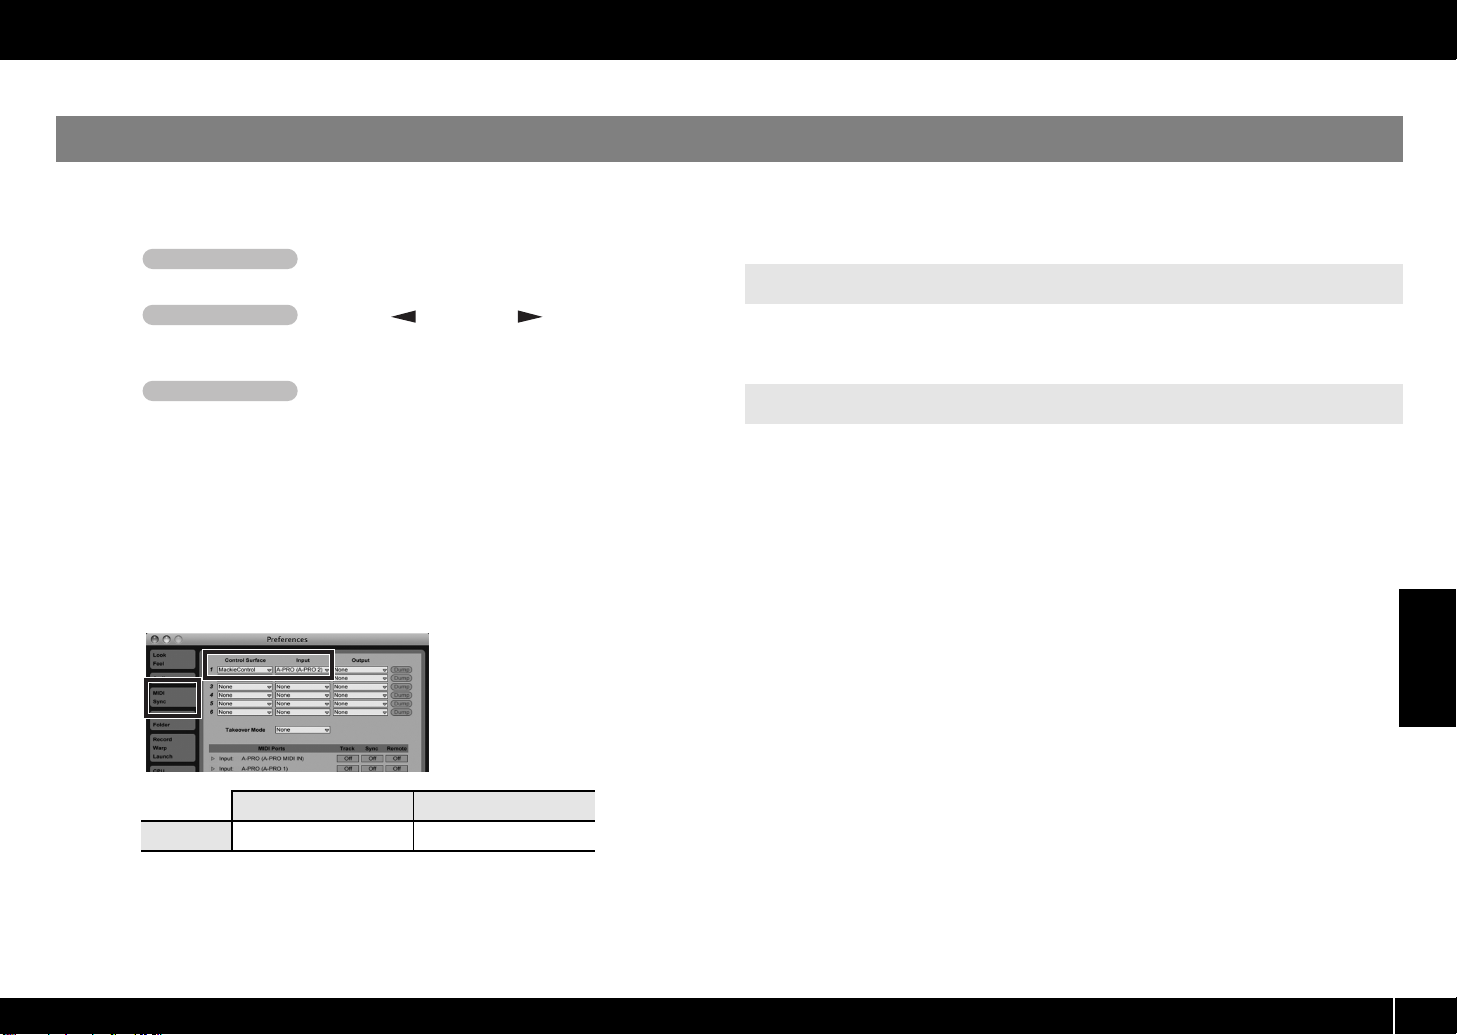
Open the “Preferences” dialog box.
Windows users
In the [Options] menu, click [Preferences...].
Mac OS X users
In the [Live] menu, click [Preferences...].
In the left side of the “Preferences” dialog box, click the [MIDI Sync]
6
tab, and make the following settings.
Choose PLAY mode (see “Performing (Play
Press the [ ] button or [ ] button to move
Turn the [VALUE] knob to select number 12.
Control Map Guide
Functions Assigned to the Controllers
Refer to p. 11.
Troubleshooting
Values, such as that for pan, change even though you didn’t adjust
them
Make sure that knobs [R1]–[R9] are in the center position.
Encoder Simulate is assigned to Knobs [R1]–[R9]. If knobs [R1]–[R9] are not at the center
position, control messages will continue to be transmitted from the A-PRO.
You can control PLAY or STOP, but not Volume or Pan
Check the track that is set to “channel 1.”
Control Surface
1
7
Close the “Preferences” dialog box.
Mackie Control
Input
A-PRO (A-PRO 2)
Pressing the [B1] button or [B2] button will switch the tracks that are assigned to sliders
[S1]–[S8] and knobs [R1]–[R8]. It is not necessarily the case that [R1] and [S1] are
assigned to track 1.
English
7
Page 8
Control Map Guide
GarageBand
If you’re using GarageBand, make the following settings.
The explanation here uses GarageBand ’09 as an example. The procedure might differ if you’re using a different version.
Operation of the A-PRO
1
mode)” in the owner’s manual.)
Operation of the A-PRO
2
the cursor to “CTRL MAP” in the display.
The display shows the number of the currently selected control map.
Operation of the A-PRO
3
Start up GarageBand.
4
Choose PLAY mode (see “Performing (Play
Press the [ ] button or [ ] button to move
Turn the [VALUE] knob to select number 15.
Functions Assigned to the Controllers
Troubleshooting
No sound
Refer to p. 11.
It may be that the driver was not correctly installed. Proceed as follows to check this.
1
Close GarageBand.
2
Disconnect all MIDI devices other than the A-PRO from your Mac.
3
Start up GarageBand.
In the [GarageBand] menu, click [Preferences].
4
Click the [Audio/MIDI] tab.
5
6
Check whether the screen indicates “0 MIDI Input(s) were detected.”
If the number is 0, refer to “Reinstalling the driver” in the “Troubleshooting” section of
the owner’s manual, and reinstall the driver.
Sustain message is not output when you press the [L9] ([HOLD]) button
At the factory settings, HOLD is assigned to the [L9] button.
To have the [L9] button transmit a Sustain message, assign the function of the [L9]
button to L9. For details, refer to “L9 FUNCTION” in the “System settings (EDIT mode)”
section of the owner’s manual.
8
Page 9

Control Map List
Cubase (Control Map #1–3)
1. Cubase
SOLO
R1
R2 ROTARY ENCODER 2
R3 ROTARY ENCODER 3
R4 ROTARY ENCODER 4
R5 ROTARY ENCODER 5
R6 ROTARY ENCODER 6
R7 ROTARY ENCODER 7
R8 ROTARY ENCODER 8
R9 NO ASSIGN
S1 FADER 1
S2 FADER 2
S3 FADER 3
S4 FADER 4
S5 FADER 5
S6 FADER 6
S7 FADER 7
S8 FADER 8
S9 MASTER FADER
A1 SOLO 1 MUTE 1 RECORD 1
A2 SOLO 2 MUTE 2 RECORD 2
A3 SOLO 3 MUTE 3 RECORD 3
A4 SOLO 4 MUTE 4 RECORD 4
A5 SOLO 5 MUTE 5 RECORD 5
A6 SOLO 6 MUTE 6 RECORD 6
2. Cubase
MUTE
ROTARY ENCODER 1
3. Cubase
RECORD
1. Cubase
SOLO
A7 SOLO 7 MUTE 7 RECORD 7
A8 SOLO 8 MUTE 8 RECORD 8
B1 BANK LEFT
B2 BANK RIGHT
B3 MIXER VIEW
B4 FLIP
L1 RETURN TO ZERO
L2 REWIND
L3 FAST FORWARD
L4 NO ASSIGN
L5 STOP
L6 PLAY
L7 NO ASSIGN
L8 RECORD
L9 NO ASSIGN
P1 NO ASSIGN
P2 NO ASSIGN
BEND NO ASSIGN
MOD NO ASSIGN
AFT NO ASSIGN
2. Cubase
MUTE
3. Cubase
RECORD
Logic Pro (Control Map #4–8)
4. Logic
SOLO
R1
R2 ROTARY ENCODER 2 NO ASSIGN
R3 ROTARY ENCODER 3 NO ASSIGN
R4 ROTARY ENCODER 4 NO ASSIGN
R5 ROTARY ENCODER 5 NO ASSIGN
R6 ROTARY ENCODER 6 NO ASSIGN
R7 ROTARY ENCODER 7 NO ASSIGN
R8 ROTARY ENCODER 8 NO ASSIGN
R9 NO ASSIGN NO ASSIGN
S1 FADER 1 NO ASSIGN
S2 FADER 2 NO ASSIGN
S3 FADER 3 NO ASSIGN
S4 FADER 4 NO ASSIGN
S5 FADER 5 NO ASSIGN
S6 FADER 6 NO ASSIGN
S7 FADER 7 NO ASSIGN
S8 FADER 8 NO ASSIGN
S9 MASTER FADER NO ASSIGN
A1 SOLO 1 MUTE 1 RECORD 1
A2 SOLO 2 MUTE 2 RECORD 2
A3 SOLO 3 MUTE 3 RECORD 3
A4 SOLO 4 MUTE 4 RECORD 4
5. Logic
MUTE
ROTARY ENCODER 1 NO ASSIGN
6. Logic
RECORD
7. Logic
GLOBAL
GLOBAL -
AUDIO
GLOBAL -
INST
GLOBAL -
AUX
GLOBAL -
BUS
8. Logic
INITIALIZE
NO ASSIGN
NO ASSIGN
NO ASSIGN
NO ASSIGN
English
9
Page 10

Control Map List
Logic Pro (Control Map #4–8)
.
Digital Performer (Control Map #9–11)
4. Logic
SOLO
A5
A6 SOLO 6 MUTE 6 RECORD 6
A7 SOLO 7 MUTE 7 RECORD 7
A8 SOLO 8 MUTE 8 RECORD 8
B1 BANK LEFT
B2 BANK RIGHT
B3 GLOBAL VIEW
B4 FLIP NO ASSIGN
L1 NO ASSIGN NO ASSIGN
L2 REWIND NO ASSIGN
L3 FAST FORWARD NO ASSIGN
L4 NO ASSIGN NO ASSIGN
L5 STOP NO ASSIGN
L6 PLAY NO ASSIGN
L7 NO ASSIGN NO ASSIGN
L8 RECORD NO ASSIGN
L9 NO ASSIGN NO ASSIGN
P1 NO ASSIGN NO ASSIGN
P2 NO ASSIGN NO ASSIGN
BEND NO ASSIGN NO ASSIGN
MOD NO ASSIGN NO ASSIGN
AFT NO ASSIGN NO ASSIGN
SOLO 5 MUTE 5 RECORD 5
5. Logic
MUTE
6. Logic
RECORD
7. Logic
GLOBAL
GLOBAL -
INPUT
GLOBAL -
OUTPUT
GLOBAL -
MIDI
GLOBAL
VIEW
8. Logic
INITIALIZE
NO ASSIGN
NO ASSIGN
NO ASSIGN
NO ASSIGN
Logic
INITIALIZE 1
Logic
INITIALIZE 2
Logic
INITIALIZE 3
9. DP
SOLO
R1 ROTARY ENCODER 1
R2 ROTARY ENCODER 2
R3 ROTARY ENCODER 3
R4 ROTARY ENCODER 4
R5 ROTARY ENCODER 5
R6 ROTARY ENCODER 6
R7 ROTARY ENCODER 7
R8 ROTARY ENCODER 8
R9 NO ASSIGN
S1 FADER 1
S2 FADER 2
S3 FADER 3
S4 FADER 4
S5 FADER 5
S6 FADER 6
S7 FADER 7
S8 FADER 8
S9 MASTER FADER
A1 SOLO 1 MUTE 1 RECORD 1
A2 SOLO 2 MUTE 2 RECORD 2
A3 SOLO 3 MUTE 3 RECORD 3
A4 SOLO 4 MUTE 4 RECORD 4
A5 SOLO 5 MUTE 5 RECORD 5
A6 SOLO 6 MUTE 6 RECORD 6
A7 SOLO 7 MUTE 7 RECORD 7
A8 SOLO 8 MUTE 8 RECORD 8
10. DP
MUTE
11. DP
RECORD
9. DP
SOLO
B1 BANK LEFT
B2 BANK RIGHT
B3 NO ASSIGN
B4 FLIP
L1 RETURN TO ZERO
L2 REWIND
L3 FAST FORWARD
L4 NO ASSIGN
L5 STOP
L6 PLAY
L7 NO ASSIGN
L8 RECORD
L9 NO ASSIGN
P1 NO ASSIGN
P2 NO ASSIGN
BEND NO ASSIGN
MOD NO ASSIGN
AFT NO ASSIGN
10. DP
MUTE
11. DP
RECORD
10
Page 11

Control Map List
Live (Control Map #12–14)
12. Live
SOLO
R1
R2 ROTARY ENCODER 2
R3 ROTARY ENCODER 3
R4 ROTARY ENCODER 4
R5 ROTARY ENCODER 5
R6 ROTARY ENCODER 6
R7 ROTARY ENCODER 7
R8 ROTARY ENCODER 8
R9 NO ASSIGN
S1 FADER 1
S2 FADER 2
S3 FADER 3
S4 FADER 4
S5 FADER 5
S6 FADER 6
S7 FADER 7
S8 FADER 8
S9 MASTER FADER
A1 SOLO 1 MUTE 1 RECORD 1
A2 SOLO 2 MUTE 2 RECORD 2
A3 SOLO 3 MUTE 3 RECORD 3
A4 SOLO 4 MUTE 4 RECORD 4
A5 SOLO 5 MUTE 5 RECORD 5
A6 SOLO 6 MUTE 6 RECORD 6
A7 SOLO 7 MUTE 7 RECORD 7
A8 SOLO 8 MUTE 8 RECORD 8
13. Live
MUTE
ROTARY ENCODER 1
14. Live
RECORD
12. Live
SOLO
B1 BANK LEFT
B2 BANK RIGHT
B3 ARRANGE/SESSION VIEW SW
B4 FLIP
L1 RETURN TO ZERO
L2 REWIND
L3 FAST FORWARD
L4 NO ASSIGN
L5 STOP
L6 PLAY
L7 NO ASSIGN
L8 RECORD
L9 NO ASSIGN
P1 NO ASSIGN
P2 NO ASSIGN
BEND NO ASSIGN
MOD NO ASSIGN
AFT NO ASSIGN
13. Live
MUTE
14. Live
RECORD
GarageBand (Control Map #15)
R1 NO ASSIGN
R2 NO ASSIGN
R3 NO ASSIGN
R4 NO ASSIGN
R5 NO ASSIGN
R6 NO ASSIGN
R7 NO ASSIGN
R8 NO ASSIGN
R9 PAN
S1 MODULATION
S2 PITCH BEND
S3 EXPRESSION
S4 NO ASSIGN
S5 NO ASSIGN
S6 NO ASSIGN
S7 NO ASSIGN
S8 NO ASSIGN
S9 VOLUME
A1 KICK (NOTE 36)
A2 SNARE (NOTE 38)
A3 CLOSED HH (NOTE 42)
A4 OPEN HH (NOTE 46)
A5 LOW TOM (NOTE 43)
A6 MID TOM (NOTE 47)
A7 HI TOM (NOTE 50)
A8 CRASH CYMBAL (NOTE 49)
B1 NO ASSIGN
B2 NO ASSIGN
B3 NO ASSIGN
B4 NO ASSIGN
L1 NO ASSIGN
L2 NO ASSIGN
L3 NO ASSIGN
L4 NO ASSIGN
L5 NO ASSIGN
L6 NO ASSIGN
L7 NO ASSIGN
L8 NO ASSIGN
L9 HOLD
P1 NO ASSIGN
P2 NO ASSIGN
BEND NO ASSIGN
MOD NO ASSIGN
AFT NO ASSIGN
English
11
Page 12

Control Map List
GM2 (Control Map #16)
R1 FILTER CUT OFF
R2 FILTER RESONANCE
R3 VIBRATO RATE
R4 VIBRATO DEPTH
R5 VIBRATO DELAY
R6 COARSE TUNE
R7 FINE TUNE
R8 TEMPO
R9 PAN (CHANNEL)
S1 PORTAMENT TIME
S2 ENVELOPE ATTACK
S3 ENVELOPE DECAY
S4 ENVELOPE RELEASE
S5 CHORUS
S6 REVERB
S7 BANK LSB
S8 BANK MSB
S9 VOLUME (CHANNEL)
A1 KICK (NOTE 36)
A2 SNARE (NOTE 38)
A3 CLOSED HH (NOTE 42)
A4 OPEN HH (NOTE 46)
A5 LOW TOM (NOTE 43)
A6 MID TOM (NOTE 47)
A7 HI TOM (NOTE 50)
A8 CRASH CYMBAL (NOTE 49)
B1 GM2 SYSTEM ON
B2 PORTAMENT
B3 SOFT
B4 SOSTENUTO
L1 PROGRAM CHANGE DEC
L2 PROGRAM CHANGE INC
L3 MONO MODE ON
L4 POLY MODE ON
L5 STOP
L6 START
L7 CONTINUE
L8 RESET ALL CONTROL
L9 HOLD DRUM
P1 NO ASSIGN
P2 NO ASSIGN
BEND NO ASSIGN
MOD NO ASSIGN
AFT NO ASSIGN
SD-50 (Control Map #17)
R1 NO ASSIGN
R2 NO ASSIGN
R3 NO ASSIGN
R4 NO ASSIGN
R5 NO ASSIGN
R6 NO ASSIGN
R7 NO ASSIGN
R8 NO ASSIGN
R9 PAN
S1 PART LEVEL
S2 REVERB SEND
S3 CHORUS SEND
S4 NO ASSIGN
S5 NO ASSIGN
S6 NO ASSIGN
S7 NO ASSIGN
S8 NO ASSIGN
S9 NO ASSIGN
A1 KICK (NOTE 36)
A2 SNARE (NOTE 38)
A3 CLOSED HH (NOTE 42)
A4 OPEN HH (NOTE 46)
A5 LOW TOM (NOTE 43)
A6 MID TOM (NOTE 47)
A7 HI TOM (NOTE 50)
A8 CRASH CYMBAL (NOTE 49)
B1 VARIATION 1
B2 VARIATION 2
B3 PORTAMENT SW
B4 BENDER MODE
L1 PIANO
L2 SHAKUHACHI
L3 VIOLIN
L4 TROMBONE
L5 ELECTRIC PIANO
L6 STRINGS
L7 SAW LEAD
L8 TRANCE KEYS
L9 HOLD DRUM
P1 NO ASSIGN
P2 NO ASSIGN
BEND NO ASSIGN
MOD NO ASSIGN
AFT NO ASSIGN
12
Page 13

コントロール・マップ・ガイド
A-300PRO / 500PRO / 800PRO(以降 A-PRO)には、お買い上げ時に
19 種類のコントロール・マップがあります。このコントロール・マップを使
用して、簡単にソフトウェアやハードウェアに合った設定にすることができま
す。
コントロール・マップ番号 対応ソフトウェア/ハードウェア
1 Cubase SOLO
2 Cubase MUTE
3 Cubase RECORD
4 Logic SOLO
5 Logic MUTE
6 Logic RECORD
7 Logic GLOBAL
8 Logic INITIALIZE
9 DP (DigitalPerformer)SOLO
10 DP MUTE
11 DP RECORD
12 Live SOLO
13 Live MUTE
14 Live RECORD
15 GarageBand
16 GM2
17 SD-50
18 汎用 MIDI コントローラー
19(*1) NO ASSIGN
お使いのソフトウェアやハードウェアに対応しているコントロール・マップが
ない場合、ローランド・ホームページにアクセスし、コントロール・マップが
公開されていないか確認してください。
ローランド・ホームページ
http://www.roland.co.jp/support/
対応しているコントロール・マップが公開されている場合、ダウンロードして
A-PRO 本体に送信することができます。
取扱説明書『A-PRO エディターを使用する』の『作成したコントロール・
マップを A-PRO に送信する』をご覧ください。
コントロール・マップは以下のようにして切り替えます。
1 PLAY モード(参照:取扱説明書『演奏する(PLAY モード)』)にし
ます。
2 []ボタンまたは[]ボタンを押して、ディスプレイの「CTRL
MAP」にカーソルを合わせます。
ディスプレイに、現在選ばれているコントロール・マップ番号が表示され
ます。
3 [VALUE]つまみを回して、保存したコントロール・マップの番号に合わ
せます。
付属のステッカーはコントロール・マップ 16 番の GM2 に対応しています。
必要に応じて、以下の位置に貼ってください。
(*1)お使いのソフトウェアによっては、このコントロール・マップの内容を書
き換えることがあります。
© 2010 ローランド株式会社
本書の一部、もしくは全部を無断で複写・転載することを禁じます。
日本語
33
111133
Page 14

コントロール・マップ・ガイド
Cubase
Cubase を使うときは、以下の設定をします。
ここでは、Mac OS X 版 Cubase 5 を使用するときの説明をします。その他のバージョンでは手順が異なることがあります。
A-PROの操作
1 PLAY モード(参照:取扱説明書『演奏する(PLAY
モード)』)にします。
A-PROの操作
2 []ボタンまたは[]ボタンを押して、ディスプ
レイの「CTRL MAP 」にカーソルを合わせます。
ディスプレイに、現在選ばれているコントロール・マップ番号が表示され
ます。
A-PROの操作
3 [VALUE]つまみを回して、1 番に合わせます。
4 Cubase 5 を起動します。
5 [デバイス]メニューの[デバイスの選択]をクリックします。
6 ダイアログ左上にある[+]ボタンを押して、プルダウン・メニューから
[Mackie Control]を選択します。
fig.cubase1-j.eps
コントローラーに割り当てられる機能
P.19 をご覧ください。
トラブル・シューティング
操作していないのに Pan などの値が変化する
つまみ[R1]〜[R9]の位置がセンターになっているか確認してください。
つまみ[R1]〜[R9]には Encoder Simulate がアサインされています。
つまみ[R1]〜[R9]の位置がセンターになっていない場合は、A-PRO か
らコントロール・メッセージが出力され続けます。
PLAY や STOP はコントロールできるが、Volume や Pan をコント
ロールできない
「チャンネル 1」になっているトラックを確認してください。
[B1]ボタンや[B2]ボタンを押すと、スライダー[S1]〜[S8]やつま
み[R1]〜[R8]に割り当てられるトラックが切り替わります。トラック 1
に[R1]や[S1]が割り当てられているとは限りません。
111144
7 MIDI 入力に[A-PRO 2]を選択して、[適用]をクリックします。続けて
[OK]をクリックします。
fig.cubase2-j.eps
44
Page 15

Logic Pro
Logic Pro を使うときは、以下の設定をします。
ここでは、Logic Pro 9 を使用するときの説明をします。その他のバージョンでは手順が異なることがあります。
1 Logic Pro 9 を起動します。
A-PROの操作
2 PLAY モード(参照:取扱説明書『演奏する(PLAY
モード)』)にします。
A-PROの操作
3 []ボタンまたは[]ボタンを押して、ディスプ
レイの「CTRL MAP 」にカーソルを合わせます。
ディスプレイに、現在選ばれているコントロール・マップ番号が表示され
ます。
A-PROの操作
4 [VALUE]つまみを回して、8 番に合わせます。
A-PROの操作
5 [B1]ボタン、[B2]ボタン、[B3]ボタンを順番に続け
て押します。
A-PRO から Logic Pro 9 をコントロールできるようになります。
6 Logic Pro 9 で開いている設定ウィンドウを閉じます。
コントローラーに割り当てられる機能
P.19 と P.20 をご覧ください。
トラブル・シューティング
操作していないのに Pan などの値が変化する
つまみ[R1]〜[R9]の位置がセンターになっているか確認してください。
つまみ[R1]〜[R9]には Encoder Simulate がアサインされています。
つまみ[R1]〜[R9]の位置がセンターになっていない場合は、A-PRO か
らコントロール・メッセージが出力され続けます。
PLAY や STOP はコントロールできるが、Volume や Pan をコント
ロールできない
「チャンネル 1」になっているトラックを確認してください。
[B1]ボタンや[B2]ボタンを押すと、スライダー[S1]〜[S8]やつま
み[R1]〜[R8]に割り当てられるトラックが切り替わります。トラック 1
に[R1]や[S1]が割り当てられているとは限りません。
トラックの順番どおりにコントロールしたい場合は、GLOBAL VIEW を OFF
にしてください。GLOBAL VIEW が ON になっていると、GLOBAL で設定し
たグループがコントロールの対象になります。
※ GLOBAL VIEW の状態を確認するには、Logic で Track Mixer を開いて
※ GLOBAL VIEW の切り替えをしたり GLOBAL を変更したりするには、コ
おいてください。
ントロール・マップ 7 番を使用してください。
コントロール・マップ・ガイド
日本語
111155
55
Page 16

コントロール・マップ・ガイド
Digital Performer
Digital Performer を使うときは、以下の設定をします。
ここでは、Digital Performer 7 を使用するときの説明をします。その他のバージョンでは手順が異なることがあります。
A-PROの操作
1 PLAY モード(参照:取扱説明書『演奏する(PLAY
モード)』)にします。
A-PROの操作
2 []ボタンまたは[]ボタンを押して、ディスプ
レイの「CTRL MAP 」にカーソルを合わせます。
ディスプレイに、現在選ばれているコントロール・マップ番号が表示され
ます。
A-PROの操作
3 [VALUE]つまみを回して、9 番に合わせます。
4 Digital Performer 7 を起動します。
5 [セットアップ]メニューから[コントロールサーフェスの設定]をクリッ
クします。
6 「コントロールサーフェス」ダイアログにある[+]ボタンをクリックし、
以下のように設定します。
コントローラーに割り当てられる機能
P.20 をご覧ください。
トラブル・シューティング
操作していないのに Pan などの値が変化する
つまみ[R1]〜[R9]の位置がセンターになっているか確認してください。
つまみ[R1]〜[R9]には Encoder Simulate がアサインされています。
つまみ[R1]〜[R9]の位置がセンターになっていない場合は、A-PRO か
らコントロール・メッセージが出力され続けます。
PLAY や STOP はコントロールできるが、Volume や Pan をコント
ロールできない
「チャンネル 1」になっているトラックを確認してください。
[B1]ボタンや[B2]ボタンを押すと、スライダー[S1]〜[S8]やつま
み[R1]〜[R8]に割り当てられるトラックが切り替わります。トラック 1
に[R1]や[S1]が割り当てられているとは限りません。
111166
ドライバ Mackie Control
ユニット Mackie Control
MIDI A-PRO 2-1
66
Page 17

Live
Live を使うときは、以下の設定をします。
ここでは Live 8 を使用するときの説明をします。その他のバージョンでは手順が異なることがあります。
A-PROの操作
1 PLAY モード(参照:取扱説明書『演奏する(PLAY
モード)』)にします。
A-PROの操作
2 []ボタンまたは[]ボタンを押して、ディスプ
レイの「CTRL MAP 」にカーソルを合わせます。
ディスプレイに、現在選ばれているコントロール・マップ番号が表示され
ます。
A-PROの操作
3 [VALUE]つまみを回して、12 番に合わせます。
4 Live 8 を起動します。
5 「環境設定」ダイアログを開きます。
Windows の場合
[オプション]メニューから[環境設定]をクリックします。
Mac OS X の場合
[Live]メニューから[環境設定]をクリックします。
6 「環境設定」ダイアログ左の[MIDI Sync]タブをクリックして、以下の
ように設定します。
コントローラーに割り当てられる機能
トラブル・シューティング
操作していないのに Pan などの値が変化する
PLAY や STOP はコントロールできるが、Volume や Pan をコント
ロールできない
コントロール・マップ・ガイド
P.21 をご覧ください。
つまみ[R1]〜[R9]の位置がセンターになっているか確認してください。
つまみ[R1]〜[R9]には Encoder Simulate がアサインされています。
つまみ[R1]〜[R9]の位置がセンターになっていない場合は、A-PRO か
らコントロール・メッセージが出力され続けます。
「チャンネル 1」になっているトラックを確認してください。
[B1]ボタンや[B2]ボタンを押すと、スライダー[S1]〜[S8]やつま
み[R1]〜[R8]に割り当てられるトラックが切り替わります。トラック 1
に[R1]や[S1]が割り当てられているとは限りません。
コントロールサーフェス 入力
1 Mackie Control A-PRO (A-PRO 2)
7 「環境設定」ダイアログを閉じます。
日本語
77
111177
Page 18

コントロール・マップ・ガイド
GarageBand
GarageBand を使うときは、以下の設定をします。
ここでは、GarageBand '09 を使用するときの説明をします。その他のバージョンでは手順が異なることがあります。
A-PROの操作
1 PLAY モード(参照:取扱説明書『演奏する(PLAY
モード)』)にします。
A-PROの操作
2 []ボタンまたは[]ボタンを押して、ディスプ
レイの「CTRL MAP 」にカーソルを合わせます。
ディスプレイに、現在選ばれているコントロール・マップ番号が表示され
ます。
A-PROの操作
3 [VALUE]つまみを回して、15 番に合わせます。
4 GarageBand を起動します。
コントローラーに割り当てられる機能
P.21 をご覧ください。
トラブル・シューティング
音がでない
ドライバが正常にインストールされていない場合があります。以下の手順で、
確認してください。
1 GarageBand を終了します。
2 A-PRO 以外の MIDI 機器を Mac からはずします。
3 GarageBand を起動します。
4 [GarageBand]メニューの[環境設定]をクリックします。
5 [オーディオ/ MIDI]タブをクリックします。
6 「0 個の MIDI 入力が検出されました」と表示されているか確認します。
0 個の場合は、取扱説明書『トラブルシューティング』の『ドライバの再イン
ストール』をご覧いただき、ドライバの再インストールを行ってください。
111188
[L9]([HOLD])ボタンを押しても Sustain メッセージが出力され
ない
お買い上げ時は、[L9]ボタンには HOLD が割り当てられています。
[L9]ボタンから Sustain メッセージを出力させるためには、[L9]ボタンの
機能を L9 に設定してください。詳しくは取扱説明書『システムを設定する
(EDIT モード)』の『L9 FUNCTION』をご覧ください。
88
Page 19

コントロール・マップ一覧
Cubase(コントロール・マップ 1 〜 3 番)
1. Cubase
SOLO
R1
R2 ROTARY ENCODER 2
R3 ROTARY ENCODER 3
R4 ROTARY ENCODER 4
R5 ROTARY ENCODER 5
R6 ROTARY ENCODER 6
R7 ROTARY ENCODER 7
R8 ROTARY ENCODER 8
R9 NO ASSIGN
S1 FADER 1
S2 FADER 2
S3 FADER 3
S4 FADER 4
S5 FADER 5
S6 FADER 6
S7 FADER 7
S8 FADER 8
S9 MASTER FADER
A1 SOLO 1 MUTE 1 RECORD 1
A2 SOLO 2 MUTE 2 RECORD 2
A3 SOLO 3 MUTE 3 RECORD 3
A4 SOLO 4 MUTE 4 RECORD 4
A5 SOLO 5 MUTE 5 RECORD 5
A6 SOLO 6 MUTE 6 RECORD 6
2. Cubase
MUTE
ROTARY ENCODER 1
3. Cubase
RECORD
1. Cubase
SOLO
A7 SOLO 7 MUTE 7 RECORD 7
A8 SOLO 8 MUTE 8 RECORD 8
B1 BANK LEFT
B2 BANK RIGHT
B3 MIXER VIEW
B4 FLIP
L1 RETURN TO ZERO
L2 REWIND
L3 FAST FORWARD
L4 NO ASSIGN
L5 STOP
L6 PLAY
L7 NO ASSIGN
L8 RECORD
L9 NO ASSIGN
P1 NO ASSIGN
P2 NO ASSIGN
BEND NO ASSIGN
MOD NO ASSIGN
AFT NO ASSIGN
2. Cubase
MUTE
3. Cubase
RECORD
Logic Pro(コントロール・マップ 4 〜 8 番)
4. Logic
SOLO
R1
R2 ROTARY ENCODER 2 NO ASSIGN
R3 ROTARY ENCODER 3 NO ASSIGN
R4 ROTARY ENCODER 4 NO ASSIGN
R5 ROTARY ENCODER 5 NO ASSIGN
R6 ROTARY ENCODER 6 NO ASSIGN
R7 ROTARY ENCODER 7 NO ASSIGN
R8 ROTARY ENCODER 8 NO ASSIGN
R9 NO ASSIGN NO ASSIGN
S1 FADER 1 NO ASSIGN
S2 FADER 2 NO ASSIGN
S3 FADER 3 NO ASSIGN
S4 FADER 4 NO ASSIGN
S5 FADER 5 NO ASSIGN
S6 FADER 6 NO ASSIGN
S7 FADER 7 NO ASSIGN
S8 FADER 8 NO ASSIGN
S9 MASTER FADER NO ASSIGN
A1 SOLO 1 MUTE 1 RECORD 1
A2 SOLO 2 MUTE 2 RECORD 2
A3 SOLO 3 MUTE 3 RECORD 3
A4 SOLO 4 MUTE 4 RECORD 4
5. Logic
MUTE
ROTARY ENCODER 1 NO ASSIGN
6. Logic
RECORD
7. Logic
GLOBAL
GLOBAL -
AUDIO
GLOBAL -
INST
GLOBAL -
AUX
GLOBAL -
BUS
8. Logic
INITIALIZE
NO ASSIGN
NO ASSIGN
NO ASSIGN
NO ASSIGN
日本語
19
Page 20

Logic Pro(コントロール・マップ 4 〜 8 番)
4. Logic
SOLO
A5
A6 SOLO 6 MUTE 6 RECORD 6
A7 SOLO 7 MUTE 7 RECORD 7
A8 SOLO 8 MUTE 8 RECORD 8
B1 BANK LEFT
B2 BANK RIGHT
B3 GLOBAL VIEW
B4 FLIP NO ASSIGN
L1 NO ASSIGN NO ASSIGN
L2 REWIND NO ASSIGN
L3 FAST FORWARD NO ASSIGN
L4 NO ASSIGN NO ASSIGN
L5 STOP NO ASSIGN
L6 PLAY NO ASSIGN
L7 NO ASSIGN NO ASSIGN
L8 RECORD NO ASSIGN
L9 NO ASSIGN NO ASSIGN
P1 NO ASSIGN NO ASSIGN
P2 NO ASSIGN NO ASSIGN
BEND NO ASSIGN NO ASSIGN
MOD NO ASSIGN NO ASSIGN
AFT NO ASSIGN NO ASSIGN
SOLO 5 MUTE 5 RECORD 5
5. Logic
MUTE
6. Logic
RECORD
7. Logic
GLOBAL
GLOBAL -
INPUT
GLOBAL -
OUTPUT
GLOBAL -
MIDI
GLOBAL
VIEW
8. Logic
INITIALIZE
NO ASSIGN
NO ASSIGN
NO ASSIGN
NO ASSIGN
Logic
INITIALIZE 1
Logic
INITIALIZE 2
Logic
INITIALIZE 3
.
Digital Performer
(コントロール・マップ 9 〜 11 番)
9. DP
SOLO
R1
R2 ROTARY ENCODER 2
R3 ROTARY ENCODER 3
R4 ROTARY ENCODER 4
R5 ROTARY ENCODER 5
R6 ROTARY ENCODER 6
R7 ROTARY ENCODER 7
R8 ROTARY ENCODER 8
R9 NO ASSIGN
S1 FADER 1
S2 FADER 2
S3 FADER 3
S4 FADER 4
S5 FADER 5
S6 FADER 6
S7 FADER 7
S8 FADER 8
S9 MASTER FADER
A1 SOLO 1 MUTE 1 RECORD 1
A2 SOLO 2 MUTE 2 RECORD 2
A3 SOLO 3 MUTE 3 RECORD 3
A4 SOLO 4 MUTE 4 RECORD 4
A5 SOLO 5 MUTE 5 RECORD 5
A6 SOLO 6 MUTE 6 RECORD 6
A7 SOLO 7 MUTE 7 RECORD 7
A8 SOLO 8 MUTE 8 RECORD 8
10. DP
MUTE
ROTARY ENCODER 1
11. DP
RECORD
B1 BANK LEFT
B2 BANK RIGHT
B3 NO ASSIGN
B4 FLIP
L1 RETURN TO ZERO
L2 REWIND
L3 FAST FORWARD
L4 NO ASSIGN
L5 STOP
L6 PLAY
L7 NO ASSIGN
L8 RECORD
L9 NO ASSIGN
P1 NO ASSIGN
P2 NO ASSIGN
BEND NO ASSIGN
MOD NO ASSIGN
AFT NO ASSIGN
9. DP
SOLO
10. DP
MUTE
11. DP
RECORD
20
Page 21

Live(コントロール・マップ 12 〜 14 番)
GarageBand(コントロール・マップ 15 番)
12. Live
SOLO
R1
R2 ROTARY ENCODER 2
R3 ROTARY ENCODER 3
R4 ROTARY ENCODER 4
R5 ROTARY ENCODER 5
R6 ROTARY ENCODER 6
R7 ROTARY ENCODER 7
R8 ROTARY ENCODER 8
R9 NO ASSIGN
S1 FADER 1
S2 FADER 2
S3 FADER 3
S4 FADER 4
S5 FADER 5
S6 FADER 6
S7 FADER 7
S8 FADER 8
S9 MASTER FADER
A1 SOLO 1 MUTE 1 RECORD 1
A2 SOLO 2 MUTE 2 RECORD 2
A3 SOLO 3 MUTE 3 RECORD 3
A4 SOLO 4 MUTE 4 RECORD 4
A5 SOLO 5 MUTE 5 RECORD 5
A6 SOLO 6 MUTE 6 RECORD 6
A7 SOLO 7 MUTE 7 RECORD 7
A8 SOLO 8 MUTE 8 RECORD 8
13. Live
MUTE
ROTARY ENCODER 1
14. Live
RECORD
12. Live
SOLO
B1 BANK LEFT
B2 BANK RIGHT
B3 ARRANGE/SESSION VIEW SW
B4 FLIP
L1 RETURN TO ZERO
L2 REWIND
L3 FAST FORWARD
L4 NO ASSIGN
L5 STOP
L6 PLAY
L7 NO ASSIGN
L8 RECORD
L9 NO ASSIGN
P1 NO ASSIGN
P2 NO ASSIGN
BEND NO ASSIGN
MOD NO ASSIGN
AFT NO ASSIGN
13. Live
MUTE
14. Live
RECORD
R1 NO ASSIGN
R2 NO ASSIGN
R3 NO ASSIGN
R4 NO ASSIGN
R5 NO ASSIGN
R6 NO ASSIGN
R7 NO ASSIGN
R8 NO ASSIGN
R9 PAN
S1 MODULATION
S2 PITCH BEND
S3 EXPRESSION
S4 NO ASSIGN
S5 NO ASSIGN
S6 NO ASSIGN
S7 NO ASSIGN
S8 NO ASSIGN
S9 VOLUME
A1 KICK (NOTE 36)
A2 SNARE (NOTE 38)
A3 CLOSED HH (NOTE 42)
A4 OPEN HH (NOTE 46)
A5 LOW TOM (NOTE 43)
A6 MID TOM (NOTE 47)
A7 HI TOM (NOTE 50)
A8 CRASH CYMBAL (NOTE 49)
B1 NO ASSIGN
B2 NO ASSIGN
B3 NO ASSIGN
B4 NO ASSIGN
L1 NO ASSIGN
L2 NO ASSIGN
L3 NO ASSIGN
L4 NO ASSIGN
L5 NO ASSIGN
L6 NO ASSIGN
L7 NO ASSIGN
L8 NO ASSIGN
L9 HOLD
P1 NO ASSIGN
P2 NO ASSIGN
BEND NO ASSIGN
MOD NO ASSIGN
AFT NO ASSIGN
日本語
21
Page 22

GM2(コントロール・マップ 16 番)
SD-50(コントロール・マップ 17 番)
R1 FILTER CUT OFF
R2 FILTER RESONANCE
R3 VIBRATO RATE
R4 VIBRATO DEPTH
R5 VIBRATO DELAY
R6 COARSE TUNE
R7 FINE TUNE
R8 TEMPO
R9 PAN (CHANNEL)
S1 PORTAMENT TIME
S2 ENVELOPE ATTACK
S3 ENVELOPE DECAY
S4 ENVELOPE RELEASE
S5 CHORUS
S6 REVERB
S7 BANK LSB
S8 BANK MSB
S9 VOLUME (CHANNEL)
A1 KICK (NOTE 36)
A2 SNARE (NOTE 38)
A3 CLOSED HH (NOTE 42)
A4 OPEN HH (NOTE 46)
A5 LOW TOM (NOTE 43)
A6 MID TOM (NOTE 47)
A7 HI TOM (NOTE 50)
A8 CRASH CYMBAL (NOTE 49)
B1 GM2 SYSTEM ON
B2 PORTAMENT
B3 SOFT
B4 SOSTENUTO
L1 PROGRAM CHANGE DEC
L2 PROGRAM CHANGE INC
L3 MONO MODE ON
L4 POLY MODE ON
L5 STOP
L6 START
L7 CONTINUE
L8 RESET ALL CONTROL
L9 HOLD DRUM
P1 NO ASSIGN
P2 NO ASSIGN
BEND NO ASSIGN
MOD NO ASSIGN
AFT NO ASSIGN
R1 NO ASSIGN
R2 NO ASSIGN
R3 NO ASSIGN
R4 NO ASSIGN
R5 NO ASSIGN
R6 NO ASSIGN
R7 NO ASSIGN
R8 NO ASSIGN
R9 PAN
S1 PART LEVEL
S2 REVERB SEND
S3 CHORUS SEND
S4 NO ASSIGN
S5 NO ASSIGN
S6 NO ASSIGN
S7 NO ASSIGN
S8 NO ASSIGN
S9 NO ASSIGN
A1 KICK (NOTE 36)
A2 SNARE (NOTE 38)
A3 CLOSED HH (NOTE 42)
A4 OPEN HH (NOTE 46)
A5 LOW TOM (NOTE 43)
A6 MID TOM (NOTE 47)
A7 HI TOM (NOTE 50)
A8 CRASH CYMBAL (NOTE 49)
B1 VARIATION 1
B2 VARIATION 2
B3 PORTAMENT SW
B4 BENDER MODE
L1 PIANO
L2 SHAKUHACHI
L3 VIOLIN
L4 TROMBONE
L5 ELECTRIC PIANO
L6 STRINGS
L7 SAW LEAD
L8 TRANCE KEYS
L9 HOLD DRUM
P1 NO ASSIGN
P2 NO ASSIGN
BEND NO ASSIGN
MOD NO ASSIGN
AFT NO ASSIGN
22
Page 23

Page 24

*5100016234 - 01*
 Loading...