

Page 1
Installation Instructions
Shock Mount Strips for Hard Disk Drive
VersaView 6181P (1500P/1700P) Integrated Display Computers
Catalog No. 6189V-25HDDSA
This document shows how to replace the hard drive gaskets in 6181P 15"
and 17" Industrial Computers.
Safety Precautions
Observe the following precautions when working with the computer’s hard
disk drive:
• Do not touch internal components unnecessarily.
• Always handle the hard disk drive by its metal frame.
• Store the hard disk drive in an anti-static bag when it is not installed.
• Never disconnect or install a hard disk drive with the power turned on.
ATTENTION
Failure to follow proper safety procedures could result in
severe electrical shock or damage to the VersaView 6181P
Integrated Display Computers.
!
ATTENTION
ESD can damage the computer and components. Make
sure you work in a static-safe environment and wear a
grounding strap whenever handling circuit boards, hard
disk drive or other internal components.
!
ATTENTION
Mechanical shock can damage a hard drive. Do not drop or
bump the drive.
!
The Hard Drisk Drive Shock Mount Strips Kit (6189V-25HDDSA)
consists of:
• 2 shock mount strips
• 4 flat head screws
• 2 pan head screws
1 Publication 6181P-IN005A-EN-P
Page 2
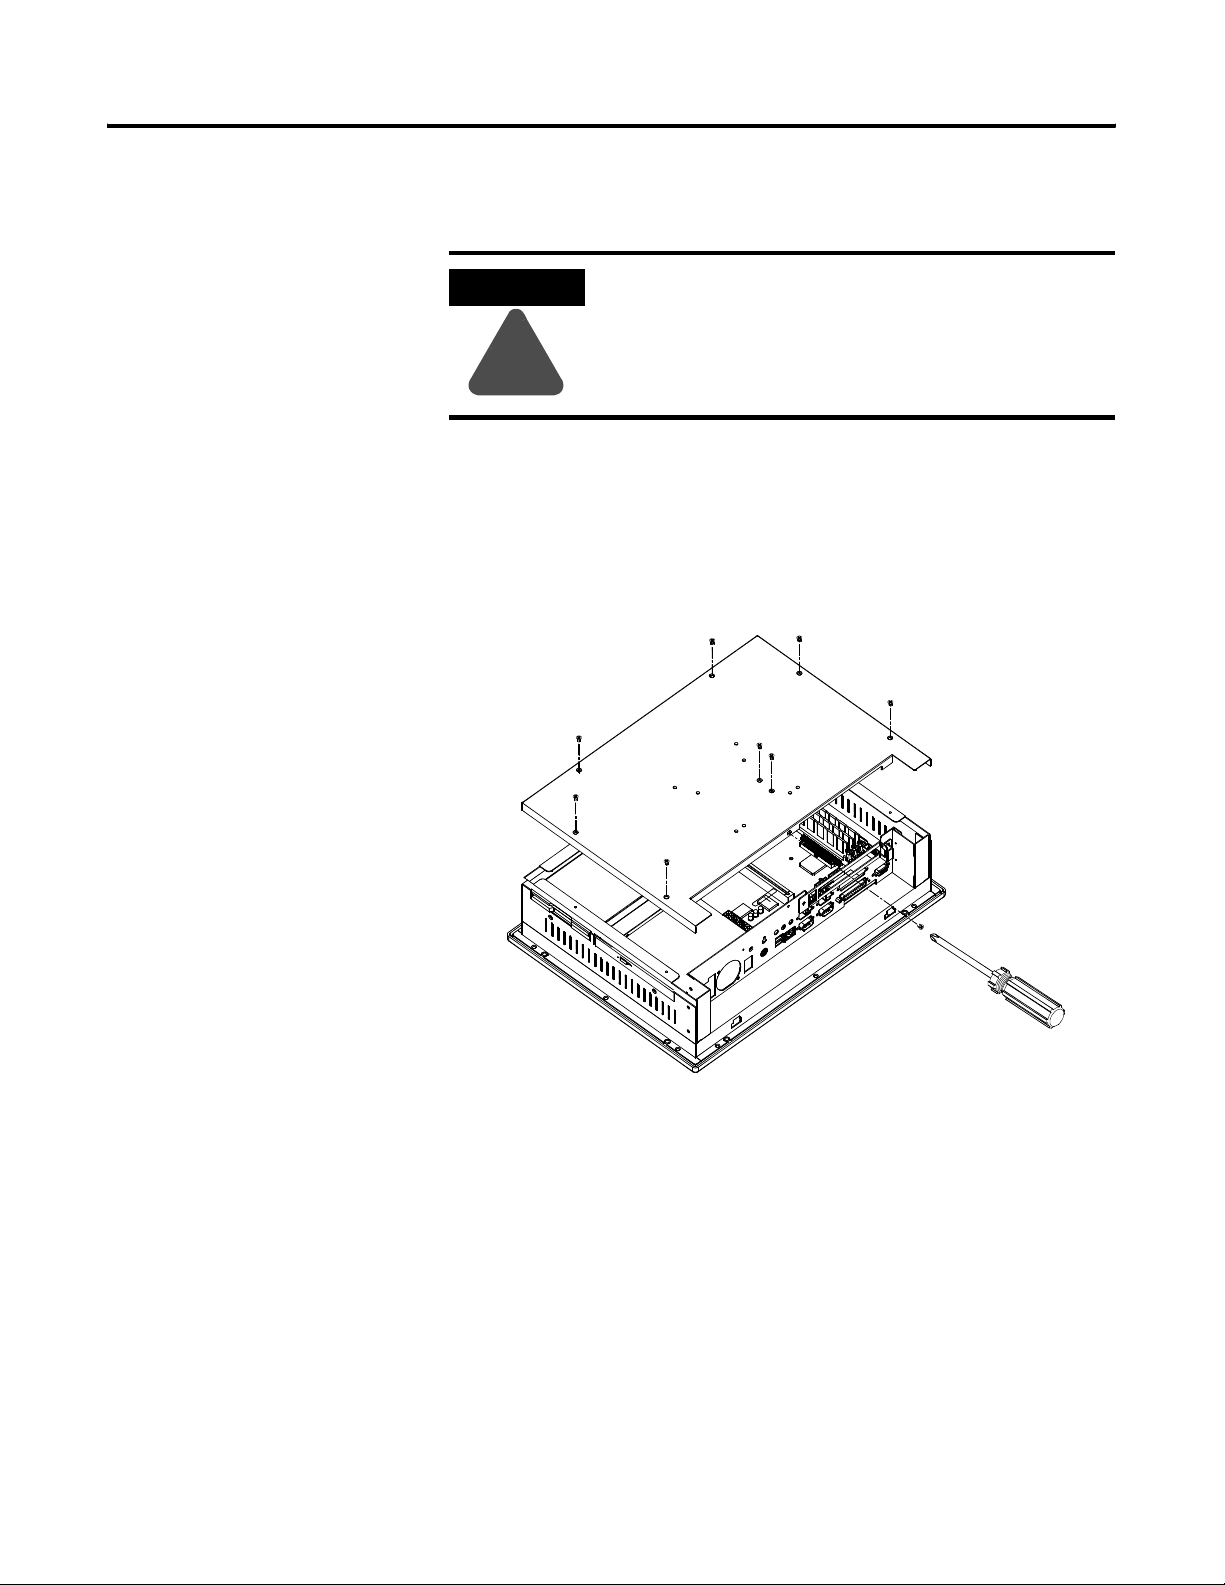
2 Shock Mount Strips for Hard Disk Drive
For maintenance, installation or upgrade of computer components, you have
to remove the back cover of the VersaView computer first.
ATTENTION
Failure to follow proper safety procedures could result in
severe electrical shock or damage to the VersaView 6181P
Integrated Display Computers.
!
To remove the back cover:
1. Disconnect power from the computer.
2. Remove the screws securing the back cover.
Publication 6181P-IN005A-EN-P
Page 3

Hard Disk Drive
Brackets
Shock Mount Strips for Hard Disk Drive 3
To remove the hard disk drive:
1. Remove the screws that fasten the hard disk drive assembly to the
chassis.
2. Lift the upper plate from the hard disk drive.
3. Remove and discard the upper and lower shock absorbers.
Rubber Shock
Mount Strips
Hard Disk Drive
Publication 6181P-IN005A-EN-P
Page 4

To install the hard disk drive:
1. Place one of the rubber shock mount strips into the bottom hard disk
drive bracket.
2. Place
3. P
4. P
5. F
the hard disk drive into the bottom hard disk drive bracket so that
i
t fits inside the rubber shock mount strip.
lace the other rubber shock mount strip evenly around the top edge of
th
e hard drive.
lace the top hard disk drive brackets on top of the hard drive and shock
mo
unt strip.
asten the hard disk drive assembly to the chassis with 4 screws.
6. Reinstall the back cover.
Publication 6181P-IN005A-EN-P - February 2004 4 PN 41061-343-01(1)
Copyright © 2004 Rockwell Automation, Inc . All rights reserved. Printed in the U.S.A.
 Loading...