

Page 1
1-800-557-4825
www.rivalproducts.com
Servicio de Asistencia al Cliente:
Whoopie Pie Maker
Whoopie pies
Máquina para hacer
™
™
Customer Assistance:
1-800-557-4825
www.rivalproducts.com
FPRVTRWP01_12ESM1 P.indd 1-1 11/23/11 9:25 AM
Page 2

IMPORTANT SAFEGUARDS
When using an electrical appliance basic safely precautions should always
be followed including the following:
1. Read carefully and save all the instructions provided with an
appliance. This appliance is not a toy.
2. Do not touch hot surfaces. Use handles or knobs.
3. To protect against electric shock do not immerse cord, plugs
or any part in water or other liquid.
4. Always attach plug to appliance first, then plug cord in the wall
outlet. To disconnect, remove plug from wall outlet.
5. Always plug your appliance cord into a power outlet of the
voltage (A.C. only) marked on the appliance.
6. Unplug from outlet when not in use and before cleaning.
Allow to cool before putting on or taking off parts, and before
cleaning the appliance.
7. Close supervision is necessary when your appliance is being
used by children.
8. Never leave an appliance unattended while in use.
9. Do not use an appliance for any purpose other than its
intended use.
10. Do not place an appliance on or near a hot gas flame, electric
element or on a heated oven. Do not place on top of any other
appliance.
11. Do not let the power cord of an appliance hang over the edge
of a table or bench top or touch any hot surface.
12. Do not operate any electrical appliance with a damaged cord
or after the appliance has been damaged in any manner.
13. The use of accessory attachments not recommended by the
appliance manufacturer may cause injuries.
14. Do not use outdoors.
15. Appliances are not intended to be operated by means of an
external timer or separate remote control system.
16. This appliance is intended for household use only.
-E2-
-S2-
remoto separado.
marcador de tiempo externo ni con un sistema a control
15. Este aparato no a sido diseñado para ser operado con un
14. No use al aire libre.
fabricante de este aparato podría causar lesiones.
13. El uso de accesorios o aditamentos no recomendados por el
cualquier manera.
dañado, o después de que el aparato haya sido dañado de
12. No opere cualquier aparato que tenga un cordón o enchufe
tablero de cocina, o que toque superficies calientes.
11. No permita que el cordón cuelgue del borde de la mesa o
un elemento u hornilla eléctrica o dentro de un horno caliente.
10. No coloque el aparato sobre o cerca de una llama de gas caliente,
9. No use este aparato para otro uso que no sea el recomendado.
8. Nunca deje un aparato descuidado mientras esté en uso.
aparato sea usado por niños.
7. Es necesario mantener supervisión constante cuando su
retirar partes, y antes de limpiarlo.
de limpiar. Permita que el aparato se enfríe antes de poner o
6. Desenchufe del tomacorriente cuando no esté en uso y antes
eléctrico (AC solamente) del voltaje marcado en el aparato.
5. Siempre enchufe el cordón de su aparato en un tomacorriente
desenchufe del tomacorriente de pared.
el cordón al tomacorriente de pared. Para desconectar,
4. Siempre adjunte el enchufe al aparato primero y luego enchufe
sumerja el enchufe o cualquier parte en agua u otro líquido.
3. Para protegerse contra el riesgo de descarga eléctrica, no
2. No toque superficies calientes. Use las asas o perillas.
Whoopie pies descuidada.
se proveen con el aparato. No deje su Maquina para hacer
1. Lea cuidadosamente y guarde todas las instrucciones que
seguridad básicas incluyendo la siguientes:
Cuando use un artefacto eléctrico, siempre debe usar precauciones de
PRECAUCIONES IMPORTANTES
FPRVTRWP01_12ESM1 P.indd 2-3 11/23/11 9:25 AM
Page 3
-S3-
ENCHUFE POLARIZADO
1-800-557-4825 o al www.rivalproducts.com
Preguntas o Comentarios
GUARDE ESTAS INSTRUCCIONES
cuasar tropiezos sin querer.
una mesa o tablero de donde podría ser jalado por niños o podría
arreglarse de modo tal que no queden colgando del borde de
la clasificación eléctrica del aparato. Todos los cordones deben
o cordón eléctrico desmontable debe ser por lo menos igual que
largo, la clasificación eléctrica marcada en la extensión de cable
Si usa una extensión de cable o un cordón eléctrico desmontable
largos o extensiones de cable si se usan con cuidado.
cordón largo. Pueden usarse cordones eléctricos desmontables más
para reducir el riesgo de enredos o tropiezos que pueda causar un
Se provee un cordón eléctrico corto (o cordón eléctrico desmontable)
USO DE UNA EXTENSIÓN DE CABLE
si el tomacorriente se siente caliente, no utilice ese tomacorriente.
ninguna manera. Si el enchufe está fl ojo en el tomacorriente de CA, o
electricista califi cado. No intente modifi car el enchufe de
al enchufe. Si todavía no se ajusta, contacte a un
ajusta completamente en el tomacorriente, dé vuelta
tomacorriente polarizado. Si el enchufe no se
para ajustarse sólo de una forma en un
descarga eléctrica, este enchufe está diseñado
más ancha que la otra). Para reducir el riesgo de
Este aparato tiene un enchufe polarizado (una pata es
ESTA UNIDAD ES PARA USO DOMÉSTICO ÚNICAMENTE
que contenga aceite o líquidos calientes.
19. Debe usar extremo cuidado cuando mueva cualquier aparato
18. No coloque ninguna parte de este aparato en el lavaplatos.
superficie plana.
17. Opere la Maquina para hacer Whoopie pies sobre una
16. Este aparato es para uso doméstico solamente.
17. Operate the Whoopie Pie Maker on a flat surface.
18. Do not place any part of this appliance in a dishwasher.
19. Extreme caution must be used when moving an appliance
containing hot oil or other hot liquids.
THIS UNIT IS INTENDED FOR HOUSEHOLD USE ONLY.
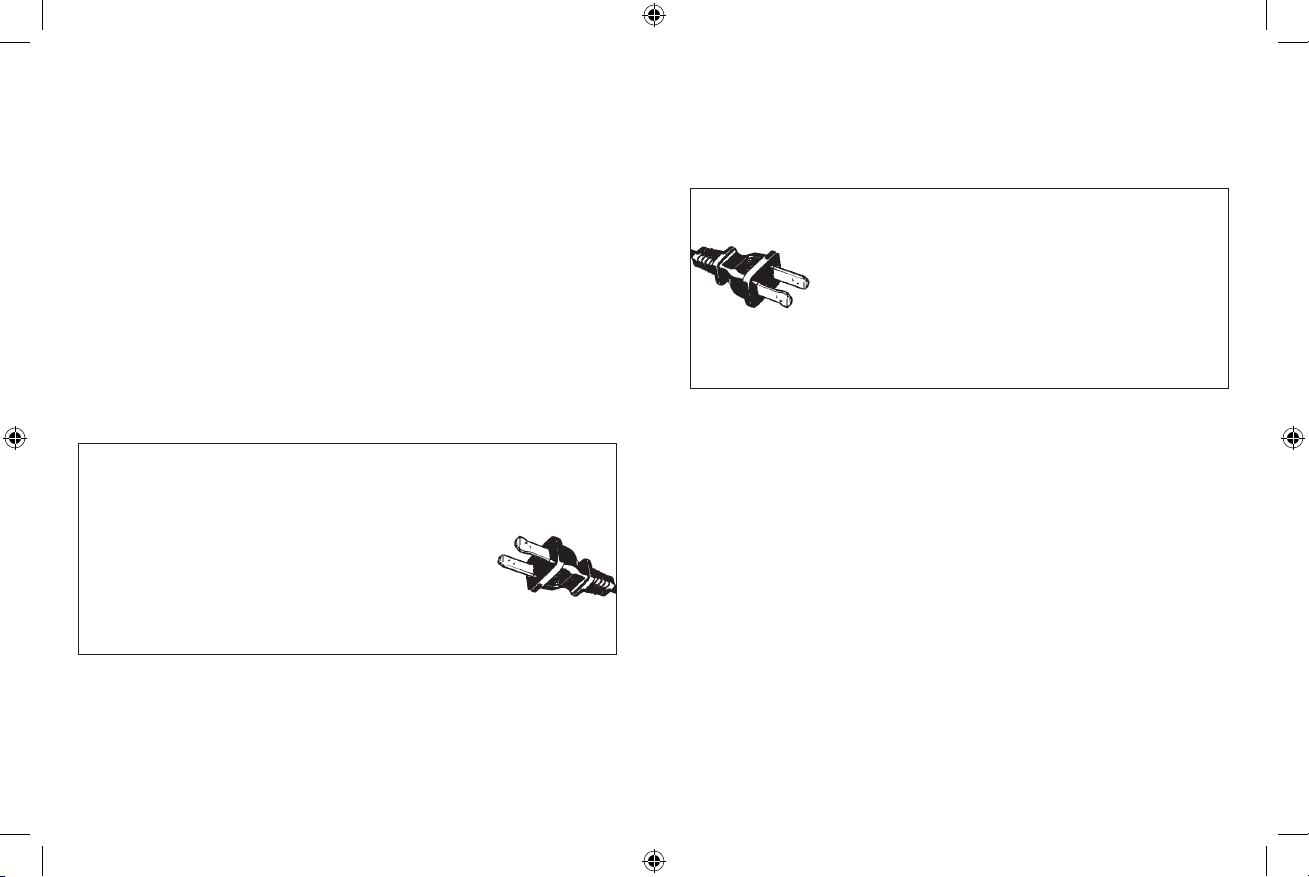
POLARIZED PLUG
This appliance has a polarized plug (one blade
is wider than the other). To reduce the risk of
electric shock, this plug is intended to fit into a
polarized outlet only one way. If the plug does
not fit fully into the outlet, reverse the plug. If it
still does not fit, contact a qualified electrician.
Do not attempt to modify the plug in any way. If
the plug fits loosely into the AC outlet or if the AC outlet feels
warm do not use that outlet.
EXTENSION CORD USE
A short power-supply cord (or detachable power-supply cord) is
provided to reduce the risk resulting from becoming entangled in
or tripping over a longer cord. Longer detachable power-supply
cords or extension cords are available and may be used if care is
exercised in their use.
If a long detachable power-supply cord or extension cord is
used, the electrical rating of the cord or extension cord must
be at least as great as the electrical rating of the appliance. The
extension cord should be arranged so that it will not drape over
the countertop or tabletop where it can be pulled on by children or
tripped over unintentionally.
SAVE THESE INSTRUCTIONS
Questions or Comments
1-800-557-4825 or at www.rivalproducts.com
-E3-
FPRVTRWP01_12ESM1 P.indd 4-5 11/23/11 9:25 AM
Page 4
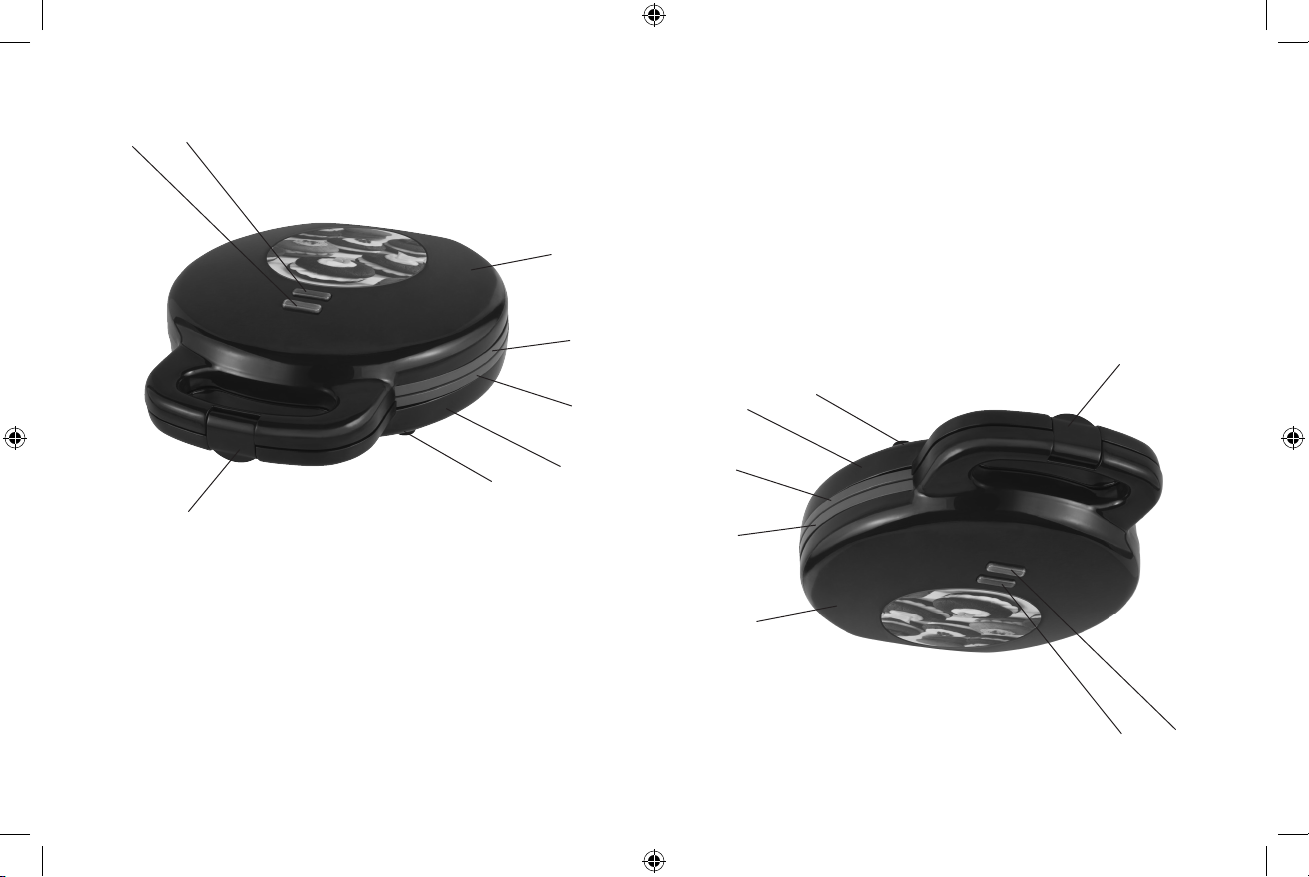
LEARNING ABOUT YOUR RIVAL™ WHOOPIE PIE MAKER
B
A
-S4-
cocción
(almacenaje)
H. Amarre del cordón
G. Pestillo de la tapa
F. Cubierta inferior
C
cocción
E. Plancha inferior de
D. Plancha superior de
C. Cubierta superior
horneado listo
B. Luz indicadora de
encendido
A. Luz indicadora de
D
G
H
E
F
F
E
H
G
A. Power light indicator
B. Ready light indicator
C. Upper housing
F. Bottom housing
G. Lid Latch
H. Cord Wrap (storage)
D
C
D. Upper cooking plate
E. Bottom cooking
plate
-E4-
FPRVTRWP01_12ESM1 P.indd 6-7 11/23/11 9:25 AM
A
B
APRENDIENDO ACERCA DE SU MÁQUINA PARA PASTELES RIVAL™
Page 5

-S5-
HOW TO USE
For whoopie pie batter you can use:
1. Store bought cake mix.
2. Use the whoopie pie recipes beginning on page E7 or a store
cavidad.
NOTA: Para Whoopie pies, use ¼ de taza con mezcla en cada
antes de usar.
placas de cocción con un rociador con aceite de cocina
Whoopie pies, se recomienda que rocié ligeramente las
Consejo: Cuando coloque la mezcla en la máquina para hacer
seguridad de su aparato.
es normal en aparatos de calentamiento. Esto no afecta la
primera vez, puede que emita un ligero humo u olor, esto
3. Cuando su máquina para hacer Whoopie pies se calienta por
de cocción han alcanzado la temperatura correcta para cocinar.
hasta que la luz de LISTO se encienda. Esto indica que las placas
2. Permita que su máquina para hacer Whoopie pies precaliente
indicadora de encendido se encenderá.
1. Inserte el enchufe en un tomacorriente de 120 voltios. La luz
Para usar la máquina para hacer Whoopie pies siga estas indicaciones:
NUNCA SUMERJA LAS SUPERFICIES PARA COCINAR EN EL AGUA.
una esponja suave.
4. Lave las superficies de cocción con agua caliente jabonosa y
3. Desenrolle el cordón eléctrico completamente.
húmeda y luego deje secar.
2. Limpie las superficies para horneado con una tela suave
1. Remueva todo el empaque.
Antes del uso inicial:
una mezcla para bizcochos comprada en tienda.
2. Use las recetas de Whoopie pies ubicadas en la pagina S8 o
1. Mezcla para bizcochos comprada en la tienda.
Mezcla que puede usar para el Whoopie pie:
CÓMO USAR
bought cake mix.
Before initial use:
1. Remove all packaging.
2. Clean the baking surfaces with a soft damp cloth, then dry it.
3. Unwind the power cord completely.
4. Wash cooking surfaces with hot sudsy water and a soft sponge.
NEVER IMMERSE COOKING SURFACES IN WATER.
To use Whoopie Pie Maker follow these guidelines:
1. Insert the plug into a 120 volt power outlet. Power Light
indicator will turn on.
2. Allow your Whoopie Pie Maker to pre-heat until the ‘READY’
light comes on. This indicates that the cooking plates have
reached the correct temperature for cooking.
3. When your Whoopie Pie Maker is heated for the first time it
may emit slight smoke or odor, this is normal with heating
appliances. This does not affect the safety of your appliance.
Tip: When placing mixture into the Whoopie Pie Maker, it is
advised to lightly spray the cooking plates with a cooking oil
spray before use.
NOTE: For whoopie pies, use ¼ cup batter in each cavity.
4. Gently close the lid and make sure lid latch is engaged.
5. Allow to cook until a tooth pick inserted into the whoopie pie
comes out clean.
Tip: Do not lift the lid before the recommended cooking time as
this will affect the result.
6. To remove whoopie pie, always use a plastic or wooden
spatula. Never use a sharp object or metal, as this will
damage the non-stick surface of the cooking plates.
NOTE: Surfaces are hot.
-E5-
FPRVTRWP01_12ESM1 P.indd 8-9 11/23/11 9:25 AM
Page 6

CARE AND CLEANING
This appliance should be cleaned after every use.
1. Always unplug Whoopie Pie Maker from outlet when not
in use or before cleaning. Allow to completely cool before
cleaning. The cooking plates are coated with non-stick
cooking surface, therefore little cleaning is required. Simply
wipe cooking plates over with a damp cloth.
2. Do not immerse the Whoopie Pie Maker in water or other
liquids. Do not use abrasive scouring pads, powders or
cleaners. Before next use; lightly grease the cooking plates for
easy removal of cooked whoopie pies.
3. Do not wash in dishwasher.
HELPFUL HINTS
1. Cooking times may vary depending on the whoopie pie batter
mixture.
2. Cake mixes are suitable to use in the Whoopie Pie Maker. Use
the recipe and method as directed on the packet mix but only
cook for 5–6 minutes per batch.
3. Do not open the Whoopie Pie Maker before the recommended
cooking time as this can affect the cooking result of the
whoopie pie.
4. Finished whoopie pies can be frozen and thawed for later use.
Allow the whoopie pies to cool completely then place into an
airtight container and freeze. Whoopie pies can be individually
wrapped and frozen for lunchbox treats.
5. Use a flat rounded knife or angled spatula to spread icing
easily. Angled spatulas are available from kitchen supply
stores.
-E6-
-S6-
3. No lave en el lavaplatos.
fácilmente los Whoopie pies cocidos.
ligeramente las planchas de cocción para poder remover
o limpiadores abrasivos. Antes del siguiente uso; engrase
cualquier otro líquido. No use esponjas de refregar, polvos
2. No sumerja la máquina para hacer Whoopie pies en agua o
Simplemente pásele una tela húmeda a las planchas de cocción.
cocción antiadherente , por lo tanto se requiere poca limpieza.
planchas de cocción están cubiertas con una superficie de
Permita que se enfríe por completo antes de limpiar. Las
del tomacorriente cuando no esté en uso o antes de limpiar.
1. Siempre desenchufe la máquina para hacer Whoopie pies
Este aparato se debe limpiar después de cada uso.
CUIDADO Y LIMPIEZA
NOTA: Las superficies están calientes.
placas de cocción.
puesto que este dañará la superficie antiadherente de las
de plástico o madera. Nunca use un objeto filudo o de metal
6. Para remover los Whoopie pies, siempre use una espátula
recomendado puesto que esto afectará los resultados.
Consejo: No levante la tapa antes del tiempo de cocción
éste salga limpio.
5. Continúe cocinando hasta que al insertar un palillo de dientes
tapa esté enganchado.
4. Cierre la tapa suavemente y asegúrese que el seguro de la
FPRVTRWP01_12ESM1 P.indd 10-11 11/23/11 9:25 AM
Page 7

-S7-
pueden obtenerse en las tiendas de artículos de cocina.
esparcir el glaseado fácilmente. Las espátulas angulares
5. Use un cuchillo plano de punta redonda o una espátula para
las luncheras.
individualmente y congelarse para poner como postrecito en
y congélelos. Los Whoopie pies pueden envolverse
totalmente y luego póngalos en un recipiente hermético
para su uso posterior. Deje que los Whoopie pies se enfríen
4. Los Whoopie pies pueden congelarse y descongelarse
de cocción del pastel.
cocción recomendado ya que esto puede afectar el resultado
3. No abra la máquina de hacer pasteles antes del tiempo de
mezcla, pero solo cocine durante 5–6 minutos por tanda.
la receta y el método según las instrucciones en el paquete de
2. Las mezclas para pasteles se pueden usar en la máquina. Siga
mezcla del Whoopie pie.
1. Los tiempos de cocción pueden variar dependiendo de la
CONSEJOS ÚTILES
RECIPES
VANILLA WHOOPIE PIES
1 cup flour
2
⁄3 cup sugar
1 ¼ teaspoons baking powder
¼ teaspoon salt
Lightly spray Whoopie Pie Maker inside on top and bottom with
non-stick cooking spray and spray inside top. Close lid, plug in and
preheat Whoopie Pie Maker until bake ready light turns on. Combine
flour, sugar, baking powder and salt. In another bowl, combine butter,
milk, egg and vanilla. Pour wet ingredients into dry ingredients and stir
until just fully incorporated. Fill well and close lid. Do not overfill. Cook
for around 8 minutes or until lightly browned. Remove whoopie pies,
let cool and top with your favorite frosting.
NOTE: For best result, use no more than ¼ cup of whoopie pie batter per
pie cavity.
1
⁄3 cup melted butter
½ cup milk
1 egg, lightly beaten
1 teaspoon vanilla extract
-E7-
FPRVTRWP01_12ESM1 P.indd 12-13 11/23/11 9:25 AM
Page 8

CHOCOLATE BROWNIE PIES
½ cup (1 stick) butter
¼ cup bittersweet or semisweet
chocolate morsels
2 tablespoons cocoa powder
Lightly spray Whoopie Pie Maker inside on top and bottom with
non-stick cooking spray and spray inside top. Close lid, plug in and
preheat Whoopie Pie Maker until bake ready light turns on. Melt butter
and chocolate in microwave for 25 seconds, stir, and repeat until
butter and chocolate are just melted. Stir to combine. In a medium
bowl combine cocoa, sugar, salt and eggs and stir well. Pour in
chocolate and butter mixture; stir well until just fully incorporated.
Stir in flour. Fill well and close lid. Do not overfill. Cook for around
10 minutes or until a toothpick inserted into pie comes out clean.
Remove whoopie pies, let cool and top with ganache or chocolate
frosting/filling.
NOTE: Fill bottom cavities well with batter.
¾ cup sugar
¼ teaspoon salt
2 large eggs, lightly beaten
½ cup flour
-E8-
-S8-
Whoopie pies en cada cavidad.
NOTA: Para mejore resultados, no use más de ¼ de taza de mezcla para
Retire los Whoopie pies, deje enfriar y cubra con su glaseado favorito.
por unos 8 minutos minutos o hasta que estén ligeramente dorados.
huecos completamente y cierre la tapa. No llene en exceso. Cocine
ingredientes secos y revuelva hasta que se mezclen bien. Llene los
el huevo y la vainilla. Eche los ingredientes líquidos sobre los
hornear y la sal . En otro tazón, combine la mantequilla, la leche,
Hornear se encienda. Combine la harina, el azúcar, el polvo para
máquina para hacer Whoopie pies hasta que la luz de Listo para
y rocíe en la parte superior. Cierre la tapa, enchufe y precaliente la
máquina para hacer Whoopie pies con aceite antiadherente en spray
Rocíe ligeramente las partes superior e inferior del interior de la
1 cucharadita de extracto de vainilla
1 huevo, batido ligeramente
½ taza de leche
⁄3 de taza de mantequilla derretida
1
¼ de cucharadita sal
1 ¼ cucharadita de polvo para hornear
⁄3 taza de azúcar
2
1 taza de harina
WHOOPIE PIES DE VAINILLA
RECETAS
FPRVTRWP01_12ESM1 P.indd 14-15 11/23/11 9:25 AM
Page 9

-S9-
BREAKFAST CORN AND BACON WHOOPIE PIES
½ cup cornmeal
1
⁄3 cup flour
1 tablespoon sugar
1 ½ teaspoons baking powder
¼ teaspoon Kosher salt
2
⁄3 cup milk
1 large egg, lightly beaten
2 tablespoons butter, melted
¼ cup cooked, crumbled bacon
Lightly spray Whoopie Pie Maker inside on top and bottom with
non-stick cooking spray and spray inside top. Close lid, plug in and
preheat Whoopie Pie Maker until bake ready light turns on. In medium
bowl, combine cornmeal, flour, sugar, baking powder and salt. In a
small bowl, combine milk, egg and butter. Pour wet ingredients into
dry ingredients, add bacon and stir until just fully incorporated. Fill well
and close lid. Do not overfill. Cook at least 4–5 minutes. Remove food
and serve.
NOTE: For best results, fill batter to top of bottom cavity.
NOTA: Llene bien las cavidades inferiores con la mezcla.
glaseado/relleno de chocolate.
limpio. Retire los Whoopie pies, deje enfriar y cubra con Ganache o
hasta que al insertar un palillo de dientes en el pie, el palillo salga
y cierre la tapa. No llene en exceso. Cocine por unos 10 minutos o
bien hasta que se mezclen. Vierta y mezcle la harina. Llene los huecos
y mezcle bien. Vierta la mezcla de chocolate y mantequilla, revuelva
un tazón mediano, combine la cocoa, el azúcar, la sal y los huevos
mantequilla y el chocolate estén derretidos. Revuelva y combine. En
en el microondas por 25 segundos, revuelva y repita hasta que la
para Hornear se encienda. Derrita la mantequilla y el chocolate
la máquina para hacer Whoopie pies hasta que la luz de Listo
y rocíe en la parte superior. Cierre la tapa, enchufe y precaliente
máquina para hacer Whoopie pies con aceite antiadherente en spray
Rocíe ligeramente las partes superior e inferior del interior de la
½ taza de harina
2 huevos grandes, batidos ligeramente
¼ de cucharadita sal
¾ de taza de azúcar
2 cucharadas de cocoa en polvo
semi dulce o amargas
¼ de taza de pastillas de chocolate
½ taza (1 barra) de mantequilla
PIES DE BROWNIE DE CHOCOLATE
-E9-
FPRVTRWP01_12ESM1 P.indd 16-17 11/23/11 9:25 AM
Page 10

CHOCOLATE WHOOPIE PIES WITH VANILLA FILLING
Makes 4–5 sandwiched Whoopie Pies
Filling:
½ stick (¼ cup) unsalted butter,
softened
2
⁄3 cup confectioner’s sugar
Cakes:
1 cup flour
¼ cup unsweetened cocoa powder
½ teaspoon baking soda
¼ teaspoon salt
Combine all filling ingredients and beat on medium speed until
smooth. Chill for 2 hours. Butter cavities/wells of Whoopie Pie
Maker. Combine flour, cocoa, baking soda and salt. Whisk until well
combined. Add butter and brown sugar to bowl of electric mixer and
beat on medium speed until light and fluffy, about 3–4 minutes. Add
egg. On low speed, alternate adding buttermilk and flour, adding
a third of buttermilk and flour each time. Mix until smooth and well
combined, scraping down sides of bowl as necessary. Fill Whoopie
Pie Maker with up to
1
⁄3 cup of batter and cook for around 8 minutes.
Carefully remove cakes and let cool. Grease wells with butter for
subsequent batches. Spread 1 tablespoon of chilled filling on flat side
of 1 cake and top with another. Chill and store in refrigerator for up to
3 days.
1 cup marshmallow cream
½ teaspoon vanilla
½ cup buttermilk
½ stick (¼ cup) butter, softened
½ cup brown sugar, packed
1 small egg (or half a large egg)
-S10-
arriba de las cavidades inferiores.
NOTA: Para mejores resultados, llene con la mezcla hasta la parte de
comida y sirva.
No llene en exceso. Cocine por lo menos 4 a 5 minutos. Retire la
revuelva bien hasta que se mezclen por completo. Llene bien y cierre.
ingredientes líquidos sobre los ingredientes secos, añada el tocino y
un tazón pequeño combine la leche, huevo y la mantequilla. Vierta los
maíz (cornmeal), el harina, el azúcar, el polvo para hornear y la sal. En
Hornear se encienda. En un tazón mediano, combine la harina de
máquina para hacer Whoopie pies hasta que la luz de Listo para
y rocíe en la parte superior. Cierre la tapa, enchufe y precaliente la
máquina para hacer Whoopie pies con aceite antiadherente en spray
Rocíe ligeramente las partes superior e inferior del interior de la
¼ taza de trocitos de tocino cocido
2 cucharadas de mantequilla derretida
1 huevo grande, batido ligeramente
⁄3 taza de leche
2
-E10-
FPRVTRWP01_12ESM1 P.indd 18-19 11/23/11 9:25 AM
¼ cucharadita de sal Kosher
1 ½ cucharadita de polvo para hornear
1 cucharada de azúcar
⁄3 taza de harina
1
½ taza de harina de maíz (cornmeal)
Whoopie pies para el desayuno de Maíz/Choclo y tocino
Page 11

-S11-
NOTES
otro bizcocho. Enfríe y guarde en la refrigeradora por hasta 3 días.
relleno frío sobre la parte plana de uno de los bizcochos y cúbralo con
con mantequilla para las siguientes tandas. Esparza una cucharada de
bizcochos cuidadosamente y déjelos enfriar. Engrase las cavidades
⁄3 de taza de mezcla y cocine por unos 8 minutos. Retire los
1
más de
bol si es necesario. Llene la máquina para hacer Whoopie pies con no
hasta que quede suave y bien combinado, y raspe las paredes del
añadiendo un tercio de la leche cuajada y la harina cada vez. Mezcle
velocidad baja, alterne añadiendo la leche cuajada y la harina,
y esponjoso, por unos 3 a 4 minutos. Añada el huevo. Manteniendo
batidora eléctrica y bata a velocidad media hasta que quede ligero
bien combinados. Añada la mantequilla y azúcar rubia al bol de la
harina, cocoa, bicarbonato de soda y sal. Revuelva hasta que queden
las cavidades de la máquina para hacer Whoopie pies. Combine la
media hasta que quede suave. Refrigere por 2 horas. Enmantequille
Combine todos los ingredientes para el relleno y bata a velocidad
1 huevo chico (o medio huevo grande)
½ taza (apretada) de azúcar rubia
suavizada
½ barra (¼ de taza) de mantequilla,
½ taza de leche cuajada/batida
¼ cucharadita de sal
½ cucharadita de bicarbonato de soda
azúcar
¼ de taza de cocoa en polvo sin
1 taza de harina
Bizcochos:
½ cucharadita de vainilla
(marshmallow)
1 taza de crema de malvavisco
⁄3 de taza de azúcar en polvo
2
sin sal, suavizada
½ barra (¼ de taza) de mantequilla
Relleno:
Hace de 4 a 5 sándwiches Whoopie pies
WHOOPIE PIES DE CHOCOLATE CON RELLENO DE VAINILLA
FPRVTRWP01_12ESM1 P.indd 20-21 11/23/11 9:25 AM
-E11-
Page 12

Sunbeam Products, Inc. doing business as Jarden Consumer Solutions or if in Canada, Sunbeam
Garantía Limitada de 1 año
Corporation (Canada) Limited doing business as Jarden Consumer Solutions (collectively “JCS”)
warrants that for a period of one year from the date of purchase, this product will be free from defects
in material and workmanship. JCS, at its option, will repair or replace this product or any component of
the product found to be defective during the warranty period. Replacement will be made with a new or
remanufactured product or component. If the product is no longer available, replacement may be made
with a similar product of equal or greater value. This is your exclusive warranty. Do NOT attempt to
repair or adjust any electrical or mechanical functions on this product. Doing so will void this warranty.
This warranty is valid for the original retail purchaser from the date of initial retail purchase and is
not transferable. Keep the original sales receipt. Proof of purchase is required to obtain warranty
performance. JCS dealers, service centers, or retail stores selling JCS products do not have the right to
alter, modify or any way change the terms and conditions of this warranty.
This warranty does not cover normal wear of parts or damage resulting from any of the following:
negligent use or misuse of the product, use on improper voltage or current, use contrary to the operating
instructions, disassembly, repair or alteration by anyone other than JCS or an authorized JCS service
center. Further, the warranty does not cover: Acts of God, such as fire, flood, hurricanes and tornadoes.
What are the limits on JCS’s Liability?
JCS shall not be liable for any incidental or consequential damages caused by the breach of any express,
implied or statutory warranty or condition.
Except to the extent prohibited by applicable law, any implied warranty or condition of merchantability or
fitness for a particular purpose is limited in duration to the duration of the above warranty.
JCS disclaims all other warranties, conditions or representations, express, implied, statutory or otherwise.
JCS shall not be liable for any damages of any kind resulting from the purchase, use or misuse of, or inability
to use the product including incidental, special, consequential or similar damages or loss of profits, or for any
breach of contract, fundamental or otherwise, or for any claim brought against purchaser by any other party.
Some provinces, states or jurisdictions do not allow the exclusion or limitation of incidental or consequential
damages or limitations on how long an implied warranty lasts, so the above limitations or exclusion may not
apply to you.
This warranty gives you specific legal rights, and you may also have other rights that vary from province to
province, state to state or jurisdiction to jurisdiction.
How to Obtain Warranty Service
In the U.S.A.
If you have any question regarding this warranty or would like to obtain warranty service, please call
1-800-557-4825 and a convenient service center address will be provided to you.
In Canada
If you have any question regarding this warranty or would like to obtain warranty service, please call
1-800-557-4825 and a convenient service center address will be provided to you.
In the U.S.A., this warranty is offered by Sunbeam Products, Inc. doing business as Jarden Consumer
Solutions located in Boca Raton, Florida 33431. In Canada, this warranty is offered by Sunbeam
Corporation (Canada) Limited doing business as Jarden Consumer Solutions, located at 20 B Hereford
Street, Brampton, Ontario L6Y 0M1. If you have any other problem or claim in connection with this
product, please write our Consumer Service Department.
PLEASE DO NOT RETURN THIS PRODUCT TO ANY OF THESE ADDRESSES OR TO THE PLACE OF PURCHASE.
© 2012 Sunbeam Products, Inc. doing business as Jarden Consumer Solutions. All rights reserved.
Distributed by Sunbeam Products, Inc. doing business as Jarden Consumer Solutions, Boca Raton, Florida
33431.
www.rivalproducts.com Printed in China GCDS-RIV23833-JC P.N. 155243
1-YEAR LIMITED WARRANTY
FPRVTRWP01_12ESM1
www.rivalproducts.com Impreso en China
Consumer Solutions, Boca Raton, Florida 33431.
derechos reservados. Distribuido por Sunbeam Products, Inc. operando bajo el nombre de Jarden
© 2012 Sunbeam Products, Inc. operando bajo el nombre de Jarden Consumer Solutions. Todos los
POR FAVOR NO DEVUELVA ESTE PRODUCTO A NINGUNA DE ESTAS DIRECCIONES NI AL LUGAR DE COMPRA.
este producto, por favor escriba al Departamento de Servicio al Consumidor.
Hereford Street, Brampton, Ontario L6Y 0M1. Si usted tiene otro problema o reclamo en conexión con
Sunbeam Corporation (Canada) Limited operando bajo el nombre de Jarden Consumer Solutions, 20 B
de Jarden Consumer Solutions, Boca Ratón, Florida 33431. En Canadá, esta garantía es ofrecida por
En los Estados Unidos, esta garantía es ofrecida por Sunbeam Products, Inc. operando bajo el nombre
1-800-557-4825 y podrá obtener la dirección del centro de servicio que le resulte más conveniente.
Si tiene alguna pregunta sobre esta garantía o desea recibir servicio de garantía, llame al
En Canadá
1-800-557-4825 y podrá obtener la dirección del centro de servicio que le resulte más conveniente.
Si tiene alguna pregunta sobre esta garantía o desea recibir servicio de garantía, llame al
En los Estados Unidos
Cómo solicitar el servicio en garantía
de un estado, provincia o jurisdicción a otro.
Esta garantía le otorga derechos legales específicos y es posible que usted tenga otros derechos que varían
exclusión o las limitaciones antes mencionadas no se apliquen en su caso.
o emergentes ni las limitaciones a la duración de las garantías implícitas, de modo que es posible que la
Algunas provincias, estados o jurisdicciones no permiten la exclusión o limitación de los daños incidentales
naturaleza, ni de ningún reclamo iniciado contra el comprador por un tercero.
la pérdida de ganancias, ni de ningún incumplimiento contractual, sea de una obligación esencial o de otra
la imposibilidad de usar el producto, incluidos los daños incidentales, especiales, emergentes o similares, o
JCS no será responsable de ningún tipo de daño que resulte de la compra, uso o mal uso del producto, o por
cualquier otra naturaleza.
JCS queda exenta de toda otra garantías, condiciones o manifestaciones, expresa, implícita, legal o de
antes mencionada.
comerciabilidad o aptitud para un fin determinado se limita, en cuanto a su duración, al plazo de la garantía
Excepto en la medida en que lo prohíba la ley aplicable, cualquier garantía o condición implícita de
garantía o condición expresa, implícita o legal.
JCS no será responsable de daños incidentales o emergentes causados por el incumplimiento de alguna
¿Cuál es el límite de responsabilidad de JCS?
como incendios, inundaciones, huracanes y tornados.
a JCS o a un Centro de Servicio autorizado por JCS. Asimismo, la garantía no cubre actos fortuitos tales
contrario a las instrucciones operativas, y desarme, reparación o alteración por parte de un tercero ajeno
de uso negligente o mal uso del producto, uso de voltaje incorrecto o corriente inapropiada, uso
Esta garantía no cubre el desgaste normal de las piezas ni los daños que se produzcan como resultado
otro modo los términos y las condiciones de esta garantía.
minoristas que venden productos de JCS no tienen derecho a alterar, modificar ni cambiar de ningún
se requiere presentar un recibo de compra. Los agentes y centros de servicio de JCS o las tiendas
misma no es transferible. Conserve el recibo de compra original. Para solicitar servicio en garantía
La garantía es válida para el comprador minorista original a partir de la fecha de compra inicial y la
producto. Al hacerlo elimínará ésta garantía.
es su garantía exclusiva. No intente reparar o ajustar ninguna función eléctrica o mecánica de este
ya no estuviera disponible, se lo reemplazará por un producto similar de valor igual o superior. Ésta
de garantía. El reemplazo se realizará por un producto o componente nuevo o reparado. Si el producto
reemplazará este producto o cualquier componente del mismo que presente defectos durante el período
este producto estará libre de defectos de materiales y mano de obra. JCS, a su elección, reparará o
(en forma conjunta, “JCS”), garantiza que por un período de un año a partir de la fecha de compra,
Sunbeam Corporation (Canada) Limited operando bajo el nombre de Jarden Consumer Solutions,
Sunbeam Products, Inc. operando bajo el nombre de Jarden Consumer Solutions, o en Canadá,
FPRVTRWP01_12ESM1 P.indd 16-17 11/23/11 9:25 AM
 Loading...