

Page 1

Programming Guide RIGOL
Publication Number: PGC01107-1110
Apr. 2009
DM3000 Series Digital Multimeter
© 2008 RIGOL Technologies, Inc. All Rights Reserved.
DM3061/2/3/4
DM3051/2/3/4
Page 2

Page 3

RIGOL
I
© 2008 RIGOL Technologies, Inc. All Rights Reserved.
RIGOL products are protected by patent laws in and outside of the P.R. China.
Information in this publication replaces all previous corresponding material.
RIGOL Technologies, Inc. reserves the right to modify or change part of or all the
specifications and pricing policies at company’s sole decision.
NOTE: RIGOL is registered trademark of RIGOL Technologies, Inc.
© 2008 RIGOL Technologies, Inc.
Programming Guide for DM3000 Series
Page 4

RIGOL
II
Summary
This manual provides the guidance for remote control programming of DM3000 series
digital multimeters. Users can carry on remote control to a multimeter or do the
further development according to this manual. We believe that this manual’s readers
have read the detailed RIGOL DM3000 series multimeter user guide, and been
familiar with the RIGOL DM3000 series multimeter’s operation.
The manual contains four chapters:
Chapter 1
Generalize the methods of using commands;
Chapter 2
Introduce the detailed commands according to the functions of RIGOL DM3000
series digital multimeter;
Chapter 3
List other commands that the RIGOL DM3000 series digital multimeter are
compatible with;
Chapter 4
The application examples of the RIGOL DM3000 series digital multimeter commands.
Index lists all the commands of the RIGOL DM3000 series digital multimeter, and
makes it easier for users to quickly find.
© 2008 RIGOL Technologies, Inc.
Programming Guide for DM3000 Series
Page 5

RIGOL
III
Contents
Chapter 1 Introduction .......................................................................... 1-1
Programming Introduction ......................................................................... 1-2
Symbol Instruction .................................................................................... 1-3
Parameter Types ....................................................................................... 1-4
Commands Introduction ............................................................................. 1-5
Chapter 2 DM3000 Commands Systerm ................................................ 2-1
Common Commands ................................................................................. 2-2
Function Commands .................................................................................. 2-4
Measure Commands .................................................................................. 2-9
Precision Commands................................................................................ 2-36
System Commands .................................................................................. 2-44
Utility Commands .................................................................................... 2-54
Trigger Commands .................................................................................. 2-61
Calculate Commands ............................................................................... 2-67
Datalog Commands ................................................................................. 2-76
Scan Commands ..................................................................................... 2-83
Chapter 3 DM3000 Compatible Commands ........................................... 3-1
Agilent Commands .................................................................................... 3-2
Fluke Commands ..................................................................................... 3-13
Chapter 4 DM3000 Commands Examples .............................................. 4-1
Example 1 : Reading Statistic ..................................................................... 4-2
Example 2 : Elimination of test impedance error .......................................... 4-3
Example 3 : dBm Measurement .................................................................. 4-4
Index DM3000 Command Quick Reference ............................................... I
© 2008 RIGOL Technologies, Inc.
Programming Guide for DM3000 Series
Page 6

Page 7

RIGOL
1-1
Chapter 1 Introduction
This chapter provides the guidance for user to use a RIGOL DM3000 series digital
multimeter for remote control programming correctly, and to achieve a long-distance
measuring operation.
This chapter includes:
Programming Introduction
Symbol Instruction
Parameter Types
Commands Introduction
© 2008 RIGOL Technologies, Inc.
Programming Guide for DM3000 Series
Page 8

RIGOL
1-2
Programming Introduction
This part intrduces the basic programming operations.These programming commands
provide the methods for remote control to a multimeter.
The Basic operations that you can do with a computer and a multimeter include:
Setup a multimeter.
Measure.
Receive data (equipment working condition or measurement results) from a
multimeter.
A computer can communicate with a multimeter by sending and receiving messages
over an I/O port, such as USB, GPIB port or a RS-232 port. The commands appear as
ASCII strings embedded inside the output statements of a “host” language available
on your computer, so users can control and do the secondary development. Please
refer to the user guide about the connection methods of communication interface.
© 2008 RIGOL Technologies, Inc.
Programming Guide for DM3000 Series
Page 9

RIGOL
1-3
Symbol Instruction
1. Colon :
Commands usually begin with a colon (:). A colon (:) is used to separate a command
keyword from a lower-level keyword. It shows the operation that a multimeter will
implement.
2. Blank Space □
A Blank space is used to separate commands from the program data. If your
command does not need any program data, the blank space is not needed.
3. Interrogation ?
A query is formed by adding an interrogation (?) to the end of the commands. The
query commands usually include different data, and both of them usually divided by a
space □. But some commands don’t include data.
4. Braces { }
When several elements separated by a vertical line (|) are enclosed by braces, { },
only one element may be selected. For example, {ON | OFF} indicates that only ON or
OFF may be selected, not both.
5. Triangle Brackets < >
A item enclosed in < > should be replaced by a numerical value or character string.
© 2008 RIGOL Technologies, Inc.
Programming Guide for DM3000 Series
Page 10

RIGOL
1-4
Parameter Types
1. Consecutive Integer Parameter
The parameters can be any integer only in effective range. Note that do not set the
parameters for decimal format, or else abnormal. For example, setting screen
brightness command ": system: display: bright", the parameter range is from 0 to
255.
2. Consecutive Real Number Parameter
In effective value range, the parameters can be random value according to precision
(usually the default precision takes six effective digits behind decimal point). For
example, setting NULL offset command ": calculate: NULL: offset", the parameters
meet the range of the real number Table 2- 12 indicated.
3. Discrete Parameters
The parameters can only be the cited value. For example, setting AC voltage measure
range command ": measure: voltage: AC", the parameter can only be 0, 1, 2 or 3,
but not other values.
4. Boolean Parameters
The parameters can only be ON or OFF. For example, setting beeper state command
“:system:beeper:state”, the parameter can only be ON or OFF.
5. ASCII Character string
The parameter should be composed of ASCII character string. For example, setting
date command ":system:clock:date”, the parameter can be a character string of
date format.
© 2008 RIGOL Technologies, Inc.
Programming Guide for DM3000 Series
Page 11
RIGOL
1-5
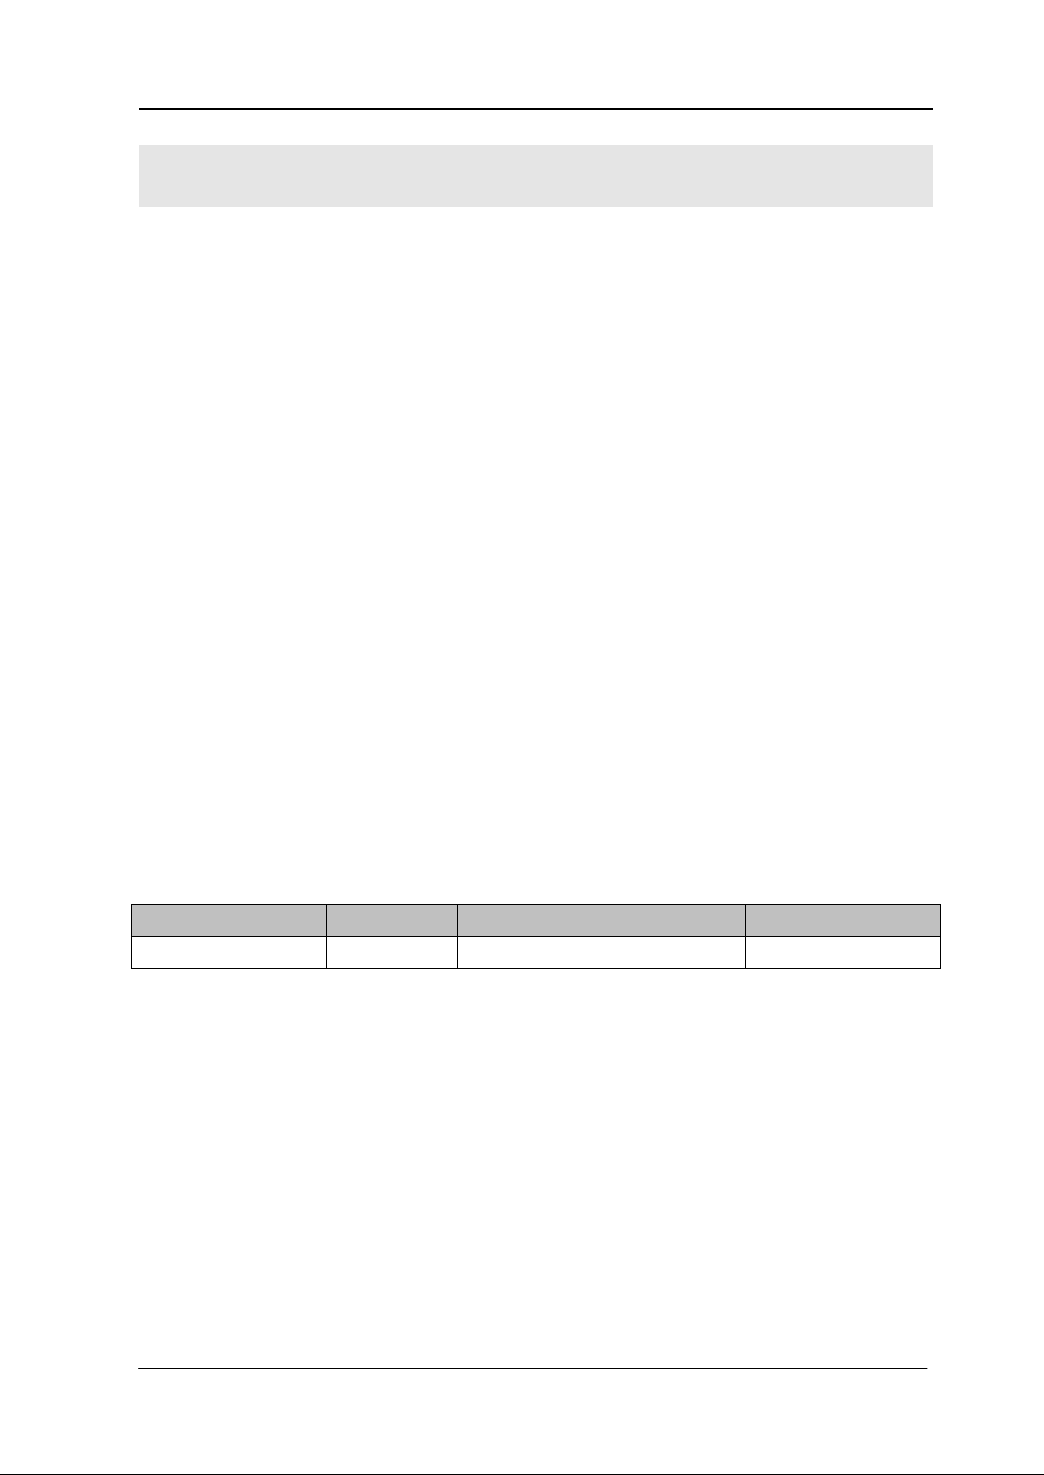
Name
Type
Range of values
Default
Digital parameter
Discrete
{RIGOL|AGILENT|FLUKE}
RIGOL
Commands Introduction
To meet the needs of different users, DM3000 provides RIGOL commands and
another two commands that are compatible with the related products.
RIGOL DM3000 commands
The commands compatible with Agilent
The commands compatible with Fluke
Send CMDSET command to change the commands type. For the usage please see
the follows:
Syntax:
CMDSET□{RIGOL|AGILENT|FULUKE}
CMDSET?
Function:
The command sets and queries command types.
The first command parameters include RIGOL,AGILENT and FLUKE, and it means
choosing the corresponding commands.
The second command queries the current commands, and returns the
commands’ name.
Parameters:
Remarks:
If you don’t want to send this commands when strating machine, the default will be
ROGOL.
© 2008 RIGOL Technologies, Inc.
Programming Guide for DM3000 Series
Page 12

Page 13

RIGOL
2-1
Chapter 2 DM3000 Commands Systerm
In RIGOL DM3000 series digital multimeter commands, all the command parameters
and the returned values are ASCII characters. All the commands do not distinguish the
letter size.
RIGOL DM3000 series digital multimeter includes the following commands
subsystems:
Common Commands
Function Commands
Measure Commands
Precision Commands
System Commands
Utility Commands
Trigger Commands
Calculate Commands
Datalog Commands
Scan Commands
© 2008 RIGOL Technologies, Inc.
Programming Guide for DM3000 Series
Page 14

RIGOL
2-2
Common Commands
This commands are used to query equipment state and perform some basic
operations.
The commands mainly include:
*IDN?
*RST
© 2008 RIGOL Technologies, Inc.
Programming Guide for DM3000 Series
Page 15

RIGOL
2-3
1. *IDN?
Syntax:
*IDN?
Function:
The command queries equipment ID, and returns 35 characters at least.
Return Format:
The query returns a character string, and it shows the equipment ID.
2. *RST
Syntax:
*RST
Function:
The command resets the equipment state, and makes it the factory default.
© 2008 RIGOL Technologies, Inc.
Programming Guide for DM3000 Series
Page 16

RIGOL
2-4
Function Commands
The commands are used to set the basic measurement functions, and they equal to
select the measure function buttons in DM3000 front panel.
The commands mainly include:
:function
:function:voltage:DC:ratio
:function:voltage:DC
:function:voltage:AC
:function:current:DC
:function:current:AC
:function:resistance
:function:fresistance
:function:frequency
:function:period
:function:continuity
:function:diode
:function:capacitance
© 2008 RIGOL Technologies, Inc.
Programming Guide for DM3000 Series
Page 17

RIGOL
2-5
1. :function
Syntax:
:function?
Function:
The command queries the kinds of measure functions.
Return Format:
The query returns the current DM3000 measure function’s shortening. The possible
returned values are: DCV, ACV, DCI, ACI, RESISTANCE, CAPACITANCE, CONTINUITY,
FRESISTANCE, DIODE, FREQUENCY, PERIOD, RATIO.
2. :function:voltage:DC:ratio
Syntax:
:function:voltage:DC:ratio
Function:
The command turns on DC voltage ratio measure function.
Remark:
In “:function?” , this function is corresponding to the returned value“ RATIO”.
3. :function:voltage:DC
Syntax:
:function:voltage:DC
Function:
The command turns on DC voltage measure function.
Remark:
In “:function?” , this function is corresponding to the returned value“ DCV”.
4. :function:voltage:AC
Syntax:
© 2008 RIGOL Technologies, Inc.
Programming Guide for DM3000 Series
Page 18

RIGOL
2-6
:function:voltage:AC
Function:
The command turns on AC voltage measure function.
Remark:
In “:function?” , this function is corresponding to the returned value “ACV”.
5. :function:current:DC
Syntax:
:function:current:DC
Function:
The command turns on DC current measure function.
Remark:
In “:function?” , this function is corresponding to the returned value “DCI”.
6. :function:current:AC
Syntax:
:function:current:AC
Function:
The command turns on AC current measure function.
Remark:
In “:function?” , this function is corresponding to the returned value “ACI”.
7. :function:resistance
Syntax:
:function:resistance
Function:
The command turns on resistance measure function.
© 2008 RIGOL Technologies, Inc.
Programming Guide for DM3000 Series
Page 19

RIGOL
2-7
Remark:
In “:function?” , this function is corresponding to the returned value “RESISTANCE”.
8. :function:fresistance
Syntax:
:function:fresistance
Function:
The command turns on fresistance measure function.
Remark:
In “:function?” , this function is corresponding to the returned value “FRESISTANCE”.
9. :function:frequency
Syntax:
:function:frequency
Function:
The command turns on frequency measure function.
Remark:
In “:function?” , this function is corresponding to the returned value “FREQUENCY”.
10. :function:period
Syntax:
:function:period
Function:
The command turns on period measure function.
Remark:
In “:function?” , this function is corresponding to the returned value “PERIOD”.
11. :function:continuity
© 2008 RIGOL Technologies, Inc.
Programming Guide for DM3000 Series
Page 20

RIGOL
2-8
Syntax:
:function:continuity
Function:
The command turns on continuity measure function.
Remark:
In “:function?” , this function is corresponding to the returned value “CONTINUITY”.
12. :function:diode
Syntax:
:function:diode
Function:
The command turns on diode measure function.
Remark:
In “:function?” , this function is corresponding to the returned value “DIODE”.
13. :function:capacitance
Syntax:
:function:capacitance
Function:
The command turns on capacitance measure function.
Remarks:
In “:function?” , this function is corresponding to the returned value “CAPACITANCE”.
© 2008 RIGOL Technologies, Inc.
Programming Guide for DM3000 Series
Page 21

RIGOL
2-9
Measure Commands
The commands are used to set measure function further which equal to select
measure function buttons in DM3000 front panel.
The commands mainly include:
:measure?
:measure
:measure:voltage:DC?
:measure:voltage:DC
:measure:voltage:DC:range?
:measure:voltage:DC:impedance
:measure:voltage:DC:digit
:measure:voltage:DC:ratio
:measure:voltage:DC:ratio:digit
:measure:voltage:AC?
:measure:voltage:AC
:measure:voltage:AC:range?
:measure:voltage:AC:filter
:measure:voltage:AC:digit
:measure:voltage:AC:freq?
:measure:voltage:AC:freq:display
:measure:voltage:AC:freq:hide
:measure:voltage:AC:freq:state?
:measure:current:DC?
:measure:current:DC
:measure:current:DC:range?
:measure:current:DC:digit
:measure:current:AC?
:measure:current:AC
:measure:current:AC:range?
:measure:current:AC:digit
:measure:current:AC:freq?
:measure:current:AC:freq:display
:measure:current:AC:freq:hide
:measure:current:AC:freq:state?
:measure:resistance?
:measure:resistance
:measure:resistance:range?
:measure:resistance:digit
:measure:fresistance?
:measure:fresistance
:measure:fresistance:range
:measure:fresistance:digit
:measure:frequency?
:measure:frequency
:measure:frequency:range?
:measure:frequency:digit
:measure:period?
:measure:period
:measure:period:range?
:measure:period:digit
:measure:continuity?
:measure:continuity
:measure:diode
:measure:diode:digit
:measure:capacitance?
:measure:capacitance
:measure:capacitance:range?
:measure:capacitance:digit
© 2008 RIGOL Technologies, Inc.
Programming Guide for DM3000 Series
Page 22

RIGOL
2-10
1. :measure?
Syntax:
:measure?
Function:
The command queries whether the current measure have been completed.
Explanations:
To query whether the current measure have been completed or not. If “complete”
returns “ture”, or else “false”.
Return Format:
The query returns true or false.
2. :measure
Syntax:
:measure□{AUTO|MANU}
Function:
The command sets measure mode as auto or manual.
Example:
To set as manual:
:measure□MANU
3. :measure:voltage:DC?
Syntax:
:measure:voltage:DC?
Function:
The command queries DC voltage.
Return Format:
The query returns the current DC voltage in the form of scientific countity, for example:
8.492853e-05, unit is V
© 2008 RIGOL Technologies, Inc.
Programming Guide for DM3000 Series
Page 23
RIGOL
2-11
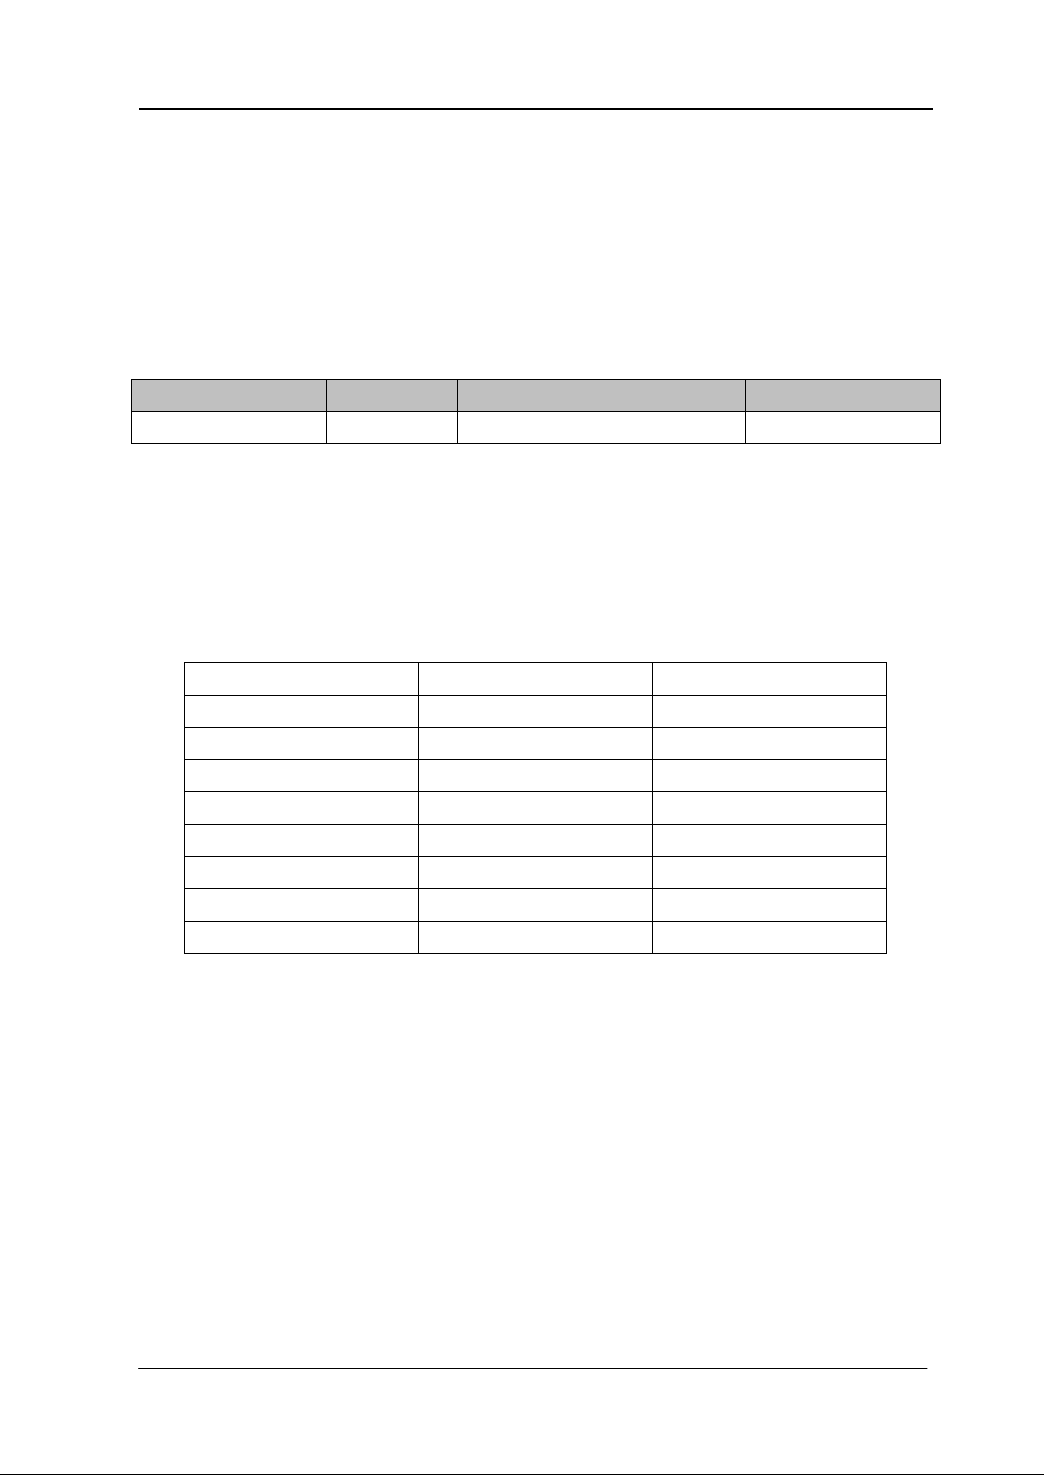
Name
Type
Range of values
Default
<
range
>
discrete
{0|1|2|3|4}
2
Parameter
DC Voltage Range
Resolution
0
200mV
100 nV
1
2V
1 μV
2
20V
10 μV
3
200V
100 μV
4
1000V
1 mV
MIN
200mV
100 nV
MAX
1000V
1 mV
DEF
20V
10 μV
4. :measure:voltage:DC
Syntax:
:measure:voltage:DC□{<
range
>|MIN|MAX|DEF}
Function:
The command sets the measure range of DC voltage and resolution.
Parameters:
Explanations:
To set the DC voltage range and the resolution at the same time.
The measure mode will be changed into manual when setting range
Table 2- 1 incdicates the parameters and the resolutions.
Table 2- 1 The DC voltage range and the resolution
Examples:
To set the DC voltage range as 200.0V.
:measure:voltage:DC□3
To set the DC voltage range as minimum.
:measure:voltage:DC□MIN or :measure:voltage:DC□0
5. :measure:voltage:DC:range?
Syntax:
:measure:voltage:DC:range?
© 2008 RIGOL Technologies, Inc.
Programming Guide for DM3000 Series
Page 24

RIGOL
2-12
Function:
The command queries DC voltage range.
Remark:
Please make sure the DC voltage measure must be set at least one time before using
this command
Return Format:
The query returns the current range parameter: 0,1,2,3 or 4(see Table 2- 1).
6. :measure:voltage:DC:impedance
Syntax:
:measure:voltage:DC:impedance?
:measure:voltage:DC:impedance□{10M|10G}
Function:
The command queries and sets DC voltage impedance.
Explanations::
:measure:voltage:DC:impedance? returns 10M or 10G(>10G).
:measure:voltage:DC:impedance□{10M|10G} sets the DC voltage impedance as
10MΩ or >10GΩ.
Remark:“>10G” is available only in 200mV,2V,20V of the DC voltage range.
Example:
To set the DC voltage impedance as 10GΩ:
:measure:voltage:DC:impedance□10G
7. :measure:voltage:DC:digit
Syntax:
:measure:voltage:DC:digit?
:measure:voltage:DC:digit□{INC|DEC|5|6|7}
Function:
The command queries and sets the digit of DC voltage.
© 2008 RIGOL Technologies, Inc.
Programming Guide for DM3000 Series
Page 25
RIGOL
2-13
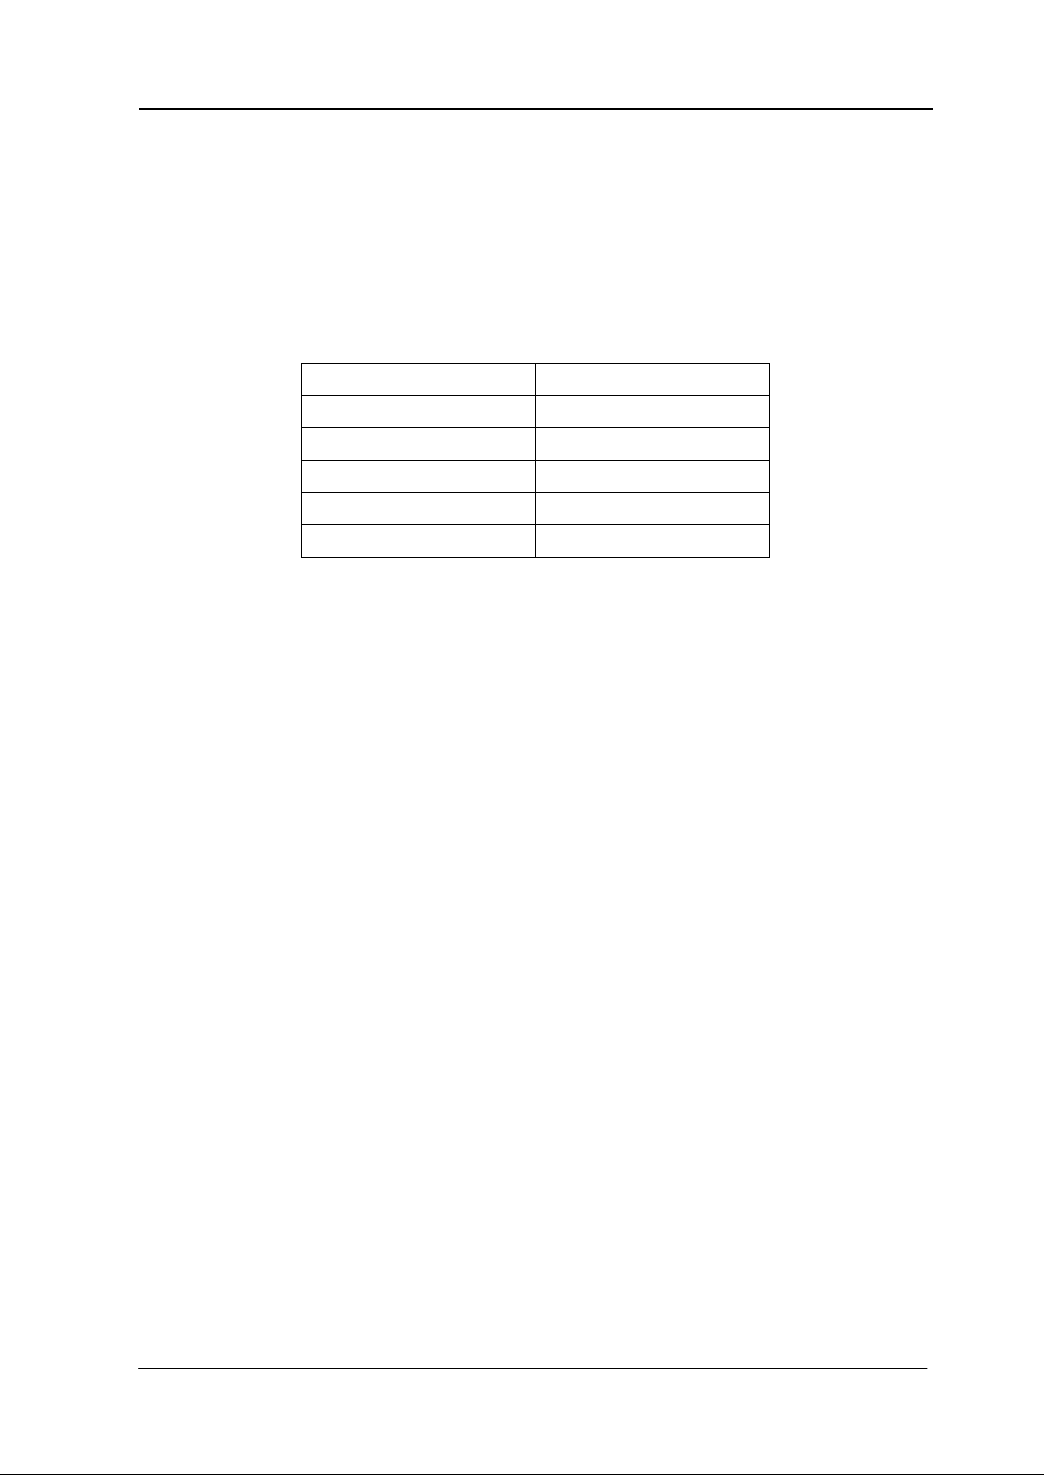
Parameter
Meaning
INC
increase digit
DEC
decrease digit
5
the digit is 5
6
the digit is 6
7
the digit is 7
Explanations:
:measure:voltage:DC:digit? queries the digit of the DC voltage.
:measure:voltage:DC:digit□{INC|DEC|5|6|7} set the digit of DC voltage.
Remarks: If the showing digit reachs 5, DEC command will be invalid. If 7,INC
invalid.
The table 2-2 indicates the meanings of the digit.
Table 2- 2 The meanings of the digit
Return Format:
:measure:voltage:DC:digit? returns the current digit: 5、6 or 7.
Examples:
To set the digit of the DC voltage as 7:
:measure:voltage:DC:digit□7
To decease the digit to 5, please send the following command two times:
:measure:voltage:DC:digit□DEC
8. :measure:voltage:DC:ratio
Syntax:
:measure:voltage:DC:ratio?
Function:
The command queries the ratio of DC voltages in two circuits.
Remark:
At the same time the DC voltages in two circuits should be input in the multimeter.
Return Format:
The query returns the current ratio in the form of 4.656613e-05(for example).
© 2008 RIGOL Technologies, Inc.
Programming Guide for DM3000 Series
Page 26

RIGOL
2-14
9. :measure:voltage:DC:ratio:digit
Syntax:
:measure:voltage:DC:ratio:digit?
:measure:voltage:DC:ratio:digit□{INC|DEC|5|6|7}
Function:
The command queryies and sets the digit of the ratio of DC voltages in two circuits.
Explanations:
:measure:voltage:DC:ratio:digit? queries the digit of the ratio of the DC voltages in
two circuits.
:measure:voltage:DC:ratio:digit□
<value>
sets the digit of the ratio of the DC
voltages in two circuits.
The Table 2- 2 indicates the parameters and their meanings.
Remarks: If the showing digit reachs 5, DEC command will be invalid. If 7,INC
invalid.
Return Format:
:measure:voltage:DC:ratio:digit? returns the current digit: 5、6 or 7.
Examples:
To set the digit of the ratio as 6:
:measure:voltage:DC:ratio:digit□6
To increase the digit to 7:
:measure:voltage:DC:ratio:digit□INC
10. :measure:voltage:AC?
Syntax:
:measure:voltage:AC?
Function:
The command queries AC voltage.
Return Format:
The query returns the current AC voltage in the form of 3.941713e-01, unit is V(for
example).
© 2008 RIGOL Technologies, Inc.
Programming Guide for DM3000 Series
Page 27
RIGOL
2-15
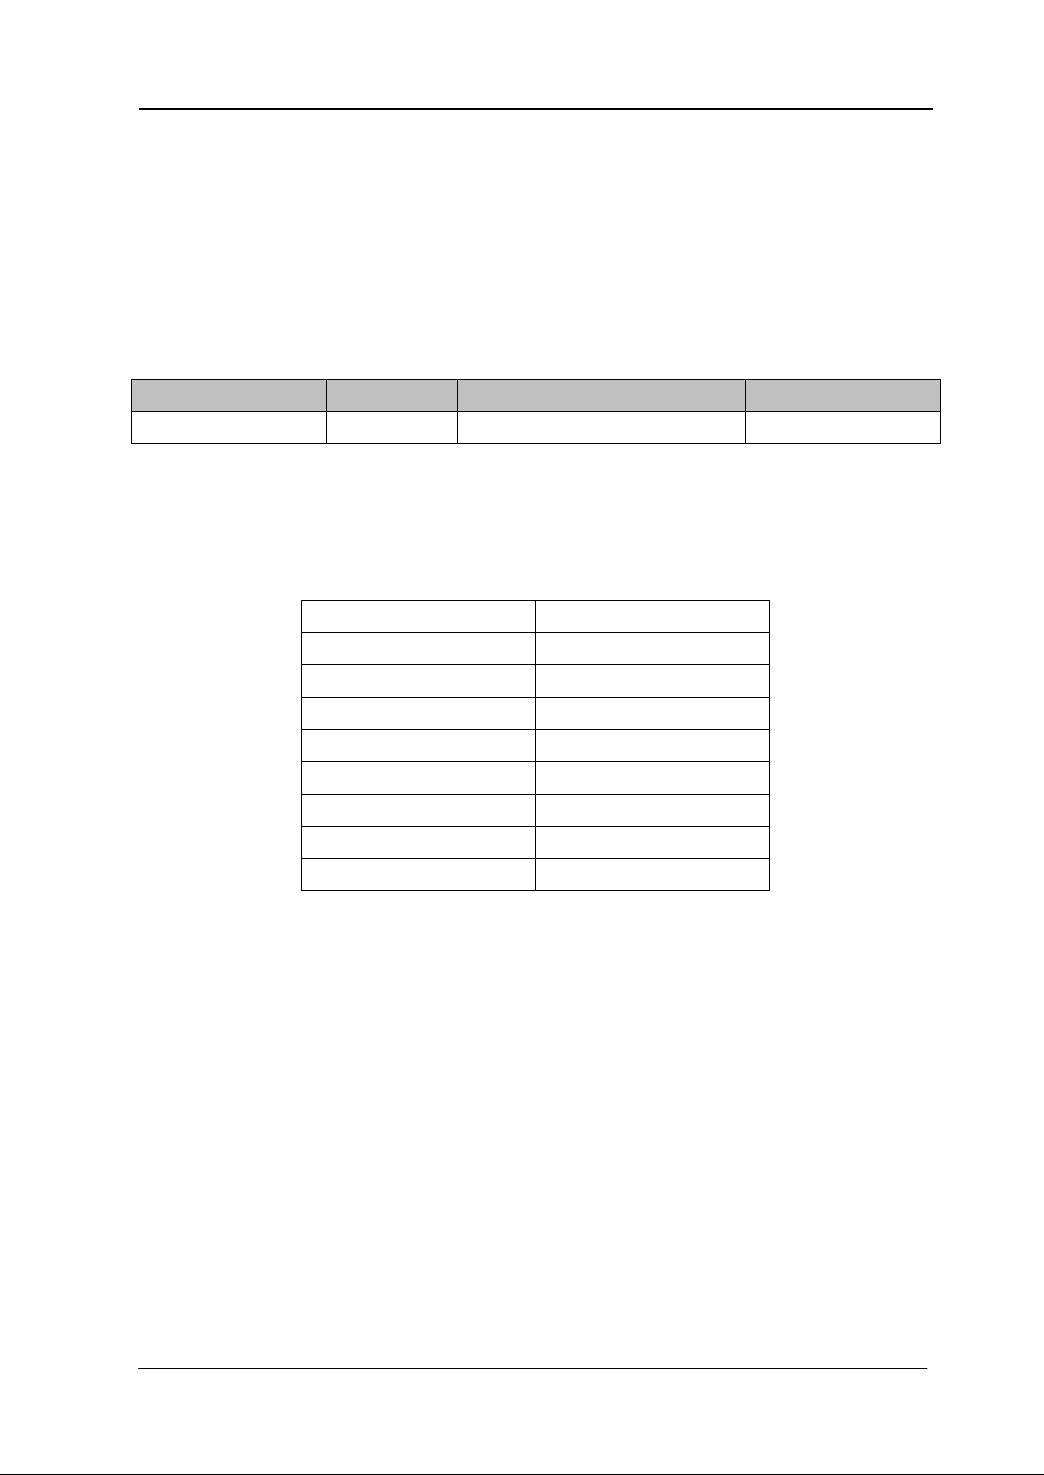
Name
Type
Range of Value
default
<
range>
discrete
{0|1|2|3|4}
2
Parameter
Range
0
200mV
1
2.0V
2
20.0V
3
200.0V
4
750.0V
MIN
200mV
MAX
750V
DEF
20.0V
11. :measure:voltage:AC
Syntax:
:measure:voltage:AC□{<
range>
|MIN|MAX|DEF}
Function:
The command sets the measure range of AC voltage.
Parameters:
Explanations:
The Table 2- 3 lists the parameters and the ranges.
Table 2- 3 The range of AC voltage
Example:
To set the AC voltage range as 750.0V:
:measure:voltage:AC□MAX or :measure:voltage:AC□4
12. :measure:voltage:AC:range?
Syntax:
:measure:voltage:AC:range?
Function:
The command queries the measure range of AC voltage.
Return Format:
© 2008 RIGOL Technologies, Inc.
Programming Guide for DM3000 Series
Page 28

RIGOL
2-16
The query returns the range parameter: 0、1、2、3 or 4(see Table 2- 3).
13. :measure:voltage:AC:filter
Syntax:
:measure:voltage:AC:filter?
:measure:voltage:AC:filter□{SLOW|MID|FAST}
Function:
The command queries and sets the speed of AC voltage filter.
Explanations:
:measure:voltage:AC:filter? queries the filter speed.
:measure:voltage:AC:filter□{SLOW|MID|FAST} sets the filter speed as “slow”,
“middle”, or “fast”, and the default is “fast”.
Return Format:
:measure:voltage:AC:filter? returns the current filter speed: slow,mid or fast.
Example:
To set the filter speed as “middle”:
:measure:voltage:AC:filter□MID
14. :measure:voltage:AC:digit
Syntax:
:measure:voltage:AC:digit?
:measure:voltage:AC:digit□{INC|DEC|5|6|7}
Function:
The command queries and sets the digit of AC voltage.
Explanations:
:measure:voltage:AC:digit? queries the digit of the AC voltage.
:measure:voltage:AC:digit□{INC|DEC|5|6|7} sets the digit of the AC voltage.
The Table 2- 2 indicates the parameters and their meanings.
Remarks: If the showing digit reachs 5, DEC command will be invalid. If 7,INC
invalid.
© 2008 RIGOL Technologies, Inc.
Programming Guide for DM3000 Series
Page 29

RIGOL
2-17
Return Format:
:measure:voltage:AC:digit? returns the current digit of the AC voltage: 5、6 or 7.
Example:
To set the digit as 7:
:measure:voltage:AC:digit□7
15. :measure:voltage:AC:freq?
Syntax:
:measure:voltage:AC:freq?
Function:
The command queries AC voltage frequency.
Remarks:
Before sending the command, please turn on AC voltage measure function.
Return Format:
The query returns the current frequency in the form of 5.000000e+01, and unit is Hz.
(for example)
16. :measure:voltage:AC:freq:display
Syntax:
:measure:voltage:AC:freq:display
Function:
The command displays frequency on the secondary screen while measuring the AC
voltage.
17. :measure:voltage:AC:freq:hide
Syntax:
:measure:voltage:AC:freq:hide
Function:
The command hides frequency on the secondary screen while measuring AC voltage.
© 2008 RIGOL Technologies, Inc.
Programming Guide for DM3000 Series
Page 30
RIGOL
2-18
Name
Type
Range of Value
Default
< range >
discrete
{0|1|2|3|4 }
0
Remarks:
When the frequency display is on in measuring AC voltage, the command is invalid.
18. :measure:voltage:AC:freq:state?
Syntax:
:measure:voltage:AC:freq:state?
Function:
The command queries whether the frequncy displays on the secondary screen in
measuring AC voltage.
Return Format:
The query returns the current state: display or hide.
19. :measure:current:DC?
Syntax:
:measure:current:DC?
Function:
The command queries DC current.
Return Format:
The query returns the DC current in the form of 9.674418e-05, and unit is A.
20. :measure:current:DC
Syntax:
:measure:current:DC□{<
range
>|MIN|MAX|DEF}
Function:
The command sets the measure range of DC current.
Parameters:
© 2008 RIGOL Technologies, Inc.
Programming Guide for DM3000 Series
Page 31

RIGOL
2-19
Parameter
Current
Resolution
0
2mA
1 nA
1
20mA
10nA
2
200mA
100nA
3
1A
1μA
4
10A
10μA
MIN
2mA
1 nA
MAX
10A
10μA
DEF
200mA
100nA
Explanations:
To set the measurement range of DC current and the resolution at the same time.
The measure mode will be changed into manual when setting range.
The table 2-4 indicates the current ranges and the resolutions.
Table 2- 4 The DC current ranges and their resolutions
Example:
To set the DC current range as 10.0A:
:measure:current:DC□MAX or :measure:current:DC□4
21. :measure:current:DC:range?
Syntax:
:measure:current:DC:range?
Function:
The command queries the measure range of DC current.
Return Format:
The query returns the current range parameter: 0、1、2、3 or 4.(see Table 2- 4)
22. :measure:current:DC:digit
Syntax:
:measure:current:DC:digit?
:measure:current:DC:digit□{INC|DEC|5|6|7}
Function:
© 2008 RIGOL Technologies, Inc.
Programming Guide for DM3000 Series
Page 32

RIGOL
2-20
Name
Type
Range
Default
The command queries and sets the digit of DC current.
Explanations:
:measure:current:DC:digit? queries the digit of the DC current.
:measure:current:DC:digit□{INC|DEC|5|6|7} sets the digit of the DC current.
The Table 2- 2 indicates the meanings of the digit.
Remarks: If the showing digit reachs 5, DEC command will be invalid. If 7,INC
invalid.
Return Format:
:measure:current:DC:digit? returns the current digit : 5, 6 or 7.
Example:
To set the digit as 6:
:measure:current:DC:digit□6
23. :measure:current:AC?
Syntax:
:measure:current:AC?
Function:
The command queries AC current.
Return Format:
The query returns the current in the form of 9.293791e-05, and unit is A. (For
example)
24. :measure:current:AC
Syntax:
:measure:current:AC□{
<range>
|MIN|MAX|DEF}
Funtion:
The command sets the measure range of AC current.
Parameters:
© 2008 RIGOL Technologies, Inc.
Programming Guide for DM3000 Series
Page 33

RIGOL
2-21
<range>
discrete
{0|1|2|3}
2
Parameter
Range
0
20mA
1
200mA
2
2A
3
10A
MIN
20mA
MAX
10A
DEF
200mA
Explanations:
:measure:current:AC? queries the AC current. Before sending the command, please
turn on AC current measure function.
:measure:current:AC□
<value>
sets the AC current range. At the same time the
manual mode is set.
The Table 2- 5 indicates the parameters and their meanings.
Table 2- 5 The AC current parameters and their meanings
Example:
To set the AC current range as 10.0A:
:measure:current:AC□MAX or :measure:current:AC□3
25. :measure:current:AC:range?
Syntax:
:measure:current:AC:range?
Function:
The command queries AC current range.
Remark:
Before sending the command, please turn on AC current measure function.
Return Format:
The query returns the range parameter: 0、1、2 or 3.(see Table 2- 5)
© 2008 RIGOL Technologies, Inc.
Programming Guide for DM3000 Series
Page 34

RIGOL
2-22
26. :measure:current:AC:digit
Syntax:
:measure:current:AC:digit?
:measure:current:AC:digit□{INC|DEC|5|6|7}
Function:
The command queries and sets the digit of AC current.
Explanations:
:measure:current:AC:digit? queries the digit of the AC current. Before sending the
command, please turn on AC current measure function.
:measure:current:AC:digit□{INC|DEC|5|6|7} sets the digit of the AC current.
The Table 2- 2 indicates the parameters and their meanings.
Remarks: If the showing digit reachs 5, DEC command will be invalid. If 7,INC
invalid.
Return Format:
:measure:current:AC:digit? returns the current digit: 5、6 or 7.
Example:
To set the digit as 7:
:measure:current:AC:digit□7
27. :measure:current:AC:freq?
Syntax:
:measure:current:AC:freq?
Function:
The command queries the measure frequency of AC current.
Return Format:
The query returns the current frequency in the form of 5.000000e+01, and unit is Hz.
(for example)
28. :measure:current:AC:freq:display
Syntax;
© 2008 RIGOL Technologies, Inc.
Programming Guide for DM3000 Series
Page 35

RIGOL
2-23
:measure:current:AC:freq:display
Function:
The command displays AC current frequency on the secondary screen.
Remark:
Please turn on AC current measure function before sending command.
29. :measure:current:AC:freq:hide
Syntax:
:measure:current:AC:freq:hide
Function:
The command hides AC current frequency on the secondary screen.
Remark:
Please turn on AC current measure function before sending command.
30. :measure:current:AC:freq:state?
Syntax:
:measure:current:AC:freq:state?
Function:
The command queries wheher the frequency displays on the secondary screen or not.
Remark:
Please turn on AC current measure function before sending command.
Return Format:
The query returns the current state: display or hide.
31. :measure:resistance?
Syntax:
:measure:resistance?
© 2008 RIGOL Technologies, Inc.
Programming Guide for DM3000 Series
Page 36

RIGOL
2-24
Name
Type
Range
Default
<
range
>
discrete
{0|1|2|3|4|5|6}
3
Parameter
Range
0
200Ω
1
2KΩ
2
20KΩ
3
200KΩ
4
1MΩ
5
10MΩ
6
100MΩ
MAX
100MΩ
MIN
200Ω
DEF
200KΩ
Function:
The commad queries two circuits resistance.
Return Format:
The query returns the current resistance in the form of 8.366031e-05, and unit is Ω.
(for example)
32. :measure:resistance
Syntax:
:measure:resistance□{<
range
>|MIN|MAX|DEF}
Function:
The command sets the measure range of two circuits resistance.
Parameters :
Explanations:
The table 2-6 indicates the parameters and the range.
Table 2- 6 The two circuits resistance range
Example:
To set the measure range of the two circuits resistance as 200.0Ω:
:measure:resistance□MIN or :measure:resistance□0
© 2008 RIGOL Technologies, Inc.
Programming Guide for DM3000 Series
Page 37

RIGOL
2-25
33. :measure:resistance:range?
Syntax:
:measure:resistance:range?
Function:
The command queries the measure range of two circuits resistance.
Return Format:
The query returns the current range parameter: 0, 1, 2, 3, 4, 5 or 6.(see
Table 2- 6)
34. :measure:resistance:digit
Syntax:
:measure:resistance:digit?
:measure:resistance:digit□{INC|DEC|5|6|7}
Function:
The command queries and sets the digit of two circuits resistance.
Explanations:
:measure:resistance:digit? queries the digit of the two circuits resistance.
:measure:resistance:digit□{INC|DEC|5|6|7} sets the digit of the two circuits
resistance.
Remarks: If the showing digit reachs 5, DEC command will be invalid. If 7,INC
invalid.
Return Format:
:measure:resistance:digit? returns the digit of the current resistance: 5、6 or 7.
Example:
To set the digit as 6:
:measure:resistance:digit□6
35. :measure:fresistance?
Syntax:
:measure:fresistance?
© 2008 RIGOL Technologies, Inc.
Programming Guide for DM3000 Series
Page 38

RIGOL
2-26
Name
Type
Range
Default
<
range
>
discrete
{0|1|2|3|4|5|6 }
3
Function:
The command queries four circuits resistance.
Return Format:
The query returns the current four circuits resistsnce in the form of 8.822946e-05, and
unit is Ω. (for eample)
36. :measure:fresistance
Syntax:
:measure:fresistance□{<
range
>|MIN|MAX|DEF}
Function:
The command sets the measure range of four circuits resistance.
Parameters:
Explanation:
The Table 2- 6 indicates the parameters and their meanings.
Example:
To set the measure range of the four circuits resistance as 200.0Ω:
:measure:fresistance□MIN or :measure:fresistance□0
37. :measure:fresistance:range?
Syntax:
:measure:fresistance:range?
Function:
The command queries the measure range for four circuits resistance.
Return Format:
The query returns the current range parameter: 0、 1、2 、3、 4、 5 or 6.(see
© 2008 RIGOL Technologies, Inc.
Programming Guide for DM3000 Series
Page 39

RIGOL
2-27
Table 2- 6)
38. :measure:fresistance:digit
Syntax:
:measure:fresistance:digit?
:measure:fresistance:digit□{INC|DEC|5|6|7}
Function:
The command queries and sets the digit of four circuits resistance.
Explanations:
:measure:fresistance:digit? queries the digit of the four circuits resistance.
:measure:fresistance:digit□{INC|DEC|5|6|7} sets the digit of the four circuits
resistance.
Remarks: If the showing digit reachs 5, DEC command will be invalid. If 7,INC
invalid.
Return Format:
:measure:fresistance:digit? returns the current digit. The Table 2- 2 indicates the
meanings.
Example:
To set the digit as 6:
:measure:resistance:digit□6
39. :measure:frequency?
Syntax:
:measure:frequency?
Function:
The command queries frequency.
Remark:
The range of frequency is 3Hz~300kHz.
Return Format:
The query returns the current frequency in the form of 8.485240e-05, and unit is Hz.
(for example)
© 2008 RIGOL Technologies, Inc.
Programming Guide for DM3000 Series
Page 40

RIGOL
2-28
Name
Type
Range
Default
<
range
>
discrete
{0|1|2|3|4}
2
40. :measure:frequency
Syntax:
:measure:frequency□{<
range
>|MIN|MAX|DEF}
Function:
The command sets input voltage range in measuring frequency.
Parameters:
Explanations:
The frequency range is 3Hz~300kHz.The Table 2- 3 indicates the parameters and the
ranges.
Example:
To set the voltage range as 20V:
:measure:frequency□DEF
41. :measure:frequency:range?
Syntax:
:measure:frequency:range?
Function:
The command queries AC voltage range in measuring frequency.
Explanations:
The range is the same as the DC voltage. See Table 2- 3.
Return Format:
The query returns the current range parameter: 0、1、2、3 or 4.( see Table 2- 3)
42. :measure:frequency:digit
Syntax:
© 2008 RIGOL Technologies, Inc.
Programming Guide for DM3000 Series
Page 41

RIGOL
2-29
:measure:frequency:digit?
:measure:frequency:digit□{INC|DEC|5|6|7}
Function:
The command queries and sets the digit of frequency.
Explanations:
:measure:frequency:digit? queries the digit of the frequency. Before sending the
command, please turn on frequency measure function.
:measure:frequency:digit□{INC|DEC|5|6|7} sets the digit of the frequency. The
Table 2- 2 indicates the meanings of the digit.
Remarks: If the showing digit reachs 5, DEC command will be invalid. If 7,INC
invalid.
Return Format:
:measure:frequency:digit? returns the current digit: 5、6 or 7.
Example:
To set the digit as 6:
:measure:frequency:digit□6
43. :measure:period?
Syntax:
:measure:period?
Function:
The command queries period.
Return Format:
The query returns the current AC period in the form of 9.185433e-05, and unit is s.
(for example)
44. :measure:period
Syntax:
:measure:period□{<
range
>|MIN|MAX|DEF}
© 2008 RIGOL Technologies, Inc.
Programming Guide for DM3000 Series
Page 42

RIGOL
2-30
Name
Type
Range
Default
<
range
>
Discrete
{0|1|2|3|4}
2
Function:
The command sets input voltage range in measuring period.
Parameters:
Explanations:
The period range is 3.3us~0.33s. The Table 2- 3 indicates the parameters and their
ranges.
Example:
To set the input voltage range as 20V:
:measure:period□DEF or :measure:period□2
45. :measure:period:range?
Syntax:
:measure:period:range?
Function:
The command queries AC voltage range in measuring period.
Explanations:
The range is the same as the AC voltage range. See Table 2- 3.
Return Format:
The query returns the current range parameter: 0、1、2、3 or 4.(see Table 2- 3)
46. :measure:period:digit
Syntax:
:measure:period:digit?
:measure:period:digit□{INC|DEC|5|6|7}
Function:
The command queries and sets the digit of period.
© 2008 RIGOL Technologies, Inc.
Programming Guide for DM3000 Series
Page 43

RIGOL
2-31
Name
Type
Range
Default
<range>
Consecutive Integer
1Ω~2000Ω
10
Explanations:
:measure:period:digit? queries the digit of the period. Before sending the command,
please turn on period measure function.
:measure:period:digit□{INC|DEC|5|6|7} sets the digit of the period. The Table 2- 2
indicates the parameters and the ranges.
Remarks: If the showing digit reachs 5, DEC command will be invalid. If 7,INC
invalid.
Return Format:
:measure:period:digit? returns the current digit: 5、6 or 7.
Example:
To set the digit as 6:
:measure:period:digit□6
47. :measure:continuity?
Syntax:
:measure:continuity?
Function:
The command qureies resistance in the state of short circuit.
Return Format:
The query returns the current resistance in the form of 8.888000e+03, and unit is Ω.
(For example)
48. :measure:continuity
Syntax:
:measure:continuity□{
<range>
|MIN|MAX|DEF}
Function:
The command sets the limit resistance in measuring short circurt.
Parameters:
© 2008 RIGOL Technologies, Inc.
Programming Guide for DM3000 Series
Page 44

RIGOL
2-32
Remarks:
The resistance range is a consecutive Integer among 1Ω~2000Ω.
The default resistance is 10Ω. MAX denotes the maximum is 2000Ω. MIN denotes the
minimum is 1Ω. DEF denotes the default is 10Ω.
Example:
To set the limit resistance as 1KΩ:
:measure:continuity□1000
49. :measure:diode?
Syntax:
:measure:diode?
Function:
The command queries diode voltage at both ends.
Remarks:
In measuring diode, the beep condition is 0.1V≤V
measured
≤2.4 V.
Return Format:
The query returns the current diode voltage in the form of 4.492510e-04, and unit is V.
(for examole)
50. :measure:diode:digit
Syntax:
:measure:diode:digit?
:measure:diode:digit□{INC|DEC|5|6|7}
Function:
The command queries and sets the digit of diode voltage.
Explanations:
:measure:diode:digit? queries the digit of the diode voltage.
:measure:diode:digit□<
value
> sets the digit of the diode voltage.
See Table 2- 2 .
© 2008 RIGOL Technologies, Inc.
Programming Guide for DM3000 Series
Page 45

RIGOL
2-33
Name
Type
Range
Default
<
range
>
discrete
{0|1|2|3|4|5 }
2
Remarks: If the showing digit reachs 5, DEC command will be invalid. If 7,INC
invalid.
Return Format:
:measure:diode:digit? returns the current digit: 5、6 or 7.
Example:
To set the digit as 6:
:measure:diode:digit□6
51. :measure:capacitance?
Syntax:
:measure:capacitance?
Function:
The command queries capacitance.
Return Format:
The query returns the current capacitance in the form of 8.889030e-05, and unit is F.
(for examole)
52. :measure:capacitance
Syntax:
:measure:capacitance□{<
range
>|MIN|MAX|DEF}
Function:
The command sets the measure range of capacitance.
Parameters:
Explanations:
The Table 2- 7 indicates the parameters and the ranges.
© 2008 RIGOL Technologies, Inc.
Programming Guide for DM3000 Series
Page 46

RIGOL
2-34
Parameter
Range
0
2nF
1
20nF
2
200nF
3
2uF
4
20uF
5
200uF
MIN
2nF
MAX
200uF
DEF
200nF
Table 2- 7 The parameters and the ranges
Example:
To set the capacitance range as 2uF:
:measure: capacitance□3
53. :measure:capacitance:range?
Syntax:
:measure:capacitance:range?
Function:
The command queries the measure range of capacitance.
Return Format:
The query returns the current range parameter: 0、1、2、3、4 or 5.(see Table 2- 7)
54. :measure:capacitance:digit
Syntax:
:measure:capacitance:digit?
:measure:capacitance:digit□{INC|DEC|5|6|7}
Function:
The command queries and sets the digit of capacitance.
Explanations:
© 2008 RIGOL Technologies, Inc.
Programming Guide for DM3000 Series
Page 47

RIGOL
2-35
:measure:capacitance:digit? queries the digit of the capacitance.
:measure:capacitance:digit□{INC|DEC|5|6|7} sets the digit of the capacitance.
The Table 2- 2 indicates the parameters and their meanings.
Return Format:
:measure:capacitance:digit? returns the current digit: 5、6 or 7.
© 2008 RIGOL Technologies, Inc.
Programming Guide for DM3000 Series
Page 48

RIGOL
2-36
Precision Commands
The commands are used to set the measure precision for a multimeter.
The commands mainly includes:
:resolution:voltage:DC
:resolution:voltage:DC:ratio
:resolution:voltage:AC
:resolution:current:DC
:resolution:current:AC
:resolution:resistance
:resolution:fresistance
:resolution:capacitance
© 2008 RIGOL Technologies, Inc.
Programming Guide for DM3000 Series
Page 49

RIGOL
2-37
Name
Type
Range
Default
<range>
discrete
{0|1|2}
2
Parameter
Meaning
0
4 ½ digit(measure precision)
1
5 ½ digit
2
6 ½ digit
MAX
6 ½ digit
MIN
4 ½ digit
DEF
5 ½ digit
1. :resolution:voltage:DC
Syntax:
:resolution:voltage:DC?
:resolution:voltage:DC□{
<range>
|MIN|MAX|DEF}
Function:
The command queries and sets the measure precision of DC voltage.
Parameters:
Explanations:
:resolution:voltage:DC? queries the measure precision of the DC voltage. Before
sending the command, please turn on DC voltage measure function.
:resolution:voltage:DC□{
<range>
|MIN|MAX|DEF} sets the measure precision of the
DC voltage.
The Table 2- 8 indicates the parameters and their meanings.
Table 2- 8 The DC parameters and their meanings
Return Format:
:resolution:voltage:DC? returns the current precision parameter: 0、1 or 2.(see Table
2- 8)
Example:
To set the measure precision of the DC voltage as 5 ½ :
:resolution:voltage:DC□1
2. :resolution:voltage:DC:ratio
© 2008 RIGOL Technologies, Inc.
Programming Guide for DM3000 Series
Page 50

RIGOL
2-38
Name
Type
Range
Default
<range>
Discrete
{0|1|2}
2
Name
Type
Range
Default
<range>
discrete
{0|1|2}
2
Syntax:
:resolution:voltage:DC:ratio?
:resolution:voltage:DC:ratio□{
<range>
|MIN|MAX|DEF}
Function:
The command queries and sets the measure precision of DC voltage ratio.
Parameters:
Explanations:
:resolution:voltage:DC:ratio? queries the measure precision of the DC voltage ratio.
Before sending the command, please turn on DC voltage ratio measure function.
:resolution:voltage:DC:ratio□{
<range>
|MIN|MAX|DEF} sets the measure precision
of the DC voltage ratio.
The Table 2- 8 indicates the parameters and their meanings.
Return Format:
:resolution:voltage:DC:ratio? returns the current parameter: 0、1 or 2.(see Table 2- 8)
Example:
To set the measurement precision of the DC voltage ratio as 5 ½ :
:resolution:voltage:DC:ratio□1
3. :resolution:voltage:AC
Syntax:
:resolution:voltage: AC?
:resolution:voltage: AC□{
<range>
|MIN|MAX|DEF}
Function:
The command queries and sets the measure precision of AC voltage.
Parameters:
© 2008 RIGOL Technologies, Inc.
Programming Guide for DM3000 Series
Page 51

RIGOL
2-39
Parameter
Meaning
0
3 ½ digit(measure precision)
1
4 ½ digit
2
5 ½ digit
MAX
5 ½ digit
MIN
3 ½ digit
DEF
4 ½ digit
Name
Type
Range
Default
<range>
Discrete
{0|1|2}
2
Explanations:
:resolution:voltage: AC? queries the measure precision of the AC voltage. Before
sending the command, please turn on AC voltage measure function.
:resolution:voltage: AC□{
<range>
|MIN|MAX|DEF} sets the measure precision of the
AC voltage.
The Table 2- 9 indicates the parameters and their meanings.
Table 2- 9 The AC parameters and their meanings
Return Format:
:resolution:voltage: AC? returns the current parameter: 0、1 or 2.(see Table 2- 8)
Example:
To set the measurement precision of the AC voltage as 5 ½ :
:resolution:voltage:AC□2
4. :resolution:current:DC
Syntax:
:resolution:current:DC?
:resolution:current:DC□{
Function:
The command queries and sets the measure precision of DC current.
Parameters:
Explanations:
:resolution:current:DC? queries the measure precision of the DC current. Before
© 2008 RIGOL Technologies, Inc.
<range>
Programming Guide for DM3000 Series
|MIN|MAX|DEF}
Page 52

RIGOL
2-40
Name
Type
Range
Default
<range>
discrete
{0|1|2}
2
sending the command, please turn on DC current measure function.
:resolution:current:DC□{
<range>
|MIN|MAX|DEF} sets the measurement precision
of the DC current.
The Table 2- 8 indicates the parameters and their meanings.
Return Format:
:resolution:current:DC? returns the current parameter: 0、1 or 2.(see Table 2- 8)
Example:
To set the measure precision of the DC current as 5 ½ :
:resolution:current:DC□1
5. :resolution:current:AC
Syntax:
:resolution:current:AC?
:resolution:current:AC□{
<range>
|MIN|MAX|DEF}
Function:
The command queries and sets the measure precision of AC current.
Parameters:
Explanations:
:resolution:current:AC? queries the measure precision of the AC current. Before
sending the command, please turn on AC current measure function.
:resolution:current:AC□{
<range>
|MIN|MAX|DEF} sets the measure precision of the
AC current.
The Table 2- 9 indicates the parameters and their meanings.
Return Format:
:resolution:current:AC? returns the current parameter: 0、1 or 2.(see Table 2- 9)
Example:
To sets the measure precision of the AC current as 5 ½ :
:resolution: current:AC□2
© 2008 RIGOL Technologies, Inc.
Programming Guide for DM3000 Series
Page 53

RIGOL
2-41
Name
Type
Range
Default
<range>
discrete
{0|1|2}
2
6. :resolution:resistance
Syntax:
:resolution:resistance?
:resolution:resistance□{
<range>
|MIN|MAX|DEF}
Function:
The command queries and sets the measure precision of two circuits resistance.
Parameters:
Explanations:
:resolution:resistance? queries the measure precision of the two circuits resistance.
Before sending the command, please turn on two circuit resistance measure function.
:resolution:resistance□{
<range>
|MIN|MAX|DEF} sets the measure precision of the
two circuits resistance.
The Table 2- 8 indicates the parameters and their meanings.
Return Format:
:resolution:resistance? returns the current parameter: 0、1 or 2.(see Table 2- 8)
Example:
To set the measure precision of the two circuits resistance as 5 ½ :
:resolution:resistance□1
7. :resolution:fresistance
Syntax:
:resolution:fresistance?
:resolution:fresistance□{
<range>
|MIN|MAX|DEF}
Function:
The command queries and sets the measure precision of four circuits resistance.
© 2008 RIGOL Technologies, Inc.
Programming Guide for DM3000 Series
Page 54

RIGOL
2-42
Name
Type
Range
Default
< range >
discrete
{0|1|2}
2
Name
Type
Range
Default
<range>
discrete
{0|1|2}
2
Parameters:
Explanations:
:resolution:fresistance? queries the measure precision of the four circuit resistance.
Before sending the command, please turn on four circuits resistance measure
function.
:resolution:fresistance□{
<range>
|MIN|MAX|DEF} sets the measure precision of the
four circuit resistance.
The Table 2- 8 indicates the parameters and their meanings.
Return Format:
:resolution:fresistance? returns the current parameter: 0、1 or 2.(see Table 2- 8)
Example:
To set the measure precision of the four circuit resistance as 5 ½ :
:resolution:fresistance□1
8. :resolution:capacitance
Syntax:
:resolution:capacitance?
:resolution: capacitance□{
<range>
|MIN|MAX|DEF}
Function:
The command queries and sets the measure precision of capacitance.
Parameters:
Explanations:
:resolution:capacitance? queries the capacitance measure precision. Before sending
the command, please turn on capacitance measure function.
:resolution:capacitance□{
<range>
|MIN|MAX|DEF} sets the capacitance measure
precision.The Table 2- 8 indicates the parameters and their meanings.
© 2008 RIGOL Technologies, Inc.
Programming Guide for DM3000 Series
Page 55

RIGOL
2-43
Return Format:
:resolution:capacitance? returns the current parameter: 0、1 or 2.(see Table 2- 8)
Example:
To set the capacitance measure precision as 5 ½ :
:resolution: capacitance□1
© 2008 RIGOL Technologies, Inc.
Programming Guide for DM3000 Series
Page 56

RIGOL
2-44
System Commands
The commands are used to set the system parameters.
The commands mainly include:
:system:beeper
:system:beeper:state
:system:configure:poweron
:system:configure:default
:system:language
:system:clock:state
:system:clock:date
:system:clock:time
:system:format:decimal
:system:format:separate
:system:display:bright
:system:display:contrast
:system:display:invert
:system:scanserial
:system:macaddr
:system:lanserial
:system:opentimes
© 2008 RIGOL Technologies, Inc.
Programming Guide for DM3000 Series
Page 57

RIGOL
2-45
Name
Type
Range
Default
<value>
Boolean
{ON|OFF}
ON
1. :system:beeper
Syntax:
:system:beeper
Function:
The command tests the beeper.
Remarks:
The beeper is beeping only one time When testing. Before sending the command,
please do open the beeper.
2. :system:beeper:state
Syntax:
:system:beeper:state?
:system:beeper:state□
<value>
Function:
The command queries and sets the beeper state.
Parameters:
Explanations:
:system:beeper:state? queries whether the beeper is on.
:system:beeper:state□
<value>
sets the beeper state. The parameter “ON” means
turning on the beeper, “OFF” means turning off. If the beeper was off by using “OFF”,
“:system:beeper” is invalid.
Return Format:
:system:beeper:state? returns the beeper state. “ON” returns 1, else for 0.
Example:
To turn on the beeper:
:system:beeper:state□ON
© 2008 RIGOL Technologies, Inc.
Programming Guide for DM3000 Series
Page 58

RIGOL
2-46
Name
Type
Range
Default
<value>
Discrete
{LAST|DEFAULT}
DEFAULT
3. :system:configure:poweron
Syntax:
:system:configure:poweron□
<value>
Function:
The command sets system parameters on power.
Parameters:
Explanations:
The command is used to set the system parameters as the last setting or the system
default when powering on. “LAST” means to read the last setting, and “DEFAULT”
means the system default.
4. :system:configure:default
Syntax:
:system:configure:default
Function:
The command sets system default.
Explanation:
The command sets the system setting as default.
5. :system:language
Syntax:
:system:language?
:system:language□
<value>
Function:
The command queries and sets system language category.
Parameters:
© 2008 RIGOL Technologies, Inc.
Programming Guide for DM3000 Series
Page 59

RIGOL
2-47
Name
Type
Range
Default
<value>
discrete
{CHINESE|ENGLISH}
CHINESE
Name
Type
Range
Default
<value>
discrete
{HIDE|DISPLAY}
DISPLAY
Explanations:
:system:language? queries the system language category.
:system:language□
<value>
sets the system language category. “CHINESE” means
the system language is chinese, “ENGLISH” means english.
Return Format:
:system:language? returns the current system language: CHINESE or ENGLISH.
6. :system:clock:state
Syntax:
:system:clock:state?
:system:clock:state□
<value>
Function:
The command queries and sets the display state of system clock.
Parameters:
Explanations:
:system:clock:state? queries whether the system clock displays or not.
:system:clock:state□
<value>
sets whether the system clock displays or not.
Return Format:
:system:clock:state? returns the system clock display state:DISPLAY or HIDE.
7. :system:clock:date
Syntax:
:system:clock:date?
:system:clock:date□
<value>
Function:
© 2008 RIGOL Technologies, Inc.
Programming Guide for DM3000 Series
Page 60

RIGOL
2-48
Name
Type
Range
Default
<value>
ASCII string
{xxxx-xx-xx}
---
Name
Type
Range
Default
<value>
ASCII string
{xx-xx-xx}
---
The command queries and sets system date.
Parameters:
Explanations:
:system:clock:date? queries the system date.
:system:clock:date□
<value>
sets the system date. The format is {year-month-day}.
Return Format:
:system:clock:date? returns the current system date in the form of xxxx-xx-xx.
8. :system:clock:time
Syntax:
:system:clock:time?
:system:clock:time□
<value>
Function:
The command queries and sets system time.
Parameters:
Explanations:
:system:clock:time? queries the system time.
:system:clock:time□
<value>
sets the system time. The format is {hour –minute
-second}.
Return Format:
:system:clock:time? returns the current system time in the form of xx-xx-xx.
9. :system:format:decimal
Syntax:
:system:format:decimal?
© 2008 RIGOL Technologies, Inc.
Programming Guide for DM3000 Series
Page 61

RIGOL
2-49
Name
Type
Range
Default
<value>
Discrete
{COMMA | DOT}
DOT
Name
Type
Range
Default
<value>
discrete
{ON | NONE | SPACE}
ON
:system:format:decimal□
<value>
Function:
The command queries and sets radix point format used in system.
Parameters:
Explanations:
:system:format:decimal? queries the radix point format.
:system:format:decimal□
<value>
sets the radix point format. “COMMA” means to
use “,” as a radix point, and at the same time the former “,” is changed into “.”. “DOT”
means to use “·” as a radix point, meanwhile the former “.” is changed into “,”.
Remarks: As it is easier to change the format of data separator by using this
commond, so please do it carefully.
Return Format:
:system:format:decimal? returns the current radix point format.: COMMA or DOT.
10. :system:format:separate
Syntax:
:system:format:separate?
:system:format:separate□
<value>
Function:
The command queries and sets the format of system separator.
Parameters:
Explanations:
:system:format:separate? queries the system data separator format.
:system:format:separate□
<value>
sets the system data separator format.
“ON” denotes displaying the seperator, “NONE” denotes not displaying the spererator,
and “SPACE” denotes that a space replaces the separator.
© 2008 RIGOL Technologies, Inc.
Programming Guide for DM3000 Series
Page 62

RIGOL
2-50
Name
Type
Range
Default
<value>
Consecutive Integer
0~255
168
Return Format:
:system:format:separate? returns the current data seperator format:ON、NONE or
SPACE。
11. :system:display:bright
Syntax:
:system:display:bright?
:system:display:bright□
<value>
Function:
The command queries and sets display brightness.
Parameters:
Explanations:
:system:display:bright? queries the display brightness.
:system:display:bright□
<value>
sets the display brightness.
The brightness value is an integer among 0~255. 0 is the minimum bright, and 255 is
maximum.
Return Format:
:system:display:bright? returns the current bright, and the range is 0~255.
12. :system:display:contrast
Syntax:
:system:display:contrast?
:system:display:contrast□
Function:
The command queries and sets display contrast.
© 2008 RIGOL Technologies, Inc.
<value>
Programming Guide for DM3000 Series
Page 63

RIGOL
2-51
Name
Type
Range
Default
<value>
Consecutive Integer
0~255
152
Parameters:
Explanations:
:system:display:contrast? queries the display contrast.
:system:display:contrast□
<value>
sets the display contrast.
The contrast is an integer among 0~255. 0 is the minimum, and 255 is maximum.
Return Format:
:system:display:contrast? returns the current display contrast, and the range is
0~255.
13. :system:display:invert
Syntax:
:system:display:invert
Function:
The command inverts the display color.
Explanation:
To invert the current display color.
14. :system:scanserial?
Syntax:
:system:scanserial?
Function:
The command queries the state of inspection panel.
Explanation:
To query the installation state of inspection panel.
Return Format:
The query returns the current panel state: None or Installed, and they denote that the
panel has not been installed and the panel has been installed.
© 2008 RIGOL Technologies, Inc.
Programming Guide for DM3000 Series
Page 64

RIGOL
2-52
15. :system:macaddr
Syntax:
:system: macaddr?
Function:
The command queries MAC address.
Explanation:
To query the MAC address for network communication setting.
Return Format:
The query returns the current MAC address in the form of XX-XX-XX-XX-XX-XX. For
example, 00-01-02-03-04-05.
16. :system:lanserial
Syntax:
:system:lanserial?
Function:
The command queries the module state of interface.
Explanation:
To query the interface module state for the instrument.
Return Format:
The query returns the current state: None or Installed, and they denotes that the
module has not been installed and the module has been installed.
17. :system:opentimes?
Syntax:
:system:opentimes?
Function:
The command queries the number of start-up.
Explanation:
© 2008 RIGOL Technologies, Inc.
Programming Guide for DM3000 Series
Page 65

RIGOL
2-53
To query the number of start-up.
Return Format:
The query returns the current number of start-up.
© 2008 RIGOL Technologies, Inc.
Programming Guide for DM3000 Series
Page 66

RIGOL
2-54
Utility Commands
The commands are used to set communication control and self-inspection. Before
controlling communication, please make sure that communication interface has been
connected stably, otherwise it possiblely to be abnormal or wrong.
The commands mainly include:
:utility:interface:LAN:dhcp
:utility:interface:LAN:host
:utility:interface:LAN:domain
:utility:interface:LAN:ip
:utility:interface:LAN:mask
:utility:interface:LAN:gateway
:utility:interface:LAN:dns
:utility:interface:GPIB:address
:utility:interface:RS232:baud
:utility:interface:RS232:parity
© 2008 RIGOL Technologies, Inc.
Programming Guide for DM3000 Series
Page 67

RIGOL
2-55
Name
Type
Range
Default
<value>
Boolean
{ON|OFF}
ON
Name
Type
Range
Default
<value>
character string
self-definition
DM3000
1. :utility:interface:LAN:dhcp
Syntax:
:utility:interface:LAN:dhcp?
:utility:interface:LAN:dhcp□
<value>
Function:
The command queries and sets the state of DHCP for LAN connection.
Parameters:
Explanations:
:utility:interface:LAN:dhcp? queries whether the DHCP is on.
:utility:interface:LAN:dhcp□
<value>
sets the DHCP state. “ON” denotes DHCP is on,
and “OFF” denotes DHCP is off.
Return Format:
:utility:interface:LAN:dhcp? returns the current DHCP state: ON or OFF.
2. :utility:interface:LAN:host
Syntax:
:utility:interface:LAN:host?
:utility:interface:LAN:host□
<value>
Function:
The command queries and sets HOST name for LAN connection.
Parameters:
Explanations:
:utility:interface:LAN:host? queries the HOST name.
:utility:interface:LAN:host□
<value>
sets the HOST name. The parameter is the
user-defined character string.
© 2008 RIGOL Technologies, Inc.
Programming Guide for DM3000 Series
Page 68

RIGOL
2-56
Name
Type
Range
Default
<value>
character string
self-definition
RIGOL
Name
Type
Range
Default
<value>
character string
self-definition
168.254.0.238
Return Format:
:utility:interface:LAN:host? returns the current HOST name.
3. :utility:interface:LAN:domain
Syntax:
:utility:interface:LAN:domain?
:utility:interface:LAN:domain□
<value>
Function:
The command queries and sets domain name for LAN connection.
Parameters:
Explanations:
:utility:interface:LAN:domain? queries the equipment domain name.
:utility:interface:LAN:domain□
<value>
sets the equipment domain name. The
parameter is the user-defined character string.
Return Format:
:utility:interface:LAN:domain? returns the current domain name.
4. :utility:interface:LAN:ip
Syntax:
:utility:interface:LAN:ip?
:utility:interface:LAN:ip□
Function:
The command queries and sets IP address for LAN connection.
Parameters:
Explanations:
© 2008 RIGOL Technologies, Inc.
<value>
Programming Guide for DM3000 Series
Page 69

RIGOL
2-57
Name
Type
Range
Default
<value>
character string
self-definition
255.255.255.0
:utility:interface:LAN:ip? queries the IP address.
:utility:interface:LAN:ip□
<value>
sets the IP address. The parameter is the
user-defined character string.
Return Format:
:utility:interface:LAN:ip? returns the current IP address.
5. :utility:interface:LAN:mask
Syntax:
:utility:interface:LAN:mask?
:utility:interface:LAN:mask□
<value>
Function:
The command queries and sets IP mask for LAN connection.
Parameters:
Explanations:
:utility:interface:LAN:mask? queries the IP mask.
:utility:interface:LAN:mask□
<value>
sets the IP mask. The parameter is the
user-defined character string.
Return Format:
:utility:interface:LAN:mask? returns the current IP mask.
6. :utility:interface:LAN:gateway
Syntax:
:utility:interface:LAN:gateway?
:utility:interface:LAN:gateway□
<value>
Function:
The command queries and sets gateway for LAN connection.
© 2008 RIGOL Technologies, Inc.
Programming Guide for DM3000 Series
Page 70

RIGOL
2-58
Name
Type
Range
Default
<value>
character string
self-definition
172.16.3.1
Name
Type
Range
Default
<value>
character string
self-definition
0.0.0.0
Parameters:
Explanations:
:utility:interface:LAN:gateway? queries the gateway.
:utility:interface:LAN:gateway□
<value>
sets the gateway. The parameter is the
user-defined character string.
Return Format:
:utility:interface:LAN:gateway? returns the current gateway.
7. :utility:interface:LAN:dns
Syntax:
:utility:interface:LAN:dns?
:utility:interface:LAN:dns□
<value>
Function:
The command queries and sets DNS address for LAN connection.
Parameters:
Explanations:
:utility:interface:LAN:dns? queries the DNS address.
:utility:interface:LAN:dns□
user-defined character string.
Return Format:
:utility:interface:LAN:dns? returns the current DNS address.
8. :utility:interface:GPIB:address
Syntax:
:utility:interface:GPIB:address?
:utility:interface:GPIB:address□
© 2008 RIGOL Technologies, Inc.
<value>
Programming Guide for DM3000 Series
sets the DNS address. The parameter is the
<value>
Page 71

RIGOL
2-59
Name
Type
Range
Default
<value>
Consecutive Integer
1~30
7
Name
Type
Range
Default
<value>
discrete
{1200|2400|4800|9600|19200|38400|57600|
115200}
9600
Function:
The command queries and sets GPIB address.
Parameters:
Explanations:
:utility:interface:GPIB:address? queries the GPIB address.
:utility:interface:GPIB:address□
<value>
sets the GPIB address.
Return Format:
:utility:interface:GPIB:address? returns the current GPIB address.
9. :utility:interface:RS232:baud
Syntax:
:utility:interface:RS232:baud?
:utility:interface:RS232:baud□
<value>
Function:
The command queries and sets communication baud rate of serial interface (RS232).
Parameters:
Explanations:
:utility:interface:RS232:baud? queries the RS232 baud rate.
:utility:interface:RS232:baud□
Return Format:
:utility:interface:RS232:baud? returns the current RS232 baud rate.
10. :utility:interface:RS232:parity
Syntax:
© 2008 RIGOL Technologies, Inc.
Programming Guide for DM3000 Series
<value>
sets the RS232 baud rate.
Page 72

RIGOL
2-60
Name
Type
Range
Default
<value>
discrete
{none8bits|odd7bits|even7bits}
none8bits
:utility:interface:RS232:parity?
:utility:interface:RS232:parity□
<value>
Function:
The command queries and sets communication parity bit of serial interface(RS232).
Parameters:
Explanations:
:utility:interface:RS232:parity? queries the RS232 parity bit.
:utility:interface:RS232:parity□
<value>
sets the RS232 parity bit.
Return Format:
:utility:interface:RS232:parity? returns the current parity bit. The range of the
returned value is the same as the setting parameter. It respectively means “none
parity, 8 bits”,“odd, 7bits”, and “even, 7bits”.
© 2008 RIGOL Technologies, Inc.
Programming Guide for DM3000 Series
Page 73

RIGOL
2-61
Trigger Commands
The commands are used to set the tigger system parameters.
The commands mainly include:
:trigger:source
:trigger:auto:interval
:trigger:auto:hold
:trigger:single:triggered
:trigger:ext
:trigger:vmcomplete:polar
:trigger:vmcomplete:pulsewidth
© 2008 RIGOL Technologies, Inc.
Programming Guide for DM3000 Series
Page 74

RIGOL
2-62
Name
Type
Range
Default
<value>
discrete
{AUTO|SINGLE|EXT}
AUTO
Name
Tyoe
Range
Default
<value>
consecutive
integer
4½ 30~2000ms
5½ 200~2000ms
6½ 400~2000ms
30ms
200ms
400ms
1. :trigger:source
Syntax:
:trigger:source?
:trigger:source□
<value>
Function:
The command queries and sets trigger mode in measuring.
Parameters:
Return Format:
:trigger:source? returns the current trigger mode: auto、single or ext, and they
respectively denotes “automatic trigger”,“single trigger”, and “exterior trigger”.
2. :trigger:auto:interval
Syntax:
:trigger:auto:interval?
:trigger:auto:interval□
<value>
Function:
The command queries and sets display interval.
Parameters:
Return Format:
:trigger:auto:interval? returns the current display interval.
:trigger:auto:interval□
<value>
sets the display interval. The range of value: the
resolution is 4½ , 30~2000ms, and the default is 30ms; the resolution is 5½ ,
200~2000ms, and the default is 200ms; the resolution is 6½ , 400~2000ms, and the
default is 400ms.
Remarks: For ACV and ACI measurement, the range of value: the resolution is 3½ ,
© 2008 RIGOL Technologies, Inc.
Programming Guide for DM3000 Series
Page 75

RIGOL
2-63
Name
Type
Range
Default
<value>
Boolean
{ON|OFF}
OFF
Name
Tyoe
Range
Default
<value>
discrete
{0|1|2|3}
1
30~2000ms, and the default is 30ms; the resolution is 4½ , 200~2000ms, and the
default is 200ms; the resolution is 5½ , 400~2000ms, and the default is 400ms.
3. :trigger:auto:hold
Syntax:
:trigger:auto:hold?
:trigger:auto:hold□
<value>
Function:
The command queries and sets auto trigger delay state.
Parameters:
Return Format:
:trigger:auto:hold? returns the current auto trigger delay state. “ON” means the delay
is on, and “OFF”means off.
4. :trigger:auto:hold:sensitivity
Syntax:
:trigger:auto:hold:sensitivity?
:trigger:auto:hold:sensitivity□
<value>
Function:
The command queries and sets the sensitivity of auto trigger delay.
Parameters:
Explanations:
The Table 2- 10 indicates the parameters and their meanings.
© 2008 RIGOL Technologies, Inc.
Programming Guide for DM3000 Series
Page 76

RIGOL
2-64
Parameter
sensitivity
0
0.01%
1
0.1%
2
1%
3
10%
Name
Type
Range
Default
<value>
consecutive integer
1~1000
1
Table 2- 10 The sensitivity parameters and their meanings
Return Format:
:trigger:auto:hold:sensitivity? returns the current sensitivity parameter: 0,1,2 or
3.(see Table 2- 10)
5. :trigger:single
Syntax:
:trigger:single?
:trigger:single□
<value>
Function:
The command queries and sets sampling times in single trigger.
Parameters:
Return Format:
:trigger:single? returns the current sampling times.
6. :trigger:single:triggered
Syntax:
:trigger:single:triggered
Function:
The command carry out the function of single trigger.
Explanation:
The command equals to doing a single trigger in manual operation.
© 2008 RIGOL Technologies, Inc.
Programming Guide for DM3000 Series
Page 77

RIGOL
2-65
Name
Type
Range
Default
<value>
discrete
{RISE|FALL|HIGH|LOW}
RISE
Name
Type
Range
Default
<value>
discrete
{POS|NEG}
POS
7. :trigger:ext
Syntax:
:trigger:ext?
:trigger:ext□
<value>
Function:
The command queries and sets exterior trigger mode.
Parameters:
Explanations:
:trigger:ext? queries the exterior trigger mode, and the default is the rise edge trigger.
:trigger:ext□
<value>
sets the exterior trigger mode. The parameters include
{RISE|FALL|HIGH|LOW}, and respectively means “rise edge trigger.” ,“fall edge
trigger.”,“high level trigger” and “low level trigger”.
Return Format:
:trigger:ext? returns the current trigger mode.
8. :trigger:vmcomplete:polar
Syntax:
:trigger:vmcomplete:polar?
:trigger:vmcomplete:polar□
Function:
The command queries and sets VMC output polar.
Parameters:
Explanations:
:trigger:vmcomplete:polar? queries the VMC output polar, and the default is positive.
:trigger:vmcomplete:polar□
include {POS|NEG}, and respectively means “positive polar” and “negative polar”.
© 2008 RIGOL Technologies, Inc.
<value>
<value>
Programming Guide for DM3000 Series
sets the VMC output polar. The parameters
Page 78

RIGOL
2-66
Name
Type
Range
Default
<value>
consecutive integer
5½ 1~200ms
6½ 1~400ms
30ms
100ms
100ms
Return Format:
:trigger:vmcomplete:polar? returns the current VMC output polar.
9. :trigger:vmcomplete:pulsewidth
Syntax:
:trigger:vmcomplete:pulsewidth?
:trigger:vmcomplete:pulsewidth□
<value>
Function:
The command queries and sets VMC output pulsewidth.
Parameters:
Explanations:
:trigger:vmcomplete:pulsewidth? queries the VMC output pulsewidth.
:trigger:vmcomplete:pulsewidth□
<value>
sets the VMC output pulsewidth. The
range of value: the resolution is 4½ , 1~30ms, and the default is 30ms; the resolution
is 5½ , 1~200ms, and the default is 100ms; the resolution is 6½ , 1~400ms, and the
default is 100ms.
Remarks: For ACV and ACI measurement, the range of value: the resolution is 3½ ,
1~30ms, and the default is 30ms; the resolution is 4½ , 1~200ms, and the default is
100ms; the resolution is 5½ , 1~400ms, and the default is 100ms.
Return Format:
:trigger:vmcomplete:pulsewidth? returns the current VMC output pulsewidth.
© 2008 RIGOL Technologies, Inc.
Programming Guide for DM3000 Series
Page 79

RIGOL
2-67
Calculate Commands
The commands are used to set the calculate system parameters for instrument.
The commands mainly include:
:calculate:function
:calculate:statistic:min
:calculate:statistic:max
:calculate:statistic:average
:calculate:statistic:count
:calculate:NULL:offset
:calculate:DB
:calculate:DB:reference
:calculate:DBM
:calculate:limit:lower
:calculate:limit:upper
© 2008 RIGOL Technologies, Inc.
Programming Guide for DM3000 Series
Page 80

RIGOL
2-68
Name
Type
Range
Dedault
<value>
discrete
{NONE|NULL|DB|DBM|MIN|MAX
|AVERAGE|TOTAL|LIMIT}
NONE
Parameter
Meaning
NONE
turning off calculation
NULL
NULL calculation
DB
dB calculation
DBM
dBm calculation
MIN
minimum calculation
MAX
maximum calculation
AVERAGE
average calculation
TOTAL
total calculation
LIMIT
limit calculation
1. :calculate:function
Syntax:
:calculate:function?
:calculate:function□
<value>
Function:
The command queries and sets math calculation function.
Parameters:
Explanations:
:calculate:function? queries the math calculation function. The default is NONE
(turning off math calculation).
:calculate:function□
<value>
sets the math calculation function.
The Table 2- 11 indicates the math calculation parameters and their meanings.
Table 2- 11 The math calculation parameters and their meanings
Return Format:
:calculate:function? returns the current math calculation parameter(see Table 2- 11).
2. :calculate:statistic:min
Syntax:
:calculate:statistic:min?
© 2008 RIGOL Technologies, Inc.
Programming Guide for DM3000 Series
Page 81

RIGOL
2-69
Function:
The command queries statistic minimum.
Remark:
Only when MIN calculation is available, the command should be available.
Return Format:
The query returns the current statistic minimum.
3. :calculate:statistic:max
Syntax:
:calculate:statistic:max?
Function:
The command queries statistic maximum.
Remark:
When MAX calculation is available, the command is just available.
Return Format:
The query returns the current statistic maximum.
4. :calculate:statistic:average
Syntax:
:calculate:statistic:average?
Function:
The command queries the statistic average .
Remark:
Only when the AVERAGE calculation is available, the command is just available.
Return Format:
The query returns the current statistic average.
© 2008 RIGOL Technologies, Inc.
Programming Guide for DM3000 Series
Page 82

RIGOL
2-70
Name
Type
Range
Default
<value>
consecutive real number
{
<range>
|MIN|MAX|DEF}
0
5. :calculate:statistic:count
Syntax:
:calculate:statistic:count?
Function:
The command queries measure number in calculation.
Remark:
The command is available to the current measure operation.
Return Format:
The query returns the current measure number.
6. :calculate:NULL:offset
Syntax:
:calculate:NULL:offset?
:calculate:NULL:offset□
<value>
Function:
The command queries and sets NULL calculation offset.
Parameters:
Explanations:
:calculate:NULL:offset? queries the NULL calculation offset.
:calculate:NULL:offset□
For the parameter range please see the follows:
<range>
varies with the measurement. See Table 2- 12. All the values can be set
7digits after a demical point. MAX denotes the maximum, and MIN denotes the
minimum. All the value is just available to the corresponding measurement.
© 2008 RIGOL Technologies, Inc.
<value>
Programming Guide for DM3000 Series
sets the NULL calculation offset.
Page 83

RIGOL
2-71
Measurement
Range
DEF
Unit
DC voltage
± 1200
0
V
AC voltage
± 900
0
V
DC current
±12 0 A
AC current
± 12 0 A
resistance
± 1.2e+08
0
Ω
capacitance
± 2.4e-04
0
F
frequency
± 3.6e+05
0
HZ
Name
Type
Range
Default
<value>
consecutive integer
{
<range>
|MIN|MAX|DEF}
0
Table 2- 12 The range of NULL calculation offset
Return Format:
:calculate:NULL:offset? returns the current NULL calculation offset.
7. :calculate:DB
Syntax:
:calculate:DB?
Function:
The command queries dB value.
Return Format:
The query returns the current dB value.
8. :calculate:DB:reference
Syntax:
:calculate:DB:reference?
:calculate:DB:reference□
Function:
The command queries and sets dB reference value.
Parameters:
Explanations:
© 2008 RIGOL Technologies, Inc.
<value>
Programming Guide for DM3000 Series
Page 84

RIGOL
2-72
Name
Type
Range
Default
<value>
Consecutive integer
{
<range>
|MIN|MAX|DEF}
600
:calculate:DB:reference? queries the dB reference value.
:calculate:DB:reference□
<value>
sets the dB reference value.
When setting dB reference value, the value is an integer, and the range is between
+120dB and -120dB. MIN denotes -120dB, MAX denotes +120dB, and DEF denotes 0.
Return Format:
:calculate:DB:reference? returns the current dB reference value.
9. :calculate:DBM
Syntax:
:calculate:DBM?
Function:
The command queries dBm value.
Return Format:
The query returns the current dBm value.
10. :calculate:DBM:reference
Syntax:
:calculate:DBM:reference?
:calculate:DBM:reference□
<value>
Function:
The command queries and sets dBm reference resistance.
Parameters:
Explanations:
:calculate:DBM:reference? queries the dBm reference resistance.
:calculate:DBM:reference□
<value>
sets the dBm reference resistance.
When setting dBm reference resistance, the value should be an integer, and the range
is between 2 and 8000, unit is Ω. MIN denotes 2Ω, MAX denotes 8000Ω, and DEF
denotes 600Ω.
© 2008 RIGOL Technologies, Inc.
Programming Guide for DM3000 Series
Page 85

RIGOL
2-73
Name
Type
Range
Default
<value>
consecutive real number
{
<range>
}
0
Return Format:
:calculate:DBM:reference? returns the current dBm reference resistance.
11. :calculate:limit
Syntax:
:calculate:limit?
Function:
The command queries limit calculation.
Remark:
When the measure value is between min and max, the command returns pass, or else
fail.
Return Format:
The query returns whether the limit calculation have passed: pass or fail.
12. :calculate:limit:lower
Syntax:
:calculate:limit:lower?
:calculate:limit:lower□
<value>
Function:
The command queries and sets lower value in limit calculation.
Parameters:
Explanations:
:calculate:limit:lower? queries the lower value in limit calculation.
:calculate:limit:lower□
<value>
sets the lower value in limit calculation.
The
Table 2- 13 indicates the ranges and the units. But the lower can not be bigger than
the upper.
© 2008 RIGOL Technologies, Inc.
Programming Guide for DM3000 Series
Page 86

RIGOL
2-74
Measurement
Range
DEF
Unit
DC voltage
-1200 ~ +1200
0
V
AC voltage
0 ~ 900
0
V
DC current
-12 ~ +12
0
A
AC current
0 ~ 12
0 A Resistance
0 ~ 1.2e+08
0
Ω
Capacitance
0 ~ 2.4e-04
0
F
Frequency
3 ~ 3.0e+05
0
HZ
Period
3.0e-06 ~ 3.0e-01
0 s Ratio
-1.0e+09 ~ 1.0e+09
0 dB
-120 ~ +120
0
Name
Type
Range
Default
<value>
consecutive real number
{
<range>
}
0
Table 2- 13 Upper and lower limit
Return Format:
:calculate:limit:lower? returns the current lower value.
13. :calculate:limit:upper
Syntax:
:calculate:limit:upper?
:calculate:limit:upper□
<value>
Function:
The command queries and sets upper value in limit calculation.
Parameters:
Explanations:
:calculate:limit:upper? queries the upper value in limit calculation.
:calculate:limit:upper□
<value>
sets the upper value in limit calculation.
The
Table 2- 13 indicates the range and the unit. But the upper can not be smaller than the
upper.
© 2008 RIGOL Technologies, Inc.
Programming Guide for DM3000 Series
Page 87

RIGOL
2-75
Return Format:
:calculate:limit:upper? returns the current upper value.
© 2008 RIGOL Technologies, Inc.
Programming Guide for DM3000 Series
Page 88

RIGOL
2-76
Datalog Commands
The commands are used to set the datalog system parameters for instrument.
The commands mainly include:
:datalog
:datalog:configure:function
:datalog:configure:startmode
:datalog:configure:startmode:auto
:datalog:configure:startmode:extern
:datalog:configure:startmode:delaytime
:datalog:configure:stopmode?
:datalog:configure:stopmode:time
:datalog:configure:stopmode:number
:datalog:configure:rate
:datalog:run
:datalog:stop
:datalog:fetchdata
NOTE:DM3000 series Digital Multimeter that the version is or later than 03.03.00.03
.02. 00.01 supports the Datalog Commands.
© 2008 RIGOL Technologies, Inc.
Programming Guide for DM3000 Series
Page 89

RIGOL
2-77
1. :datalog
Syntax:
:datalog?
Function:
The command queries whether the datalog function is on.
Explanation:
Befroe the datalog function is on, please configure the datalog settings.
Return Format:
The return value “Run” and “Stop” respectively denote that the datalog system runs or
stops.
2. :datalog:configure:function
Syntax:
:datalog:configure:function?
:datalog:configure:function□
<DCV,DCI,2WR,4WR>,<range>
Function:
The command queries and sets the datalog function.
Explanations:
:configure:function? queries the current datalog function.
:configure:function□
<DCV,DCI,2WR,4WR>,< range>
sets the datalog function. The
first parameter including DCV,DCI,2WR and 4WR shows the datalog type.; the second
paramater shows the correspanding range.
Remarks: the auto range is unavailable for the datalog function. The lower level of
the range is 1; and the upper level is related with the set function. The upper level of
DCV range is 5; the upper level of DCI is 5; the upper level of 2WR is 7; and the upper
level of 4WR is 7.
Return Format:
:datalog:configure:function? returns the corresponding range parameters of
DCV,DCI,2WR or 4WR.
© 2008 RIGOL Technologies, Inc.
Programming Guide for DM3000 Series
Page 90

RIGOL
2-78
3. :datalog:configure:startmode
Syntax:
:datalog:configure:startmode?
Function:
The command queries the startmode of the scan function.
Return Format:
:datalog:configure:startmode? returns the startmode name: Auto or Extern. The
delay startmode is considered as Auto, and by quering the delay time, you can be sure
whether the delay startmode is on.
4. :datalog:configure:startmode:auto
Syntax:
:datalog:configure:startmode:auto
Function:
The command sets the datalog startmode as auto.
Explanation:
If you have set the delay time, the datalog system starts automatically when the delay
time is reached. If not, the datalog system starts the datalog function when the
command is received.
5. :datalog:configure:startmode:extern
Syntax:
:datalog:configure:startmode:extern
Function:
The command sets the scan startmode as extern.
Explanations:
After receiving this order, if not acquire the trigger signal, the system will be in wait
state. Until the advent of triggering signals, datalog system starts. Please refer to the
manual about the setting and requirement of the trigger signal.
© 2008 RIGOL Technologies, Inc.
Programming Guide for DM3000 Series
Page 91

RIGOL
2-79
6. :datalog:configure:startmode:delaytime
Syntax:
:datalog:configure:startmode:delaytime?
:datalog:configure:startmode:delaytime□
<value>
Function:
The command queries and sets the delay time of auto startmode.
Explanations:
:datalog:configure:startmode:delaytime? queries the delay time of auto startmode.
:datalog:configure:startmode:delaytime□
<value>
sets the delay time of auto
startmode. The value is the delay time you will set, the default unit is s. The range of
the value is 0 ~ 3600s.
Return Format:
:datalog:configure:startmode:delaytime? returns the delay time in auto startmode,
and the default unit is s.
7. :datalog:configure:stopmode?
Syntax:
:datalog:configure:stopmode?
Function:
The command queries the stop condition of datalog function.
Explanation:
:datalog:configure:stopmode? queries the stop condition of datalog function.
Return Format:
:datalog:configure:startmode:delaytime? returns “Time” or “Number”, respectively
showing the datalog system stops according to the set time or the datalog number.
8. :datalog:configure:stopmode:time
Syntax:
:datalog:configure:stopmode:time?
:datalog:configure:stopmode:time□
© 2008 RIGOL Technologies, Inc.
Programming Guide for DM3000 Series
<value>
Page 92

RIGOL
2-80
Function:
The command queries and sets the stop time of datalog function.
Explanations:
:datalog:configure:stopmode:time? queries the stop time of datalog function.
:datalog:configure:stopmode:time□
<value>
sets the time every datalog funtion lasts
for. At the same time the stopmode sets as time. The value is the time the every
datalog function lasts for.
Return Format:
:datalog:configure:stopmode:time? returns the time every datalog function lasts for.
9. :datalog:configure:stopmode:number
Syntax:
:datalog:configure:stopmode:number?
:datalog:configure:stopmode:number□
<value>
Function:
The commad queries and sets the datalog number of stopmode.
Explanations:
:datalog:configure:stopmode:number? queries the datalog number the datalog
function needs for stop.
:datalog:configure:stopmode:number□
<value>
sets the datalog number and the
stopmode as number。The value is the datalog number needed.
Return Format:
:datalog:configure:stopmode:number? returns the datalog number the datalog
function needs for stop.
10. :datalog:configure:rate
Syntax:
:datalog:configure:rate?
:datalog:configure:rate□
<range>
Function:
© 2008 RIGOL Technologies, Inc.
Programming Guide for DM3000 Series
Page 93

RIGOL
2-81
The command queries and sets the sample rate of datalog function.
Explanations:
:datalog:configure:rate? queries the sample rate of datalog function.
:datalog:configure:rate□
<range>
sets the sample rate of datalog function, the range
is 1~13, respectively showing the sample rate is 1/10min, 1/5min, 1/min, 1/10s, 1/s,
10/s, 50/s, 100/s, 833/s, 1K/s, 5K/s, 10K/s, 50K/s.
Return Format:
:datalog:configure:rate?returns the range of the current sample rate : 1~13.
11. :datalog:run
Syntax:
:datalog:run
Function:
The command runs the datalog function according to the startmode。
Explanation:
Before sending the command, you should send “:datalog:configure” to set the datalog
function and range. Or else the system will not run, and return the wrong sign.
12. :datalog:stop
Syntax:
:datalog:stop
Function:
The command stops the datalog function.
13. :datalog:fetchdata
Syntax:
:datalog:fetchdata□
<value>
Function:
The command fetches the data the datalog system acquire.(32 digits binary format
data)
© 2008 RIGOL Technologies, Inc.
Programming Guide for DM3000 Series
Page 94

RIGOL
2-82
Explanations:
:datalog:fetchdata□
<value>
fetches the data the datalog system acquire. The
instrument can storage data for 2097152, and the command can acquire a data
packet every time, including 512 sampling data and occuping the storage space for 2K.
The value is the serial number of the data packet, the range is 1 ~ 4096. Every datalog
starts storaging from the first packet. The sencondary developmant of the PC
programm needs RIGOL drive programm and dynamic link library to change the
obtained 32 digits binary data into floating-point-type data, and calculates the
numbers of the effective data and pick up. Please refer to RIGOL Demo programm
about the use methods of the programm.
Return Format:
:datalog:fetchdata□
<value>
returns the data packet in the form of 32digits binary
data.
© 2008 RIGOL Technologies, Inc.
Programming Guide for DM3000 Series
Page 95

RIGOL
2-83
Scan Commands
The commands are used to set the scan system parameters for instrument.
The commands mainly include:
:scan:create
:scan:addtask
:scan:deletetask
:scan:intervaltime
:scan:run
:scan:run:cycle
:scan:stop
:scan:list:task
:scan:list:project
:scan:current:cycle
:scan:current:projname
:scan:fetchdata
:scan:saveproj
:scan:loadproj
:scan:deleteproj
:scan:cardID
NOTE:DM3000 series Digital Multimeter that the version is or later than 03.03.00.03
.02. 00.01 supports the Scan Commands.
© 2008 RIGOL Technologies, Inc.
Programming Guide for DM3000 Series
Page 96

RIGOL
2-84
Parameter
Type
Range
Task Number
Consecutive Integer
0 ~ 99
*1Channel
Consecutive Integer
1 ~ 16
Function
Discrete
DCV, ACV, DCI, ACI,
2WR, FREQ, PERI,
CAP, DIODE
*2Range
Discrete
0 ~ 6
(0 indicates “Auto”)
*3Precision
Discrete
0, 1, 2
Sampling Number
Consecutive Integer
0 ~ 99
*4Delay Time
Consecutive Real
Number
The default unit is s
1. :scan:create
Syntax:
:scan:create□
Function:
The command creates the project.
Explanation:
:scan:create□
not set the project name, but you must use the command for the initialization. Or else
the system can not runs the latter operation, and returns the wrong sign.
2. :scan:addtask
Syntax:
:scan:addtask□
<value>
<value>
creates the project. The value is the project name. You may
<value1>,<value2>,
…...
,<value7>
Function:
The command adds the task for the scan project.
Explanations:
:scan:addtask□
including task number, channel, function, precision, sampling number and delay time.
Their parameter ranges are shown in Table 2- 14. You only can add the task in number
order. If the two task have the same number, the previous setting will be changed.
<value>
Table 2- 14 The Task Parameter and Their Range
adds a scan task, the value are the new task’s parameters,
© 2008 RIGOL Technologies, Inc.
Programming Guide for DM3000 Series
Page 97

RIGOL
2-85
*1Note: the scan channel includes 1~16, the channel 1~12 is connected
for measuring DCV, ACV, DCI, ACI, 2WR, FREQ, PERI, CAP, DIODE. The
channel 13~16 is connected for measuring DCV, ACV, DCI, ACI and 2WR.
*2Note: the different measure function have the different range, thereinto:
When DCV measurement, range parameters can be 0, 1, 2, 3 or 4;
When ACV measurement, range parameters can be 0, 1, 2, 3 or 4;
When DCI measurement, range parameters can be 0, 1, 2, 3 or 4;
When ACI measurement, range parameters can be 0, 1, 2 or 3;
When 2WR measurement, range parameters can be 0, 1, 2, 3, 4, 5 or 6;
When FREQ measurement, range parameters can be 0, 1, 2, 3 or 4;
When PERI measurement, range parameters can be 0, 1, 2, 3 or 4;
When CAP measurement, range parameters can be 0, 1, 2, 3, 4 or 5.
*3Note: ultimeter respectively shows the range as 4 ½ , 5 ½ ,6 ½ ; for 5 ½ digits
multimeter respectively shows the range as 3 ½ , 4 ½ ,5 ½ .
*4Note: Delay Time can be integer or decimal within 0~3600, please follow the
rules of rounding if using decimal format.
3. :scan:deletetask
Syntax:
:scan:deletetask□
<value>
Function:
The command deletes the added task.
Explanations:
:scan:deletetask□
<value>
deletes the added task, the value is the deleted task
number, and the range is 0~99. If the middle task is deleted, the latter task moves
forward in order.
4. :scan:intervaltime
Syntax:
:scan:intervaltime□
Function:
The command sets the interval time of the project cycle.
Explanations:
:scan:intervaltime□
<value>
<value>
sets the interval time of the project cycle. The value is
© 2008 RIGOL Technologies, Inc.
Programming Guide for DM3000 Series
Page 98

RIGOL
2-86
the interval time you will set, and the unit is s. When the project cycle number is
greater than 1, the command sets the interval time between the close project cycles.
5. :scan:run
Syntax:
:scan:run
Function:
The command circulates the current project one time.
6. :scan:run:cycle
Syntax:
:scan:run:cycle□
<value>
Function:
The command sets the project cycle number, and runs the current project.
Explanations:
:scan:run:cycle□
<value>
sets the project cycle number, and runs the current project.
The value is the cycle number.
7. :scan:stop
Syntax:
:scan:stop
Function:
The command forces to stop the scan task in operating.
8. :scan:list:task
Syntax:
:scan:list:task□
<value>
Function:
The command lists all the task of the setting project.
© 2008 RIGOL Technologies, Inc.
Programming Guide for DM3000 Series
Page 99

RIGOL
2-87
Explanations:
:scan:list:task□
<value>
lists the task table of the setting project. The value is the
project number. If don’t set the project number, the command lists the task table of
the current project.
Return Format:
:scan:list:task□
<value>
returns the task table of the setting project in the form of :
<task number>:channel, range, precision, sampling number and function.
9. :scan:list:project
Syntax:
:scan:list:project
Function:
The command returns the table of all the project names in DM3000 local storage.
10. :scan:current:cycle
Syntax:
:scan:current:cycle?
Function:
The command queries the cycle number completed.
Return Format:
:scan:current:cycle? returns the cycle number completed.
11. :scan:current:projname
Syntax:
:scan:current:projname?
Function:
The command queries the project name in current cache.
Return Format:
:scan:current:projname? queries the project name in current cache. If there is not any
project in cache, return the right sign “R”.
© 2008 RIGOL Technologies, Inc.
Programming Guide for DM3000 Series
Page 100

RIGOL
2-88
12. :scan:fetchdata
Syntax:
:scan:fetchdata□
<value>
Function:
The command fetches the data.
Explanation:
:scan:fetchdata□
13. :scan:saveproj
Syntax:
:scan:saveproj□
<value>
<value>
has the same usage with :datalog:fetchdata□
<value>.
Function:
The command saves the setting project.
Explanation:
:scan:saveproj□
number of the file location. DM3000 can save up to 10 projects, if exceeded, and
return the wrong sign.
14. :scan:loadproj
Syntax:
:scan:loadproj□
<value>
<value>
saves the setting project in DM3000 local. The value is the
Function:
The command loads the saved project to cache, and directly can run the project.
Explanation:
:scan:loadproj□
the file location.
15. :scan:deleteproj
Syntax:
:scan:deleteproj□
<value>
<value>
loads the saved project to cache. The value is the number of
© 2008 RIGOL Technologies, Inc.
Programming Guide for DM3000 Series
 Loading...