

Ricoh Pro C550ex, Pro C700ex Network Manual
Monitoring and Configuring the Machine
Appendix
1
2
Read this manual carefully before you use this machine and keep it handy for future reference. For safe and correct use, be sure to read the Safety Information
in "About This Machine" before using the machine.
Network Guide

Introduction
This manual contains detailed instructions and notes on the operation and use of this machine. For your safety and
benefit, read this manual carefully before using the machine. Keep this manual in a handy place for quick reference.
Do not copy or print any item for which reproduction is prohibited by law.
Copying or printing the following items is generally prohibited by local law:
bank notes, revenue stamps, bonds, stock certificates, bank drafts, checks, passports, driver's licenses.
Important
Contents of this manual are subject to change without prior notice. In no event will the company be liable for direct,
indirect, special, incidental, or consequential damages as a result of handling or operating the machine.
Two kinds of size notation are employed in this manual. With this machine refer to the inch version.
Notes
Some illustrations in this manual might be slightly different from the machine.
Certain options might not be available in some countries. For details, please contact your local dealer.
Depending on which country you are in, your machine may include certain options as standard. For details, please
contact your local dealer.

Manuals for This Machine
Refer to the manuals that are relevant to what you want to do with the machine.
• Media differ according to manual.
• The printed and electronic versions of a manual have the same contents.
• Adobe Acrobat Reader/Adobe Reader must be installed in order to view the manuals as PDF files.
• A Web browser must be installed in order to view the html manuals.
About This Machine
Be sure to read the Safety Information in this manual before using the machine.
This manual provides an introduction to the functions of the machine. It also explains the control panel,
preparation procedures for using the machine, how to enter text, and how to install the CD-ROMs
provided.
Troubleshooting
Provides a guide to solving common problems, and explains how to replace paper, toner, and other
consumables. Also refer to this manual for explanations on where to put the machine and how to
maintain it.
Copy/Document Server Reference
Explains Copier and Document Server functions and operations. Also refer to this manual for
explanations on how to place originals.
Network Guide
Explains how to configure and operate the machine in a network environment, and use the software
provided.
General Settings Guide
Explains User Tools settings, and Address Book procedures such as registering user codes. Also refer
to this manual for explanations on how to connect the machine.
Security Reference
This manual is for administrators of the machine. It explains security functions that you can use to
prevent unauthorized use of the machine, data tampering, or information leakage. For enhanced
security, we recommend that you first make the following settings:
• Install the Device Certificate.
• Enable SSL (Secure Sockets Layer) Encryption.
• Change the user name and password of the administrator using Web Image Monitor.
For details, see “Setting Up the Machine”, Security Reference.
1

Be sure to read this manual when setting the enhanced security functions, or user and administrator
authentication.
Information
Contains general notes on the machine, and information about the trademarks of product names used
in the manuals
• Manuals provided are specific to machine types.
• In addition to the above, manuals are also provided for the Printer functions.
• Some of the example screens shown in this manual might differ slightly from actual screens. Also, some
functions might not be available, even if they are shown in screenshots.
2

TABLE OF CONTENTS
Manuals for This Machine.................................................................................................................................1
How to Read This Manual.................................................................................................................................5
Symbols...........................................................................................................................................................5
About IP Address............................................................................................................................................5
1. Monitoring and Configuring the Machine
Using Web Image Monitor................................................................................................................................7
Displaying Top Page......................................................................................................................................8
When User Authentication is Set...................................................................................................................9
About Menu and Mode..............................................................................................................................10
Access in the Administrator Mode..............................................................................................................11
List of Setting Items.......................................................................................................................................12
Displaying Web Image Monitor Help.......................................................................................................15
Machine Status Notification by E-Mail..........................................................................................................17
Auto E-mail Notification..............................................................................................................................18
On-demand E-mail Notification.................................................................................................................19
Mail Authentication......................................................................................................................................20
Sending E-mail Notification........................................................................................................................21
Remote Maintenance by telnet.......................................................................................................................25
Using telnet...................................................................................................................................................25
access...........................................................................................................................................................26
autonet..........................................................................................................................................................27
bonjour (rendezvous)..................................................................................................................................27
devicename..................................................................................................................................................28
dhcp..............................................................................................................................................................29
dhcp6............................................................................................................................................................30
dns.................................................................................................................................................................30
domainname................................................................................................................................................32
help...............................................................................................................................................................32
hostname......................................................................................................................................................33
ifconfig..........................................................................................................................................................33
ipv6...............................................................................................................................................................34
passwd..........................................................................................................................................................34
pathmtu.........................................................................................................................................................35
3

route..............................................................................................................................................................35
set..................................................................................................................................................................37
show..............................................................................................................................................................38
smb................................................................................................................................................................38
snmp..............................................................................................................................................................39
sntp................................................................................................................................................................42
ssdp...............................................................................................................................................................43
syslog............................................................................................................................................................43
upnp..............................................................................................................................................................44
web...............................................................................................................................................................44
wins...............................................................................................................................................................45
SNMP................................................................................................................................................................46
Understanding the Displayed Information.....................................................................................................47
Configuring the Network Interface Board.................................................................................................47
Message List.....................................................................................................................................................53
System Log Information...............................................................................................................................53
2. Appendix
Using DHCP......................................................................................................................................................57
Using AutoNet..............................................................................................................................................57
Configuring the WINS Server.........................................................................................................................58
Using Web Image Monitor.........................................................................................................................58
Using telnet...................................................................................................................................................58
Using the Dynamic DNS Function...................................................................................................................59
Updating.......................................................................................................................................................59
DNS servers targeted for operation...........................................................................................................60
DHCP servers targeted for operation.........................................................................................................60
Setting the dynamic DNS function..............................................................................................................60
Setting Up the Machine on a Network..........................................................................................................62
Initial Settings Overview..............................................................................................................................62
Initial Settings...............................................................................................................................................64
Specifications....................................................................................................................................................66
Functions.......................................................................................................................................................67
INDEX.............................................................................................................................................................69
4
How to Read This Manual
Symbols
This manual uses the following symbols:
Indicates important safety notes.
Ignoring these notes could result in serious injury or death. Be sure to read these notes. They can be found
in the “Safety Information” section of About This Machine.
Indicates important safety notes.
Ignoring these notes could result in moderate or minor injury, or damage to the machine or to property. Be
sure to read these notes. They can be found in the “Safety Information” section of About This Machine.
Indicates points to pay attention to when using the machine, and explanations of likely causes of paper
misfeeds, damage to originals, or loss of data. Be sure to read these explanations.
Indicates supplementary explanations of the machine's functions, and instructions on resolving user errors.
This symbol is located at the end of sections. It indicates where you can find further relevant information.
[ ]
Indicates the names of keys that appear on the machine's display panel.
[ ]
Indicates the names of keys on the machine's control panel.
About IP Address
In this manual, “IP address” covers both IPv4 and IPv6 environments. Read the instructions that are relevant
to the environment you are using.
5

6

1. Monitoring and Configuring the
Machine
Using Web Image Monitor
Using Web Image Monitor, you can check the machine status and change settings.
Available operations
The following operations can be remotely performed using Web Image Monitor from a client
computer.
• Displaying machine status or settings
• Checking the print job status or history
• Checking, modifying, printing, or deleting print jobs stored in the Document Server
• Interrupting currently printing jobs
• Resetting the machine
• Managing the Address Book
• Making machine settings
• Making network protocol settings
• Making security settings
Configuring the machine
To perform the operations from Web Image Monitor, TCP/IP is required. After the machine is
configured to use TCP/IP, operations from Web Image Monitor become available.
Recommended Web browser
• Windows:
Internet Explorer 5.5 SP2 or higher
Firefox 1.0 or higher
• Mac OS:
Firefox 1.0 or higher
Safari 1.0, 1.2, 2.0 (412.2) or higher
Web Image Monitor supports screen reader software. We recommend JAWS 7.0 or a later version.
• Safari cannot be used on Mac OS X 10.4.1.
• Display and operation problems can occur if you do not enable JavaScript and cookies, or if you are
using a non-recommended Web Browser.
7
1

• If you are using a proxy server, change the Web browser settings. Contact your administrator for
information about the settings.
• Machine information is not automatically updated. To perform an update, click [Refresh] in the display
area.
• We recommend using Web Image Monitor in the same network.
• You cannot access to the machine from outside the firewall.
• When using the machine under DHCP, the IP address may be automatically changed by the DHCP
server settings. Enable DDNS setting on the machine, and then connect using the machine's host name.
Alternatively, set a static IP address to the DHCP server.
• If the HTTP port is disabled, connection to the machine using the machine's URL cannot be established.
SSL setting must be enabled on this machine. For details, consult your network administrator.
• When using the SSL encryption protocol, enter “https://(machine's IP address or host name)/”.
• Internet Explorer must be installed on your computer. Use the most recent available version. We
recommend Internet Explorer 6.0 or later.
• When you are using Firefox, fonts and colors may be different, or tables may be out of shape.
• When using a host name under Windows Server 2003/2003 R2/2008, or Windows Vista with
IPv6 protocol, perform name resolution using an external DNS server. The host cannot be used.
• To use JAWS 7.0 under Web Image Monitor, you must be running Windows OS and Microsoft
Internet Explorer 5.5 SP2, or a later version.
Displaying Top Page
This section explains the Top Page and how to display Web Image Monitor.
• When entering an IPv4 address, do not begin segments with zeros. For example: If the address is
“192.168.001.010”, you must enter it as “192.168.1.10”.
1. Start your Web browser.
2. Enter “http://(machine's IP address or host name)/” in your Web browser's URL bar.
Top Page of Web Image Monitor appears.
If the machine's host name has been registered on the DNS or WINS server, you can enter it.
When setting SSL, a protocol for encrypted communication, under environment which server
authentication is issued, enter “https://(machine's IP address or host name)/”.
Every Web Image Monitor page is divided into the following areas:
1. Monitoring and Configuring the Machine
8
1
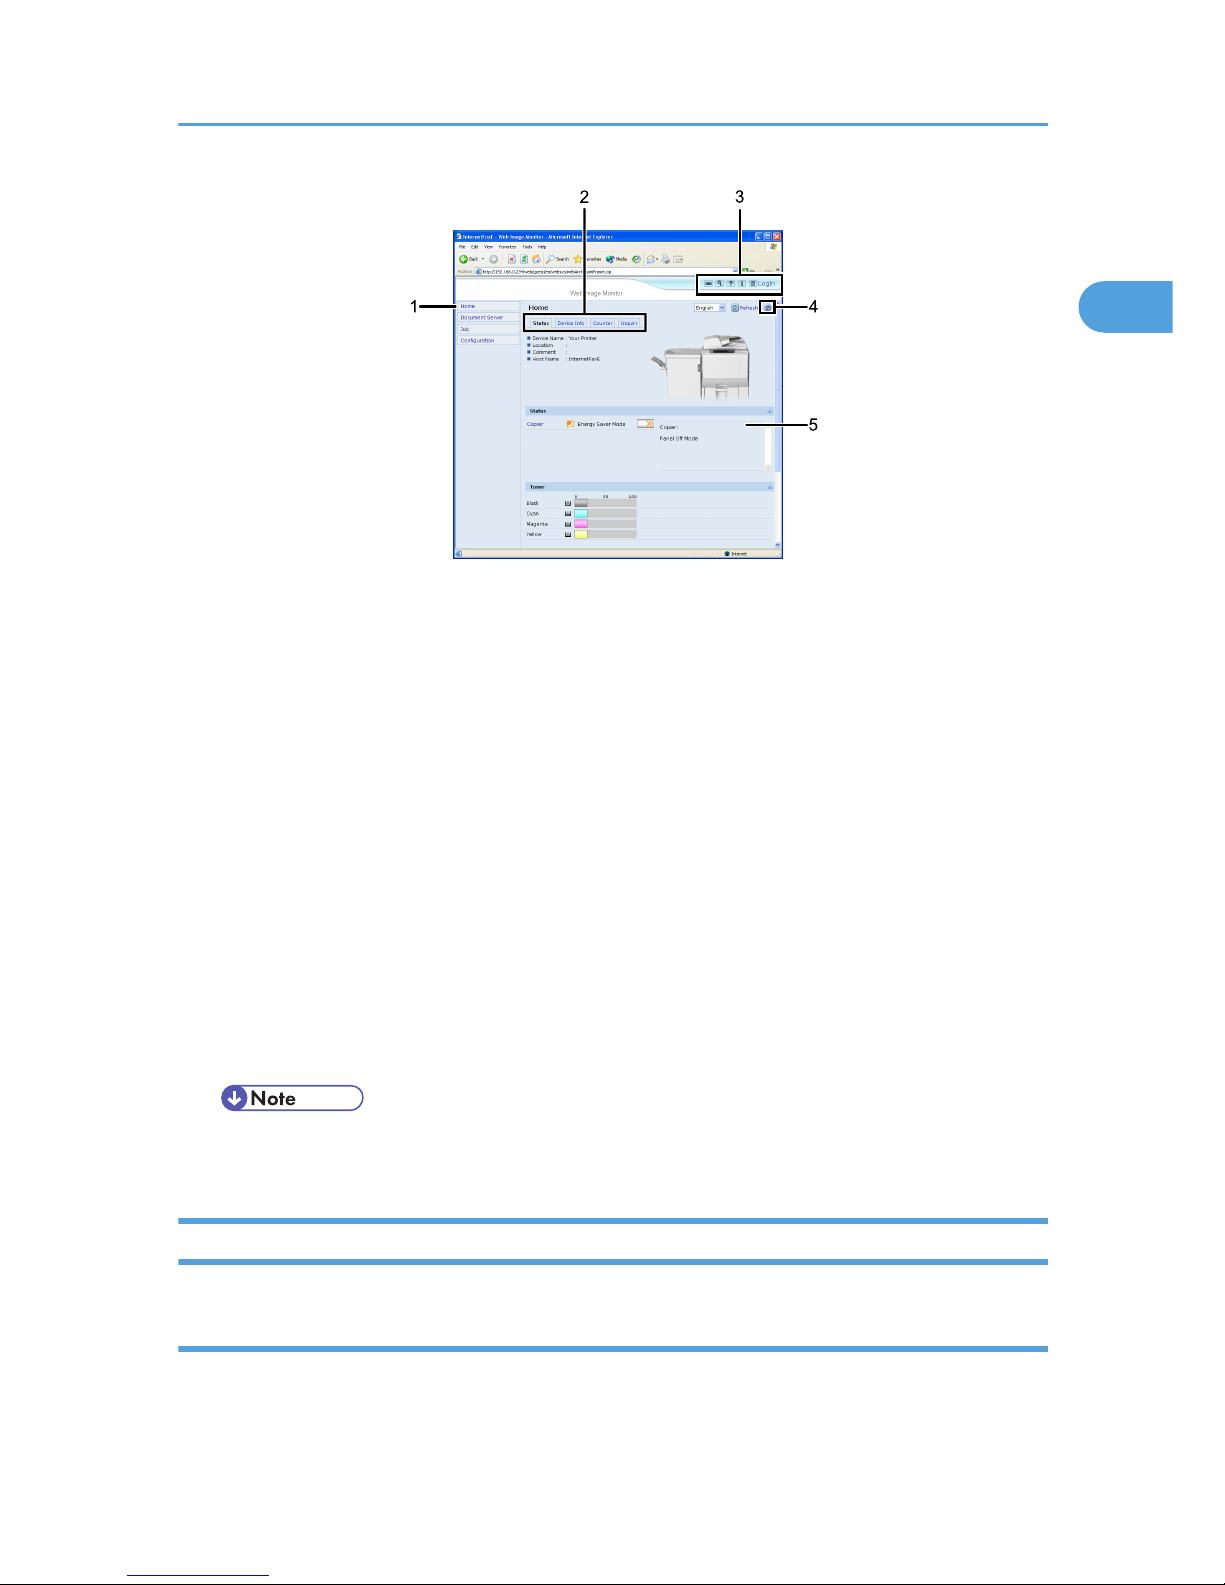
BTD102S
1. Menu area
If you select menu, its content will be shown on the work area, or the sub area.
2. Tab area
Details about each menu appear.
3. Header area
The dialog box for switching to the user mode and administrator mode appears, and each mode's menu will be
displayed.
The link to help and dialog box for keyword search appears.
4. Help
Use Help to view or download Help file contents.
5. Display area
Displays the contents of the item selected in the menu area.
Machine information in the display area is not automatically updated. Click [Refresh] at the upper right in the
display area to update the machine information. Click the Web browser's [Refresh] button to refresh the entire
browser screen.
• When using a host name under Windows Server 2003/2003 R2/2008 or Windows Vista with IPv6
protocol, perform host name resolution using an external DNS server. The host file cannot be used.
When User Authentication is Set
Login (using Web Image Monitor)
Follow the procedure below to log on when user authentication is set.
1. Click [Login].
Using Web Image Monitor
9
1
2. Enter a login user name and password, and then click [Login].
For details about the login user name and password, consult your network administrator.
• For user code authentication, enter a user code in [Login User Name], and then click [Login].
• The procedure may differ depending on the Web browser used.
Log Off (using Web Image Monitor)
Click [Logout] to log off.
• When you log on and made the setting, always click [Logout].
About Menu and Mode
There are two modes available with Web Image Monitor: guest mode and administrator mode.
Displayed Items may differ depending on the machine type.
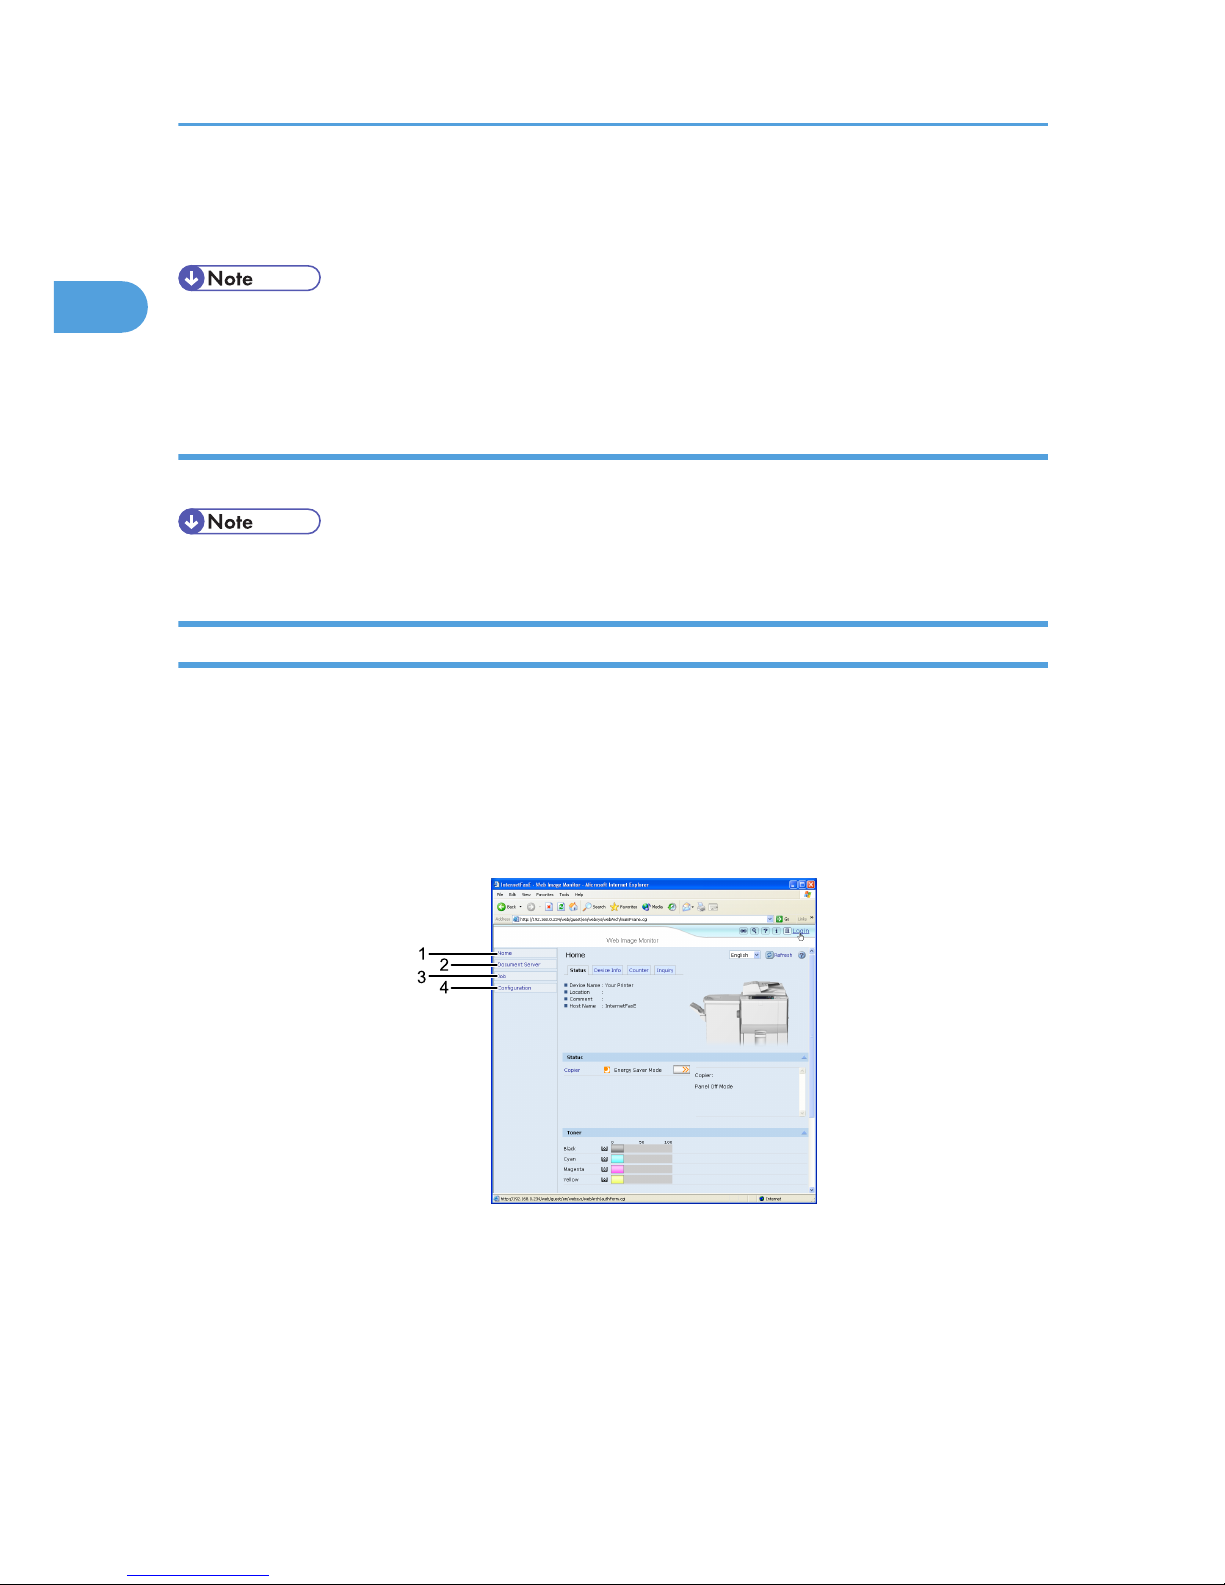
About Guest Mode
In the guest mode, machine status, settings, and print job status can be viewed, but the machine settings
cannot be changed.
BTD100S
1. Home
The [Status], [Configuration], [Counter], and [Inquiry] tab are displayed. Details of the tab menu are displayed
on the work area.
2. Document Server
Display files stored in the Document Server.
1. Monitoring and Configuring the Machine
10
1

3. Job
Display all print files.
4. Configuration
Display current machine and network settings.
Administrator Mode
In the administrator mode, you can configure various machine settings.
BTD101S
1. Home
The [Status], [Configuration], [Counter], and [Inquiry] tab are displayed. Details of the tab menu are displayed
on the work area.
2. Document Server
Display files stored in the Document Server.
3. Job
Display all print files.
4. Address Book
User information can be registered, displayed, changed, and deleted.
5. Configuration
Make system settings for the machine, interface settings, and security.
6. Reset Device
Click to reset the machine. If a print job is being processed, the machine will be reset after the print job is completed.
This button is located on Top Page.
Access in the Administrator Mode
Follow the procedure below to access Web Image Monitor in the administrator mode.
1. On Top Page, click [Login].
The window for entering the login user name and password appears.
Using Web Image Monitor
11
1

2. Enter your login user name and password, and then click [Login].
For details about the login user name and password, consult your network administrator.
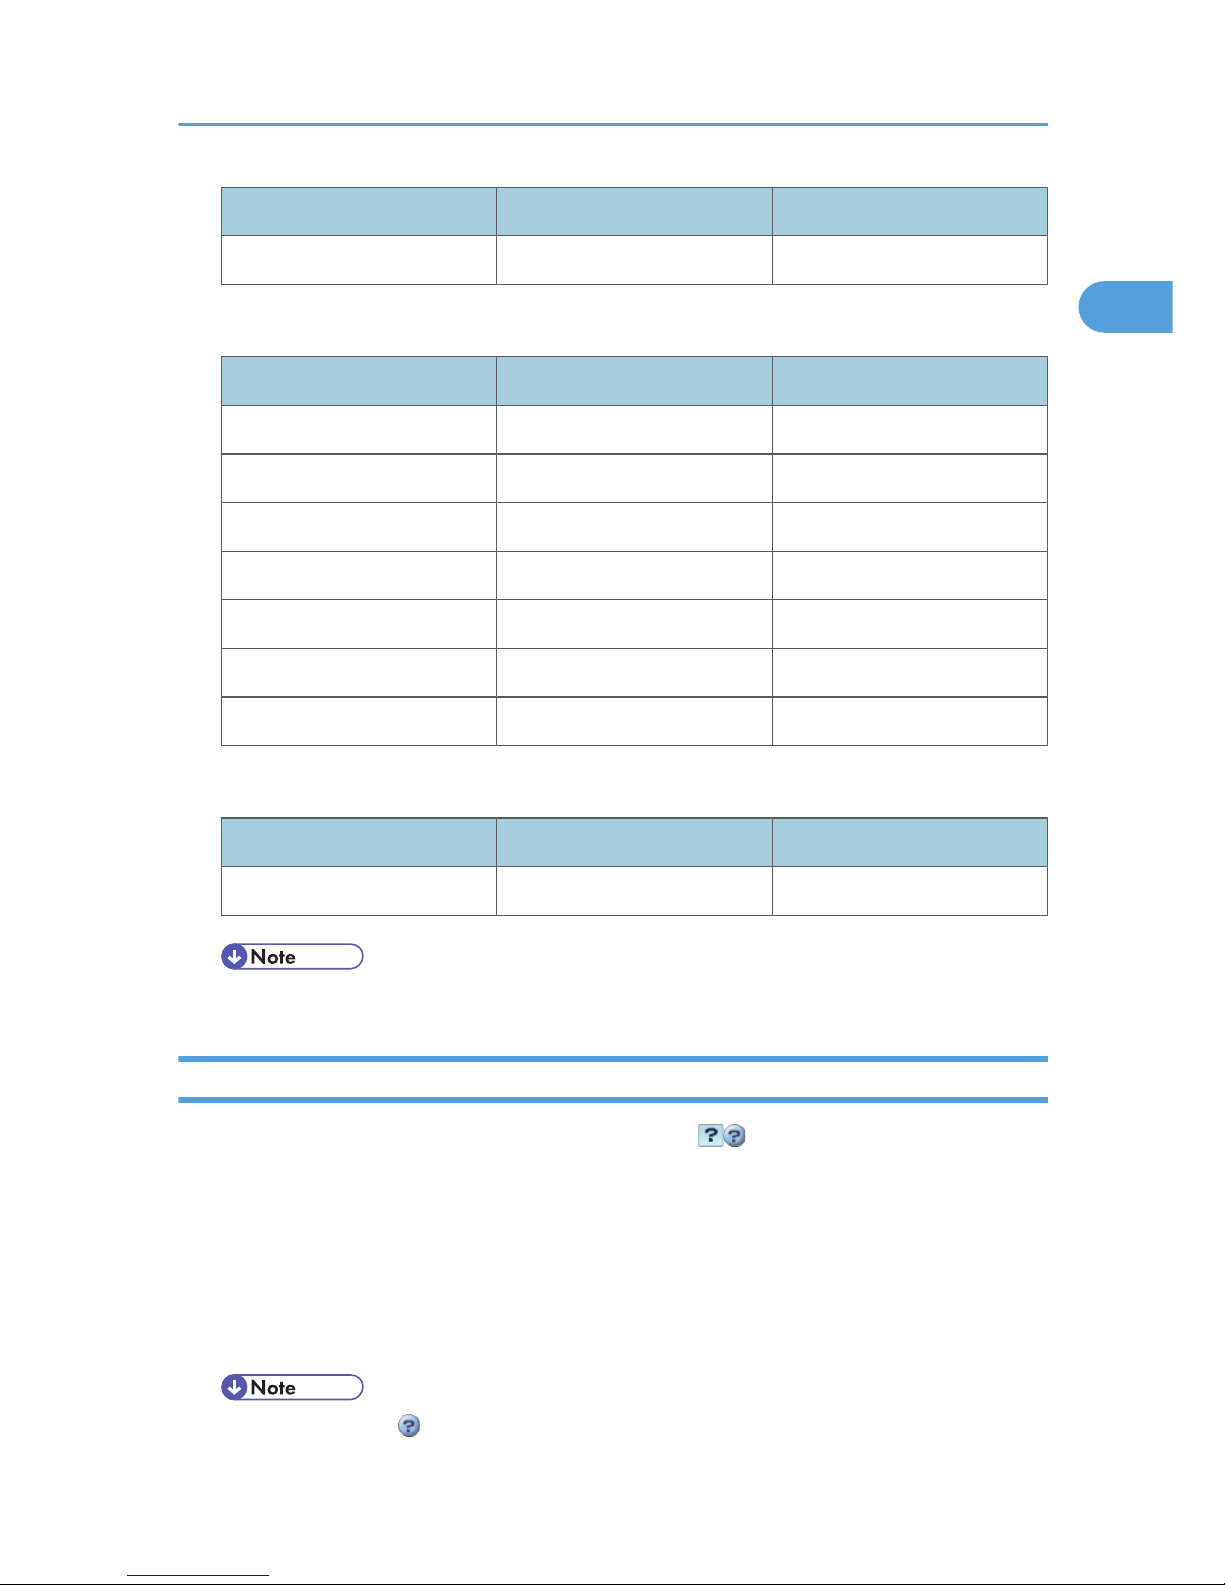
List of Setting Items
The following tables show Web Image Monitor items that can be viewed or modified depending on the
selected mode on the Web browser. Select one of the following modes to log on Web Image Monitor:
• Guest mode: logged on as a user
• Administrator mode: logged on as an administrator
Home
Status
Menu Guest mode Administrator mode
Reset Device None Modify
Status Read Read
Toner Read Read
Input Tray Read Read
Output Tray Read Read
Device Info
Menu Guest mode Administrator mode
Functions Read Read
System Read Read
Version Read Read
Counter
Menu Guest mode Administrator mode
Copier Read Read
Other Function(s) Read Read
Inquiry
1. Monitoring and Configuring the Machine
12
1

Menu Guest mode Administrator mode
Machine Maintenance/Repair Read Read
Sales Representative Read Read
Document Server
Document Server
Guest mode Administrator mode
Read/Modify Read/Modify
Job
Job List
Menu Guest mode Administrator mode
Current/Waiting Jobs Read Read/Modify
Job History Read Read
Document Server
Menu Guest mode Administrator mode
Print Job History Read/Modify Read/Modify
Address Book
Menu Guest mode Administrator mode
Address Book None Read/Modify
Configuration
Device Settings
Menu Guest mode Administrator mode
System Read Read/Modify
Paper Read Read/Modify
Date/Time Read Read/Modify
Using Web Image Monitor
13
1

Menu Guest mode Administrator mode
Timer Read Read/Modify
Logs None Read/Modify
E-mail Read Read/Modify
Auto E-mail Notification None Read/Modify
On-demand E-mail
Notification
None Read/Modify
User Authentication
Management
None Read/Modify
Administrator Authentication
Management
None Read/Modify
Program/Change
Administrator
None Read/Modify
Firmware Update None Read/Modify
Interface
Menu Guest mode Administrator mode
Interface Settings Read Read/Modify
Network
Menu Guest mode Administrator mode
IPv4 Read Read/Modify
IPv6 Read Read/Modify
SMB Read Read/Modify
SNMP None Read/Modify
SNMPv3 None Read/Modify
SSDP None Read/Modify
Bonjour Read Read/Modify
1. Monitoring and Configuring the Machine
14
1
Menu Guest mode Administrator mode
System Log Read Read
Security
Menu Guest mode Administrator mode
Network Security None Read/Modify
Access Control None Read/Modify
SSL/TLS None Read/Modify
Site Certificate None Read/Modify
Device Certificate None Read/Modify
IPsec None Read/Modify
User Lockout Policy None Read/Modify
Webpage
Menu Guest mode Administrator mode
Webpage Read/Modify Read/Modify
• Some items are not displayed depending on the security settings.
Displaying Web Image Monitor Help
When using Help for the first time, clicking the icon marked “? ” ( ) makes the following screen appear,
in which you can view Help in two different ways, as shown below:
Viewing Help on our Web site
Downloading Help to your computer
Downloading and Checking Help
You can download Help to your computer. As the Help URL, you can specify the path to the local file
to view the Help without connecting to the Internet.
• By clicking “?” ( ) in the header area, the contents of Help appear.
Using Web Image Monitor
15
1

• By clicking “?” ( ), the Help icon in the display area, Help for the setting items in the display
area appears.
Downloading Help
1. In the [OS] list, select the operating system.
2. In the [Language] list, select the language.
3. Click [Download].
4. Download Help by following the instructions on the screen.
5. Store the downloaded compressed file in a given location, and then decompress the file.
To create a link for the Help button ( ), save the downloaded Help files on a Web server.
Linking the URL of the downloaded Help
You can link the URL of the help file on a computer or Web server to the “?” button.
1. Log on to Web Image Monitor in the administrator mode.
2. In the menu area, click [Configuration].
3. Click [Webpage].
4. In the [Set Help URL Target] box, enter the URL of the help file.
If you saved the help file to "C:\HELP\EN", enter “file://C:/HELP/”. For example, if you saved the
file to a Web server, and the URL of the index file is “http:// a.b.c.d/HELP/EN/index.html”, enter
“http://a.b.c.d/HELP/”.
5. Click [OK].
• If you save the Help files on your hard disk, you must access them directly - you cannot link to them
using the Help button ( ).
1. Monitoring and Configuring the Machine
16
1

Machine Status Notification by E-Mail
Whenever a paper tray becomes empty or paper is jammed, an e-mail alert is issued to the registered
addresses to notify the machine status.
For this notification, you can make the e-mail notification settings.
Notification timing and e-mail content can be set.
• Depending on your e-mail application, a phishing warning might appear after you receive an e-mail
message. To prevent phishing warnings appearing after you receive e-mail from a specified sender,
you must add the sender to your e-mail application's exclusion list. For details about how to do this,
see your e-mail application's Help.
You can be notified of the following events:
• Service call.
• Toner cartridge is empty.
• Toner cartridge is nearly empty.
• Paper has jammed.
• Open door is detected.
• The paper tray is empty.
• The paper tray is nearly empty.
• A paper tray error occurred.
• Output paper tray is full.
• Unit connection error.
• Waste toner bottle is full.
• Stapler has no staples.
• Service call is successful.
• File storage memory is nearly full.
• Punch dust is full.
• Waste Staple Receptacle is Full.
• Log error.
• Device access is violated.
1. Log on to Web Image Monitor in administrator mode.
2. In the menu area, click [Configuration].
3. Click [E-mail] on the [Device Settings] area.
Machine Status Notification by E-Mail
17
1

4. Make the following settings:
• Items in the Reception column: Make the necessary settings for sending and receiving e-mail.
• Items in the SMTP column: Configure the SMTP server. Check your mailing environment, and
then specify the necessary items. You can also perform mail authentication for the SMTP server.
• Items in the POP before SMTP column: Configure the POP server. Check your mailing
environment, and then specify the necessary items. You can also perform mail authentication for
the POP server.
• Items in the POP3/IMAP4 column: Configure the POP3 or IMAP4 server. Check your mailing
environment, and then specify the necessary items.
• Items in the E-mail Communication Port column: Configure the port to be used for access to the
mail server.
5. Click [OK].
6. Click [Logout].
7. Quit Web Image Monitor.
• For details about login user name and password, see Security Reference, which is the administrator's
manual.
• For details about the settings, see Web Image Monitor Help.
• For details about Web Image Monitor, see “Using Web Image Monitor”.
• p.7 "Using Web Image Monitor"
Auto E-mail Notification
1. Log on to Web Image Monitor in administrator mode.
2. Click [Configuration] in the menu area, and then click [Auto E-mail Notification] on the
[Device Settings] area.
The dialog box for making notification settings appears.
3. Make the following settings:
• Items in Notification Message column: You can set this according to your needs, for example,
the machine's location, service representative contact information.
• Items in the Groups to Notify column: E-mail notification addresses can be grouped as required.
• Items in the Select Groups/Items to Notify column: Select groups for each notification type, such
as machine status and error.
To make detailed settings for these items, click [Edit] next to [Detailed Settings of Each Item].
1. Monitoring and Configuring the Machine
18
1

4. Click [OK].
5. Click [Logout].
6. Quit Web Image Monitor.
• For details about Web Image Monitor, see “Using Web Image Monitor”.
• For details about the settings, see Web Image Monitor Help.
• p.7 "Using Web Image Monitor"
On-demand E-mail Notification
1. Log on to Web Image Monitor in administrator mode.
2. Click [Configuration] in the menu area, and then click [On-demand E-mail Notification] on
the [Device Settings] area.
The dialog box for making notification settings appears.
3. Make the following settings:
• Notification Subject column: Enter a text string to be added to the subject line of return e-mails.
• Items in Notification Message column: You can set this according to your needs, for example,
the machine's location, service representative contact information.
• Items in the Access Restriction to Information column: Select whether to restrict accesses based
on a specific category of information.
• Items in the Receivable E-mail Address/Domain Name Settings column: Enter an e-mail address
or domain name to use for requesting information by e-mail and to receive its return e-mail.
4. Click [OK].
5. Click [Logout].
6. Quit Web Image Monitor.
• For details about Web Image Monitor, see “Using Web Image Monitor”.
• For details about the settings, see Web Image Monitor Help.
• p.7 "Using Web Image Monitor"
Machine Status Notification by E-Mail
19
1

Mail Authentication
You can configure mail authentication to prevent illegal use of the mail server.
SMTP Authentication
Specify SMTP authentication.
When mail is sent to the SMTP server, authentication is performed using the SMTP AUTH protocol by
prompting the mail originator to enter the user name and password. This prevents illegal use of the
SMTP server.
1. Log on to Web Image Monitor in administrator mode.
2. Click [Configuration] in the menu area, and then click [E-mail] on the [Device Settings] area.
3. Make the following settings in SMTP column:
• SMTP Server Name: Enter the IP address or host name of the SMTP server
• SMTP Port No.: Enter the port number used when sending e-mail to the SMTP server.
• SMTP Authentication: Enable or disable SMTP authentication.
• SMTP Auth. E-mail Address: Enter the e-mail address.
• SMTP Auth. User Name: Enter the SMTP account name.
• SMTP Auth. Password: To set or change the password for SMTP AUTH.
• SMTP Auth. Encryption: Select whether to encrypt the password or not.
[Encryption]-[Auto Select]: If the authentication method is PLAIN, LOGIN, CRAM-MD5, or
DIGEST-MD5.
[Encryption]-[Active]: If the authentication method is CRAM-MD5 or DIGEST-MD5.
[Encryption]-[Inactive]: If the authentication method is PLAIN or LOGIN.
4. Click [OK]
5. Click [Logout].
6. Quit Web Image Monitor.
POP before SMTP Authentication
Select whether to log on to the POP3 server before sending e-mail.
1. Log on to Web Image Monitor in administrator mode.
2. Click [Configuration] in the menu area, and then click [E-mail] on the [Device Settings] area.
3. Make the following settings in POP before SMTP column:
• POP before SMTP: Enable or disable POP before SMTP.
• POP E-mail Address: Enter the e-mail address.
• POP User Name: Enter the POP account name.
• POP Password: To set or change the POP password.
1. Monitoring and Configuring the Machine
20
1

• Timeout setting after POP Auth.: Enter the time available before connecting to the SMTP
server after logging on to the POP server.
4. Click [OK].
5. Click [Logout].
6. Quit Web Image Monitor.
Sending E-mail Notification
To use on-demand e-mail notification, perform the following configuration tasks in Web Image Monitor.
1. Log on to Web Image Monitor in administrator mode.
2. Click [Configuration] in the menu area, and then click [E-mail] on the [Device Settings] area.
3. Make the following settings:
• E-mail Notification E-mail Address: Enter the address using alphanumeric characters.
• Receive E-mail Notification: Specify whether to use on-demand e-mail notification.
• E-mail Notification User Name: Enter the administrator's user name as the mail originator name.
• E-mail Notification Password: Enter the password of the mail notification user.
4. Click [OK].
5. Click [Logout].
6. Quit Web Image Monitor.
Format of on-demand e-mail messages
To use mail notification, you need to send an on-demand e-mail message to this machine.
Using your mail software, enter the following:
Item Description
Subject (Referred to as Subject) Enter a request regarding the device. For details,
see the table below.
From (Referred to as From) Specify a valid mail address. The device
information will be sent to the address specified
here.
• A mail message must be within 1 MB in size.
• E-mail may be incomplete if sent immediately after power on.
Subject field
Format: devicestatus parameter-name=parameter[&=parameter][& =parameter]...
Machine Status Notification by E-Mail
21
1
 Loading...