

Page 1
Paper Feed Unit PB3040/LCIT PB3050
R
R
(Code: D351, D352)
For Machine Code: G179
INSTALLATION GUIDE
CAUTION:
For service personnel only (D009, D011,
D012, D013)
When installing the Paper Feed Unit, follow
the installation procedure in the service
manual.
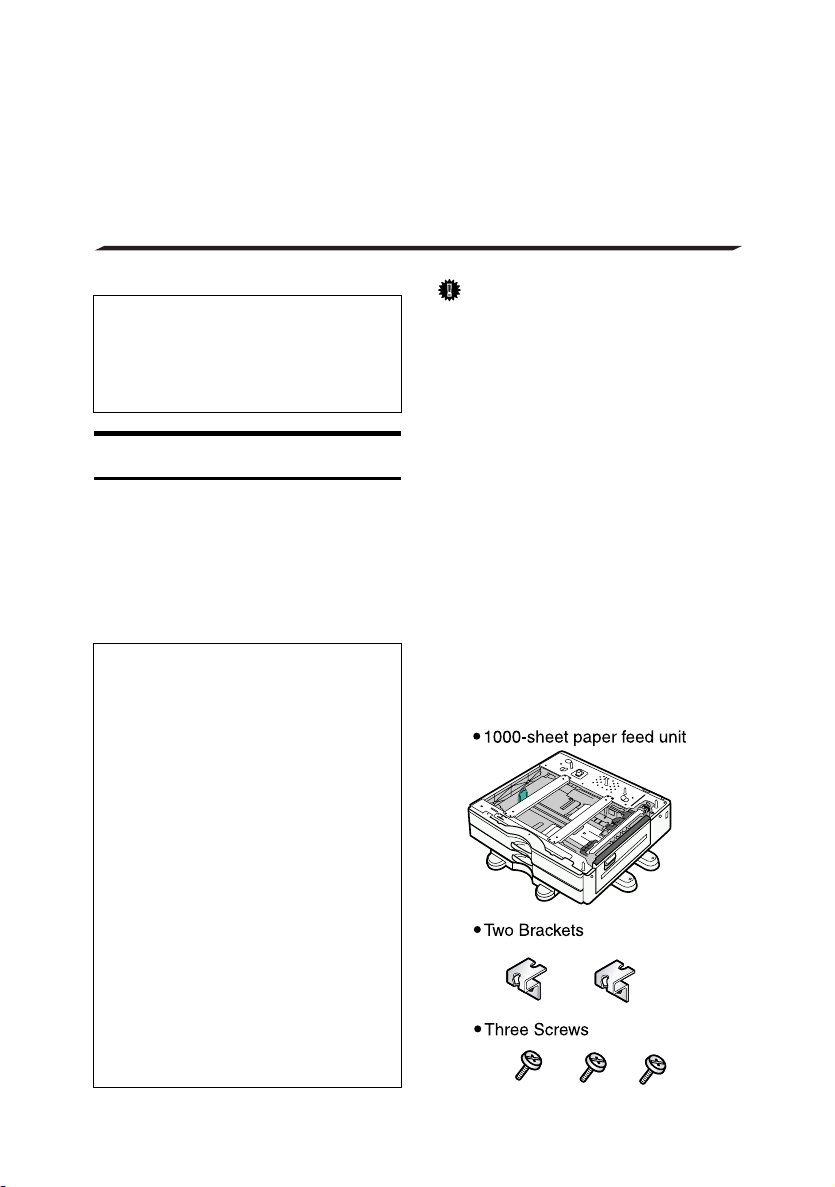
Attaching the Paper Feed Unit
This section describes how to attach
the 1000-sheet paper feed unit or
2000-sheet paper feed unit to the
printer. The procedure is the same for
both units. The 1000-sheet paper feed
unit is used as an example.
CAUTION:
• The printer weights approxi-
mately 73 kg (161 lb.).
• Four or more people are re-
quired to move the printer. Hold
the handles located on both
sides, and then lift it slowly. Lifting it carelessly or dropping it
may cause an injury.
• It is dangerous to handle the
plug with wet hands. Doing this
may result in receiving an electric shock.
• Before moving the machine, un-
plug the power cord from the outlet. If the cord is unplugged
abruptly, it could become damaged. Damaged plugs or cords
can cause an electrical or fire
hazard.
Important
❒ When attaching multiple options,
attach the paper feed unit first.
❒ Either the 1000-sheet paper feed
unit or 2000-sheet paper feed unit
can be attached, but not both.
❒ When the 1000-sheet paper feed
unit or the 2000-sheet paper feed
unit is attached, you can also attach the 1200-sheet paper feed
unit. To attach the 1200-sheet paper feed unit, contact your sales or
service representative.
❒ Before using the new paper feed
unit, you must configure settings
in the printer driver.
A
Check the contents of the package.
For 1000-sheet paper feed unit:
BEK501S
1
Page 2
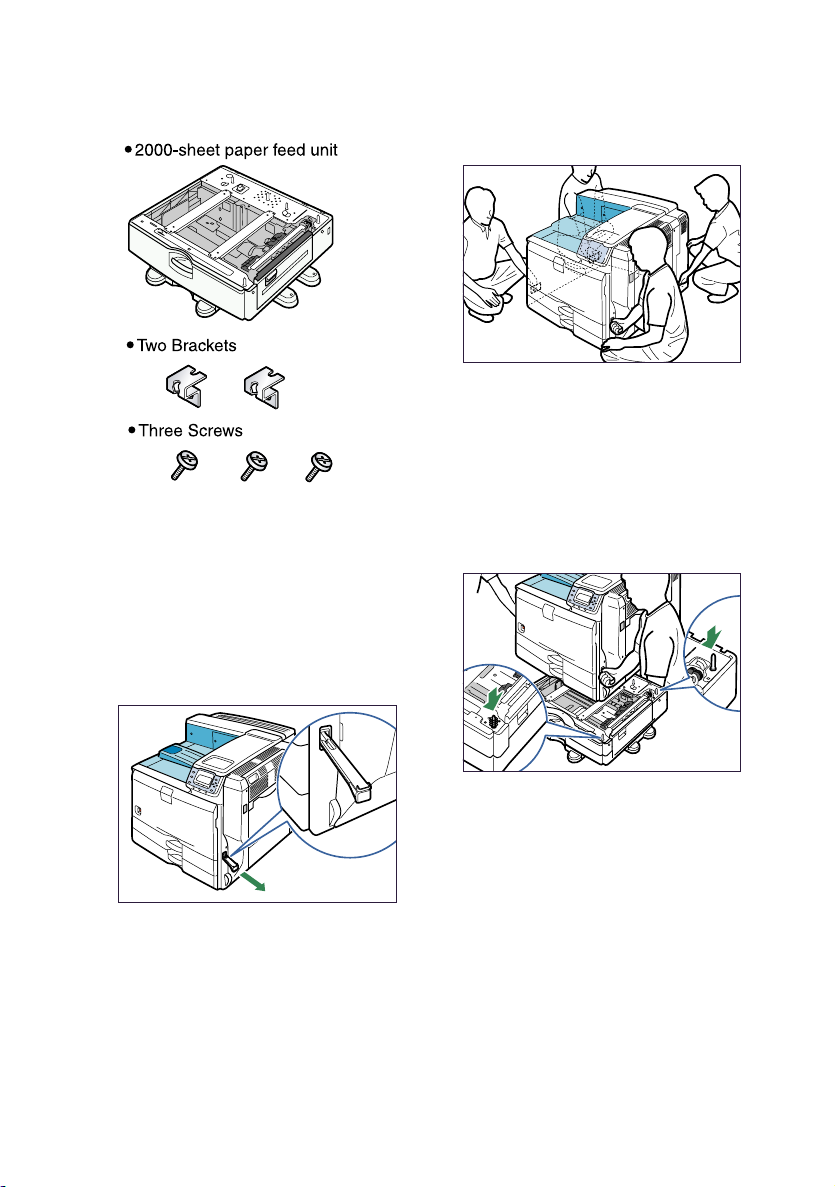
For 2000-sheet paper feed unit:
BEK500S
B Turn the printer off and unplug
the power cord.
C Remove the packaging from the
paper feed unit.
D Pull out the handle from the right
side of the printer.
E Lift the printer using the handles
on both sides.
BEJ126S
The printer should always be lifted
by at least four people.
F Align the front of the printer with
the front of the paper feed unit,
and slowly lower it.
Place it so that it is held firmly in
place by the vertical pins.
BEJ124S
Return the handle you pulled out
from the printer to its original position.
BEK011S
2
Page 3

G Pull out tray 2 of the printer slow-
ly until it stops, lift the front of
the tray slightly, and then pull out
the tray completely.
J On the rear of the unit, attach two
brackets using the remaining
screws.
Tighten the screws firmly using a coin.
BEK103S
Place the tray on a flat surface.
H Attach a screw in the hole on the
left side of the tray opening to secure the printer to the paper feed
unit.
Tighten the screw firmly using a
coin.
BEJ115S
I Lift the front of the tray, and slide
it carefully into the printer until it
stops.
BEK106S
K Plug in the power cord, and then
turn on the printer.
L Print the configuration page to
confirm that the unit was attached
correctly.
Note
❒ To confirm whether the optional
paper feed unit was correctly attached, print the configuration
page, and check "Attached Equipment" on the configuration page. If
the unit was attached correctly, the
following will be displayed:
• 1000-sheet paper feed unit:
Lower Paper Trays
• 2000-sheet paper feed unit: Tray 3
❒
If the optional paper feed unit was
not installed properly, repeat the
procedure from step
be installed correctly even after reattempting installation, contact your
sales or service representative.
2
. If it cannot
BEK105S
Reference
For information about printing the
configuration page, see "Test Printing", Quick Installation Guide
If the print area is not centered correctly, see "Adjusting Printing Position", Hardware Guide
3
Page 4

Copyright © 2008
Printed in China
GB GB EN USA D351-6600A
4
D3516600A
 Loading...