

Ricoh KR-5 Super II Owner's Manual
Ricoh KR-5 Super II
This camera manual library is for reference and historical purposes, all rights reserved.
This page is copyright by mike@butkus. M. Butkus, N.J.
This page may not be sold or distributed without the expressed permission of the producer
If you find this manual useful, how about a donation of $3 to: M. Butkus, 29 Lake Ave., High
Bridge, NJ 08829-1701 This will allow me to continue to buy new manuals and pay their
shipping costs. It'll make you feel better, won't it?
If you use Pay Pal, use the link below. Use the above address for a check, M.O. or cash.
Back to my main Chinon/Ricoh information page
BACK TO MAIN PAGE
[Webmaster: The main difference with this camer and the KR-5 (1/500 shutter max) and KR-5 Super
is the TTL wide open metering and the 1/2000 shutter]

Congratulations on your selecting of RICOH KR- 5 SUPER II. This is a compact and
www.orphancameras.com
lightweight SLR camera with full open aperture TTL exposure metering. Enjoying good
photography becomes far easier with this camera. It just requires releasing the shutter on
your focused subject at the setting which the LED displays green. With carefully reading
this booklet, you can enjoy easy-to-take highest quality photography for the years ahead.
DESCRIPTION OF PARTS
1. Shutter Speed Dial
2. Shutter Release Bettors
3 Film Advance Lever
4. Frame Counter
5. Strap Hook
6. Hand Grip
7. Self-timer Lever
B. Lens Release Button
9. Hot Shoe
10 Film Rewind Crank
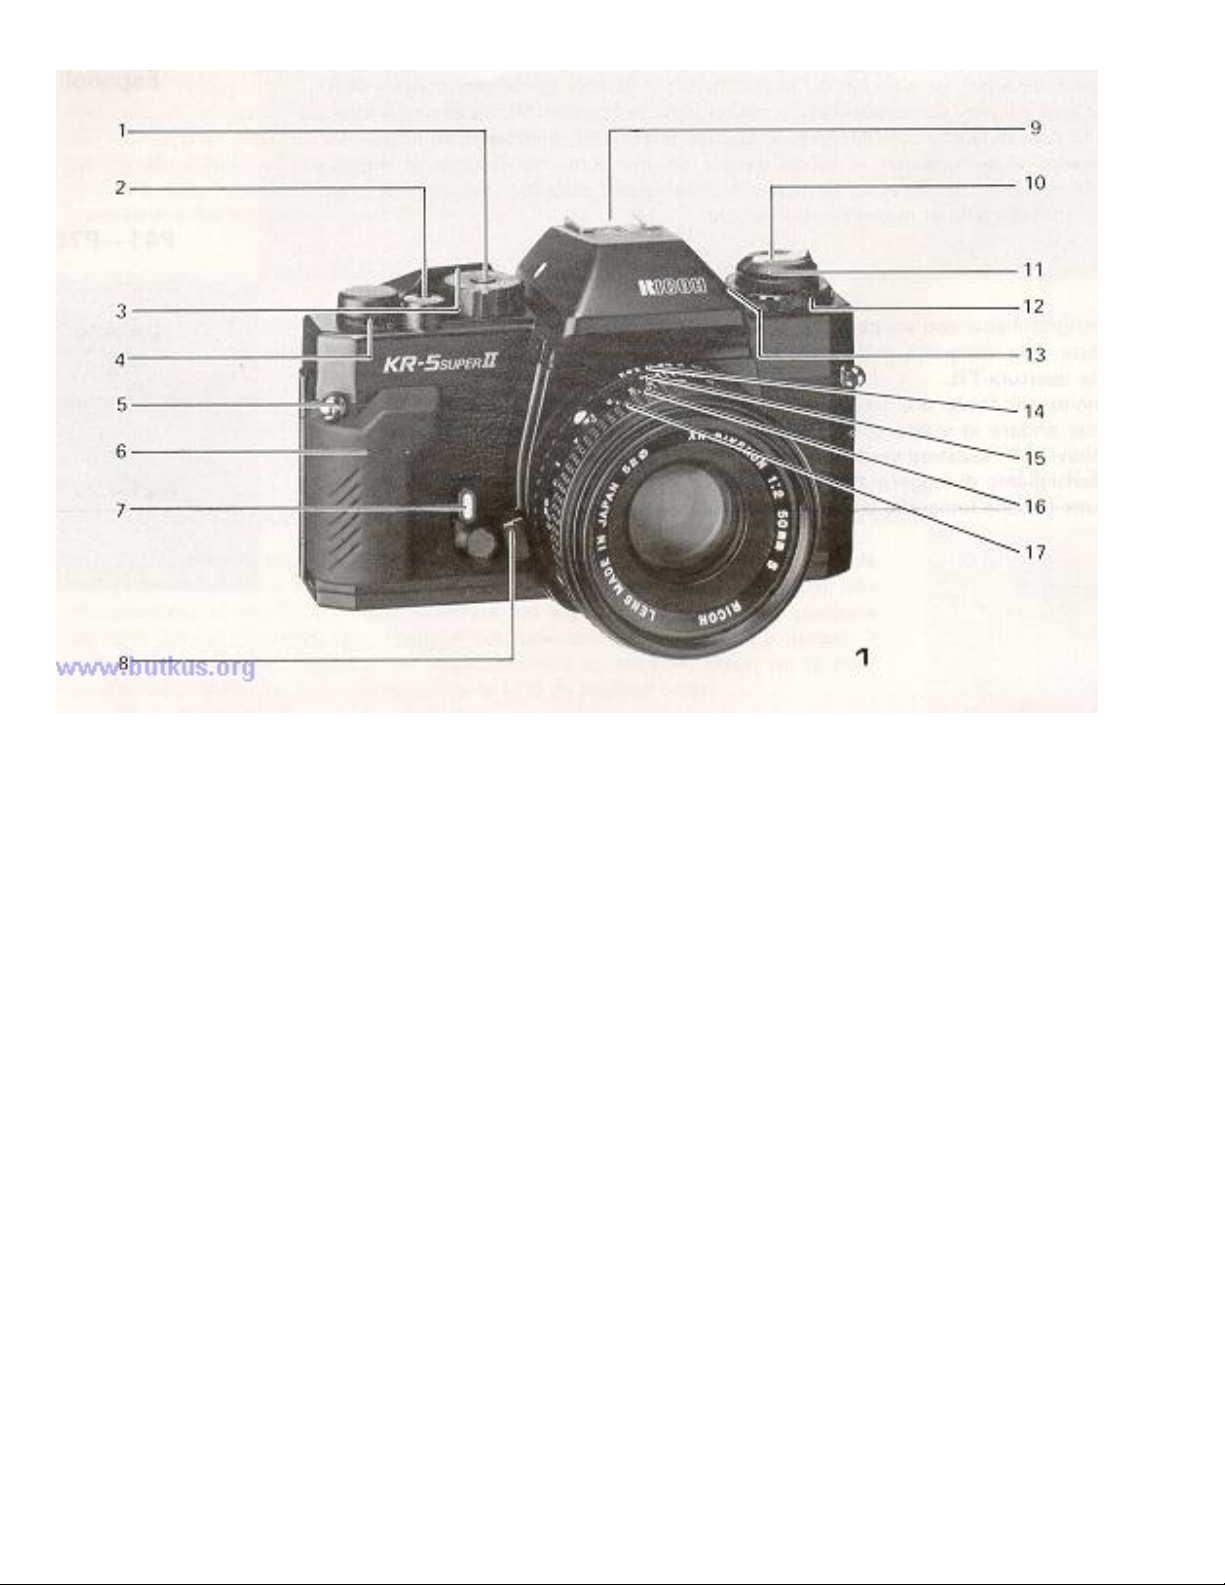
11. Film Rewind Knob/Film compartment Opening Knob
12. Film Speed Dial
13. Film Speed Index
14. Aperture Ring
15 Depth-of-field Scale (Not on all lenses)
16 Distance Scale
17 Focusing Ring
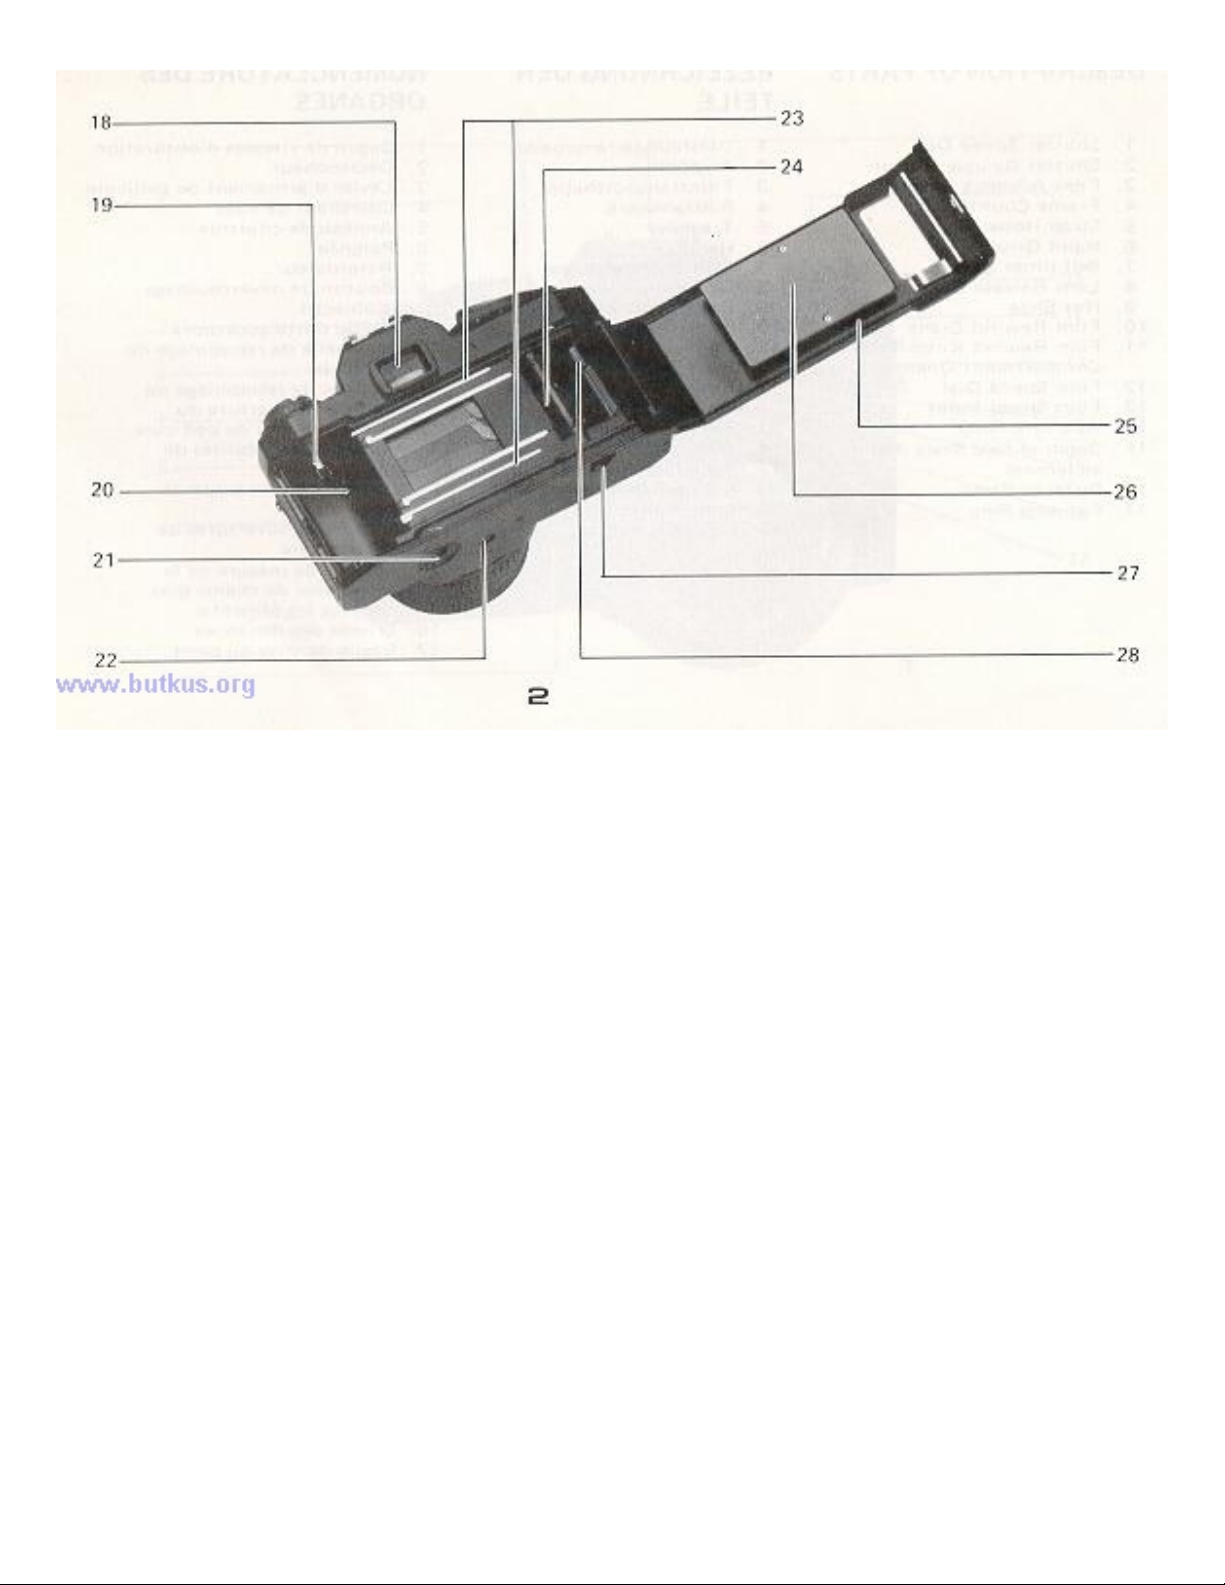
18. Viewfinder Eyepiece
19. Rewired Shaft
20. Film Chamber
www.orphancameras.com
21. Battery Compartment Cover
22. Tripod Socket
23 Film Guide Bars
24. Sprocket
25. Back Cover
26 Film Pressure Plate
27. film Rewind Button
28. Film Take up Spool
4www.butkus.org
Inserting Batteries
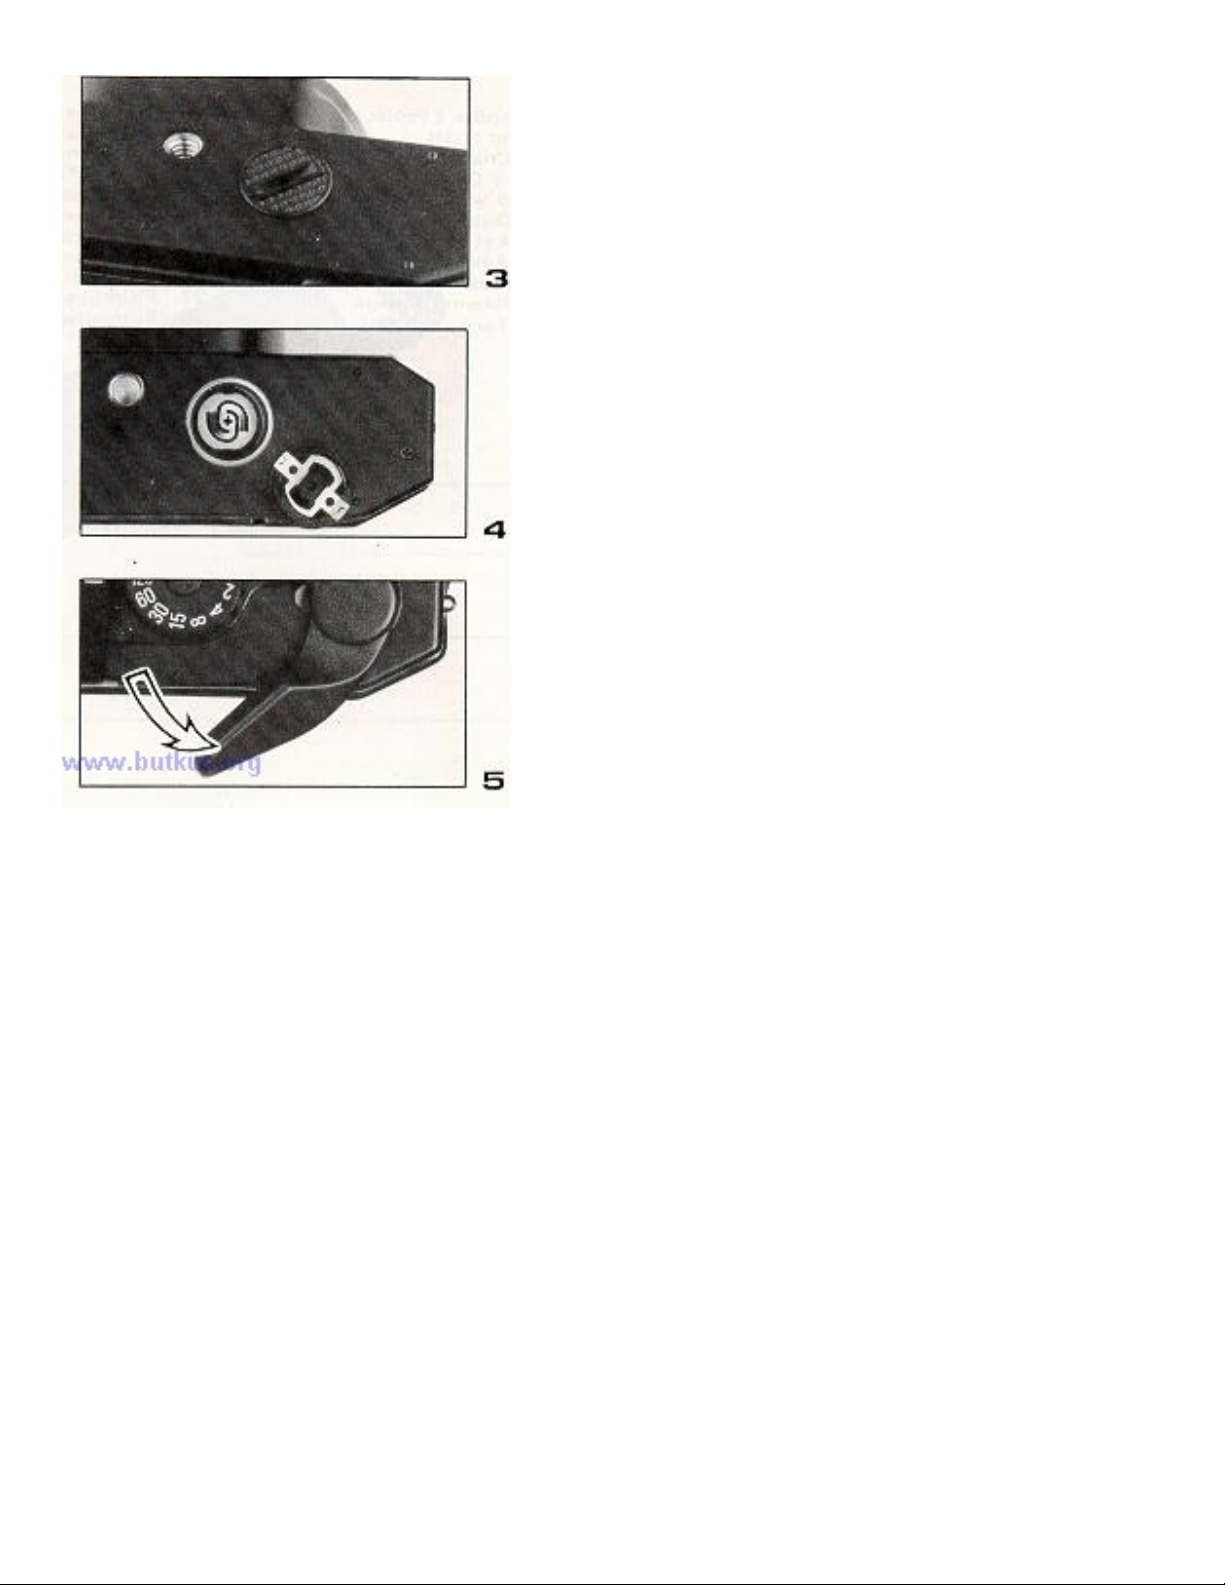
1. Turn the battery compartment cover (21 ) counter
clockwise using a coin or something similar.
2. Two LR44 type alkaline batteries or two SR44
type silver batteries are used with this camera.
3 Place the batteries so that both positive (+) sides
are at the top of the compartment
4. Turn the battery compartment cover clockwise
until it closes firmly.
4www.butkus.org
Battery Check
1. Move the film advance lever (3) to the ready position.
2. Partly press the shutter release button (2) Now the exposure metering system is
switched on. Next, look through the viewfinder When one of three LED lamps (
or
- ) lights, then battery condition is satisfactory. If no lamp lights, the batteries need
replacing or have been (loaded incorrectly.
3. Renew both batteries as necessary.
4. When not using of the camera, always return the film advance lever to the original
position to prevent accidentally releasing the shutter.
+, 0
Loading film
1. To open the back cover (25), fold out the film
www.orphancameras.com
rewind crank (10), then pull knob (11 ) out. When
the back cover opens, the frame counter (4)
automatically resets to "S''.
2. Insert the film cassette into the film chamber so
that the projecting end of the film cassette is
downward. Do this in a place away from direct
sunlight.
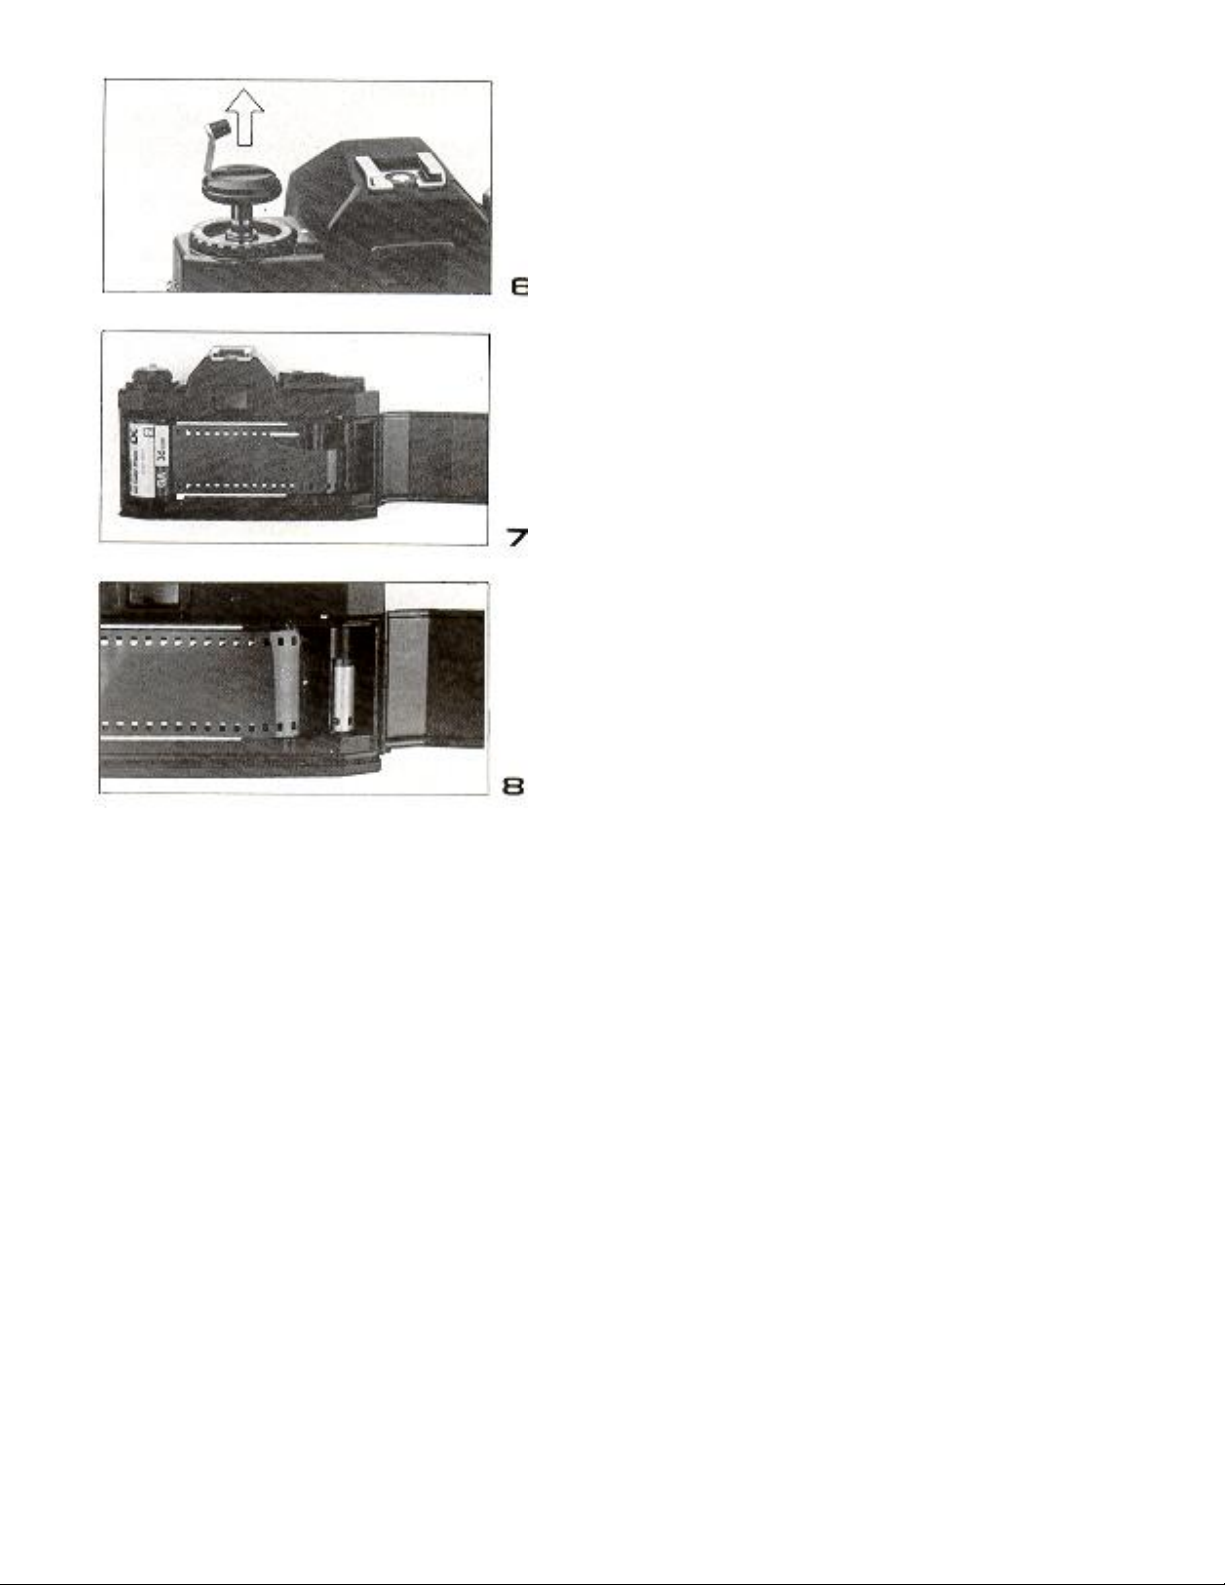
3. Fold out and lift up the film rewind crank (10)
Then rotate the crank carefully while pushing it
down lightly until the film locks on the film rewind
shaft (19)
4www.butkus.org
4. Return the film rewind crank to its original
position
5. Insert the film leader into the groove of the takeup spool (28) and place it so that the film
perforations engage with the spool teeth.
6. Check that the film perforations engage properly
with the teeth of sprocket (24) and the film slides
smoothly along the film guide bars (23) by
operating lightly the film advance lever (3) to
advance the film.
7. Turn the film rewind crank gently in the direction
of the arrow to properly tension the loaded film,
Stop turning the crank when it becomes stiff, and
return the crank to its original position.
 Loading...