

Page 1
Read This First
1
Preparing for Printing
2
Printer Driver
3
Monitoring and Configuring the Printer
4
5
Maintaining
User Guide
6
Troubleshooting
7
Appendix
Read this manual carefully before you use this machine and keep it handy for future reference. For safe and correct use, be sure to read the Safety Information
before using the machine.
Page 2

Page 3

TABLE OF CONTENTS
1. Read This First
About This Product..............................................................................................................................................7
Introduction.....................................................................................................................................................7
Trademarks.....................................................................................................................................................7
Disclaimer.......................................................................................................................................................8
User's Notes....................................................................................................................................................8
Manuals for This Printer...............................................................................................................................11
How to Read This Manual...............................................................................................................................12
Description for the Specified Model..........................................................................................................12
Symbols........................................................................................................................................................12
Installing User Guide...................................................................................................................................13
How to Use User Guide..............................................................................................................................14
Removing the User Guide...........................................................................................................................16
Guide to Components......................................................................................................................................
Machine Body..............................................................................................................................................17
Machine Rear...............................................................................................................................................18
Control Panel................................................................................................................................................19
Making Printer Settings Using the Control Panel...........................................................................................22
Options.............................................................................................................................................................25
Network Interface Board Type GX3..........................................................................................................25
Paper Feed Unit TK1060............................................................................................................................25
Duplex Unit AD1020..................................................................................................................................26
Multi Bypass Tray BY1010.........................................................................................................................27
Recommended Functions.................................................................................................................................29
17
2. Preparing for Printing
Setting Up the Hardware.................................................................................................................................31
Checking the Computer and Installation Area..........................................................................................31
Checking the Supplied Items and Unpacking the Printer..........................................................................
Attaching the Options..................................................................................................................................35
Installing the Print Cartridges......................................................................................................................40
34
Plugging in the Power Cord and Turning the Power On...........................................................................41
Loading Paper..............................................................................................................................................43
Printing a Configuration Page.....................................................................................................................55
1
Page 4

Connecting the Computer and Installing the Software (USB Connection)..................................................57
Before Installing the Software (USB)..........................................................................................................57
Quick Install for USB....................................................................................................................................58
Connecting the Computer and Installing the Software (Network Connection)..........................................61
Before Installing the Software (Network Interface Board).......................................................................61
Quick Install for Network............................................................................................................................64
Checking the Printer Status and Settings using the Printer's Control Panel (List/Test Print Menu).............66
Interpreting the Configuration Page...........................................................................................................66
Confirming the Connection Method...............................................................................................................67
Installing the Printer Driver (USB)....................................................................................................................69
Sharing the Printer........................................................................................................................................71
Specifying the Interface and Network Settings using the Printer's Control Panel (Host Interface Menu)......
74
Changing the Host Interface Menu............................................................................................................76
Installing the Drivers for Network Connection...............................................................................................77
Installing the Printer Driver (Network)........................................................................................................78
Installing the DeskTopBinder - SmartDeviceMonitor for Client ...............................................................84
Paper.................................................................................................................................................................86
Compatible Paper Types.............................................................................................................................86
Loadable Paper Sizes and Quantities........................................................................................................86
Paper Handling Precautions.......................................................................................................................90
Specifying the Paper Settings using the Printer's Control Panel (Paper Input Menu)..................................96
Changing the Paper Input Menu................................................................................................................96
3. Printer Driver
Two Types of Printer Properties Dialog Box...................................................................................................99
Opening the Printer Properties Dialog Box................................................................................................99
Opening the Printing Preferences Dialog Box...........................................................................................99
Opening from an Application..................................................................................................................100
Specifying Settings on [Accessories] Tab....................................................................................................101
Conditions for Bidirectional Communication...........................................................................................101
If Bidirectional Communication is Disabled.............................................................................................101
Printing............................................................................................................................................................103
Unauthorized Copy Control.....................................................................................................................104
2
Page 5

Canceling Printing..........................................................................................................................................107
Canceling Printing from the Status Monitor.............................................................................................107
Canceling Printing Using the [Job Reset] Key of the Printer...................................................................107
Canceling Printing from the Taskbar........................................................................................................108
4. Monitoring and Configuring the Printer
Using the Status Monitor...............................................................................................................................109
Receiving Notification of Print Job Status via the Status Monitor..........................................................109
Using SmartDeviceMonitor for Client..........................................................................................................110
Using Notification via SmartDeviceMonitor for Client...........................................................................111
Specifying the Settings for Monitoring the Printer...................................................................................112
Displaying the Printer Status.....................................................................................................................113
Using Web Browser......................................................................................................................................114
Displaying Top Page.................................................................................................................................114
Menu..........................................................................................................................................................115
Checking the Printer Status.......................................................................................................................116
Changing the Printer Settings...................................................................................................................116
Notifying the Printer Status by E-mail.......................................................................................................117
About the Web Browser Help..................................................................................................................129
SNMP.............................................................................................................................................................130
5. Maintaining
Checking the Number of Printed Pages using the Control Panel (Counter Menu)...................................131
Displaying the Counter.............................................................................................................................131
Performing Maintenance using the Control Panel (Maintenance Menu).................................................133
Nozzle Check............................................................................................................................................134
Head-cleaning...........................................................................................................................................135
Head-flushing............................................................................................................................................137
Head Position.............................................................................................................................................138
Adj.Paper Feed..........................................................................................................................................140
Registration................................................................................................................................................142
De-condensation.......................................................................................................................................145
Specifying System Settings using the Control Panel (System Menu).........................................................147
Changing the System Menu.....................................................................................................................148
Selecting the Control Panel Language.........................................................................................................150
3
Page 6

Restricting Printer Functions...........................................................................................................................152
Locking the Keys........................................................................................................................................152
Unlocking the Keys....................................................................................................................................152
Replacing a Print Cartridge...........................................................................................................................154
Checking the Remaining Ink.....................................................................................................................154
Replacing a Print Cartridge......................................................................................................................156
Handling Print Cartridges.........................................................................................................................158
Cleaning.........................................................................................................................................................160
Moving...........................................................................................................................................................161
Moving a Short Distance..........................................................................................................................161
Moving a Long Distance...........................................................................................................................162
Disposing........................................................................................................................................................163
When Not Using for a Long Period of Time................................................................................................164
6. Troubleshooting
Software Cannot Be Installed.......................................................................................................................165
Confirming Installation..............................................................................................................................165
Checking Your Computer Environment....................................................................................................165
Printer Driver Cannot Be Installed............................................................................................................168
USB Connection is not Automatically Detected......................................................................................168
If Test Print Fails..............................................................................................................................................170
Uninstalling.....................................................................................................................................................171
Uninstalling the Printer Driver...................................................................................................................171
Deleting Devices........................................................................................................................................172
Printing Will Not Start....................................................................................................................................174
Power Cannot Be Turned On...................................................................................................................174
Paper Will Not Feed Even When the Power Is On................................................................................174
An Error Occurs.........................................................................................................................................174
Paper Is Not Fed or Delivered Normally.....................................................................................................176
Paper Jam.......................................................................................................................................................178
Using the [Form Feed / Head-cleaning] Key to Remove Jammed Paper............................................178
Removing Paper Jammed in Tray 1.........................................................................................................179
Removing Paper Jammed in Tray 2 (Optional)......................................................................................180
Removing Paper Jammed in the Bypass Tray (optional)........................................................................183
4
Page 7

Removing Paper Jammed under the Top Cover.....................................................................................187
Removing Paper Jammed around the Guide Board...............................................................................190
Removing Paper Jammed in the Duplex Unit (optional).........................................................................193
If You Cannot Remove Jammed Paper....................................................................................................195
Print Results Are Not Satisfactory.................................................................................................................200
Prints are Unsatisfactory............................................................................................................................200
Colors Do Not Match the Displayed Image...........................................................................................202
Positions Do Not Match the Displayed Image........................................................................................202
Other Problems..........................................................................................................................................203
Checking the Consumables......................................................................................................................205
If a Message Appears during Installation....................................................................................................206
Error & Status Messages on the Control Panel............................................................................................207
Control Panel Error Messages..................................................................................................................207
Status Monitor Errors.....................................................................................................................................212
Status Monitor Does Not Open...............................................................................................................212
No Response from Printer.........................................................................................................................212
No Paper/Tray Not Detected (Tray 1)...................................................................................................212
No Paper/Tray Not Detected (Tray 2)...................................................................................................214
No Paper/Tray Not Detected (Bypass Tray).........................................................................................216
Paper Size Mismatch/Paper Type Mismatch (Tray 1)..........................................................................218
Paper Size Mismatch/Paper Type Mismatch (Tray 2)..........................................................................220
Paper Size Mismatch/Paper Type Mismatch (Bypass Tray).................................................................222
Paper Size Mismatch/Paper Type Mismatch (Auto Tray Select)..........................................................224
Cover Open...............................................................................................................................................226
Cover Open/Tray Not Detected (Tray 1)..............................................................................................228
Cover Open/Tray Not Detected (Tray 2)..............................................................................................229
Cover Open / Print Cartridge(s) Not Detected......................................................................................231
Duplex Unit Not Detected........................................................................................................................232
Cartridge End............................................................................................................................................233
Cartridge/Print-head Tank Empty............................................................................................................234
Used Cartridge..........................................................................................................................................235
Ink Collector Unit Not Detected...............................................................................................................236
Out of Printable Temperature Range.......................................................................................................237
5
Page 8

Printer Error................................................................................................................................................238
Network Interface Board Error.................................................................................................................238
Envelope Selector Position Mismatch......................................................................................................239
7. Appendix
Updating the Firmware..................................................................................................................................243
Checking the Current Printer Driver Version................................................................................................244
Software on the CD-ROM............................................................................................................................245
Files.............................................................................................................................................................245
RPCS Raster Printer Drivers.......................................................................................................................245
SmartDeviceMonitor for Client.................................................................................................................246
Manuals (HTML files)................................................................................................................................246
Cautions to Take When Using in a Network...............................................................................................248
Using DHCP...............................................................................................................................................248
Electromagnetic Interference........................................................................................................................249
Specifications.................................................................................................................................................250
Printer Body................................................................................................................................................250
Option (Paper Feed Unit).........................................................................................................................252
Option (Bypass tray).................................................................................................................................253
Option (Network Interface Board)..........................................................................................................253
Option (Duplex Unit).................................................................................................................................254
Information about Installed Applications.....................................................................................................255
expat...........................................................................................................................................................255
NetBSD......................................................................................................................................................255
Samba(Ver 2.2.2-1.1)..............................................................................................................................257
JPEG LIBRARY............................................................................................................................................257
Where to Inquire............................................................................................................................................258
Recommended Consumables.......................................................................................................................259
Option and Consumables.............................................................................................................................260
INDEX...........................................................................................................................................................261
6
Page 9

1. Read This First
1
About This Product
This section tells you about the product.
Introduction
This manual describes detailed instructions on the operation and notes about the use of this machine. To
get maximum versatility from this machine, all operators are requested to read this manual carefully and
follow the instructions. Please keep this manual in a handy place near the machine.
For safe and correct use, please be sure to read the Safety Information in the “Safety Information” that
comes with this machine before using the machine.
Trademarks
Microsoft, Windows, Windows NT are registered trademarks of Microsoft Corporation in the United States
and/or other countries.
Adobe,
Incorporated in the United States and/or other countries.
UNIX is a registered trademark in the United States and other countries, licensed exclusively through X/
Open Company Limited.
Netscape is a registered trademark of Netscape Communication Corporation in the U.S. and/or other
countries.
Other product names used herein are for identification purposes only and might be trademarks of their
respective companies. We disclaim any and all rights to those marks.
Flash, Macromedia and Reader are either registered trademarks or trademarks of Adobe Systems
• The product name of Windows 98 is Microsoft® Windows® 98.
• The product name of Windows Me is Microsoft® Windows® Millennium Edition (Windows Me).
• The product names of Windows 2000 are as follows:
Microsoft® Windows® 2000 Professional
Microsoft® Windows® 2000 Server
Microsoft® Windows® 2000 Advanced Server
• The product names of Windows XP are as follows:
Microsoft® Windows® XP Home Edition
Microsoft® Windows® XP Professional
• The product names of Windows Vista are as follows:
7
Page 10
BAJ087S
1. Read This First
1
Microsoft® Windows VistaTM Ultimate
Microsoft® Windows VistaTM Enterprise
Microsoft® Windows VistaTM Business
Microsoft® Windows VistaTM Home Premium
Microsoft® Windows VistaTM Home Basic
• The product names of Windows Server 2003 are as follows:
Microsoft® Windows Server® 2003 Standard Edition
Microsoft® Windows Server® 2003 Enterprise Edition
Microsoft® Windows Server® 2003 Web Edition
• The product names of Windows NT 4.0 are as follows:
Microsoft® Windows NT® Workstation 4.0
Microsoft® Windows NT® Server 4.0
Disclaimer
1. Contents of this manual are subject to change without prior notice.
2.
In no event will the company be liable for direct, indirect, special, incidental, or consequential
damages as a result of handling or operating the machine.
User's Notes
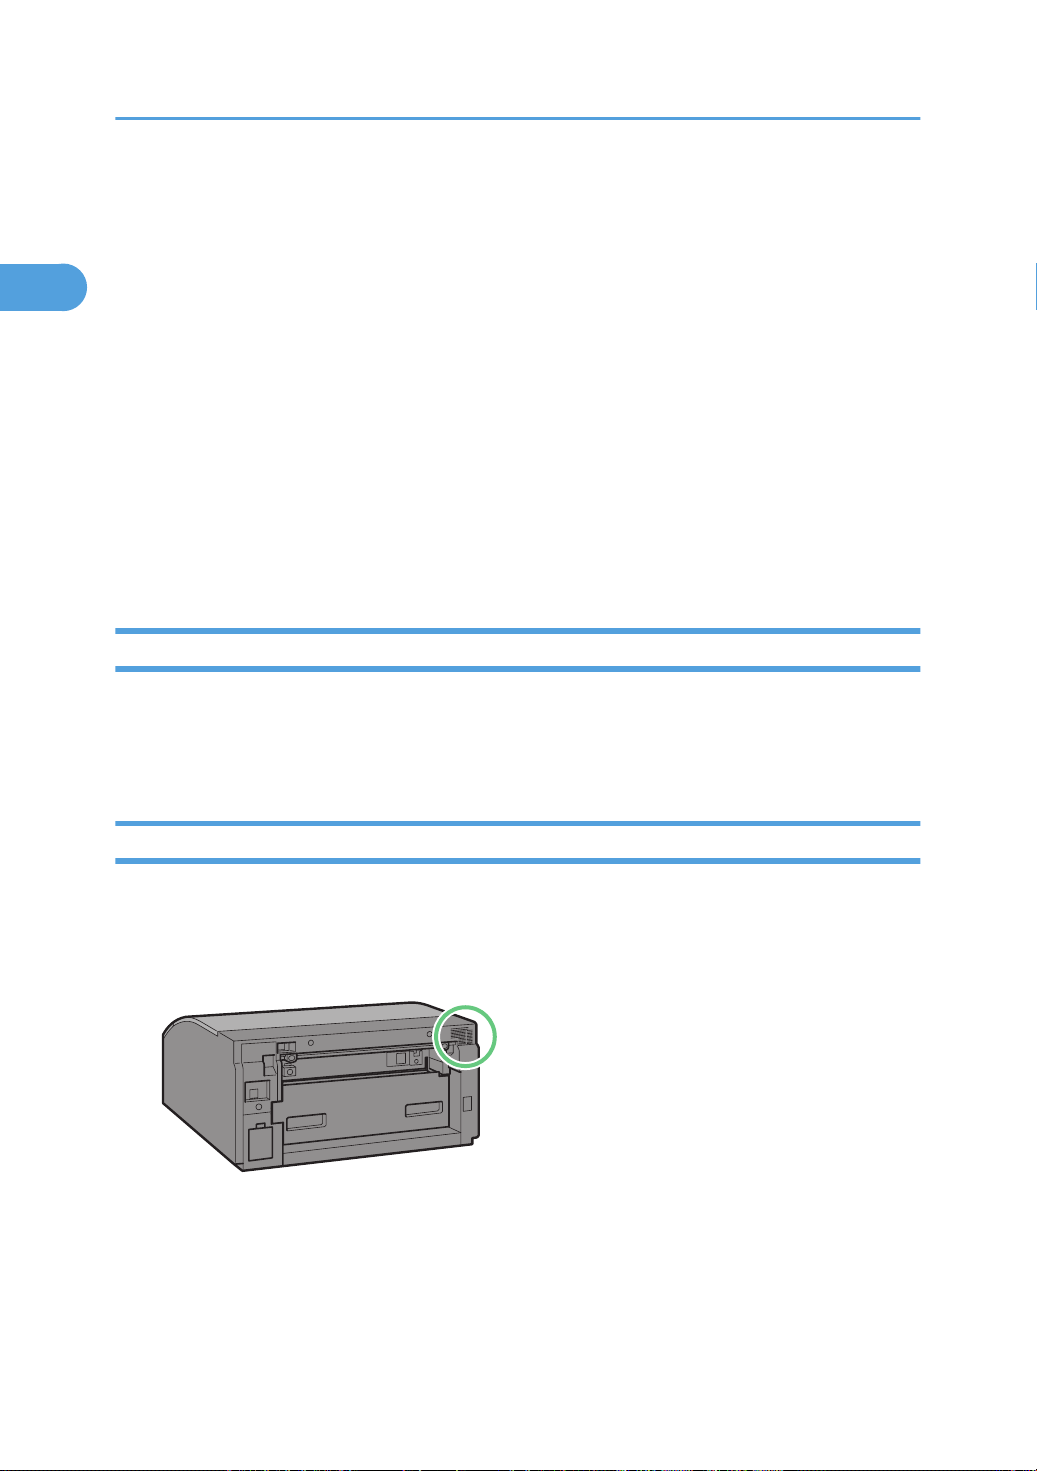
• High temperatures inside the printer can cause a breakdown. Do not lean anything against the vent
or block it in any way.
• Warm air from the vent is normal and not a cause for concern.
not leave the left, top, or right front cover open. If you do, dust or other matter might get inside the
• Do
printer, and this will reduce print quality.
8
Page 11
1
2
3
1
2
3
4
4
5
5
BAJ089S
About This Product
1
• During printing, do not move the printer or open its covers.
• Do not open the left, top, or right front cover during printing. If you do, printing will stop.
• During printing, do not pull out a paper tray. Printing will stop and the paper will jam.
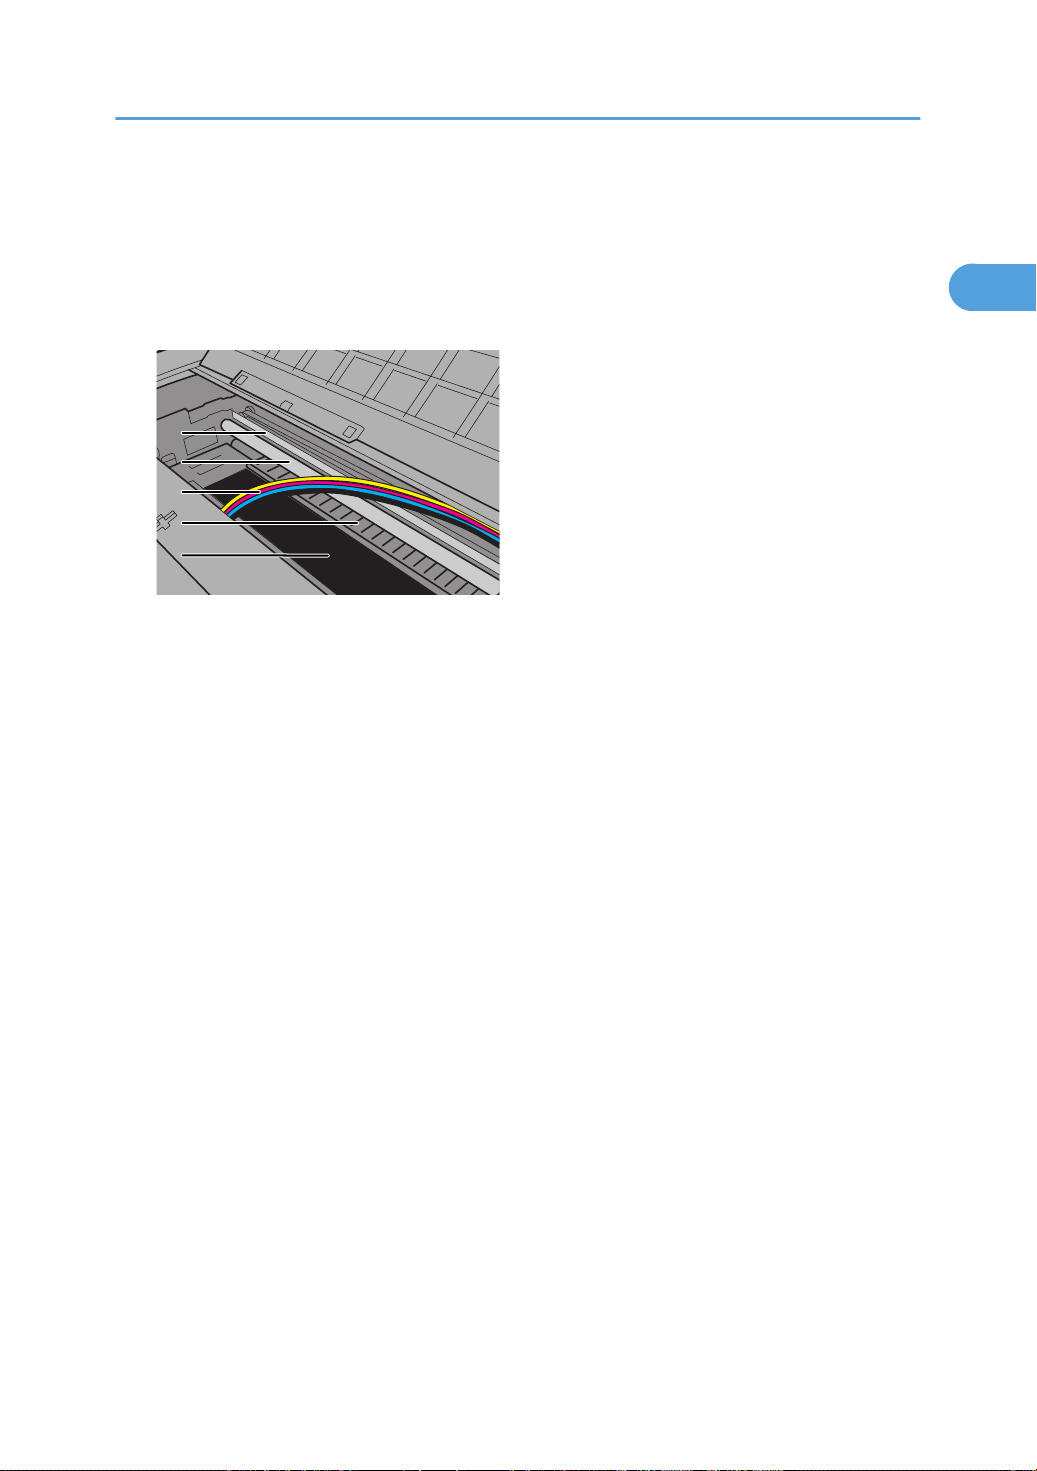
• Do not touch the feed belt, the transparent black band, print head rail rod, ink tubes, or paper pressing
board. Take care not to snag the sleeves of your clothing on the ink tubes.
1. Transparent black band
Print head rail rod
2.
3. Ink tubes
4. Paper pressing board
5. Feed belt
• Take care not to let paper clips and other foreign objects fall inside the printer.
• After you install the print cartridge and switch the printer on for the first time, the print head priming
process will begin. This process sometimes clogs the print head. If this happens, perform the head
cleaning procedure.
• During printing, do not turn off the power or unplug the power cord from the wall outlet.
• During printing, do not subject the printer to external shock such as that caused by tapping paper on
it.
• When not using the printer, turn off the power.
• You can place up to 20 kg (44.1 lb.) of evenly spread weight on the printer. Do not place any
concentrated weight of more than 5 kg (11.1 lb.) on the printer.
• Do not place unsteady objects on the printer. If they fall, they will cause injury to users and/or damage
to the printer.
• This printer has a nominal operational life of 5 years if used normally for 12 hours a day to produce
up to 2,500 A4 prints a month. Exceeding these limits may reduce the operational life. The operational
life also depends on the environment in which the printer is used.
• “Total Counter” displays the number of pages printed. Use “Total Counter” to estimate the number
of pages that can be printed within the printer's remaining operational life. The printer's operational
9
Page 12

1. Read This First
1
life is calculated based on the number of pages that it can print on plain paper in [Speed priority]
mode.
• This printer is designed to have an operational life of 5 years or be good for 150,000 pages.
• Depending on your printing document, the ink collector unit may fill up sooner than normal.
An “Ink Collector almost full” message appears shortly before the ink collector unit is full. Although
the printer remains usable until the unit is completely full, contact your sales or service representative
as early as possible (charge incurred).
• Print cartridges should be used up before their expiry date, ideally within six months of being removed
from their packaging.
• Cartridges that are no longer usable for printing reserve a small quantity of ink for maintenance usage.
• Print cartridges and supplies comply with the manufacturer's safety specifications. To ensure safety
and reliability, use genuine print cartridges and supplies.
• Single-sided copies are printed at higher density than duplex-printed copies.
• For print quality and consistency, this printer always uses all the available ink colors (black, cyan,
yellow, and magenta) to produce print images. Even if your print image is black and white or [Black
and White] is selected in the printer properties dialog box, all ink colors will still be used.
• Printing stops if one of the print cartridges becomes empty. If a cartridge containing a color ink such
as cyan, yellow, or magenta becomes empty, you cannot print, even in black/white. If a message
prompting you to change the print cartridge appears, change the cartridge as soon as possible.
• Printing hundreds of copies in a single day might cause the print head to clog the following day. If
this happens, perform the head cleaning procedure.
• This printer performs regular automatic maintenance, after and during printing, to ensure consistent
print quality. Maintenance is also performed when printing begins after a period of disuse.
• Color ink may be used even if you print all-black text or if you specify black and white printing. It may
also be used for print head cleaning and refreshing, which are done to maintain printer performance.
• If the printer will not be used for a long time, turn its power off, disconnect the USB cable, and unplug
the power cord from the wall outlet. Because the printer consumes a lot of ink for maintenance and
print head cleaning when switched on after a long period of inactivity, we recommended you use the
printer at least once a month.
• Do not move the printer while it is powered. Even when it is off, make sure the printer is on a level
surface and safe from shock and vibration.
• Do not switch the printer off while it is busy. Make sure the printer is idle before switching it off.
• Condensation can form inside the printer if it is moved from a cold place to a warm place. Allow any
condensation to fully evaporate by not switching the printer on for at least an hour after moving it.
10
Page 13

About This Product
1
Manuals for This Printer
Read the appropriate manual according to what you want to do.
Quick Installation Guide
This guide briefly explains how to unpack and install the printer.
User Guide (HTML)
This guide, which is on the CD-ROM, explains in detail how to use the printer.
The guide explains how to make network and printer driver settings, and how to make and check
printer settings using a Web browser and other utilities.
The guide also contains troubleshooting procedures, such as those related to printing and paper jams,
and important information about types of paper and replacing consumables.
We recommend you install this guide on your computer so you can refer to it easily.
Safety Information
This booklet contains important information about using the machine safely and correctly. Be sure to
read this before using the machine.
11
Page 14
BAJ097S
1. Read This First
1
How to Read This Manual
Be sure to read this section before anything else.
•
This guide uses Windows XP procedures for its examples. Procedures and screens might vary
depending on the operating system you are using.
• The color samples in this manual may differ slightly from the colors of actual copies.
• Some illustrations in this manual might be slightly different from the machine.
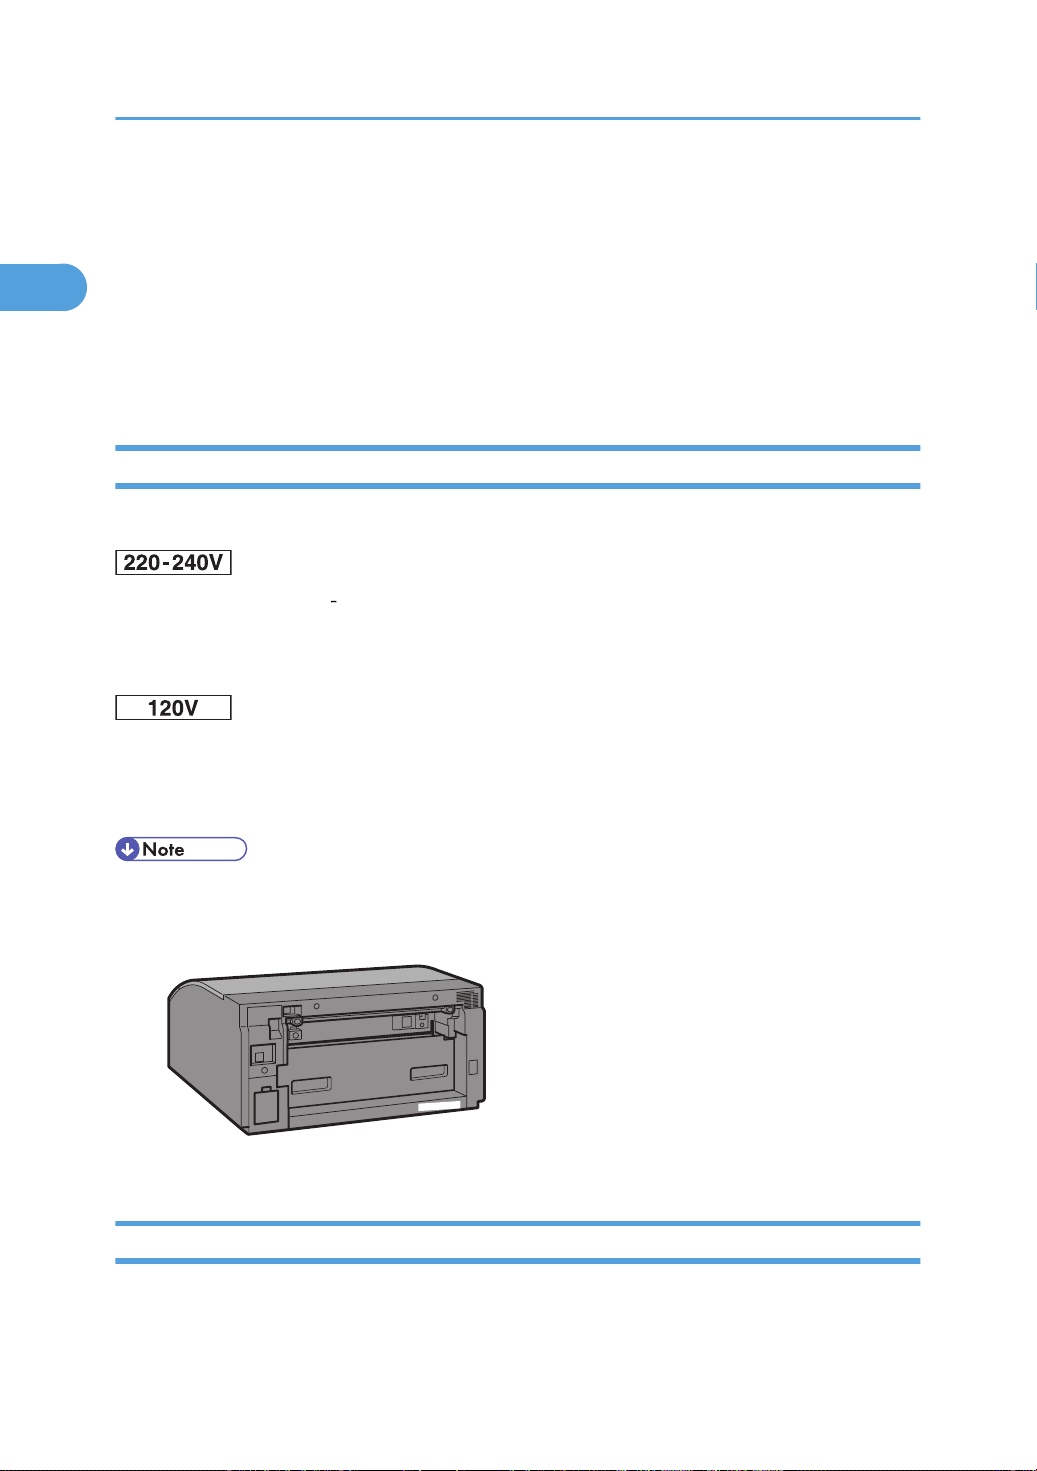
Description for the Specified Model
In this manual, the following items explain about the machine for the specified models:
This explains about the 220 240 V model machine. You can identify the model by checking the label on
the rear of the machine.
Read if you purchase this model.
This explains about the 120 V model machine. You can identify the model by checking the label on the
rear of the machine.
Read if you purchase this model.
• You can identify the machine's model by checking the label on the rear of the machine as shown.
Symbols
The following set of symbols is used in this manual.
12
Page 15
How to Read This Manual
1
Indicates important safety notes.
Ignoring these notes could result in serious injury or death. Be sure to read these notes.
They can be found in the “Safety Information”.
Indicates important safety notes.
Ignoring
sure to read these notes.
They can be found in the “Safety Information”.
Indicates points to pay attention to when using the machine, and explanations of likely causes of paper
misfeeds, damage to originals, or loss of data. Be sure to read these explanations.
Indicates supplementary explanations of the machine's functions, and instructions on resolving user errors.
This symbol is located at the end of sections.
It indicates where you can find further relevant information.
these notes could result in moderate or minor injury, or damage to the machine or to property. Be
[ ]
Indicates the names of keys and buttons.
Installing User Guide
Follow the procedure below to install User Guide only.
If you installed the software when performing [Quick Install for USB] or [Quick Install for Network], there
is no need to install it again here.
• The following explanation uses Windows XP as an example. Procedures under other operating
systems may differ.
• Screens vary according to the operating environment.
1. Start Windows, and insert the provided CD-ROM into the CD-ROM drive.
Quit all other applications currently running.
13
Page 16

1. Read This First
1
After inserting the CD-ROM, the [Driver, Manual & Utility] dialog box appears. If it does not, doubleclick the CD-ROM drive icon under [My Computer] or [Explorer], and then double-click
[SETUP.EXE].
2. Select a language for the interface, and then click [OK].
3. Click [User Guide].
4. Read the entire license agreement carefully. If you accept its terms, click [I accept the terms
of the license agreement], and then click [Next >].
5. Confirm the location in which you want to install User Guide, and then click [Next >].
To change the installation location, click [Change...].
6. Confirm the program folder in which you want to install User Guide, and then click [Next
>].
7. Click [Install].
Installation starts.
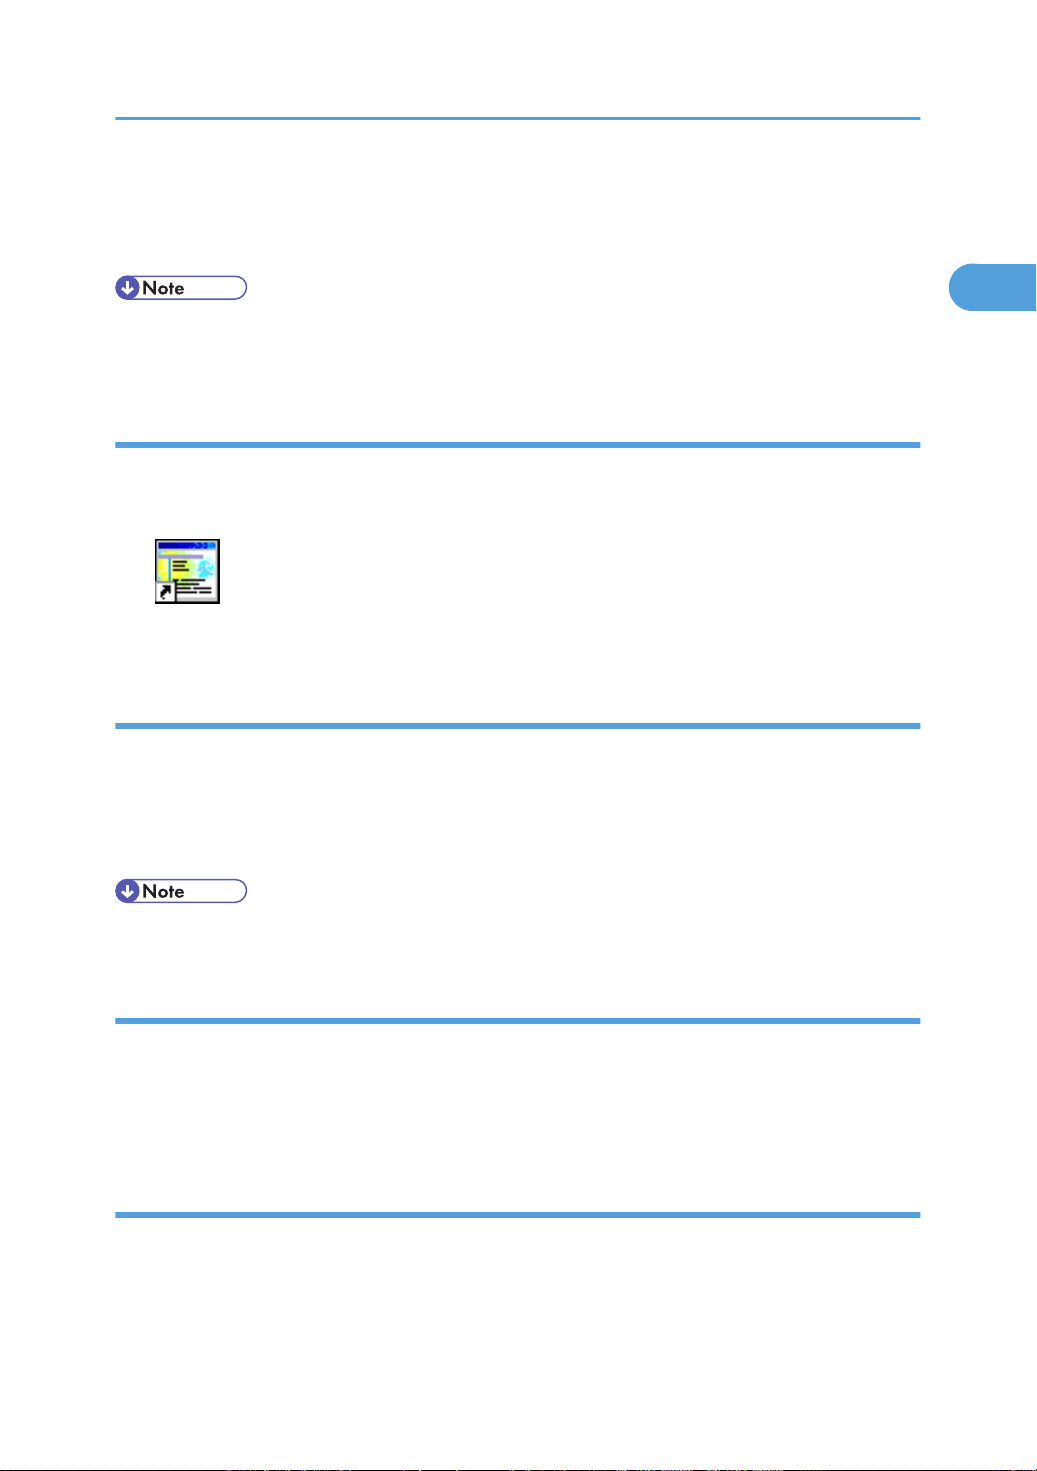
During installation, a message asking whether you want to create a desktop shortcut icon is displayed.
Click [Yes] or [No] as appropriate.
8. When installation is complete, click [Finish].
• To use the printer, the printer driver must be installed. See p.69 "Installing the Printer Driver
(USB)".
How to Use User Guide
User Guide (on the provided CD-ROM) includes detailed information about this printer and a
troubleshooting guide.
Use one of the browsers below to display User Guide.
Microsoft Internet Explorer Version 4.01 SP2 or later
•
• Netscape 6.2 or later
To view the video files of User Guide, Adobe Flash Player (Macromedia Flash Player 5 or later) plug-in is
required.
When using screen reader software or when you cannot install Adobe Flash Player (Macromedia
Flash Player 5 or later) plug-ins
When using screen reader software to listen to User Guide or when video files cannot be displayed
because Flash plug-ins cannot be installed, click [For screen reader] to display User Guide version
optimized for screen reader software.
Use the button in the upper right window to change the screen.
14
Page 17
How to Read This Manual
1
When using a non-recommended browser
When using Internet Explorer 3.02 or Netscape Navigator 4.05 or later versions, a simplified User
Guide is displayed.
• If the simplified User Guide does not automatically appear, in the CD-ROM's [unv] folder, open
index.htm.
Opening from the Icon
This section explains how to open User Guide from the desktop icon.
1. Double-click the [User Guide] icon on your desktop.
The browser opens, and then User Guide appears.
Opening from the [Start] Menu
This section explains how to open User Guide from the Windows Start menu.
1. On the [Start] menu, point to [All Programs], point to [Product Name], and then click
[Product Name User Guide].
The browser opens, and then User Guide appears.
• Depending on the settings made during installation, menu folder names may differ.
Opening from the Printer Driver
This section explains how to open User Guide from the printer driver.
1. In the printer properties dialog box, click [User Guide] on the [Setup] tab.
The browser opens, and then User Guide appears.
Opening from the CD-ROM
This section explains how to open User Guide from the supplied CD-ROM.
15
Page 18

1. Read This First
1
1. Start Windows, and insert the provided CD-ROM into the CD-ROM drive.
After inserting the CD-ROM, the [Driver, Manual & Utility] dialog box appears. If it does not, doubleclick the CD-ROM drive icon under [My Computer] or [Explorer], and then double-click
[SETUP.EXE].
2. Select a language for the interface, and then click [OK].
3. Click [Browse User Guide].
The browser opens, and then User Guide appears.
Opening from Printer Status Error Messages
This section explains how to open User Guide when Printer Status error message is displayed.
1. The Status monitor displays an error message if a problem occurs.
2. Click [User Guide].
The browser opens, and then User Guide appears.
Open User Guide from here if a problem occurs while using the printer.
Removing the User Guide
Follow the procedure below to remove the User Guide installed on your computer.
Removing the User Guide using its [Uninstall] function
1. On [Start] menu, point to [All Programs].
2. Point to the installed [Product name], and then click [Uninstall User Guide].
3. Follow the instructions that appear to remove the User Guide.
Removing the User Guide using [Add/Remove Programs]
1. On [Start] menu, click [Control Panel].
2. Click [Add or Remove Programs].
3. Select the installed [Product name User Guide], and then click [Change/Remove].
4. Follow the instructions that appear to remove the User Guide.
16
Page 19

BAJ008S
1
2
3
5
4
11
6
7
8
9
10
BAJ034S
12
13
Guide to Components
1
Guide to Components
The names and functions of parts of the printer body, control panel, and options are explained.
Machine Body
This is a front view of the printer.
1. Top cover
Normally,
keep this cover closed. If you cannot locate paper jams, or jammed paper cannot be removed easily,
you can check the condition of paper from the top of the printer.
2. Tray 1 output ramp
Prints are delivered on top of the Tray 1 cover.
3. Tray 1 output ramp extension
Pull out when using large paper to keep the printed paper from falling.
4. Tray 1 cover
This is attached to Tray 1.
To load paper, lift off the Tray 1 cover.
If you want to print on paper larger than A4 or letter size, pull the Tray 1 cover extension.
17
Page 20

BAJ026S
1
2
3
4
1. Read This First
1
5. Tray 1
Load paper here.
If you want to print on paper larger than A4 or letter size, pull the tray extension out.
6.
Envelope selector
For envelopes, set the lever to the rear position
.
7.
Print cartridge (yellow)
8. Print cartridge (magenta)
9. Print cartridge (cyan)
10. Print cartridge (black)
11. Right front cover
Normally, keep this cover closed. Open to install or replace Print cartridges.
12. Paper feed wheel
Use to wind out paper jammed around the guide board.
13. Left cover
Normally, keep this cover closed. Open this cover when you need to turn the paper feed wheel.
; for everything else, set the lever to the forward position
Machine Rear
This is a rear view of the printer.
18
Page 21

BAJ027S
5
6
Guide to Components
1
1. USB slot
Connect the USB cable from the computer here.
Rear Cover
2.
Remove this when attaching the duplex unit.
Remove this to open guide board, and then remove paper jammed inside the printer.
3. Vent
Air is vented here to prevent the inside of the printer from getting too warm. Do not lean anything against the vent
or block it in any way. If the inside of the printer gets too warm, a breakdown could occur.
4. Power inlet
Plug the power cord.
Plug one end of the power cord into the printer's power inlet and the other end into a wall outlet.
Connect the grounding wire attached to the power plug directly to a grounding terminal.
5. Guide board
To remove paper that has jammed inside the printer, open the guide board by removing the rear cover.
6. Ink collector unit cover
The ink collector unit for storing ink is installed in the printer.
Be careful not to spill the ink.
Remove the ink collector unit only when necessary.
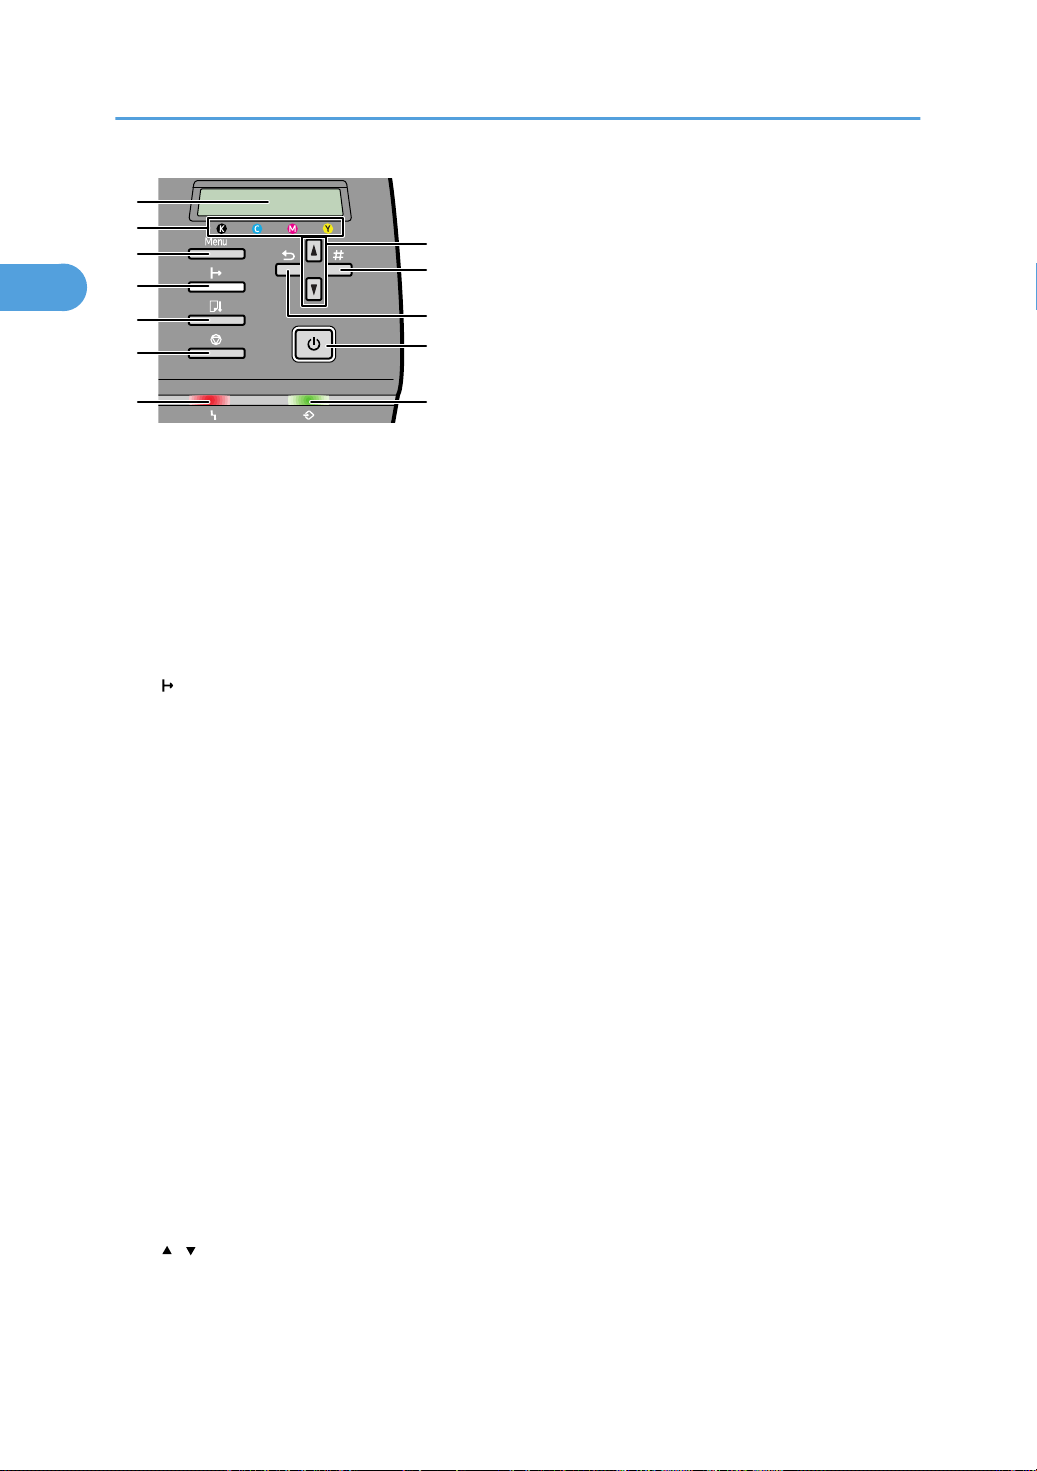
Control Panel
The illustrations in this manual show the model. The model may differ slightly from
the illustrated model.
19
Page 22
BAJ301S
1
2
3
4
5
6
7
8
9
10
11
12
1. Read This First
1
1. Display
Displays current printer status and error messages.
Print Cartridge End LED
2.
Each LED corresponds to a print cartridge. From the left, the LEDs show the status of the black (K), cyan (C),
magenta (M), and yellow (Y) cartridges.
3. [Menu] key
Press this key to make and check the current printer settings.
4. [
Online] key
Indicates whether the printer is online or offline. Press this to switch between online and offline.
When the lamp is lit, the printer is online, enabling data reception from the host computer.
When the lamp is unlit, the printer is offline, disabling data reception from the host computer.
Press to return to the ready condition.
[Form Feed / Head-cleaning] key
5.
When the printer is offline, press this to print all data left in the printer's input buffer.
You can use this to force the printer to print data received in the online status when the paper size or type does
not match the actually set size or type.
If a message prompting you to remove the jammed paper by pressing the [Form Feed / Head-cleaning] key
appears, press this key.
When the printer is offline, press and hold down the [Form Feed / Head-cleaning] key for three seconds to clean
the cyan, magenta, yellow, and black print heads.
6. [Job Reset] key
When the printer is online, press this key to cancel an ongoing print job.
7. Alert indicator
Lights up whenever a printer error occurs. A red light indicates an error has occurred that makes printing
impossible; the yellow light indicates a potential error during printing.
20
If the red light is on, follow the instructions that appear on the display.
8. [
][ ] keys
Use these keys to increase or decrease values on the display when making settings.
Keep the key pressed to quicken scrolling, and increase or decrease values on the display in units of 10.
Page 23

Guide to Components
1
To apply this function: under [Maintenance], set [Key Repeat] to [On].
9.
[#Enter] key
Press this key to execute menu items selected on the display.
10. [Escape] key
Press this key to return to the previous condition on the display.
11. [Power] key
• Press to turn the power on and off.
• To turn the power on, press and hold down the [Power] key for one second until it lights.
• After the power is turned on, the [Power] key will flash until the printer is ready for printing, at which point
the key will stop flashing and remain lit.
• When the power is turned off, the key will blink slowly until the printer has completely shut down at which
point the key will be dark.
means “standby”. To avoid any power consumption, disconnect the power plug from the wall outlet.
•
12.
Data In indicator
Blinks when the printer is receiving data from a computer. The Data In indicator is lit if there is data to be printed.
• For details about the Key Repeat, see p.133 "Performing Maintenance using the Control Panel
(Maintenance Menu)".
21
Page 24

1. Read This First
1
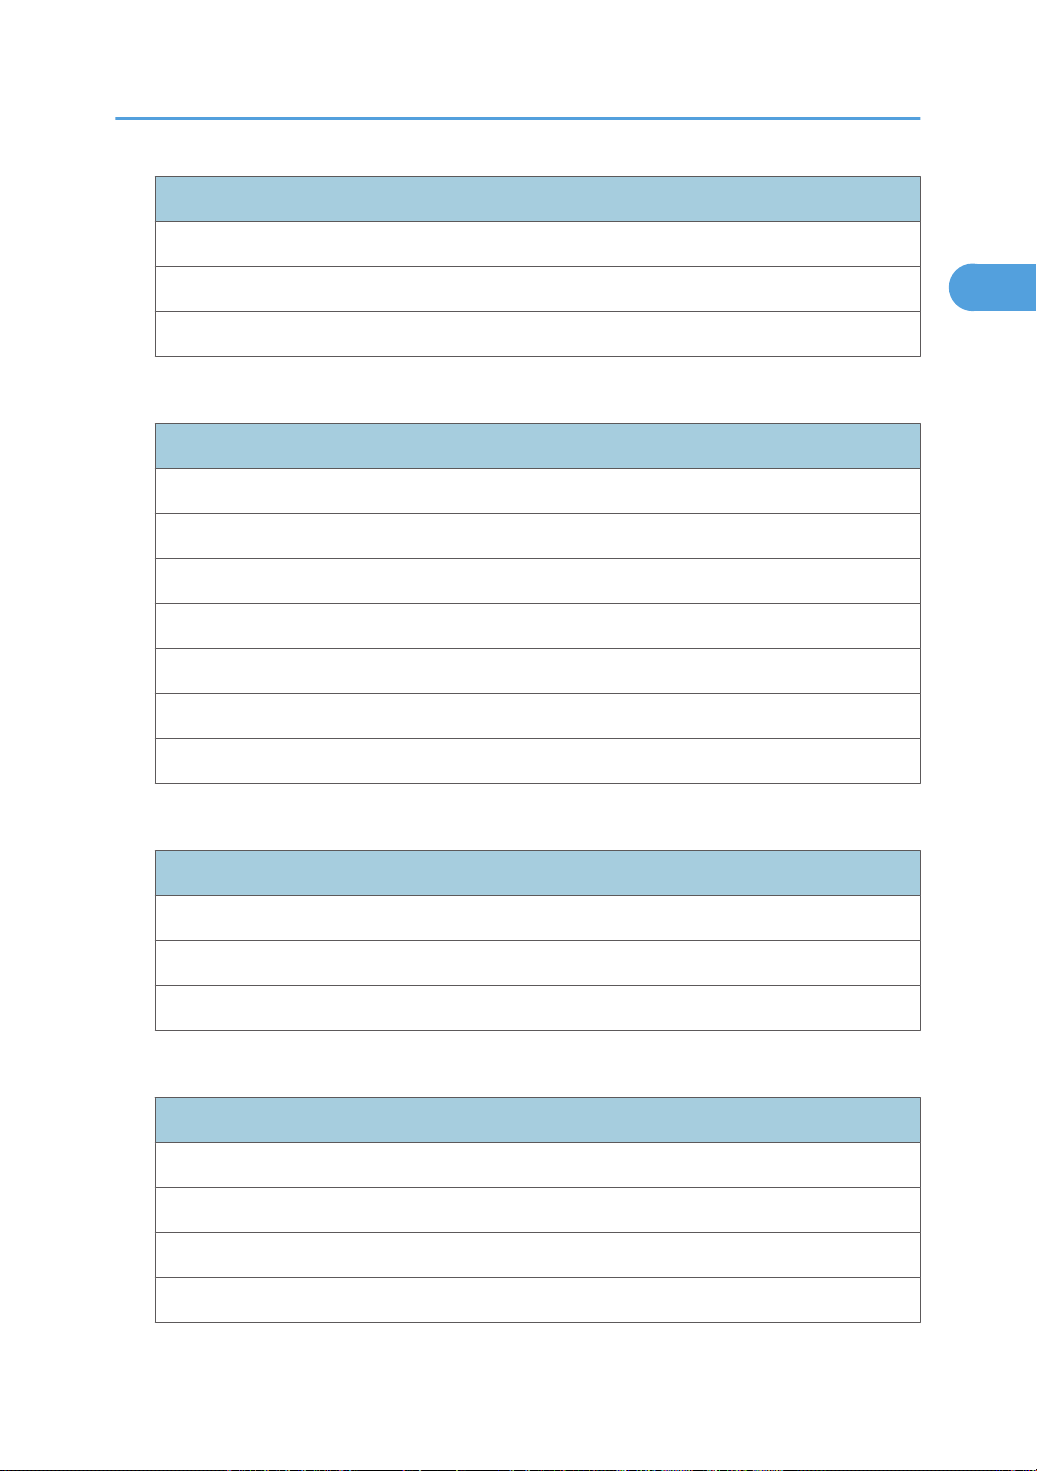
Making Printer Settings Using the Control Panel
This section explains how to change the default settings of the printer and provides information about the
parameters included in each menu. For details about procedures and settings, see the information under
in .
Counter
Menu
Show Counter
Print
Paper Input
Menu
Tray Paper Size
Paper Type
Aut.Tray Select
Tray Priority
List/Test Print
Menu
Config. Page
Maintenance
Menu
Nozzle Check
Head-cleaning
Head-flushing
Head Position
Adj.Paper Feed
Registration
22
Page 25
Menu
1
Key Repeat
Paper Feed Test
De-condensation
System
Menu
Auto Continue
Sub Paper Size
Energy Saver
Notify by Email
Unit of Measure
Making Printer Settings Using the Control Panel
Ink CU Replace
Env.Slctr.Alert
Host Interface
Menu
I/O Timeout
Network Setup
USB Setting
Language
Menu
Japanese
English
German
French
23
Page 26

1. Read This First
1
Menu
Italian
Dutch
Spanish
• p.131 "Checking the Number of Printed Pages using the Control Panel (Counter Menu)"
•
p.96 "Specifying the Paper Settings using the Printer's Control Panel (Paper Input Menu)"
• p.66 "Checking the Printer Status and Settings using the Printer's Control Panel (List/Test Print Menu)"
• p.133 "Performing Maintenance using the Control Panel (Maintenance Menu)"
• p.147 "Specifying System Settings using the Control Panel (System Menu)"
• p.74 "Specifying the Interface and Network Settings using the Printer's Control Panel (Host Interface
Menu)"
• p.150 "Selecting the Control Panel Language"
• p.152 "Restricting Printer Functions"
24
Page 27
Options
AKR127S
1
BAJ013S
1
2
1
This section explains the names and functions of the various available options.
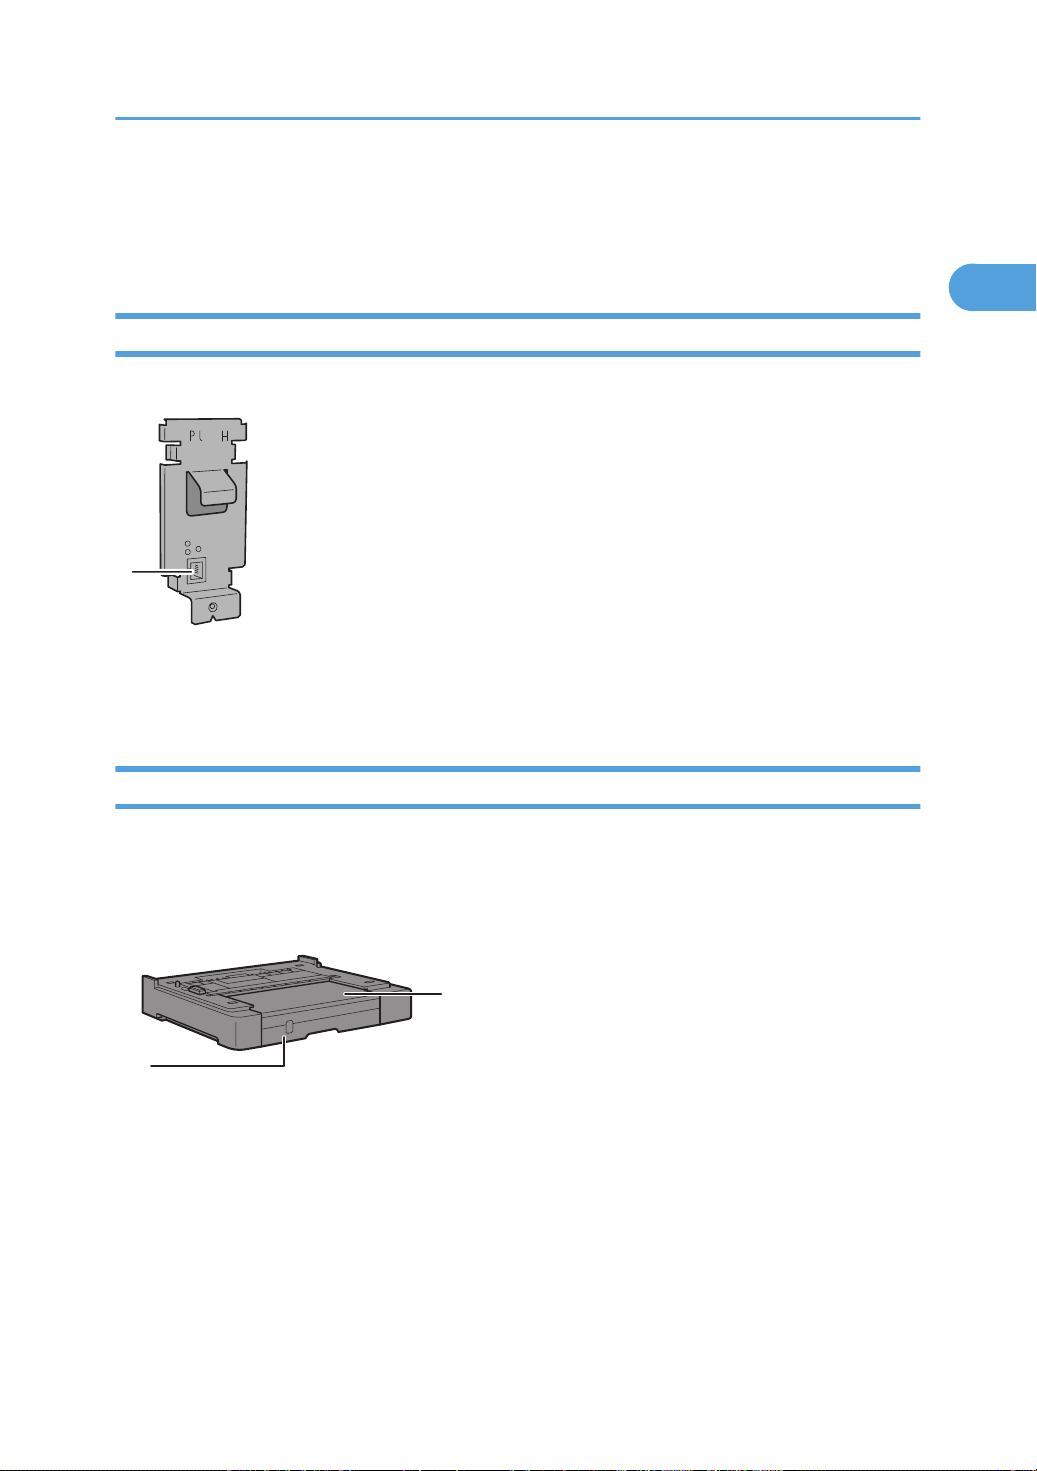
Network Interface Board Type GX3
By installing this optional network interface board in the machine, you can print over the network.
Options
1. Ethernet Port
Use a network interface cable to connect the printer to a network.
Paper Feed Unit TK1060
This optional tray can hold 250 sheets.
1. Tray 2
Load paper here.
If you want to print on paper larger than A4 or letter size, pull the tray extension out.
Tray 2 cover
2.
This is attached to tray 2.
Take this cover off when loading paper.
25
Page 28
BAJ002S
2
1
3
1. Read This First
1
If you want to print on paper larger than A4 or letter size, pull the tray 2 cover extension out and attach it to Tray
2.
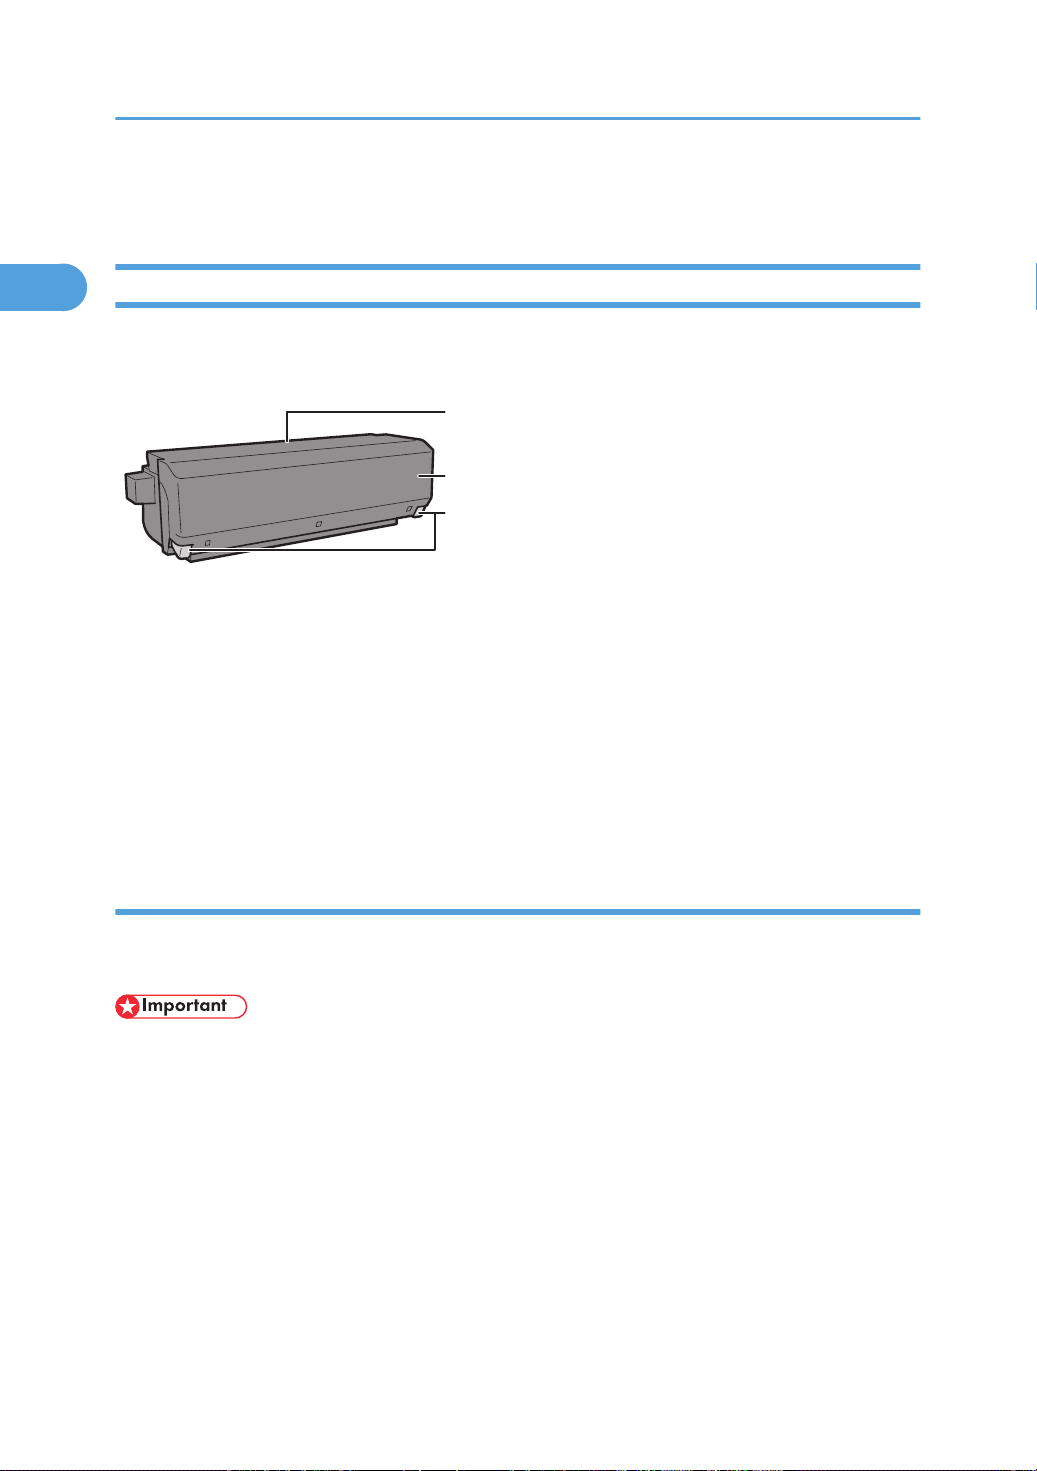
Duplex Unit AD1020
Turns the paper over when performing duplex printing.
1. Duplex unit cover button
Press to open the duplex unit cover.
Duplex unit cover
2.
Open to remove paper jammed inside the duplex unit.
3. Duplex unit locks
Use to lock or unlock the duplex unit when attaching or detaching it.
Detaching and Reattaching the Duplex Unit
To clear a paper jam, you might have to detach the duplex unit.
This section explains how to detach and reattach the duplex unit.
• If the duplex unit is attached to the printer, switch the printer off and detach the duplex unit before
printing anything.
26
Page 29
BAJ041S
BAJ005S
BAJ001S
1
2
3
Options
1
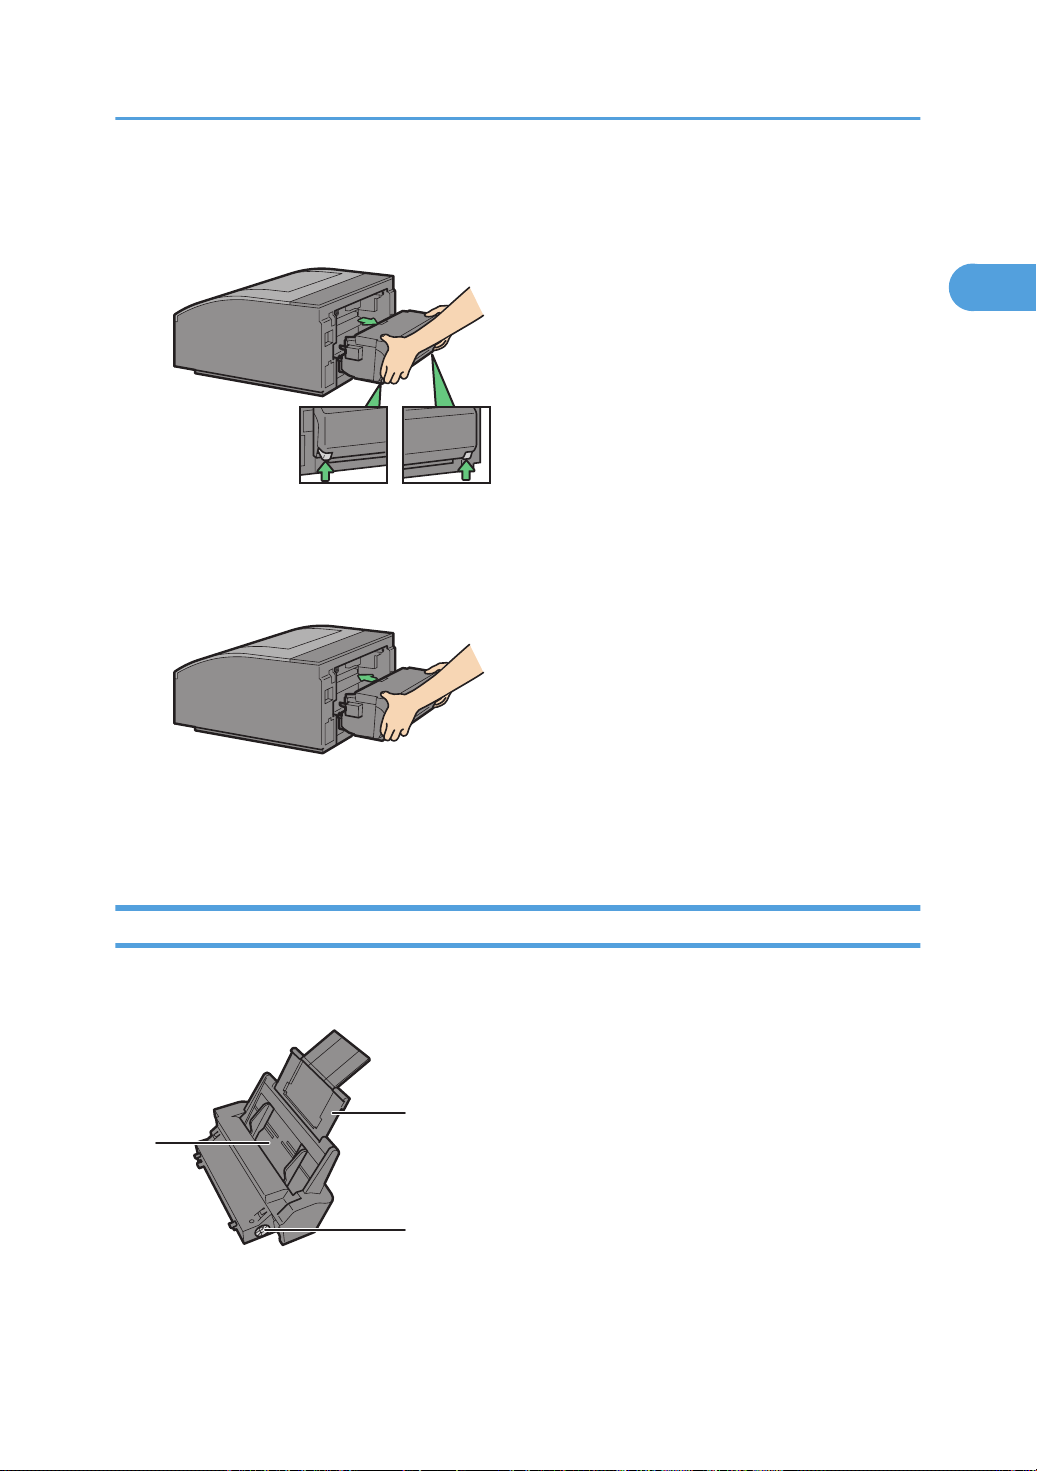
1. Pressing the catches on both sides of the duplex unit, carefully detach the duplex unit from
the printer body.
2. Reattach the duplex unit.
Push the duplex unit firmly to avoid a paper jam.
Multi Bypass Tray BY1010
Use this tray to feed in sheets manually.
1. Bypass tray
Load paper here.
27
Page 30
BAJ004S
BAJ038S
1. Read This First
1
2. Bypass tray extension
Pull this out according to the paper size.
3.
Wheel
Use this to wind out paper that became jammed after being fed in from the bypass tray.
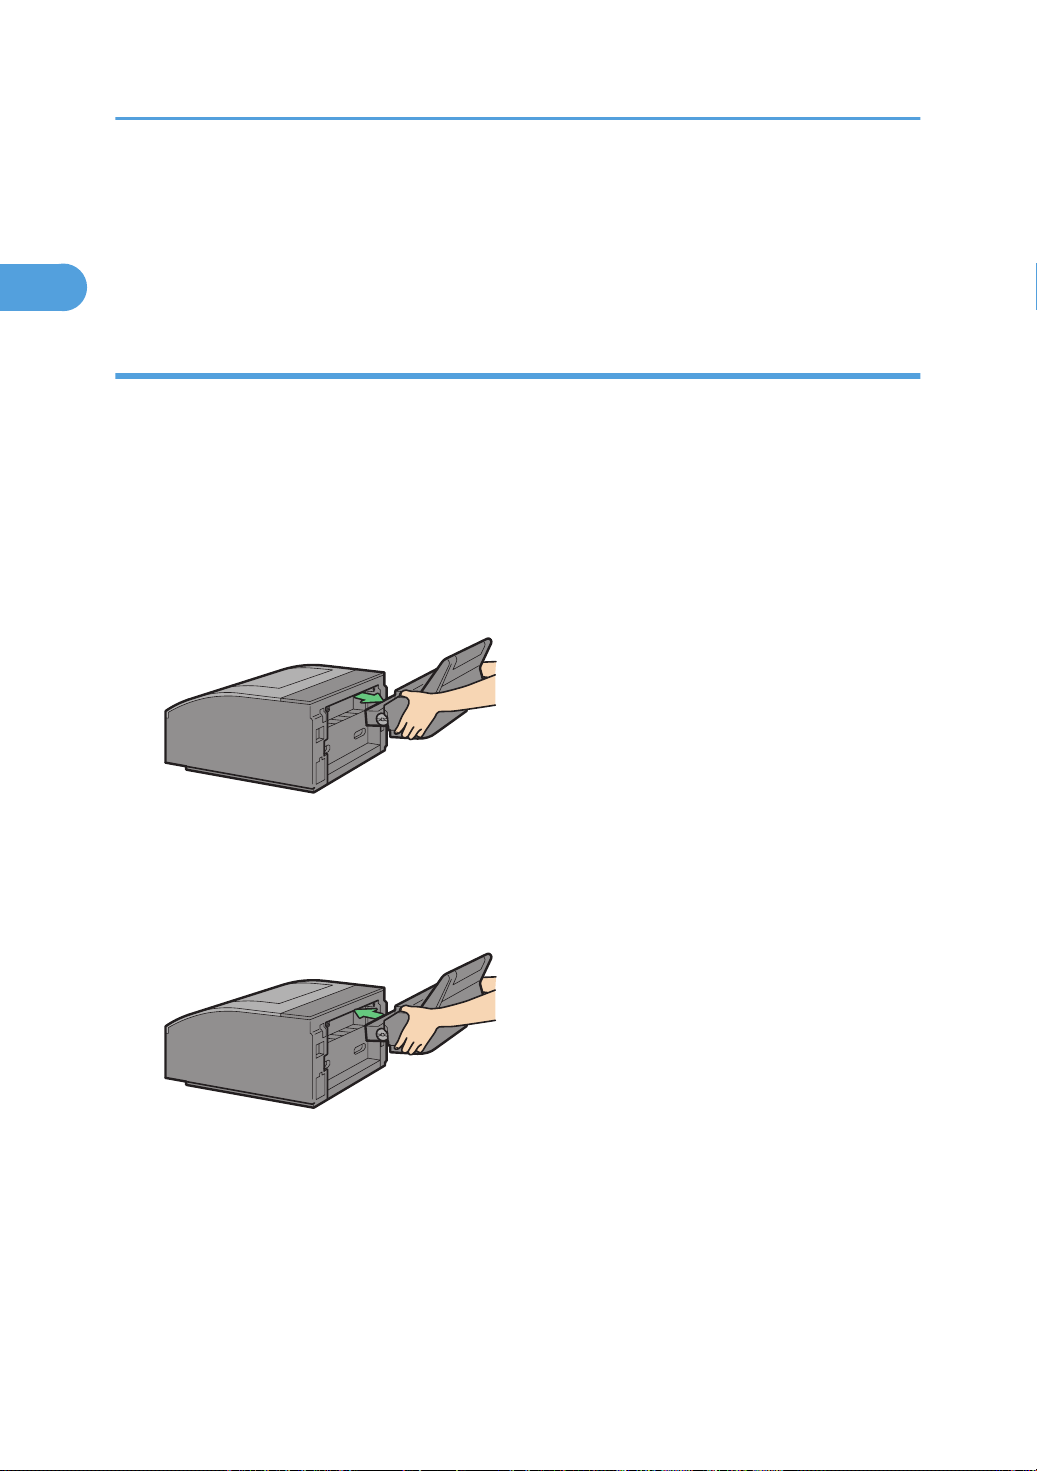
Detaching and Reattaching the Multi Bypass Tray
To clear a paper jam, you might have to detach the multi bypass tray.
This section explains how to detach and reattach the multi bypass tray.
1. Remove any paper in the bypass tray.
2. Push the bypass tray extension in.
3. Detach the multi bypass tray.
28
4. Reattach the multi bypass tray.
5. Pull the bypass tray extension out.
6. Load paper in the bypass tray.
Page 31

Recommended Functions
1
Recommended Functions
This section lists useful and recommended functions.
Automatically selecting the tray for printing
See p.96 "Specifying the Paper Settings using the Printer's Control Panel (Paper Input Menu)".
Copy-guard of printed documents for preventing information leaks
See p.103 "Printing".
Notifying the printer status by e-mail on an occasion such as if the printer runs out or paper or
paper is jammed
See p.117 "Notifying the Printer Status by E-mail".
29
Page 32

1. Read This First
1
30
Page 33

2. Preparing for Printing
2
Setting Up the Hardware
This section explains how to install the printer.
Checking the Computer and Installation Area
The printer's location should be carefully chosen because environmental conditions greatly affect its
performance.
The area where the printer is to be placed
• To avoid malfunctions, position the machine away from the following:
• direct sunlight
• flow of air from air conditioners or heaters
• radios, televisions, or other electronic devices
• areas of high/low temperature and high/low moisture
• humidifying appliances
• oil stoves and ammonia-emitting appliances (such as diazo copiers)
Choose a flat, stable area to install the machine.
• The surface should be level within two degrees, left to right and front to back.
• To prevent condensation, install the machine in an area where temperature and humidity conditions
do not exceed those indicated in the diagram below.
• The machine may cease to print if these limitations are exceeded.
31
Page 34

ZDJX006J
TS4K031E
19 cm
(7.5 inches)
b
3 cm (1.2 inches)
32 cm (12.6 inches)
10 cm (4 inches)
16 cm (6.3 inches)
a
BAJ007S
2. Preparing for Printing
2
• White area: Permissible Range
• Gray area: Recommended Range
• The diagram below shows the ideal clearance for loading paper, replacing print cartridges, and
removing jammed paper
a. If you attach the multi bypass tray (option), provide additional clearance of 26 cm (10.3 inches).
b. If you attach the multi bypass tray (option), provide additional clearance of 29 cm (11.5 inches).
32
Page 35

Setting Up the Hardware
2
Check the power source
• Keep the machine away from humidity and dust. Otherwise a fire or an electric shock might occur.
• Place
• If you use the machine in a confined space, confirm that there is a continuous flow of air.
• Only connect the machine to the power source described on this sheet.
• Avoid multi-wiring.
• Connect the power cord directly into a wall outlet and never use an extension cord.
• Do not damage, break or make any modifications to the power cord. Do not place heavy objects on
• Do not plug or unplug the power cord with your hands wet. Otherwise, an electric shock might occur.
• Make sure the wall outlet is near the machine and freely accessible so that in event of an emergency
The power requirements of this machine are as follows:
• 50/60 Hz, 0.55 A or more.
• 50/60 Hz, 1.1 A or more.
the machine on a strong and level surface. Otherwise, the machine might fall and cause personal
injury.
it. Do not pull it hard nor bend it more than necessary. These actions could cause an electric shock or
fire.
it can be unplugged easily.
Checking the Computer to be Connected
To use this printer, computers must meet the following specifications:
• PC/AT-compatible computer with USB or network interface
• Operating system: Windows 98/Me/2000/ XP/Vista, Windows Server 2003, Windows NT 4.0
or later
• 80-100MB or more available hard disk space
• For Windows NT 4.0, IE 4.0 or later is required.
• Windows
• USB connection is supported by Windows 98/Me/ 2000/ XP/Vista and Windows Server 2003.
• USB connection speed under Windows 98/Me is USB 1.1 equivalent.
NT 4.0 does not support USB connection. Connect your printer via a network in this case.
33
Page 36

BAJ037S
2. Preparing for Printing
2
• To operate this printer, your computer must have at least the amount of memory necessary to run its
operating system.
• The machine does not support Windows XP/Vista 64-Bit Edition or Windows Server 2003 64-Bit
Edition.
Checking the Supplied Items and Unpacking the Printer
• The machine weighs around 19.2 kg (42.4 lb) (28 kg (61.8 lb) with options installed).
avoid injury to self and damage to the machine, lift the machine slowly and carefully by gripping
• To
the central areas near the base on both sides. When lifting the machine with options attached, have
at least one other person assist you.
• Careless handling and over exertion when lifting can result in breakage and/or injury.
• Do not turn the machine on until you have read how to do so.
Open the box and take out all supplied items. Check that all the following items are present:
• Power Cord
• Starter cartridge - Cyan
• Starter cartridge - Magenta
• Starter cartridge - Yellow
• Starter cartridge - Black
• Quick Installation Guide
• Safety information
• CD-ROM; User Guide is included on this.
1. Take off the protective covering.
2. Remove the plastic bag.
34
Page 37

BAJ017S
Setting Up the Hardware
2
3. Lift the printer and move it to the place where you want to install it.
Always lift and carry the printer with another person. Grip the indented area at the base of the printer's
sides, as shown. Lift and carry the printer slowly and carefully.
4. Remove the orange tape from the printer body.
• We recommend you keep the box, so you can use it again when relocating the printer.
•
Remove all the orange tape, except the tape around the power cord.
• USB and LAN cables are not supplied.
Attaching the Options
Attaching the Network Interface Board Type GX3
• Before touching the network interface board, ground yourself by touching something metal to
discharge any static electricity.
• Do not subject the network interface board to impact or other physical stress.
1. Check the product and its supplied components.
2. Make sure the printer's power cord is unplugged.
35
Page 38

BAJ040S
AKR130S
BAJ083S
2. Preparing for Printing
2
3. Using a coin, turn the network interface board cover screw counterclockwise, and then
remove the cover.
4. Remove the spacer in the network interface board cover.
36
The removed spacer will not be used again.
5. Align the network interface board notch with the triangular mark on the printer, and then
push in the network interface board by pressing the part marked “PUSH”.
6. Reattach
the network interface board cover to the printer, and then secure it with the screw
provided.
• Be sure to push the network interface board fully into the printer.
Page 39

BAJ021S
Setting Up the Hardware
2
• If the network interface board is not installed properly, repeat the entire installation procedure. If you
cannot install it properly even after attempting reinstallation, contact your sales or service
representative.
• Dispose of the removed component as general plastic waste or hand it in for collection.
Attaching the Paper Feed Unit TK1060
• The machine weighs around 19.2 kg (42.4 lb) (28 kg (61.8 lb) with options installed).
avoid injury to self and damage to the machine, lift the machine slowly and carefully by gripping
• To
the central areas near the base on both sides. When lifting the machine with options attached, have
at least one other person assist you.
• Careless handling and over exertion when lifting can result in breakage and/or injury.
1. Make sure the printer's power cord is unplugged.
2. Take the paper feed unit out of its box.
3. Position the paper feed unit close to the printer.
4. Remove the orange tape from the paper feed unit.
5. Attach the paper feed unit cover to the paper feed unit.
6. Align
the connecting parts of the printer and paper feed unit, and then lower the printer onto
the paper feed unit.
Always lift and carry the printer with another person. Grip the indented area at the base of the printer's
sides, as shown. Lift and carry the printer slowly and carefully.
37
Page 40

BAJ082S
BAJ065S
2. Preparing for Printing
2
After attaching the paper feed unit, you must register where to start printing on paper loaded in the
paper feed unit.
• Align the paper feed unit and printer using their corners.
•
When the printer is placed on top of the paper feed unit, installation is complete.
• Do not tilt the printer.
• Be careful not to trap your fingers.
• For details about registering where to start printing on paper loaded in the paper feed unit, see
p.142 "Registration".
Attaching the Duplex Unit AD1020
1. Make sure the printer's power cord is unplugged.
2. Take the duplex unit out of its box.
3. Remove the orange tape from the duplex unit.
4. Remove the rear cover.
38
Page 41

BAJ005S
BAH304S
Setting Up the Hardware
2
5. Fully insert the duplex unit.
Paper jams can occur if the unit is not properly connected. Be sure to push the unit firmly into position.
• Dispose of the removed component as general plastic waste or hand it in for collection.
Attaching the Multi Bypass Tray BY1010
1. Make sure the printer's power cord is unplugged.
2. Take the multi bypass tray out of its box.
3. Remove the orange tape from the multi bypass tray.
4. Fully insert the multi bypass tray.
5. When using the multi bypass tray, pull out its extension and adjust the side guides according
to the size of the loaded paper.
After attaching the paper feed unit, you must register where to start printing on paper loaded in the paper
feed unit.
• For details about registering where to start printing on paper loaded in the paper feed unit, see
p.142 "Registration".
39
Page 42

BAJ037S
BAJ035S
2. Preparing for Printing
2
Installing the Print Cartridges
• If ink comes into contact with your eyes, rinse immediately in running water. For other symptoms,
consult a doctor.
ink is ingested, induce vomiting by drinking a strong saline solution. Consult a doctor immediately.
• If
• If your skin comes into contact with ink, wash the affected area thoroughly with soap and water.
• Keep the ink or ink container out of reach of children.
• Do not turn the machine on until you have read how to do so.
40
• Be sure to install the unused print cartridge that is supplied. Installing any other cartridge could result
in incomplete ink filling and malfunction.
1. Remove the packaging from the print cartridges.
Do not touch the ink supply ports or silicon substrates of print cartridges.
2. Open the right front cover.
Page 43

3. Check the orientation of each cartridge, and then install them gently.
BAJ039S
BAJ009S
2
Install in the following order from the left: black, cyan, magenta, and yellow.
4. Push in each cartridge by pressing on the PUSH area.
5. Repeat steps 3 to 4 for all four cartridges.
6. Close the right front cover.
Setting Up the Hardware
Plugging in the Power Cord and Turning the Power On
Before connecting the printer to a computer, connect the printer's power cord and switch the printer on.
• Only connect the machine to the power source described on this sheet.
• Avoid multi-wiring.
• Connect the power cord directly into a wall outlet and never use an extension cord.
• Do not damage, break or make any modifications to the power cord. Do not place heavy objects on
it. Do not pull it hard nor bend it more than necessary. These actions could cause an electric shock or
fire.
• Do not plug or unplug the power cord with your hands wet. Otherwise, an electric shock might occur.
41
Page 44

BAJ054S
BAJ055S
BAG052S
2. Preparing for Printing
2
• Do not handle the machine while the cartridge is being filled. Ink filling begins when the machine's
power is switched on. Until the "Loading Ink..." message disappears from the control panel.
1. Remove the orange tape from around the power cord.
2. Plug the power cord fully into the printer.
3. Plug the power cord fully into the wall outlet.
42
The surface should be level within two degrees.
Make sure the power cord is not trapped under the printer.
4. Press the [Power] key.
Page 45

BAJ025S
Setting Up the Hardware
2
The printer starts feeding ink into its print-heads (taking approximately 6 minutes).
Make sure the "Ready" message is displayed on the control panel.
Do not switch off the power of the machine during this period. Make sure the plug is not removed
from the wall outlet.
You might hear a clicking sound while the print heads are filling. This is not a malfunction. It will stop
after a while.
Loading Paper
Load paper into the paper tray.
Normally, load paper into tray 1. Tray 2 (optional) can be used if installed.
• Load paper with the paper grain parallel to the feed direction.
Loading Paper into Tray 1
Follow the procedure below to load paper into tray 1.
A4/Letter size paper is loaded here.
• Load A4/Letter size paper in orientation.
1. Hold
the Tray 1 grip, pull the tray halfway out, lift it slightly (
( ).
Pull tray 1 completely out. Take care not to drop it.
), and then pull it out further
43
Page 46

BAJ024S
BAJ020S
BAJ042S
2. Preparing for Printing
2
2. Lift off the tray 1 cover.
Do not place the paper tray cover on top of the printer.
3. While squeezing the catch on the paper guide, slide the guide so it is positioned according
to the paper size.
44
Beforehand, make sure to squeeze the front end paper guide, and then expand the guide.
4. Load paper with the print side face down but not over the limit mark.
Page 47

BAJ043S
BAJ022S
BAJ044S
Setting Up the Hardware
2
5. Squeeze the front end paper guide, and then slide it to meet the edge of the paper.
6. Re-attach the tray 1 cover.
7. Push tray 1 gently in until it stops.
Loading Paper Larger than A4/Letter (Tray1)
Follow the procedure below to use the paper tray extension for paper larger than A4/Letter size, such as
Legal size paper.
A3 size paper is loaded here.
45
Page 48

BAJ025S
BAJ024S
BAJ045S
2. Preparing for Printing
2
• Load Legal size paper in orientation.
1. Hold
the Tray 1 grip, pull the tray halfway out, lift it slightly (
( ).
Pull tray 1 completely out. Take care not to drop it.
2. Lift off the tray 1 cover.
), and then pull it out further
46
Do not place the paper tray cover on top of the printer.
3. Slide the tabs on both sides of the tray's interior to the unlocked position.
Page 49

BAJ046S
BAJ047S
BAJ048S
Setting Up the Hardware
2
4. Pull out the paper tray extension.
5. Slide the tabs back into place to lock the paper tray extension into position.
6. While squeezing the catch on the paper guide, slide the guide so it is positioned according
to the paper size.
Do not use the paper tray extension for A4 (Letter) size paper or smaller paper. Use it only for long
paper.
47
Page 50

BAJ049S
BAJ050S
BAJ084S
2. Preparing for Printing
2
7. Load paper with the print side face down but not over the limit mark.
8. Squeeze the front end paper guide, and then slide it to meet the edge of the paper.
48
9. Pull out the tray 1 output ramp extension together with the tray 1 cover extension.
Page 51

10. Re-attach the tray 1 cover.
BAJ051S
BAJ052S
2
11. Push tray 1 gently in until it stops.
Setting Up the Hardware
Loading Paper into Tray 2
Follow the procedure below to load paper into tray 2.
You can load plain paper and inkjet plain paper in tray 2.
A4/Letter size paper is loaded here.
• Load A4/Letter size paper in orientation.
49
Page 52

BAJ032S
BAJ088S
BAJ014S
2. Preparing for Printing
2
1. Hold the Tray 2 grip, pull the tray halfway out, lift it slightly ( ), and then pull it out further
( ).
Pull tray 2 completely out. Take care not to drop it.
2. Lift off the tray 2 cover.
50
Do not place the paper tray cover on top of the printer.
3. While squeezing the catch on the paper guide, slide the guide so it is positioned according
to the paper size.
Beforehand, make sure to squeeze the front end paper guide, and then expand the guide.
Page 53

4. Load paper with the print side face down but not over the limit mark.
BAJ080S
BAJ021S
BAJ023S
2
5. Re-attach the tray 2 cover.
Setting Up the Hardware
6. Push tray 2 gently in until it stops.
Loading Paper Larger than A4/Letter (Tray2)
Follow the procedure below to use the paper tray extension for paper larger than A4/Letter size, such as
Legal/81/2" × 14" size paper.
51
Page 54

BAJ032S
BAJ088S
BAJ036S
2. Preparing for Printing
2
1. Hold the Tray 2 grip, pull the tray halfway out, lift it slightly ( ), and then pull it out further
( ).
Pull tray 2 completely out. Take care not to drop it.
2. Lift off the tray 2 cover.
52
Do not place the paper tray cover on top of the printer.
3. Slide the tabs on both sides of the tray's interior to the unlocked position.
Page 55

BAJ046S
BAJ047S
BAJ048S
Setting Up the Hardware
2
4. Pull out the paper tray extension.
5. Slide the tabs back into place to lock the paper tray extension into position.
6. While squeezing the catch on the paper guide, slide the guide so it is positioned according
to the paper size.
Do not use the paper tray extension for A4 (Letter) size paper or smaller paper. Use it only for long
paper.
Beforehand, make sure to squeeze the front end paper guide, and then expand the guide.
53
Page 56

BAJ049S
BAJ085S
BAJ074S
2. Preparing for Printing
2
7. Load paper with the print side face down but not over the limit mark.
8. Pull out the tray 2 cover extension.
54
9. Re-attach the tray 2 cover.
Page 57

10. Push tray 2 gently in until it stops.
BAJ023S
BAJ012S
2
Loading Paper into Bypass Tray (optional)
Follow the procedure below to load paper into bypass tray.
A4/Letter size paper is loaded here.
1. Pull the bypass tray extension out all the way.
Setting Up the Hardware
2. Load paper in the bypass tray with the side to be printed on facing up.
Printing a Configuration Page
After setting up the hardware and before connecting the printer to a computer, make a test print by printing
the configuration page.
Printing
is functional.
You can also use the configuration page to check the printer's configuration and system settings.
the configuration page as a test print primes the print heads and allows you to check that the printer
• The configuration page is printed on A4 or Letter (8 1/2" × 11") size paper, so load them in the same
paper tray.
55
Page 58

BAG053S
2. Preparing for Printing
2
1. Press the [Menu] key.
2. Press the [ ] or [ ] key to display [List/Test Print], and then press the [#Enter] key.
Menu:
List/Test Print
3. Press the [ ] or [ ] key to display [Config. Page], and then press the [#Enter] key.
List/Test Print:
Config. Page
The configuration page is printed.
The List/Test Print menu screen returns on completion of printing.
whether the print-head nozzles are clogged up or not by printing a nozzle check test pattern.
Check
4. Hold the [Power] key down until the printer shuts down.
If you are connecting the printer to a computer via USB, proceed to p.57 "Connecting the Computer
and Installing the Software (USB Connection)".
If you are connecting the printer to a network, proceed to p.61 "Connecting the Computer and
Installing the Software (Network Connection)".
• For details about printing a nozzle check test pattern, see p.134 "Nozzle Check".
•
For details about the items on the configuration page, see p.66 "Checking the Printer Status and
Settings using the Printer's Control Panel (List/Test Print Menu)".
56
Page 59

BAJ037S
Connecting the Computer and Installing the Software (USB Connection)
2
Connecting the Computer and Installing the
Software (USB Connection)
After setting up the hardware and making a test print, connect the printer to your computer. This section
explains
“Quick Install”.
Before Installing the Software (USB)
Before installing the software, connect the printer to your computer using a USB cable.
how to connect the printer to a computer using a USB cable, and how to install the software using
• For details about the connection method, see p.67 "Confirming the Connection Method".
For details about the installing the printer driver only, see p.69 "Installing the Printer Driver
•
(USB)".
• Even
Connecting the Printer via USB
1. Make sure the printer is off.
2. Turn on the power of the computer, and start Windows.
if the computer that you are connecting the printer to via USB is networked, you can still connect
the printer and computer according to the procedure explained in this section. For details about
sharing the printer, see p.71 "Sharing the Printer".
Do not turn the printer on until you have read how to do so.
57
Page 60

BAJ056S
BAJ037S
2. Preparing for Printing
2
3. Remove the seal on the USB slot located on the rear of the printer, and then insert the USB
cable's hexagonal (type B) plug firmly into the slot.
4. Insert the USB cable's rectangular (type A) plug firmly into the computer's USB slot.
• Insert the USB cable's plug with the USB mark facing down.
•
Make sure that the USB cable is fully inserted.
• Make sure the USB cable is connected properly, especially when the multi bypass tray is attached to
the printer, because the tray makes connecting the cable difficult.
Quick Install for USB
Follow the procedure below to install the printer driver and User Guide.
• Do not turn the printer on until you have read how to do so.
install under Windows 2000/XP/Vista ,Windows Server 2003 or WindowsNT4.0, you must log
• To
on as a user with administrator rights.
58
Page 61

Connecting the Computer and Installing the Software (USB Connection)
2
Notes on the Installation (USB Connection)
If the message “Digital Signature Not Found” or the [Software Installation] , [Hardware
Installation] or [Windows can't verify the publisher of this driver software] dialog box
appears:
1. Click [Yes], [Continue Anyway] or [Install this driver software anyway] to continue the
installation.
If the [Found New Hardware Wizard] dialog box appears:
1. Click [Install from a list or specific location (Advanced)], and then click [Next >].
2. Click [Include this location in the search], and then click [Browse].
3. Browse to “DRIVERS” on the CD-ROM, and then click [OK]. Select the folder appropriate
for your operating system.
Be sure to clear the [Search remove media (floppy, CD-ROM...)] check box.
For details about the files stored on the CD-ROM labeled, see p.245 "Software on the
CD-ROM".
1. Start Windows, and insert the provided CD-ROM into the CD-ROM drive.
Quit all applications currently running.
When you start Windows, the “Add New Hardware Wizard” may appear. If this happens, click
[Cancel]. Check again that the power is off.
2. Select a language for the interface, and then click [OK].
3. Click [Quick Install for USB].
4. Read the entire license agreement carefully. If you accept its terms, click [I accept the
agreement], and then click [Next >].
5. Check that the power of the printer is off, and then click [Next >].
6. Check again that the power of the printer is off, and then click [Next >].
Check that the dialog box below appears.
If the [Software Installation] or [Windows can't verify the publisher of this driver software] dialog box
appears, see “Notes on the Installation”.
7. Make sure that the computer and printer are properly connected, and then press the [Power]
key.
Installation starts.
If the connection to the computer was not confirmed, make the port settings again after installation is
complete.
If the message “Digital Signature Not Found” or the [Found New Hardware Wizard] or [Hardware
Installation] dialog box appears, see “Notes on the Installation”.
8. Select whether or not to open the printer status monitor automatically, and then click [Next
>].
59
Page 62

2. Preparing for Printing
2
9. Check the installation result, and then click [Next >].
Install User Guide.
10. Click [Finish].
The printer driver and User Guide are now installed.
If the message “Digital Signature Not Found” or the [Found New Hardware Wizard] or [Hardware
Installation] dialog box appears, see “Notes on the Installation”.
• After inserting the CD-ROM, the [Drivers, Manual & Utilities] dialog box appears. If it does not,
double-click the CD-ROM drive icon under [My Computer] or [Explorer], and then double-click
Setup.exe.
When installation is complete, the User Guide icon appears on your desktop.
•
• If a message prompting you to restart the computer appears, restart the computer.
• Confirm the printer driver is correctly installed by checking the printer's [Power] key is lit, and then
performing a test print.
60
Page 63

BAJ099S
Connecting the Computer and Installing the Software (Network Connection)
2
Connecting the Computer and Installing the
Software (Network Connection)
After setting up the hardware and making a test print, connect the printer to your computer. This section
explains
via Ethernet cable, and how to use “Quick Install”.
Before Installing the Software (Network Interface Board)
Connect the printer and computer via Ethernet cable. Then, on the printer's control panel, specify the printer's
network settings according to the network environment, and then install the software.
how to connect the printer when it is fitted with the optional network interface board to a computer
• For details about the connection method, see p.67 "Confirming the Connection Method".
For details about the installing the printer driver only, see p.77 "Installing the Drivers for Network
•
Connection".
Connecting the Printer via the Network
Be sure to install all necessary network equipment, such as hubs, etc. before connecting the Ethernet cable
to the printer.
You can connect a 10BASE-T or 100BASE-TX cable to the printer.
• Ethernet cables are not supplied with this printer. Select your cable according to the network
environment.
1. Plug the Ethernet cable into the Ethernet port on the rear of the printer.
2. Connect the other end of the cable to the printer's network, such as to a hub.
61
Page 64

AKR136S
1
2
3
2. Preparing for Printing
2
Check the LEDs on the Ethernet port
1. Indicator (green)
Remains
BASE-T cable is connected.
2. Indicator (orange)
Lights whenever the printer is sending or receiving data via the network.
3. [Reset] key
Press this to initialize and reboot the network interface board.
green as long as the machine is properly connected to the network via 100 BASE-TX cable. Unlit if 10
Specifying Settings on the Control Panel
Make the following network settings according to the network interface you are using.
If you have connected the printer to a network, make the required network environment settings.
The following table shows the control panel settings and their default values. These items appear in the
[Network Setup] menu.
Setting Name Value
1.DHCP On
2.IP Address 0.0.0.0
3.Subnet Mask 0.0.0.0
4.Gateway Address 0.0.0.0
5.Active Protocol TCP/IP: Active
6.Ethernet Speed Auto Select
The following example explains making settings for TCP/IP.
62
Page 65

1. Press the [Power] key.
BAG052S
BAG053S
2
2. Press the [Menu] key.
Connecting the Computer and Installing the Software (Network Connection)
The Menu screen appears on the display.
3. Press the [ ] or [ ] key to display the [Host Interface] menu, and then press the [#Enter]
key.
Menu:
Host Interface
4. Press the [ ] or [ ] key to display [Network Setup], and then press the [#Enter] key.
Host Interface:
Network Setup
5. Press the [ ] or [ ] key to select [IP Address], and then press [#Enter] key.
Network Setup
IP Address
The current IP address appears on the display.
6. Press
] or [ ] key to enter the left most entry field of the IP address, and then press the
the [
[#Enter] key.
IP Address:
63
Page 66

2. Preparing for Printing
2
. 0. 0. 0
To get an IP address for the printer, contact your network administrator.
The value moves by 10 if the [ ] or [ ] key is kept pressed.
When the [#Enter] key is pressed, the cursor moves to the next field.
7. Press the [#Enter] key.
As the specified value is entered in each field, the cursor moves to the next field.
IP Address:
192. . 0. 0
8. Repeating the steps, specify values in all fields, and then press the [#Enter] key.
To return to the previous field, press the [Escape] key.
9. Specify “Subnet Mask” and “Gateway Address” in the same way as when specifying the
IP address.
10. After you have made all the settings, press the [Online] key.
The specified settings are set and the initial printer screen reappears.
You can print the configuration page to confirm the specified settings.
• For details about how to print a configuration page, see p.55 "Printing a Configuration Page".
Quick Install for Network
Follow the procedure below to install the printer driver, User Guide, and DeskTopBinder SmartDeviceMonitor for Client.
• If the version of SmartDeviceMonitor for Client already installed in the computer is newer than that
on the CD-ROM, you cannot use “Quick Install” to install the printer driver. Install the printer driver,
and then create the port.
•
To install under Windows 2000/XP/Vista, Windows Server 2003 or WindowsNT4.0, you must
have an account that has Manage Printers permission. Log on as an Administrator.
Notes on the Installation (Network Connection)
If the message “Digital Signature Not Found” or the [Software Installation], [Hardware Installation]
or [Windows can't verify the publisher of this driver software] dialog box appears:
1. Click [Yes], [Continue Anyway] or [Install this driver software anyway] to continue the installation.
1. Start Windows, and insert the provided CD-ROM into the CD-ROM drive.
Quit all other applications currently running.
64
Page 67

Connecting the Computer and Installing the Software (Network Connection)
2
2. Select a language for the interface, and then click [OK].
3. Click [Quick Install for Network].
4. Read the entire license agreement carefully. If you accept its terms, click [I accept the
agreement], and then click [Next >].
5. The search for the network printer starts. If the selection dialog box appears, select the model
of printer you want to use, and then click [Install].
Installation starts.
If the [Software Installation], or [Windows can't verify the publisher of this driver software] dialog box
appears, see “Notes on the Installation”.
If the printer cannot be found and only “Printer Port” appears in the printer selection dialog box, either
the printer's IP address has not been specified or the computer and printer are not on the same network
segment. Before installing the software, check the printer's IP address and the network topology.
Otherwise, select “Printer Port” in the dialog box, and then install the printer driver. If you do this,
SmartDeviceMonitor for Client will not be simultaneously installed, so install it afterwards, and then
configure the port.
If the message “Digital Signature Not Found” or [Hardware Installation] dialog box appears, see
“Notes on the Installation”.
6. Click [Finish].
The printer driver, User Guide, and DeskTopBinder - SmartDeviceMonitor for Client are now installed.
• After inserting the CD-ROM, the [Drivers, Manual & Utilities] dialog box appears. If it does not,
doubleclick the CD-ROM drive icon under [My Computer] or [Explorer], and then double-click
[Setup.exe].
When installation is complete, the User Guide icon appears on your desktop.
•
• If a message prompting you to restart the computer appears, restart the computer.
• Confirm the printer driver is correctly installed by checking the printer's [Power] key is lit, and then
performing a test print.
65
Page 68

2. Preparing for Printing
2
Checking the Printer Status and Settings using
the
Using the List/Test Print menu on the control panel, you can print a configuration page to check whether
the printer is working properly and to ascertain the printer's status and settings.
Config. Page
Printer's Control Panel (List/Test Print Menu)
You can print the current configuration of the printer.
• For details about how to print a configuration page, see p.55 "Printing a Configuration Page".
Interpreting the Configuration Page
System Reference
Information such as the printer's version, attached options, printer language name, and remaining
amount of ink are printed in this area.
[Counter] displayed on the machine's control panel, the “Total Counter” numbers include test
Unlike
patterns printed using “Maintenance”, system configurations printed using “List/Test Print”, and
counter printouts made using “Counter”.
Paper Input
The specified [Tray Priority] setting and the specified settings in the Paper Input Menu, such as the size
and type of paper loaded in each tray, are printed in this area.
Host Interface, Interface Information
The specified settings in the Host Interface Menu are printed in this area.
66
Page 69

Confirming the Connection Method
2
Confirming the Connection Method
This printer supports local and network connection.
Before installing the drivers, check how the printer is connected. Follow the driver installation procedure
that is appropriate to the connection method.
Local Connection
If the printer is connected via USB, install the necessary software by inserting the supplied CD-ROM
into your computer and then clicking [Quick Install for USB].
Installation Key Installed Software
Quick Install for USB • Printer driver
• User Guide
Printer Driver Printer driver
User Guide User Guide
DeskTopBinder - SmartDeviceMonitor for Client DeskTopBinder - SmartDeviceMonitor for Client
Network Connection
the printer is connected via the network, install the necessary software by inserting the supplied CD-
If
ROM into your computer and then clicking [Quick Install for Network], [Printer Driver], and
[DeskTopBinder - SmartDeviceMonitor for Client].
Installation Key Installed Software
Quick Install for Network • Printer driver
User Guide
•
• DeskTopBinder - SmartDeviceMonitor for
Client
Printer Driver Printer driver
User Guide User Guide
DeskTopBinder - SmartDeviceMonitor for Client DeskTopBinder - SmartDeviceMonitor for Client
• Once the settings are complete, the printer becomes ready for use.
67
Page 70

2. Preparing for Printing
2
• With a network connection, you can use the Windows printer port to send print jobs to the printer
directly (peer-to-peer transfer) or use the printer as a network printer and send print jobs to the printer
from a client computer via a print server.
• p.78 "Using the SmartDeviceMonitor for Client Port"
p.82 "Using as the Windows Network Printer"
•
• p.84 "Installing the DeskTopBinder - SmartDeviceMonitor for Client "
• p.64 "Quick Install for Network"
• p.58 "Quick Install for USB"
68
Page 71

BAJ037S
Installing the Printer Driver (USB)
2
Installing the Printer Driver (USB)
This section explains how to install only the printer driver when the printer is connected to a computer via
USB.
If you installed the printer driver by performing Quick Install for USB, there is no need to install it again
here.
install the printer driver under Windows 2000/XP/Vista or Windows Server 2003, you must log
• To
on as a user with administrator rights.
• Do not turn on the power at this point.
The following explanation uses Windows XP as an example. Procedures under other operating systems
may differ.
Screens vary according to the operating environment.
1. Start Windows, and insert the provided CD-ROM into the CD-ROM drive.
Quit all other applications currently running.
When you start Windows, the Add New Hardware Wizard may appear. If this happens, click
[Cancel]. Check again that the power is off, and then proceed to step 2.
After
inserting the CD-ROM, the [Driver, Manual & Utility] dialog box appears. If it does not, doubleclick the CD-ROM drive icon under [My Computer] or [Explorer], and then double-click
[SETUP.EXE].
If the [Driver, Manual & Utility] screen does not appear even when you double-click the
[SETUP.EXE] icon, or if an error occurs during installation, access the CD-ROM drive from [My
Computer] or [Explorer], double-click the [English] icon, and then install the printer driver by following
the instructions that appear on the screen.
2. Select a language for the interface, and then click [OK].
3. Click [Printer Driver].
69
Page 72

BAG052S
2. Preparing for Printing
2
4. Read the entire license agreement carefully. If you accept its terms, click [I accept the
agreement], and then click [Next >].
5. Click [Connected with USB cable], and then click [Next >].
6. Check again that the power of the printer is off, and then click [Next >].
Check that the dialog box below appears.
7. Make sure that the computer and printer are properly connected, and then press the [Power]
key.
Installation starts.
8. Select whether or not to open the Status monitor automatically, and then click [Next >].
9. Check the installation result, and then click [Finish].
• You cannot select [Connected with USB cable] under Windows NT 4.0.
• If
the message “Digital Signature Not Found” or the [Found New Hardware Wizard] or [Hardware
Installation] dialog box appears:
• Click [Yes], [Continue Anyway] or [Install this driver software anyway] to continue the installation.
• If the message prompting you to restart the computer appears, restart the computer.
• Confirm the printer driver is correctly installed by checking that the [Power] key of the printer is lit and
performing a test print.
• To perform a test print, open the printer properties dialog box, click [Print Test Page] on the
[Maintenance] tab.
• To specify a USB port for sharing the printer on a server running Windows Firewall, add the port to
Windows Firewall before using Status Monitor.
1. On Windows Firewall dialog box, click the [Exception] tab, and then select the [File and Print
Sharing] check box.
2. Click [Add Port...], make sure [TCP] is selected, and then enter “55665” in [Port number].
70
Page 73

Installing the Printer Driver (USB)
2
• For details about installing User Guide only, see p.13 "Installing User Guide".
For details about sharing the printer, see p.71 "Sharing the Printer".
•
• p.206 "If a Message Appears during Installation"
• p.170 "If Test Print Fails"
Sharing the Printer
This section explains how to share the printer over a network by connecting it via USB to a computer acting
as a print server.
Setting Up a Server
Follow the procedure below to set up a print server so that the printer can be shared by users.
• For Windows 2000/XP/Vista, Windows Server 2003, and Windows NT 4.0, log on as an
administrator (a user with an administrator right).
Configure a computer connected to the printer as the print server.
The print server is a computer used to manage the shared printer on the network.
1. On the [Start] menu, click [Control Panel].
2. Click [Network and Internet Connections].
3. Click [Network Connections].
4. Click
5. Select the [Client for Microsoft Networks] check box.
6. Click [OK].
7. Install the printer driver.
8. On the [Start] menu, click [Printers and Faxes].
9. Click the icon of the printer, and then click [Sharing...] on the [File] menu.
10. Click [Share this printer], and then enter a name in the [Share name] box.
11. Click [OK].
• Configure a computer connected to the network, where the print server is connected, as a client
[Local Area Connection] to highlight it, and then, in the [File] menu, click [Properties].
computer.
71
Page 74

2. Preparing for Printing
2
• p.72 "Setting Up a Client Computer"
Setting Up a Client Computer
Follow the procedure below to configure a computer as a client computer and connect it to the shared
printer. Make this setting when installing the printer driver from the CD-ROM provided.
• For Windows 2000/XP/Vista, Windows Server 2003, and Windows NT 4.0, log on as an
administrator (a user with an administrator right).
Configure a computer connected to the network where the print server is connected.
1. Start Windows, and then insert the “Driver, Manual & Utility” CD-ROM into the CD-ROM
drive.
Quit all other applications currently running.
When
starting Windows, a wizard for adding new hardware may open. If this happens, click [Cancel].
Check again that the power is off.
2. Select a language for the interface, and then click [OK].
3. Click [Printer Driver].
4. Read the entire license agreement carefully. If you accept its terms, click [I accept the
agreement], and then click [Next >].
5. Click [Connected via LAN].
6. Click [Next >].
7. Click the plus mark next to a printer name.
8. Click [Port:< LPT1: >] under [Printer name:].
9. Click [Add].
10. Click [Network Printer].
11. Click [OK].
12. Select a shared printer.
13. Click [OK].
14. Check that [<\\servername\sharedprintername>] appears after [Port:].
15. Click [Continue].
Installation starts.
16. Select whether or not to open the Status monitor automatically.
17. Click [Next >].
18. Check the installation result, and then click [Finish].
72
Page 75

Installing the Printer Driver (USB)
2
• When the CD-ROM is inserted, the [Driver, Manual & Utility] dialog box appears. If it does not,
double-click the CD-ROM drive icon under [My Computer] or [Explorer], and then double-click
[SETUP.EXE].
If the message prompting you to restart the computer appears, restart the computer.
•
73
Page 76

2. Preparing for Printing
2
Specifying the Interface and Network Settings using the Printer's Control Panel (Host Interface Menu)
In the Host Interface menu, you can make network settings and settings for the computer to printer USB
connection (if used). Settings made using the Host Interface menu remain effective even if you turn the
printer off.
To configure the printer's network settings, use “Network Setup” on the printer's control panel.
I/O Timeout
Specify
time elapses, the printer can receive data from another interface.
If you make the I/O Timeout period too short, timeout might occur while data transfer is in progress.
If this happens, the print job will be interrupted by a new job from another interface.
Default: 15 seconds
Network Setup
You can make network-related settings.
DHCP
IP Address
how long the printer waits for the currently-connected interface to respond. When the specified
• 10 seconds
• 15 seconds
• 20 seconds
• 25 seconds
• 60 seconds
You can specify the DHCP.
• On
• Off
Default: On
You can specify the IP address.
When DHCP is set to on, the IP address cannot be changed. To change it, set DHCP to off.
Contact your network administrator for information about the network configuration.
Default: 0.0.0.0
Subnet Mask
You can specify the subnet mask.
74
Page 77

Specifying the Interface and Network Settings using the Printer's Control Panel (Host Interface Menu)
2
When DHCP is set to on, the subnet mask cannot be changed. To change it, set DHCP to off.
Contact your network administrator for information about the network configuration.
Default: 0.0.0.0
Gateway Address
You can specify the gateway address.
When DHCP is set to on, the gateway address cannot be changed. To change it, set DHCP to
off. Contact your network administrator for information about the network configuration.
Default: 0.0.0.0
Active Protocol
You can select the active protocol.
• TCP/IP
Default: Active
Ethernet Speed
You can select the network speed to operate the printer.
• Auto Select
• 10Mbps Half D.
• 10Mbps Full D.
• 100Mbps Half D.
• 100Mbps Full D.
Default: Auto Select
USB Setting
You can specify the settings related to communication when the computer and printer are connected
via USB. Usually, you do not need to change these settings.
After changing this setting, turn the machine off and then back on.
USB Speed
• Full Speed
• Auto
Default: Auto
Port Setting
• On
• Off
Default: Off
75
Page 78

BAG053S
2. Preparing for Printing
2
Changing the Host Interface Menu
This section gives an example of changing a setting in the Host Interface menu.
1. Press the [Menu] key.
2. Press the [ ] or [ ] key to display [Host Interface], and then press the [#Enter] key.
Menu:
Host Interface
3. Press the [ ] or [ ] key to display [I/O Timeout], and then press the [#Enter] key.
Host Interface:
I/O Timeout
4. Press the [ ] or [ ] key to display [20 seconds], and then press the [#Enter] key.
I/O Timeout:
20 seconds
The [Host Interface] menu appears.
5. Press the [Online] key.
The initial screen appears.
76
Page 79

Windows 98/Me Windows 2000/XP/Vista
Windows Server 2003
Windows NT 4.0
BAJ057S
Installing the Drivers for Network Connection
2
Installing the Drivers for Network Connection
This
section explains how to install the printer driver for a network printer and configure it according to the
printer port.
Using this Printer as the Windows Printing Port
Network connections can be established through Ethernet.
Available ports are determined based on the combination of Windows operating system version and
connection method used.
Windows 98/Me
Connection Method Available Ports
Ethernet SmartDeviceMonitor for Client port
Windows 2000/XP/Vista, Windows Server 2003
Connection Method Available Ports
Ethernet
Windows NT 4.0
SmartDeviceMonitor for Client port
Standard TCP/IP port
LPR port
77
Page 80

Windows 2000/XP/Vista
Windows Server 2003
Windows NT 4.0
Print Server
Windows 98/Me Windows 2000/XP/Vista
Windows Server 2003
Windows NT 4.0
BAJ064S
2. Preparing for Printing
2
Connection Method Available Ports
Ethernet
Using as a Network Printer
This printer can be used as the Windows network printer.
SmartDeviceMonitor for Client port
LPR port
• p.82 "Using as the Windows Network Printer"
Installing the Printer Driver (Network)
Using the SmartDeviceMonitor for Client Port
This section explains how to install the printer driver (TCP/IP) and set up the SmartDeviceMonitor for
Client port.
To use the SmartDeviceMonitor for Client port, you need to install the SmartDeviceMonitor for Client.
• To install this printer driver under Windows 2000/XP Professional/Vista, Windows Server 2003,
Windows NT 4.0, you must have an account that has Manage Printers permission. Log on as an
and
Administrators or Power Users group member.
1. Start Windows, and then insert the provided CD-ROM into the CD-ROM drive.
Quit all applications currently running.
78
Page 81

Installing the Drivers for Network Connection
2
2. Select an interface language, and then click [OK].
3. Click [Printer Driver].
The software license agreement appears in the [<License Agreement>] dialog box.
4. Read the entire license agreement carefully. If you accept its terms, click [I accept the
agreement], and then click [Next >].
5. Click [Connected via LAN].
6. Double-click the printer name to display the printer settings.
The details shown in [Comment:], [Driver:], and [Port:] vary depending on the operating system, printer
model, and port.
7. Click [Port:], and then click [Add].
8. Click [SmartDeviceMonitor], and then click [OK].
9. Click [TCP/IP], and then click [Search].
A list of printers using TCP/IP appears.
10. Select the printer you want to use, and then click [OK].
Only printers that respond to a broadcast from the computer appear. To use a printer not listed here,
click [Specify Address], and then enter the IP address or host name of the printer.
Under Windows 98/Me, you cannot add an IP address partially similar to the one already used. For
example, if “192.168.0.2” is in use, “192.168.0.2xx” cannot be used. Similarly, if “192.168.0.20”
is in use, “192.168.0.2” cannot be used.
11. Check that the port of the selected printer is displayed in [Port:].
12. Select the [Default Printer] check box to configure the printer as default.
13. Click [Continue].
Installation starts.
14. Select whether or not to open the Status monitor automatically.
15. Click [Next >].
16. Click [Finish] in the installation completion dialog box.
A message about restarting the computer may appear. Restart the computer to complete installation.
message about restarting the computer may appear. Restart the computer to complete installation.
• A
• If the message “Digital Signature Not Found” or the [Software Installation], [Hardware Installation]
or [Windows can't verify the publisher of this driver software] dialog box appears:
• Click [Yes], [Continue Anyway] or [Install this driver software anyway] to continue the installation.
79
Page 82

2. Preparing for Printing
2
• A message appears if there is a newer version of the printer driver already installed. If there is, you
cannot install the printer driver using Auto Run. If you still want to install the printer driver, use [Add
Printer]. See p.206 "If a Message Appears during Installation".
Using the Standard TCP/IP Port
This section explains how to install the printer driver (TCP/IP) and set up the Standard TCP/IP Port.
• To install printer driver under Windows 2000/XP Professional/Vista, and Windows Server 2003,
you
must have an account that has Manage Printers permission. Log on as an Administrators or Power
Users group member.
1. Start Windows, and then insert the provided CD-ROM into the CD-ROM drive.
Quit all applications currently running.
2. Select an interface language, and then click [OK].
3. Click [Printer Driver].
The software license agreement appears in the [<License Agreement>] dialog box.
4. Read the entire license agreement carefully. If you accept its terms, click [I accept the
agreement], and then click [Next >].
5. Click [Connected via LAN].
6. Double-click the printer name to display the printer settings.
The details shown in [Comment:], [Driver:], and [Port:] vary depending on the operating system, printer
model, and port.
7. Click [Port:], and then click [Add].
8. Click [Standard TCP/IP], and then click [OK].
Configure the Standard TCP/IP port settings, and then see Windows Help if [Standard TCP/IP Port]
does not appear.
9. Click [Next >] in the [Add Standard TCP/IP Printer Port Wizard] dialog box.
10. Enter the printer name or IP address in the [Printer Name or IP Address] box.
The [Port Name] text box automatically obtains a port name. Change this name if necessary.
When screen for Device selection appears, select “RICOH Network Printer Driver C Model”.
11. Click [Finish] in the [Add Standard TCP/IP Printer Port Wizard] dialog box.
The installation start dialog box reappears.
12. Check that the port of the selected printer is displayed in [Port:].
80
Page 83

Installing the Drivers for Network Connection
2
13. Configure the default printer as necessary.
14. Click [Continue].
The printer driver installation starts.
15. Select whether or not to open the Status monitor automatically.
16. Click [Next >].
17. Click [Finish] in the installation completion dialog box.
A message about restarting the computer may appear. Restart the computer to complete installation.
• If the message “Digital Signature Not Found” or the [Software Installation], [Hardware Installation]
or [Windows can't verify the publisher of this driver software] dialog box appears:
• Click
• A message about restarting the computer may appear. Restart the computer to complete installation.
• A message appears if there is a newer version of the printer driver already installed. If there is, you
cannot install the printer driver using Auto Run. If you still want to install the printer driver, use [Add
Printer]. See p.206 "If a Message Appears during Installation".
[Yes], [Continue Anyway] or [Install this driver software anyway] to continue the installation.
Using the LPR Port
This section explains how to install the printer driver (TCP/IP) and set up the LPR Port.
• To install this printer driver under Windows 2000/XP Professional/Vista, Windows Server 2003,
and Windows NT 4.0, you must have an account that has Manage Printers permission. Log on as an
Administrators or Power Users group member.
1. Start Windows, and then insert the provided CD-ROM into the CD-ROM drive.
Quit all applications currently running.
2. Select an interface language, and then click [OK].
3. Click [Printer Driver].
The software license agreement appears in the [<License Agreement>] dialog box.
4. Read the entire license agreement carefully. If you accept its terms, click [I accept the
agreement], and then click [Next >].
5. Click [Connected via LAN].
6. Double-click the printer name to display the printer settings.
The details shown in [Comment:], [Driver:], and [Port:] vary depending on the operating system, printer
model, and port.
81
Page 84

2. Preparing for Printing
2
7. Click [Port:], and then click [Add].
8. Click [LPR Port], and then click [OK].
If [LPR Port] does not appear, see Windows Help and install it.
9. Enter the printer's IP address in the [Name or address of server providing lpd] box.
10. Enter “lp” in the [Name or address of server providing lpd] box, and then click [OK].
The port is added.
11. Check that the port of the selected printer is displayed in [Port:].
12. Configure the default printer as necessary.
13. Click [Continue].
The printer driver installation starts
14. Select whether or not to open the Status monitor automatically.
15. Click [Next >].
16. Click [Finish] in the installation completion dialog box.
• If the message “Digital Signature Not Found” or the [Software Installation], [Hardware Installation]
or [Windows can't verify the publisher of this driver software] dialog box appears:
• Click
• A message about restarting the computer may appear. Restart the computer to complete installation.
• A message appears if there is a newer version of the printer driver already installed. If there is, you
cannot install the printer driver using Auto Run. If you still want to install the printer driver, use [Add
Printer]. See p.206 "If a Message Appears during Installation".
[Yes], [Continue Anyway] or [Install this driver software anyway] to continue the installation.
Using as the Windows Network Printer
This section assumes that the client has already been configured to communicate with a Windows 2000/
XP/Vista,
before the client is set up and configured correctly.
To use the print server, install the printer driver by selecting “Network printer server”, and then select the
Windows 2000/XP/Vista, Windows Server 2003, or Windows NT 4.0 shared printer.
• To install printer driver under Windows 2000/XP Professional/Vista, Windows Server 2003, and
Windows Server 2003, or Windows NT 4.0 print server. Do not begin the following procedure
Windows NT 4.0, you must have an account that has Manage Printers permission. For this, log on as
an Administrators or Power Users group member.
• If you print with a print server connected to the printer using the SmartDeviceMonitor port, Recovery
Printing and Parallel Printing cannot be used from the client.
82
Page 85

Installing the Drivers for Network Connection
2
• If you print with a Windows XP/Vista or Windows Server 2003 print server, notification functions of
SmartDeviceMonitor may not be used with the client.
• If you print with a Windows NT 4.0 print server, install the printer driver before you connect the print
server to the printer.
1. Start Windows, and then insert the provided CD-ROM into the CD-ROM drive.
Quit all applications currently running.
2. Select an interface language, and then click [OK].
3. Click [Printer Driver].
The software license agreement appears in the [<License Agreement>] dialog box.
4. Read the entire license agreement carefully. If you accept its terms, click [I accept the
agreement], and then click [Next >].
5. Click [Connected via LAN].
6. Select the [Printer Name:] check box to select the printer models you want to use.
The printer name can be changed in the [Change settings for 'Printer Name'] box.
7. Double-click the printer name to display the printer settings.
The details shown in [Comment:], [Driver:], and [Port:] vary depending on the operating system, printer
model, and port.
8. Click [Port:], and then click [Add].
9. Click [Network Printer], and then click [OK].
10. Double-click the computer name you want to use as a print server in the [Browse for Printer]
window.
11. Select the printer you want to use, and then click [OK].
12. Check that the port of the selected printer is displayed in [Port:].
13. Configure the user code as necessary.
For an RPCS raster printer driver, a user code can be set after the printer driver installation. For
information about user code, see the printer driver Help.
14. Select the [Default Printer] check box to configure the printer as default.
15. Click [Continue].
The printer driver installation starts.
16. Click [Finish] in the installation completion dialog box.
the message “Digital Signature Not Found” or the [Software Installation] , [Hardware Installation]
• If
or [Windows can't verify the publisher of this driver software] dialog box appears:
• Click [Yes], [Continue Anyway] or [Install this driver software anyway] to continue the installation.
83
Page 86

2. Preparing for Printing
2
• A message about restarting the computer may appear. Restart the computer to complete installation.
• A message appears if there is a newer version of the printer driver already installed. If there is, you
cannot install the printer driver using Auto Run. If you still want to install the printer driver, use [Add
Printer]. See p.206 "If a Message Appears during Installation".
p.71 "Setting Up a Server"
•
Installing the DeskTopBinder - SmartDeviceMonitor for Client
Follows the procedure below to install the Installing DeskTopBinder - SmartDeviceMonitor for Client.
• To install SmartDeviceMonitor for Client under Windows 2000/XP Professional/Vista, Windows
Server
2003, and Windows NT 4.0, you must have an account that has Manage Printers permission.
Log on as an Administrator.
• Install SmartDeviceMonitor for Client before installing the printer driver when using the
SmartDeviceMonitor for Client port.
You can install SmartDeviceMonitor for Client in either of the following two ways:
Full install
Installs all modules.
Custom Install
You can select which modules to install.
This section explains the procedure for Full install.
1. Start Windows, and then insert the provided CD-ROM into the CD-ROM drive.
Quit all applications currently running.
2. Select an interface language, and then click [OK].
3. Click [DeskTopBinder - SmartDeviceMonitor for Client].
4. Select the language to be used for installation, and then click [Next >].
5. Click [Next >].
6. The software license agreement appears in the [<License Agreement>] dialog box. After
reading through its contents, click [Yes] to accept it.
7. Click [Full install].
8. Select the folder in which you want to install the files, and then click [Next >].
9. Register the Program folder.
10. Click [Next >].
84
Page 87

Installing the Drivers for Network Connection
2
11. Check the specified setting, and then click [Next >].
12. Click [Complete].
If you are required to restart the computer after installing SmartDeviceMonitor for Client, restart the
computer.
• After inserting the CD-ROM, the “Drivers, Manual & Utilities” dialog box appears. If it does not,
doubleclick the CD-ROM drive icon under [My Computer] or [Explorer], and then double click
[Setup.exe].
85
Page 88

2. Preparing for Printing
2
Paper
This section explains the available paper types and how to load paper.
Compatible Paper Types
You can use various types of paper.
•
Plain paper
This paper is normally used for copying and printing. Unlike inkjet plain paper or glossy paper, it is
uncoated.
• Inkjet plain paper
This extra-white plain paper makes the printed colors appear more vivid. Since it does not have an
ink-absorbent coating, you can write on it and use it for photocopying, just like regular plain paper.
• Glossy paper
This machine prints best on glossy paper for laser. For details the types of glossy paper, contact your
sales or service representative.
• Envelopes
For details about the types of envelope that can be used, see Paper Handling Precautions.
• Thick paper
For details about the types of thick paper that can be used, see Paper Handling Precautions.
• All types of paper besides thick paper can be loaded in tray 1.
• p.90 "Paper Handling Precautions"
Loadable Paper Sizes and Quantities
You can load in each tray the paper of the following size and number.
Tray 1
Type Size Paper capacity
Plain / Inkjet Plain Paper A3 (297 × 420 mm)
A4 (210 × 297 mm)
A5 (148 × 210 mm)
Maximum paper capacity: 250
sheets (A3/11" × 17" (90 g/
m2
(24 lb.) or more); 200 sheets)
86
Page 89

Type Size Paper capacity
2
Paper
A6 (105 × 148 mm)
B4 (257 × 364 mm)
B5 JIS (182 × 257 mm)
11" × 17"
Letter (81/2" × 11")
Legal (81/2" × 14")
81/2" × 51/2"
Executive (71/4" × 101/2")
8" × 13"
81/2" × 13"
81/4" × 13"
8K
16K
Custom paper sizes
Vertical: 139.7-432.0 mm
(5.50-17.01 inch), Horizontal:
88.0-297.0 mm (3.46-11.69
inch)
Maximum paper output
capacity: 150 sheets
Glossy Paper A3 (297×420 mm)
A4 (210 × 297 mm)
Envelope Com10 Envelope (41/8" × 91/
")
2
Monarch Envelope (37/8" ×
71/2")
C6 Envelope (114 × 162 mm)
C5 Envelope (162 × 229 mm)
DL Envelope (110 × 220 mm)
Tray 2
Maximum paper capacity: 250
sheets (A3; 200 sheets)
Maximum
Maximum paper capacity: 20
sheets
Maximum paper output
capacity: 20 sheets
paper output: 1 sheets
87
Page 90

2. Preparing for Printing
2
Type Size Paper capacity
Plain / Inkjet Plain Paper A3 (297 × 420 mm)
A4 (210 × 297 mm)
B4 (257 × 364 mm)
B5 JIS (182 × 257 mm)
11" × 17"
Letter (81/2" × 11")
Legal (81/2" × 14")
Executive (71/4" × 101/2")
8" × 13"
81/2" × 13"
81/4" × 13"
8K
Custom paper sizes
Vertical: 210.0-432.0 mm
(8.27-17.01 inch), Horizontal:
88.0-297.0 mm (3.46-11.69
inch)
Maximum paper capacity: 250
sheets (A3/11" × 17" (90 g/
m2 (24 lb.) or more); 200 sheets)
Maximum paper output
capacity: 150 sheets
88
Glossy paper A3 (297 × 420 mm)
A4 (210 × 297 mm)
Bypass Tray Unit
Type Size Paper capacity
Plain / Inkjet Plain Paper A3 (297 × 420 mm)
A4 (210 × 297 mm)
A5 (148 × 210 mm)
A6 (105 × 148 mm)
B4 (257 × 364 mm)
B5 JIS (182 × 257 mm)
11" × 17"
Letter (81/2" × 11")
Legal (81/2" × 14")
Maximum paper capacity: 250
sheets (A3; 200 sheets)
Maximum
Maximum paper capacity: 100
sheets (A3/11" × 17"; 10
sheets)
Maximum paper output
capacity: 150 sheets
paper output: 1 sheets
Page 91

Type Size Paper capacity
2
320 × 450 mm
12" × 18"
81/2" × 51/2"
Executive (71/4" × 101/2")
8" × 13"
81/2" × 13"
81/4" × 13"
8K
16K
Custom paper sizes
Vertical: 127.0-1295.4 mm
(5.00-51.00 inch), Horizontal:
55.0-330.0 mm (2.17-12.99
inch)
Paper
Glossy Paper A3 (297 × 420 mm)
A4 (210 × 297 mm )
Envelope Com10 Envelope (41/8" × 91/
")
2
Monarch Envelope (37/8" ×
71/2")
C6 Envelope (114 × 162 mm)
C5 Envelope (162 × 229 mm)
DL Envelope (110 × 220 mm)
Thick Maximum paper capacity: 20
Maximum paper capacity: 100
sheets (A3; 10 sheets)
Maximum
Maximum paper capacity: 10
sheets
Maximum paper output
capacity: 20 sheets
sheets
Maximum paper output
capacity: 20 sheets
paper output: 1 sheets
• Thick paper: 157 g/m2 (42 lb.) or more
89
Page 92

BAJ042S
ZDJY202J
2. Preparing for Printing
2
Paper Handling Precautions
To ensure optimum print results, take care when handling paper before and after printing.
Loading Precautions
To ensure correct printing, handle the paper carefully.
Cautions when Loading Paper
• Pull the tray completely out before loading it with paper.
• Load only supported paper in the paper tray.
• Load paper with the print side face down in the paper trays.
• Load paper with the paper grain parallel to the feed direction.
• Do not load paper of different types at the same time.
• To load a different type of paper than that already loaded, first remove all currently loaded paper.
• Do not stack paper over the limit mark.
90
• Curled paper may jam. Straighten any curls before loading.
• Before loading envelopes, make sure their edges are sharply creased by rubbing the edges with a
pen or similar object.
Page 93

BAH001S
12
AKR150S
Paper
2
Correct Orientation of Preprinted Paper When Loaded in the Tray 1 or Tray 2 (optional)
Load paper print side down, shorter edge pointing in the paper feed direction.
Set paper according to the orientation of the print image, as follows.
Correct Orientation of Preprinted Paper When Loaded in the Bypass Tray
Load paper print side up, shorter edge pointing in the paper feed direction.
Set paper according to the orientation of the print image, as follows.
1. To print over a portrait image:
Load paper so that its top edge is pointing in the paper feed direction.
91
Page 94

2. Preparing for Printing
2
2. To print over a landscape image:
Load paper so that its right edge is pointing in the paper feed direction.
Paper Storage Precautions
This section gives cautions on storing paper.
If stored under adverse conditions, even paper suitable for printing can cause paper jams, poor print
quality, or machine malfunctions. When you store paper, keep the following points in mind:
• Do not store paper in humid places.
• Do not store paper in direct sunlight.
• Store paper flat.
• Store unused paper in the original package.
Paper Type Precautions
Plain paper
•
Use the bypass tray to print on thick paper (157 g/m2 (42 lb.) or more).
• The only type of A6 (105 × 148 mm (4.2 × 5.9 inches)) paper that can be loaded in tray 1 is
that of 80g/m2 (21.5 lb.).
• After printing, some types of paper take longer than others to dry. With duplex printing, the ink
may smear or rub off. Using the printer driver, specify how long to wait for the prints to dry
between printing each side of a duplex sheet. For details, see the printer driver Help.
Inkjet plain paper
• When printing on inkjet plain paper, in the printer properties dialog box, click [Inkjet Plain Paper].
This allows printing at higher quality.
• In the printer properties dialog box, when [Inkjet Plain Paper] is selected, only one-sided printing
is possible. To print on both sides of a sheet, click [Plain].
• Use as soon as possible after opening the package.
Glossy paper
• The time it takes for the ink to dry depends on the kind of printed image and the environmental
conditions.
• If the temperature exceeds 25°C or the relative humidity exceeds 50%, problems with continuous
feeding of glossy paper might occur. If this is the case, feed the sheets one by one.
• If you load multiple sheets of glossy paper and they do not feed in properly, feed them one by
one.
92
Page 95

• Ink smearing can be caused by environmental conditions (such as high humidity) and the type
2
of image being printed (such as ink-heavy images).If smearing occurs, set [Print Quality] to
[Quality priority] or [Speed priority]. This may stop the ink smearing.
• Roller marks might appear on printed images.
• If paper is fed from the bypass tray, roller marks might appear on the printed image.
• To ensure water and oil resistance, leave the printed sheet to dry for about a day.
• Some print images can cause the paper to curl, which creates patchy print. If this happens, set
[Print Quality] to [Quality priority].
• Only one sided printing is possible.
• When using these sheets, see the instructions supplied with them.
Envelopes
• Up to 20 envelopes can be loaded in tray 1.
• If the envelopes bulge, flatten them.
• Load envelopes carefully, because the printable area depends on the orientation.
• Set the lever to the rear position before printing.
Paper
Thick paper
• Thick paper is heavier than 157 g/m2 (42 lb.).
• You can insert paper with weights up to 255 g/m2 (60 lb.) into the bypass tray.
• Insert paper with the print side face up into the bypass tray.
Cautions to Observe After Printing
Depending on the paper type, the ink may take a while to dry. Before handling, make sure printed
sheets have fully dried. otherwise, the ink may smudge.
• The ink may smear depending on the type of image. If this happens, set the envelope selector to the
rear position .
Non-compatible Paper
Check if the paper is compatible.
Do not use paper that is:
wrinkled, folded, or damaged
•
• wavy at the ends
• curled
• absorbent
• dry and conducive to static buildup
93
Page 96

a
b
c
c
2. Preparing for Printing
2
• already printed on (such as the back of preprinted paper)
• preprinted (unless specified)
• heat sensitive/non-carbon
• too thick or thin
• pre-stitched
• glued or tacked
• stapled or clipped together
• dark in places
• irregular in length and proportion
• Even if compatible paper types are used, print quality may be lower than usual or paper jams may
occur if the paper was improperly stored.
Printable Area
Printable and unprintable areas
a. Output Direction
b. Printable Area
c. 3 mm (0.12 inches)
Print images wider than A3 (297 mm) may be cropped.
94
Page 97

When printing on envelopes, the following print area limitations apply.
c
d
e
a
b
c
d
b
a
e
2
a. Output Direction
b. Printable Area
c. 8 mm (0.4 inches)
Paper
d. 38 mm (1.5 inches)
e. 3 mm (0.2 inches)
95
Page 98

2. Preparing for Printing
2
Specifying the Paper Settings using the Printer's Control Panel (Paper Input Menu)
This section explains the settings you can specify in the Paper Input menu, such as those for the size and
type of the paper loaded in each tray.
The very first time you load paper or anytime you change to a different size or type of paper, you must
specify the paper settings using “Paper Input Menu” on the printer's control panel.
Tray Paper Size
You can specify the size of the paper loaded in the paper feed tray.
Paper Type
You can specify the type of the paper loaded in the paper feed tray.
Aut.Tray Select
You
can specify whether or not to automatically select the tray according to the paper size and paper
type.
Tray Priority
You can specify the prioritized paper feed tray. This setting is factory-preset to “tray 1”.
• “Aut.Tray Select” can be specified only if the optional bypass tray is attached.
If you select “Aut.Tray Select”, the tray is automatically selected according to the paper size set for
•
the trays in “Tray Paper Size”.
• p.86 "Compatible Paper Types"
•
p.86 "Loadable Paper Sizes and Quantities"
Changing the Paper Input Menu
The following procedure is an example of setting the Tray Paper Size.
96
Page 99

BAG053S
Specifying the Paper Settings using the Printer's Control Panel (Paper Input Menu)
2
1. On the control panel, press the [Menu] key.
2. Press the [ ] or [ ] key to display [Paper Input], and then press the [#Enter] key.
Menu:
Paper Input
3. Press the [ ] or [ ] key to display [Tray Paper Size], and then press the [#Enter] key.
Paper Input:
Tray Paper Size
4. Press the [ ] or [ ] key to display the tray you want to specify, and then press the [#Enter]
key.
Tray Paper Size:
Tray 1
5. Press
6. Press the [Online] key.
the [
] or [ ] key to display appropriate paper size, and then press the [#Enter] key.
Tray 1:
*A4 (297 x 210)
The setting is applied, and then, the Paper Input menu reappears.
The initial screen appears.
97
Page 100

2. Preparing for Printing
2
98
 Loading...