

Ricoh GR LENS A12, GR LENS A12 28mm F2.5 Instruction Manual

GR LENS A12 28mm F2.5
Instruction Manual
The serial number may be found on the bottom of the lens.
2
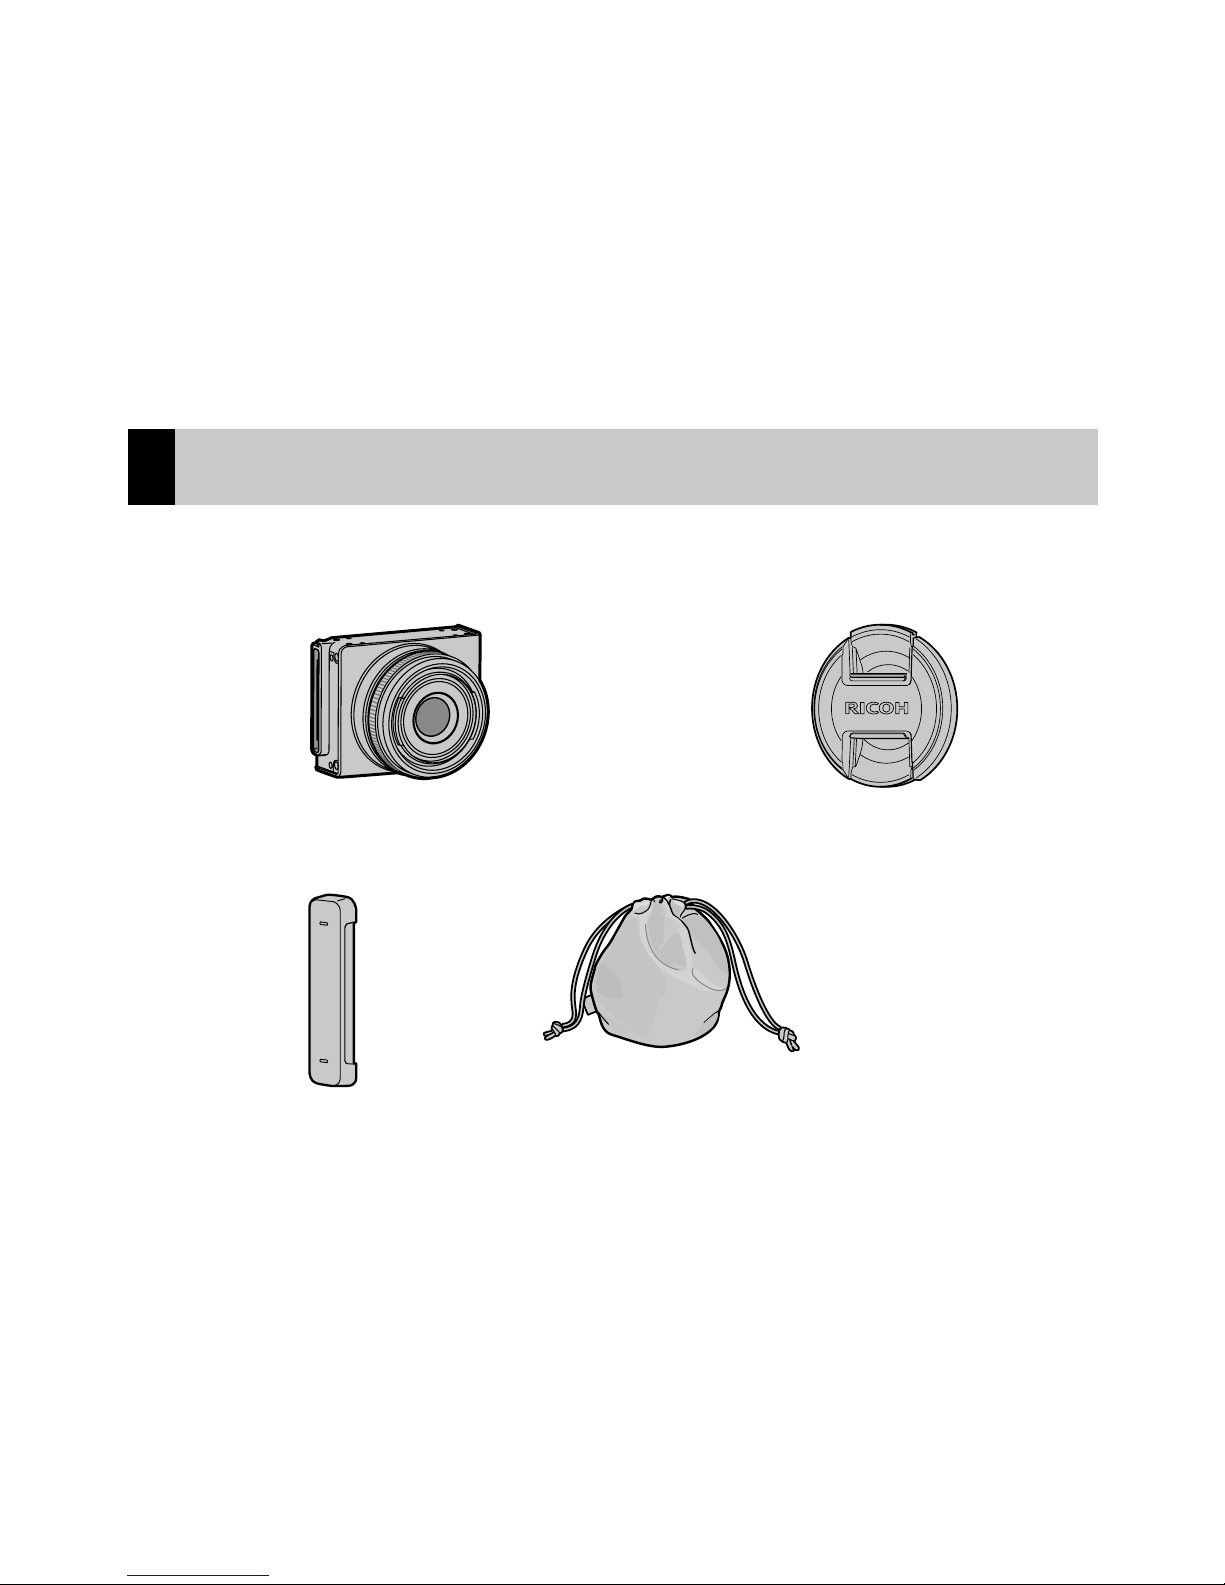
Package Contents
Before using your Ricoh lens, conrm that the package contains the items
listed below.
Camera unit
The serial number may be found on the bottom.
Lens cap
Comes attached to the camera unit.
Instruction manual
(this manual)
Warranty
Connector cap
Comes attached to the camera unit.
Soft case

3
Introduction
To use this lens, you need to attach it to a compatible camera body.
Refer to the Camera Body User Guide for details about how to operate shooting and
playback functions and change settings and to read important precautions for use. This
instruction manual will explain functions and operating procedures that are available
only when this camera unit is used with a compatible camera body. See also the GXR
Camera Body User Guide.
To make the best use of this product’s functions, read this manual thoroughly before
use. Please keep this manual handy for ease of reference.
Ricoh Co., Ltd.

4
Safety precautions Read all safety precautions thoroughly to ensure safe use.
Test shots Take test shots to ensure that the camera is working properly
before taking photos on important occasions.
Copyright Reproduction or alteration of copyrighted documents, magazines,
and other materials, other than for personal, home, or other
similarly limited purposes, without the consent of the copyright
holder, is prohibited.
Exemption from liability Ricoh Co., Ltd. assumes no liability for failure to record or display
images as a result of product malfunction.
Warranty The warranty supplied with this product is only valid within the
country of purchase. The manufacturer assumes no responsibility
for servicing the product in other countries or bearing any
expense thereby incurred.
Radio interference Operating this product in the vicinity of other electronic
equipment may adversely aect both the camera and the other
device. Interference is particularly likely if the camera is used
in close proximity to a radio or television. This can be resolved
by moving the camera as far as possible from the other device,
reorienting the radio or television antenna, or plugging the radio
or television into a dierent outlet.

5
© 2010 RICOH CO., LTD. All rights reserved. This publication may not be reproduced in whole or in part without
Ricoh’s express written permission. Ricoh reserves the right to change the contents of this document at any time
without prior notice.
Every eort has been made to ensure the accuracy of the information in this document. Should you nevertheless
notice any errors or omissions, we would be grateful if you would notify us at the address listed on the back cover
of this booklet.
6
Safety Precautions
Warning Symbols
Various symbols are used throughout this instruction manual and on the
product to prevent physical harm to you or other people and damage to
property. The symbols and their meanings are explained below.
Danger
This symbol indicates matters that may lead to imminent risk of
death or serious injury if ignored or incorrectly handled.
Warning
This symbol indicates matters that may lead to death or serious
injury if ignored or incorrectly handled.
Caution
This symbol indicates matters that may lead to injury or physical
damage if ignored or incorrectly handled.
7
Sample Warnings
The symbol alerts you to actions that must be performed.
The symbol alerts you to prohibited actions.
The symbol may be combined with other symbols to indicate that a specic action
is prohibited.
Examples
= Do not touch = Do not disassemble
Observe the following precautions to ensure safe use of this unit.
Danger
Do not attempt to disassemble, repair or alter the equipment yourself. The highvoltage circuitry in the equipment poses signicant electrical hazard.
8
Warning
Keep the equipment out of the reach of children.
Do not touch the internal components of the equipment if they become exposed as
a result of being dropped or damaged. The high-voltage circuitry in the equipment
could lead to an electric shock. Remove the battery as soon as possible, being careful
to avoid electric shocks or burns. Take the equipment to your nearest dealer or service
center if it is damaged.
Do not use the equipment in wet areas as this could result in re or electric shock.
Do not use the equipment near ammable gases, gasoline, benzene, thinner or
similar substances to avoid the risk of explosion, re or burns.
•
Do not use the equipment in locations where usage is restricted or prohibited as
this may lead to disasters or accidents.

9
Caution
Do not allow the equipment to get wet. In addition, do not operate it with wet hands.
Both pose the risk of electric shock.
Safety Precautions
for Accessories
When using optional products, carefully read the instructions
provided with the product before using that product.

10
Package Contents ................................................................................................................. 2
Introduction ............................................................................................................................ 3
Safety Precautions ................................................................................................................ 6
Parts of the Lens .................................................................................................13
Upgrading the Product .....................................................................................
14
Updating the camera’s rmware ...................................................................................14
Shooting ...............................................................................................................17
Macro Functions..................................................................................................................17
Mode P: Program Shift ......................................................................................................18
Mode M: Manual Exposure ..............................................................................................20
Playback ...............................................................................................................21
Camera Unit Information Display ................................................................................. 21
Table of Contents

11
Settings ................................................................................................................22
[Picture Quality/Size] Setting (Shooting Menu) ......................................................22
Photographs ............................................................................................................... 23
Movies ...........................................................................................................................24
[Noise Reduction] Setting (Shooting Menu) .............................................................25
[ISO Setting] Setting (Shooting Menu) .......................................................................26
[Enlrg Display] (Shooting Menu) ...................................................................................27
[Reg. My Settings] (Key Custom Options) ..................................................................28
[Shutter Button Conrmation] (Key Custom Settings Tab Menu) .....................28
ADJ. Lever Settings (Key Custom Settings Tab Menu) ...........................................29
Fn1/Fn2 Buttons Settings (Key Custom Settings Tab Menu) ..............................29
[Delete My Settings] (Key Custom Settings Tab Menu) ........................................30
[Restore Defaults] (Key Custom Settings Tab Menu) .............................................30
[Digital Zoom Image] Setting (Setup Tab) .................................................................31
[Focus Ring Settings] (Setup Tab) .................................................................................32

12
[Spot AF Area Setting] (Setup Tab Menu) ..................................................................33
Specications ......................................................................................................34
Internal Memory/Memory Card Capacity ..................................................................40
Appendices ..........................................................................................................43
Optional Accessories .........................................................................................................43
Precautions for Use ............................................................................................................44
Equipment Care and Storage .........................................................................................46
Warranty and Servicing .................................................................................................... 48
13
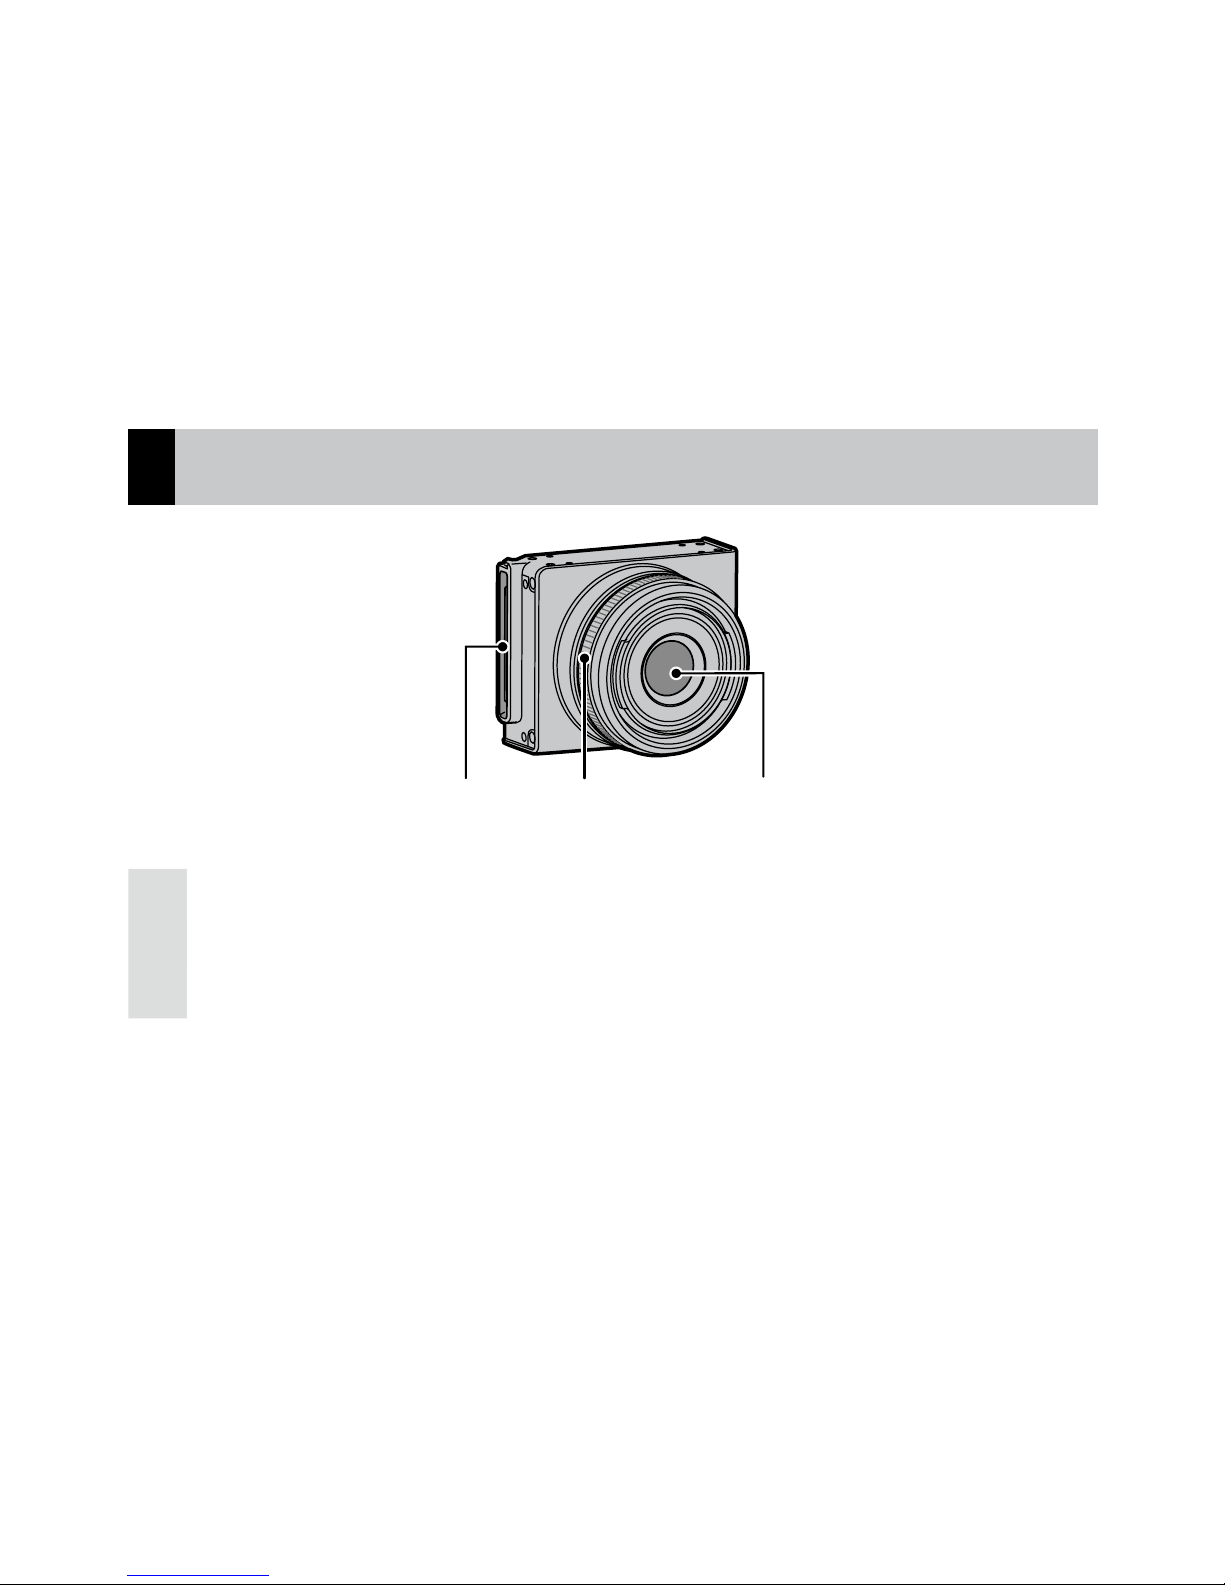
Parts of the Lens
1 2 3
1 Connector
2 Focus ring
3 Lens

14
Upgrading the Product
Updating the camera’s rmware
When you rst attach the camera unit to the camera body, the version
update function will start automatically if the rmware of the camera’s
body need to be updated. In such case, update the rmware of the camera’s
body using the following procedure.
If the rmware’s version is already up to date, the version update function
will not start and you can use the lens right away.
1 Check that the camera is turned o and attach the camera unit to the
camera body.
• For details about how to attach the camera unit, refer to the Camera Body
User Guide.

15
2 Turn on the camera.
• A conrmation message about updating the rmware appears.
3 Press the Fn1/Fn2 buttons to select [Yes] and then press the MENU/
OK button.
• The rmware’s update begins and the following messages appear on the
picture display.
[Checking rewrite le]
[Rewriting program]
The camera will automatically turn o and then back on. After the camera
restarts, the rmware’s version screen will be displayed and the update will
be completed.

16
Note --------------------------------------------------------------------------------------
• To conrm the rmware’s version, select [Firmware Version] in the setup
menu. Alternatively, with the camera o, keep the 6 (Play) button
pressed for more than 1 second while holding the – button pressed
down. The rmware’s version will appear on the picture display for about
20 seconds.
• For the latest information on rmware updates, see the Ricoh Web site
(http://www.ricoh.com/r_dc/). You can download the latest rmware
updates to upgrade your equipment.
 Loading...