

Page 1

FACSIMILE FEATURES
MANUAL
Page 2

INTRODUCTION
Your facsimile machine is equipped with a wide range of labor-saving and costsaving features. This manual explains each of these features, and how you can
put them to use.
The procedures for operating the features specific to your model can be found
in the Operator’s Manual. Please use this manual in conjunction with the Operator’s Manual to get the most out of your fax machine.
Section 1 (Routine Operation) - This section describes the features and
❐
settings that you will normally be using every day.
Section 2 (Advanced Features) - This section explains how to take advan-
❐
tage of the special features of your fax machine.
Section 3 (Programming) - This section explains all the programmable fea-
❐
tures of your fax machine. It also advises you on what items you need to program after you have just set up your machine for the first time.
Section 4 (Reports) - This section explains the reports that the machine
❐
generates.
Section 5 (Networking Features) - This section explains how you can set
❐
up complex fax networks for distribution of fax messages over analog and
digital networks.
Section 6 (Group 4 Features) - This section explains the extra features
❐
that are available if you install a Group 4 kit in your fax machine. Group 4
kits are not available for all models.
Note that your fax machine may not be equipped with all the features that are
described in this manual. Refer to the Operator’s Manual for a list of the features that your machine has.
Page 3

SECTION 1. ROUTINE O PERATION
1. TRANSMISSION
1-1. Routine Transmission
There are two ways to send a fax message.
Immediate Transmission
❐
Memory Trans mission
❐
Error Correction Mode (ECM) can be used with both of these modes.
Immediate Transmission
Immediate Transmission is convenient when:
You wish to send a message immediately
❐
You quickly wish to check whether successful connection has been made
❐
with the other party
The machine dials immediately after you press Start (or at the specified later
time, if you used a time-delay feature like Send Later). The message is
scanned and transmitted page by page without being stored in memory.
1-1
Page 4
SECTION 1 ROUTINE OPERATION
Memory Transmission
Memory Transmission is convenient because:
Fax messages can be scanned much more quickly (you can take your docu-
❐
ment away from the fax machine without waiting too long)
While your document is being sent, another user can operate the machine
❐
using the Dual Access or Transmission Reserve feature (people will not
have to wait by the fax machine too long)
After you press Start, the machine doesn’t dial until all the pages of your fax
message have been stored in the memory.
Cross-references
Send Later:
Dual Access:
Transmission Reserve:
page 1-7. ECM: ☞ page 2-34.
☞
page 2-43.
☞
page 2-43.
☞
1-2
Page 5

SECTION 1 ROUTINE OPERATION
1-2. Contrast, Resolution, and Halftone Modes
You may wish to send many different types of fax message. Some of these may
be difficult to reproduce at the other end. However, your machine has three settings that you can adjust to help you transmit your document with the best possible image quality.
If you are not sure whether your settings are suitable, make a copy of the
document using these settings. The printout shows how the fax message
will look when it is printed at the other end.
1-3
Page 6

SECTION 1 ROUTINE OPERATION
Contrast
The text and diagrams in your document must stand out clearly from the paper
they are written on. If your document has a darker background than normal (for
example, a newspaper clipping), or if the writing is faint, adjust the contrast.
Resolution
If your document contains fine print or detailed diagrams, use a higher resolution setting.
Halftone
Without Halftone
If your document contains a photograph, or diagrams with complex shading patterns or grays, switch Halftone Mode on to achieve optimum image quality.
Notes:
The settings available differ from model to model. For details about the settings
that your machine has, refer to your machine’s Operator’s Manual.
Some models have two types of Halftone, the Dither Process, and
❐
the higher quality Error Diffusion Process.
Halftone Mode slows down the transmission speed, and may in-
❐
crease your communication costs, especially if you use the Error Diffusion process. Higher resolutions also do this. This is because
these settings create larger files that contain more information.
Messages are transmitted the fastest if you use the standard resolu-
❐
tion setting, and keep Halftone off.
1-4
With Halftone
Page 7

SECTION 1 ROUTINE OPERATION
1-3. Convenient Dialing Methods
In addition to dialing the full number on the fax machine’s keypad, you can use
Speed Dial, Quick Dial or Groups.
These features allow you to store telephone numbers in your machine’s memory. (A stored number will remain in the memory, and you can use it as many
times as you wish without having to reprogram it.)
Then, when you need to dial a number, just call it up (for example, by pressing
the required Quick Dial Key).
Each of the features is briefly described in this section.
Quick Dial and Speed Dial
Quick Dial is also known as One-touch Dial.
Speed Dial is also known as Shorthand Dial.
Quick Dial and Speed Dial are very convenient for dialing numbers that you
often call, especially if these numbers are very long (like international numbers).
These features greatly improve the convenience of operating your machine.
However, first, you have to program the telephone numbers that you need into
the Quick Dial Keys and Speed Dial Codes in your machine.
After programming your Quick Dials and Speed Dials, you can dial a telephone
number with very few keystrokes.
For Quick Dial, just press a Quick Dial Key then press Start.
❐
For Speed Dial, press the key on the operation panel labeled "Speed Dial"
❐
(or "Shorthand"), enter a two-digit Speed Dial Code, then press Start.
You can also access Speed Dial codes using the Telephone Directory feature (
page 2-11)
☞
1-5
Page 8

SECTION 1 ROUTINE OPERATION
The number of Quick Dial Keys and Speed Dial Codes that you can program differs from model to model; refer to your machine’s Operator’s Manual.
- Labeling -
In some machines, you can store the name of the other party as a quick reference (this name will be displayed on the operation panel before you press the
Start key, so you can check whether you have selected the correct number).
This label is used with features such as Telephone Directory or Label Insertion.
In other machines, you have to attach labels to the operation panel, or keep a
separate list.
Cross-references
Telephone Directory:
Label Insertion:
Groups
If you frequently send the same message at the same time to more than one
place, program these telephone numbers into a group. Then you can send the
messages to all the addresses in that group with just a few keystrokes.
☞
page 2-11.
☞
page 2-25.
You can also program a name for that group (for example, "Branch Offices"),
which will be displayed before you press the Start key. This helps you to check
whether you selected the correct group.
Groups can be used with the following features.
Broadcasting; ☞ page 2-1.
❐
Transfer Request (in some models); ☞ page 2-6.
❐
Polling Reception; ☞ page 2-10.
❐
CAUTION
There are limits on the number of addresses that can be dialed with each
of these features. Do not store more numbers in the group than the
capacity of the feature that you plan to use it with. See the machine’s
Operator’s Manual for details on these limits.
1-6
Page 9
SECTION 1 ROUTINE OPERATION
1-4. Optional Features for Routine Transmission
When you make a routine transmission, you can access a few optional features. See your Operator’s Manual for details.
Send Later
Using this feature, you can instruct the machine to delay transmission of your
fax message until a later time, which you specify. This allows you to take advantage of off-peak telephone line charges without having to be by the machine at
the time.
CAUTION
If your machine’s memory is full, or if i t has no memory, you will have to
keep the message in the document feeder. This means that nobody can
use the document feeder, unless they take out your message, which would
cancel the Send Later operation.
1-7
Page 10

SECTION 1 ROUTINE OPERATION
Page Count
When your fax message is printed at the other end, page numbers will be
printed on the top of each page. Using the Page Count feature, you can select
the format in which the page numbers are printed.
If you use Page Count:
Page numbers will be printed in batch-numbering format (for example, p1/3,
❐
p2/3, and p3/3 for a three-page message). This makes it easy for the other
party to see how many pages you sent, and if any are missing. However,
you have to input the number of pages at the keypad.
If you do not use Page Count:
Page numbers will be printed only as a sequence (for example p1, p2, p3).
❐
This makes it difficult for the other party to tell at a glance whether any
pages are missing at the end of the message.
Note: If you use Memory Transmission, Page Count is automaticall y switched
on, so you may not see this as an option.
1-8
Page 11

SECTION 1 ROUTINE OPERATION
Personal Code
Personal Codes do the following.
They allow you to keep track of machine usage (for example, for billing pur-
❐
poses). If everybody uses a Personal Code when they use the fax machine,
the codes, or the names programmed into the codes, will be printed on the
TCR (also known as the Journal). This will help you to check up on who has
been using the machine, and how often.
If you use Label Insertion and store your name with your Personal Code,
❐
they allow the receiver of your fax message to see your name at the top of
the printout.
Note: If you switch Restricted Access on, users have to enter their personal
code before they can use the machine. The personal code must have already been stored in the machine. This may deter unauthorized personnel from casually using the machine.
Cross-references
Programming Personal Codes:
Label Insertion:
Restricted Access:
page 2-25.
☞
☞
page 2-29.
page 3-8.
☞
1-9
Page 12

SECTION 1 ROUTINE OPERATION
TRD (Transmission Deadline)
If your message has to be sent to the other end before a certain time, use the
Transmission Deadline option and input this deadline.
If the line is busy, the machine will redial at set intervals until the deadline
passes. Before the deadline passes, there is no limit to the number of times
that the machine can redial.
After the deadline passes, the machine will print a report which indicates
whether or your not your message was sent within the deadline. Then, the message will be erased from memory.
This feature is only available with Memory Transmission.
Cross-reference
Transmission Deadline Report:
Memory Transmission:
page 1-2.
☞
page 4-2.
☞
1-9a
Page 13

SECTION 1 ROUTINE OPERATION
Economy Transmission
This feature is similar to Send Later. However, it has the added bonus of automatically combining two cost-saving features: use of off-peak rates, and Batch
Transmission. Also, you do not have to input the required transmission time
every time, like you do with Send Later. However, the Send Later time can be
changed for each transmission on a case by case basis.
If you select Economy Transmission, your fax message will be sent at the time
that you previously stored in programming mode for this feature. Also, all messages that were stored for sending to the same destination using this feature
will be batched automatically.
Cross-reference
Send Later:
Automatic Reduction On/Off
Normally, if the width of the document you are sending is greater than the copy
paper width at the other end, your machine will reduce the data so that it will fit.
If you do not want the data to be reduced, even if the paper at the other end is
not wide enough, switch Automatic Reduction off. Note that data at the left and
right edges of your document will be lost if it is wider than the paper at the other
end.
This setting does not affect Length Reduction.
Cross-reference
Reduction:
page 1-7. Batch Transmission: ☞ page 2-35.
☞
page 2-27.
☞
1-9b
Page 14
SECTION 1 ROUTINE OPERATION
ID Transmission
If you switch ID Transmission on, transmission will only take place if the other
terminal’s ID Code is the same as yours. This feature can stop you from accidentally sending information to the wrong place, if you co-ordinate ID Codes
with the other party.
This feature works in the same way as Closed Network. To enable Closed Network, you or a service technician have to switch it on, and it stays on for all
communications until you switch it off. However, you can use ID Transmission
for whichever transmissions you like. For receptions, ID Transmission does not
work; you will have to use Closed Network if you wish to use this type of feature
for your received fax messages.
This feature may not be reliable when communicating with terminals produced
by another maker.
Cross-reference
ID Code:
TTI On/Off
In some models, you can switch TTI On/Off as a Transmission Option for each
individual transmission.
Cross-reference
TTI On/Off:
page 3-4. Closed Network: ☞ page 2-28.
☞
page 2-24.
☞
1-9c
Page 15

SECTION 1 ROUTINE OPERATION
Alternative Destination
This feature is useful if the person you are sending to has access to two fax machines.
When sending a fax message, you can dial two fax terminals. If your first
choice cannot be reached (for example, because it is busy), your machine will
dial the alternative destination. However, if the first destination was reached
successfully, the alternative will be disregarded. When connection is successful, the document will be fed, scanned, and transmitted.
If the first destination cannot be reached at the first dialing attempt, the machine will redial. The method used differs from model to model. Refer to your
machine’s Operator’s Manual for details.
Notes:
Cross-reference
Redialing:
Alternative Destination cannot be used with Polling, Transfer Re-
❐
quest, or Memory Transmission.
If you use Memory Transmission, you will not see this as an option.
❐
This is because you can send the same message to more than one
address using the memory (
page 1-12. Broadcasting: ☞ page 2-1.
☞
"Broadcasting").
☞
1-10
Page 16

SECTION 1 ROUTINE OPERATION
Voice Request
Using this feature, you can have a telephone conversation with the other party,
on the same call, after your fax message has been sent out. This is useful if
you wish to discuss the contents of the fax message with the other party.
1
2
Because you don’t have to redial the other party to have the conversation, you
can save overall telephone line costs.
Note: In some models, this feature cannot be used with Memory Transmission.
Destination Check
In some models, if you wish to send a fax message to more than one location,
you can scroll through the list of telephone numbers that you have input so far
to check whether you have missed any out or entered any wrong numbers.
This feature is useful when using features such as Broadcasting, Transfer Request, and Polling Reception.
Cross-reference
Broadcasting:
Polling Reception:
page 2-1. Transfer Request: ☞ page 2-6.
☞
page 2-10.
☞
1-11
Page 17

SECTION 1 ROUTINE OPERATION
1-5. Redialing
If a message was not transmitted successfully, that does not mean that you
have to enter the telephone number again. In many cases, the machine will
redial the destination automatically. Or, with the AI Redial key, you can redial
with just a few keystrokes.
Automatic Redialing
The machine will automatically redial the other party if any of the following conditions occurred.
The other party was busy
❐
There was no reply from the other party
❐
The message was rejected by the machine at the other end because of ex-
❐
cessive errors (redialing will only take place if Memory Transmission was
used)
The number of times that the machine will redial and the interval between redialing attempts may vary from model to model, and it may depend on what features are being used. Refer to the machine’s Operator’s Manual for details.
Using the AI (Artificial Intelligence) Redial Key
The machine learns and remembers the last ten telephone numbers that you input. Then, if you have to redial one of these numbers, just press the AI Redial
key until the number or name of the party you wish to redial is displayed, then
press the Start key.
This feature has the following uses.
If the machine is waiting to redial the other party, you do not have to wait for
❐
the redialing interval to expire.
Press the AI Redial key until the required telephone number or name is displayed, then press the Start key.
If you wish to send another message to the same address that you just sent
❐
one to recently, you don’t have to dial the full number again if it is still in the
AI Redial memory.
Place the message in the feeder, then press the AI Redial key until the required telephone number or name is displayed, then press the Start key.
Redialing does not work if you dialed with the handset.
Notes:
Using the AI Redial key, you cannot retry a failed Memory Transmis-
❐
sion. However, you can redial the telephone number, as explained
above.
The AI Redial key does not work if you used the handset to dial.
❐
1-12
Page 18

SECTION 1 ROUTINE OPERATION
2. RECEPTION
2-1. Routine Reception
There are three ways to set up your machine to receive fax messages.
Auto Receive Mode (also known as Fax Mode)
Incoming fax messages are received automatically. You do not have to be by
the machine, as long as you have kept the power switch on. Use this setting
when you have to leave the machine and you do not have an answering machine.
Manual Receive Mode (also known as Tel Mode)
This setting is convenient if you wish to use your fax machine’s handset to answer telephone calls coming in on the same line as fax messages. However,
your fax machine cannot automatically receive fax messages; you have to be
by the machine if a fax message comes in.
Note that you should use this mode when you wish your answering machine to
answer calls coming in to your fax machine while you are out.
Note: Answering machines can only be connected to fax machines that were
manufactured for use in North America. Not all models have an answering machine interface; see your operator’s manual.
Auto Select Mode (also known as Auto Mode)
Use this mode if you wish to receive both fax and telephone calls on the same
line, using your fax machine and its handset. When a call comes in, your machine will determine whether the other party is a fax machine or a telephone
caller.
If the other party is a fax machine, your machine will automatically go into Auto
Receive mode.
If the other party is a telephone caller, (or if the user dialed your number using
the handset connected to their fax machine and wishes to speak to you before
sending a fax), your machine will emit a ringing tone, asking you to pick up the
handset.
Note: Not all models have this mode.
1-13
Page 19

SECTION 1 ROUTINE OPERATION
2-2. Substitute Reception
If the printer is jammed or out of supplies, you will still be able to receive fax
messages; any messages coming in will be stored in the machine’s memory.
If the "Receive File" indicator is lit, a message has been stored in the memory
using the Substitute Reception feature.
To print the message, you will have to do the following.
If the printer is jammed: Remove the jammed paper.
❐
If there is no paper: Supply the machine with paper.
❐
If there is no toner [plain paper fax machines only]: Resupply the machine.
❐
Refer to your machine’s Operator’s Manual for details on how to deal with
these matters.
Messages stored by Substitute Reception will be printed automatically after you
have returned the machine to normal operating condition.
Note: If your machine has only a small memory, you may wish to disable this
feature. This is because your memory may be too small to receive incoming messages. Also, in some models with a small memory, ECM
does not work if the memory has a message in it. (ECM is a facsimile
signaling system that allows error-free communication over noisy telephone lines.)
Cross-reference ECM: ☞ page 2-34.
1-14
Page 20

SECTION 1 ROUTINE OPERATION
3. USING THE MACHINE AS A TELEPHONE
Fax machines have several features that allow you to use them conveniently as
telephones. These features are also useful when calling fax machines that are
usually kept in Manual Receive Mode. The most notable are the following:
You can dial using Quick Dial Keys or Speed Dial Codes.
❐
With the On Hook Dial and Speakerphone features, you do not have to pick
❐
up the handset before dialing.
You can send a fax message after finishing the conversation, without having
❐
to make a new call.
All the common features are explained below. Your machine may not have all
these features, so refer to your machine’s Operator’s Manual.
3-1. Handset
Using the fax machine’s built-in or optional handset, you can use the fax machine in the same way as a normal telephone. Pick up the handset and dial on
the fax machine’s ten-key pad (or use a Quick Dial Key or Speed Dial Code if
you wish).
3-2. On Hook Dial
This is like using the handset, except you do not have to pick up the handset
before dialing. Just press the On Hook Dial key, and dial the number. When you
hear the other party on the fax machine’s built-in speaker, you can pick up the
handset.
3-3. Speakerphone
Using the speakerphone, you can conduct a telephone conversation without
having to pick up the handset. Press the Speakerphone key, and dial the other
party. You will be able to hear the other party’s voice at the built-in speaker. To
reply, talk towards the machine’s built-in microphone.
3-4. Music on Hold
If you wish, you can place the other party on hold. While the other party is on
hold, the machine will play a melody.
Cross-reference
Manual Receive Mode:
page 1-13.
☞
1-15
Page 21

SECTION 2. ADVANCED FEATURES
1. TRANSMISSION
1-1. Broadcasting
Using this feature, you can send the same fax to more than one location with
just one operation. The fax message will be stored in memory, then sent to
each address in sequence.
The maximum number of destinations varies from model to model. Refer to
your machine’s Operator’s Manual for details.
Broadcasting works well with the Group feature.
Note: Make sure that there is enough space in the memory for your document.
Cross-reference
Groups:
page 1-6. Destination Check: ☞ page 1-11.
☞
2-1
Page 22

SECTION 2 ADVANCED FEATURES
1-2. Keystroke Programs
If you regularly transmit to a particular destination or set of destinations using
the same features, you can save a lot of repetitive keypad operation by storing
the features and destinations in a Keystroke Program.
Example: Let us say that you normally send a daily report to lo cati ons A, B,
and C at 11 pm (using Send Later). Store these instructions as a Keystroke Program. Then every day, you will only have to place the report in the document
feeder, then press that key to set up the transmission.
Keystroke Programs are stored as Quick Dial Keys.
If you store a Keystroke Program into a Quick Dial Key, that Quick Dial Key
❐
cannot be used for any other purpose.
Be sure to store your Keystroke Program in a vacant Quick Dial Key.
❐
The features that you can store into a Keystroke Program vary from model to
model. Refer to your machine’s Operator’s Manual for details.
Cross-reference Send Later: ☞ page 1-7.
2-2
Page 23

SECTION 2 ADVANCED FEATURES
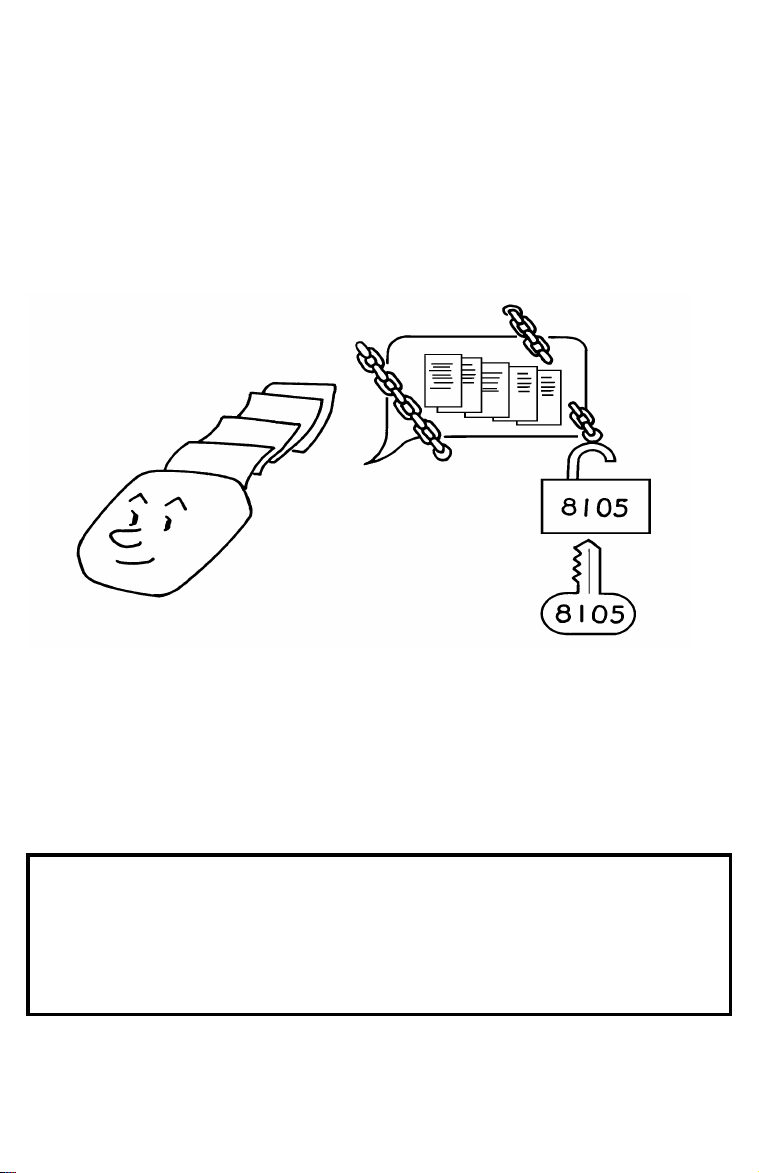
1-3. Confidential Communicati on
Confidential Transmission
If you do not want your message to be picked up casually by anybody at the
other end, use this feature. The message will be stored in the memory at the
other end. It will not be printed until an ID is entered.
Note:
Continued on the next page
The machine at the other end must have memory space available
❐
and it must have the Confidential Reception feature.
This is a proprietary feature, and as such it only functions with ma-
❐
chines produced by the same maker that have this feature.
Before sending a confidential message, it is recommended that you
❐
call the receiver and advise them that you are sending a fax message in this manner.
2-3
Page 24

SECTION 2 ADVANCED FEATURES
There are two types of Confidential Transmission.
1. Normal Confidential Transmission
The other party can print the message by entering the ID that was previously
stored using the Confidential ID feature.
2. Confidential ID Override
If you wish to send a confidential message to a particular person at the other
end, you can specify the Confidential ID that person has to enter to see that
message. Anybody entering the machine’s Confidential ID will not be able to
see the message. Before you send the message, don’t forget to tell the intended receiver what code must be entered to print the message.
Note: The receiving machine’s Confidential ID is not changed by this process.
If the intended receiver has a Personal Code with a Confidential ID stored with
it, override the receiving machine’s ID with that Confidential ID. Then:
The receiver can print the message by inputting the Confidential ID that is
❐
stored with that person’s Personal Code.
The intended receiver will also be informed personally by a Confidential File
❐
Report; this report will have the name of the receiver on it, if the name was
stored with the Personal Code.
Cross-references
Confidential ID:
Confidential File Report:
Confidential Reception:
page 3-5. Personal Codes: ☞ p. 3-8.
☞
page 4-2. TCR/Journal: ☞ page 4-1.
☞
page 2-5.
☞
2-4
Page 25
SECTION 2 ADVANCED FEATURES
Confidential Reception
Incoming confidential messages are stored in the memory, and not printed. The
"Confidential File" indicator on the operation panel lights up to inform you when
a confidential message has come in. Also, if you have switched Confidential
File Report on, the machine will print a report whenever a confidential message
comes in.
There is no need to do anything immediately. When you want to print the message, input the Confidential ID.
Notes:
Cross-references
Confidential ID:
Confidential File Report:
Confidential Transmission:
Confidential ID Override:
User Parameter List:
For this feature to work properly, you must have stored a Confiden-
❐
tial ID in advance.
If the machine’s Confidential ID does not have any effect, contact
❐
the sender and check whether they used Confidential ID Override to
override your ID. Print the TCR/Journal to find out who the sender is,
if necessary.
If you have forgotten the machine’s Confidential ID, print a User Pa-
❐
rameter List, or call a service technician for assistance.
page 3-5. TCR/Journal: ☞ page 4-1.
☞
☞
page 4-2.
☞
page 2-3.
☞
page 2-4.
☞
page 4-4.
2-5
Page 26

SECTION 2 ADVANCED FEATURES
1-4. T ransfer Request
Transfer Request is also known as Relay Request.
Transfer Request helps you save costs when you send the same message to
more than one place in a distant area.
Your machine sends the message to the Transfer Broadcaster, which holds
❐
it in memory.
The Transfer Broadcaster then sends it on to each of the End Receivers in
❐
sequence.
After broadcasting, the Transfer Broadcaster sends your machine a Transfer
❐
Result Report to tell you if there were any problems with the communication.
Note: This feature can only be used if the Transfer Broadcaster was made by
the same maker as your machine.
CAUTION
The ID Code of your machine must be the same as the ID Code of the
Transfer Broadcaster.
Your fax machine’s telephone number must have been programmed in
advance.
The Transfer Broadcaster must have memory space available, and must
have the Transfer Broadcasting feature.
2-6
Page 27

SECTION 2 ADVANCED FEATURES
The maximum number of Transfer Broadcasters and End Receivers that you
can select differs from model to model. Refer to your machine’s Operator’s Manual for details.
Some transfer broadcasters may not accept a request for an international transfer.
Your machine may not be able to act as a transfer broadcaster; refer to your Operator’s Manual.
In most models, you cannot dial the End Receivers as full numbers on your tenkey pad, and you cannot use your own stored Speed Dials, Quick Dials, and
Groups. You must use the numbers that are stored in the Transfer Broadcaster.
Always keep a copy of the Transfer Broadcaster’s Telephone Lists (Quick Dial,
Speed Dial, and Group Lists) near the machine if you plan to use Transfer Request.
In some advanced models, you can set up Transfer Requests using more than
one Transfer Broadcasting station. In the more advanced models of this type,
you can combine Transfer Request with Broadcasting and other networking features to set up complex fax message distribution networks.
Cross-reference
Speed Dial and Quick Dial:
ID Code:
Destination Check:
Networking:
page 3-4. Telephone Lists: ☞ p. 4-3.
☞
☞
page 1-11. Broadcasting: ☞ page 2-1.
☞
section 5.
page 1-5. Groups: ☞ page 1-6.
☞
2-7
Page 28

SECTION 2 ADVANCED FEATURES
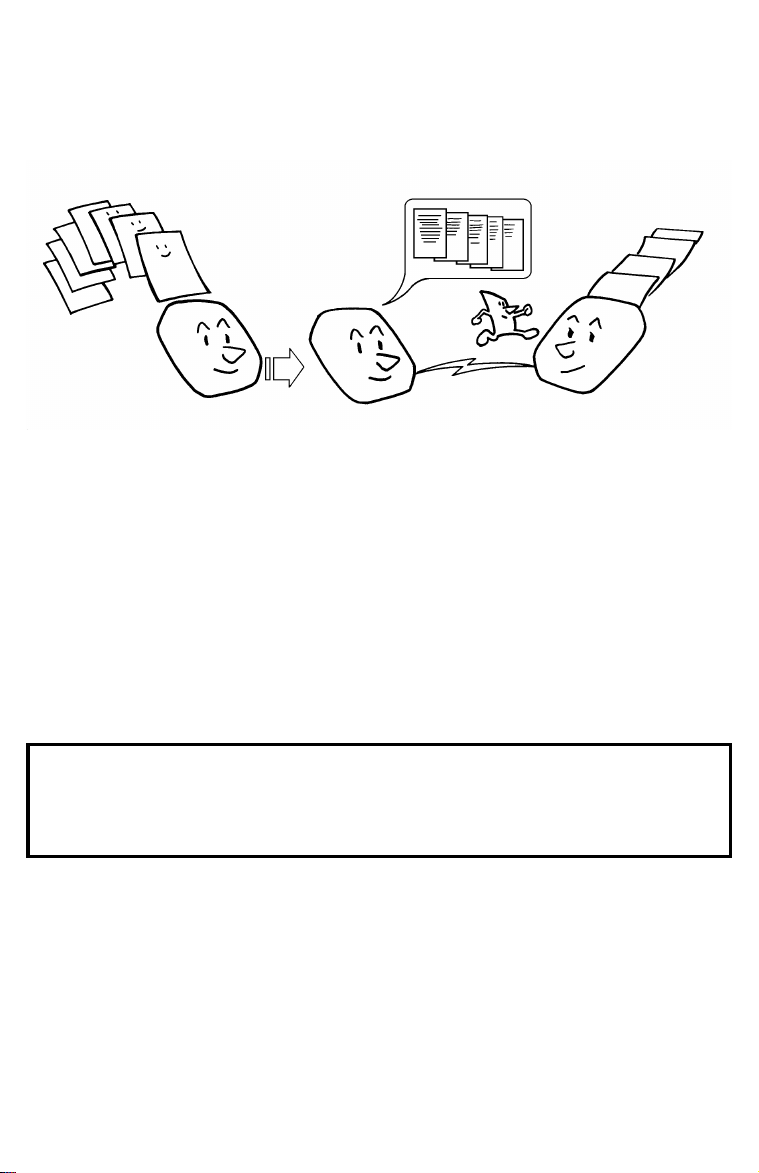
1-5. Polling
Polling means "picking up" a document that has been left for you at a remote
fax terminal.
Using this feature, you can poll a document that has been left for you at a fax
machine at another location. Or, you can leave a document in your machine’s
memory for other machines to poll from you.
Message Transmitter
1
Message Receiver
2
Note: In some models, the message does not go to memory. It is kept in the
document feeder. If the document is removed, the Polling Transmission
is canceled.
With polling, telephone line costs are charged to the person receiving the
❐
message.
Polling can only be used when the machine at the other end has the Polling
❐
feature.
Polling Transmission
Use Polling Transmission when you wish to leave a document in the memory
for others to pick up.
You cannot enter the telephone number of the terminal that you wish to poll
your document, but, using the ID Code, there are ways to make sure that the
message does not go to the wrong place.
Continued on the next page
2-8
Page 29

SECTION 2 ADVANCED FEATURES
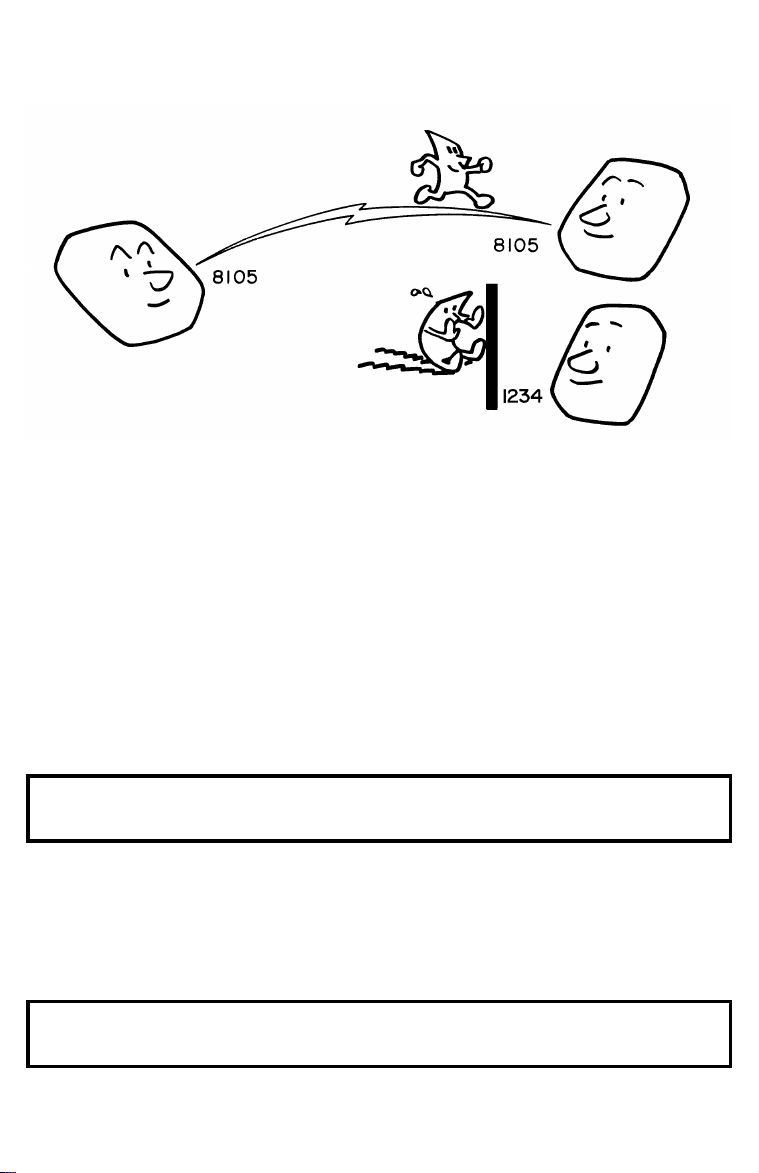
There are three types of Polling Transmission.
Free Polling: Anybody can poll the message from your machine.
Secured Polling: The message will only be sent out if the ID Code of the ma-
chine trying to poll your document is the same as the ID Code stored in your
machine.
Stored ID Override: There are two ways to use this feature:
If your ID Code is different from that of the other party (for Polling Transmis-
❐
sion, the other party is the machine that you wish to poll your document),
you can use the other party’s ID Code just for this transmission (ask the
other party what their ID Code is). Your machine’s stored ID Code will be ignored.
For extra security, both parties can specify an ID Code just for this communi-
❐
cation. The ID Codes of both machines will be ignored. All communicating
parties need to coordinate their ID Codes in this case.
Only one document can be stored in the memory for Free Polling, and only one
can be stored for Secured Polling. However, with Stored ID Override, you can
store more than one file, but you must use a different ID for each file.
Secured Polling and Stored ID Override can only be used between terminals
produced by the same manufacturer. If the machine at the other end is made by
a different manufacturer and if you wish to use one of these features, try using
Remote Control as follows. (Not all models have Remote Control.)
Set up your machine for Remote Control and switch Remote Transfer on.
❐
Store the message using Polling Transmission
❐
Instruct the other party to pick up the message using the Remote Control
❐
feature known as "Remote Printing of a Polling File". Tell them which keys to
press; see your Operator’s Manual for details.
When you store a document in memory for Polling Transmission, you also have
the following options in some models that have memory:
Poll once only: The message will be automatically erased from memory after it
has been polled once.
Keep indefinitely: The message will be kept in memory until you erase it.
While the message is in the memory, it can be polled at any time by as many
terminals that need it. This option is not available if your machine cannot store
messages for Polling Transmission into memory.
2-9
Page 30

SECTION 2 ADVANCED FEATURES
Polling Reception
Use this feature when you wish to poll a message from another terminal.
You can poll documents from many terminals with only one operation (use
Groups and Keystroke Programs to make the most out of this feature).
You have three options: Free Polling, Secured Polling, and Stored ID Override,
as described for Polling Transmission (see the previous page).
The number of terminals that you can poll in one operation varies from model to
model. Refer to your machine’s Operator’s Manual for details.
Cross-references
ID Code:
Groups:
Keystroke Programs:
Continuous Polling Reception
If you wish to poll a number of destinations in a continuous cycle, switch this
feature on. After the machine has polled all the specified destinations, it will
start again from the first destination.
page 3-4. Remote Control: ☞ p. 2-20.
☞
page 3-8. Remote Transfer: ☞ p. 2-21.
☞
page 2-2.
☞
2-10
Page 31

SECTION 2 ADVANCED FEATURES
1-6. Auto Document
If you often find that you have to send a particular page to people (for example,
a map, a standard attachment, or a set of instructions), store that page in the
memory as an Auto Document, using a Quick Dial Key.
Then, when you need to send that page to somebody, press the Quick Dial Key
that you stored it in, place any other pages that you wish to send into the
feeder, dial, and press Start. At the other end, the Auto Document will be
printed first.
1-7. Telephone Directory
This makes using Speed Dial Codes more convenient.
When you program a Speed Dial Code, you can program a name and a tele-
phone number. Then, instead of having to refer to the latest Speed Dial Code
list when you want to dial that number, you can type in the first letter of the
name, and scroll through the list of names that begin with that letter until you
find the right one.
In some models, you may also program the letter under which you wish to file
the label. For example, if a Speed Dial Code has the label HOTEL NEW YORK,
you may wish to file this label under N instead of under H. This would make it
easier to find using the Telephone Directory feature; type in N instead of H, then
scroll through the N’s until you find the HOTEL NEW YORK.
Cross-reference
Speed Dial:
page 1-5.
☞
2-11
Page 32

SECTION 2 ADVANCED FEATURES
1-8. Secure Transmission
This feature allows some degree of data security when sending a fax message.
However, care should be taken because the method used for data encryption is
quite simple, unlike the methods used in data scramblers or in the DES (Data
Encryption Standard) used in some software packages.
To use Secure Transmission, you must program a Secure ID in your machine.
Then just select Secure Transmission whenever you wish to use it.
If you selected Secure Transmission, the Secure IDs in the two communicating
machines will be compared. If they are the same, the transmitting machine will
encrypt the data, and the receiving machine will recover the original data form
the encrypted signal before printing.
Cross-reference
Secure ID:
page 3-5.
☞
1-9. Direct Fax Number Entry
This feature allows you to input destination fax numbers before placing the
document in the feeder. This is useful when you would like to read the destination fax number off the document without having to write it down on the reverse
side or on another scrap of paper.
2-11a
Page 33

SECTION 2 ADVANCED FEATURES
2. RECEPTION
2-1. Forwarding
Using this feature, you can send fax messages coming in from certain locations
on to another fax machine. The terminals that receive your forwarded messages are called "forwarding terminals".
If other fax machines in your organization have this feature, you can use Forwarding to set up distribution chains for incoming fax messages.
1
2
To set up Forwarding, program your machine as follows:
Program the phone numbers of the forwarding terminals that you will use.
❐
Program the RTI or CSI of each sender, allocating it to one of the forwarding
❐
terminals. (Ask the sending party what their RTI/CSI is. Or make a communication with that terminal, print a TCR/Journal, and read off the RTI/CSI.)
Make sure that forwarding is switched on.
❐
Continued on the next page
2-12
Page 34

SECTION 2 ADVANCED FEATURES
If the RTI/CSI of the machine sending you a fax is not the same as any of those
that you have programmed into this feature, the message will not be forwarded.
The number of RTI/CSI’s that you can store for use with this feature varies from
model to model. However, you can use Wild Cards to extend the number of
RTI/CSI’s that you can specify. Refer to your Operator’s Manual for details.
Notes:
You can select whether your machine prints forwarded messages or not.
You can also select whether your machine transmits a forwarding mark to
be printed at the other end on the top of each page of the output. This
mark brings to the other party’s attention that this message has been
forwarded.
If one of the senders changes their RTI/CSI, you must change the stored
RTI/CSI, or you will not be able to forward messages from that sender.
Cross-references
RTI and CSI:
page 3-2. Wild Cards: ☞ page 2-41.
☞
2-13
Page 35

SECTION 2 ADVANCED FEATURES
2-2. Authorized Reception
This feature helps you to reject junk fax mail. It lets you specify which terminals
you wish to receive fax messages from; all others will be shut out.
To authorize reception from a particular sender:
Program the RTI or CSI of the sender. (Ask the sending party what their
❐
RTI/CSI is. Or make a communication with that terminal, print a TCR/Journal, and read off the RTI/CSI.)
Make sure that authorized reception is switched on.
❐
If the RTI/CSI is not the same as any of those that you have programmed into
this feature, the message will not be accepted.
The number of RTI/CSI’s that you can store for use with this feature varies from
model to model. However, you can use Wild Cards to extend the number of
RTI/CSI’s that you can specify. Refer to your Operator’s Manual for details.
Note: If one of the authorized terminals changes their RTI/CSI, you have to
change the stored RTI/CSI also. Otherwise, you will not be able to accept messages from that sender any more.
Cross-references
RTI and CSI:
page 3-2. Wild cards: ☞ page 2-41.
☞
2-14
Page 36

SECTION 2 ADVANCED FEATURES
2-3. Reception Mode Switching Timer
You probably wish to receive telephone calls with the fax machine’s handset
while you are present (using Manual Receive mode or Auto Select mode), and
leave the machine in Auto Receive mode while you are away.
You can arrange this yourself by pressing the reception mode selector key
whenever you want to change the mode. However, you can set up a timer that
switches modes automatically for you every day. There are two timers for each
day of the week.
Example:
Saturdays and Sundays - You may wish to leave the machine in Auto Receive
mode all day
Weekdays - You can keep the machine in Manual Receive mode during office
hours (e.g., from 9 am to 5 pm), and in Auto Receive mode from 5 pm to 9 am.
Cross-references
Reception Modes:
page 1-13.
☞
2-15
Page 37

SECTION 2 ADVANCED FEATURES
3. OTHERS
3-1. Copying an Original
If you need to make a copy of something, and there is no copier available, use
your fax machine. Just place your original in the feeder, and press the Copy key.
If you have a laser fax machine with memory, you can make more than one
copy.
Note: Copying an original is a good way to test contrast and resolution before
sending a document, if you are not sure that the settings are appropriate. The copy made by your printer shows you how the message would
look when received at the other end. If it does not look good, change
the settings and try again.
Cross-references
Contrast, Resolution, and Halftone:
page 1-3.
☞
2-16
Page 38

SECTION 2 ADVANCED FEATURES
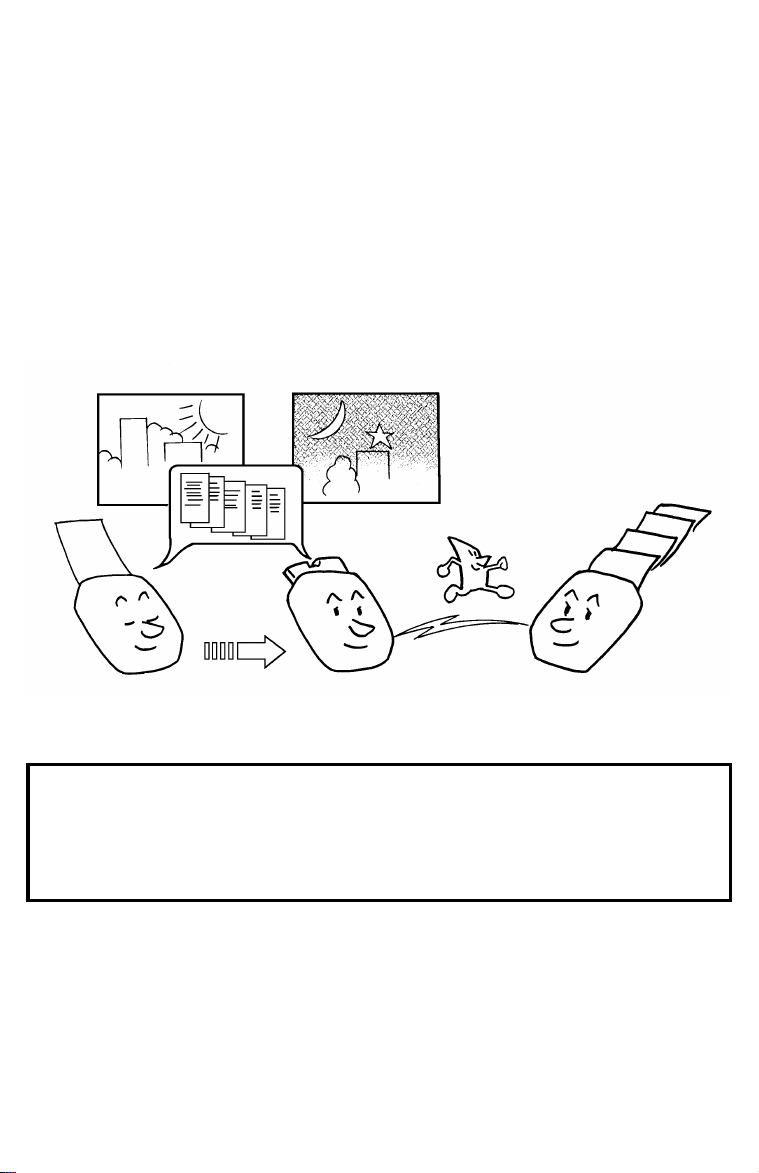
3-2. Night Timer
This feature is only available with plain paper fax machines. Laser printing requires the application of heat to bond toner to the printer paper.
Example:
Using the Night Timer, you can program the heating element inside the printer
to stay off at night and over the weekend. (You can program different settings
for every day of the week.)
This feature means that you will be able to reduce overnight electricity costs. It
also means that anyone casually wandering through the office after working
hours will not be able to read your incoming fax messages.
If a fax message comes in while the timer is in effect and the printer is
❐
switched off, the message is stored in the memory. When the timer runs out
and the printer switches back on, the message is automatically printed.
While the timer is in effect and the printer is disabled, all incoming calls are
❐
refused when the memory fills up.
If you wish to print a fax message while the timer is in effect and the printer
❐
is off, you can temporarily override the night timer and print the message.
The timer will activate again automatically a few minutes after you have
printed your message.
2-17
Page 39

SECTION 2 ADVANCED FEATURES
3-3. Function Programs
If you often use a particular function, program it as a Function Program. This
will save you a little time whenever you use this function.
Example:
If you often use Function 33, program it into a Quick Dial Key. Then, when you
want to use the function, just press the Quick Dial Key instead of pressing Function, 3, 3, and Yes.
Note: Some machines have a row of User Function Keys similar to those on a
personal computer keyboard.
Cross-reference
User Function Keys:
page 2-44.
☞
2-18
Page 40

SECTION 2 ADVANCED FEATURES
3-4. Answering Machine Inter face (N. Ameri can model s only)
This feature is only available in models manufactured for use in North America.
If you connect an answering machine to the rear of your fax machine, you will
be able to record incoming telephone messages and receive incoming fax messages on the same line while you are out.
Setting up the Answering Machine
1. Connect the answering machine to either telephone jack on your fax machine.
2. Record a message in the answering machine. It should be something like
the following. The sentence in boldface is particularly important.
" Hello this is ..... I am out now. If you would like to leave a message, please
speak after you hear the beep. If you wo uld like to send a fax message,
press X after you hear the beep, then press Start on your fax machine
after you hear a high-pitched tone, then hang up."
Notes:
Activating the Answering Machine
When you leave the fax machine, do the following:
Switch answering machine mode on.
❐
Set your fax machine up in Manual Receive Mode.
❐
Set the "At Home/Out" switch on the answering machine to "Out".
❐
When you come back:
Switch answering machine mode back off.
❐
Set your fax machine up in whichever receive mode you prefer.
❐
Set the "At Home/Out" switch on the answering machine to "At Home".
❐
Refer to your fax machine’s Operator’s Manual for instructions on how to switch
answering mode on and off.
The value of X is normally 2. However, if your answering machine
❐
uses 2 for a different feature, you must specify another value for X.
Refer to your fax machine’s Operator’s Manual for instructions.
If the other party dials any other number than X, the fax message
❐
will not be accepted.
The telephone at the other end must dial using DTMF (tone dial) sig-
❐
nals.
If your answering machine takes less than 0.3 second to answer the
❐
line, this feature may not work.
2-19
Page 41

SECTION 2 ADVANCED FEATURES
3-5. Remote Control Features
Introduction
Your machine may have a number of remote control features. These features allow you to control the machine while you are out, provided that you have access to a telephone (or, for some features, a fax machine).
Remote control will operate only if the following conditions have been met.
Both your fax machine and the other telephone or fax machine must be con-
❐
nected to a telephone line that can accept DTMF (tone dial) signals.
Your fax machine’s reception mode must be Auto Select or Auto Receive,
❐
unless you are using an answering machine (USA models only; see below).
Your fax machine’s remote ID must have been programmed.
❐
Remote Control mode must have been switched on in your fax machine.
❐
For some features, Remote Transfer must have been switched on.
❐
For some features, your machine’s Confidential ID or ID Code must have
❐
been programmed in advance.
Setting Up the Machine
Reception Mode
Set up the machine in one of the following ways:
North American models only - If an answering machine is connected to a
❐
TEL jack at the rear of the machine, and if you wish to keep the answering
machine in answer mode, set your fax machine up in Manual Receive (Tel)
mode. Then switch Answering Machine mode on.
In any case other than the above, set the fax machine up in Auto Receive
❐
(Fax) mode. You may also use Auto Select (Auto) mode, but you will have to
wait up to 30 seconds after dialing before you hear the high-pitched tone
from your fax machine.
Continued on the next page
2-20
Page 42

SECTION 2 ADVANCED FEATURES
Remote ID
If you wish to use your fax machine’s remote control features, you must store
this ID code in advance. You will have to enter this code every time you access
your machine from a remote location.
Remote Control
Before you go out, you will have to switch remote control on.
Available Features
Your machine may have some or all of the following features. Refer to your Operator’s Manual for details.
If you operate these features at a fax machine at a remote location, that fax
❐
machine does not have to be of the same maker as yours.
The features involving confidential messages are known collectively as "Mail
❐
Box".
Forwarding On/Off
This feature switches Forwarding on or off. Forwarding and Remote Transfer
(see below) cannot both be switched on at the same time. If Forwarding is
switched on, incoming messages will be forwarded to the appropriate forwarding terminal, and immediately erased from memory. Therefore, you can not
transfer or pick up your received fax messages by remote transfer if Forwarding
is switched on.
Remote Transfer On/Off
This feature switches the Remote Transfer feature on or off. If Remote Transfer
has been switched on, all incoming fax messages are stored in the memory
and printed. The messages are kept in the memory, so you can instruct your
machine to transfer the messages to another fax machine.
Remote Transfer
This feature allows you to transfer your fax machine’s received messages to another fax machine. After transfer, the fax messages will be erased from your
machine’s memory. Remote Transfer must have been switched on. Messages
stored in your machine’s memory using Memory Lock cannot be transferred.
Remote Printing
This feature allows you to instruct your fax machine to transfer any received
messages to the fax machine at your current location. You have to dial your fax
machine from another fax machine to use this feature. After printing, the fax
messages will be erased from your machine’s memory. Remote Transfer must
have been switched on. This is useful if your printer is out of action or has no
paper.
2-21
Page 43

SECTION 2 ADVANCED FEATURES
Remote Transfer of a Confidential Message
This is like Remote Transfer, except that it transfers a message that your machine received using Confidential Reception. You need to know the Confidential
ID needed to access the message. After transfer, the message will not be
erased from memory; to clear the memory space, you will have to go back to
your machine and print it out.
Remote Printing of a Confidential Message
This is like Remote Printing, except that it transfers a confidential message
from your machine to the fax machine at your current location. You need to
know the Confidential ID needed to access the message. After printing, the
message will not be erased from memory; to clear the memory space, you will
have to go back to your machine and print it out.
Remote Transfer of a Polling File
This is like Remote Transfer, except that it transfers a message that was stored
in your machine using Polling Transmission. You need to know the ID Code that
was used to store the message. After transfer, the message will not be erased
from memory; go to your machine and use Polling File Clearance.
Remote Printing of a Polling File
This is like Remote Printing, except that it transfers a message that was stored
in your machine using Polling Transmission to the fax machine at your current
location. You must know the ID Code that was used to store the message. After
printing, the message will not be erased from memory; to clear the memory
space, go back to your machine and erase it using Polling File Clearance.
Note: This feature allows the owner of a machine made by a different maker
to poll your machine. Normally, such machines cannot poll your machine, unless they use Free Polling.
Reception Mode Changeover
This allows you to change your machine’s reception mode by remote control.
Printing the TCR (Journal)/Telephone Lists
These features allow you to print your machine’s TCR (Journal) and/or Telephone Lists using somebody else’s fax machine. You have to dial your fax machine from another fax machine.
Cross References
Remote ID:
Polling Transmission:
Polling File Clearance:
Confidential Reception:
Confidential ID:
Memory Lock:
page 3-5. ID Code: ☞ page 3-4.
☞
☞
☞
page 2-40.
page 2-8. Tone Dial: ☞ page 3-1.
☞
page 2-42. Forwarding: ☞ page 2-12.
☞
page 2-5. TCR/Journal: ☞ page 4-1.
☞
page 3-5. Telephone Lists: ☞ p. 4-3.
2-22
Page 44

SECTION 2 ADVANCED FEATURES
3-6. Specified Cassette Selec tion
This feature is only available with laser fax machines that have more than one
paper feed unit. Using this feature, you can direct fax messages from certain
senders to be printed from a cassette of your choice.
Example:
Put yellow paper in one cassette. Then, messages from head office can be
printed out on yellow paper; this will make it easy for you to see when a message from head office has arrived.
To direct messages from a particular sender to a special cassette:
Program the RTI or CSI of the sender. (Ask the sending party what their
❐
RTI/CSI is. Or make a communication with that terminal, print a TCR/Journal, and read off the RTI/CSI.)
Switch specified cassette selection on.
❐
Continued on the next page
2-23
Page 45

SECTION 2 ADVANCED FEATURES
If the RTI/CSI is not the same as any of those that you have programmed into
this feature, the incoming message will be printed on paper from the normallyused cassette.
The number of RTI/CSI’s that you can store for use with this feature varies from
model to model. You can use Wild Cards to extend the number of RTI/CSI’s
that you can specify. Refer to your Operator’s Manual for details.
Note: If one of the senders changes their RTI/CSI, you have to change the
stored RTI/CSI also. Otherwise, messages from that sender will no
longer be sent to the required cassette.
Cross-references
RTI and CSI:
page 3-2. Wild Cards: ☞ page 2-41.
☞
3-7. TTI On/Off
Normally, the TTI programmed in your machine is printed at the top of each of
the pages you transmit when they are received at the other end. The top of the
image will be overprinted if there is no margin at the top of the transmitted page.
In some cases, you may wish the other party to receive an unmarked copy of
your original. In this case, you can switch TTI off.
Note: If you switch TTI off, make sure that Label Insertion is also off.
Cross-reference
TTI:
page 3-2.
☞
2-24
Page 46

SECTION 2 ADVANCED FEATURES
3-8. Label Insertion
This feature supplements the TTI. It uses the Personal Code and the Quick Dial
or Speed Dial Label to inform the other party who is sending the message, and
to state who the message is for.
Example:
TTI (32 characters)
To use this feature, you must:
Switch Label Insertion on (TTI on/off has no effect on this feature).
❐
Program the Personal Codes of the machine’s users, and store their names
❐
with their codes.
Program labels with the Speed Dial and Quick Dial numbers.
❐
In the above example, the message was sent using Johnson’s personal code.
The Quick Dial or Speed Dial used to dial the destination had MR SMITH as
the label.
Received Fax Message
TO MR SMITH FROM JOHNSON
From the
Quick/Speed
Dial Label
From the
Personal
Code
If you later reprogram the Speed/Quick Dial, be sure to reprogram or delete the
label as well.
In the same way as with the TTI, the top of the image will be overprinted if there
is no margin at the top of the transmitted page.
Note: Different models implement this feature in slightly different ways. Refer
to your fax machine’s operator’s manual for full details.
Cross-reference
Speed Dial and Quick Dial:
Personal Codes:
page 3-8.
☞
page 1-5.
☞
2-25
Page 47

SECTION 2 ADVANCED FEATURES
3-9. Marker
The Marker is also known as the Stamp or Verification Marker.
If you switch the Marker on, it helps you to check whether the message was
sent or stored without errors. If a page was sent or stored successfully, the machine stamps the bottom edge of the document.
Memory Transmission: If the page is stamped, it was scanned and stored
❐
successfully. Check all pages of your document. If some of them are not
stamped, there may have been a misfeed or double feed. Some machines
do not use the marker during Memory Transmission.
Immediate Transmission: If the page is stamped, it was received at the
❐
other end without significant errors. Check all pages of your document. If
some of them are not stamped, there could have been a line problem, or a
misfeed or double feed.
Retransmit any pages that are not stamped.
3-10. Center Mark
If you switch this feature on, a mark is printed halfway down each received
page on the left hand side. This makes it easy for you to position the hole
puncher correctly when you file away received fax messages.
3-1 1 . Checkered Mark
If you switch this feature on, the machine prints a checkered mark in the top left
corner of the first page of received messages.
Using this mark, you can find the first page easily. This makes it easier for you
to separate messages that are lying in the copy tray.
2-26
Page 48

SECTION 2 ADVANCED FEATURES
3-12. Reception Time
When you receive a message, the time is printed at the top of the page. However, this is the time at the transmitting end. To check the local time, you have
to print the TCR/Journal.
However, if you switch on Reception Time, the local time is also printed on
each page that you receive. The time is taken from your machine’s internal
clock, and is the same as the time that will be printed on the TCR/Journal.
Switch this feature on if you often receive fax messages from other countries.
In some models, this does not work for messages received into memory, such
as Confidential Receptions.
Cross-references
TCR/Journal:
page 4-1. Date and Time: ☞ page 3-1.
☞
3-13. Reduction
Automatic Reduction
If the fax message that you are sending is wider than the printer paper in the receiving machine, the condition of the printout at the other end depends on
whether or not you have switched Reduction on.
If you have switched Reduction on:
Your machine will reduce the image so that it will fit on the printer paper.
❐
During transmission, the display panel will inform you of the type of reduc-
❐
tion that is being done. For example, "B4 to A4 TRANSMIT" means that your
B4-width [10.1"] original is being reduced to A4-width [8.3"] before being
sent out. (Some machines do not display this information.)
If you have switched Reduction off:
Your machine will not reduce the image. Parts of your image at the left and
❐
right edges will not be printed at the other end. However, the central part of
the document will be printed without any reduction.
Length Reduction
This feature is only used in plain paper fax machines.
If an incoming page is longer than the copy paper by a small amount, the
length of the incoming data will be reduced to fit on one page. If Length Reduction is switched off, the excess data (only a few millimetres) may be lost.
If the incoming page is too long by more than a certain amount, the page will be
split up and printed on two sheets of paper.
2-27
Page 49

SECTION 2 ADVANCED FEATURES
3-14. Closed Network
This feature helps to stop you from accidentally sending a fax message to a terminal that is outside your fax network. It may also help you to prevent reception
of excessive junk fax mail.
The ID Codes of the communicating machines are checked. If they are not the
same, the communication is stopped.
This feature is similar to the ID Transmission option, but it cannot be switched
on/off for individual transmissions.
Contact a service technician if you are interested in this feature.
Note: This feature may not be reliable if you are communicating with a termi-
nal produced by a different manufacturer.
Cross-references
ID Codes:
page 3-4. ID Transmission: ☞ page 1-9c.
☞
2-28
Page 50

SECTION 2 ADVANCED FEATURES
3-15. Restricted Access
This feature allows you to keep a closer track of machine usage, and deters
passers-by from casually using your machine.
If this feature is switched on, users have to enter their personal code before
they can use the machine. The personal code must have already been stored
in the machine.
If you switch Restricted Access on, the machine forces each user to enter a Personal Code before they can use the machine. However, the user can enter any
code directly at the keypad. Therefore, if you wish to use this feature to stop
casual users from operating the machine, you must allocate relatively obscure
codes to all authorized users, and try to avoid obvious numbers such as 0001.
Note: In some models, there is a limit to the number of Personal Codes that
can be registered. Refer to your Operator’s Manual for details.
Cross-reference
Personal Codes:
page 3-8.
☞
2-29
Page 51

SECTION 2 ADVANCED FEATURES
3-16. RDS (Remote Diagnostic System)
If your machine has a problem, a service technician can perform various diagnostic tasks over the telephone line from the service station to try to find out
what is wrong with your machine.
The service technician can also use RDS to change some of your machine’s
settings if you request it.
For RDS to work, you must switch it on before the service technician starts the
RDS operation on your machine.
For some operations, it may be necessary to have a user near the machine.
2-30
Page 52

SECTION 2 ADVANCED FEATURES
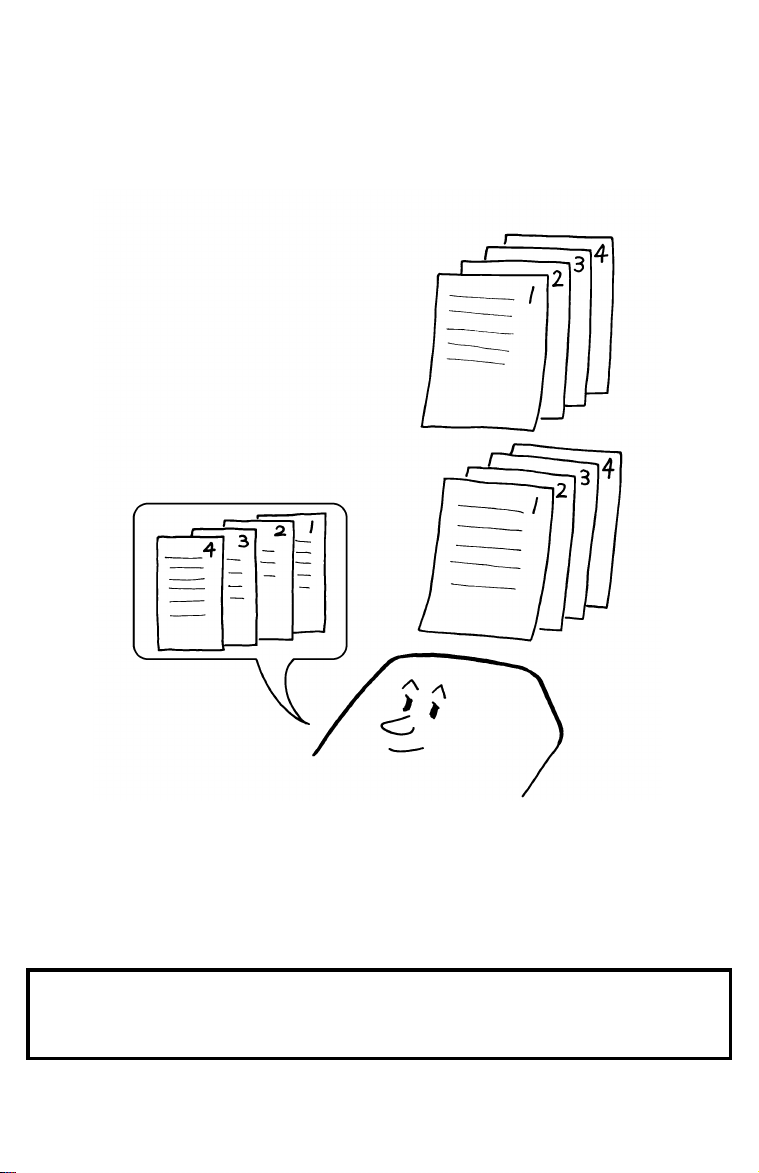
3-17. Reverse Order Printing
Normally, the machine prints the pages of received messages in the order that
they were received.
However, with Reverse Order Printing, the machine will print the message from
the last page first. This will make it easier to distribute the received fax messages, and more convenient for reading.
2-31
Page 53
SECTION 2 ADVANCED FEATURES
3-18. Multi-sort Document Recepti on
Using this feature, more than one copy of each incoming fax message can be
printed. This feature is useful if you need to reduce your photocopier’s work
load.
Example:
If you switch this feature on overnight, you will not have to make distribution
copies of the messages that came in during the night. However, the paper in
the cassette will be used up much faster.
The copies will be conveniently stacked, because Reverse Order Printing is
automatically switched on if you switch on Multi-sort Document Reception.
Cross-reference
Reverse Order Printing:
Copying an Original:
☞
page 2-16.
☞
page 2-31.
2-32
Page 54

SECTION 2 ADVANCED FEATURES
3-19. Protection Against Wr ong Connections
This feature prevents the automatic switching equipment in the telephone network from accidentally connecting you to the wrong fax terminal.
However, it does not help you if you dialed the wrong number yourself. So,
even if this feature is switched on, you should still check your operation panel
display to check whether you have reached the correct terminal, and be ready
to press Stop if the wrong terminal’s RTI or CSI is displayed.
Your machine compares the number that you dialed with the CSI received from
the other end. Only the last 8 digits are checked, and spaces and pauses in the
telephone number are ignored.
If the CSI is not the same as the telephone number, the transmission is stopped.
This feature has to be switched on by a service technician.
Note: If you cannot send a message to a certain location using this feature,
contact the other end and make sure that they have stored their CSI correctly.
Cross-references
CSI:
page 3-2.
☞
2-33
Page 55

SECTION 2 ADVANCED FEATURES
3-20. ECM and Page Retransmission
ECM (Error Correction Mode) is a signaling system that greatly reduces the
chance of data being lost because of a bad telephone line. Switch ECM on if
you frequently communicate over poor telephone lines.
With ECM switched on, the communication cost will increase if the line is bad,
but the data will be sent much more reliably.
If ECM is switched off, Page Retransmission will be used. The whole page will
be resent (unless you used Immediate Transmission, in which case damaged
data cannot be resent at all). ECM is more efficient, because it only resends the
damaged parts of the data, and the maximum possible number of retransmission attempts is much higher, and it also works with Immediate Transmission.
If you wish reliable communication and do not mind paying extra communication charges when the line is noisy, keep ECM switched on. However, if you are
more worried about communication costs, contact a service technician and ask
to have ECM switched on and Page Retransmission switched off.
ECM is switched on in your machine when it leaves the factory, to provide you
with the ability to send accurate and complete documents as reliably as possible.
2-34
Page 56

SECTION 2 ADVANCED FEATURES
3-21. Batch Transmission
This feature will save communication costs if you often send more than one
message to the same location.
Example:
If various people in your office send messages to the Tokyo branch office, sending all these messages on separate calls can be expensive. It is cheaper to
send them all together on the same call. You can further cut costs by sending
out batches during off-peak hours. To do so, simply create Keystroke Programs
that use Send Later or Economy Transmission to transmit to those common
destinations.
Instruct people in your office to store all faxes for the Tokyo branch in the memory, using Send Later or Economy Transmission. The selected time of transmission must be the same for each message that you wish to include in the batch.
Then, when that time comes, the messages will all be sent out on the same
call, or ’batched’.
You can set up more than one batch. In the example shown in the diagram
above, you have set up two batches; one is for destination A and one is for destination B. In another example, you could set up a batch for Tokyo at, say, 1 am,
a batch for Hong Kong at 2 am, a batch for London at 3 am, and so on.
Continued on the next page
2-35
Page 57

SECTION 2 ADVANCED FEATURES
Another point about Batch Transmission is as follows.
When you send a fax message, if there is a message in the memory waiting for
transmission to the same telephone number, it will be sent out with your message. This will only happen if the message already in the memory is waiting for
retransmission (for example, because the line was busy).
Note: There is a limit on the number of files that can be included in one batch.
Refer to your Operator’s Manual for details.
Cross-reference
Send Later:
Economy Transmission:
page 1-7.
☞
page 1-9b.
☞
3-22. Short Preamble
Short Preamble slightly reduces communication costs between machines produced by the same manufacturer. This feature reduces the length of signals exchanged between the machines during communication.
If you are interested in this feature, contact a service technician.
Note: Short Preamble may cause problems with long distance and interna-
tional calls. If you suspect that such problems are occurring, store the
number as a Quick Dial or Speed Dial. Then call a service technician
and discuss the matter. Tell the technician the Speed Dial/Quick Dial
that you stored the telephone number in.
Cross-references
Speed Dial and Quick Dial:
page 1-5.
☞
2-36
Page 58

SECTION 2 ADVANCED FEATURES
3-23. AI Short Protocol
This feature employs Artificial Intelligence (AI) to learn the protocol characteristics of the machines programmed as Speed Dials or Quick Dials. AI Short
Protocol helps you to reduce communication costs between machines produced by the same manufacturer. AI Short Protocol only works if you dial using
Quick Dial, Speed Dial, or AI Redial; also, the machine at the other end must
have the AI Short Protocol feature.
When you send a fax message, the two machines carry out a handshaking procedure, during which they establish the best way to communicate with each
other. Using AI Short Protocol, this handshaking procedure only takes place in
full the first time you dial a particular number. Your machine remembers the optimum communication parameters for calling that number. The next time you dial
that number, the preliminary handshaking will be significantly reduced, saving
communication costs.
If you are interested in this feature, contact a service technician to have it
switched on.
Note: AI Short Protocol may cause problems with long distance and interna-
tional calls. If you suspect that such problems are occurring, store the
number as a Quick Dial or Speed Dial. Then call a service technician
and discuss the matter. Tell the technician the Speed Dial/Quick Dial
that you stored the telephone number in.
Cross-references
Speed Dial and Quick Dial:
page 1-5.
☞
3-24. Dedicated Transmission Parameters
If you often encounter problems when transmitting to a certain address, program that address into a Quick Dial Key or Speed Dial Code.
Then contact a service technician, describe the problem, and tell them which
Speed Dial or Quick Dial you have stored the number in.
The technician can instruct the machine to use different transmission parameters whenever you select that Speed Dial/Quick Dial.
If you reprogram the Speed/Quick Dial, be sure to inform your service technician.
Cross-references
Speed Dial and Quick Dial:
page 1-5.
☞
2-37
Page 59

SECTION 2 ADVANCED FEATURES
3-25. MDF (Manual Feed)
Using Manual Feed, you can scan originals that are outside the range of the
document feeder’s specifications. You can scan the following:
Thicker documents than usual
❐
Thinner documents than usual
❐
Wider documents than usual
❐
Stapled documents (only the top page will be scanned)
❐
Wider originals: Fold the document in half, and scan one half at a time. You
may have to make a separate telephone call for each half (use the AI Redial
key). Or, you could send both halves using Send Later and Batch Transmission.
Using Manual Feed, the specifications for the maximum scannable document
will vary from model to model. Refer to your machine’s Operator’s Manual for
details.
Cross-reference
Redial:
Batch Transmission:
page 1-12.
☞
page 2-35.
☞
2-38
Page 60

SECTION 2 ADVANCED FEATURES
3-26. Chain Dialing
This feature allows you to compose a telephone number from various parts,
some of which may be stored as Quick Dial Keys or Speed Dial Codes, and
some of which may be input at the keypad.
For example, you can program commonly used area or country codes into
Speed Dial Codes or Quick Dial Keys.
This feature is convenient if:
You often communicate with many terminals for which the area code, or in-
❐
ternational code is the same.
You often make international calls.
❐
For example, if you often call Tokyo, Japan, program 011813 (Overseas to
Tokyo from the USA) as Quick Dial Key 01. This will save work at the operation panel when dialing a Tokyo number.
Your PBX requires an ID code before the destination number.
❐
For example, if your ID is 1234567, and the destination is stored in Quick
Dial Key 01, enter 1234567 at the keypad, press Pause, then press Quick
Dial Key 01.
For examples of use, see your Operator’s Manual.
Note: Do not store any labels with the Quick Dials and Speed Dials that you
are using with Chain Dialing. This is because Label Insertion does not
work with Chain Dialing.
Cross-reference
Speed Dial and Quick Dial:
Label Insertion:
page 2-25.
☞
page 1-5.
☞
2-39
Page 61

SECTION 2 ADVANCED FEATURES
3-27. Tonal Signals
Some companies, such as banks, offer you special services by telephone,
which you can access by transmitting Touch Tone or DTMF tones. If your phone
service provides only pulse dialing, the ability to generate Tonal Signals will allow you to access these services.
First, dial the other party. When you are through to the other end, press the
Tone key and enter the code number that is needed to access the required feature at the other terminal.
You do not need to press the Tone key if your machine is set up for dialing in
Tone Dial (DTMF) mode.
Cross-reference
Tone Dial:
page 3-1.
☞
3-28. Memory Lock
If this feature is switched on, the machine will not print any incoming fax messages. They will be kept in memory until you enter the Memory Lock ID previously stored in the machine. Messages received by Confidential Reception
will not be printed when you input the Memory Lock ID.
Cross-reference
Memory Lock ID:
Confidential Reception:
page 3-5 .
☞
page 2-5.
☞
2-40
Page 62

SECTION 2 ADVANCED FEATURES
3-29. Wild Cards
This feature greatly enhances the effectiveness of the following features:
Authorized Reception
❐
Forwarding
❐
Specified Cassette Selection
❐
In each of these features, you have to store the RTI or CSI of various terminals
that you normally receive fax messages from. Then, when your machine detects an incoming call, it checks the RTI or CSI of the other terminal, and acts
accordingly.
When you program RTIs for these features, you can program wild cards to
greatly expand the number of terminals that you can receive from.
Example:
If you wish to accept messages from all 150 branches of XYZ Company (using
Authorized Reception), print them on yellow paper (using Specified Cassette
Selection), and forward them on to head office (using Forwarding), you don’t
have to store the RTI of each branch of XYZ Company. Program "XYZ" as a
wild card for each of these functions. If the RTIs of all XYZ branches contain an
"XYZ" somewhere in the RTI, messages coming in from them will be accepted,
printed on yellow paper, and sent on to head office.
CAUTION
This feature cannot recognize spaces.
Example:
If you store MAN as a wild card, and a terminal with an RTI that includes
MANCHESTER, HUMAN, or HUMANE calls you, your machine will
recognize MAN as a wild card and accept and/or forward the message.
Cross-references
Authorized Reception:
Specified Cassette Selection:
page 2-14. Forwarding: ☞ page 2-12.
☞
page 2-23. RTI and CSI: ☞ page 3-2.
☞
2-41
Page 63

SECTION 2 ADVANCED FEATURES
3-30. File Management
Every time you store a fax message in your machine’s memory, a new file is
created. Each file is given a number. The File List informs you which files are
currently in the memory.
Note: A new file is created for each Polling Transmission, Substitute Recep-
tion, and Confidential Reception also.
You can delete any of the memory files (except Confidential Reception files).
Also, you can print the contents of any of the files to check their contents (except for Confidential Reception files).
3-31. Counters
These counters will help you if you wish to keep a regular check on how many
pages your machine has sent, received, and copied.
The machine has the following counters:
Tx (Transmit) Counter: The number of pages that your machine has sent
❐
Rx (Receive) Counter: The number of pages that your machine has re-
❐
ceived
Scan Counter: The number of pages that your machine has scanned (in-
❐
cludes copy mode)
Print Counter: The number of pages that your machine has printed (in-
❐
cludes copy mode and report/list printing)
3-32. Well Log Transmission
Using this feature, you can transmit a document that is longer than the maximum limit, without having to cut it up into separate sheets. However, you must
contact a service technician to have this feature switched on.
The name of this feature is taken from oil well borehole surveying. A well log is
a vertical profile of a borehole, drawn to scale, showing important data. A well
log can be several yards long.
Caution
If this feature is switched on permanently, users must stay by the machine
while their documents are being scanned. This is because, if the document
jams, the machine may take much longer than usual to recognize the jam;
this could result in excessive wear and tear of the mechanical components
of the scanner.
If a jam does occur, press the Stop key immediately.
2-42
Page 64

SECTION 2 ADVANCED FEATURES
3-33. Transmission Reserve
If your machine is currently receiving a long fax message, but you want to send
a message and go back to your desk without having to wait by the machine,
you can place your message in the feeder, select the required transmission features (such as Confidential Transmission), dial the number, and press Start. After the incoming message has been received, your outgoing message will be
scanned, stored, and transmitted.
This feature is known as Transmission Reserve. It is always available on your
machine; you do not have to switch it on beforehand.
3-34. Dual Access
Dual Access is a more powerful version of Transmission Reserve. Not all machines have this feature.
Using Dual Access, you can do everything that is described in the Transmission
Reserve section above. However, in addition, your message will be scanned
and stored to memory while the machine is still receiving. This means that you
can take your document back to your desk.
3-35. Silent Ringing Detecti on (N. Am erican models only)
If you switch this feature on, the fax machine will not ring when a call comes in.
The merit of this feature is that the noise level in your workplace can be re-
duced if you do not need to be alerted every time a fax message comes in.
If you use Manual Receive mode, this feature will not be used.
❐
If you use Auto Receive mode, you may have the choice of switching this
❐
feature on or off.
If you use Auto Select mode, this feature is always used, unless the ma-
❐
chine determines that the incoming call is a telephone call.
Cross-reference
Reception modes:
page 1-13.
☞
2-43
Page 65

SECTION 2 ADVANCED FEATURES
3-36. User Function Keys
This is similar to the Function Programs feature, except that there are a number
of Function keys on the operation panel, like on a personal computer keyboard.
Each of these keys can be programmed with a feature that you wish to use frequently. Your Operator’s Manual contains a list of features that you can store in
the User Function Keys.
Cross-reference
Function Programs:
page 2-18.
☞
3-37. Communication Result Displa y
You can call up an on-screen display of the results of the previous few communications. This is useful if you wish to know whether your transmission was successful, but do not wish to print a TCR/Journal.
Cross-reference
TCR/Journal:
page 4-1.
☞
2-44
Page 66

SECTION 2 ADVANCED FEATURES
3-38. Inch-to-millimetre Conversion
Some fax machines are designed for use on digital data networks using Group
4. The hardware of these machines is set up to scan on a dot-per-inch basis.
However, Group 3 fax machines are set up to scan and print on a dot-per-millimetre basis. This means that, if a dot-per-inch based machine transmits to a
dot-per-millimeter based machine, the data will be distorted slightly as it is
printed at the other end (the data is reduced by about 1% across the page and
expanded by about 1% down the page).
If your machine has inch-to-millimetre conversion, you may ask a service technician to switch it on or off, as you wish. If you switch it on, the machine will correct for the distortion.
3-39. Ordering Toner
This feature is available with some plain paper fax machines. If you input the
fax number of your dealer, and the amount of toner needed, the machine will
generate an order form and send it to your dealer.
2-45
Page 67

SECTION 3. PROGRAMMING THE MACHI NE
1. PROGRAMMING AT INST ALLATION
1-1. Language Selection
If the display on the operation panel is not in your own language, try using this
feature. The machine’s software contains displays for several different languages.
1-2. Date and Time
Your fax machine has an internal clock. It controls the following features.
The time display on the operation panel while the machine is idle
❐
Operation of time-delay features like Send Later
❐
The date and time that is printed out on pages that you receive, if Reception
❐
Time is switched on.
The date and time that is printed out at the other end on pages received
❐
from your machine
Program the correct date and time when you install the machine, and whenever
local custom requires advancing the clock or setting the clock back.
Cross-references:
Send Later:
Reception Time:
page 1-7.
☞
☞
page 2-27.
1-3. Telephone Line Type
If the setting of this feature is incorrect, you will not be able to dial using the machine’s keypad or automatic dialer.
There are two basic types of telephone company exchange:
Exchanges using Tone Dialing (also known as DTMF, TT, or sometimes PB)
❐
Exchanges using Pulse Dialing (also known as PD or DP)
❐
The telephone line type setting in your fax machine must match the type of exchange that you are connected to.
Note: If there is a handset connected to your fax machine, make sure that it is
also set up in the correct dialing mode.
3-1
Page 68

RTI or CSI
SECTION 3 PROGRAMMING THE MACHINE
1-4. RTI, TTI, and CSI
These three are labels which identify yourself to the operator at the other end.
RTI or CSI: These appear at the other end in the display on the operation panel
during communication, and on reports after communication.
TTI: This is printed at the other end at the top of each page received from your
machine.
Similarly, you can see the RTI, TTI, and CSI of the other party.
TTI
Some machines may reject your transmitted fax messages if you have not
stored the RTI, TTI, or CSI in advance.
Continued on the next page
3-2
Page 69

SECTION 3 PROGRAMMING THE MACHINE
Programming the RTI, TTI, and CSI
RTI (Remote Terminal Identification)
The RTI can have up to 20 characters (numbers and letters can be used, along
with some punctuation marks). Program something easy to recognize, such as
your name, company name, or department name within the company.
TTI (Transmit Terminal Identification)
The TTI can have up to 32 characters (numbers and letters can be used, along
with some punctuation marks). Program something easy to recognize, such as
your name, company name, or department name within the company.
CSI (Called Subscriber Identification)
The CSI can have up to 20 characters (only numbers and spaces can be used).
Enter your fax machine’s telephone number, because some features of your
machine may not work if the CSI is not the same as the telephone number.
Notes:
Cross-reference
Reports:
You can switch the TTI off if you do not wish it to be printed on your
❐
pages as they are printed at the other end.
The RTI is only used between terminals made by the same maker.
❐
Between different makers’ machines, the CSI is used instead.
section 4.
☞
3-3
Page 70

SECTION 3 PROGRAMMING THE MACHINE
1-5. Various ID Codes
ID Code
This can be any four-digit code (using digits 0 to 9 and letters A to F), except
0000 and FFFF.
ID Codes are used with the following communication features.
Polling: ☞ page 2-8.
❐
Transfer Request: ☞ page 2-6.
❐
Closed Network: ☞ page 2-28.
❐
ID Transmission: ☞ page 1-9c.
❐
Features using ID Codes can only be used between terminals made by the
same maker.
Before programming the ID Code, confer with other users in your fax network to
agree on an ID Code. This is because communications using ID Codes will fail
if the codes are not the same.
3-4
Page 71

SECTION 3 PROGRAMMING THE MACHINE
Remote ID
This can be any four-digit code (using digits 0 to 9).
This is the code that you need to send to your machine before it will execute
any of the Remote Control features. There are various built-in safety measures
to make sure that unauthorized users cannot casually access your machine using Remote Control.
Confidential ID
This can be any four-digit code (using digits 0 to 9). It is used with the following
features.
Confidential Communication
❐
Mail Box
❐
It must be used to print any confidential messages that your machine has received.
CAUTION
If you forget your Confidential ID, print a User Parameter List or call a
service technician for assistance.
Secure ID
This can be any four-digit code (using digits 0 to 9 and letters A to F), except
0000 and FFFF, and is only used in models that have Secure Transmission.
Memory Lock ID
This can be any four-digit code (using digits 0 to 9 and letters A to F), except
0000 and FFFF.
Cross-references
Remote Control Features:
Confidential Transmission:
Confidential Reception:
page 2-20. Memory Lock: ☞ page 2-40.
☞
page 2-3. Mail Box: ☞ page 2-21.
☞
page 2-5. Secure Trans.: page. 2-11a.
☞
1-6. Your Fax Machine’s Telephone Number
Store your fax terminal’s telephone number using this feature. If you do not do
this, you will not be able to use the Transfer Request feature.
3-5
Page 72

SECTION 3 PROGRAMMING THE MACHINE
1-7. Country Code
To allow correct operation of Transfer Request and other networking features,
some fax machines require you to store the following two codes:
Yo ur Int ernational Dial Access Code: This is the code that you have to
❐
dial at the start of the number when you are making an international call.
Your Country Code: This is the code that callers in other countries have to
❐
input when dialing a number inside your own country.
In some models, you must input both of the above codes. In other models, you
must only input the Country Code. refer to your machine’s operator’s manual
for details.
1-8. Area Code Prefix
To allow correct operation of Transfer Request and other networking features,
some fax machines require you to store the digit that is added to area codes
when you dial another area within your own country.
In many countries, this code is just a zero. In Spain, a ’9’ is used, and in the
USA, the setting is just left blank.
The situation in France is a little more complex.
3-5a
Page 73

SECTION 3 PROGRAMMING THE MACHINE
2. SETTINGS
In older models, it was necessary to have a service technician turn some features on or off. User programmable settings allow you to make these adjustments, eliminating the need for service calls.
2-1. On/Off Switches
Many of your fax machine’s features have to be switched on before they are effective. Also, they can be switched off if you wish to deactivate them.
The features that are controlled by On/Off Switches vary from model to model.
Refer to your machine’s Operator’s Manual for details.
2-2. User Parameter Setti ngs
Your machine has additional features that you can switch on or off using User
Parameters. The parameters differ from model to model; refer to your machine’s Operator’s Manual for details.
When you view the user parameter settings on the display, you will see a row of
eight digits. This row of digits is known as a ’switch’. These digits are numbered
from 0 to 7; 7 is at the left and 0 is at the right. Each digit will be either 1 or 0.
Example:
In the following example, digits 5, 3, 2, and 0 are set to 1.
7 6 5 4 3 2 1 0
0 0 1 0 1 1 0 1
Each of these digits corresponds to a user parameter. The value of the digit determines whether the parameter is on or off. You can change the value of the
digits at the operation panel.
If there are more than eight user parameters, you will be able to access more
than one row of digits.
2-3. Economy Transmission Time
In order to use the Economy Transmission feature, you have to store a time in
advance. This is different from the Send Later feature, where you have to enter
the time for each individual communication.
Cross-reference
Send Later:
page 1-7. Economy Transmission: ☞ page 1-9b.
☞
3-6
Page 74

SECTION 3 PROGRAMMING THE MACHINE
3. ADJUSTMENTS
3-1. Speaker Volume
Your machine has a built in speaker. With this speaker, you can listen to the
telephone line without picking up the handset. The speaker will be automatically
switched off just before the start of facsimile data communication.
When you are sending a fax message, you will be able to hear the line after the
machine has dialed. If the line is busy, you can press the Stop key and start another operation without having to wait for the machine to disconnect the line.
If the speaker volume is not satisfactory, you can adjust it.
3-2. Display Panel Contrast
If the liquid crystal display panel is too faint or too bright, call a service technician.
Note: A few models allow you to do this yourself. Check your Operator’s Man-
ual.
4. TELEPHONE NUMBERS AND PERSONAL CODES
4-1. Programming Quick Dial
Using this feature, you can store telephone numbers as Quick Dial Keys. You
can also store a label with each telephone number for use with the Label Insertion feature.
The number of Quick Dial keys varies from model to model. Refer to your Operator’s Manual for details.
Note: You cannot use this feature to program Function Programs or Key-
stroke Programs, or to store Auto Documents.
4-2. Programming Speed Dial
Using this feature, you can store telephone numbers as Speed Dial Codes. You
can also store a label with each telephone number for use with the Telephone
Directory and Label Insertion features.
The number of Speed Dial codes varies from model to model. Refer to your Operator’s Manual for details.
3-7
Page 75

SECTION 3 PROGRAMMING THE MACHINE
4-3. Programming Groups
Using this feature, you can store a set of telephone numbers in a group. You
can also store a label with each Group. This label will be displayed when you
select the Group.
The number of Groups varies from model to model. Refer to your Operator’s
Manual for details.
Cross-references
Keystroke Programs:
Function Programs:
Convenient Dialing Methods:
page 2-2. Auto Document: ☞ p. 2-11.
☞
page 2-18. Label Insertion: ☞ p. 2-25.
☞
page 1-5.
☞
4-4. Storing Personal Codes
Personal Codes allow you to track machine usage and restrict access to the
machine (
The Personal Code is a four digit code. It can have any value from 0001 to
9999.
page 2-29).
☞
You can store the following items with each Personal Code:
A name - This name is printed on various reports, such as the TCR/Journal
❐
and Confidential File Report. It is also used with the Label Insertion feature.
A Confidential ID - This Confidential ID is used with Confidential Transmis-
❐
sion and Confidential Reception. It is not available in machines that have
only a small memory. Each Personal Code must have a different Confidential ID.
Cross-references
Using Personal Codes:
page 2-3, 2-5, and 2-29.
☞
3-8
Page 76

SECTION 4. REPORTS
1. AUTOMATIC REPORTS
These reports are automatically printed out at the appropriate time. There may
be a user parameter switch or other adjustment to enable or disable these reports. Consult your Operator’s Manual.
1-1. TCR/Journal
This report gives detail on each communication made by your terminal. It is
automatically output after a certain number of communications. In some models, this report is called the TCR (Transmission Confirmation Report), and in
others, it is called the Journal.
1-2. Transmission Result Report
This report is printed out after every transmission. It shows whether each transmission was successful or not.
1-3. Error Report
This report is printed after each unsuccessful communication (compare with the
Communication Failure Report below, which is printed after an operation has
been completed). So while doing a broadcast, the machine may print a number
of error reports, and at the end, it prints a Communication Failure Report (or
Transmission Result Report if it is switched on).
Check the report and retransmit any pages that were not sent. Keep any error
reports that are printed, as they may be useful for a service technician if a particular problem continues or gets worse.
1-4. Communication Failure Report
This report is printed after executing an operation, whether it be a single transmission or a broadcast from memory, if a transmission failure occurred during
that operation. It is only printed if the Transmission Result Report is switched off.
1-5. Memory Storage Report
This report is printed immediately after you store a document in memory for
Memory Transmission or Polling Transmission. It gives the file number , the time
that it was stored, and the destinations (including any Group numbers that were
selected).
4-1
Page 77

SECTION 4 REPORTS
1-6. Power Failure Report
This report is printed if the machine’s power was off for long enough to erase
the memory. The report gives details of the files that were lost. With this information, you may store messages for transmission again, and contact the senders of any received messages that were lost.
1-7. Transfer Result Report
After the end of a transfer transmission, the transfer broadcasting station sends
you this report. The report lists the telephone numbers of the broadcasting station and the end receivers, and indicates whether each transmission was successful or not. With this information, you may retransmit any pages that were
not sent, either directly, or using another transfer request operation.
If your machine is the broadcasting terminal, it will print the report if it cannot
send the report to the transfer requesting terminal (e.g., due to a busy line). The
report asks you to send the report manually, and the telephone number is given.
1-8. Polling Reserve Report
This report is printed automatically after you program the machine for polling reception (immediate or send later). It gives the file number, time of polling, and
destinations (including any Group numbers that you selected).
1-9. Polling Result Report
This report is printed after your machine polls a message from another machine.
1-10. Polling Clear Report
This report is printed after a polling file has been erased from memory.
1-11. Confidential File Report
This report informs you when a confidential message has been received.
If the sender of the message used Confidential ID Override, and specified an ID
that is the same as one of the Confidential IDs stored with a Personal Code in
your machine, the name stored with that Personal Code will be printed on the
Confidential File Report.
1-12. Transmission Deadline Report/Polling Confirmation List
If you selected the TRD (Transmission Deadline) option, this report will be
printed when the deadline passes. The report will tell you whether the transmission was made before the deadline or not. If you selected TRD with Polling, the
Polling Confirmation List will be printed instead.
4-2
Page 78

SECTION 4 REPORTS
2. USER-INITIATED REPORTS
These reports can be printed by executing a procedure on the operation panel.
Refer to your Operator’s Manual for details.
2-1. TCR/Journal
In addition to the automatic output of this report, you can print the TCR/Journal
at any time.
2-2. Quick Dial List
This is a list of the telephone numbers and other items that you have stored in
the machine’s Quick Dial Keys.
2-3. Speed Dial List
This is a list of the telephone numbers that you have stored as Speed Dial
Codes.
2-4. Group List
This is a list of all the groups that you have programmed, and the telephone
numbers in these groups.
2-5. Personal Code List
This is a list of the Personal Codes that you have stored, along with the names
and Confidential IDs.
2-6. File List
This is a list of memory transmission, memory reception, and polling files still in
the memory. It gives information about each stored operation, such as the fax
numbers, start time, status, and type of operation.
2-7. Authorized Reception List
This is a list of all terminal names that you have specified for Authorized Reception. It includes Wild Cards.
2-8. Forwarding List
This list shows details of how you have programmed the Forwarding feature. It
also includes the Wild Cards.
4-3
Page 79

SECTION 4 REPORTS
2-9. Specified Cassette Selection List
This is a list of all terminal names that you have specified for Specified Cassette Selection. It includes Wild Cards.
2-10. User Parameter List
This shows the current settings of the User Parameters.
2-11. Program List
This gives details on the Keystroke Programs that you have stored in the machine.
2-12. User Function List
This shows how the User Function Keys are currently programmed.
Cross-references
Immediate Transmission:
Memory Transmission:
Confidential Transmission:
Confidential Reception:
Keystroke Programs:
Personal Codes:
Authorized Reception:
Specified Cassette Selection:
User Function List:
☞
page 3-8. TRD: ☞ page 1-9a
☞
☞
page 1-1. Quick Di al: ☞ page 1-5.
☞
page 1-2. Transfer Request: ☞ p. 2-6.
☞
☞
page 2-44.
page 2-3. Polling: ☞ page 2-8.
☞
page 2-5. Groups: ☞ page 1-6.
☞
page 2-2. Speed Dial: ☞ page 1-5.
page 2-14. Forwarding: ☞ page 2-12.
page 2-23. User Parameters: ☞ p. 3-6.
☞
4-4
Page 80

SECTION 5. NETWORKING FEATURE S
This section explains some of the enhanced networking features that are available with the more advanced fax machines.
Using the Group Dial, Broadcasting, and Transfer Request Features, you
❐
can set up extensive facsimile networks. Such networks can save time and
cost if you set them up to cover commonly-used broadcasting operations, especially if long-distance communications are involved. However, if your machine can only do a Transfer Request through one broadcasting station, you
may not be able to use all of these features.
If you do a particular operation regularly, programming the operation as a
❐
keystroke program will allow you to start it with only one keystroke.
Some of these network set-ups require the installation of a Group 4 kit.
❐
Note
Your sales or service representative will be able to help make all the
necessary group and transfer station number programming in the various
broadcasting terminals throughout your proposed network. Please
co-ordinate with your sales representative to obtain correct programming at
the time of installation.
Cross-reference
Group Dial:
Broadcasting:
Transfer Request:
page 1-6.
☞
☞
page 2-1.
page 2-6.
☞
5-1
Page 81

SECTION 5 NETWORKING FEATURES
1. TRANSFER STATIONS
Transfer Stations allow you to expand the standard features of your fax machine to set up complex networks. There are two types:
Group Transfer Stations
❐
Next Transfer Station
❐
1-1. Group Transfer Station
In machines designed for Group 4 communication, you may be able to program
a number known as the Group Transfer Station with each of your Groups.
The Group Transfer Station allows a fax message to be broadcasted from your
fax machine to all the numbers in the Group, using the Group Transfer Station
as a broadcasting station. Normally, the instruction to carry out this broadcast
comes from another machine in a pre-programmed network set-up. Some examples are given in the next section (Setting up a Facsimile Network); refer to
these for details of how to use this feature.
Cross reference
Setting up a Facsimile Network:
Transfer Request:
page 2-6.
☞
page 5-1. Groups: ☞ page 1-6.
☞
1-2. Next Transfer Station
If you have programmed the telephone number of the Next Transfer Station,
this number allows your fax machine to be a transfer station in a two-step transfer operation using a digital network. An example is given in the next section
(Setting up a Facsimile Network); refer to this for details of how to use this feature.
Cross reference
Two-step Transfer:
page 5-4.
☞
5-2
Page 82

New Yo rk
Atlantic City
New
Orleans
Boston
SECTION 5 NETWORKING FEATURES
2. BROADCASTING, WITH TRANSFER REQUEST
Assume that your machine is in San Francisco and you wish to send the same
message to various locations in the U.S.A. Of course, doing a simple broadcast, sending to each terminal directly from your machine, would get the job
done, but you would not be taking advantage of the cost-cutting features of the
machine.
However, if you incorporate transfer request, as shown below, your machine
would only make 4 calls, instead of the 10 that would be necessary if transfer
request was not used. This saves costs.
San
Francisco
Seattle
This feature can be used over analog (Group 3) and digital (Group 4) net-
❐
works, and your machine can play any part in a transfer request network,
provided that your machine has all the required features.
The ID codes of the requester (San Francisco) and the broadcasters (New
❐
York and Houston) must be the same. The requester must have its own fax
number programmed.
The model used by the requester (San Francisco) must be able to make
❐
Transfer Requests through more than one Transfer Broadcaster.
Reports indicating success or failure will be returned to San Francisco from
❐
the terminals in Houston and New York.
Los Angeles
New Yo rk
Houston
Hartford
Philadelphia
Dallas
Oklahoma
City
Cross reference
Broadcasting:
Own Telephone Number:
page 2-1. Transfer Request: ☞ p 2-6.
☞
page 3-5. ID Code: ☞ page 3-4.
☞
5-3
Page 83

Yokohama
G3
G3
Osaka
SECTION 5 NETWORKING FEATURES
3. TWO-STEP TRANSFER
Digital Link (Specified Two-step Transfer)
D
Nagoya
A
PSTN (G3)
DIGITAL (G4)
B
G3
C
Sacramento
T erminal A
makes a transfer
request
A machine which does not have immediate access to a digital network can use
a digital link between San Francisco (B) and Tokyo (C) to send a fax message
to various locations in Japan (D to F). This speeds up communication and reduces costs. Terminals B and C must be G4 fax machines from the same manufacturer and must have the two-step transfer feature.
To start the operation, terminal A begins communication in the same way as it
would for a transfer request, specifying terminal B as the transfer station and
stations D to F as end receivers. B will send the message to C, and C will then
distribute it to D, E, and F.
Note that the following programming must be done in terminals B and C if twostep transfer is to work using a digital link.
The ID codes of terminals A, B, and C must be the same.
❐
The fax number of terminal C must be stored in Terminal B as the Next
❐
Transfer Station.
The fax number of terminal B must be stored in Terminal C as the Next
❐
Transfer Station.
Terminals B and C may need adjustment; contact a service technician.
❐
San Francisco
Next Transfer Stn. = C
Tokyo
Next Transfer Stn. = B
E
F
If the line between A and B is Group 3 (analog), then the lines from C to D, C to
E, and C to F must also be Group 3, unless the operation was done using
Groups stored in terminal C; in that case, the destinations (D, E, F) can be a
mixture of Group 3 and Group 4 terminals.
If the line between A and B is digital, the destinations can be a mixture of Group
3 and Group 4 terminals.
Cross-reference
Groups:
ID Code:
page 1-6. Next Transfer Station: ☞ page 5-2.
☞
page 3-4.
☞
5-4
Page 84

SECTION 5 NETWORKING FEATURES
Analog Link
Two-step transfer can also be done if the link between terminals B and C is analog (Group 3 on the PSTN).
D
PSTN (G3)
A
B
C
E
Dials #**01
(Transfer
Request)
Terminal A starts the communication in the same way that it would start a transfer request. However, it must dial using a group stored in terminal B (for example, if the required group in terminal B is group 1, terminal A must dial #∗∗01).
See the fax machine’s operator’s manual (Transfer Request) for more details.
Note that the following programming must be done if two-step transfer is to
work using an analog link.
The ID codes of terminals A, B, and C must be the same.
❐
Terminals D, E, and F must be programmed in a group at terminal B (for ex-
❐
ample, Group 1). Terminal C must be programmed as the Group Transfer
Station for that group (this is one of the optional programming features available when programming a Group). See the fax machine’s operator’s manual
for details.
Caution
If terminal C is not programmed in terminal B as the transfer station for the
group, the message will be sent out to D, E, and F using terminal B as the
broadcaster. If the link between B and C is long-distance, this would not be
much help in reducing your communication costs, as you can see from the
previous diagram.
Terminal B: Group 01
Terminal D
Terminal E
Terminal F
Group Transfer Stn. = C
F
Cross-reference
Transfer Request:
Group Transfer Station:
page 2-6. ID Code: ☞ page 3-4.
☞
page 5-2. Groups: ☞ page 1-6.
☞
5-5
Page 85

SECTION 5 NETWORKING FEATURES
4. MULTI-STEP TRANSFER
The principles of the two-step transfer feature can be used to build up a multistep facsimile network using either analog (Group 3) or digital (Group 4) lines.
An example follows.
A
Dials #**01
(Transfer
Request)
To set up this network, the following programming must be done:
Terminal C must contain two preprogrammed groups. Group 1 must contain
❐
terminals I and J. Group 2 must contain terminals E, F, G, and H. In Group
1, terminal D must be specified as the Group Transfer Station.
Terminal B must contain a preprogrammed group (Group 1). This group
❐
must contain two numbers, #∗∗01, and #∗∗02. These specify transfer using
groups 1 and 2 that are stored in the Group Transfer Station. In Group 1, C
must be specified as the Group Transfer Station.
The ID codes of terminals A, B, C, and D must be the same.
❐
Terminal C: Group 1
Terminals I and J
Group Transfer Stn. = D
Terminal C: Group 2
Terminals E, F, G, and H
B
Terminal B: Group 01
#**01
#**02
Group Transfer Stn. = C
C
H
D
G
I
J
E
F
To start the operation, terminal A does a transfer request using terminal B as
the broadcaster and #∗∗01 as the end receiver; this specifies transmission to
the numbers stored in Group 1 at terminal B.
Cross-reference
Groups:
page 1-6. Group Transfer Station: ☞ page 5-2.
☞
5-6
Page 86

SECTION 6. GROUP 4 FEATURES
Page No.
Group 4 allows you to send fax messages using high-speed digital data networks. Group 4 has the following major advantages over Group 3:
If your organization sends large volumes of material by fax, using Group 4
❐
will greatly reduce your communication costs as a result of the high speed of
data transmission.
Normal analog networks tend to be noisy, affecting the quality of received
❐
data. However, communications over digital networks are of a high quality.
There are a few additional features that can be used with Group 4 machines,
and a few differences between Group 4 communications and Group 3 communications. These are described in this section.
1. EXTRA FEATURES FOR GROUP 4 KITS
1-1. Terminal ID
Instead of the TTI, a Group 4 communication will transmit a variety of information, including an identifier known as the Terminal ID, which identifies the other
party in the same way as a TTI.
The contents of the Terminal ID are programmed by a service technician.
The make-up of the Group 3 TTI and the Group 4 Terminal ID is as shown be-
low.
Group 3
Group 4
Date
Label Insertion
Rx Terminal ID Date
Label Insertion
TTI
Tx Terminal ID Page No.
6-1
Page 87

SECTION 6 GROUP 4 FEATURES
Date, TTI, Page No., and Label Insertion are transmitted in the data signal,
❐
superimposed on the image.
Rx Terminal ID, Tx Terminal ID, Date (Group 4), Page No. (Group 4), are
❐
transmitted in the Group 4 protocol.
The Rx and Tx Terminal IDs have up to 24 characters. The Date (Group 4)
❐
is in the YY-MM-DD- HH:MM format. The Page No. (Group 4) has up to 7
characters.
Explanation of the Items in the Group 4 Identifier
Tx and Rx Terminal IDs
The following shows what happens when the two communicating terminals are
connected to two different ISDNs. Each ISDN has its own country code.
ISDNs
Transmitter
Country Code: 44
Terminal ID:
LDN/081-890-5566
At the top of the received page, the following will be seen.
1 - 2015558310 = N.J./44 - 818905566 = LDN/(Date)/(Page No.)
The zero in the London area code and the other pauses in the phone numbers
are not represented on the printout.
The country code and terminal ID are programmed by the service technician at
installation.
Date and Time
The date and time in the receiving machine are printed.
Page Number
001-001 (File number followed by page number)
Example: Batch Transmission
Receiving a three-page file and a two-page file
First page: 001-001 Fourth page: 002-001
Second page: 001-002 Fifth page: 002-002
Third page: 001-003
International Link
6-2
Receiver
Country Code: 1
Terminal ID:
N.J./201-555-8310
Page 88

SECTION 6 GROUP 4 FEATURES
1-2. Terminal ID Verification
This feature helps you to make sure that your communications do not go to the
wrong place. However, like Protection Against Wrong Connections, it will not
help you if you dial the wrong number.
If the Terminal ID of the other party does not match the label stored with the
Quick Dial or Speed Dial that you used to dial the other party with, the communication will be stopped.
For this function to work:
You must store the destination as a Quick or Speed Dial.
❐
You must make sure that the labels that you program in the Quick/Speed Di-
❐
als exactly match the Terminal IDs that are actually stored in the destination
fax machines.
Cross-reference
Terminal ID:
Quick Dial:
1-3. Automatic Fallback from Group 4 Mode to Group 3 Mode
If your machine cannot communicate with the other party using Group 4 mode,
it will try using Group 3 mode. This will allow your machine to send the message even if you selected Group 4 mode instead of Group 3 mode by mistake.
page 6-1. Speed Dial: ☞ page 1-5.
☞
page 1-5.
☞
1-4. Subaddress
Inputting the subaddress of a destination fax machine will allow you to reach it
directly if it is connected behind a multiplexer or similar device. The subaddress
can be thought of as similar to the extension number of a telephone connected
behind a PBX.
6-3
Page 89

GLOSSARY
ADF (Automatic Document Feeder):
A device which feeds the pages of a multipage document one at a time, in the
order that you arranged the pages in the stack.
Batch Numbering (Page Count):
This is a way of numbering pages that allows you to check whether you received all pages, and if not, which ones are missing. For example, if you receive two pages with p1/3 printed on one and p2/3 on the other, you have just
received a three-page document but page 3 didn’t make it.
BPS (Bits Per Second):
This is the data communication rate. In G3 mode, your fax terminal digitizes
documents, transforming them into ’bits’ produce about 200,000 of them), and then sends them out at a top speed of
9,600 to 14,400 bps, depending on the model.
Broadcasting:
In G3 fax communication terminology, broadcasting is the transmission of a
document to more than one address in sequence, not simultaneously.
CCITT
Consultative Committee for International Telephone and Telegraph. This committee sets international standards for communication.
Communication:
Transmission or reception.
binary digits - (an average page will
Copy:
When used as a noun, this refers to a printout, either in copy mode or receive
mode
Country Code:
In international dialing, this is the code that directs the call to the country where
the terminal that you wish to send to is located.
CSI:
Called Subscriber Identification.
Dial Pulses:
These are dialing signals that your terminal sends out if it uses pulse dialing
page 3-1).
(
☞
Document:
This is the original page or set of pages that you wish to send.
page 3-2.
☞
Page 90

DPI (Dots Per Inch), or l/mm (Lines Per Millimetre):
This is the unit of resolution. The scanner scans your document according to
the selected resolution. An 8-1/2" x 11" page is broken down into about
1,728,000 dots if standard resolution is used. (Digital compression techniques
for G3 convert these into about 200,000 bits.)
EFC:
This is a proprietary digital data compression technique. It shortens the time for
sending a page.
Factory Setting:
The factory setting of a function is the state into which it was programmed at
the factory; this will also be the state of that function in a new machine.
File:
Memory File, Polling File.
☞
Group 3:
This is an internationally-agreed signaling and data transfer method used for
facsimile communication (approved by CCITT). It is also known as G3.
Handset:
This is the telephone that is connected to the jack marked "TEL 1 or TEL 2".
International Dialing Code:
This is the code that must be dialed at the beginning of the number if the destination is outside your country.
Memory File:
This is a document stored in the SAF memory (see the next page) and the instructions (destinations, time of transmission) for sending that document.
Modem:
Acronym for modulator/demodulator. A device that transforms a digital signal
into a form suitable for transmission over the telephone network.
Original:
Same as "Document".
Page Retransmission:
If the terminal you are sending to indicates that it did not properly receive the
page you just sent, your terminal will resend that page from memory. This only
works if you used Memory Mode and if you are not using ECM. (ECM is a more
effective data retransmission method.)
Polling File:
This is a set of instructions (destinations to be polled, time of polling) for polling
reception.
Page 91

Pulse Dialing:
This method of dialing uses a string of pulses to represent each dialed digit.
Reception:
The act of receiving a document.
Reduction:
If your document is wider than the paper available in the other terminal, your terminal will automatically reduce it so that it will fit.
Remote Terminal:
The facsimile terminal that you are sending to or receiving from.
RTI:
Remote Terminal Identification.
SAF:
Store and forward.
SAF File:
Same as "Memory File"; see the previous page.
SAF Memory:
This is the memory used for storing documents.
Sending:
Same as "Transmission", see below.
Standby Mode:
The terminal is said to be in standby mode when it is idle.
page 3-2.
☞
Terminal:
A facsimile terminal, such as your machine.
Tone Dialing:
This method of dialing uses a tone to represent each dialed digit.
Transmission:
The act of sending a document.
TTI:
Transmit Terminal Identification.
page 3-2.
☞
 Loading...