

Page 1

MFD User Guide
With PCC
Ver 1.3
Page 2

CONTENTS
CONTROL PANEL Page 3
An overview of the function buttons.
MFD BASICS Page 4
Explains some of the most commonly used functions and buttons.
LOGIN & LOGOUT Page 5
How to login and out of the MFD.. (You will need to register your card first)
REGISTER ACARD Page 6
Registering will enable you to login and out using your card.
RELEASE PRINTS Page 8
How to release your print jobs from the MFD.
ACCESS SCANNING Page 9
How to access scanning functions.
SCAN TO ME Page 10
Scan a document and email it to yourself.
SCAN TO FOLDER Page 12
Please confirm with your IT support whether either or both of these options
have been setup. ‘My Folder’ will send to you directly, whereas ‘Network Folder’
will be in a shared folder accessed by many.
SCAN TO MAIL Page 14
Scan a document and email it to yourself and others. You may edit the
‘sender’ and ‘cc’ fields.
SCAN SETTINGS Page 16
Where to change scan settings such as 2 sided and colour scanning.
COPIER Page 17
Details how to access the Copier function.
COPIER Double-sided Page 18
Make 2-sided copies from single and double sided originals.
COPIER Sort & Staple Page 19
Collate documents into sets. Add a staple to your documents.
Where you see QR codes in this guide, use a QR code reader app on
your smartphone to scan the codes which will link to relevant videos on
the Ricoh Wiki playlist on YouTube.
Page 3

CONTROL PANEL
RESET Clears all settings (Defaults).
PROGRAM Store frequently used copy settings
in the machine memory and recall
them for future use.
INTERRUPT Not in use.
ENERGY SAVER Turn the machine ON/OFF (from
standby)
LOGOUT Logout hard key.
USER TOOLS/COUNTER Access System menus. Take coun-
ter readings.
C/CLEAR Delete quantity.
STOP Stop copying/scanning/faxing when
on that function.
SIMPLIFIED DISPLAY Toggles between normal and sim-
plified screen mode.
SAMPLE COPY Use this key instead of the green
button to produce a sample set. *
Can only be used when [Sort] is
selected.
START Begin copying/scanning/faxing
when on that function.
STOP Cancel/stop Copier job.
CHECK STATUS Overview of function status.
F1 Access the Copier function.
F2 Access the Printer function.
F3 Not in use.
F4 Not in use.
F5 Not in use.
Page 3
Page 4
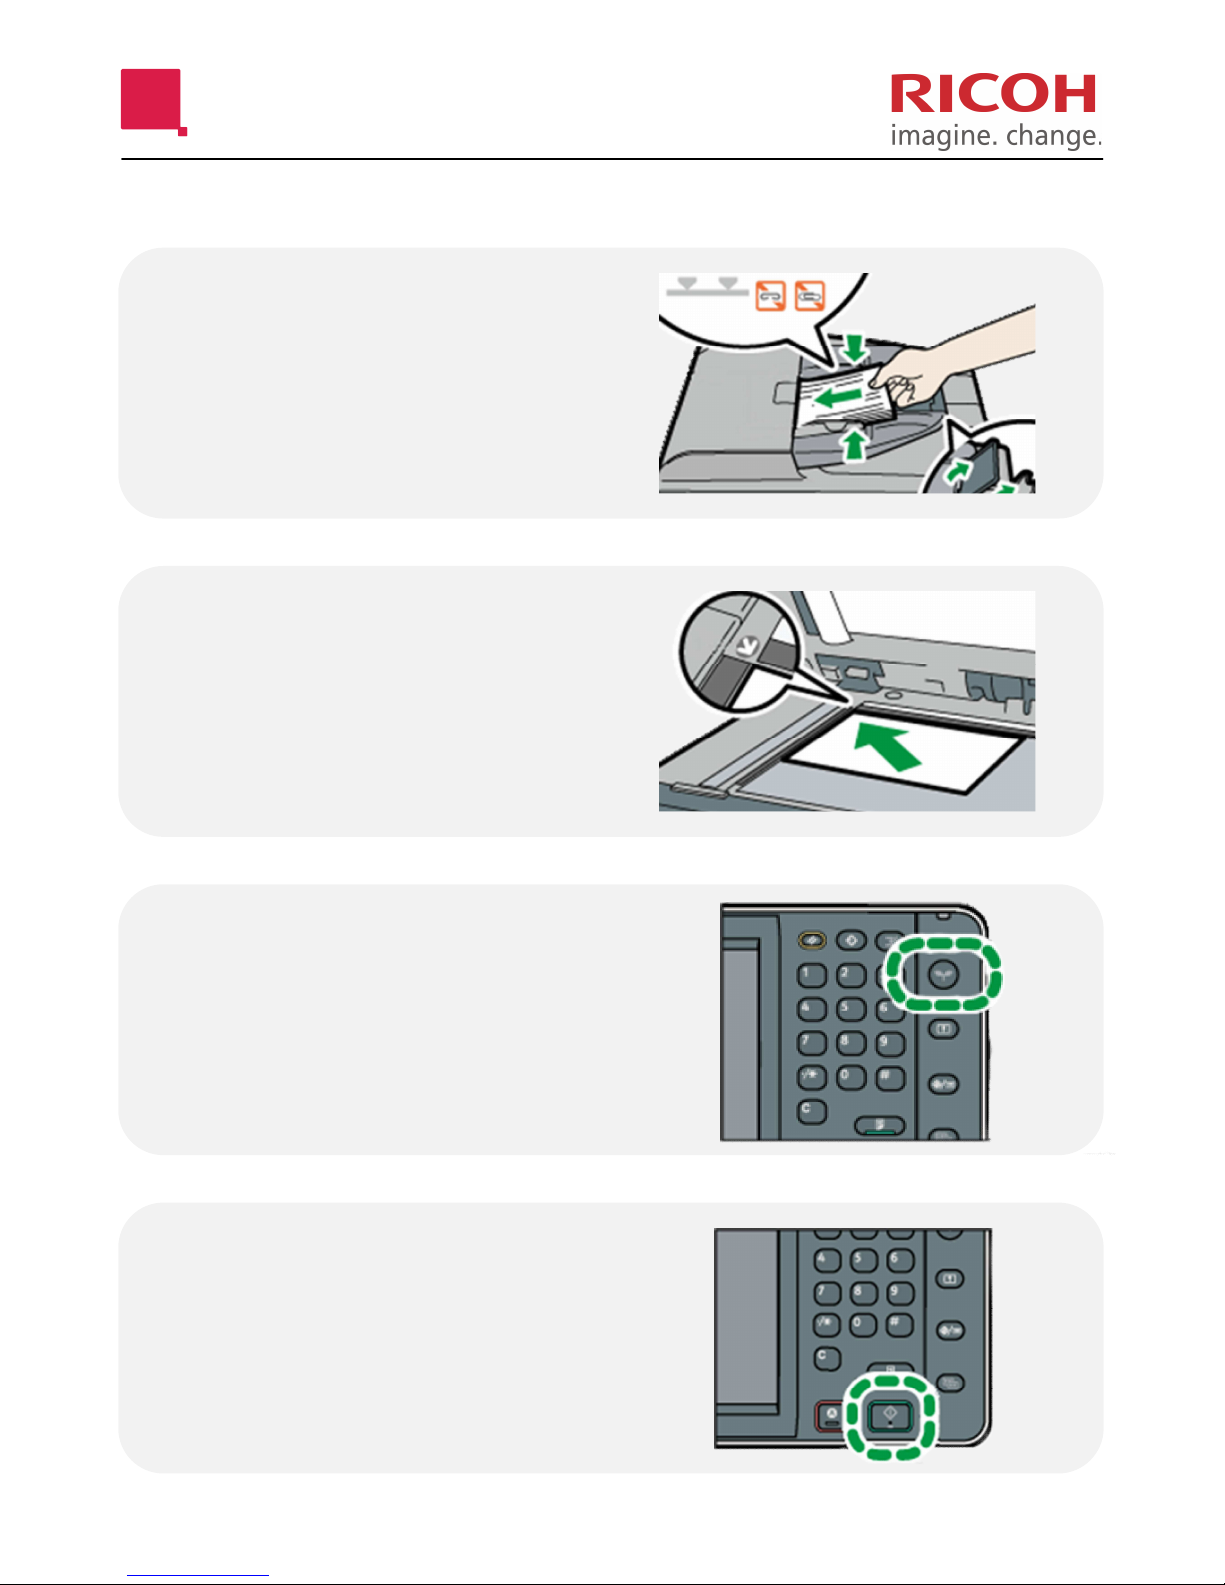
BASICS
Load documents
FACE UP in the auto
document feeder.
Place documents
FACE DOWN on the
glass.
Press the
‘Energy Saver’ button
to turn the machine
on from standby.
Press the [Start] button to commence
Copying/Printing/
Scanning/Faxing.
Page 4
Page 5
LOGIN & LOGOUT
NOTE:- BEFORE YOU CAN USE ADEVICE
YOU WILL NEED TO REGISTER YOUR CARD!
See ‘Register a Card’ section for instructions.
HOLD YOUR
CARD OVER THE
READER FOR A
FEW SECONDS.
PRESS THE
LOGOUT BUTTON
or
HOLD YOUR CARD
OVER THE
READER AGAIN.
LOGIN
LOGOUT
Page 5
Page 6
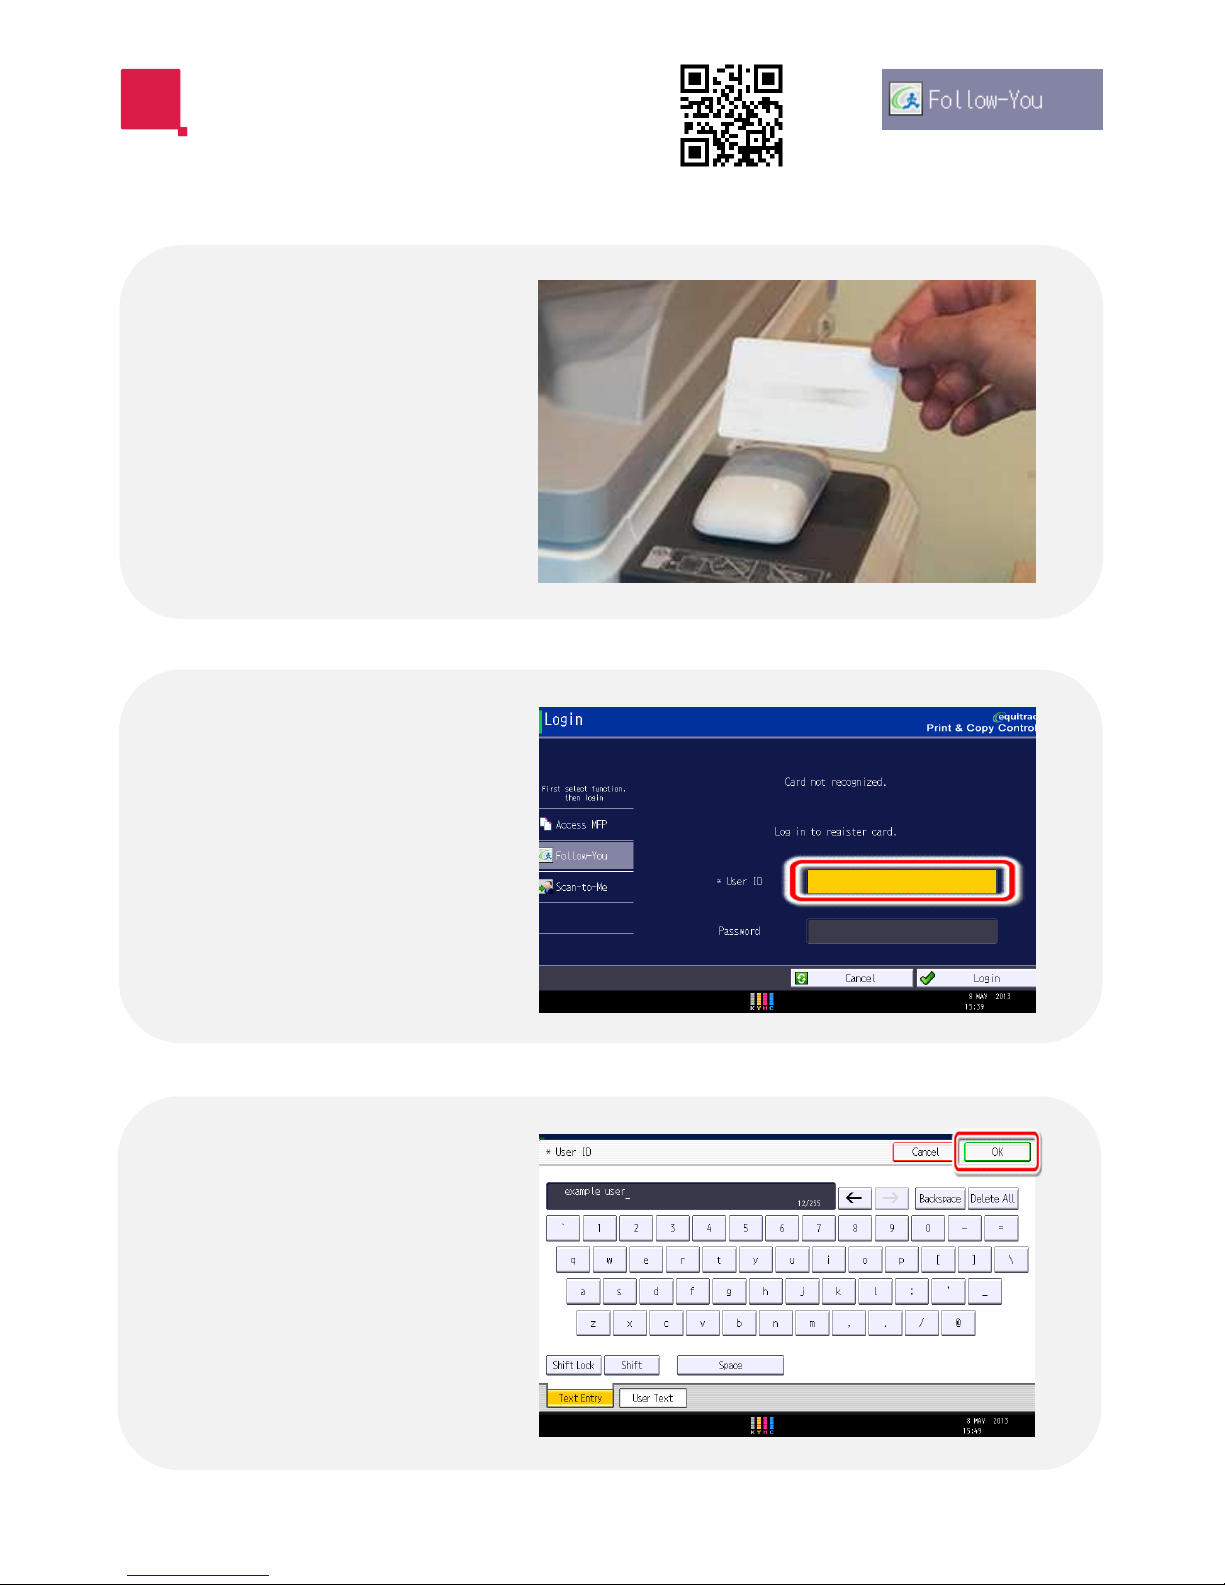
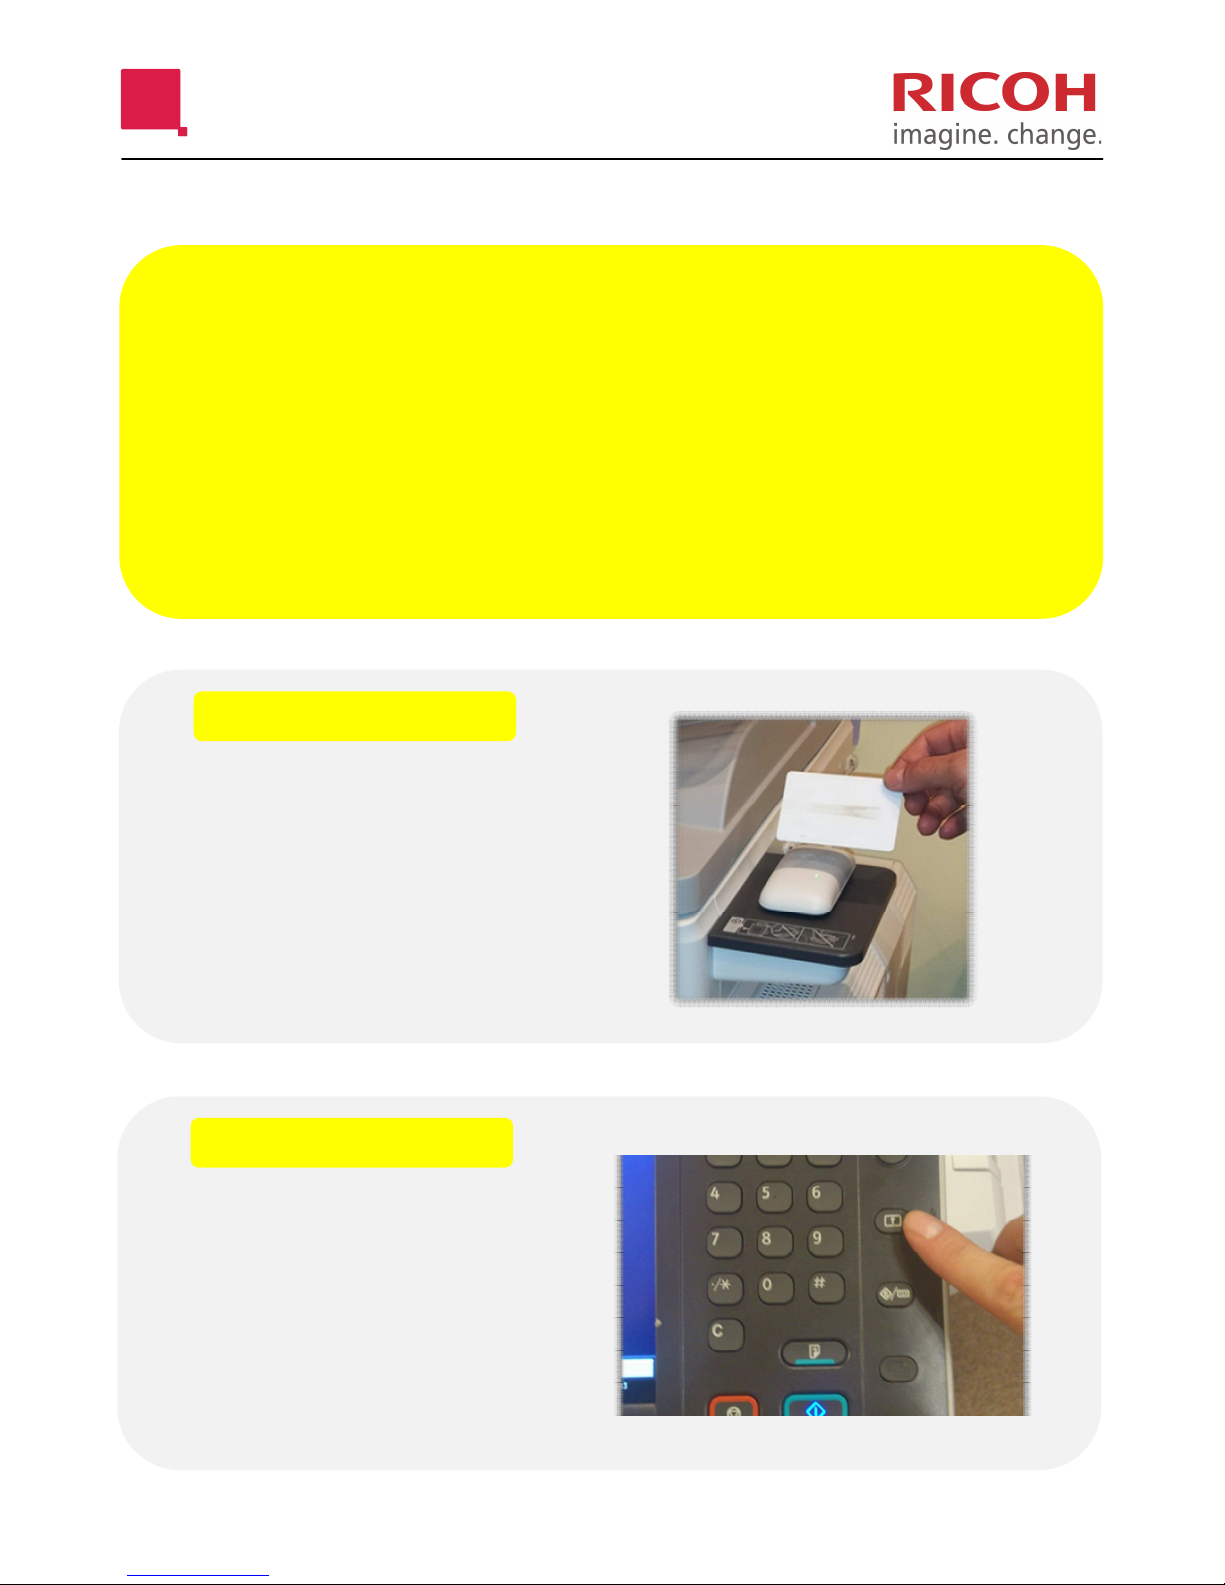
REGISTERA CARD
Hold your
card briefly
over the card
reader.
You will
need to enter
your network
login details.
Select
‘User ID’.
Type in your
network user
name and
then
select ‘OK’.
❶
❷
❸
Page 6
Page 7

REGISTERA CARD
Now select
‘Password’.
Type in your
network pass-
word and then
select ‘OK’.
Select ‘Login’
to complete
the
registration.
❹
❺
❻
Page 7
Page 8

RELEASE PRINTS
Hold your
card briefly
over the card
reader.
Use
‘Select All’ to
highlight all
the jobs in
your queue.
Select ‘Print’
to release
your jobs.
Then Logout!
❶
❷
❸
Page 8
Page 9

ACCESS SCAN FUNCTIONS
Hold your
card over the
reader to
login.
Select ‘Exit’.
Select ‘Scan’.
❶
❷
❸
Page 9
Page 10

SCAN-TO-ME
Then select
‘Scan-To-Me’
Select ‘Next’.
Select ‘Next’.
❶
❷
❸
Follow steps in ‘Access Scan Functions’ section first.
Page 10
Page 11

SCAN-TO-ME
Select ‘Scan’.
Logout or
Select ‘Done’
for more
options.
❹
❺
Page 11
Page 12

SCAN TO FOLDER
Select ‘Scan’.
❶
❷
❸
* See next page
The folder
destination is
displayed in
the yellow
box. Select
‘Next’.
Then select either
‘Network Folder’
or ‘My Folder. *
Follow steps in ‘Access Scan Functions’ section first.
Page 12
Page 13

SCAN TO FOLDER
Logout or
Select ‘Done’
for more
options.
❹
* Please confirm with your IT support whether either or both
of these options have been setup.
‘My Folder’ will send to your Home Folder directly, whereas
‘Network Folder’ will be in a shared folder accessed by many.
The folder destination will be displayed on-screen. Please
consult your IT support if you are unsure where to find this at
your PC.
Page 13
Page 14

SCAN TO MAIL
To choose a
different file type,
select the yellow
box.
For PDF
scanning,
select ‘Next’.
❶
❷
❸
* See next page
Select any of
the boxes to
change the con-
tent. Change
email addresses
or subject. Then
select ‘Next’.
Then select ‘Mail’.
Follow steps in ‘Access Scan Functions’ section first.
Page 14
Page 15

SCAN TO MAIL
Select ‘Scan’.
Logout or
Select ‘Done’
for more
options.
❹
❺
Page 15
Page 16

SCAN SETTINGS
The ‘Scan
Settings’
option is
always next to
the ‘Scan’
button.
Select
‘Feed’ to
change to 2
sided
scanning.
Select ‘Type’
to choose
Black & White
or Full Colour
scanning.
❶
❷
❸
Page 16
Page 17

COPIER
Hold your
card briefly
over the card
reader.
Press the
[Copier]
function
button.
Choose your
options from
the MFD
display.
❶
❷
❸
Page 17
Page 18

DOUBLE SIDED
To make
two-sided
copies from
one- sided
originals:
To make two-
sided copies
from two-
sided
originals:
Page 18
Page 19

SORT & STAPLE
To collate
documents in-
to sets, select
‘Sort’.
To staple
your
documents
choose from
one of the
staple
options.
Page 19
Page 20

 Loading...