

Page 1
Benchmark
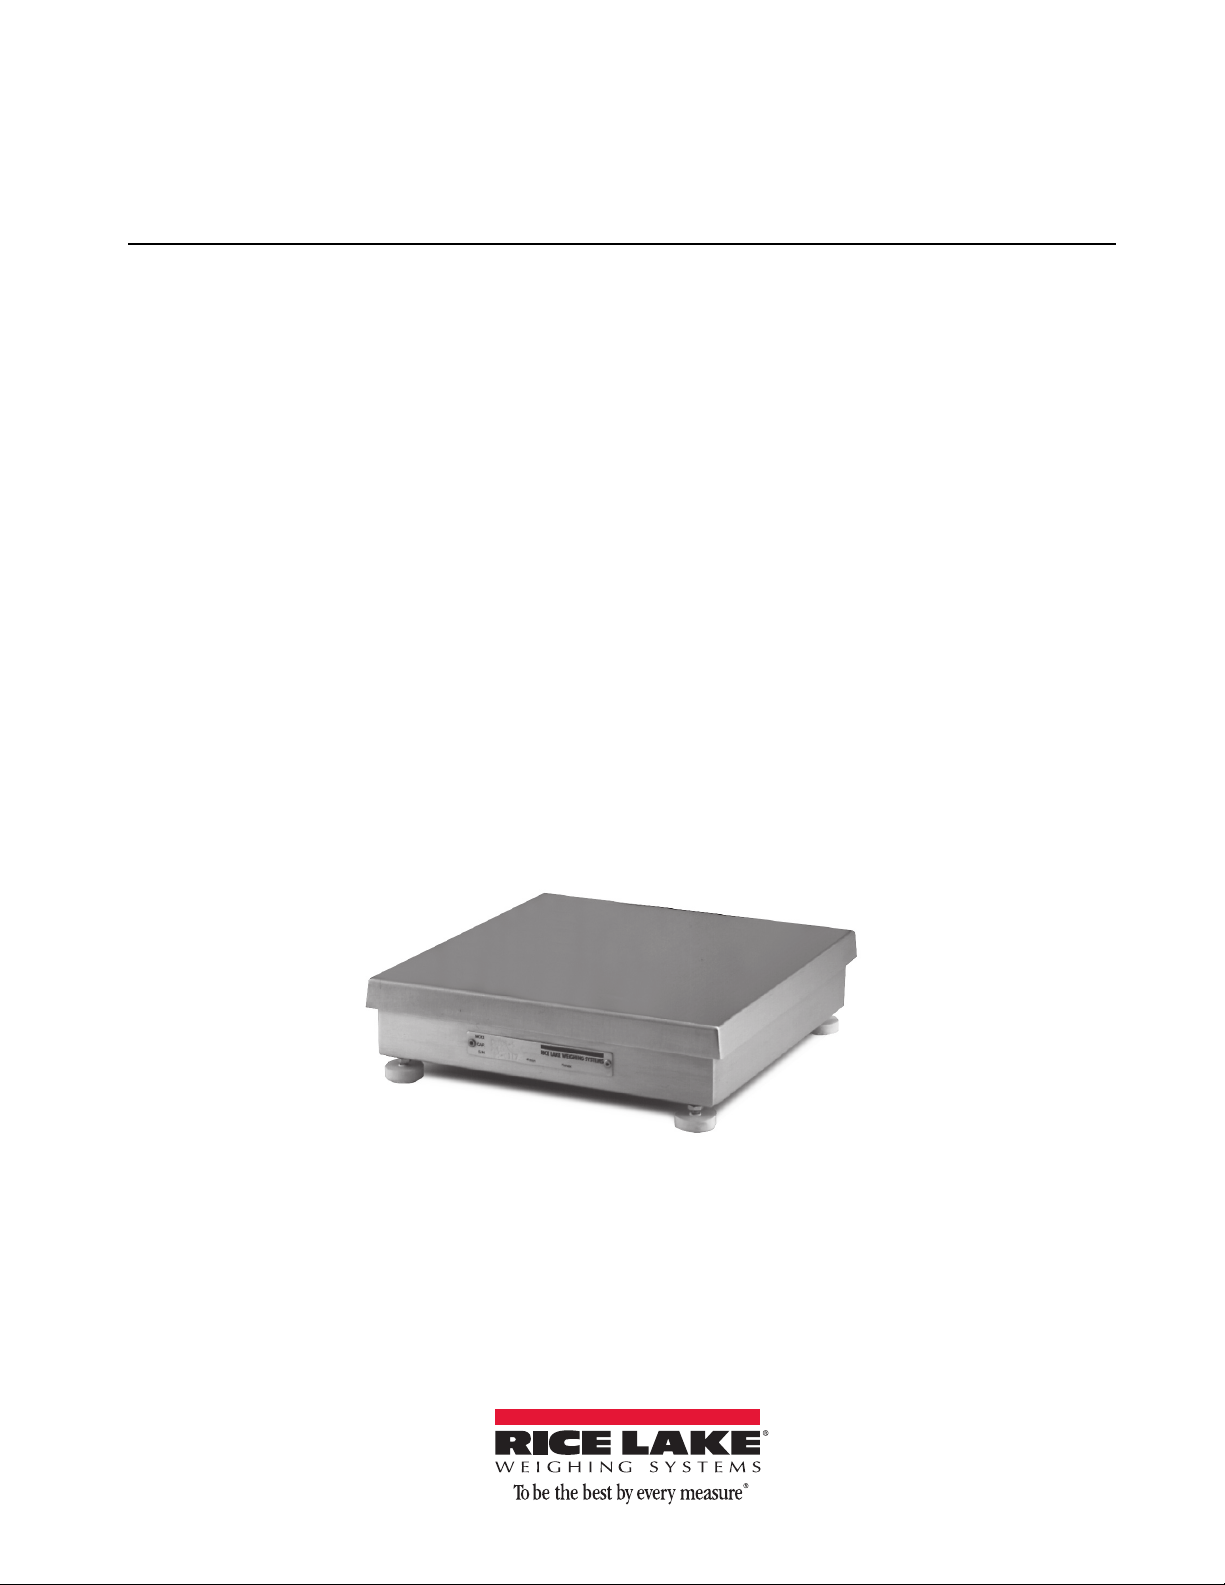
CW-80B Series Bench Scale
Installation/Service
Manual
™
40543
Page 2

Page 3

Contents
Technical training seminars are available through Rice Lake Weighing Systems.
Course descriptions and dates can be viewed at www.ricelake.com/training
or obtained by calling 715-234-9171 and asking for the training department.
Introduction.............................................................................................................................................. 1
1.0 Installation ................................................................................................................................... 1
1.1 Leveling . . . . . . . . . . . . . . . . . . . . . . . . . . . . . . . . . . . . . . . . . . . . . . . . . . . . . . . . . . . . . . . . . . . . . . . 1
1.2 Grounding . . . . . . . . . . . . . . . . . . . . . . . . . . . . . . . . . . . . . . . . . . . . . . . . . . . . . . . . . . . . . . . . . . . . . 1
1.3 Load Cell Wiring and Specifications . . . . . . . . . . . . . . . . . . . . . . . . . . . . . . . . . . . . . . . . . . . . . . . . . . 1
2.0 Troubleshooting ........................................................................................................................... 2
3.0 Load Cell Replacement................................................................................................................ 2
4.0 10" x 10" Base Assembly Parts .................................................................................................. 4
5.0 12" x 12" Base Assembly Parts .................................................................................................. 5
BenchMark™ CW-80B Limited Warranty................................................................................................ 6
© Rice Lake Weighing Systems. All rights reserved. Printed in the United States of America.
Specifications subject to change without notice.
Rice Lake Weighing Systems is an ISO 9001 registered company.
19 November 2014
i
Page 4

ii CW-80B Installation Manual
Rice Lake continually offers web-based video training on a growing selection
of product-related topics at no cost. Visit www.ricelake.com/webinars.
Page 5

1.0 Introduction
Congratulations on choosing a scale from the Benchmark CW-80B series, the highest quality single-point benchtop
scale available.
Authorized distributors and their employees can view or download this manual from the Rice Lake
Weighing Systems distributor site at
www.rlws.com.
1
Page 6

2.0 Installation
CAUTION
Remove the scale from the shipping container and place it in the desired location. Select a location for the CW-80B
that is reasonably level and free of unnecessary vibrations and air currents.
2.1 Leveling
Do not lift the scale by the spider assembly that supports the platter. Lifting by the spider can damage the
load cell. Always lift under the ba
Remove the scale platter and locate the bubble level. Adjust the four corner feet on the base until the bubble level
on the inside frame of the unit reads level. When level, the base should not rock and all four feet should have solid
contact with the support surface. If using a column with the scale, adjust the two column feet until they make solid
contact with the support surface.
2.2 Grounding
Bench scales can build up a charge of static electricity during weighing operations. If powerful enough, this charge
can travel through the load cell cable to the indicator. To prevent this, all bench scales should be grounded so that
static charges and transient electrical surges can drain directly to ground.
A chassis ground screw is located on th
e bottom of the platform (number 26 on the parts diagrams shown on pages
4 and 5) to facilitate grounding. Use a ground wire of at least 18 gauge copper to connect this screw to the same
earth ground as the attached indicator.
2.3 Load Cell Wiring and Specifications
Use the wiring code shown in Table1-1 when connecting the CW-80B bench scale to your indicator. Refer to the
indicator manual for information about indicator connections and calibration.
se when moving the scale.
Color Function
Green +Excitation
Black –Excitation
White +Signal
Red –Signal
Yello w Shield
Table 2-1. RL1380 load cell wiring code
RL1380 Load cell specifications
Full scale output 2.0 mv/V
Bridge resistance 350
Material Stainless steel
Temperature 14°F–104°F / -10°C to 40°C
(compensated ra
Safe overload 150% full scale
Rated excitation 10V AC/DC (15V maximum)
Combined error 0.03% full scale
Insulation resistance 1000 M
Seal type Environmentally protected
Cable length 10 ft/3.1 m
nge)
2 Benchmark HD Series
Table 2-2. Load cell specifications
Page 7

3.0 Troubleshooting
This section will provide basic troubleshooting techniques associated with the CW-80B.
Symptom Probable Cause Remedy
No display Power disconnected Connect power
Cable cut or disconnected Repair or reconnect cable
Signal leads incorrectly wired at indicator Connect according to indicator manual
Display stays at zero Incorrect load cell cable
Faulty indicator Service indicator
Erratic weight display Vibration near the scale Remove source of vibration
Scale not level Level the scale
Water damage to load cell or cable Replace load cell
Faulty indicator Service indicator
Loose load cell screws Tighten to correct torque
Faulty load cell Test and replace load cell if necessary
Consistently low weights Indicator not properly adjusted to zero Zero indicator correctly
Scale deck cover binding Obtain adequate clearance
Overload stops
Indicator not calibrated for scale Calibrate
Faulty load cell Test and replace load cell if necessary
connections Connect according to manual
averaging of indicator to minimize erratic weight
display
set too high Reset stops correctly
, or adjust digital
Table 3-1. CW-80B Troubleshooting Table
Load Cell Wiring and Specifications 3
Page 8

4.0 Load Cell Replacement
Top Sub -Assembly
Load Plate/Spider
Load Cell Screw
Top Cover
Overload
Protection
Screw
Lift up
Protection
Screw
Load Cell Screw
H –.02
Use the following steps when replacing a load cell in the CW-80B.
1. Unplug AC power from indicator and disconnect load cell
2. Lift off scale top cover. Locate two u
pper load cell screws. Use 7/16” wrench to unscrew and remove those
two load cell screws. Do not remove four spring-loaded screws that attach load plate to spider assembly.
Lift off load plate/spider assembly as a unit. Remove spacer between load plate and load cell and set it
aside.
80 in lbs.
6. Replace Lift up Protection Screw by screwi
ng it in until it lightly bottoms, then back it off
1/4 turn.
7. Turn scale right side up. Position spacer on load cell, then
in two upper load cell screws. Torque to 80 in/lbs.
8. Use an accurate caliper to check compressed spring length of the four overload springs as s
3-2. If necessary, adjust length to specifications in Table 3-1. Replace top cover and re-level scale.
9. Connect load cell cable to correct p
10. Tighten cord grip where cable enters indica
ins on indicator terminal strip.
tor head. Reassemble indicator enclosure if required.
cable from indicator’s terminal connection strip.
3.Turn scale over and back off Overload
Protection Screw one complete turn.
Compl
etely unscrew and remove the Lift up
Protection Screw.
4.Use 7/16” wrench to unscrew and remove two
lower load cell screws. The load cell and cable
can now be removed from scale. Do not lose
shim beneath load cell.
5.Thread cable of replacement load cell
rubber grommet. Position load cell on shim and
screw in two lower load cell screws. Torque to
place load plate/spider unit into position. Screw
through
hown in Figure
11. Recalibrate scale according
to calibration instructions for the attached indicator.
12. Adjust Overload Protection Screw on bottom of scale by loading
on top cover, centered on platform. With appropriate size hex wrench, screw in Overload Protection Screw
until it touches load cell, then back it off 1/6 turn. Recheck calibration.
Figure 4-1.
Figure 4-2. Overload Spring Height Adjustment
CW-80B Load Cell Mounting
scale to 125% capacity. Place this weight
4 Benchmark HD Series
Page 9

Platform Capacity Spring Height “H”
10" x 10" 6 lb (3 Kg) 1.00”
10 lb (5 Kg) 0.94”
15 lb (7 Kg) 1.04”
30 lb (15 Kg) 1.43”
12" x 12" 30 lb (15 Kg) 1.43”
60 lb (30 Kg) 0.93”
Table 4-1. Overload Spring Height Values
Load Cell Wiring and Specifications 5
Page 10

5.0 Replacement Parts
Section BB (Enlarged)
TOP VIEW OF SCALE
WITH COVER REMOVED
18
19
20
21
23
22
26
27
24
25
1
2
3
4
5
6
7
8
9
10
11
13
14
15
16
17
A
A
B
B
12
Section AA (Enlarged)
28
5.1 10" x 10" Base Assembly
6 Benchmark HD Series
Page 11

Ref P/N Description
1 35087 Screw, pull protection, 1/4-20 NC x 1/2, SS
(6-15 lb only)
2 14920
3 35128 Foot, 1/4-20 NC
4 14645 Jam nut, foot
5 19086 Bottom sub-assembly
6 15220 Rivet, sealing
7 16907 Label, bench scale
8 19091 Cover, top, 10” x 10”
9 19088 Spider, top
10 35088 Screw, load cell, top
11 15148 Washer, locking
12 15410 Spirit level bubble, plastic
13 35075 Load cell, RL1380 (6 lb model)
13 35076 Load cell, RL1380 (10 lb model)
13 35077 Load cell, RL1380 (15 lb model)
13 35078 Load cell, RL1380 (30 lb model)
14 14857 Screw, pan head
15 15132 Washer, locking, #8SS
16 15408 Grommet, rubber, 3/16 ID x 7/16 OD
17 14984 Bolt, overload spring (6-15 lb models)
17 21947 Bolt, overload spring (10 lb models)
18 21945 Spring, overload (6 lb model)
18 15416 Spring, overload (10 lb model)
18 21946 Spring, overload (15 lb model)
18 21944 Spring, overload (30 lb model)
19 15149 Washer, flat 1/4 type A, SS
20 14634 Nut, nylon insert, 1/4-20 UNC, SS
21 35082 Shim, load cell, bottom, SS
22 15409 Clamp, nylon cable
23 19090 Load plate
24 15150 Washer, rubber
25 15138 Washer #8SS
26 14862 Screw, cable clamp
27 30909 Shim, load cell, top, SS
28 14956 Screw, load cell, bottom, SS
Screw, overload protection, 8-32 UNC x 1/4, SS
Table 5-1. 10" x 10" Base Assembly Parts
10" x 10" Base Assembly 7
Page 12

5.2 12" x 12" Base Assembly Parts
TOP VIEW OF SCALE
WITH COVER REMOVED
A
A
B
B
12
17
18
19
20
22
21
25
26
23
24
Section AA (Enlarged)
27
Section BB (Enlarged)
2
3
4
5
6
7
8
9
10
11
13
14
15
16
28
8 Benchmark HD Series
Page 13

Ref P/N Description
2 14920
3 35128 Foot assembly
4 14645 Jam nut, foot
5 35066 Bottom sub-assembly
6 15220 Rivet, sealing
7 16907 Label, bench scale
8 35069 Cover, top, 12” x 12”
9 35068 Spider, top
10 35088 Screw, load cell, top
11 15148 Washer, locking
12 15410 Spirit level bubble, plastic
13 35079 Load cell, RL1380 (30 lb model)
13 35080 Load cell, RL1380 (60 lb model)
14 14857 Screw, pan head
15 15132 Washer, locking, #8SS
16 15408 Grommet, rubber, 3/16 ID x 7/16 OD
17 21947 Bolt, overload spring (30 lb model)
17 14984 Bolt, overload spring (60 lb model)
18 21944 Spring, overload (30 lb model)
18 35086 Spring, overload (60 lb model)
19 15149 Washer, flat 1/4 type A, SS
20 14634 Nut, nylon insert, 1/4-20 UNC, SS
21 35082 Shim, load cell, bottom, SS
22 15409 Clamp, nylon cable
23 35067 Load plate
24 15150 Washer, rubber
25 15138 Washer #8SS
26 14862 Screw, cable clamp
27 30909 Shim, load cell, top, SS
28 14956 Screw, load cell, bottom, SS
Screw, overload protection, 8-32 UNC x 1/4, SS
Table 5-2. 12" x 12" Base Assembly Parts
12" x 12" Base Assembly Parts 9
Page 14

BenchMark™ CW-80B Limited Warranty
Rice Lake Weighing Systems (RLWS) warrants that all RLWS equipment and systems properly installed by a
Distributor or Original Equipment Manufacturer (OEM) will operate per written specifications as confirmed by the
Distributor/OEM and accepted by RLWS. All systems and components are warranted against defects in materials
and workmanship for one year.
RLWS warrants that the equipment sold hereunder will conform to the current written specifications authorized by
RLWS. RLWS warrants the equipment against faulty workmanship and defective materials. If any equipment fails
to conform to these warranties, RLWS will, at its option, repair or replace such goods returned within the warranty
period subject to the following conditions:
• Upon discovery by Buyer of such nonconformity, RLWS will be given prompt written notice with a detailed
explanation of the alleged deficiencies.
• Individual electronic components returned to RLWS for warranty purposes must be packaged to prevent
electrostatic discharge (ESD) damage in shipment. Packaging requirements are listed in a publication,
“Protecting Your Components From Static Damage in Shipment,” available from RLWS Equipment
Return Department.
• Examination of such equipment by RLWS confirms that the nonconformity actually exists, and was not
caused by accident, misuse, neglect, alteration, improper installation, improper repair or improper testing;
RLWS shall be the sole judge of all alleged non-conformities.
• Such equipment has not been modified, altered, or changed by any person other than RLWS or its duly
authorized repair agents.
• RLWS will have a reasonable time to repair or replace the defective equipment. Buyer is responsible for
shipping charges both ways.
• In no event will RLWS be responsible for travel time or on-location repairs, including assembly or
disassembly of equipment, nor will RLWS be liable for the cost of any repairs made by others.
THESE WARRANTIES EXCLUDE ALL OTHER WARRANTIES, EXPRESSED OR IMPLIED,
INCLUDING WITHOUT LIMITATION WARRANTIES OF MERCHANTABILITY OR FITNESS FOR A
PARTICULAR PURPOSE. NEITHER RLWS NOR DISTRIBUTOR WILL, IN ANY EVENT, BE LIABLE
FOR INCIDENTIAL OR CONSEQUENTIAL DAMAGES.
RLWS AND BUYER AGREE THAT RLWS’S SOLE AND EXCLUSIVE LIABILITY HEREUNDER IS
LIMITED TO REPAIR OR REPLACEMENT OF SUCH GOODS. IN ACCEPTING THIS WARRANTY,
THE BUYER WAIVES ANY AND ALL OTHER CLAIMS TO WARRANTY.
SHOULD THE SELLER BE OTHER THAN RLWS, THE BUYER AGREES TO LOOK ONLY TO THE
SELLER FOR WARRANTY CLAIMS.
No terms, conditions, understanding, or agreements purporting to modify the terms of this warranty shall have any
legal effect unless made in writing and signed by a corporate officer of RLWS and the Buyer.
© 1997 Rice Lake Weighing Systems, Inc. Rice Lake, WI USA. All Rights Reserved.
RICE LAKE WEIGHING SYSTEMS • 230 WEST COLEMAN STREET • RICE LAKE, WISCONSIN 54868 • USA
10 Benchmark HD Series
Page 15

Page 16

230 W. Coleman St. • Rice Lake, WI 54868 • USA
U.S. 800-472-6703 • Canada/Mexico 800-321-6703 • International 715-234-9171 • Europe +31 (0)26 472 1319
www.ricelake.com www.ricelake.mx www.ricelake.eu www.ricelake.co.in m.ricelake.com
© Rice Lake Weighing Systems 11/14 PN 40543
 Loading...