

Page 1

RCA
SoundPal?
AUDIO
MODEL RP-7946
USE AND CARE GUIDE
Portable
Disc Player/Radio/
Cassette Recorder
Page 2
lMPORTANT lNFORMATlON
IMPORTANT INFORMATION REQUIRED BY FEDERAL COMMUNICATIONS COMMISSION
CONCERNING RADIO FREQUENCY INTERFERENCE
This device generates and uses radio frequency (RF) energy and if not installed and used properly this equipment may cause
interference to radio and television reception.
This equipment has been type tested and found to comply with the limits for a Class B Computing Device in accordance with
the specifications in Subpart J of Part 15 of FCC Rules. These rules are designed to provide reasonable protection against radio
and television interference in a residential installation. However, there is no guarantee that interference will not occur in a particular installation.
If this equipment ‘does cause interference to radio or television reception (which you can determine by turning the equipment
off and on), try to correct the interference by one or more of the following measures:
l Reorient the receiving antenna (that is, the antenna for the radio or television that is “receiving” the interference).
l Change the position of the unit with respect to the radio or television equipment that is receiving interference.
l Move the unit away from the equipment that is receiving interference.
l Plug the unit into a different wall outlet so that the unit and the equipment receiving interference are on different branch circuits.
If: these measures do not eliminate the interference, please..consult youi,deal’er or an experienced radio/television technician for
additional suggestions. Also, the Federal Communications Commission has prepared a helpful booklet, “How To Identifyand Resolve
Radio TV Interference Problems.” This booklet is available from the U.S. Government Printing Office, Washington, DC 20402.
Please specify stock number 004-000-00345-4 when ordering copies,
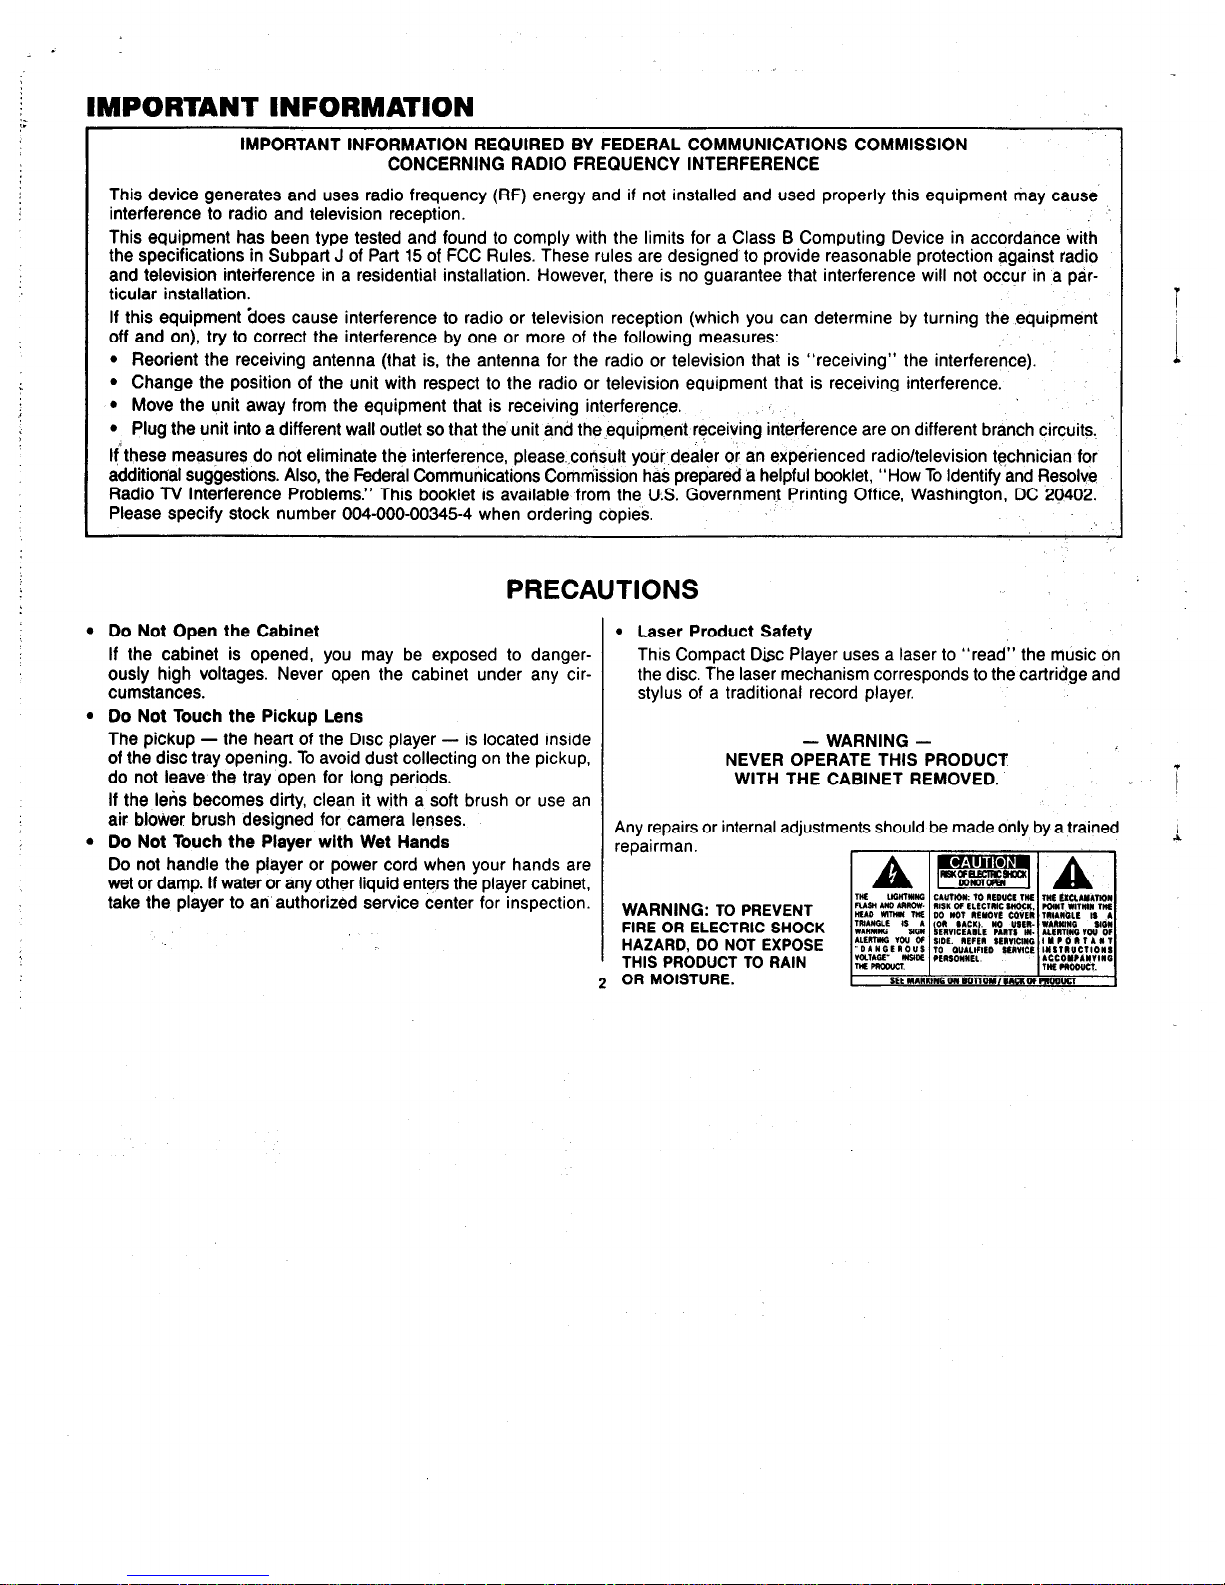
PRECAUTIONS
l Do Not Open the Cabinet
I l
Laser Product Safety
If the cabinet is opened, you may be exposed to danger- This Compact D&c Player uses a laser to “read” the music on
ously high voltages. Never open the cabinet under any cir-
the disc. The laser mechanism corresponds to the cartridge and
cumstances. stylus of a traditional record player.
l Do Not Touch the Pickup Lens
I
The pickup - the heart of the Disc player - is located inside
of the disc tray opening. To avoid dust collecting on the pickup,
do not leave the tray open for long periods.
If the lens becomes dirty, clean it with a soft brush or use an
air blower brush designed for camera lenses.
l Do Not Touch the Player with Wet Hands
Do not handle the player or power cord when your hands are
wet or damp. If water or any other liquid enters the player cabinet,
take the player to an authorized service center for inspection.
- WARNING -
NEVER OPERATE THIS PRODUCT
WITH THE CABINET REMOVED.
Any repairs or internal adjust1
repairman.
ments should be made only by a trained
WARNING:
TO PREVENT
FIRE OR ELECTRIC SHOCK
HAZARD, DO NOT EXPOSE
THIS PRODUCT TO RAIN
OR MOISTURE.
2
.
1
i
I
Page 3
According to some State laws, and in the event service should
be required, you may need both Model and Serial Numbers.
Please record the Serial Number (located inside the Battery Compartment) in the space below:
SERIAL NO:
This unit opertes on 120V AC household power or 8 “D”-size bat-
teries.
Batteries are not included.
AC POWER OPERATION
Plug one end of the AC line cord into, the AC input Jack on the
left side of the cabinet, and the opposite end into 120-volt AC
household outlet. Plugging the AC line cord into the set
automatically disconnects the batteries.
NOTE: The AC line cord must be disconnected from the unit as
well as the AC household outlet for battery operation.
BATTERY OPERATION
l
Unlatch and remove the compartment door located on the
cabinet back.
l
Insert 8 “D”-size batteries into battery compartment. Be sure
the (+) or cap end of each battery is installed as shown on the
battery diagram.
If the tape player bagins to sound distorted or has poor tone quality,
or if the tape reels turn very slowly or not at all, try using another
cassette, installing a new set of batteries, or using AC power before
seeking service.
NOTE: This unit will not operate on battery power unless AC line
cord is disconnected from the unit, as well as from the AC outlet.
CD operation requires more power than Tape operation and Tape
operation requires more power than Radio operation; therefore,
you may continue to use the same batteries for a while longer by
switching to a function requiring less power.
IMPORTANT: Be sure to remove batteries when storing the set.
for more than 88 days. Leaky batteries can badly damage the product. When discarding batteries, be sure to dispose of them in
the proper manner, according to your state and local regulations.
Always return tape operation buttons to their off position before
storing. This will relieve pressure on certain parts in the tape player
that might deform after long periods of time.
When the FUNCTION switch is placed in RADIO or CD positions,
or a tape operation button is pressed while it is in TAPE position,
the INDICATOR will light indicating “Power” On.
When operating the unit on battery power, the brightness level of
the INDICATOR indicates battery level. If the INDICATOR is dim
(or does not light), the batteries are weak and need replacing.
3
Page 4

1. 3-Band Graphic Equalizer
2. Telescoping, Swivel Whip FM Antenna.
3. Volume Control
4. Bass Boost ON/OFF Switch
5. Function Switch
l
Tape (Power Off)
. CD
. Radio
6. FM Stereo Indicator Light.
7. Power On Indicator Light.
8. Band Switch
l
AM
l
FM
l
FM Stereo
9. Tuning Wheel
4
Page 5
1. Slide FUNCTION switch to RADIO.
l
The POWER “ON” indicator will light.
2. Set BAND switch to desired broadcast band. . . AM or FM, or
FM Stereo.
3. Use TUNING wheel to select a station.
4. Adjust VOLUME and GRAPHIC EQUALIZER controls to your
listening preference.
5. To turn the radio off, slide FUNCTION switch to TAPE (Power
OffI.
FM STEREO INDICATOR LIGHT
The STEREO INDICATOR will light when you are tuned to an FM
station broadcasting in stereo. (Mono broadcasts will be received
in mono.)
NOTE: If FM stereo reception is poor, set BAND switch to FM
(mono) position. This reduces noise, but the station will not be
heard in stereo.
BUILT-IN AFC
The Automatic Frequency Control works only on FM. It helps to
keep the radio locked on the station to which it is tuned.
When tuning in stations, you may notice that often the FM station
you desire can be heard on two or three nearby points on the dial.
Always tune carefully to the loudest and clearest point.
3-BAND
_
. .,. “,A .-._- i -. __., ,.,.. ..> . . . rL-,u
GRAPHIC EQUALIZER I
The 3 slide controls permit you to tailor the bass, mid-range and
treble frequencies to your listening preference.
Moving the control above zero, emphasizes the frequency
response; moving it below zero, de-emphasizes the frequency
response.
BASS BOOST SWITCH
When operating your unit at a low-volume level, some of the bass
frequencies may not be discernible. To give a boost to these fre-
quencies and enhance your low-volume listening enjoyment, a
bass circuit has been added to your unit.
When listening to music or whenever maximum audio fidelity is
desired, switch the BASS BOOST control to ON to bring out the
bass frequencies.
ANTENNAS ARE IMPORTANT
AM Antenna - The AM antenna, built into the unit, is somewhat
directional. On weak stations, it may be necessary to rotate the unit
for best reception. (The whip antenna is not used for AM reception.)
FM Antenna - Lift and extend the telescoping whip antenna. It
may be necessary to adjust the length and direction of the antenna for best FM reception.
NOTE: To avoid damaging the whip antenna, always lower the
antenna one section at a time, starting wjth the largest diameter
section. Do not push down from the top of the antenna since buckting or bending is possible.
5
Page 6
‘,.,
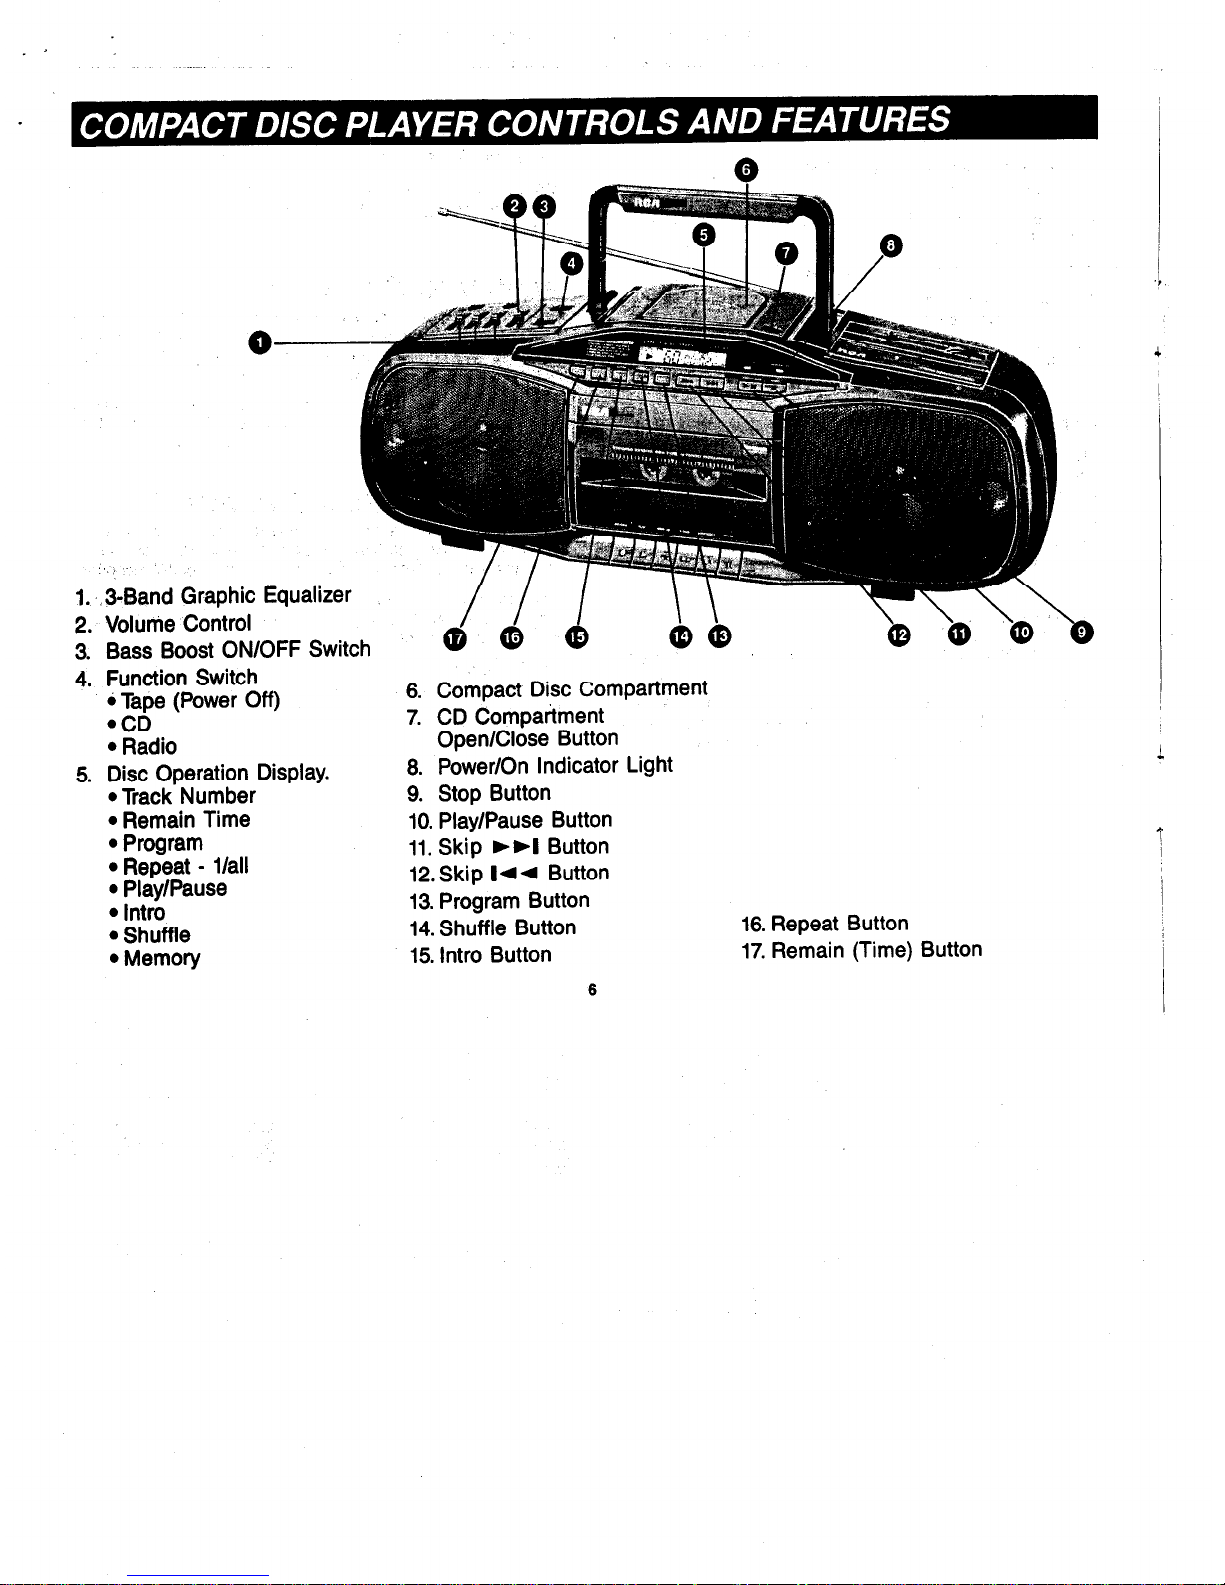
1. ‘, 3Band Graphic Equalizer
2. Volume Control
3. Bass Boost ON/OFF Switch
4. Function Switch
6 Tape (Power Off)
@CD
l Radio
5. Disc Operation Display.
l Track Number
l Remain Time
l Program
l Repeat - l/all
l Play/Pause
l Intro
l Shuffle
l Memory
6. Compact Disc Compartment
7. CD Compartment
Open/Close Button
8. Power/On Indicator Light
9. Stop Button
10. Play/Pause Button
11. Skip ,,I Button
12. Skip 144 Button
13. Program Button
14. Shuffle Button
15. Intro Button
16. Repeat Button
17. Remain (Time) Button
6
Page 7

3. Press the PLAY/PAUSE button. The first selection (track)
on the disc will begin to play.
The DISPLAY will indicate, for example:
INSERTING A DISC
1.
Slide FUNCTION switch to CD position.
l
POWER Indicator Lights.
l
CD DISPLAY lights.
2. Open the Disc Compartment by pressing the OPEN/CLOSE
button.
3. Without touching the disc surface, place the disc in the compartment with the label facing up.
4. Press the OPEN/CLOSE button to close the Disc Compartment
door.
CAUTION:
To avoid damage to the disc or disc mechanism, be
sure disc is property seated in the disc tray before closing disc door.
NOTE:
Onlv 3” or 5” discs with the identification looo shown below
can be played in this player.
DISC PLAY
uGlTALAuolo
1. After the disc is installed and the compartment door closed,
the disc will begin to spin and the player will scan the table
of contents encoded in the lead-in portion of the disc.
2. After approximately 4 seconds, the disc will stop spinning. The
DISPLAY will indicate the total number of selections on the disc,
and the total disc playing time.
For example: If a disc has 12 selections and the total playing
time is 62 minutes and 56 seconds, the DISPLAY will show. .
then:
l
) - indicating PLAY.
6, 9,
l 1
- for 1st Track (selection).
l
Elapsed play time (example indicating 1 minute, 15 seconds
into disc play).
6. At the beginning of disc play, adjust VOLUME and GRAPHIC
EQUALIZER controls to suit your listening preference.
7. At the end of disc play:
l
The laser pickup will return to the beginning of the disc and
again display total selections, and play time.
l
The player will stop automatically.
Remove the disc, close the Compartment door, and place
FUNCTION switch in Tape (Power Off) position.
6. To terminate disc play before the end of the disc is reached,
press the STOP button.
PAUSE FUNCTION
You can temporarily stop disc play during operation by pressing
the PLAVlPAUSE button again. The PAUSE symbol (II) appears
to the right of the PLAY symbol (b) in the display while unit is
ii-r PAUSE mode.
To resume play, press PLAY/PAUSE.
7
Page 8

. ’
. .,.- .-.
SKIP ,,I AND 144 BUTTONS
During disc play, you can skip forward or backward to the beginning of any selection on the disc by using the SKIP buttons.
,,I SKIP
Momentarily press the fibI SKIP button to instantly move
to the beginning of the next selection on the disc. To “skip” to
a selection further down the disc, repeatedly press and release
the button until the desired Track Number appears in the DISPLAY.
When the last selection on the disc is reached, SKIP is no
longer effective and disc play will start at the beginning of the
last selection.
Id.4 SKIP
A momentary press of the I44 SKIP button will return the
pickup to the beginning of the selection being played. To “skip”
backward to a selection further up the disc, again momentarily
press the button until the desired Track Number appears in the
DISPLAY.
To speed-up SKIP in either direction, press and hold the appropriate button. Release the button when the desired Track
Number appears in the DISPLAY.
You can also use SKIP when disc play is in the PAUSE mode.
Upon completion of SKIP, the player will return to the PAUSE
mode.
PROGRAMMING DISC PLAY
(UP TO 21 SELECTIONS)
The PROGRAM feature permits you to change the order in which
various selections on the disc are played. You can also elect to
play only a few or all of the selections, up to a total of 21.
To PROGRAM your disc play:
1. Slide the FUNCTION switch to CD position.
2. Open the Disc Compartment, insert the disc and close the
Compartment. Wait for the total number of selections and total
disc playing time to appear in the Display.
3. Press the PROGRAM button.
l 0oP:Ol MEMORY appears in the Display.
4. While the above is in the Display, press the FORWARD or
REVERSE button until the Track No. of the desired selection
s
is indicated in the Display.
5. Press the PROGRAM button again.
l The selected Track is now stored in memory as Program 1,
and
l OOP:O2 MEMORY appears in the Display.
6. Press FORWARD or REVERSE button to make your selection
for Program 2.
7. Follow Steps 3 and 4 to store additional Programs into memory
. . . up to a total of 21 Programs.
To review the order in which you have stored the selections in Program memory:
l Press PROGRAM Button repeatedly.
l The memorized tracks will be displayed in successive order.
To change Program selection:
l Press and release the PROGRAM button until the Program
number of the unwanted selection appears in the Display.
l Press FORWARD or REVERSE button to select a new Track.
l Press Program button again to store the new Track.
To add Tracks to your Program,
repeatedly press the PROGRAM button until you reach a program which has no Track
Number displayed. For example, if you have already programmed 6 tracks, the next time you press the PROGRAM button, the
following will be displayed:
Make your Track selection for Program 7 and press the PROGRAM
button.’
1. Press the PLAY/PAUSE BUTTON.
l Programmed Play will start from Program 1.
l The Display will indicate the Track number and the elapsed
play time in minutes and seconds.
- The word, “Program”, will also be displayed.
2. When Play starts, adjust Volume, and GRAPHIC EQUALIZER
controls to your listening preference.
Page 9

Upon completion of the last Programmed selection, the player will
automatically stop and the disc’s total tracks and playing time invisible displayed.
”
To stop play before the end of the last programmed selection, press
the STCP button.
Programmed play is automatically cleared when:
l
The Disc Compartment is opened.
l
The Function switch is set to another operating mode.
REMAIN BUTTON
At any time during CD Play you can press the REMAIN button
to find out the remaining PLAY time of the Track in play.
Press the button a second time and the remaining PLAY time of
the disc is displayed.
Press the button a third time, and the display returns to elapsed
time of the Track being played.
REPEAT BUTTON
l
Press the REPEAT button once for repeat play of the Track currently in normal or Programmed play. The Display will indicate:
[RepeaT] q
l
Press the REPEAT button twice for repeated play of all the
Tracks on the Disc in normal or Programmed play. The Display
will indicate:
p&z-I piJ
l
Press REPEAT again to cancel REPEAT play.
9
INTRO BUTTON
Press
the INTRO button for a W-second sampling of each Track
on the disc. The Display will indicate:
I
Intro
Press the PLAY button again during an Intro sampling, and normal play of that Track and subsequent Tracks will start.
After a sampling of the last Track on the disc, INTRO is cancelled.
SHUFFLE BUTTON
Press the SHUFFLE button for an automatic random play of the
Tracks on the disc. The Display will indicate:
piq
l
Pressing SHUFFLE button again cancels Shuffle play and normal play resumes for the track currently In play.
NOTE: SHUFFLE play is nd available during Pmgrammed Disc Play.
Page 10

1. 3-Band Graphic Equalizer
2. Volume Control
3.. Bass Boost ON/OFF Switch
4. Function Switch
l Tape (Power Off)
.CD
l Radio
5. Power “ON” Indicator Light.
6. Cassette Tape Compartment.
7. Tape Operation Buttons
l Record
l Play
l Rewind
l Fast Forward
l Stop/Eject
l Pause
Page 11

AUTOMATIC STOP
When operating in the PLAY and RECORD modes and the end of
the tape is reached, your unit will automatically shut itself off and
return the buttons to their off position.
.
REWIND
While in OFF position (all buttons up), press REWIND button which
remains depressed to run the tape back to the beginning or to any
point of your tape. Press STOP/EJECT button after you have rewound to the desired point. !
FAST FORWARD
While in OFF position (all buttons up), press F-FWD button, which
remains depressed, to skip over portions of the tape quickly.
Depress STOP/EJECT button after you have advanced the desired
amount of tape.
PAUSE CONTROL
This feature is most helpful when recording, because you can stop
operation momentarily without resetting the control buttons.
Depress PAUSE button to stop operation in either PLAY or
RECORD modes; push again to resume operation.
TO INSERT OR REMOVE CASSETTE
The STOP/EJECT button is used to stop the recorder, eject the
cassette, and open the CASSETTE CARRY DOOR. However, an
internal interlock prevents the cassette door from opening
unless all controls are in the off (up) position.
To insert or remove a cassette when any tape operation button is
ehgaged, you must:
1. Press STOP/EJECT button (to return all buttons to their off
position).
2. Press STOP/&fECT again to ‘open the CASSETTE CARRY
.poqR.
If no tape operation buttons are engaged, then the door will open
on the first press of STOP/EJECT
Insert cassette by gently sliding it into the CASSETTE CARRY
DOOR with the exposed tape downward and the side you wish to
record on or play back facing out (full reel of tape to the left); then,
close door.
TAPE PLAY
To listen to your recorded tape cassettes:
1. Insert recorded cassette as indicated above.
2. Place FUNCTION switch in TAPE position. (The POWER ON indicator will light when a tape operation button is pressed.)
3. Rewind tape to the starting point if necessary. (See REWIND
OPERATION)
4. Press PLAY button.
5. Adjust VOLUME and GRAPHIC EQUALIZER CONTROLS to
your listening preference.
6. The unit automatically returns to STOP mode when end of tape
is reached.
To stop play before the end of the tape is reached, ‘press
STOP/EJECT button, or press PAUSE to temporarily stop play.
RECORPJNG RAP!0 PROGRAMS
1. Place FUNCTION switch to RADIO position and tune in a
desired radio program as described in “RADIO OPERATION”
2. Insert a blank cassette into the Cassette Compartment.
3. When the radio selection you want to record begins, depress the
RECORD button. You are now recording the radio program on
the tape.
4. When you finish recording, press STOP/EJECT button.
NOTE: The built-in Automatic Level Control (ALC) will automatically
set the record level for optimum recordings. You can monitor (listen
to) the radio and adjust the VOLUME and GRAPHIC EQUALIZER
CONTROLS to suit your listening preference without affecting the
recording.
BEA’i CUT SWITCH
When recording an AM broadcast, a beat sound may sometimes
be heard. This is caused by interaction between the radiqfrequency
and the recording bias frequency. If this occurs, simply set the
switch (on the cabinet back) to position 1 or 2, whichever position
minimizes the interference.
IMPOMANT: This product is capable of substantial uses that
do not constitute infringement under the Copyright Laws. It is
sold only for such uses, and it should not be used, to.
infringe the Copyrights of others.
11
Page 12

RECORDING FROM COMPACT DISCS
1. Place FUNCTION switch in CD position.
2. Insert a compact disc into the compact disc compartment.
3. Insert a blank cassette tape into the cassette tape compartment.
4. Press the PLAY/PAUSE button on the CD Player; then, press
the PLAY/PAUSE button again to place the CD Player in the
PAUSE mode.
5. Press the RECORD button on the Tape Recorder.
You are now recording from the compact disc onto tape.
When you finish recording, press the STOP/EJECT button on the
Tape Recorder and the STOP button on the CD Player.
To monitor (listen to) what is being recorded, adjust the VOLUME
and GRAPHIC EQUALIZER CONTROLS to suit your listening
preference.
Selected Recording
If you wish to’record a particular selection only from the compact
disc,’ follow steps 1 through 3 above and:
1. Press’the PLAY/PAUSE buttonon the CD Player; then, press
the PLAY/PAUSE button again to place the CD Player in the
PAUSE mode.
2. Press the’right or left SKIP button until the Track number
for the desired selection appears in the display.
3. Press the RECORD button on the Tape Recorder.
You are,,now recording from the Compact Disc into the tape..
When recording is complete, press the STOP/EJECT button on
the Tape Recorder and then STOP button on the CD player.
REMOTE MICROPHONE RECORDING
Insert optional microphone (No. 5-1033) into MIC jack on cabinet top.
1. Place FUNCTION switch in TAPE position.
2. Insert blank cassette and press RECORD button (PLAY button will automatically depress.) You are now recording.
3. Place the remote microphone as close as possible to the sound
source. The built-in ALC will set the record level for optimum
recordings.
4. When you finish recording, press the STOP/EJECT button.
TAPE ERASE
To erase what you have already recorded, record again over the
. . .
Whenever you make a recording, any previous recording on the
tape is automatically erased.
When you have a recording you want to keep permanently, break
out the rear left tab of the side you want to save as shown in illustration.
When a cassette with the tab broken out is inserted in the tape
unit, accidental erasure is prevented by a lever in the mechanism
that keeps-the RECORD button from depressing. Cellophane tape
can be placed over the opening if you decide later to record over
the original recording. Similarly, you can record over purchased
recorded cassettes.
PLEASE NOTE: Your machine is equipped with a cassette sensing mechanism. This mechanism prevents RECORD button from
being depressed when cassette is not in unit.
The Headphone Jack on the top of the unit is for optional Stereo
Headphones, No. 3-5750. (See Accessory Order Form.) Use of the
headphones permits private listening (monitoring) of material during PLAY and RECORD operations.
unwanted matenai.
12
Page 13

Left and right CD OUTPUT jacks are located on the back of the
unit. These jacks enable you to:
RECORD TO AN EXTERNAL TAPE
SOURCE
1. FUNCTION switch: CD.
fr
ll
CD OUTPUT
2. Insert a compact disc and press PLAY/PAUSE button.
3. Set the external tape deck or tape recorder to the recording
mode.
PLAYBACK THROUGH AN EXTERNAL
AMPLIFIER
1. FUNCTION switch: CD (listening to compact disc)
2. Insert compact disc and press PLAY/PAUSE button.
CD OUTPUT
PATCH CORD KIT
The optional Patch Cord Kii, No. 5-1051, makes it possible to record
direct to most low output tape machines equipped with input jacks.
Plug adapter into CD OUTPUT jacks and into input jacks on the
tape unit. Direct recordings,eliminate background rioise problems
normally encountered with microphones. (Kit includes complete
instructions.)
Need 2 kits for stereo.
CD STORAGE
A storage holder is provided on the cabinet bottom so you can
carry two extra compact discs. Push the CD’s, in their cases, into
the slot openings at the back of the unit.
13
Page 14

POINTS TO REMEMBER
If the player is brought from a cold environment to a warm one
or was in‘s cold room that has been quickly heated, condensation forms on the pickup preventing proper operation. To
remove the condensation, remove the disc and leave the power
ON for about one hour.
Always close the disc compartment when not using the player
to prevent dust reaching delicate internal parts.
Do not place objects on top of Player and, when transporting
the player, be careful not to bump it into walls or other.objects.
Do not use the player in ,a slanted or perpendicular’position.
It should only be operated in a horizontal position.
To clean, wipe the cabinet with a soft, dry cloth. Dampen the
cloth with water to remove stubborn stains. Never use benzine,
thinners, alcohol or other chemical solvents since they may
discolor the cabinet and remove lettering. Protect the cabinet
from insecticides, hair sprays, paint and other substances that
cause stains.
Place the unit in a well-ventilated location. Do not expose to
direct sunlight or heating units as the player’s internal
temperature may rise and shorten the life of the pickup.
CLEANING THE CD PLAYER
LASER LENS
To ensure the continued high performance of your CD PLAYER,
periodically clean the laser lens or whenever dust or finger prints
are evident.
Failure to clean the laser lens can result in no sound or inferior
sound quality.
1. Open the disc compartment by pressing the OPEN button and
remove the compact disc if one is installed.
2. lbrn the unli’s power off.
3. Clean the laser lens with a soft brush or use an air blower brush
designed for camera.
4. When you cannot remove dirt under above stap 3, moisten a
cotton swab with isopropyl alcohol and apply to the faces of
laser lens, rubbing gently until all trace of dirt is removed.
NOTE: Be sure to turn the unit’s power o,ff.
LASER &ENS
WHEN HANDLING COMPACT DISCS
In order to enjoy your music under the best conditions, always
keep your discs clean and note the following:
Do not touch the playing surface (shiny, rainbow-colored
surface.)
Do not leave the discs in places with high temperatures or
high humidity where they may become warped.
Always store each disc in its case and not in the CD player.
Do not put tape or any other adhesives on the label surfaces.
Before playing back a disc, wipe any dust or fingerprints from
the playback surface with a soft cloth.
Do not use cleaners or antistatic sprays on discs, such as
those used on conventional analog phonograph records.
14
Page 15

FOR CASSETTE DECK
CLEANING THE ,HEADS
.
Iron oxide particles from the magnetic tape will, in time, build up
on the parts that come in direct contact with the tape. These
deposits can cause incomplete erasure, a “muffled” sound dur-
ing playback, and may prevent Automatic Stop.
With the cassette door open and the PLAY button pushed down,
the parts indicated can be cleaned (gently) with a head cleaner.
PLAVlRECORD PlNCH
S~)ICE HEAD WHEEL
Clean areas indicated after every 40 hours of use.
Always unplug the power cord while cleaning and allow 30 minutes
drying time when using a liquid cleaner.
Another convenient method is to use cassette head cleaning tape.
CASSETTE TAPES
l
Loose or slack cassette tapes.
A tape that is loose or slack inside the cassette may result in
scratches on the tape or tape breakage. To avoid this problem,
check and tighten (if necessary) the tape by using a pencil as
shown in the diagram below.
USE A PENCIL OR SIMILAR
OBJECT TO TAKE UP THE
SLACK.
l
Tape Handling
Avoid storing tapes in the following areas:
- On top of heaters, or in direct sunlight or in any other high
temperature areas.
- Near speakers, on TV sets or amplifiers, or near any strong
magnetic fields.
- High humidity areas.
SERVICE
:
This product should be serviced only by those specially trained
in appropriate servicing techniques. For instructions on how to ob-
tain service, refer to the warranty included in this Guide.
Attach your sales receipt to the booklet for future reference or jot
down the date this product was purchased or received as a gift.
This information will be valuable if service should be required during the warranty period.
Purchase date
Name of store
15
Page 16

SERWCE LITERATURE
Service literature is available for your unit. For information on how
to order, note the complete model number of your unit and, then,
call:
RCA Publications Ordering
(502)491-8110
Do not use the Accessory Order Form (or its mailing address) included in this Guide, as service literature is hot available from that
location.
The service literature will be useful to, and should be used only
by, those trained in appropriate servicing techniques.
FCC INFORMATION
This device complies with Part 15 of the FCC Rules. Operation
is subject to the following two conditions:
(1)
This device may not
cause harmful interference, and (2) This device must accept any
interference received, including interference that may cause
undesired operation.
In accordance with FCC requirements, changes or modifications
not expressly approved by Thomson Consumer Electronics could
void the user’s authority to operate this product.
i
16
Page 17

If a problem arises, these simple checks are recommended. Sometimes you can correct the problem yourself.
PROBLEM
SYSTEM does not
turn “ON”.
CAUSE
l
No AC Power.
l
Batteries are dead
REMEDY
l
Make sure the power cord is firmly seated
in
the power outlet.
l
Make sure the receptacle is operational by
plugging some other device into the same
socket for a test.
l
Replace batteries.
DISC In place but unit will not go into play
mode.
DISC in place. ,zi ,’ ‘{ ,‘- is displayed.
--
l
CD FUNCTION not selected..
l
Umt in PAUSE mode.
l
Disc was placed in backwards.
l
Disc dirty. etc.
l
Place the FUNCTION switch in CD.
l
Press PLAY/PAUSE button.
l
Insert disc with label facing out.
l
Clean the disc with a soft. dry cotton cloth
l
Insert another disc.
The sound skrps in DISC mode.
l
Disc has been damaged. ..
l
Disc is dirty or dusty.
l
External vibration.
l
The disc’s label srde was damaged by a
solid object such as a ballpoint pen.
l
. Insert a new disc.
l
Clean the disc with a soft, dry cotton cloth
l
Avoid external vibration or shock.
l
Insert a new disc (the thin membrane be-
tween the label and the pit surface may bf
damaged).
No sound
Poor FM reception
l
Incorrect function setting.
l
Select correct function setting.
l
Antenna improperly extended or adjusted.
l
Make sure the FM antenna is properly
l
Electrical Interference. oriented.
l
Electrical interference in your home may b
abnormally high. Try turning off electrical
appkances near your system, especially
those with motors (such as hair dryers or
vacuum cleaners) or transformers (such as
fluorescent lamps).
Distorted or norsy recordings.
l
Recording head dirty.
l
Inspect your recording heads. If they are
dirty, see “Maintenance”
Page 18

., ._. .
ONE-YEAR LIMITED WARRANTY
What does your warranty Covw?
l
Anv delecl in material or workmanshtip
For how long an*1 the orlglnal pw&e?
l one year.
l
The warranty for rental unils begins wilh the lirst rental.
what will we de?
.
Provide you with a new, or al our option. a reconditioned unit.
. The exchange unit is warranted for the remainder 01 your product’s orrginal oneyear war-
ranty period.
How do you nuke a warranty claim?
l
Property pack your unit. Include any cables, etc., which were originally provided with lhe
product. We mcommend using the original carton and packing materials.
.
Include in the package a copy of the sales receipt or mher evidence of dale of orrginal
purchase. If the unit was a gift. provide a statement specitying the date received. Also
print your name
and
addreG and a description 01 the de&t.
l
Ship the unit alindard UPS or equivalent lo:
Thomson Consumer Electronics, Inc
Product Exchange Center
32 Spur Drive El Paso, T&as 79906
.
Pay any charges bulled lo you by ihe Exchange Center lor serwce not covered by the
warranty
.
A new or reconditioned umt wtll bs shipped to you prepand trelghl
What doer your warranty not cover?
l
Customer instruction. Your Owner’s Manual prowdes lnlormahon regarding operating tinslruclions and user controls. For additional Inlormatlon. ask your dealer
.
lnslallaiion and set-up service adluslmenls.
l
Batteries.
l
Damage from misuse or neglect.
.
Product which have been modilied or incorporated tint0 olhar producls
.
Producl purchased or servrced ouI.slde the USA
How doaa atate law relate to thla warranty?
. This warranty gives you specific legal rights. and you may also have other nghls whtch
vary lrom state lo slab
What It vou wrchawd vour unit in Canada?
.
Refer to ihe Canadian Warranty.
For products purchased outsrde the Umled Slates and Canada. see dealer for warranty
Thomson Consumer Electronics. Inc
Page 19

RCA NUMBER ONE WITH THE TOUGHEST CRITICS IN THE WORLD.
Model RP-7946
347Ab917-oooi (RN. 2 )
91-60 PtintedhUsA
 Loading...