

Page 1

FM scanning receiver
RP-6200
Page 2

FCC INFORMATION
This device complies with Part 15 of the FCC Rules. Operation is subject to the
following two conditions: (1) This device may not cause harmful interference,
and (2) this device must accept any interference received, including interference
that may cause undesired operation.
In accordance with FCC requirements, changes or modifications not expressly
approved by Thomson Consumer Electronics could void the user’s authority to
operate this product.
CAUTION: Scanning is a great pass time. You can listen to exchanges between
police, fire departments, ambulances, military organizations, government
agencies, private companies, aircraft and amateur radio stations. Owning and
operating this scanner is legal in so far as you do not intentionally intercept the
following electronic and wire communications:
• Cellular, cordless or private telephone conversations transmit through means
of telephone signal transmissions.
• Pagers transmissions.
• Scrambles of encrypted transmissions.
As amended the Federal Electronic Communication Privacy Act (ECPA) states you
could be fined and/or imprisoned for intentionally listening to, using or
disclosing the contents of such a transmission unless a party in the communication has consented-unless such an activity is otherwise legal.
In some areas/states it is unlawful to operate a scanner. Please check the laws in
your area as they may change from time to time. Thomson Consumer Electronics assumes no liability for the operation of this scanner.
WARNING: In some areas/states it is unlawful to operate a mobile scanner.
Please check the laws in your area. Thomson Consumer Electronics assumes
no liability for the operation of this scanner.
Page 3

TABLE OF CONTENTS
FIRST THINGS FIRST ........................................................................ 2
POWERING UP ................................................................................. 2
R
ESETTING AND INITIALIZING ........................................................... 2
C
ONNECTING THE ANTENNAS .......................................................... 3
O
PTIONAL ANTENNA .................................................................. 3
B
UTTONS AND CONTROLS ................................................................. 4
T
HE DISPLAY .................................................................................. 5
U
SING THE SCANNER ....................................................................... 6
ADJUSTING VOLUME AND SQUELCH .................................................. 6
P
ROGRAMMING FREQUENCIES ........................................................... 7
U
SING DELAY .................................................................................. 8
T
EMPORARILY STORING
AN
ACTIVE FREQUENCY IN MONITOR MEMORY ................................... 8
S
HIFTING A FREQUENCY
FROM
MONITOR MEMORY TO A CHANNEL ....................................... 9
S
CANNING CHANNELS ...................................................................... 9
M
ONITORING ONE CHANNEL .......................................................... 10
L
OCKING OUT CHANNELS .................................................................. 11
C
LEARING A CHANNEL ...................................................................... 11
T
ROUBLESHOOTING TIPS .................................................................. 12
E
QUIPMENT SPECIFICATIONS ............................................................. 13
C
ARE AND MAINTENANCE ................................................................ 14
S
ERVICE INFORMATION .................................................................... 14
I
NDEX ........................................................................................... 15
L
IMITED WARRANTY ....................................................................... BACK COVER
INTRODUCTION
Congratulations!
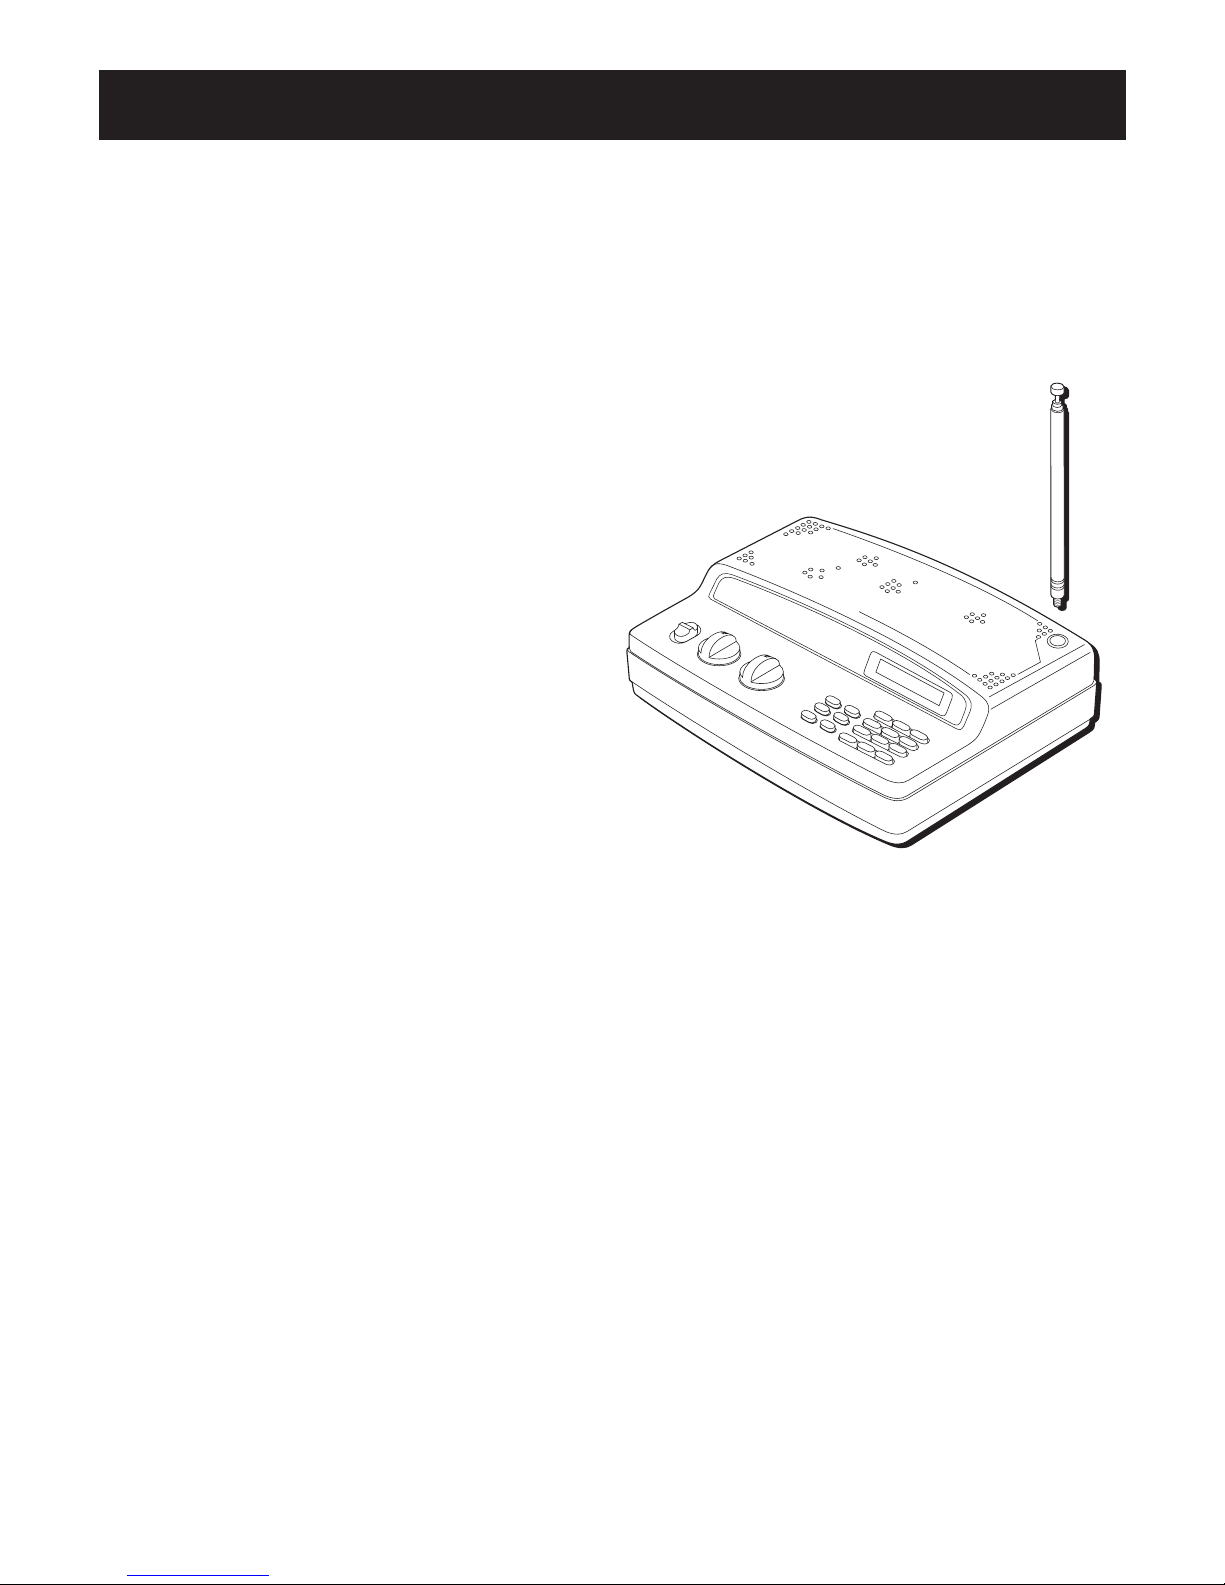
You are now the owner of a brand new RCA RP-6200 20-Channel FM Scanning
Receiver.
Your new scanner will provide for you all the excitement and action of police in
pursuit, ambulances en route and fire trucks on the scene. You’ll know the
latest changes in weather conditions, be able to warn family and friends where
the latest accidents are on the highways...plus much more!
With the capacity to scan more than 22,000 frequencies at 16 channels per
second, your new RCA FM Scanning Receiver allows you to be involved in your
community from the comfort of your own home. Enjoy!
Page 4

2
MIN MAX
MIN
ON
OFF
POWER
VOLUME
SQUELCH
SCAN
MANUAL
CLEAR
PGM
MON
DELAY
L-OUT
0
ENTER
7
8
9
4
5
6
1
2
3
AUTO SEARCH
FIRST THINGS FIRST
POWERING UP
Your scanner has an external jack. Plug in the AC adapter supplied by inserting
the barrel end into the DC 12V jack on the back of the unit.
Your scanner has a memory backup that begins to
work moments after plugging in the adapter. Stored
information will be stored for approximately 1 hour
after the removal of power for any reason.
RESETTING AND INITIALIZING
When connecting your scanner to its power source, the
display may lock up or show erroneous messages.
These situations are simply and easily fixed by
resetting the scanner.
To reset:
1. Make sure the scanner is ON.
2. Press the RESET button on the back of
the scanner with a pointed object,
such as a paper clip.
If the above steps fail to reset your
scanner, it is possible you will have
to re-initialize the unit. Do this only
if you are sure resetting the scanner
has not worked. Initializing the scanner
clears all stored information from
the unit’s memory.
NOTE: The provided adapter supplies 12 volts DC power (300 milliamperes)
with a center positive plug. Should you decide to use an adapter other than
the one provided, please make sure it meets the above specifications. Failure
to do so may cause a safety hazard or damage the unit.
Page 5
3
AUTO SEARCH
MIN MAX
MIN MAX
ON
OFF
POWER
VOLUME
SQUELCH
SCAN
MANUAL
CLEAR
PGM
MON
DELAY
L-OUT
0
.
ENTER
7
8
9
4
5
6
1
2
3
CH -MHz- -kHz-
FIRST THINGS FIRST
To initialize:
1. Make sure the scanner is ON.
2. Press and hold the CLEAR button.
3. Quickly press and release the RESET button.
4. When the display disappears, release the CLEAR
button.
CONNECTING THE ANTENNAS
Your scanner comes with a telescoping
antenna for better reception. To attach
the antenna, screw it into the provided
hole on top of the unit.
Adjust its length when necessary
to receive better reception.
OPTIONAL ANTENNA
While the telescoping antenna provides satisfactory
reception for local signals, your scanner has been
equipped with an ANT jack so you can attach a
multiband outdoor antenna - not provided - for even
better reception.
To install:
1. Choose the highest location possible to mount the
antenna, then do so according to the directions
provided by its manufacturer.
2. Plug the antenna cable into the ANT jack on the
back of your scanner.
Page 6
4
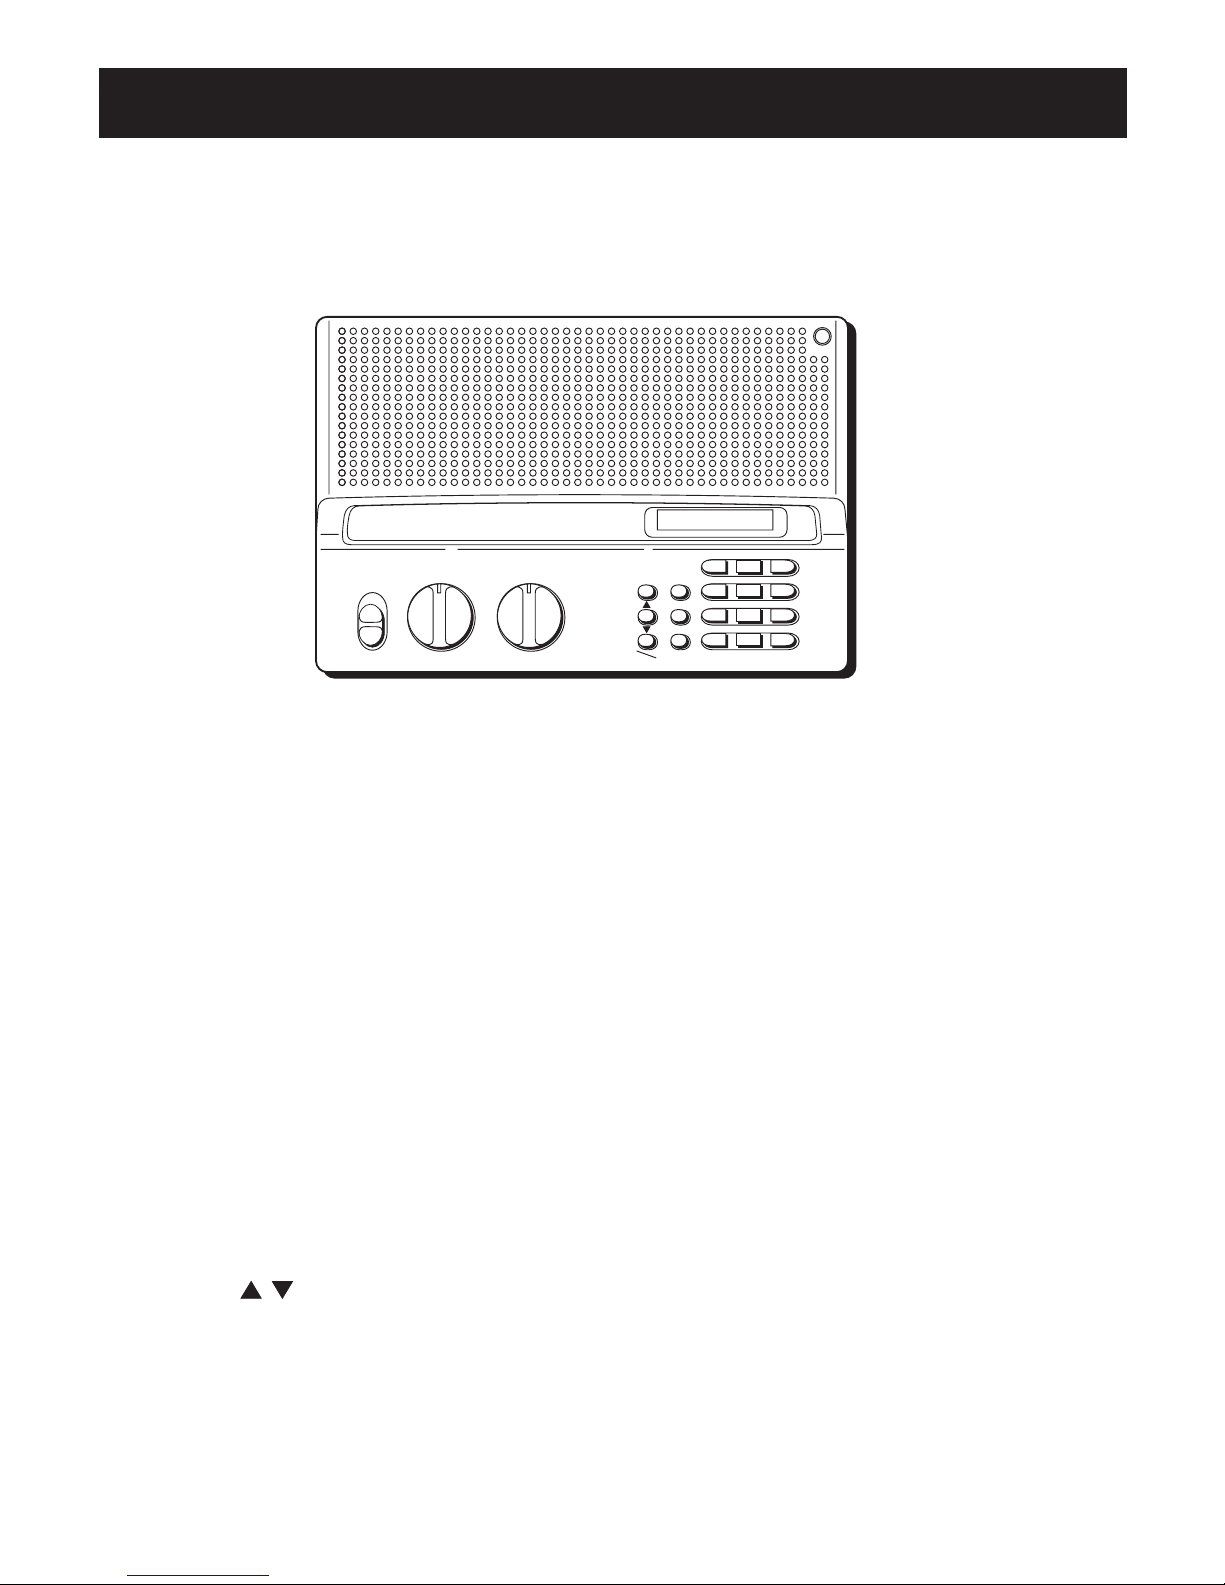
BUTTONS AND CONTROLS
CLEAR ------------- This button erases an incorrect entry.
•/DELAY ---------- This button allows you to enter a decimal point when
programming frequencies or a two-second delay for a specific
channel.
ENTER/L-OUT --- This button enters a frequency into a channel or lets you lock
out a specific channel.
MANUAL --------- This button interrupts the Scan mode and allows you to enter
a channel number.
0/MON ------------ This button allows you to enter a zero or access the Monitor
Memory.
PGM --------------- This button initiates the Program function and allows you to
enter frequencies into channels memory.
SCAN -------------- This button activates an automatic scan of all the pro-
grammed channels.
SEARCH
--- These buttons activate a search for stations transmitting in a
particular frequency range.
The following list is presented in alphabetical order and provides general
information about each button and control on your scanner.
ENTER0
.
PGM
978CLEAR
645MANUAL
312
L-OUTMON DELAY
SCAN
CH -MHz- -kHz-
SQUELCHVOLUMEPOWER
MIN MAX MIN MAX
ON
OFF
Page 7

5
THE DISPLAY
MANUAL ----- appears when you manually select a channel.
SCAN ---------- appears when you scan channels.
SEARCH ------ appears during frequency search.
and ------ indicate the search direction.
DELAY -------- appears when you have programed the scanner to pause for two
seconds on the selected channel before continuing to scan.
MON ----------- appears when you are in monitor or search mode.
PROGRAM --- appears when you program a frequency into a channel.
88 --------------- is the channel number
L/O -------------- appears when you have manually selected a locked out channel.
888.888 ------- is the frequency.
MANUAL
SCAN
SEARCH
888.888
The display lets you know what your unit is doing. The following is a list of
display messages you will encounter and what they mean.
88
MON
DELAY PROGRAM
L/O
Page 8

6
USING THE SCANNER
ADJUSTING VOLUME AND SQUELCH
1. Turn the VOLUME knob counterclockwise to MIN and the SQUELCH knob
clockwise to MAX.
2. Turn the POWER knob to ON. The display will show SCAN, a channel number
and a frequency.
NOTE: When turned on, the scanner may automatically begin scanning
channels and frequencies.
3. Press MANUAL to stop the display from scanning. A channel and frequency
will appear in the display.
4. Turn the VOLUME knob clockwise 1/5 turn. However, if the scanner is in the
middle of a transmission, wait until it finishes before turning the knob.
5. Turn SQUELCH knob slowly counterclockwise until there is an audible hissing
sound.
6. Now turn the SQUELCH knob clockwise until the hissing sound stops.
NOTE: Should the scanner begin to pick up partial, weak or unwanted
transmissions, simply rotate the SQUELCH knob clockwise. This decreases the
scanner’s sensitivity to these frequencies.
Page 9

7
USING THE SCANNER
PROGRAMMING FREQUENCIES
Your scanner is capable of storing up to 20 frequencies in memory locations
called channels.
To program frequencies:
1. Press MANUAL and then enter the channel you want to program. The current
channel will appear on the left of the display and the one you just entered
will appear on the right.
2. Press PGM and wait for PROGRAM to appear in the display.
3. Enter the frequency of your choice.
4. Press ENTER/L-OUT to store the frequency.
NOTE : Should you make an incorrect entry, Error will show in the display.
Simply press the CLEAR button and repeat Step 3.
If you want the scanner to pause 2 seconds on a particular frequency before
scanning the next channel, see the next section - USING DELAY.
5. Repeat Steps 1-4 to program additional channels not in sequence or Steps 24 to do so in sequence.
After entering the frequencies of your choice into the scanner’s channel
memory, you can scan those channels or manually select them.
Page 10

8
USING THE SCANNER
USING DELAY
Some agencies use two-way radios that allow for pause between transmissions.
To avoid missing the reply to a query, your scanner has been equipped with a
Delay feature that allows you to pause on a specific frequency for longer than
the scanner would normally allow.
To activate Delay for a specific channel, select a channel and press •/DELAY until
DELAY appears in the display.
To activate Delay when the scanner stops on an active transmission while
scanning channels or searching frequencies, quickly press •/DELAY while the
transmission is still active. DELAY will appear in the display.
The scanner will now pause for two additional seconds before resuming its scan
after the end of the transmission on that frequency.
To turn the DELAY feature off, press •/DELAY while the transmission is still
active. DELAY will disappear from the display.
TEMPORARILY STORING
AN
ACTIVE FREQUENCY IN MONITOR MEMORY
You may find a frequency that sparks your interest but you are not sure you
want to program it into a channel. Use the scanner’s Monitor Memory to
temporarily store the frequency until you decide.
To temporarily store:
1. Press MANUAL or PGM.
2. To start your search from a specific frequency, enter the frequency number.
To start from a preset channel, press MANUAL, the channel number and
MANUAL or PGM.
3. Press
to search up from the frequency or down from the frequency.
The scanner will stop searching when it finds an active frequency. It will
continue to hold at that frequency until the transmission ends. It will resume
searching immediately upon the end of the transmissions.
Page 11

9
USING THE SCANNER
4. Press or to continue the search while the scanner has pause for an active
frequency.
5. When you find the frequency you want to temporarily store in the scanner’s
Monitor Memory, press 0/MON.
To listen to the frequency you have stored in monitor memory, press MANUAL
or PGM and then 0/MON. You cannot find the frequency by scanning for it.
SHIFTING A FREQUENCY
FROM
MONITOR MEMORY TO A CHANNEL
1. Press PGM and then enter the channel number into which you want to store
the frequency from monitor memory.
2. Press PGM and then 0/MON. The entered channel will flash in the display and
the frequency in the monitor memory also appears.
3. Press ENTER to lock in your choice.
SCANNING CHANNELS
Press SCAN to begin a scan of all the unlocked channels. The scanner will stop
when it encounters an active channel. When the transmission ends and the
channel becomes inactive, the scanner automatically begins scanning again.
You can make the scanner pause for two seconds after the channel becomes
inactive by pressing DELAY.
Adjust the SQUELCH knob to eliminate the hissing sound between transmissions
or the scanner will not scan.
NOTE: To stop the scanner from immediately resuming its search upon the
transmissions end, press •/DELAY. The scanner will now pause for two seconds
after the frequency becomes inactive.
Page 12

10
SPECIAL NOTE
Your scanner can receive
frequencies that lie mainly
within its “line of sight,”
meaning you probably will
not be able to receive
transmissions from beyond
the visible horizon.
USING THE SCANNER
MONITORING ONE CHANNEL
There may come a time when you want to
monitor a specific channel for an unspecified
amount of time.
For example, you might stumble onto an
exciting exchange between police officers in
foot pursuit. Because there will be periods of
silence between the officers’ transmissions to
one another, you will have to manually select
this channel or risk the scanner taking an
inopportune moment of silence to start
scanning for more active frequencies.
To make sure you don’t miss a detail:
1. Press the MANUAL button.
2. Enter the channel number and press the
MANUAL button again.
If the scanner is already in the process of
scanning and lands on the channel you want
to hear, simply press the MANUAL button
once.
Page 13

11
SPECIAL NOTE
You cannot lock out all
the channels. At least
one channel must be
active.
USING THE SCANNER
LOCKING OUT CHANNELS
You can lock out channels you do not want to
monitor, such as a continuously active
weather channel, thereby making your
scanner much more effective.
To lock out a channel:
1. Press the MANUAL button. MANUAL will
appear in the display.
2. Enter the channel number you want to lock
out and then press MANUAL again.
3. Press the L-OUT button. L/O will appear in
the display.
Now when the scanner scans the channels, it
will skip over the ones you have locked out.
You can still manually select any channel
previously locked out.
To unlock a channel, manually select the
locked out channel. Press the L-OUT button.
L/O should disappear from the display.
CLEARING A CHANNEL
1. Press the PGM button.
2. Manually enter the channel number you
want to clear and then press the PGM
button again.
3. Press the CLEAR button and hold it down
while pressing the ENTER button.
Page 14

12
TROUBLESHOOTING TIPS
Problem Solution
The scanner will not function. • Make sure the unit is plugged into a working
outlet.
• Make sure the AC adapter is not faulty. Replace
the adapter and try again.
There is no reception • The placement of the scanner is not suitable.
or poor reception. Relocate the unit.
• Check to make sure the antenna is correctly
installed.
• Check to make sure the frequencies are
properly programmed. Reprogram if necessary.
Error appears in the display. • Indicates a programming error. Verify the
frequency and reprogram if necessary.
Keys will not function. • Reset the scanner.
Display is randomly scanning.
The frequency entered will • If the display shows no error message, you may
not display. have entered a frequency between two
acceptable frequency intervals. Re-enter the
correct frequency.
Page 15

13
EQUIPMENT SPECIFICATIONS
Operational Channels ............ 20
Sensitivity ............................... (20 dB signal-to-noise ratio)
30-54 MHz ......................... 1uV
137-174 MHz ..................... 1uV
380-512 MHz ..................... 1 uV
Spurious Rejection
30-54 MHz ......................... 50 dB at 40 MHz
137-174 MHz ..................... 50 dB at 154 MHz
380-512 MHz ..................... Not Specified
Selectivity
+/- 10 kHz ........................... -6 dB
+/- 20 kHz ........................... -50 dB
IF Interference Ration
10.7 MHz ............................ 70 dB at 154 MHz
Scanning Rate ......................... 16 channels/sec
Search Rate ............................. 16 steps/sec
Delay Time .............................. 2 sec
IF Frequencies ......................... 10.7 MHz and 455 kHz
Frequency Coverage
VHF-Lo ............................... 30-50 MHz (in 5 kHz steps)
HAM ................................... 50-54 MHz (“)
GOVERNMENT ................... 137-144 MHz (“)
HAM ................................... 144-148 MHz (“)
VHF-Hi ................................ 148-174 MHz (“)
HAM/GOVERNMENT ......... 380-450 MHz ( in 12.5 kHz steps)
UHF-Lo ............................... 450-470 MHz (“)
UHF-Hi ................................ 470-512 MHz (“)
Squelch Sensitivity
Threshold ........................... 1.0 uV
Tight (S+N)/N ..................... 25 dB
Antenna Impedance ............... 50 ohms
Audio Power ........................... 1.0 Watts nominal
Built-in Speaker ...................... 3” 8 ohm, dynamic
Power Req ...............................
120V
AC, 60 Hz, 8 Watts
Dimensions ............................. 2 1/16 x 8 1/4 x 6 7/8” (HWD)
Weight ..................................... approx. 23 oz (.65 kg) without antenna
Page 16

14
CARE AND MAINTENANCE
• This unit is to be kept dry at all times. Should the unit become wet, dry
immediately with a soft cloth. Electronic circuits may corrode should they
come in contact with liquids containing minerals.
• Do not drop the unit. Circuit boards may be damaged and cause the scanner
to malfunction if it is dropped.
• Store unit at normal temperatures. Avoid sudden temperature changes.
Excessive hot or cold temperatures may damage or disfigure plastic parts and/
or shorten the life of electronic devices.
• To prevent premature wear and tear on parts, keep the unit clean and free of
dust and dirt.
• Do not use harsh chemicals, solvents or strong detergents to clean the unit.
• Do not attempt to alter or modify the internal component’s of the unit. Such
actions may violate and/or void the unit’s warranty and/or the FCC’s
authorization for the unit’s operation.
SERVICE INFORMATION
This product should be serviced only by those specially trained in appropriate
servicing techniques. For instructions on how to obtain service, refer to the
warranty in this guide.
Attach your sales receipt for future reference, or write down the date you
purchased/received this product as a gift. This information will be valuable if
service should be required during the warranty period.
Purchase Date____________________________________________
Name of Store ____________________________________________
Page 17

15
INDEX
Symbols
•/DELAY 4, 5
0/MON 4, 5
A
Adjusting volume & squelch 6
Antennas 3
B
Buttons and controls 4
C
Care and maintenance 14
Clear 4
Clearing a channel 11
D
DELAY 5, 8
Display messages 5
E
ENTER 4
Equipment specifications 13
F
FCC information Inside Cover
I
initializing 3
L
L/O 5
L-OUT 4
Locking out channels 11
M
MANUAL 4,5
MON 5
Monitoring one channel 10
P
PGM 4
Powering Up 2
PROGRAM 5
Programming frequencies 7
R
Reset 2
S
SCAN 4,5
Scanning channels 9
SEARCH 4,5
Service information 14
Shifting a frequency from monitor
memory to a channel 9
Squelch 6
T
Temporarilly storing an active frequency
in monitor memory 8
Troubleshooting tips 12
U
Using delay 8
V
Volume 6
W
Warranty Back Cover
Page 18

Model RP-6200
20742570 (Rev. 1, E/S)
97-46
Printed in China
©1997 Thomson Consumer Electronics, Inc.
Trademark(s) ® Registered
Marca(s) ® Registradas
What your warranty covers:
• Any defect in materials or workmanship.
For how long after your purchase:
• One year. (The warranty period for rental units begins with the first rental or 45 days
from date of shipment to the rental firm, whichever comes first.)
What we will do:
• Provide you with a new or, at our option, a refurbished unit.
• The exchange unit is under warranty for the remainder of the original product’s
warranty period.
How to make a warranty claim:
• Properly pack your unit. Include any cables, etc., which were originally provided with the
product. We recommend using the original carton and packing materials.
• Include in the package evidence of purchase date such as the bill of sale. Also print your
name and address and a description of the defect. Send standard UPS or its equivalent to:
Thomson Consumer Electronics, Inc.
Product Exchange Center
32 Spur Drive
El Paso, Texas 79906
• Insure your shipment in case of loss or damage. Thomson accepts no liability in case of
damage or loss.
• Pay any charges billed to you by the Exchange Center for service not covered by the
warranty.
• A new or refurbished unit will be shipped to you prepaid freight.
What your warranty does not cover:
• Customer instruction. (Your Owner’s Manual provides information regarding operating
instructions and user controls. For additional information, ask your dealer.)
• Installation and setup service adjustments.
• Batteries.
• Damage from misuse or neglect.
• Products which have been modified or incorporated into other products.
• Products purchased or serviced outside the USA.
• Acts of God, such as but not limited to lightning damage.
How state law relates to this warranty:
• This warranty gives you specific legal rights, and you may have other rights which vary
from state to state.
If you purchased your product outside the USA:
• This warranty does not apply. Contact your dealer for warranty information.
LIMITED WARRANTY
NEED HELP?
If you need any help with this product, please contact our Scanner Customer
Service Line at: 1-888-SCAN-4-RCA.
 Loading...