

Page 1
I
RP-6
I98
Please rutain this
OHNER’S MANUAL ADDENDUM
addendum
and
Insert
inside the
front cover
of
your owcrw’s
manual.
Pags I3 to
14 “Changing Faquency at Channel
Memory”
paragraph
I m
4 as follows;
I.
2.
3.
4.
5.
4,
.
Press
MAN.
Use
the number
pad
to enter
the cw
number conainlng the
Craquency. II your
scanner displays a
frequency other
than
the
one
you want ta
change ar the same car
number, press
one
of
the
search arrows ( 4 or
b
)
until the frquwq you want to
change Is
shown in the display,
Press 0,
then press ENT-L/OUT
Tha
frequency is
delatec%
Press PROG.
Enter tie
frequmcy m~mbec
Press ENTI UOUr.
Enter car
number.
7.
Press ENT,UCWC
l
PLEASE
SEE REVERSE SIDE FOR SUPPLEMENTARY NOTES
TO
“USING
THE SCANNER” SEmION.
c
Page 2
To scan the preprogrammed weather channels,
press ( T ),
‘. ’
To
manually tune through the
preprogrammed
weather channels,
1;
reputedly
press ( 9
)
until
MAN appears on
the
display.
: ‘:
, J
Then repeatedly press > bo select higher channels af c co select ,‘,,
Cower
charm A.
‘,
.I
USING THE ATTENUATOR
To mciuce interference or
nolre caused by strong signals, you can
reduce the scanner’s
sensklvicy to those
signals,
Press Al7
urrtil
Am
appears on the display to
reduce the scanner’s sensttivity.
Note: IC you
turn on
&is
feature, the scanner might not receive
weak signals.
To turn off the
attenuator, press ATT again.
Am
chappears
from
the
display,
TURNING THE KEY TONE ON AND OFF
Each
time you
pr&s
any
of tie scanner’s keys
(except
d /
LIGHT),
rhe scanner
sounds a tone,
Follow
thee stepr’to
turn the scannet’s
key
cone on or OR
I.
2.
If
the seamer ir 011,
turn VOLUME OFF[f%%
counterclockwise
until It dicks to
turn It
off.
While you
pre~~
and &old down the 2 and
ENT-LJOUY
keys,
turn on the scannet
‘,,, .
I:,
‘.
Page 3

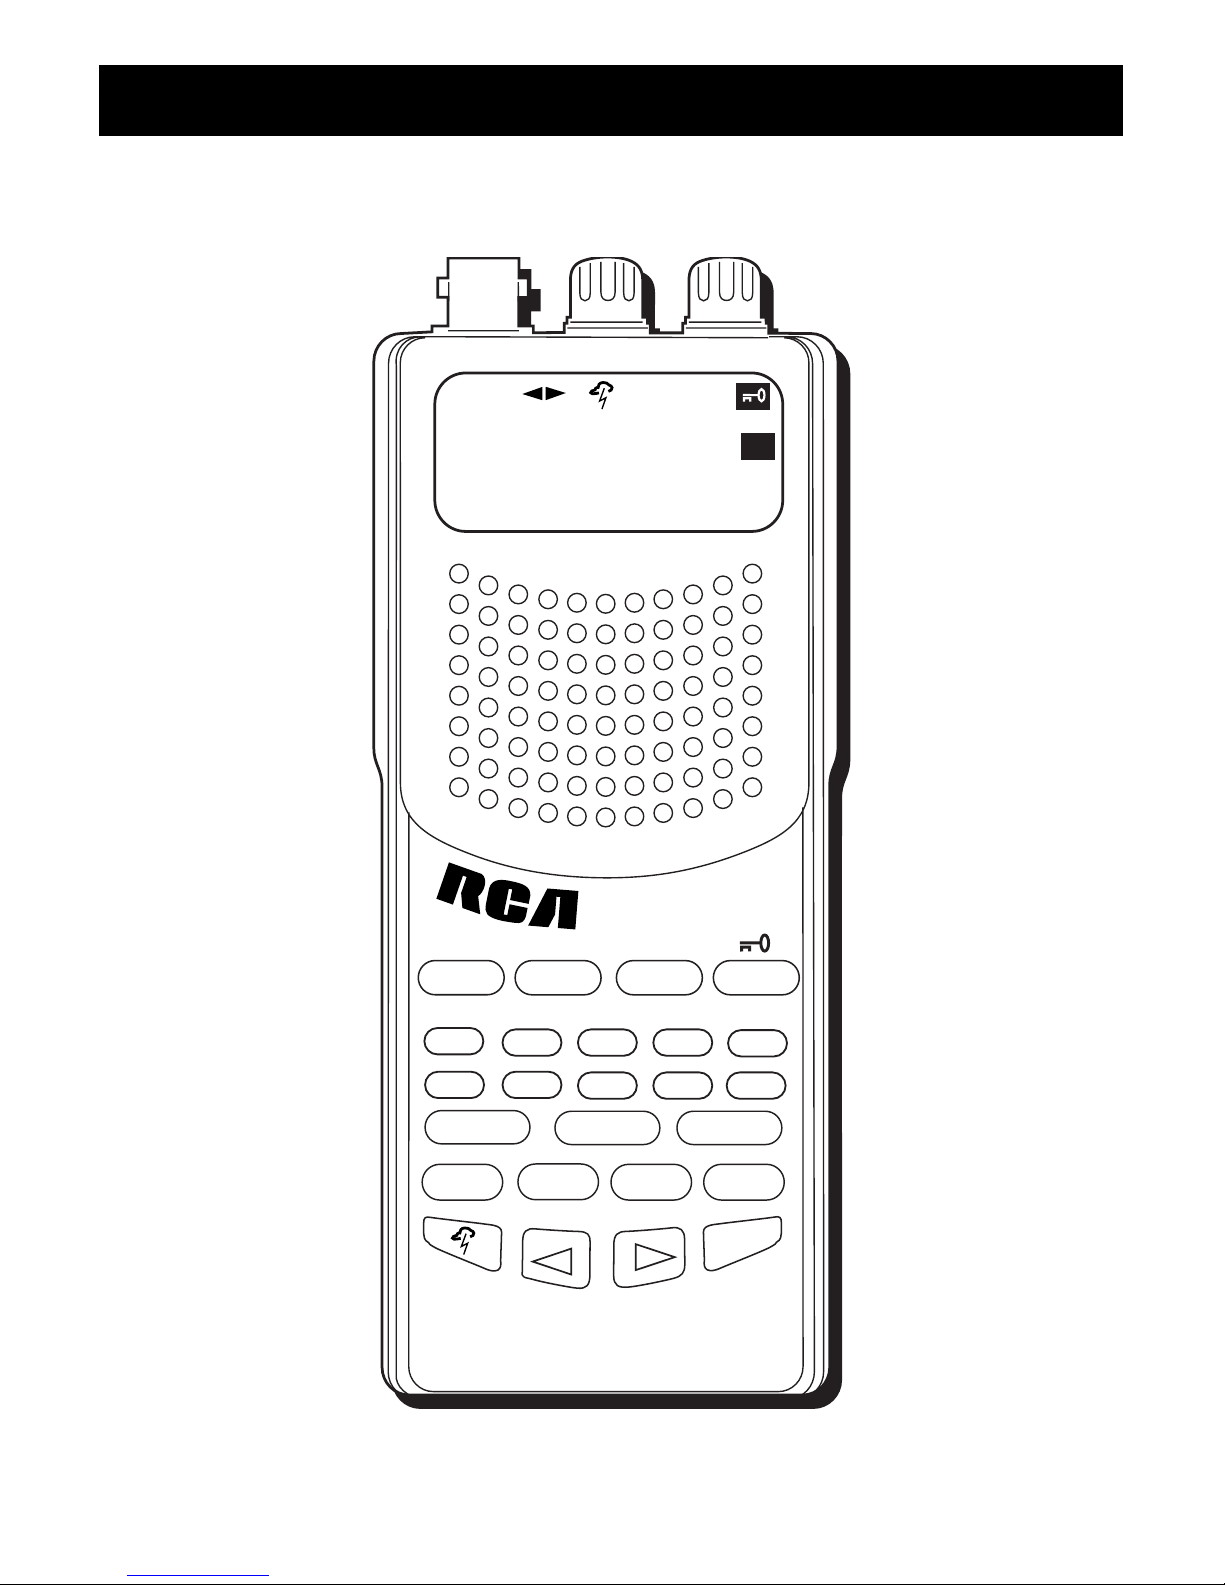
200 Channel scantrak
racing scanner
RP-6198
Page 4

FCC INFORMATION
This device complies with Part 15 of the FCC Rules. Operation is subject to the
following two conditions: (1) This device may not cause harmful interference,
and (2) this device must accept any interference received, including interference
that may cause undesired operation.
In accordance with FCC requirements, changes or modifications not expressly
approved by Thomson Consumer Electronics could void the user’s authority to
operate this product.
CAUTION: Scanning is a great pass time. You can listen to exchanges between
police, fire departments, ambulances, military organizations, government
agencies, private companies, aircraft and amateur radio stations. Owning and
operating this scanner is legal in so far as you do not intentionally intercept the
following electronic and wire communications:
• Cellular, cordless or private telephone conversations transmit through means
of telephone signal transmissions.
• Pagers transmissions.
• Scrambles of encrypted transmissions.
As amended the Federal Electronic Communication Privacy Act (ECPA) states you
could be fined and/or imprisoned for intentionally listening to, using or
disclosing the contents of such a transmission unless a party in the communication has consented-unless such an activity is otherwise legal.
In some areas/states it is unlawful to operate a scanner. Please check the laws in
your area as they may change from time to time. Thomson Consumer Electronics assumes no liability for the operation of this scanner.
WARNING: In some areas/states it is unlawful to operate a mobile scanner.
Please check the laws in your area. Thomson Consumer Electronics assumes
no liability for the operation of this scanner.
Page 5

INTRODUCTION
Congratulations!
You are now the owner of a brand new RCA ScanTrak Racing Scanner.
Your new scanner takes you out the stands and into pit row as you listen to live
communication between pit crews and their drivers.
With the capacity to scan more than 31,000 frequencies at 25 channels per
second; your new RCA ScanTrak Racing Scanner allows you to be more than just
a mere spectator of the sport.
SOME TERMS TO KNOW:
Signal electrical impulses sent or received.
Transmission a sent or received signal.
Frequency a signal transmitted through the air.
Broadcast to transmit a signal for public service.
Squelch lessens the scanner’s sensitivity to weak
signals.
Channel a location to permanently store an active
frequency.
Scan scrolls through all stored channels, pausing
on active frequencies until the transmission
ends.
Page 6

2
FIRST THINGS FIRST ........................................................................ 4
P
OWERING UP ................................................................................. 5
C
ONNECTING THE ANTENNAS .......................................................... 6
B
UTTONS AND CONTROLS ................................................................. 8
T
HE DISPLAY .................................................................................. 9
U
SING THE SCANNER ....................................................................... 10
A
DJUSTING VOLUME AND SQUELCH .................................................. 10
P
ROGRAMMING FREQUENCIES ........................................................... 10
B
AND SEARCH ................................................................................. 11
S
CANNING STORED CHANNELS ......................................................... 12
S
EARCHING ...................................................................................... 12
L
IMIT SEARCH ................................................................................. 12
S
ELECTING CHANNELS MANUALLY .................................................... 12
D
ELETING A FREQUENCY FROM A CHANNEL ....................................... 13
D
ELETING ALL CHANNEL FREQUENCIES ............................................. 13
D
ELETING ALL LOCKED OUT CHANNEL FREQUENCIES ......................... 13
C
HANGING FREQUENCY AT CHANNEL MEMORY ................................ 13
U
SING PRIORITY SCAN ..................................................................... 14
M
ONITOR MEMORY ........................................................................ 14
L
OCKING OUT ................................................................................. 15
U
SING KEYLOCK .............................................................................. 15
U
SING DELAY .................................................................................. 15
U
SING THE CARRYING CASE ............................................................. 16
TROUBLESHOOTING TIPS .................................................................. 17
E
QUIPMENT SPECIFICATIONS ............................................................. 18
C
ARE AND MAINTENANCE ................................................................ 19
S
ERVICE INFORMATION .................................................................... 19
I
NDEX ........................................................................................... 20
L
IMITED WARRANTY ....................................................................... BACK COVER
TABLE OF CONTENTS
Page 7
3
THE SCANNER
200 CHANNEL
RACING SCANNER
E
N
T
L/OUT
SRCH
SCAN
PRI DLY
888.888
8
ATT
MHz
888
MEM
CAR #
BATT
MAN PROG
L/O
• /
DELAY
RP-6198
SC
A
N
T
R
A
K
LIMIT
MEM
PRI
CLEAR
ATT PROG
MAN
SCAN BAND LIGHT
1
2
3
45
6
7
8
9
0
Page 8

4
FIRST THINGS FIRST
There are basically two ways to
power your scanner - by batteries or
adapters. However, you can use
different types of batteries and
different kinds of adapters, so pay
close attention to the procedures and
precautions written below for the
method you choose.
USING ADAPTERS
This scanner is equiped with two jacks
- POWER and CHARGE. When an
adapter is connected to the POWER
jack and an AC outlet, power from
the batteries is disconnected.
When an adapter is connected to the
CHARGE jack, this jack will provide
power for the scanner while
recharging the batteries.
AC POWER
To use the AC adapter provided,
simply insert the plug into the
POWER jack at the side of your
scanner and the pronged module into
a standard AC outlet.
DC ADAPTER
If you plan to operate the scanner in
your vehicle, you may choose to
power it using a DC adapter and the
socket of the cigarette lighter. Check
to make sure the socket is attached to
a 12-volt, negative-ground electrical
system.
Connect and disconnect with the
scanner same as an AC adapter.
• The adapter’s voltage switch must
be set on 9V.
• Never leave the adapter plugged
into the lighter when it isn’t
attached to the scanner. Always
disconnect the adapter from the
lighter first, then the scanner.
• If the scanner does not properly
operate while trying to use a DC
adapter, simply unplug the adapter
from the lighter socket and clean
the socket.
BATTERIES
It takes six batteries to operate your
scanner. Alkaline batteries offer the
best results, but it is possible to use
nickel-cadmium rechargeable batteries.
To install batteries:
1. Slide the battery door in the
direction of the arrow.
2. Insert six AA batteries as shown in
the diagram.
3. Replace the battery door.
20 CHANNEL FM
SCANNING RECEIVER
SCAN MANUAL
CLEAR PGM
KEYLOCK LIGHT
1
23
4
56
7
89
0/MON
./DLY L-OUT/ENT
Page 9

5
FIRST THINGS FIRST
FOR NICKEL-CADMIUM
(NICAD) BATTERIES:
This unit is equipped with battery
recharging circuitry, enabling you to
use NiCad batteries and recharge them
while they are still in the battery
comaprtment.
It is always a good idea to let nickelcadmium batteries run all the way
down before charging them. Then
when you do charge them, do so to
their full potential and they will last
longer and provide more power.
TO CHARGE NICAD BATTERIES:
1. Install six nickel-cadmium batteries.
2. Connect the AC adapter to the
CHARGE jack.
DO NOT CONNECT AN AC
ADAPTER TO THE CHARGE JACK IF
YOU HAVE NON-RECHARGEABLE
BATTERIES INCLUDED. If you try to
recharge non-rechargeable
batteries, you may cause serious
injury to yourself and/or severely
damage the scanner. The adapter
you use must supply 9 volts with the
center tip set to negative. It also
must fit properly into the POWER
jack and deliver at least 300
milliamperes.
3. Plug the AC adapter into an AC wall
outlet. The unit works while
recharging its batteries.
4. After approximately 15 hours,
unplug the adapter from the wall
outlet and disconnect it from the
unit.
IMPORTANT BATTERY INFORMA-
TION
• Alkaline batteries are recommended
for best results.
• If you do not intend to use the unit
for a month or more, remove the
batteries to aviod leakeage or
subsequent damage.
• Dispose of batteries in the proper
manner, according to federal, state
and local regulations.
• Any battery may leak electrolyte if
mixed with a different battery type;
if inserted incorrectly; if all batteries
are not replaced at the same time; if
disposed of in fire; or if an attempt
is made to charge a battery not
intended to be recharged.
• Discard leaky batteries immediately
to avoid possible skin burns or other
personal injury.
Use the CHARGE jack only if
you have rechargeable
nickel-cadmium batteries
installed.
DO NOT charge for more
than 24 hours. Excessive
charging may adversely
affect the performance of
the batteries.
Page 10

6
FIRST THINGS FIRST
CONNECTING THE ANTENNA
Your scanner comes with two flexible
antennas for better reception. To
attach an antenna:
1. Line up the slots on the antenna
with the knobs of the antenna
receptor on the scanner.
2. Slip the antenna over the
knobs and twist until you
feel the antenna locks
into place.
OPTIONAL ANTENNAS
While the flexible antenna provides
satisfactory reception for local
signals, you can attach a multiband
outdoor antenna - not provided - for
even better reception.
Install the antenna according to its
instructions, then connect it to the
scanner via the ANT jack.
Do not place the cable on top of
sharp edges or near moving objects
place it as high as possible outside;
place it as far from any source of
electrical noise as possible; and make
sure the antenna is vertical at all
times. Use the shorter antenna for
lengths under 50 feet. Use the
normal antenna for lengths more
than 50 feet.
PRIVATE LISTENING
Your scanner has been equipped with
a PHONE jack to allow for private
listening. The use of headphones
(included) or an earphone (not
included) immediately suspends audio
output from the scanner’s main
speaker.
To use the headphone set:
1. Turn the volume knob on the
scanner to a 12
o’clock position.
2. Insert the plug of
the headphone set
into the PHONE jack
of the scanner.
3. Turn the volume
knob (on the
headphone set) towards MIN to
avoid a blast.
4. Put on the headphones and adjust
its volume knob to the desired
listening level.
You can use two headphones at a time:
1. Take the plug of the splitter cable
(included) and insert it into the
PHONE jack of the scanner.
2. Insert the plug of the headphone
set into one of the jacks of the
splitter cable.
3. Insert the plug of another
headphone set into the other jack
of the splitter cable.
Page 11

7
FIRST THINGS FIRST
USING THE BELT CLIP
Your scanner has been
equipped with a belt
clip to make it more
mobile. To use, simply
slide the belt clip over
the waistband of your
pants/skirt or your
belt.
USING THE LIGHT
Your scanner has been
equipped with a light
to help you see better
in dim or dark lit areas. Press the
LIGHT button again to turn the light
off before the 5 seconds are up.
BATTERY SAVER
Your scanner has been equipped with
a battery-saving circuit. This feature
sends the unit into a standby mode,
which uses only 40 percent of the
available power, if no signal is
detected within a 5 second time
interval, P-SA(power save) appears in
the display.
The scanner will continue to operate
in the standby mode until it receives a
signal or you press a button.
HAVE A BLAST - JUST NOT IN
YOUR EARDRUMS
Make sure you turn down the
volume on the unit before you
put on headphones. Increase the
volume to the desired level only
after headphones are in place.
• Do not operate your scanner at
high volume. Hearing experts
advise against continuous
extended play.
• If you experience a ringing in your
ears, reduce volume or discontinue
use.
• You should use extreme caution or
temporarily discontinue use in
potentially hazardous situations.
Some headphone/earphones
allow you to hear background
noise while listening to your
scanner at a normal volume
setting. Regardless, wearing
headphones or an earphone while
riding a bike or operating a vehicle
cannot only impair your concentration, it is also dangerous and/or
illegal.
Page 12

8
BUTTONS AND CONTROLS
The following list is presented in alphabetical order and provides general
information about each button and control on your scanner:
ATT - Activates the Attenuation
feature, which blocks strong signals.
BAND - Accesses the preprogrammed
frequency ranges.
CLEAR - Erases an incorrect entry;
helps initialize the scanner.
DEL/• - Programs a two-second delay
while scanning or searching, or enters
a period.
ENT - L/OUT - stores a frequency in a
channel, or turns the channel lock on
or off.
/LIGHT - Turns Keylock feature on
or off, or illuminates the display.
LIMIT - Enters the Limit search mode;
allows you to set the search range.
SCAN - Activates an automatic scan
of all the stored channels, except
those locked out.
MAN - Enters the Manual mode or
moves channels.
MEM - Allows you to store received
frequencies in a monitor channel
while scanning in search mode. In
other modes, it allows you to call up
frequencies from a monitor channel.
NUMBERS - Allows you to enter the
numbers for frequencies and
channels.
PROG - Initiates the Program function
and allows you to enter frequencies
into channels.
PRI - Turns the Priority function on
and off.
- Selects a scan or search
direction.
- Accesses the
preprogrammed weather channels.
E
N
T
L/OUT
• /
DELAY
SC
A
N
T
R
A
K
LIMIT
MEM
PRI
CLEAR
ATT PROG
MAN
SCAN BAND LIGHT
1
2
3
45
6
7
8
9
0
Page 13

9
appears when you activate the
Attenuate feature.
appears when the batteries are
low.
# appears above the number you
enter.
appears when the scanner tunes
to the delay feature.
appears when you listen to a
channel that is locked out of the
Scan mode.
appears when you manually
select a channel.
appears when you listen to a
frequency stored in monitor
memory.
appears when the priority feature
is on.
appears when you program a
frequency into a channel.
appears when you scan through
the channels.
appears during frequency search.
appears when there is no
specified car number.
appears when deleting all non-
lock-out programmed channels.
appears when you program an
out of range frequency.
appears for 2 seconds when
scanner goes into program
mode. The indicate
the remained channel
numbers.
appears when the scanner
has 200 preprogrammed
channels and the memory is
full.
appears when you delete
only the programmed lockout channels.
appears when you specify a
car number and clear the
lock-out mode.
appears when you press
CLEAR during search while
in search mode.
appear to indicate the scan
or search direction.
appears when you listen to
a weather channel.
appears when the keylock
is turned on.
indicates the frequency.
indicates the car numbers.
THE DISPLAY
The display lets you know what your unit is doing. The following is a list of
display messages you will encounter and what they mean.
CARCAR
CARCAR
CAR
ATTATT
ATTATT
ATT
BATTBATT
BATTBATT
BATT
DLYDLY
DLYDLY
DLY
L/OL/O
L/OL/O
L/O
MANMAN
MANMAN
MAN
MEMMEM
MEMMEM
MEM
PRIPRI
PRIPRI
PRI
PROGPROG
PROGPROG
PROG
SCANSCAN
SCANSCAN
SCAN
SRCHSRCH
SRCHSRCH
SRCH
888
SRCH
SCAN
PRI DLY
888.888
8
ATT
MHz
888
MEM
CAR #
BATT
MAN PROG
L/O
Page 14

10
USING THE SCANNER
ADJUSTING VOLUME AND
SQUELCH
1. Turn the SQUELCH knob completely clockwise.
2. Turn the VOLUME knob halfway.
The scanner turns on and off via
the VOLUME knob.
3. Turn the SQULECH knob counterclockwise until there is a
perceptible static sound.
4. Now readjust the VOLUME knob
to a comfortable listening level.
5. Adjust the SQUELCH knob slowly
until the static sound stops.
It may be necessary to readjust the
SQUELCH knob to block weak and
intrusive transmissions.
At this time, the unit will automatically scan through the channels
regardless of whether or not you
have programmed any frequencies.
PROGRAMMING FREQUENCIES
Your scanner is capable of storing up
to 200 frequencies.
You can program the frequencies
randomly or match channel numbers
with car numbers, TV and radio call
numbers, etc.
TO PROGRAM FREQUENCIES:
1. Press MAN.
2. Press PROG.
The number of empty channels
appears in the display before
showing the information below.
3. Enter frequency.
4. Press ENTER.
5. Enter the car number.
6. Press ENTER.
000.0000
PROG
---
MAN
000.000
0
MHz
CAR #
---
162.340
PROG
0
---
PROG
162.340
MHz
72 0
Page 15

11
USING THE SCANNER
BAND SEARCH
You can search for and store active
frequencies by using BAND SEARCH.
1. Press BAND and the display shows
the last selected band number and
the frequency search range.
2. To select a different band, either
enter the desired band number or
press BAND repeatedly until the
desired number is displayed.
Note: When entering a band
number, make sure you enter it
within 2 seconds after BAND is
pressed.
3. After 2 seconds (approx.), SRCH
appears on display and searches in
that band (from the lowest to
highest frequency) for an active
frequency.
4. While the scanner is searching, you
can select a different band by
repeating step 2.
5. When an active frequency is found,
the scanner stops search and
displays the frequency number. You
can continue the search by pressing
and holding or for about a
second.
The following list are the
preprogrammed Band Search ranges:
BAND Frequency Search Range
(in MHz)
1 29 - 54
2 108 - 136.975
3 137 - 148
4 148 - 174
5 380 - 420
6 420 - 450
7 450 - 512
8 806 - 824
9 849 - 869
0 894 - 960
Page 16

12
SEARCHING
Press and hold or for about a
second to start a limit or band search.
Press them momentary to the next
frequency.
Press MEM during a Limit or Band
search to store a frequency in a
monitor memory.
• Key in the highest frequency in the
search range and then press the
ENTER button.
• Choose the direction you want to
search in ( or ) and press the
appropriate button. -L- and SRCH
will appear in the display.
When the scanner has
exhausted the search range, it
will begin again.
SELECTING CHANNELS MANU-
ALLY
It is possible to constantly monitor
one frequency for an unspecified
amount of time without scanning.
For example, you might stumble onto
an exciting exchange between police
officers in a foot pursuit. Because
there will be periods of silence
between the officers’ transmissions to
one another, you will have to
manually select this frequency or risk
the scanner taking an inopportune
moment of silence to start scanning
for more active frequencies.
• If the scanner is scanning and lands
on the frequency you want to
monitor, quickly press the MAN
button.
SCANNING STORED CHANNELS
To scan through all the stored,
unlocked channels, press SCAN. To
change scanning direction, press the
or button.
Adjust the SQUELCH knob to resume
scan if the scanner stays on a frequency
after the transmission has ended.
Car numbers and their corresponding
frequencies appear in the display in
ascending order, starting from the
lowest car number entered.
When multiple frequencies have been
assigned to one car number, the
scanner will display the lowest
frequency first.
USING THE SCANNER
LIMIT SEARCH
In a Limit Search, you choose the
range within which the scanner will
find frequencies.
• Press the PROG button and then the
LIMIT button.
• Key in the lowest frequency in the
search range and press the ENTER
button.
• Press the LIMIT button.
Page 17

13
USING THE SCANNER
• If the scanner is scanning and you
know the channel you wnat to
monitor, press the MAN button to
stop the scan. Enter the channel
number and press the MAN button
again.
• If the scanner is not scanning, enter
the number for the channel you
want to monitor an press the MAN
button again.
Do not press the MAN
button additional times
unless you want to step
through the channels.
DELETING A FREQUENCY FROM
A
CHANNEL
1. Press MAN.
2. Use the number keys to enter the
car number containing the
frequency you want to delete.
3. Press MAN.
If your scanner displays a frequency
other than the one you want to
delete at the same car number,
press one of the search arrows (
or ) until the frequency you
want to delete is shown in the
display.
4. Press 0.
5. Press ENT -L/OUT.
The frequency is now deleted.
To delete other frequencies in the
same way, use Steps 2-5.
DELETING ALL CHANNEL
FREQUENCIES
1. Press PROG.
2. Press and hold CLEAR, then press 0.
ALL Ch 0000 appears in the display.
3. Press ENT-L/OUT to clear all
frequencies from all channels.
If you do not clear all channels,
press CLEAR to do so.
DELETING ALL LOCKED OUT
CHANNEL FREQUENCIES
1. Press PROG.
2. Press and hold CLEAR, then press
ENT-L/OUT.
L-0 Ch0000 appears in the display.
3. Press ENT-L/OUT again to clear all
channels.
If you do not clear all channels,
press CLEAR to do so.
CHANGING FREQUENCY AT
CHANNEL MEMORY
If you want to change car number
frequency then you have to delete
the original frequency first. You
cannot replace an old frequency with
a new one.
Page 18

14
USING THE SCANNER
1. Press MAN.
Use the number pad to enter the car
number containing the frequency. If
your scanner displays a frequency
other than the one you want to
change at the same car number,
press one of the search arrows (
or ) until the frequency you
want to change is shown in the
display.
2. Press 0, then press ENT-L/OUT.
The frequency is deleted.
3. Enter the frequency number.
4. Press ENT-L/OUT.
USING PRIORITY SCAN
When you designate one channel as
the priority, the scanner will check it
every two seconds and will remain
there if an active transmission is in
progress. Pch will appear in the
display on the left whenever the
scanner switches to the priority
channel.
1. Press the PROG button.
2. Press the PRI button.
3. Enter the frequency you want to
store into a priority channel.
4. Press the ENT-L/OUT button.
To activate the priority scan, press
the PRI button while scanning. PRI
will appear from the display. To turn
off the feature, press the PRI button.
PRI will disappear from the display.
MONITOR MEMORY
Once you have temporarily stored a
frequency in a monitor memory, you
need to decide whether or not you
want to store it permanently in a
channel.
Remember that monitor
memories are not scannable.
TO LISTEN TO A FREQUENCY IN
MONITOR MEMORY
Since you cannot scan monitor
memories, you must manually select
the frequency you want to hear.
1. Press the MAN button.
2. Press the MEM button.
3. Press the number key of the
monitor memory location you want
to hear.
4. Press the MEM button.
STORE THE FREQUENCY IN
MONITOR MEMORY
When the scanner stops on an active
frequency and you want to temporarily save it, press the MEM button to
store it in the monitor memory with
the flashing indicator beneath it.
If you do not want to save the active
frequency, press either or to
continue the search.
Page 19

15
USING KEYLOCK
After programming your scanner, you
can eliminate accidental program or
functional changes by locking the
keypad. To turn the Keylock on, press
and hold the /LIGHT button for
approximately 3 seconds, or until the
scanner beeps three times and
appears in the display. The only usable
buttons while this function is active are
LIGHT, MAN, SCAN, , SQUELCH and
VOLUME.
To turn the keylock function off, press
and hold the / LIGHT button for
approximately 3 seconds until the
scanner beeps three times and
disappears in the display.
USING DELAY
Some agencies use two-way radios that
allow for pause between transmissions.
To avoid missing the reply to a query,
your scanner has been equipped with a
DLY/- button that allows you to pause
on a transmission for longer than the
scanner would normally allow.
USING THE SCANNER
To activate DELAY while scanning or
searching, press the DLY/• button until
DLY appears in the display. The
scanner will now pause for two
additional seconds before resuming its
scan after the end of the transmission
on that frequency.
To turn off the Delay feature, press
the DLY/• button. DLY will disappear
from the display.
STORE THE MONITOR MEMORY
FREQUENCY IN A PERMANENT
CHANNEL
1. Press the PROG button.
2. Press the MEM button.
3. Press the number of the monitor
memory that has the frequency you
want to store.
4. Press the MEM button again.
5. Press the ENT-L/OUT button.
6. Enter the car number using the
number pad.
7. Press the ENT-L/OUT button to lock
in your choice.
LOCKING OUT
If you press ENT-L/OUT while in the
Scan mode, all the frequencies
attached to that car number will be
locked out.
If you press ENT-L/OUT while in
Manual mode, only the frequency
displayed will be locked out.
To unlock one frequency, manually
select the channel. It is stored at and
press the ENT-L/OUT button until L/0
disappears from the display.
To unlock the same car number
channel, manually select the car
number, press and hold the CLEAR
button and press the ENT-L/OUT
button. The car number and LoALLcL
will appear in the display. Press the
ENT-L/OUT button again to unlock the
car number. If you do not want to
unlock the car number, press CLEAR.
Page 20

USING THE SCANNER
USING THE CARRYING
CASE (WITH BELT)
The carrying case with belt has two
purposes: carrying the scanner on
your shoulder or strapping the
scanner around your thigh.
To carry the scanner on your shoulder,
follow the diagram below:
To strap the scanner around your
thigh for hands-free listening, first
adjust the belt as follows:
Now, follow the diagram illustrated
below to securely strap the scanner
around your thigh:
16
Page 21

TROUBLESHOOTING TIPS
RESETTING THE SCANNER
In a few instances, it may be necessary
to reset your scanner:
• no display, or
• the display may lock up after the
installation of new batteries or the
connection to an external power
source, or
• the scanner refuses to enter or exit
a mode.
Consider resetting the scanner only
after ruling out the possibility of low
batteries or incorrect programming.
Resetting the scanner clears the
programmed modes and functions,
but retains any information stored in
the 50 monitor memories and/or the
200 channel memories.
To reset:
1. Make sure the scanner is ON.
2. Press RESET button on the side of
the scanner with a pointed object,
such as a straightened paper clip,
until the entire display is blank.
If the above steps fail to reset our
scanner, you may have to initialize it.
Do this only if you are sure resetting
the scanner has not worked.
INITIALIZING THE
SCANNER
Initializing the scanner permanently
erases all stored programs, functions
and any information in the scanner’s
monitor or channel memories.
To initialize:
1. Make sure the scanner is ON.
2. Press and hold the CLEAR button.
3. Quickly press and release the RESET
button.
4. When the display reappears,
release the CLEAR button.
IMPORTANT BATTERY INFORMATION
• Using nickel-cadmium rechargeable batteries may result in shorter playing time.
It is always a good idea to let the nickel-cadmium batteries run all the way
down before charging them. Then when you do charge them, do so to their
full potential and they will last longer and provide more power.
17
Page 22

EQUIPMENT SPECIFICATIONS
Operational Channels ......... 200 channels plus 50 monitor memories
Sensitivity ............................ FM: (S+N)/N = 20dB, Dev = 3kHz at 1 kHz
29-54 MHz ....................... 1uV (FM)
108-139.975 MHz ............ 2uV (AM)
137-174 MHz ................... 1 uV (FM)
380 - 512 MHz ................. 1 uV (FM)
806- 960 MHz .................. 2 uV (FM)
Spurious Rejection
(FM-at 154 MHz) ............. 40 dB
Selectivity
+/- 10 kHz ........................-6 dB
+/- 18 kHz ........................-50 dB
IF Interference Ration
257.5 MHz at 154 MHz ... 50 dB
21.4 MHz at 154 MHz ..... 100 dB
Scanning Rate ...................... 25 channels/sec
Search Rate .......................... 50 steps/sec
Delay Time ........................... 2 sec
IF Frequencies ...................... 257.5, 21.4 and .455 MHz
Frequency Coverage
29-54 MHz (in 5 kHz steps)
118.0000-136.9750 MHz (in 25 kHz steps)
137.0000-174.0000 MHz (in 5 kHz steps)
380.0000-512.0000 MHz (in 12.5 kHz steps)
806.0000-824.0000 MHz (“)
849.0000-869.0000MHz (“)
894.0000-960.0000 MHz (“)
Squelch Sensitivity
Threshold ........................ less than 1.0 uV
Tight (FM)........................ (S+N)/N 25 dB
Tight (AM)....................... (S+N)/N 20 dB
Antenna Impedance ............ 50 ohms
Audio Power ........................ 240 mWatts nominal (10%THD)
Built-in Speaker ................... 1 3/ 8” (36m/m) 8 ohm, dynamic
Power Req ............................
+9V DC, 6 AA batteries or a suitable adapter (negative ground only)
Current Drain
(SQUELCH)....................... 70 mA
OP Temp ............................... +14OF to + 140OF (-10OC to +60OC)
Dimensions .......................... 5 7/8 x 2 1/2 x 1 3/4” (HWD)
Weight.................................. approx. 9.2 oz (260 g) without antenna
AM: (S+N)/N = 20dB, M d = 60% at 1 kHz
18
Page 23

CARE AND MAINTENANCE
• This unit is to be kept dry at all times. Should the unit become wet, dry
immediately with a soft cloth. Electronic circuits may corrode should they
come in contact with liquids containing minerals.
• Do not drop the unit. Circuit boards may be damaged and cause the scanner
to malfunction if it is dropped.
• Store unit at normal temperatures. Avoid sudden temperature changes.
Excessive hot or cold temperatures may damage or disfigure plastic parts and/
or shorten the life of electronic devices.
• To prevent premature wear and tear on parts, keep the unit clean and free of
dust and dirt.
• Do not use harsh chemicals, solvents or strong detergents to clean the unit.
• Do not attempt to alter or modify the internal component’s of the unit. Such
actions may violate and/or void the unit’s warranty and/or the FCC’s
authorization for the unit’s operation.
SERVICE INFORMATION
This product should be serviced only by those specially trained in appropriate
servicing techniques. For instructions on how to obtain service, refer to the
warranty in this guide.
Attach your sales receipt for future reference, or write down the date you
purchased/received this product as a gift. This information will be valuable if
service should be required during the warranty period.
Purchase Date____________________________________________
Name of Store ____________________________________________
19
Page 24

INDEX
Symbols
•/DELAY 3, 8
A
Adjusting volume & squelch 10
Antennas 6
B
Buttons and controls 8
C
Care and maintenance 19
Clear 3, 8
Clearing a channel 13
D
DELAY 3, 8
E
ENTER 8
Equipment specifications 18
L
L/O 3
L-OUT 9
Limit Search 12
Locking out channels 8, 15
M
MANUAL 3, 8
P
Powering Up 4
PROGRAM 10
Programming frequencies 10
R
Reset 17
S
SCAN 12
Scanning channels 12
SEARCH 9, 12
Service information 19
Squelch 10
U
Using delay 15
Using keylock 15
V
Volume 10
20
Page 25

Model RP-6198
15307830 (Rev. 0, E/S)
98-17
Printed in Hong Kong
©1998 Thomson Consumer Electronics, Inc.
Trademark(s) ® Registered
Marca(s) ® Registradas
What your warranty covers:
• Any defect in materials or workmanship.
For how long after your purchase:
• One year. (The warranty period for rental units begins with the first rental or 45 days
from date of shipment to the rental firm, whichever comes first.)
What we will do:
• Provide you with a new or, at our option, a refurbished unit.
• The exchange unit is under warranty for the remainder of the original product’s
warranty period.
How to make a warranty claim:
• Properly pack your unit. Include any cables, etc., which were originally provided with the
product. We recommend using the original carton and packing materials.
• Include in the package evidence of purchase date such as the bill of sale. Also print your
name and address and a description of the defect. Send standard UPS or its equivalent to:
Thomson Consumer Electronics, Inc.
Product Exchange Center
32B Spur Drive
El Paso, Texas 79906
• Insure your shipment in case of loss or damage. Thomson accepts no liability in case of
damage or loss.
• Pay any charges billed to you by the Exchange Center for service not covered by the
warranty.
• A new or refurbished unit will be shipped to you prepaid freight.
What your warranty does not cover:
• Customer instruction. (Your Owner’s Manual provides information regarding operating
instructions and user controls. For additional information, ask your dealer.)
• Installation and setup service adjustments.
• Batteries.
• Damage from misuse or neglect.
• Products which have been modified or incorporated into other products.
• Products purchased or serviced outside the USA.
• Acts of God, such as but not limited to lightning damage.
How state law relates to this warranty:
• This warranty gives you specific legal rights, and you may have other rights which vary
from state to state.
If you purchased your product outside the USA:
• This warranty does not apply. Contact your dealer for warranty information.
LIMITED WARRANTY
NEED HELP?
If you need any help with this product, please contact our Scanner Customer
Service Line at: 1-888-SCAN-4-RCA.
 Loading...