

RCA RLC2685A Owner's Manual
RLC2685A
26” ATSC TUNER
LCD TV
READ CAREFULLY BEFORE OPERATION

CONTENTS
..............................................................................................03~07
....................................................................................................................01
...............................................................................................................02
......................................................................................................................08
.................................................................................................16
.......................................................................................................20
..........................................................................10~12
........................................................................................................21
..................................................................................................................21
....................................................................................................09
..................................................................................................13
...........................................................................17
....................................................................................................17
............................................................................................................18
......................................................................................................19
...............................................................................................19
.................................................................................................21
....................................................................................................20
....................................................................................................20
.......................................................................................30~34
........................................................................................28~29
............................................................................................35~37
.........................................................................................22~25
............................................................................................26~27
..............................................................................................38
ACCESSORIES
CONTROLS
CONNECTION OPTION
REMOTE CONTROL KEY FUNCTIONS
INSTALLING BATTERIES
ANTENNA CONNECTION
EXTERNAL EQUIPMENT CONNECTIONS
USB CONNECTION
PC CONNECTION
HDMI CONNECTION
YPBPR CONNECTION
EARPHONE CONNECTION
TURNING THE TV ON
VOLUME ADJUSTMENT
PROGRAM SELECTION
SLEEP TIMER
RETURN FUNCTION
SOURCE INPUT SWITCH
MAIN MENU
PICTURE MENU OPTIONS
SOUND MENU OPT IONS
CHANNEL MENU OPTIONS
PARENTAL MENU OPTIONS
SETUP MENU OPTIONS
OTHERS MENU OPTIONS
MEDIA MENU OPTIONS
STAND INSTALLATION
NOTES OF WALL INSTALLATION
ARD
INSTRUCTION
CONNECTIONS & SETUP
BASIC OPERATION
OSD OPERATION
INSTALLATION
CONTENTS
CONTENTS
ACCESSORIES
SAF TY E INSTRUCTION
SAFETY INSTRUCTION
.......................................................................................15
..........................................................................................14~15
........................................................................................................18
.................................................................................................................21
............................................................................................39~41
.............................................................................................42~43
..............................................................................................44
TROUBLE SHOOTING
PRODUCT SPECIFICATION
APPENDIX
1
3
SAFETY INSTRUCTION
This LCD TV is engineered and manufactured to comply with the international safety
standards. The same as other electrical equipments,all the safety and operating
instructions should be read before the appliance is operated.
About Symbols
This manual includes different kinds of symbols. To ensure the correct using, as well as
to avoid danger to users and others, the following introductions should be adhered to.
No Operations when Problems Occur
If any event out of the ordinary, such as smoking, smell, no picture, no voice, over loud
voice, damage of part or cable, and inside of liquid or other things, there might be fire
or electrical shock. Under such occasions, please unplug the TV set, make sure there
is no smoke or smell, and get contact with the dealer. DO NOT repair it by yourself, or
there might be hurt to human body.
No Entry of Liquid or Object
There might be fire or electrical shock if liquid or other object get inside the appliance.
Please pay more attention to your children. If it happens, please unplug the TV set,
make sure there is no smoke or smell, and get contact with the dealer.
This is a WARNING symbol. If the users ignore this warning, there might be
personal damage or even death due to incorrect operation.
This is an ATTENTION symbol. If the users ignore this warning, there might
be damage to the person or to the appliance due to incorrect operation.
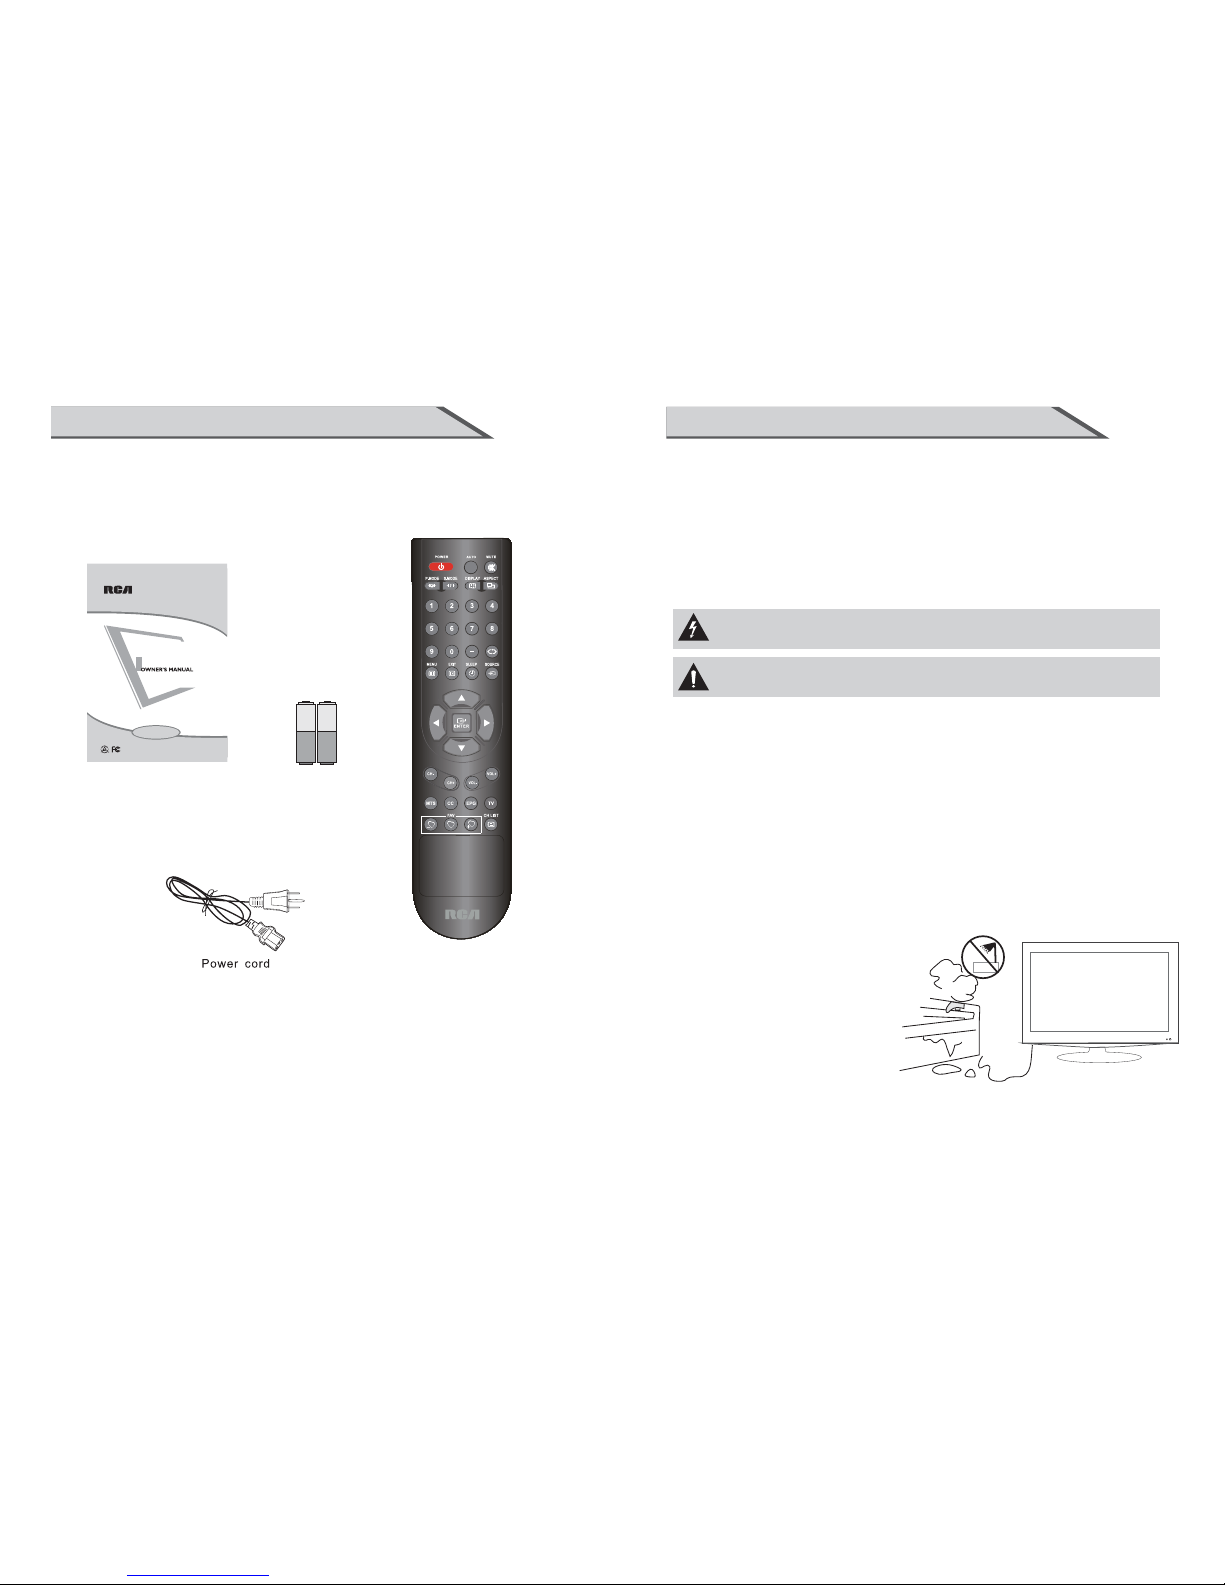
Ensure that the following accessories are included with yourTV.
If an accessory is missing, please contact the dealer where you
purchased the product.
ACCESSORIES
User Manual
Remote control
Batteries
ƵKeep the TV away from rain and moisture.
Ƶ Do not set liquids, including flower vases
and vessels filled with chemicals or water etc.
On top of the TV or around it.
Ƶ Do not set metal or tinder on top of
the TV or around it.
2
RLC2685A
26” ATSC TUNER
LCD TV
READ CAREFULLY BEFORE OPERATION

Conn ect to Ea rth in g Con ne cti on
This appliance shall be connected to a mains socket outlet with a protective earthing
connection. If the provided plug does not fit into your outlet, consult an electrician for
replacement of the obsolete outlet. Take care of the cord, or there might be fire or
electrical shock due to broken cord. Please make sure that the cord is not over hot,
pressed, or tensed. If the cord has problem (the core string emerges or the cord
break s) , pl ea se g et c on ta ct w ith the dealer.
■ Never allow heavy objects such as the TV set itself to be placed on the power cord.
Never c over the cord with table cloth, for it may lead you to set heavy object on the cord
duo to ig no ra nc e.
■ When removing the power plug from the socket, always hold onto the plug, never pull by
the cord.
■ Don’t set the cord next to heaters.
■ Don’t touch the plug right after it is unplugged to avoid electrical shock.
■ Don’t touch the plug during lightning.
■ Don’t allow cord to become knotted or tangled.
■ Protect the power cord from being walked on or pinched particularly at plugs,
convenience receptacles, and the point where they exit from the apparatus.
Dispose the Batteries Carefully
■ Incorrect disposal of batteries may cause fire or human damage, and even
explosion.
■ Don’t t hr ow b at te ri es i nt o fi re o r water.
■ Kee p the batte ri es f ar a wa y fr om f ir e or h eat.
■ Keep the batteries under cool and dry environment.
■ Mat ch t he b at te ri es t o th e (+ ) and (-) marks in the battery compartment.
■ Don’t charge up the batteries.
■ Don’t impact the batteries.
■ Please use the batteries that are appointed in the user’s manual.
■ Ple ase tre at the used b at te ri es w it h th e ob se rvance of the local law.
Keep t he TV Set a way f ro m Moi st ure a nd Dust
If yo u se t th e ap pl ia nc e un de r mo is ture or dust environment, it mi ght cause f ir e or
electrical shock due to lampblack or erosive gas.
■ Don’t s et t he T V in kitchen, places nearby heate rs , or p la ce s of l am pb la ck a nd
moi sture . Fo r he at f ro m hi gh t em pe ra ture may affe ct t he d is pl ay or other components,
and cau se d is to rt io n, m el ta ge , and fire.
■ Don’t set the TV, remote control, or other components under sun or ne ar h ea te rs .
■ Don’t set the TV where the difference in temperature is great.Remove the power
plug from the socket on occasions when you will not be using the set fo r an e xt en de d
period.
■ Bef or e cl ea ni ng , pl ea se t ur n off the TV an d un pl ug t he p ow er c ord. Or there might
be fi re or ele ctric al s ho ck .
4
Don’t Remove or Rejigger the TV Set
There is high voltage subassembly inside the TV set, which may cause fire or electrical
shock during repair.
■ DO N OT re move cove r ( or b ac k ).
NO Qui ver or Co ncu ss ion o n TV S et
This appliance should not be exposed to dripping or broken. Continuous use might
cause fire or electrical shock. If the panel gets broken, please unplug the TV set, and
get con ta ct w it h th e de al er.
Set th e TV on Bal anc ed S pot
The re will be da mage if the T V dr op s or breaks.
■ Don’t set the TV on uneven, oblique, or shacking surface.
Ventilation
Don’t interfere with its proper ventilation when the TV is working or has just been
unplugged, or the display may be spoiled or life shortened due to over heating. In order
to keep proper ventilation, please allow a clearance of 10 inches on each side from the
wall.
■ Don’t set any object around the ventilation openings of the appliance.
■ Don’t block the ventilation openings.
■ No inversion of the screen.
■ Don’t cover the appliance with table cloth.
■ Don’t set the appliance on carpet, bedding, or near to curtain.
Power Sources
Unbefitting power sources may cause fire or electrical shock. The appliance should be
connected to a power supply of the type described in the operating instructions or as
marked on the appliance.
■ Power supply cord should adapt to the socket outlet.
Power Cord Connection
Incorrect connection of power cord may cause fire or electrical shock.
■ Don’t touch the cord with wet hands.
■ Please check the pontes if it is clean ( no dust ) before use. If it is not, please do the
cleaning with dry and soft fabric.
■ Fix the power cord steadily in to the socket outlet to avoid it becoming flexible, or it
may have malfunction.
■ Don’t cut off the cord, for it may debase the performance. If you want to lengthen it,
please make an appropriate one or get contact with the dealer.
■ If you want to chan ge t he f us e in t he c on ne ct or p lu gs , pl ea se c ha nge it with the same
rating and model.
SAFETY INSTRUCTIONSAFETY INSTRUCTION
5
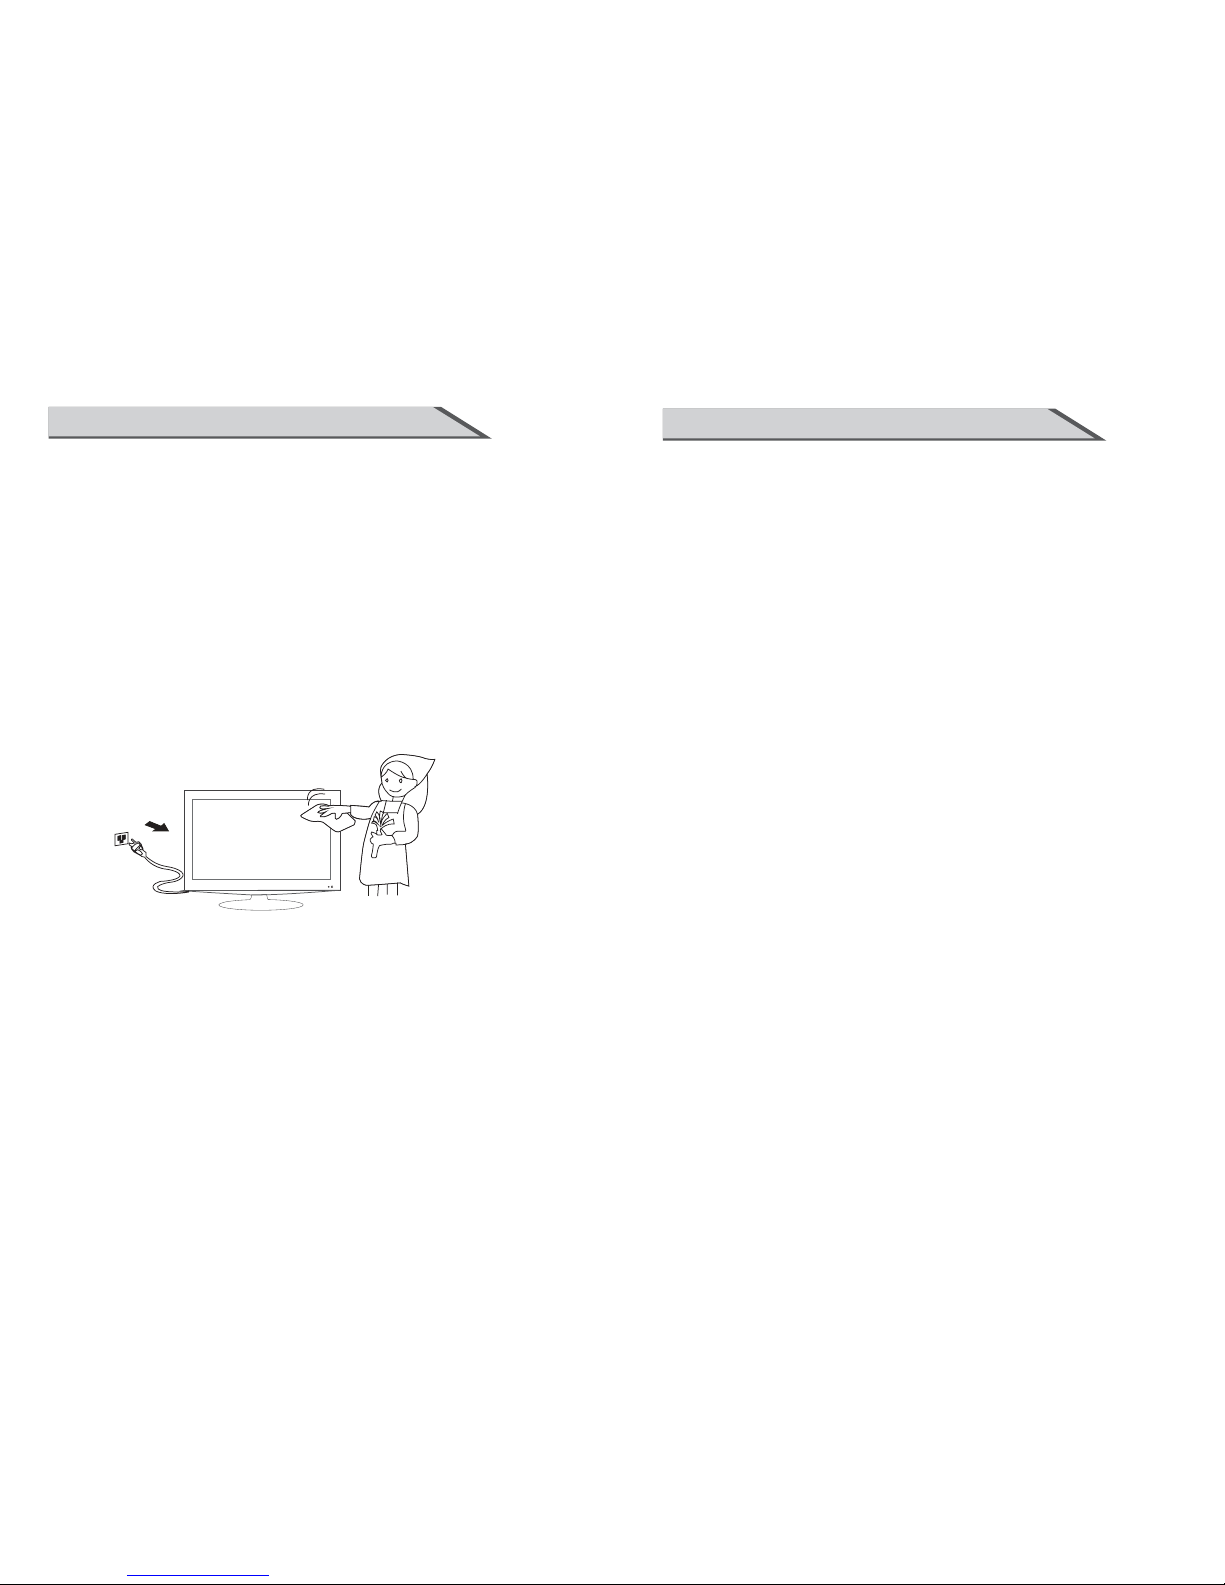
How to Clean the TV Set
Clean the TV and control panel with a soft cloth. A mild soap may be used if the screen
is extremely dirty. Dry them with a soft cloth after cleaning. Choose the right cleanser,
or it may fade the TV set, or make it scratched or cracked.
ToAvoid Wireless Receiver
This TV set is designed to comply with the EMI standard to avoid problems of wireless
receiver.
ƵSet the TV far away from wireless receiver.
ƵAdjust the wireless’s antenna to avoid interference on TV;
ƵMake sure the TV set is out of interference with the wi
reless;
ƵThe antenna should use coaxial line.
ƵTurn off all the equipments, except the TV set to check if the TV interferes the
wireless receiver;
ƵIf the problem occurs, please check all the notes above.
6
Don’t Set the TV in the places below:
ƵUnder sun or near heaters.
ƵPlaces where difference in temperature goes great.
ƵPlaces that have bad ventilation.
ƵNear fire.
ƵMoist places such as bathroom.
ƵPlaces that human walks frequently or places where are quivering fiercely.
ƵPlaces where is deflective or unbalanced.
Watching TV
Please watch TV indoors where there is proper brightness. Please make sure the sunlight
will not fall directly on the picture screen. Please relax your eyes every now and then by
taking an overlook.
How to Clean the Picture Screen
Before cleaning, please turn off the TV and unplug the power cord. Clean the screen with a
soft cloth moistened in warm water. A mild soap may be used if the screen is extremely
dirty. Dry the screen with a soft cloth after cleaning.
SAFETY INSTRUCTION
7
SAFETY INTRODUCTIONS
Notes of Cable Connection
ƵMake sure that all cables, including connector plugs, extend lines, and connecting cables between
equipments are specify by the manufacturer. Before changing the connection, please turn off
the power and unplug the power cord.
ƵThe power cord should not be the same one as other equipments.
ƵUse plugs with a protective earthing connection.
Notes of Transportation
Other Notes
Notes on Installation
Please handle with care during transportation. Please use the original carton,
or it may damage the TV set. Please retain the original carton.
ƵThe sensor of remote control will not work if the lights, such as sunlight or bright indoor
illumination fall directly on it. Make sure that there is no interference from wireless, or it
may cause distortion of the picture or unusual sound. There should no equipment like
mobile telephone or wireless receiver.
Impacts on remote control may lead to trouble.
Handle the remote control with care
ƵPlease don’t throw the remote control;
ƵDon’t set heavy object on remote control.
ƵPlease dispose the appliance with the observance of the local law.
ƵDo be ware of all electrical equipments.
ƵNever use wooden screws and bracket to fix. Use those that are specified by the manufacturer.
ƵUse only the stand, tripod, bracket, or table specified by the manufacturer, or sold with the
apparatus. Use caution when moving the apparatus.
ƵPleas follow all the operating instructions of the wall or ceiling mounting.
ƵUse only the attachments/accessories specified by the manufacturer.
ƵIf you have any questions on installation, operation, or safety, please call the dealer.

9
INSTRUCTION
CONNECTION OPTION
This is the back panel LCD TV
ŶThis is a simplified representation of a back panel.
Here shown may be somewhat different from your TV.
8
INSTRUCTION
CONTROLS
This manual explains the features available on the model of LCD TV.
Ƶ
This is a simplified representation of a front panel. Here shown may be somewhat
different from your TV.
(1): (VOL-) Press Volume- to decrease the volume.
(2): (VOL+) Press Volume+ to increase the volume.
(3): (CH-) Press the button to down the channel.
(4): (CH+) Press the button to up the channel.
(5): (SOURCE) Press this button to select AV source or TV source.
(6): (MENU) Press this button to display the OSD menu.
When the OSD menu is on, press this button to exit the menu.
(7): (POWER) Press this button to st
andby mode.
(8): Indicator.
(9): Remote control sensor window.
Right Side Panel Control
Rear Connection Panel
2
1
3
6
4
7
9
8
5
POWER
SOURC
E
ME
NU
CH- CH+
VOL- VOL
+
(07)
(08) USB:InputUSBdeviceinput
(06)
HDMI1 Input: Connect HDMI signal.
HDMI2 Input: Connect HDMI signal.
HDMI3 Input: Connect HDMI signal.
(09)
YPBPR(Y:GREEN, PB:BLUE,PR:RED): Connect the component image output
o
f your AV devices here. Then Connect audio output of your AV devices to R and L.
(05)
(04)
VGA Input: Connect PC VGA signal output.
(03)
RF: Antenna Input (75 ohm).
(02)
PCAUDIO I
AU DI O OUT: Analog Audio out.
nput Connect to PC audio output of the computer .
(01)
2
4
3
1
HDMI2
HDMI3
6
USB
9
10
7
8
HDMI1
5
11
L R
AV IN
AUDIO OUT
L R
L
R
12 13
2
(1)
1(1
)
3(1
)
COAX:Connects to the audio jack on the digital/standard 5.1 audio system.
AC 100-2 40V
~50/60HZ
0
PC AUDIO
:
L
COAX RF VGA PC-AUDIO
HDMI1 HDMI2
HDMI3
USB
Pb
PrY
R L
R L
AUDIO OUT
VIDEO R L
AV IN
COMPONENT
AACC110000--224400VV
~~5500//6600HHZZ
PPOOWWEERR
OONN//OOFFFF
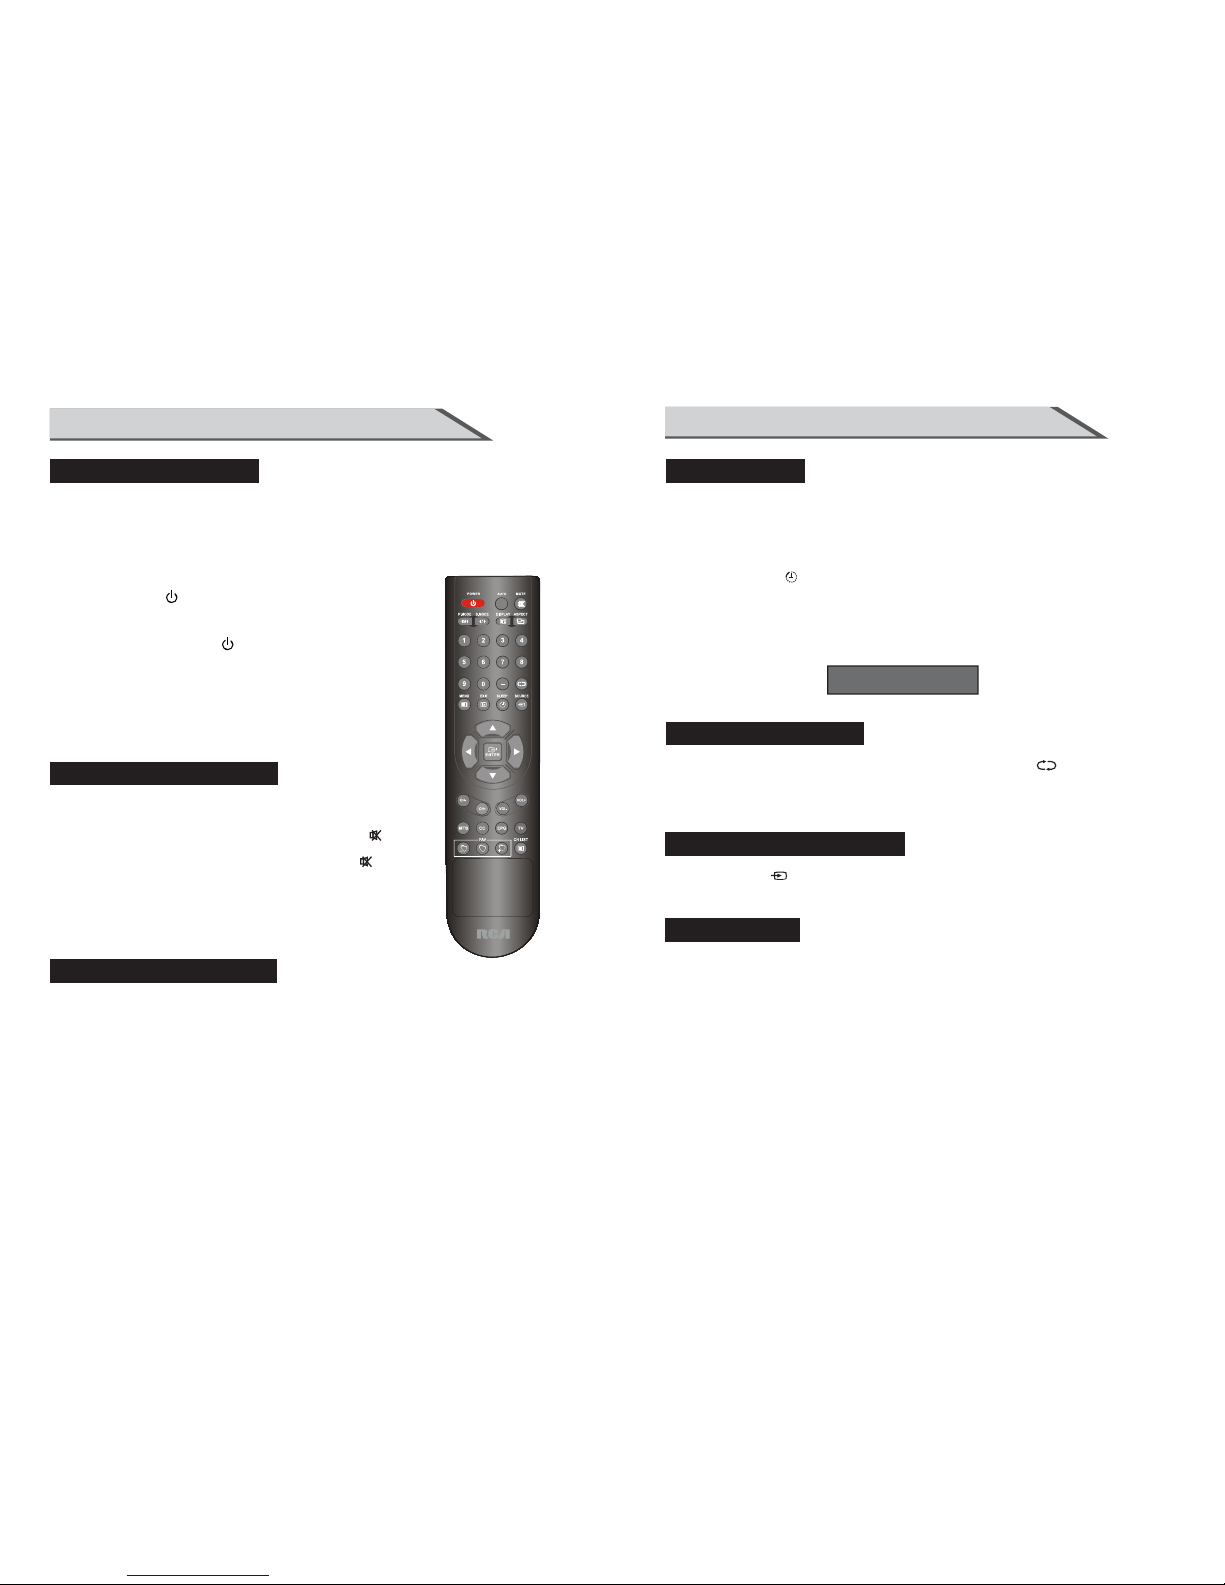
REMOTE CONTROL KEY FUNCTIONS
INSTRUCTION
26
30
29
31
24
25
27
28
(20) CH- button: Changes the channels down.
(21) CH+ button: Changes the channels up.
(22) VOL- button: Adjusts the volume down.
(23) VOL+ button: Adjusts the volume up.
(24) MTS button: Press to select the audio channels.
(25) CC button: Press to display the closed caption.
(26) EPG button: Enter Electronic Program Guide.
(27) TV button: Press the button to select the TV input.
(28) FAV- button: Changes the Favorite channels down.
(29) FAV button:
(30) FAV+ button: Changes the Favorite channels up.
(31) CH LIST button: TV Channel List button.
20
22
23
21
11
Add/Erase function for favorite.
10
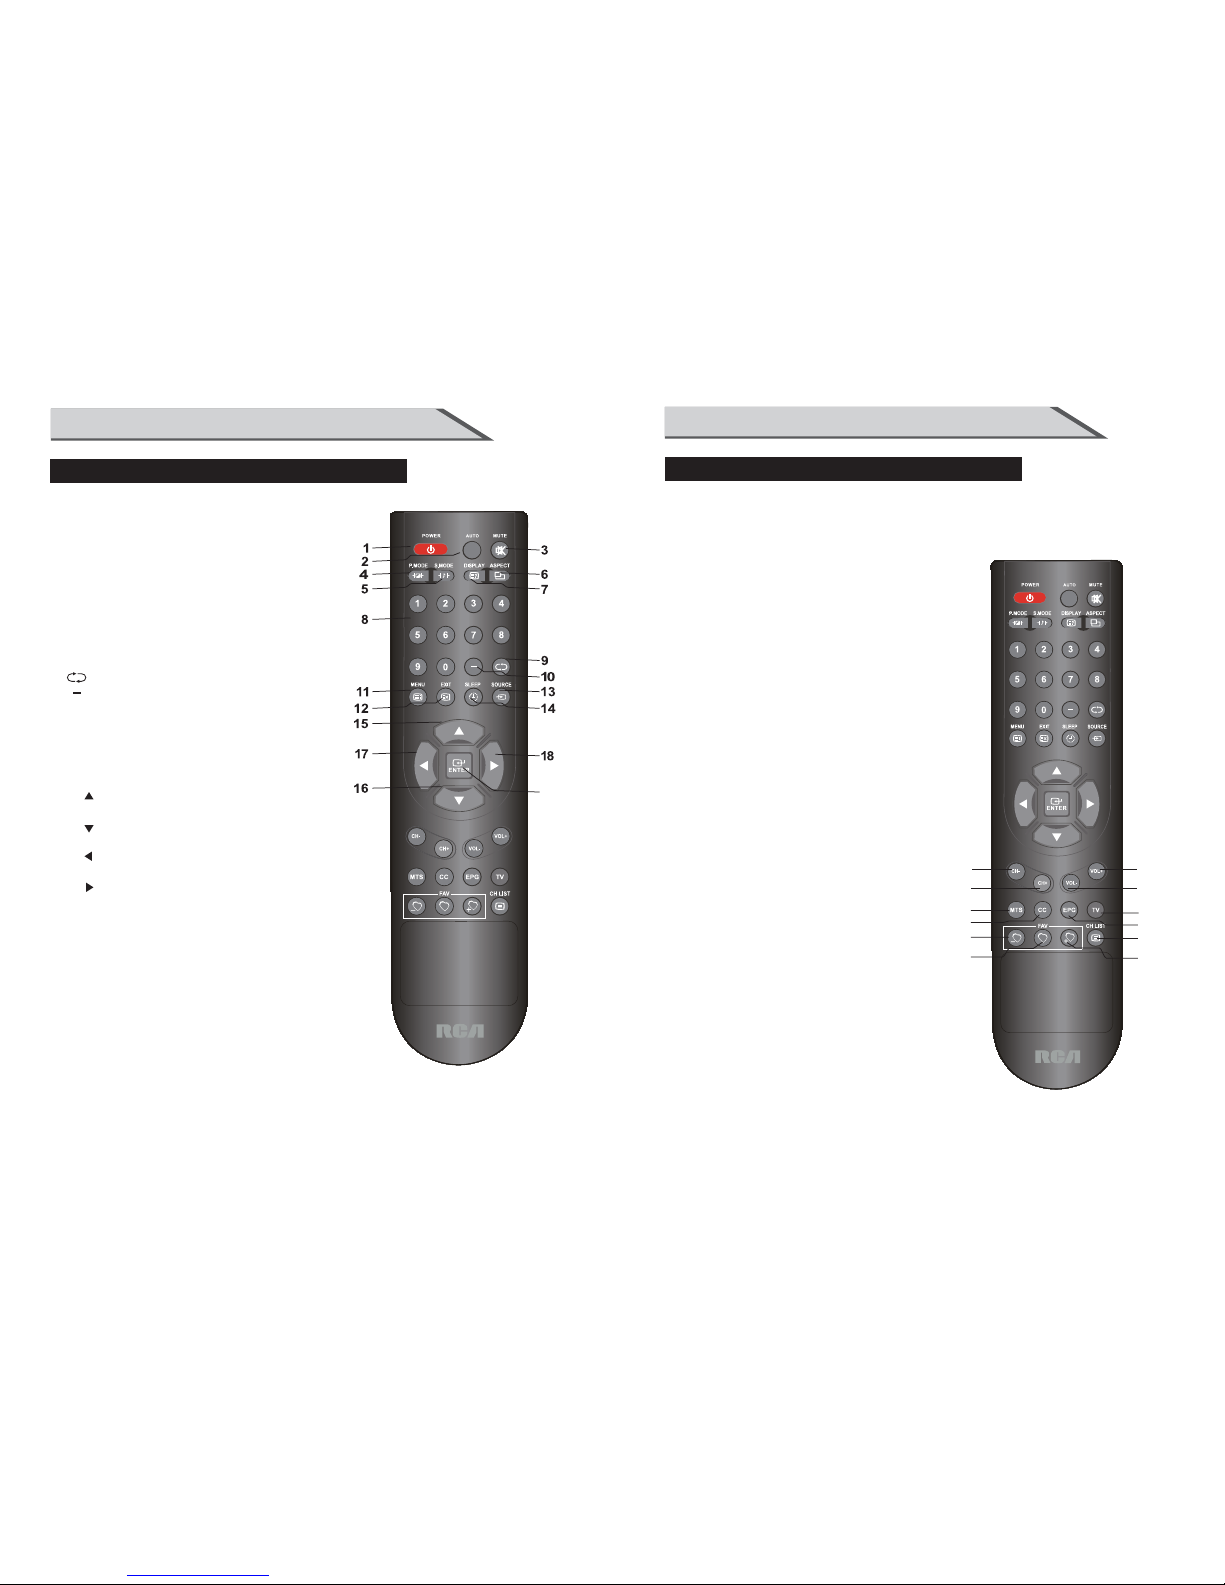
(1) POWER button: Switches the set on from power on or off to power
.
(2) AUTO button: Press to pc source picture auto adjust.
(3) MUTE button: Press to eliminate or restore the TV sound.
(4) P.MODE button:
Press to select preset picture mode
(5) S.MODE button: Press to select Sound mode button.
(6) ASPECT button:
Press to select picture mode 4:3, 16:9 etc.
(7)
DISPLAY button: Press to display current status,
TV channel,
input source.
(8) Numerical buttons:
Press number buttons for direct access TV channels.
(9) button:
Press to return to previous channel.
(10) button:
Select sub channel of each
channel in DTV mode.
(11) MENU button: LCD menu selection.
(12) EXIT button: Exit the OSD menu (On-screen display).
(13) SOURCE button:
Press to display all possible input sources
(14) SLEEP button: Sets the sleep timerDŽ
(15) " "button: When OSD menu is on, press this button
to move the selection focus up or change settings.
(16) " "button: When OSD menu is on, press this button
to move the selection focus down or change settings.
(17) " "button: When OSD menu is on, press this button
to move the selection focus left or confirm the settings.
(18) " "button: When OSD menu is on, press this button
to move the selection focus right or confirm the settings.
(19) " ENTER "button: Press the button to confirm the operation.
REMOTE CONTROL KEY FUNCTIONS
INSTRUCTION
.
19
13
INSTALLATION
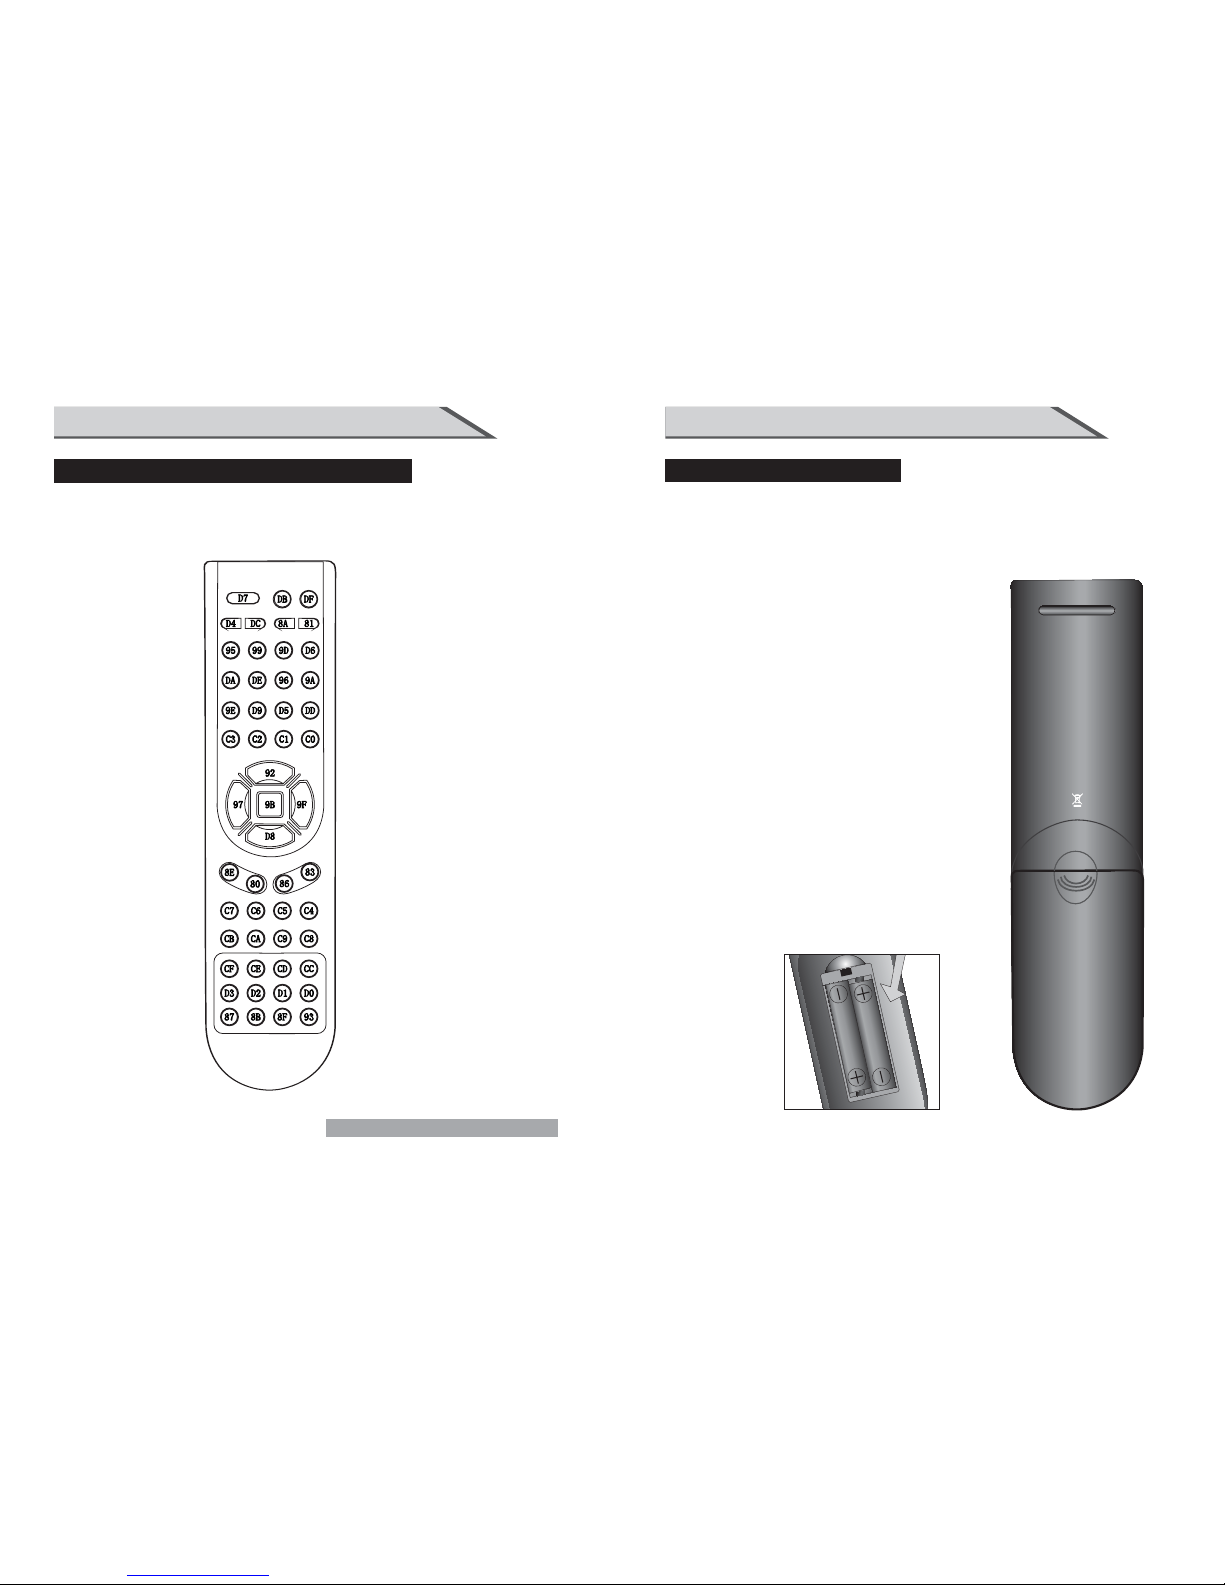
(1)Open the battery compartment cover on the back side
(2) Inser t tw o 1. 5V b at te ri es o f AAA ty pe w ith correct polarity
(3) Cl os e th e ba tt er y co mp ar tment cover on the back side
Notes on using the Remote control.
Do not strike or drop the remote.
Do not expose the remote control to liquids and do not
place it in humid environment.
Do not install or place the remote control in direct sunlight.
The heat may damage the remote control.
INSTALLING BATTERIES
Notes on Using Batteries
The use of the wrong type of batteries may cause chemical
leaks and/or explosion.
Please note the following:
Always ensure that the batteries are inserted with the
positive and negative terminals in the correct direction
as shown in the batteries compartment. Different types
of batteries have different characteristics. Do not mix
different types. Do not mix old and new batteries.
Mixing old and new batteries will shorten battery life
and /or cause chemical leaks from the old batteries.
When batteries fail to function, replace them immediately.
Chemicals which leak from batteries may cause skin
irritation. If any chemical matter seeps out of the batteries,
wipe it up immediately using a dry cloth.
Due to varying storage conditions, the battery life for the
batteries included with your unit may be shortened.
If the remote control is not used for a long period of
time, remove the batteries.
12
INTRODUCTION
This is the code for remote control of LCD,if you want to change to a
universal remote control, you can edit this code into your universal remote control.
REMOTE CONTROL KEY FUNCTIONS
Universal remote code
Not included.
The universal code for this remote is: 2295.
15
INSTALLATION
(1) Keep the TV stand for may be future use.
(2) Don’t set the TV set on shelves, carpets, beds, or closets.
(3) Don’t cover the TV with curtain or paper.
(4) Leave ventilation space to avoid the following:
No good for ventilation No good for ventilation
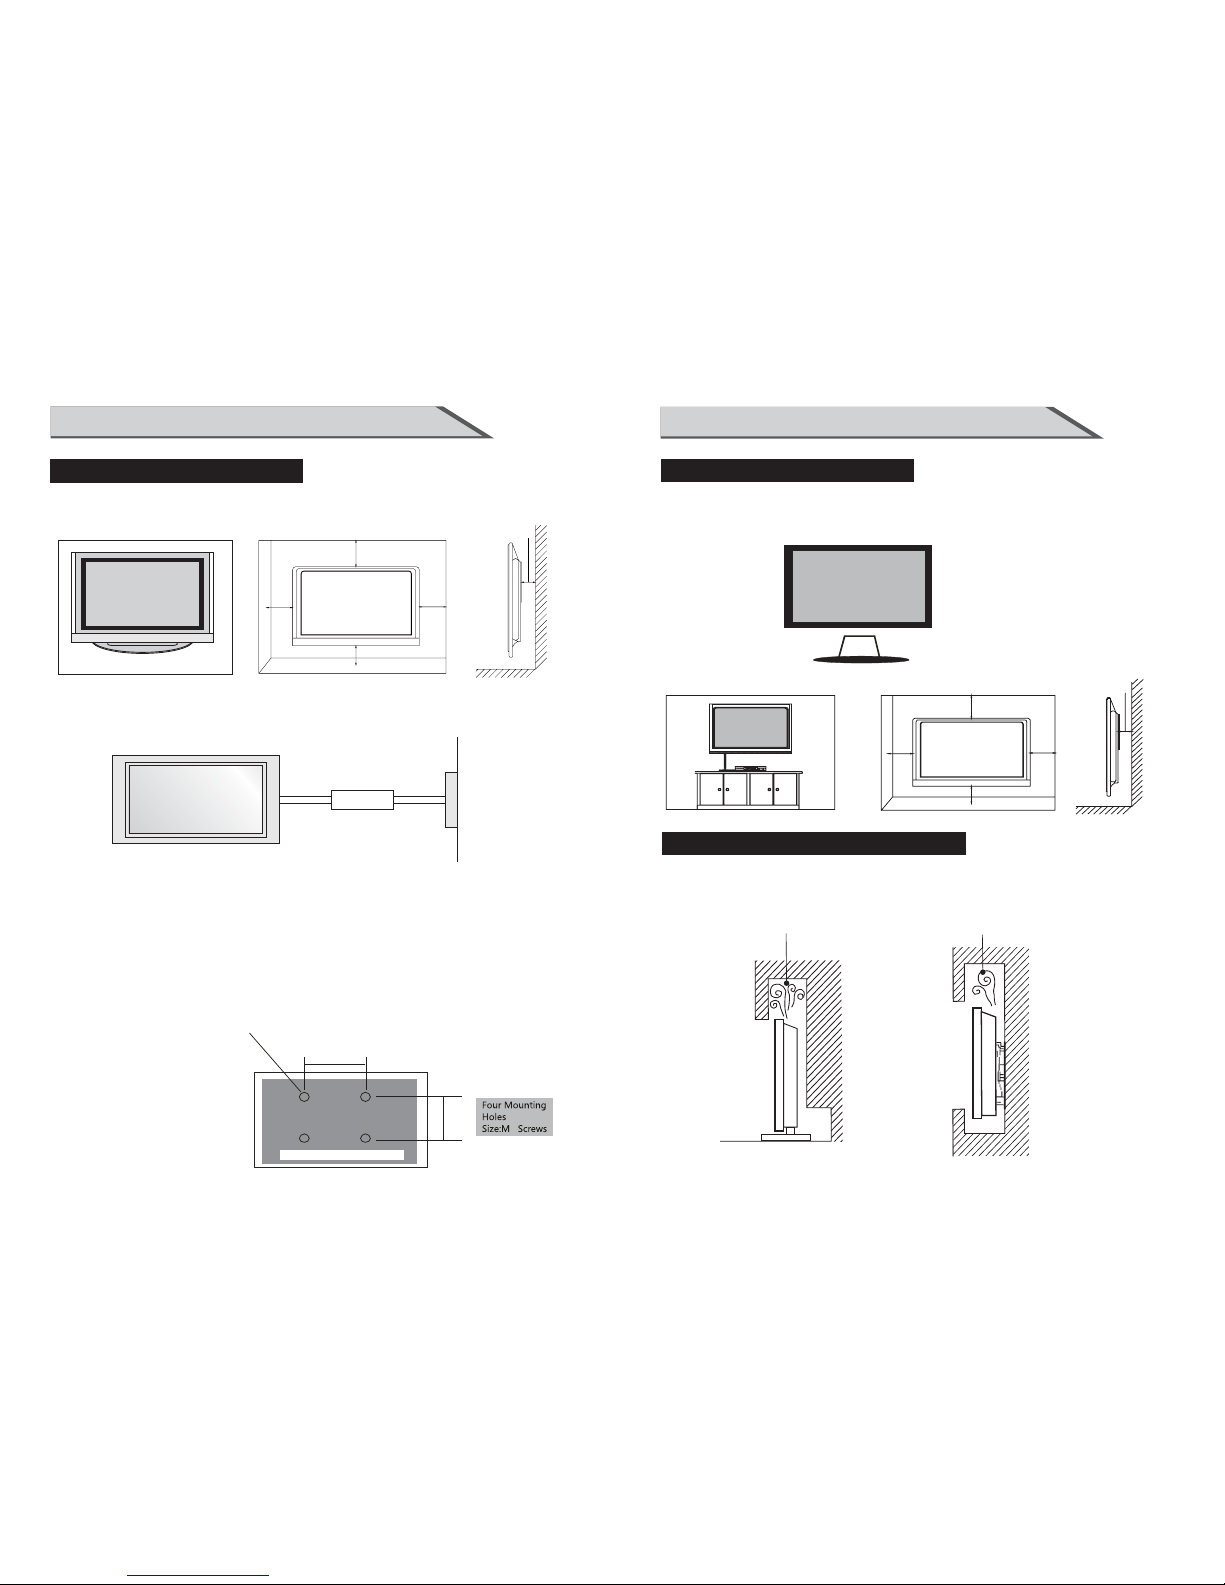
(3)For proper ventilation, allow a clearance of 10” on each side from the wall.
b. Wall Mount: Horizontal installation
STANDARD INSTALLATION
10inches
10inches
10inches
10
inches
(2) Remove the table stand of the TV when install the TV on a wall as follow:
NOTES OF WALL INSTALLATION
14
INSTALLATION
STANDARD INSTALLATION
This is the default installation way of the TV.
10inches
10inches
10inches
10inches
10inches
Ensure that you connect the earth ground wire to prevent possible electric shock.
If grounding methods are not possible, have a qualified electrician install a
separate circuit breaker.
Do not try to ground the unit by connecting it to telephone wires, lightening rods or gas pipes.
a. Desktop Pedestal Installation
ƵThe TV can be installed in various ways such as on a wall, or on a desktop etc.
ƵThe TV is designed to be mounted horizontally.
Power
Supply
Short-Circuit
Breaker
(1) Secure the wall brackets with the bolts (not provided as parts of the product, must
purchase separately) on the wall. Match the height of the bracket that is mounted on
the wall. The wall bracket is of nomal dimension. Please see the position of the wall
brackets bolts as follow picture .The actual dimension of the wall brackts bolt should
according to the products.
The wall brackets bolt position
b. Wall Mount: Horizontal installation
2550mm
200mm
17
CONNECTIONS & SETUP
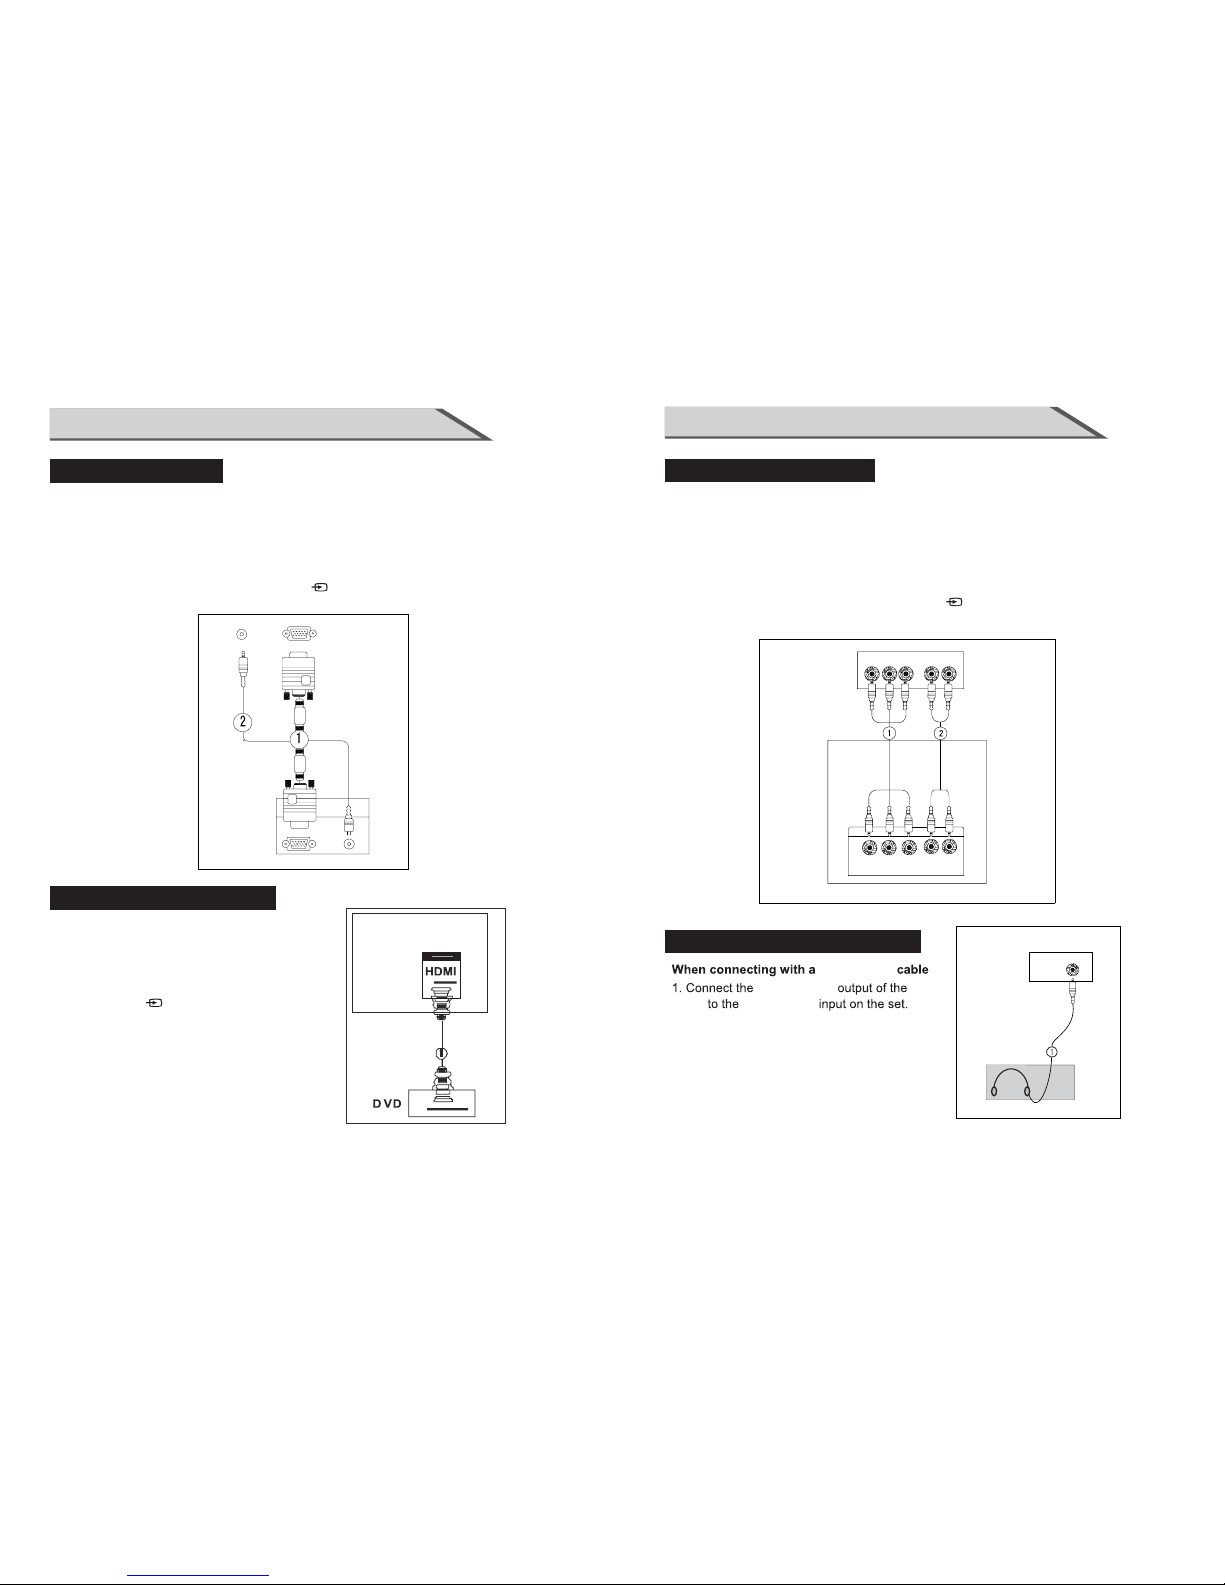
1. Connect the AV jacks between TV and external equipment. Match the j ac k co lo rs
(Vi de o = ye ll ow, Au di o Left = white, and Audio Right = red).
2. Se lect AV sou rc e wi th u sing the S OU RC E/ button on th e remote co nt ro l.
3. Operate the corresponding external equipment. Refer to external equipment
operating guide.
EXTERNAL EQUIPMENT CONNECTIONS
Video Game Set
PHILIPS
DRIVE
TURBO
Camcorder
AV
USB CONNECTION
USB
Note:Can only support MP3 format of music
16
CONNECTIONS & SETUP
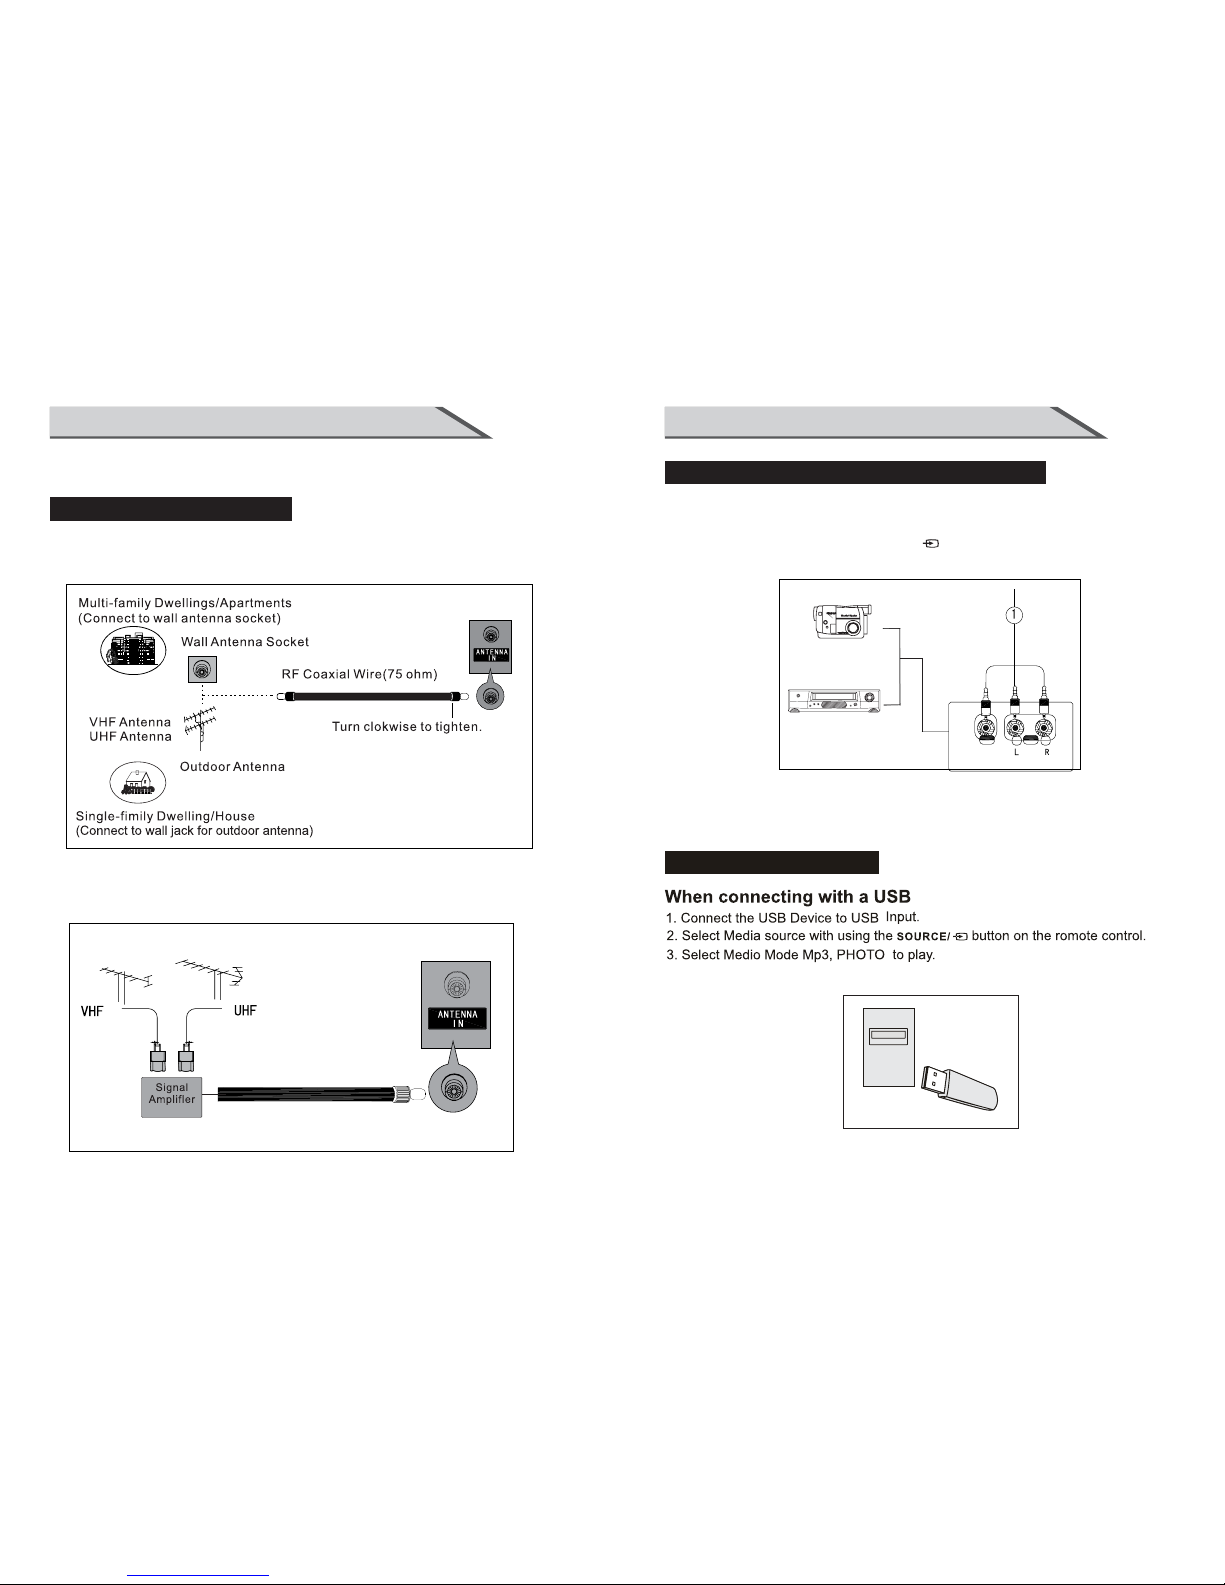
ANTENNA CONNECTION
■F or o pt im um p ic ture quality, ad ju st a nt en na d ir ec ti on.
■An antenna cable and converter are not supplied.
■
you have finished connecting all equipment.
To preve nt th e equipmen t damage, never p lug in any pow er cords until
■In poor signal areas, to get better picture quality, install a signal amplifier
to the antenna as shown below.
■If signal needs to be split for two TVs, use an antenna signal splitter for connection.
19
CONNECTIONS & SETUP
EARPHONE
EARPHONE
EARPHONE
2. Turn on the TV, the earphone is sound,
but the sepeaker no sound output.
TV
TV
EARPHONE CONNECTION
YPBPR CONNECTION
DVD
YPbPr
L
R
Y=GREEN, Pb=BLUE, Pr=RED
1. Co nnect the v id eo o ut pu ts ( Y, PB, PR) of the DVD to the
YpbPr jacks on the set
2. Co nnect the a ud io o ut pu ts o f th e DV D to t he Au dio Input (L/R)
jac ks on the s et .
3. Turn on t he D VD p la ye r, in se rt a D VD .
4. Select YPbPr source with using the SOUR CE / bu tton on the remote control.
5. Re fer to th e DV D pl ay er 's m an ua l fo r op er ating instructions.
When c onnec ting wi th a co mponent cable(VGA)
18
CONNECTIONS & SETUP
1. Connect the VGA output of the PC to the PC VGA Input jack o n th e se t.
2. Connect the audio outputs of the PC to the PC Audio Input jack on th e se t.
3. Turn on t he P C an d th e se t.
4. Select PC source with using the SOUR CE / bu tt on o n th e re mo te control.
5. Re fer to th e PC m an ua l fo r op er at in g in structions.
PC CONNECTION
When connecting with a D-su b 15 pi n ca ble (VGA)
PC
1. Connect the HDMI output of the DVD to
the H DMI Inp ut jack o n th e se t.
2. Select HDMI source with using
the SOURCE/ but to n on t he r em ot e co nt ro l
3. Re fer to th e DV D pl ay er 's m an ua l fo r
ope rating in st ru ct io ns .
When connecting with a HDMI c abl e
HDMI CONNECTION
21
You don' t ha ve to remembe r to switch the s et o ff b ef ore you go to sleep.
The sleep ti me r automatic ally switch es t he set to stand by a fter the
preset time has elapsed.
Press the SLEEP/ button o n th e remote cont ro l repeatedl y
to select th e nu mber of minut es.
The displa y wi ll appear o n th e screen foll owed by circl e,
OFF, 15, 30, 60, 9 0, a nd 120 minute s.
When you are TV pr ograms ,you c an p ress the
button on
the remote control to return to the previous channel.
watching
SLEEP TIMER
RETURN FUNCTION
Press button on the remote control to the source menu.
The s ou rc e me nu rank as: TV - AV - YPbPr - HDMI - PC - Me di a .
SOU RC E/
SOURCE INPUT SWITCH
BASIC OPERATION
Sleep Timer: Off
Press MENU to display the main menu or return to the previous menu or c lose the main
menu.
Pre ss ◄ /► t o hi gh li gh t th e de si re d menu icon, and press ENTER to sel ect.
If no b ut to ns a re p re ss ed , th e me nu will close automatically after about 10 seconds.
Main Menu
20
BASIC OPERATION
If yo ur T V wi ll b e turned on, you will be able to use its fe at ures.
Turn in g on th e TV
First, connect power cord
When the indicator illuminates red is standby mode.
Press the POWER/ button on the remote control,
after the TV initialization finished,
the indicator turns to green. It means the TV is in power mode.
When you press the POWER/ button on the remote
control once again, the power/stand-by Indicator illuminates red
in standby mode.
correctly.
If yo u in te nd t o be a wa y on v ac at io n, disconnect the power
plug from wall power outlet.
1. Pr es s th e VO L +/VOL- bu tt on o n th e co nt ro l pa ne l
VOL +/VOL- button on the r em ot e co nt ro l to a dj us t th e volume.
2. If y ou w an t to s wi tc h th e so un d off, press th e MUTE/ button
on th e re mo te c on tr ol .
3. You can re su me t he s ou nd b y pr es si ng t he MUTE/ button
on th e re mo te c on tr ol .
or th e
Pre ss t he +/ - button o n the con trol pane l or t he N um er ic al
on the remote control.
CH CH keys
TURNING THE TV ON
VOLUME ADJUSTMENT
PROGRAM SELECTION

23
OSD OPERATION
SCREEN SIZE
Highl ig ht t he i te m an d Pr es s◄ /►to select. Movie/Dynamic/Standard/User.
Brightness/Contrast/Color/Tint/Sharpness
Picture Mode
Highl ig ht the i te m and press ► , and a pr oc es s bar appears,
the n press ◄/► to a dj us t th e va lu e.
Tint is available when analo g TV o r NT SC -s ys te m AV .
Pre ss M EN U to b ac k th e Pi ct ur e Settings menu.
ADJUSTING THE VALUES
Scr een Siz e
Press ◄/►to selet the display aspect ratio till the picture is fit onto the screen.The
optio ns a re d ifferent according to diffe re nt i np ut s ource.
PC Wide/Dot by Dot.
Dot by Dot means NOT any scaling to original input pixels size.
AV/YPbPr/HDMI/TV Normal/Wide/Cinema/Zoom.
.
Zoo m is suit ab le t o vi ew t he a na lo g TV which has wide(16: 9) c on te nt o n th e 16 :9 pa ne l.
Gen erally ea ch a sp ec t ra ti o is s ui ta bl e for one input format.
For e xampl e Normal is s ui ta bl e to w at ch c om mo n TV program.
Wide will do horizontal scaling on the wide panel.
Cinem a is f or t he 2 .3 9: 1( pe rh ap s marked as 2.40:1 on the disc) film
22
OSD OPERATION
PICTURE MENU
Press ▼/▲ to highlight one of the following options, then press ENTER or ► to ente r
next su b- me nu t o ad ju st i t.
Pre ss E XI T to clear on-screen menu or MENU b ack to th e pr ev io us menu.
Whe n Pictu re M od e is s et t o Us er, t he f ollowing settings can be manually adjusted.
Pre ss PMOD E sh or tc ut b ut to n on t he r emote control to select picture mode directly.
PICTURE SETTINGS

25
Press ▼/▲ to highlight the ite m an d pr es s EN TE R or ► to d is play the sub-menu as
following.
Dyna mic Con tra st Off/Low/Medium/High
The system will adjust the luminance curve by analyzing the picture content
dynamically.
Film M ode Off/On
For th e 2 :2 or 3:2 format signal of cinema , enable special pixel process to reduce the
fli ck of mov in g ar ea .
Nois e Reduc tio n Off/Low/Medium/High
You can clear up analog TV signal by reducing the dot noise. This feature is not
ava ilable at P C or M ed ia s ou rc e.
MPEG N oise Re duc ti on Off/Low/Medium/High
Sim il ar w it h th e No is e Re du ct io n, you can set to reduce the block noise.
OSD OPERATION
ADVANCED PICTURE SETTINGS
COLOR TEMPERATURE
Pre ss ◄ /► t o se le ct t he Color Temperature th at y ou feel comfortable.
Normal Basically will be accepted by most people.
Cool mean s a high colo r te mp er at ur e th at w il l fe el cool.
Warm mean s a low col or temp eratu re that wil l fe el w ar m.
24
OSD OPERATION
PC SETTINGS
Auto Adjust
Automatically adjust Clock, Phase, H-Position and V-Position settings.
In o rder to ge t
a good result, you should open a“filling the screen”picture before executing Auto
Adjust.
Horizontal Position Shift the scree n slightly to left or right .
Vertical Position Shift the screen sli gh tl y up o r do wn .
Clock
Adjust the DB15 picture signal sampling clock rate.
Phase Adjust the DB15 picture signal sampling phase. It maybe affect the definition .
Wrongvalue maybe result the interference.
Reset Rese t the param et er s of c ur re nt m en u to d efault value.
PC Settings Menu is aviliable only in PC DB15 or DVI mode. When DVI signal input,
only Ho ri zo nt al P os it io n an d Ver ti cal Position can be adjusted.
Press ▼/▲ to highlight one of the following options, then press ENTER to select it.

27
Surround Mode
Set to enjoy the virtual surround sound. Press ENTER to set or cancel.
AVL
Auto Volume Level. Press ENTER to set or cancel. When AVL is set on, it will limit the
sound being heard when sudden changes in volume occur during commercial breaks or
channel changes. Usually be enabled at night.
Analog Sound
Available at analog TV channels. SAP/Stereo/ Mono Set the preferred sound track of
analog channels. Stereo and SAP exist on some channels. Generally SAP is a second
language sound or help the people with hearing impair.
Digital Sound
Available at digital TV channels. English/French/Spanish Set the preferred sound track
of digital channels. French and Spanish exist on some channels.
OSD OPERATION
EQUALIZER SETTINGS
Mode Off/Rock/Pop/Jazz/User(only in User mode,the following can bemanually adjusted.)
1 Set Mode to User.
2 Press to selectthe first(100Hz)item, then press Ż/Ź to select the bandto be turned.
3 Press V to adjust the value.
Adjust Equalizer Settings
Based on your favorites about which frequency band need to be adjusted, make small
adjustment with certain frequency band at a time. Suggest NOT making too large
changes.
26
OSD OPERATION
SOUND MENU
Sound Mode Standard/Dynamic/Soft/User
Only in User mode, the follow items can be adjusted.
Bass Adjust the low frequency band response.
Treble Adjust the high frequency band response.
Balance Adjust the level of sound coming from the left or right speaker.
Adjust the Bass/Treble/Balance
1 Set Sound Mode to User.
2 Highlight the item and presVŻ/ ŹWo display
the sub-menu, then presVŻ/ ŹWo adjust the value.
Press V to highlight one of the following options, then press ENTER or Źto enter
next sub-menu to adjust it.
Press EXIT to clear on-screen menu or MENU back to the previous menu.
SOUND SETTINGS
Stereo
English
Digital Audio Output
digital audio output
raw
off
,
 Loading...