

Page 1

DVD Player
User's Manual
Changing Entertainment. Again.
Page 2

Important Information
WARNING
nsKOF aecmcsHocK
DO NOT OPEN
This symbol indícales
“dangerous voltage” inside the
product that presents a risk of
electric shock or personal injury.
This symbol indicates
important instructions
accompanying the product.
FCC NOTE (for U.S.A.):
This equipment has been tested and found to comply with the limits for a
Class B digital device, pursuant to Part 15 of the FCC rules. These limits are
designed to provide reasonabie protection against harmful interference in a
residential installation. This equipment generates, uses and can radiate radio
frequency energy and, if not installed and used in accordance with the
instructions, may cause harmful interference to radio communications.
However, there is no guarantee that interference will not occur in a particular
Installation. If this equipment does cause harmful interference to radio or
television reception, which can be determined by turning the equipment off
and on, the user is encouraged to try to correct the interference by one or
more of the following measures.
• Reorient or relocate the receiving antenna.
• Increase the separation between the equipment and receiver.
• Connect this equipment into an outiet on a circuit different from that to which
the receiver is connected.
• Consult the dealer or an experienced radio/TV technician for help.
This class B digital apparatus meets all requirements of the Canadian
Interference-Causing Equipment Regulations.
Product Registration
Please fill out the product registration card and return it Immediately. Returning
this card aliows us to contact you if needed.
Keep your sales receipt to obtain warranty parts and service and for proof of
purchase. Attach it here and record the serial and model numbers In case you
need them. The numbers are located on the back of the player.
Model No. RC5227P
Serial No. _______________________________________________________________
Purchase Date:
Dealer/Address/Phone:
_____________________________________________
To reduce the risk of fire or shock hazard, do
not expose this DVD player to rain or moisture.
No objects filled with liquids, such as vases,
shall be placed on the apparatus.
CAUTION
THIS PRODUCT UTILIZES A LASER. USE OF
CONTROLS OR ADJUSTMENTS OR
PERFORMANCE OF PROCEDURES OTHER
THAN THOSE SPECIFIED HEREIN MAY
RESULT IN HAZARDOUS RADIATION
EXPOSURE. DO NOT OPEN COVERS AND
DO NOT REPAIR YOURSELF. REFER
SERVICING TO QUALIFIED PERSONNEL,
CAUTION
FCC Regulations state that unauthorized
changes or modifications to this equipment may
void the user’s authority to operate it.
Note:
This DVD player is designed and manufactured
to respond to the Region Management
information, if the Region number of a DVD
disc does not correspond to the Region
number of this DVD player, this DVD player
cannot play the disc. The Region number for
this DVD player is Region No 1.
Note:
This device is protected by U.S, patent numbers
4,631,603 and 4,577,216 and 4,819,098 and
other intellectual property rights. The use of
Macrovision’s copy protection technology in the
device must be authorized by Macrovision and is
intended for home and other limited pay-per-
view uses only, unless otherwise authorized in
writing by Macrovision. Reverse engineering or
disassembly is prohibited.
(
CLASSI
LASER
PRODUCT
Page 3

Introduction
Introduction
Your DVD player is equipped with some special features. The following information summarizes some of these features.
The On-Screen Information Display
The Info Display is a menu bar that you can bring up to access certain features while discs are playing. Icons in the display
represent the different features supported by your DVD player. By selecting different Info Display icons, you can access
features including Scene Snip™, Repeat, Audio, Subtitles, Bookmarks and Camera Angle.
Time Search
The Time Search feature lets you go to a point on a disc by entering the elapsed time in the on-screen time display. For
example, if your favorite scene in a movie is one hour and twelve minutes after the beginning of the movie, you can enter
01:12:00 into the time display and go right to that point in the movie.
The Bookmarks Feature
You can mark a point on a disc that you can go to quickly with the bookmark feature. You can store up to six bookmarks.
For example, if you have a favorite scene in a movie, you can bookmark it so you can return to it without having to fast
forward or reverse to find the exact scene.
Ratings Limits and Scene Snip^*^
Your DVD player allows you to set ratings limits and passwords. For example, you can set the DVD player so that any
movie with a PG-13 rating or above requires a password to be entered. You can use Scene Snip to edit out sections of a
disc. When this disc is played, you must have the password to view the original version.
Since not all discs contain ratings, you can also decide if you want to allow free access or require a password to view
unrated discs.
Scene Again™
when you are watching a DVD disc, you can replay a scene instantly by pressing the GO BACK »AGAIN button on the
remote . The Scene Again’’'“ feature goes back approximately ten seconds and replays both video and audio while turning
on the subtitles.
C^ynvSutround
The TruSurround* option can be used to simulate a six-speaker listening experience through two speakers.
Voice+’''^
This feature allows you to adjust the volume of the voices on a disc’s soundtrack. For example, the background music might
be very loud, so the dialog is difficult to hear. The Voice-i-^“ feature allows you to raise the volume of the voices while
keeping the remaining background sounds at a normal level.
SRS/TruSurround and the C#) symbol are trademarks of SRS Labs, Inc. in the United States and selected
foreign countries. TruSurround technology is incorporated under license from SRS Labs, Inc.
Page 4

Table of Contents
Introduction............................................................................................ 1
Chapter 1; Connections & Setup
Things to Consider Before You Connect...............................................................................6
Protect Against Power Surges
Protect Components from Overheating
Position Cables Properly to Avoid Audio Interference.................................................6
Connection Pictures......................................................................................................... 6
Types of Discs Your DVD Player will Play.......................................................................6
Choose Your Connection........................................................................................................7
Cables Needed to Connect Components to Your TV
DVD Player + TV with AudioA/ideo Input Jacks
DVD Player + TV + VCR..................................................................................................11
DVD Player + TV + Dolby Digital or DTS Receiver........................................................13
DVD Player + TV + Dolby Pro Logic or Stereo Receiver
DVD Player + TV + 5.1-channel AudioA/ideo Receiver
DVD Player + TV + VCR + Satellite Receiver................................................................19
The Jacks on the Back of the DVD Player...........................................................................20
Install Batteries in the Remote.............................................................................................21
Important Battery Information.......................................................................................21
How to Find Your TV's Video Input Channel.......................................................................22
How to Move Around the DVD Player's Menu System
Set the Menu Language.........................................................................................................23
Setting Other Options............................................................................................................23
A Quick Tour of The Remote.................................................................................................24
Component Buttons........................................................................................................24
DVD Buttons.................................................................................................................... 24
........................................................................................
.........................................................................
.....................................................
............................................................
..............................................
................................................
....................................................
23
6
6
8
9
15
17
Chapter 2: Playing DVDs
Regional Coding................................................................................................................... 28
Using Different Menus...........................................................................................................28
Loading and Playing Discs................................................................................................... 28
Using a Disc Menu................................................................................................................. 29
Using the On-Screen Info Display........................................................................................31
Time Display.....................................................................................................................32
Selecting a Title...............................................................................................................32
Selecting a Chapter.........................................................................................................32
Scene Snip Editing..........................................................................................................33
Turning Subtitles On and Off.........................................................................................35
Changing the Audio Language......................................................................................36
The Repeat Feature.........................................................................................................37
Using Bookmarks............................................................................................................38
Changing the Camera Angle..........................................................................................39
Manufactured under license from Dolby Laboratories. "Dolby" and the double-D symbol are trademarks of Dolby Laboratories.
Confidential unpublished works. ©1992-1997 Dolby Laboratories, Inc. All rights reserved.
DTS is a registered trademark of Digital Home Theater Systems, (nc.
Page 5

Table of Contents
Disc Playback Features Using the Remote..........................................................................40
Fast Motion Playback (Picture Scan).............................................................................40
Freeze Frame and Frame Advance................................................................................40
Slow Motion Playback.....................................................................................................40
' Chapter Advance..............................................................................................................40
Scene Again^*^...............................................................................................................41
Subtitles...........................................................................................................................41
Audio Language..............................................................................................................41
Camera Angle..................................................................................................................41
Scene Snip™ Edit...........................................................................................................41
Zoom.................................................................................................................................42
Chapter 3: Playing Audio CDs
Using the Info Display............................................................................................................44
Using the Time Display...................................................................................................44
Selecting a Specific Track..............................................................................................44
Selecting a Play Mode.....................................................................................................45
The Repeat Feature.........................................................................................................46
Using IntroScan™...........................................................................................................47
The Bookmark Feature....................................................................................................48
Dub Assist........................................................................................................................49
Chapter 4; Playing MP3 CDs
What is MP3?.......................................................................................................................... 52
Using the Info Display.......................................................................................................... 53
The MP3 Display.....................................................................................................................53
Using the Time Display...................................................................................................53
Selecting a Track.............................................................................................................54
Selecting a Play Mode............................................................................................................54
Using the Program Play Feature
Creating a Program.........................................................................................................55
Editing a Program............................................................................................................56
Autoplay............................................................................................................................56
The Repeat Feature.........................................................................................................57
Using IntroScan......................................................................................................................57
The MP3 Screen Saver...........................................................................................................57
..........................................................................................
55
Chapter 5: Playing Video CDs
What is a Video CD?...............................................................................................................60
The Video CD Disc Menu....................................................................................................... 60
The Video CD Information Display................................................................................61
Selecting a Specific Track..............................................................................................62
Selecting a Specific Index..............................................................................................62
The Repeat Feature ........................................................................................................62
Changing the Audio Channel Output............................................................................63
Skipping Tracks.................................................................................................................... 63
Zoom...................................................................................................................................... 63
Page 6

Tabie of Contents
Chapter 6: The DVD Player's Menu System
The DVD Player Menu System..............................................................................................66
The Play Mode Menu.............................................................................................................. 67
Selecting a Play Mode.....................................................................................................67
How to Create a Program...............................................................................................68
Creating a Program List for a DVD Disc................................................................68
Creating a Program List for an Audio CD..............................................................69
Creating a Program List for an MP3 disc
Editing a Program...........................................................................................................70
Autoplay...........................................................................................................................71
Dub Assist.......................................................................................................................71
The Lock Menu
Locking Your DVD Player...............................................................................................72
Changing Your Password.............................................................................................. 72
Editing Your Scene Snip Disc Library..........................................................................73
Setting the Ratings Limits..............................................................................................73
Front Tray Lock...............................................................................................................75
System Test..................................................................................................................... 75
The Display Menu................................................................................................................... 76
TV Image...........................................................................................................................76
Front Display................................................................................................................... 77
On-Screen Displays........................................................................................................77
The Sound Menu..................................................................................................................... 78
Digital Output...................................................................................................................78
TruSurround.....................................................................................................................79
Speaker Setup................................................................................................................. 79
Enhancements................................................................................................................81
The Languages Menu.............................................................................................................82
Changing the Player Menus Language Preferences...................................................82
Changing the Disc Menus Language Preference........................................................82
Changing the Audio Language Preference..................................................................83
Changing the Subtitle Language Preference
Glossary..................................................................................................................................85
Language Code List...............................................................................................................86
....................................................................................................................... 72
..............................................................
...............................................................
69
84
Chapter 7: Other Information
Troubleshooting................................................................................................................... 90
Handling Cautions.......................................................................................................... 93
Maintenance of Cabinet..................................................................................................93
Universal Remote...................................................................................................................94
Test the Remote...............................................................................................................94
Program the Remote.......................................................................................................94
Automatic Code Search...........................................................................................94
Direct Entry...............................................................................................................95
Operate Components after Programming the Remote
Front Panel Controls............................................................................................................ 98
Front Panel Display................................................................................................................99
Limited Warranty RCA Digital Video Disc (DVD) Player
Accessories and Order Form..............................................................................................103
Index...................................................................................................................................... 106
...............................................
................................................
95
100
Page 7

Chapter 1
Connections & Setup
Chapter Overview;
Things to Consider Before You Connect
Choose Your Connection
The Jacks on the Back of the DVD Player
Installing Batteries in the Remote
How to Find Your TV's Video Input Channel
How to Move Around the DVD Player's Menu System
Set the Menu Language
The Remote Control
Changing Entertainment. Again.
Page 8

Connections & Setup
Things to Consider Before You Connect
Protect Against Power Surges
• Connect all components before you plug any of their power cords into the wall outlet.
• Turn off the TV and/or components before you connect or disconnect any cables.
• Make sure all antennas and cables are properly grounded. Refer to the Important Safeguards
sheet packed with your DVD player.
Protect Components from Overheating
• Don’t block ventilation holes on any of the components. Arrange the components so that air
can circulate freely.
• Don’t stack components.
• When you place components in a stand, make sure you allow adequate ventilation.
• If you connect an audio receiver or amplifier, place it on the top shelf so the heated air from
it won’t flow around other components.
Position Cables Properly to Avoid Audio Interference
• Insert each cable firmly into the designated jack.
• If you place components above the TV, route all cables down the side of the back of the TV
instead of straight down the middle of the back of the TV.
• If your antenna uses 300-ohm twin lead cables, do not coil the cables. Also, keep the twin
lead cables away from audio/video cables.
Connection Pictures
Audio/video cables are usually bundled together. For better visibility, the connection pictures in
this book show each cable separately (audio left, audio right, and video).
Types of Discs Your DVD Player will Play
• DVD video discs — DVD video discs contain high quality picture and sound content.
• Audio discs - Audio CDs contain musical or sound content only, ,
• Video CD discs - Like DVD video discs. Video CDs contain picture and sound content. The
difference is the amount of information that can be stored on the disc.
• CD-R - A disc the you can write information to once (for example, download MP3 files).
• CD-RW — A re-writable disc. You can write information onto this type of disc more than
once. For example, if you have previously downloaded MP3 files to a CD-RW disc, you can
write information to the disc again, but it will erase the previously written information.
COMPACT
^
Qg®
UGmU. AUDIO
Chapter 1
Page 9

Connections & Setup
Choose Your Connection
There are several ways to connect your DVD player. Please use the following chart to determine
which connection is best for you. Turn to the appropriate page and connect your DVD player,
Components
lE^í
3^®
Cables Needed
• Coaxial
• Audio/video
• S-Video
• Component video
(optional)
• Coaxial
• Audio/video
• S-Video
• Component video
(optional)
• Coaxial
• Audio/video
• S-Video
• Optical Digital
• Component video
(optional)
• Coaxial
• Audio/video
• S-Video
• Component video
(optional)
Connection
TV + DVD
TV + DVD + VCR
TV + DVD +
Dolby Digital
TV + DVD +
Dolby Pro Logic
or Stereo
Receiver
Go to...
page 9
page 11
pagel3
pagel 5
P ^ ^ V
Chapter 1
• Audio/video
• S-Video
• Component video
(optional)
0
• Coaxial
• Audio/video
• S-Video
• Component video
(optional)
TV + DVD +
5.1-Channel
Analog
TV + DVD +
VCR + Satellite
page 17
page 19
Page 10

Connections & Setup
Cables Needed to Connect Components to Your TV
The pictures below show the cables needed for the connections represented in this book.
Note: Audio/Video cables (A/V cables for short) are usually sold as a bundled set, but the connection pictures in this book
show each cable separately for better visibility.
Audio/Video cables
Component Video cables
RF coaxial cable
S-Video cable
Optical digital audio cable
8
Chapter 1
Page 11

TV
DVD
PLAYER
S‘VIDEO VIDEO \U
m ©
Connections & Setup
AUDIO OUT
R L
© ©
ANT IN
©
©
©
■© © ©■
MKl
CABLE
OR
OFF-AIR
SIGNAL
DVD Player + TV with Audio/Video Input Jacks
1. Connect the audio cables to the AUDIO OUT FRONT L (left - white) and R (right - red) jacks
on the back of your DVD Player, and to the corresponding Audio Input jacks on your TV,
2. Connect the video cable.
• Basic video connection — Connect the video cable (yellow) to the VIDEO OUT jack on
the back of your DVD Player, and to the Video Input jack on your TV.
OR
• S-Video - (optional) If your TV has an S-Video Input jack, connect the S-Video cable to the
S-VIDEO OUT jack on the back of your DVD Player and to the S-Video jack on your TV. If
your TV doesn’t have S-Video, use the basic video connection listed above,
OR
• Component video (optional) - If your TV has component video (Y, Pj^, and P^^ jacks) use
video-grade cables for the Y, P^, and P^^ connections. Note that it is essential to match the
color-coded connectors with a compatible TV. If your TV doesn’t have component video,
use the basic video connection listed above.
3. Plug in the AC power cord into an AC outlet.
Note: Your cable or off-air connection to the telemsion should not be affected by this
connection. Connect your cable or off-air antenna to your television as you normally
tvould. You may need to consult your television manual for details.
Go to page 21
Chapter 1
Page 12

Connections & Setup
10
Chapter 1
Page 13

Connectons & Setup
DVD Player + TV + VCR
1. Connect the audio cables to the AUDIO OUT FRONT L (left - white) and R (right - red) jacks
on the back of your DVD Player, and to the corresponding Audio Input jacks on your TV.
2. Connect the video cable.
• Basic video connection - Connect the video cable (yellow) to the VIDEO OUT jack on
the back of your DVD Player, and to the Video Input jack on your TV.
OR
• S-Video - (optional) If your TV has an S-Video Input jack, connect the S-Video cable to the
S-VIDEO OUT jack on the back of your DVD Player and to the S-Video jack on your TV. If
your TV doesn’t have S-Video, use the basic video connection listed above.
OR
• Component video (optional) - If your TV has component video (Y, P^, and P^ jacks) use
video-grade cables for the Y, P^, and P^ connections. Note that it is essential to match the
color coded connectors with a compatible TV. If your TV doesn’t have component video,
use the basic video Connection listed above.
3. Connect a coaxial cable to the antenna output jack on the VCR and to the antenna input jack
on the television.
4. Connect the antenna or cable to the Antenna Input jack on the VCR.
5. Plug in the AC power cord into an AC outlet.
Go to page 21
Chapter 1
11
Page 14

Connections & Setup
o’*
Dolby Digital* and DTS*
Both Dolby Digital and DTS are audio formats used to record 5.1-channel audio signals onto the digital track of film (while
the film is being made). Both of these formats provide up to six separate channels: left, right, center, left rear, right rear,
and common subwoofer.
The disc will play 5.1-channel sound only if you’ve connected a DTS or Dolby Digital receiver or decoder and if the
original movie the disc was recorded from was encoded in the Dolby Digital or DTS format.
Please Read This Before Using the DIGITAL AUDIO OUT Jack!
This player's digital output jack is designed for a connection to a Dolby Digital or DTS receiver or decoder. This
player has two types of DIGITAL AUDIO OUT jacks: optical and coaxial. Use the jack (and the corresponding cable)
that matches the type of DIGITAL AUDIO IN jack your receii^er or decoder has.
Older digital equipment may not be compatible with the Dolby Digital bitstream. Such a connection can create a
high level of noise that may be harmful to your ears, and could damage headphones or speakers.
It is important to choose the correct Digital Output setting in the DVD Player’s Sound menu, especially when you use
the DIGITAL AUDIO OUT jack. For more information, see chapter 6.
12
Chapter 1
Page 15

Cownectiows & Setup
DVD Player + TV + Dolby Digital or DTS Receiver
To Connect the DVD Player
1. If you have a Dc^lby Digital or DTS receiver, insert an optical digital cable (not provided) to
the DIGITAL AUDIO OUT jack on the DVD player to the Digital Input jack on the back of the
receiver. You must also set the Digital Output setting in the Sound menu (see chapter 5).
Note; The connection illustration on the left shows a digital optical cable. If your receiver
has a coaxial AUDIO IN jack, use a shielded (coaxial) video or audio cable with RCA plugs
at both ends to connect the coaxial digital audio jacks on the DVD player and the A/V
receiver.
2. Connect the video cable.
• Basic video connection - Connect the video cable (yellow) to the VIDEO OUT jack on
the back of your DVD Player, and to the Video Input jack on your TV.
OR
• S-Video - (optional) If your TV has an S-Video Input jack, connect the S-Video cable to the
S-VIDEO OUT jack on the back of your DVD Player and to the S-Video jack on your TV. If
your TV doesn’t have S-Video, use the basic video connection listed above.
OR
• Component video (optional) - If your TV has component video (Y, P^, and P„ jacks) use
video-grade cables for the Y, P^, and connections. Note that it is essential to match the
color coded connectors with a compatible TV. If your TV doesn’t have component video,
use the basic video connection listed above.
3. Down Mix Audio (optional) - Connect the second set of AUDIO OUT jacks on the back of
the DVD player to the AUDIO IN jacks on the back of the TV. This allows you to listen to
discs without going through the receiver. Eor example, if it’s late at night and you want to
listen to a disc without 5.1-channel sound on, you can turn off the receiver and listen to the
disc through the TV speakers.
4. Plug in the AC power cord into an AC outlet.
Go to page 21
Manufactured under license from Dolby Laboratories. "Dolby" and the double-D symbol are trademarks of Dolby Laboratories. Confidential
unpublished works. ©1992-1997 Dolby Laboratories, Inc. Ail rights reserved.
DTS is a registered trademark of Digital Home Theater Systems, Inc.
Chapter 1
13
Page 16

Connections & Setup
TV
CABLE OR
OFF-AIR SIGNAL
DVD
PLAYER
©
PRO LOGIC
OR STEREO
RECEIVER
14
Chapter 1
Page 17

Connections & Setup
DVD Player + TV + Dolby Pro Logic or Stereo
Receiver
To Connect the DVD Player
1. Connect the left and right audio cables to your audio/video receiver and to the AUDIO OUT
FRONT L (left - white) and R (right - red) jacks on the back of your DVD Player.
2. Connect the video cable.
• Basic video connection - Connect the video cable (yellow) to the VIDEO OUT jack on
the back of your DVD Player, and to the Video Input jack on your TV.
OR
• S-Video -• (optional) If your TV has an S-Video Input jack, connect the S-Video cable to the
S-VIDEO OUT jack on the back of your DVD Player and to the S-Video jack on your TV. If
your TV doesn’t have S-Video, use the basic video connection listed above.
OR
If your TV has component video (Y, P^, and P jacks) useComponent video (optional) -
video-grade cables for the Y, P^
color coded connectors with a compatible TV. If your TV doesn’t have component video
use the basic video connection listed above.
and P|^ connections. Note that it is essential to match the
Down Mix Audio (optional) - Connect the second set of AUDIO OUT jacks on the back of
3.
the DVD player to the AUDIO IN jacks on the back of the TV. This allows you to listen to
discs without going through the receiver. For example, if it’s late at night and you want to
listen to a disc without 5.1-channel sound on, you can turn off the receiver and listen to the
disc through the TV speakers.
4. Plug in the AC power cord into an AC outlet.
Go to page 21
Chapter 1
15
Page 18

Connections & Setup
TV
DVD
PLAYER
S-VIDEO VIDEO IN
CABLE OR
OFF-AIR SIGNAL
AUDIO OUT
R L
© ©
©
AUDIO/VIDEO
RECEIVER
16
Chapter 1
Page 19

Connections & Setup
DVD Player + TV + 5.1-channel Audio/Video
Receiver
To Connect the DVD Player
1. Connect the audio cables from the AUDIO OUT FRONT R and L, SURROUND R and L,
SUBWOOFER, and/or CENTER jacks on your DVD player to the corresponding Audio Input
jacks on your audio/video receiver. Set up the speakers using the Speaker option from the
Sound menu (see chapter 5).
2. Connect the video cable.
• Basic video connection - Connect the video cable (yellow) to the VIDEO OUT jack on
the back of your DVD Player, and to the Video Input jack on your TV.
OR
• S-Video - (optional) If your TV has an S-Video Input jack, connect the S-Video cable to the
S-VIDEO OUT jack op the back of your DVD Player and to the S-Video jack on your TV, If
your TV doesn’t have S-Video, use the basic video connection listed above.
OR
• Component video (optional) - If your TV has component video (Y, P^, and Pj^ jacks) use
video-grade cables for the Y, P^, and P^^ connections. Note that it is essential to match the
color coded connectors with a compatible TV. If your TV doesn’t have component video,
use the basic video connection listed above.
3. Down Mix Audio (optional) - Connect the second set of AUDIO OUT jacks on the back of
the DVD player to the AUDIO IN jacks on the back of the TV. This allows you to listen to
discs without going through the receiver. For example, if it’s late at night and you want to
listen to a disc without 5.1-channel sound on, you can turn off the receiver and listen to the
disc through the TV speakers.
4. Plug in the AC power cord into an AC outlet.
Go to page 21
Chapter 1
17
Page 20

Connections & Setup
v|C^
18
Chapter 1
Page 21

Connections 8r Setup
DVD Player + TV + VCR + Satellite Receiver
1. Connect the audio cables to the AUDIO OUT FRONT L (left - white) and R (right - red) jacks
on the back of your DVD Player, and to the corresponding Audio Input jacks on your TV.
2. Connect the video cable.
• Basic video connection - Connect the video cable (yellow) to the VIDEO OUT jack on
the back of your DVD Player, and to the Video Input jack on your TV.
OR
• S-Video — (optional) If your TV has an S-Video Input jack, connect the S-Video cable to the
S-VIDEO OUT jack on the back of your DVD Player and to the S-Video jack on your TV. If
your TV doesn’t have S-Video, use the basic video connection listed above.
OR
• Component video (optional) - If your TV has component video (Y, P^, and P^^ jacks) use
video-grade cables for the Y, P^, and P^^ connections. Note that it is essential to match the
color coded connectors with a compatible TV, If your TV doesn’t have component video,
use the basic video connection listed above.
3. Use a coaxial cable to connect the antenna output on the satellite receiver to the antenna input
on the VCR.
4. Plug in the AC power cord into an AC outlet.
Go to page 21
Chapter 1
19
Page 22

Connections & Setup
The Jacks on the Back of the DVD Player
when connecting, make sure you connect Output jacks to Input jacks, Video to Video, Right Audio to Right Audio, etc.
20
Chapter 1
Page 23

Cownections &: Setup
Installing Batteries in the Remote
1. Remove the battery compartment cover on the back of the remote.
2. Insert new batteries. Match the polarities (+ and -) on the batteries
with the diagram on the remote.
3. Put the battery compartment cover back on the remote.
Important Battery Information
• If you’re not going to use the remote for a month or more, be sure
to remove the batteries because they can leak and cause damage.
• Dispose of batteries in the proper manner, according to federal,
state, and local regulations.
• Any battery may leak electrolyte if mixed with a different battery
type, if inserted incorrectly, if all batteries are not replaced at the
same time, if disposed of in fire, or if an attempt is made to charge a
battery not intended to be recharged.
• Discard leaky batteries immediately. Leaking batteries can cause skin
burns or other personal injury.
Point the Remote in the Right Direction
when you want the remote to operate the DVD Player, point the remote
at the DVD Player, not the TV. The remote has to be pointed in the
correct direction and toward the correct component in order for the
remote’s signal to communicate with the sensor on the component.
Make sure there is a clear path between the remote and the component
you want to operate so the signal isn’t blocked.
Turn on the TV and DVD Player
1. Turn on your TV and tune to the correct video input channel (see
following page),
2, Press the DVD button on the DVD remote or the ON»OFF button on
the DVD player.
Chapter 1
21
Page 24

Connections & Setup
How to Find Your TV's Video Input Channel
You need to tune your TV to the Video Input Channel (or S-Video Channel if you connected the
S-Video cable to your TV and to your DVD Player) to see the DVD Player’s menu and to see the
content that’s on a disc. The video channel on TVs varies for different brands and different models.
In order for your DVD remote to work, your TV must be set on the correct video input channel.
Below are some things to try.
• If your TV brand is RCA, GE, or PROSCAN, press the TV button on the remote that came with
your TV (not the DVD remote). Then press the INPUT button on the remote.
• If you have another brand, consult your TV’s Owner’s Manual.
If those options don’t work, try one of the following options.
• Press a button on the TV remote (see table below).
• Select it from the TV’s menu system.
• Tune direcdy to the DVD input channel by pressing a specific number (see table below).
• Go through all the channels in the channel list by pressing the channel up/down buttons on
the TV,
Some common scenarios are listed in the following table:
Video Input Channel Variations
Button/Swltch
on the TV
VIDEO VID 1 00
SIGNAL LINE 90
VID 1
VID 2 VIDEO 92
S-VID S-VID
S-VIDEO INPUT
Button on the
TV Remote
VID
S-VIDEO
SOURCE
AUX
Channel #
91
93
VID 1
VID 2
22
Chapter 1
Page 25
The buttons used for navigation are
shown in gray. Use these arrow buttons
to highlight an item on the screen. Press
the OK button to select a highlighted
item.
Connections & Setup
How to Move Around the DVD Player's Menu System
The teclinical term for liow you move through the DVD Player's menu
.system is "Navigation."
This book tells you how to select different menu items, but you can
explore the menu system on your own by folktwing a few "navigational
rules.’’
Press the DVD button to put tiie remote into DVD mode. Then use the
arrow buttons on the remcrte (highlighted in gray on the picture on the
left) to highlight different menu items on the screen. (In your DVD
Player’s menu, a highlighted item appears brighter than the other items
on the screen.) To select a menu item, press OK on the remote when the
menu item is highlighted.
The invalid symbol G> appears on the screen when you press a button
that doesn’t have any function for that disc.
Note: Navigational controls are also available on the front of the
player.
cii'i iMiM 4§l Kv«
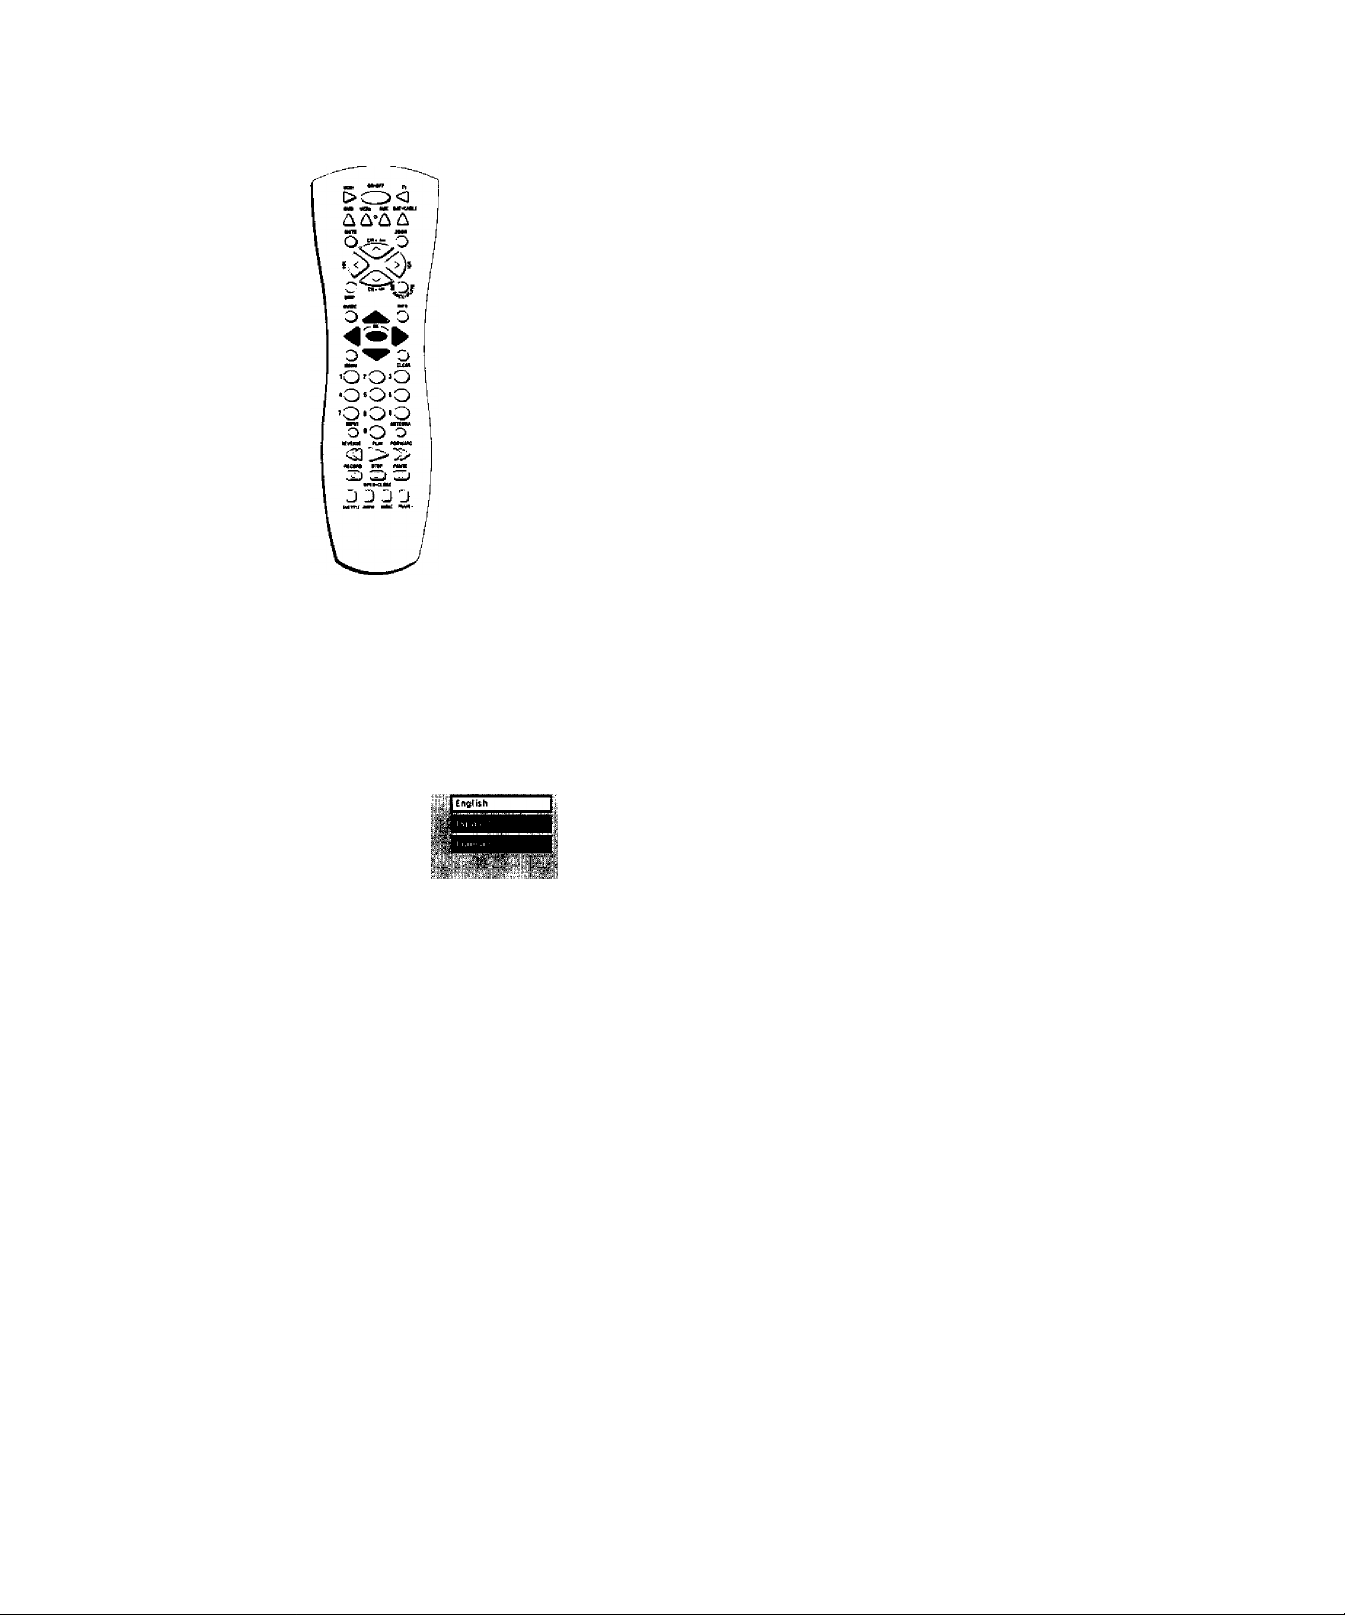
■
This is the Automatic Language
Selection Screen. English is the default
language, and automatically appears
highlighted when the screen comes up.
Set the Menu Language
■when you turn on your DVD player for the first time, the Automatic
Language Selection Screen appears.
By default, the player s on-screen displays are shown in English. If you
want the on-screen menus to appear in English, press OK on the remote.
To change the language:
1. Press the down arrow button on the remote until the appropriate
language is highlighted.
2. Press OK on the remote.
This screen sets all language preferences for on-screen displays to the
same language. You can use the DVD player menu to set individual
language preferences (see chapter 6),
Setting Other Options
The DVD player menu contains many options which can enhance your
DVD experience. These options include:
• password control and ratings limits
• language preferences
Chapter 1
• audio preferences
• display options
For more information on menu options, see chapter 6.
23
Page 26

Connections & Setup
A Quick Tour of The Remote
You can use this remote to control compatible components. The
component buttons are programmed to operate some PROSCAN, RCA
and GE components. The buttons must be programmed to operate other
brands of components. (See ‘‘Programming the Remote” in chapter 7.)
Component Buttons
(Buttons listed in alphabetical order)
Use these buttons to turn on the component and set the remote to
control the selected component.
AUX Use this button to turn on a compatible TV, VCR, satellite receiver,
or cable box after it has been programmed (see chapter 7). Used with
the ON »OFF button to turn on some brands of components.
DVD Use this button to turn on the DVD player and set the remote to
control the DVD player.
SAT »CABLE Use this button to turn on a compatible satellite
receiver. Used with the ON • OFF button to turn on some brands of
satellite receivers.
TV Use this button to turn on a compatible TV and set the remote to
control the TV, Used with the ON »OFF button to turn on some brands
of TVs.
VCRl and VCR2 Use this button to turn on a compatible VCR and set
the remote to control the VCR. Used with the ON* OFF button to turn on
some brands of VCRs.
DVD Buttons
(Buttons listed in Alphabetical Order)
ANGLE Use this button to access various camera angles on a DVD disc
(if the DVD disc contains multiple camera angles).
Arrow buttons Use the arrow buttons Cleft, right, up, and down) to
move through on-screen menus. You highlight a menu item by pressing
the arrow buttons. You select a highlighted item by pressing the OK
button.
AUDIO Use this button to access various audio features while playing
a disc.
CH +►« advances to the next chapter, track, index or MP3 title.
CH-»« reverses to the preceding chapter, track, index or MP3 title.
24
CLEAR Allows you to clear information, such as remove the Info
display from the screen.
Chapter 1
Page 27

Connections & Setup
FORWARD Allows you to search forward through a disc while it is in play mode (or slow speed
search in pause mode). Press repeatedly to increase speed,
FRAJtfE- Press this button during playback to reverse the disc one frame at a time.
GO BACK» AGAIN When you’re using the DVD Player’s menu system, press this button to
return to the preceding menu screen. When you’re watching or listening to a DVD disc, press this
button to go back 10 seconds to see/hear missed content.
Note: The AGAINfeature may not be available for some DVD titles.
GUIDE Allows you to see the titles that are available on the current disc (if the disc contains a
guide menu).
INFO Press this button while you’re playing a disc to see the on-screen Info Display. The Info
Display contains various playback features and gives you information about the disc you’re
playing (press again to remove the Info Display from the screen).
MENU Press this button to see the disc’s menu when you’re playing a disc (press it again to
resume playback).
Number buttons (0-9) Use the number buttons to input information such as chapter numbers,
track numbers, or to make selections on some menu screens.
OK Press this button to select a highlighted menu item.
ON »OFF Turns on the player when it is in standby mode or puts the player in standby mode
when power is on.
OPEN»CIOSE When the STOP button is held down, opens and closes the disc tray.
PAUSE Pauses disc play. When disc play is paused, press PAUSE again to advance a frame or
press FRAME - to go back a frame.
PLAY Begins disc play (and closes disc tray if it is open).
REVERSE Allows you to search backward through a disc white it is in play mode (or slow speed
search in pause mode).
SNIP Displays the Scene Snip Info Display so you can edit out selected scenes from the
DVD disc.
STOP Stops disc play. You can also press STOP to remove the screen saver from the screen to
see the DVD Player's main menu. When you hold the STOP button down, it acts as the
OPEN »CLOSE button to open and close disc tray.
SUBTITLE Use this feature to turn the subtitles off and on. While the subtitle info area is
displayed press the arrow up and down buttons on the remote to change subtitle languages
(if available).
ZOOM Use this button to zoom in on certain areas of the screen.
Chapter 1
25
Page 28

This page left intentionally blank.
Page 29

Playing DVDs
Chapter Overview:
• Regional Coding
• Using Different Menus
• Loading and Playing Discs
Chapter 2
• Using a Disc Menu
• Using the On-Screen Info Display
• Disc Playback Features Using the Remote
Changing Entertainment. Again
Page 30

Playing DVDs
Regional Coding
Both the DVD player and the discs are coded by region. These regional codes must match in
order for the disc to play. If the codes don’t match, the disc won’t play. This player’s code is
region 1.
Using Different Menus
Each disc is programmed with different features. There are three separate menu paths that you
can use to access features:
• The Disc menu - The Disc menu is part of each disc and is separate from the DVD player’s
menu. The contents of each Disc menu varies according to how the disc was authored and
what features are included. The Disc menu is turned on and off (while the disc is playing)
with the MENU button on the remote or the front of the player.
• The DVD player’s Info Display - The Info Display appears as icons across the top of the
screen when a disc is playing. It can only be accessed while you are playing a disc. It’s turned
on and off with the INFO button on the remote or the front of the player.
• The DVD player menu - The DVD player’s menu system is accessed only when a disc isn’t
playing. It appears automatically when the STOP button is pressed.
Remember that a feature will only work if the disc was programmed with that feature. For
example, if you choose subtitles on the Info Display, the subtitles will only appear if the disc was
created with subtitles. If a menu item is “grayed out” it means that item isn’t available.
Loading and Playing Discs
Your DVD player plays DVD discs, Video CD discs, Audio CD discs, CD-R discs and CD-RW discs.
Before you load a disc, make sure that it is compatible with the player. The following discs
CANNOT be used with this player:
• Laserdiscs
• CD-I, CD-ROM (computer-only discs), DVD-ROM
• Discs recorded using other broadcast standards (i.e. PAL or SECAM)
Notes:
If the message "Tray Locked" appears on the screen: .
• The retail lock feature has been accidentally engaged. To unlock the disc tray you must
press and hold a combination of keys simultaneously:
On the front panel of the DVD Player, at the same time press and hold the SKIP FWD,
OPEN* CLOSE, and TS SURROUND buttons for at least 3 seconds.
• The Front Tray Lock feature is turned on. From the Lock menu (see chapter 6),
highlight Front Tray Lock. Press OK to toggle the Front Tray Lock setting Off.
28
Chapter 2
Page 31

Playing DVDs
To Load and Play a Disc
Turn on the TV and yoiir DVD Player (press ON»OFF on the player or press the DVD Ixitlon on
the remote control).
1. Pre.ss the OPEN»CLOSE button on the front of the DVD Player or
on the remote. The dfsc tray ttpens.
2. Place a disc gently into the tray with the disc's label facing U]:i
(double-sided discs have content on both sides, so you can place
either side up).
This is an example
of a one-sided
disc.
This is an example
of a 2-sided disc.
The title is in the
center.
3. Pre.ss the OPEN«CLOSE or PLAY button. The di.sc tray closes.
The DVD Player reads the disc s table of contents, and then one o(
three things happens depending on how the di.sc was programmed:
• The disc starts playing.
• The disc menu appears on the screen. One of the options will
start disc play. Highlight that option and press OK on the DVD
remote.
• The DVD Player's main menu appears on the screen. Highlight
the Play option and press OK on the DVD remote.
When you stop playing a di.sc, the DVD player remembers where you
stopped. When you start playing the disc again, the player picks up
where you left off unless the disc is removed, the player is unplugged, or
you pressed the STOP button twice.
Using a Disc Menu
A disc is capable of having an on-screen menu that is separate from the DVD player’s menu
system and on-screen Info Display. The disc menu might only contain a list of the titles and
chapters, or it may allow you to change features such as language and playback settings.
Although the content and operation of disc menus vary from disc to disc, the following example
will give you an idea of what to expect.
Can'f Catch Up
An example of a disc menu. The
menus on discs vary because the disc
menu is created by the disc's author.
While the dLsc is playing, press the MENU
button on the remote or the front of the
player, The di.sc menu appears.
Tip
Many discs skip the disc
menu and start playing
automatically. To access
the disc menu when
you're playing a disc,
press MENU on the
remote.
Chapter 2
29
Page 32

Playing DVDs
In this example. The Language
setting is highlighted. To select this
option, press OK on the remote.
In the example on the left, English is
highlighted. Press OK on the remote
to play the disc with English dialog.
2.
Pres.s the iip/down arrow buttons to highlight the section of the disc
menu you want to clioose, and press OK on the remote. In the
example on the left, Liwgiuif'c has been selected.
3. Press the up/dowm arrows to select a language, and pre.ss OK on the
remote.
4. Press MENU on the remote or the front of the player to resume
playback.
¡Vote: Any settings yon change on the disc menu onlv override the
default settings in the DVD Player's menu lemporanly. Default
settings are the settings that you set up in the DVD Players menu
system. To change the default settings, see Chapter 6.
30
Chapter 2
Page 33

Playing DVDs
Using the On-Screen Info Display
The on-screen Info Display contains many playback features. To see the Info Display, pre.ss the
INFO button on the remote or the front of the player while a disc is playing. The Info Display
appears across the top of the screen. Each feature is represented by an icon. Use the left/right
arrow buttons on the rentote or the front of tlie player to move through the ciifferent icons in the
Info Display.
When an icon is highlighted, use the up/down arrow buttons on the remote or the front of tlie
player to scroll through the choices displayed in the text box under the iccrns.
Remember, you can only access the Info Display when you're playing a disc, Also, the Info
Display features are only available if the disc was created with that particular feature (i,e,, if you
select the Subtitle icon, you won't be able to change the subtitle language unless the author of the
disc created the disc with subtitles).
The invalid symbol 0 appears on the screen when you press a button that doesn't have any
function. If one of the icons is “grayed out,’’ that Info Display feature isn’t available for the disc
you're playing. To make the Info Display disappear from the screen, press INFO on the remote or
the front of the player.
Scene
Snip Subtitles
Time Display
01 ;49:37
Title
I
1:2 C:25
Chapter
Audio
Repeat
Bookmarks
► PLAY
Transport mode
Text about your
Info Display selection
appears here
The Info Display differs depending on the type of disc that is in the player. The illustration above shows
the Info Display for DVD discs.
Angle
Chapter 2
31
Page 34

Playing DVDs
01:49:37
Time Display
This feature displays the audio/video time. For DVD discs, the time di.splaycti refers to the current
title time. Fcrr Audio CDs anti MP.^ discs, it refers to the current track time.
For DVD video discs, the Time Display ttlstr ;icts as a Tiine .Search leatuie. This lets you go to a
particular .scene in ;i mtrvie by entering the time thttt scene is playerl. For example, if you like the
dogfight scene in Top Gun, you can enter the elapsed time the scene ]')kiys atid skip right to it. To
use Time Search:
1. Press INFO on the remote or the front of pkiyet to bring u]s the Info Dispki\'. Highlight the
Time Display and enter the ektpsed time of the scene you wisli to go to For example, enter
01:12:00 to go to the scene thtit plays at 1 hour and tweh e minutes into the mo\ ie.
2, When you’ve entered the time. Press OK on tiie remote.
Selecting a Title
Some discs contain more than one title. For example, there might be four movies on one disc
(each movie might be consiclered a title). Each title is divided into chapters. To select a title:
1. While the disc is playing, press INFO on the remote or the front of the player to bring up the
Info Display.
2. If the Title icon on the Info Display isn't highlighted, use the left/right arrow buttons to
highlight it.
3. Use the number button(s) on the remote to enter the title number or ¡Dress the up,'down arrow
buttons to go to the next/previous title.
4. Press OK on the remote when the title you want to play appears in the text wnndowc
Note: Some discs only have one title.
Selecting a Chapter
Because DVD discs use digital technology, a title can be divided into individual chapters (similar
to tracks on a CD), You can skip to a specific chapter by using the Chapter feature in the Info
Display,
1- While a disc is playing, press INFO on the remote or the front of the player to bring up the
Info Display.
2. Press the arrow buttons to highlight the Chapter icon.
3. Use the number buttons on the remote to enter the number of the chapter you want to play or
press the up/down arrow buttons to go to the next/previous title.
4. Press OK on the remote.
Notes:
The Chapterfeature won’t work if the disc isn’t formatted with separate chapters.
You can also advance to the next chapter by pressing CH + *»* on the remote (SKIP FWD on
the front of the player) and go to the preceding chapter by pressing CH - on the remote
(SKIP BACK on the front of the player).
32
Chapter 2
Page 35

Playing DVDs
Scene Snip Editing
The Scene Snip feature lets you edit out select scenes on a disc. Once you have made edits, the
disc's title is stored in the Scene Sniis Liliraiy so you can play either the edited or unedited version
of that disc.
Editing a Disc
1. while the disc is playing, press SNIP rrn the remote to bring up the Scene- Snip Info Display.
Note: You can also press INFO on the remote or the front of the player, select the Scene SniJ>
icon (scissors) and press OK.
2. The .Veette .S’;//y'a display apjicars. An available icon will be highlighted (a sd.ssors icon with the
word Ltneut next to it).
1 - 00:06:18
f 4 - 01:28:09 5- Uncut
This is the text display window.
3. when you reach the beginning of the scene you want to edit out, pre.ss OK on the remote.
The number of the cut and a time display appear next to the icon. For example, in the
illustraticrn above, the first cut is indicated by the number 1 followed by the time the cut
begins - 00:06:18.
4. When you reach the end of the scene you want to edit out, press the OK button on the
remote. The icon changes to a trash can with the cut number and beginning time displayed
next to it. The edited version of the disc is added to the Scene Snip library.
5. Press the INFO or CLEAR button on the remote to remove the Scene Snip display from the
screen.
00:28:09
ye- Uncut
00:45:24
Chapter 2
33
Page 36

Playing DVDs
Using Scene Snip
The DVD Player must be locked to play the edited version of a disc. If you play the disc in an
unlocked state, it will play as if there are no edits. The player is locked and unlocked from the
DVD player Lock menu (see chapter 6).
When the DVD Player is locked, you must enter the password to play the edited disc. To play the
edited version of a disc:
1. Make sure the DVD Player is locked.
2. When a disc including Scene Snips is inserted, a message box with two options appears:
Play Unedited
Play Edited
3- Highlight and select Play Edited. The edited version of the disc is played.
If you want to play an unedited version of a disc that has been assigned Scene Snips, you must
enter a password.
Each side of a 2-sided disc must be edited separately.
Note: Random and Program play are not available when Scene Snip is on.
Clearing Scene Snips
To clear an edit while the disc is playing:
1. Press SNIP on the remote to bring up the Scene Snip Display. You will be prompted for a
password. .
3- Enter your password (the Scene Snip Info Display will appear).
4. Highlight the trash can icon next to the edit you want to clear. Press OK.
5. The edit is cleared and the trash can icon changes back to the scissors icon.
If all 6 edits are in use, you can only add a new edit by clearing an existing one.
34
Chapter 2
Page 37

Playingi DVDs
Turning Subtitles On and Off
By default, subtitles are off. To turn subtitles on:
1. While the disc is playing, press INFO on the remote.
2. Highlight the Subtitles icon. The Subtitles icon acts as a toggle to turn subtitles on and off.
When subtitles are on, the text box below the icons will display the current subtitle language.
You can also turn on subtitles by pressing the SUBTITLE button on the remote control. When the
Info Display comes up the Subtitles icon will be highlighted. Press the up/down arrow buttons to
change the subtitle language (if available on that disc).
Selecting the Subtitle Language
You can change the subtitle language while you’re watching a DVD disc, but only if the disc was
created with subtitles.
1. While the disc is playing, press INFO on the remote or the front of the player.
2. Press the arrow buttons to highlight the Subtitle icon and, if subtitles are off, press OK to turn
them on.
3. Use the up/down arrow buttons to scroll through the subtitle languages that are available on
the disc. If subtitles aren’t available, the text in the text box will read Subtitles: Not Available. If
subtitles are available, the language currently showing in the text box is the active selection.
The subtitles will be shown in that language.
4. To make the Info Display disappear, press the INFO button on the remote or the front of the
player.
Notes:
Changing the subtitle language with the Info Display will only affect the disc currently
being played. When the disc is removed or the player is turned off the subtitle language will
revert to tbe language setting specified through the DVD player main menu.
The subtitle language can also be changed through the DVD player menu.
You can also display the subtitle Info Display by pressing SUBTITLE on the remote. Press
SUBTITLE again to toggle subtitles on or off. Use the up/down arrow buttons to select a
different subtitle language (if available). Press INFO to remove the Info Display from the
screen.
Chapter 2
35
Page 38

Playing DVDs
Changing the Audio Language
If the disc was created with different language tracks (recorded in different languages), you can
use the Info Display to temporarily change the DVD Player’s Audio Language setting.
1. While a disc is playing, press INFO on the remote or the front of the player to bring up the
Info Display.
Note: You can also bring up the info display by pressing the AUDIO button on the remote
(the Audio icon will be highlighted).
2. Highlight the Audio icon. The current audio language appears in the text box below the row
of icons.
3. Press the up/down arrow buttons to scroll through the audio languages that are available on
the disc until the audio language you want to use appears in the text box. Audio will be
played in that language.
4. To make the Info Display disappear, press the INFO button on the remote or the front of the
player.
Notes:
' The language feature only works if the disc was created with multiple audio tracks.
When you choose an audio language from the Info Display, you only override the audio
language setting in the DVD Player’s main menu temporarily.
The audio language can also be changed through the DVD player menu.
36
Chapter 2
Page 39

Playing DVDs
The Repeat Feature
The default mode for the Repeat feature is Off. There are four Repeat options:
• Disc - repeats the disc that is playing
• Title - repeats the title that is playing
• Chapter - repeats the chapter that is playing
• A»B - Set the beginning (point A) and the end (point B) of a segment to make this part of the
movie play repeatedly.
To Use Title or Chapter Repeat;
1. while a disc is playing, press INFO on the remote or the front of the player to bring up the
Info Display.
2. Highlight the Repeat icon. The text in the text box below the icons will read Repeat Mode: Off.
3. Press the up/down arrow buttons to scroll through the Repeat options until the Title or
Chapter Repeat option is displayed in the text box.
4. Press OK. The selected repeat option will loop continually until you turn Repeat off. Repeat is
turned off by completing steps 1 through 3 above, and selecting the Off option.
A*B Repeat
A»B Repeat lets you define a specific segment on the disc that you want to repeat. For example,
you might like to watch the dogfight in the movie Top Gun. To watch this scene over and over:
1. Find the spot on the disc that is a few seconds before the beginning of the scene you want to
repeat (this gives you time to access the Info Display and the Repeat feature).
2. Press INFO on the remote and select the Repteat icon from the Info Display.
3. Press the up/down arrow buttons until the A»B Repeat option is shown in the text box
underneath the icons. The text box reads Repeat Mode: A-B Press OK to Set A Point.
4. At the beginning of the scene you want to repeat, press OK to set the A point.
5. When you get to the part of the disc that you want to be the end of the repeated segment (the
B point), press OK. The segment will repeat until you turn Repeat off.
6. To make the Info Display disappear from the screen, press the INFO button on the remote or
the front of the player.
How to Cancel Repeat
There are three ways to cancel Repeat:
• Press STOP twice.
• Go to the Repeat icon in the Info Display and select Off.
• Eject the disc.
Chapter 2
37
Page 40

Playing DVDs
Using Bookmarks
The hocikmark I'eauire lets you mark a point on the disc tliat you can go to quickly. You can store
up to six bookmarks per disc. When y<iu turn the playei' oH’ or remo\ e the disc, bookmarks are
cleared.
Storing a Bookmark
1, While a disc is playing, press INl-O on the remote.
2. I lighliglit tile Bookmark icon and pivss OK,
3 The Bookmark Display appears. An ai'aitable unniLirked icon w'ill be highlighted (a disc \\'itli
two arrows).
00:06:18 C2
Unmarked
4, When you reach the scene you want to mark, press OK. The unmarked icon changes to two
icons (side-by-side):
• An arrow that is used to activate the bookmark.
• A trash can that is used to clear the bookmark.
Next to the icons, the bookmark start time and chapter are displayed.
5. Press the INFO button on the remote tii make the Info Display disappear from the screen.
00:28:04 C4
02:12:56 C12
03:24:09 C24
Unmarked
Using a Bookmark
1. while you’re playing a disc, press INFO on the remote. The Info Display appears.
2. Highlight the Bookmark icon and Press OK. The Bookmark display appears.
3. Highlight the arrow next to the bookmarked scene you want to activate.
4. Press OK to start playback from the place you bookmarked,
5. To make the Info Display disappear from the screen, press INFO on the remote.
38
Clearing a Bookmark
The bookmarks are cleared each time a di.sc is removed from the play^er or when the power is
turned off. If you want to clear a bookmark while the disc is playing:
1. Press INFO on the remote to bring up the Info Display.
2. Highlight the Bookmark icon and press OK.
3. Highlight the trash can icon next to the bookmark you want to clear. Press OK. The
bookmark is cleared and the trash can icon clianges back to the unmarked disc icon.
If all six bookmarks are in use. you can only mark a new scene by clearing an existing bookmark.
Chapter 2
Page 41

Playing DVDs
Changing the Camera Angle
Some discs contain multiple angles of a particular scene or sequence. If the disc only has one
angle, this feature won’t work. When multiple angles are available, the Camera Angle icon
appears in the upper right comer of the screen. To change the camera angle:
1. While a disc is playing, press INFO on the remote or the front of the player. The Info
Display appears.
2. The Camera Angle icon will display the number of angles available. For example, if there
are 3 different angles, the icon will read 1 of 3. This means angle 1 is currently being
played.
3. The text box beneath the icons displays Camera Angle: 1. Use the up/down arrow buttons
to scroll through the camera angle choices. The camera angle number displayed in the text
window is automatically shown.
4. To make the Info Display disappear, press the INFO button on the remote or the front of the
player.
Note:
You can also display the camera angle Info Display by pressing ANGLE on the remote. Use
the up/doum arrow buttons to switch between different camera angles. Press INFO to
remove the Info Display from the screen.
Chapter 2
39
Page 42

Playing DVDs
Disc Playback Features Using the Remote
You can use the remote control to activate disc playback features.
Playback features aren’t usually available during the opening credits of a movie. If a playback
feature isn’t available, the invalid symbol G) appears on the screen when you press that button.
Fast Motion Playback (Picture Scan)
To scan quickly through the disc when you’re playing it, use the Picture Scan feature,
1. Press the REVERSE or FORWARD button on the remote when you’re playing a disc.
2. Press the button again to scan at a faster speed. Each time you press the button, the scanning
speed increases.
3. Press the PLAY button at any time to resume normal playback.
You can also use the Picture Scan feature by rotating the shuttle on the front of the DVD player.
Rotate the shuttle clockwise (forward search) or counterclockwise (backward search). The farther
you rotate the shuttle, the faster the speed.
Note: You won’t hear the sound (audio) on DVD discs when you 're using the picture scan
feature.
Freeze Frame and Frame Advance
1. Press PAUSE when a disc is playing to freeze the picture.
2. Each time you press the PAUSE button, the picture advances one frame. .
• Press FRAME - on the remote to advance one frame backwards (frame-by-frame).
3- Press PLAY to resume normal playback.
Slow Motion Playback (in Freeze Frame Mode)
while the disc is in freeze frame mode, you can use slow motion playback.
1. While the disc is playing, press PAUSE on the remote.
2. Press the REVERSE or the FORWARD button.
3. Press the button again to decrease the slow motion playback speed.
4. Press PLAY to resume normal playback.
Chapter Advance
while a disc is playing, you can go forward or backward a chapter or track at a time by pressing
CFI + ►" or CH - on the remote.
40
Chapter 2
Page 43

Playing DVDs
Scene Again™
when you’re watching or listening to a DVD disc, press the GO BACK* AGAIN button on the remote to go back
approximately 10 seconds to see and hear missed content. Subtitles will automatically be displayed until the end of the
replayed scene (to select the subtitle options, see chapter 6). This feature only works if the disc is encoded with navigation
control.
Multiple presses of the GO BACK*AGAIN button will go back further. For example, if you press the GO BACK button three
times in rapid succession, play will go back 30 seconds.
Subtitles
when a DVD is recorded with subtitles, you can use the Subtitle feature to view the subtitles on-screen.
1. Press the SUBTITLE button on the remote when you’re playing a disc to bring up the Info Display.
2. Press the button again to toggle subtitles on or off.
3. Use the up/down arrow buttons on the remote to switch between different languages (if available).
4. Press INFO to remove the Info Display from the screen.
Audio Language
You can temporarily change the default audio language (if different audio languages are available on that disc).
1. Press AUDIO to bring up the Info Display.
2. Use the up/down arrow buttons to switch between different languages (if available on that disc).
3. Press INFO to remove the Info Display from the screen.
Camera Angle
Some DVDs are recorded using multiple camera angles (if available on that disc).
1. Press ANGLE to display the Angle icon.
2. Use the up/down arrow buttons to switch between different camera angles (if available on that disc).
3. Press INFO to remove the Angle icon from the screen.
Scene Snip Edit
You can edit out sections of a disc.
1. Press SNIP to bring up the Scene Snip display.
2. Select the time you want the first edit to start and press OK. Press OK again where you want the edit to end.
• You can edit out up to six sections of a disc.
Press INFO or CLEAR to remove the Info Display from the screen.
Chapter 2
41
Page 44

Playing DVDs
Zoom
When playing DVD discs and Video CDs, you can magnify the screen during normal playback.
For DVD discs, Zoom has 3 levels (l,5x, 2x, 4x). For video CDs, Zoom has 2 levels (lx, 2x). Zoom
magnifies from the center of the screen. Once in Zoom mode, you can pan right, left, up or down
by using the arrow buttons.
1. Press ZOOM on the remote control to magnify. (The zoom level will be displayed in the
corner of the screen. Press CLEAR to clear the zoom Info Display from the screen.)
2. Press the ZOOM button again to go to the next level of magnification.
3- To turn Zoom off, press the ZOOM button until you cycle through all the levels and return to
normal playback.
Note: You can use the 1.5x zoom mode to alter a 16x9 letterbox movie (black bars top and
bottom) to a 4x3 format. This mil eliminate the black bars at the top and bottom and allow
you to use left/right arrow keys to pan and scan.
42
Chapter 2
Page 45

Playing Audio CDs
Chapter Overview;
Using the Info Display
Using the Time Display
Selecting a Specific Track
Selecting a Play Mode
Chapter 3
The Repeat Feature
Using IntroScan
The Bookmark Feature
Dub Assist
DKSrrAL AUDIO
Changing Entertainment. Again
Page 46

Playing Audio CDs
Using the Info Display
Your DVD player has many of the same features as an audio CD player. The player’s on-screen
Into Display lets you choose various playback features. This sectirrn explains hcrw to play audio
CD.s in ycrur DVD player and how to use the player's features. For instructions on loading and
playing your CDs. see Chapter 2.
To access the Info Display while the CD is playing, pre.ss INFO on the remote or the front of the
player. The Info Display appears acro.ss the top of the screen. Each of the playback features is
represented by an icon. To access a feature, use the arrow buttons on the remote to highlight the
icon. Each feature that can be accessed from the on-screen Info Display is described on the
following pages. To clear the Info Display from the screen, pre.ss INFO on the remote control or
the front (if the player.
Notes
To see the Info Display while playing audio CDs, you must turn on your TV and tune it to
its Video Input Channel. For more information about the lY's Video Input Channel, see
Chapter 1.
Some transport modes (reverse and fast forward) are not available for audio CDs.
Time Display
t t
01 :49:37
► play
01:49:37
Track Repeat
Play Mode
i 1 t
IntroScan
' i o
Bookmarks
Using the Time Display
The Clock part of the Info Display shows the current track time. Press INFO to clear the screen.
Selecting a Specific Track
1. Press INFO on the remote or the front of the player (the Info Display appears).
2. Highlight the Track icon.
3. Use the number buttons on the remcite to enter the track number you want to play, or use the
up/dtrwn arrow buttons to scrtill through the track numbers. You may need to pre.ss the OK
button on the remote after you enter a single digit track number.
44
Chapter 3
Page 47

Playing Audio CDs
Selecting a Play Mode
The l’hi\ .NiiKie le;ilmv lets you set l;]'i the oiLk'i' in w hieh you \\ .ml iIk' Inieks on the (.'O to |nl;iy.
There lire three ojitions
.Standard: the traeks play in the otxler lisU'i.1 on tin- ТП (siartiiyu w ith iraek 1).
Random: tlK' iiaeks on the til) plav m laiulom oixler.
Program: the trar ks on tin.' till play m ihe orrk'r \on w progiamiiKai. ’I'ou must I'irsi create a
program h.st in the ¡’lily Mode munu of the l)\'l) Player s main menu.
StaiHlaixl (the order listtal on ihe til)) i-. the (lel.iull si_-ning lor \'oui ]rl,i\ei- To eti.mgr- tlu.'
rielaull setting'.
1, Press INl'O on the lemoie or the Iront ot the player whik' a rlise is pkit ing. The Into
Disphtx appr'ars
2 Highlight the Piay Mode k<m. The r ui ivnt play morle appears in the te.si hoN tiiuleitreatli tlie
icons. I’ress the up./dow n airow buttons to .scroll through the ¡rlay mode chokes until play
mode you want appears in the text box. The tracks oti the C.l) w ill now pla\' in that order.
Note: The ¡flayer difaiills !o Staudard ¡iln yhack irbeiierer you pul a iieie (,'P mio your ¡flayer.
Using the Program Piay Feature
l o use the Program Playback teaUire. \ou niust enter the older in w inch \'oii want the tracks on
tile Cl) to play by cretiting a program li.st. This is done Irom the 1)\ I) player's menu.
1. II the disc is playing, press STOP to slop plarback tthe DVD player main menu ajipears).
2. Highlight Play Moile imd press C)l\ (the /Vety .Wof/c menu ap]iears).
Program Usi
Ф
{ZA\
This Is wher« the two lines of context sensitive help
wii! be located
Use the Edit Program screen to create
your own program list.
3. Highlight PMil ¡’ropram and press OK (the Pdlt Program screen
appears).
4. The ¡'rack box is highlighted. I'se the number buttons on the remote
to enter tlie tniek you want to play first. The tmek number you
entered appeals in the ¡'rackbox and the cursor highlights Add.
5. Press OK U) add that trar k to the Program List. The cursor jump.s to
the next spot in the Program /.bv section. Make sure the TiYickhox is
highlighted and enter your next track
6. Continue adding tracks as explained in steps a-s until your program
is complete. You can play your program by higlilighting Play i\nd
[iressing OK. or you i,an save the program by highlighting Omte anti
pressing OK, If you sa\e the )rrogram, \'oii can select it from the info
ni,s|ilay. 'fhe program will be erased when \ou remo\e the disc from
the plaver or the pla\'er is turned oil.
Chapter 3
45
Page 48

Playing Audio CDs
Editing a Piaylist
1. If the disc is playing, press STOP to stop playback. The DVD player main menu appears.
2. Highlight Play Mode and press OK (the Play Mode menu appears).
3. Highlight Edit Program and press OK (the Edit Program screen appears).
4. Highlight the item in the playlist you want to delete.
5. Highlight Delete, and press OK.
6. When you’ve rearranged the program list and/or deleted all the tracks necessary, press OK.
The Repeat Feature
The default mode for the Repeat feature is Off. There are three Repeat options for Audio CDs:
• Disc - repeats the disc that is playing
• Track - repeats the track that is playing
• A*B - Set the beginning (point A) and the end (point B) to make this segment of the CD play
repeatedly.
To Use Disc or Track Repeat:
1. while a disc is playing, press INFO on the remote or the front of the player to bring up the
Info Display.
2. Highlight the Repeat icon. The text in the text box below the icons will read Repeat Mode: Off.
3. Press the up/down arrow buttons to scroll through the Repeat options until the Disc or Track
Repeat option is displayed in the text box.
4. Press OK. The selected repeat option will loop continually until you turn Repeat off. Repeat is
turned off by completing steps 1 through 3 above, and selecting the Off option.
A*B Repeat
A*B Repeat lets you define a specific segment on the disc that you want to repeat:
1. Find the spot on the disc that is a few seconds before the beginning of the part you want to
repeat (this gives you time to access the Info Display and the Repeat feature).
2. Press INFO on the remote or the front of the player and select the Repeat icon from the Info
Display.
3. Press the up/down arrow buttons until the A«B Repeat option is shown in the text box
underneath the icons. The text box reads Repeat Mode: A-B Press OK to Set A Point.
4. At the beginning of the part you want to repeat, press OK to set the A point.
5. When you get to the part of the disc that you want to be the end of the repeated segment (the
B point), press OK. The segment will repeat until you turn Repeat off.
46
6. To make the Info Display disappear from the screen, press the INFO button on the remote or
the front of the player. *
Chapter 3
Page 49

Playing Audio CDs
How to Cancel Repeat
There are three ways to cancel Repeat:
• Press STOP twice,
• Go to the Repeat icon in the Info Display and select Off.
• Eject the disc.
Using IntroScan™
The IntroScan system plays the first ten seconds of each track on the CD (similar to the scan
feature that’s on many car radios). To use the IntroScan system:
1. Press INFO on the remote or the front of the player (the Info Display appears).
2. Highlight the IntroScan icon. Press OK. The first ten seconds of each track will play.
• After the IntroScan system goes through all of the tracks, it stops,
• If you want to stop the IntroScan system while it's in progress, press PLAY on the remote.
' The current track starts playing in its entirety.
• You can also access the IntroScan system from the Play Mode menu in the DVD Player’s
main menu. .
Chapter 3
47
Page 50

Playing Awdio CPs
The Bookmark Feature
TIk- bookmark ieature lots you mark a point on the disc that you can jto to quickly. You can store
u]r to (> liookmai-ks per disc. When yoti turn the pkiyer olT or remow the tiisc, liookmarks are
cleared
Storing a Bookmark
1. While a disc is playing, press IKFO on the remote or the front of the player.
2 Highlight the Bookmark icon anti press OK.
y 'I'he Bookmark Mmu apitears. An tivttikihle unmtirked icon will he highlighted (a disc with
two arrows).
m|j00:06;18 T2 Q|Q00;28;04 T4
MM Unmarked BIHo2:12;56 T12
■MMMi W^m MM
Unmarked
03:24:09 T14
This is the text display window.
■I. Wlien yttu reach the place you want to mark, press OK, The unmarked icon changes to two
icons (side-by-side):
• An tuToW' that is used to activate the bookmark.
• A trash can that is used to clear the bookmark.
Next to the icons, the bookmark stan time and track are displayed.
5. Kress the INFO button on the remote or the front of the player to make the Info Display
disappear from the screen.
Using a Bookmark
1. while you're playing a disc, press INFO on the remote or the front of the player. The Info
Display appears.
2. Highlight the Bookmark icon and Press OK. The Bookmark menu appears.
3. Highlight the arrow next tf) the bookmark ytni want to activate.
48
4. Press OK to activate the bookmark.
3. Ttr make the Into Display disappear from the screen, press INFO on the remote.
Chapter 3
Page 51

Playing Audio CDs
Clearing a Bookmark
The bookmarks are clearetl each time a riise is removed From the player or when the ¡lower is
turned otf^ It you want to cleai' a bookmark while tire disc inS ¡ilayintt:
1. Press INFO on ilie remote or the front of the plar er to lirinyt uji the Info Display.
2. Highlight tile B(H>ki}iark 'Kim and piess OK,
3. Highlight the trash can icon next to the bookmark \'ou want to clear. Press OK.
4. The bookmark is cleared aiul the trashcan icon changes back to the unmarked disc icon.
If ail 6 bookmaiks aie in use, you can only mai’k new a scene by clearing an e.xisiim; bookmai’k
Dub Assist
Dub Assist helps you lecord a CD onto an audio cassette tape b\' determining the number of
tracks that will fit on one side of the tape ,s<i you have time to turn the tape rwer to record on the
other side. Dub Assist does not have an icon on the Info Display bar. It is acti\-ated througli the
DVD player's menu.
To use Dub Assist wdien you're recording a CD ontt) an audio cassette:
Play Ortfer
Segment SegmanI \
Length ^ (1 of 5? У
Standard
Ф Optinliгíd
9 Program
Use the Dub Assist screen to determine
how many CD tracks can fit on a
cassette.
(min)
Press STOP if a CD is playing (the DVD leaver s main menu
appears).
Highlight Play Muilc 'd\v\ press OK (the .Ur^r/c'ophons a|ipear)
Highlight Dub Assis! and press OK (the Dh/j As.sbv screen appetirs).
The highlight should be in the Play Order w'mdow. Choiise
Standard, Optimized, or Program.
Standard: This is the default mode. The tracks are recorded in
the order on the CD (track 1 is recorded first, track 2 second, etc.)
Optimized: The tracks are recorded in the order that optimizes
the number of tracks that can fit on one side of the audio
cassette so you have the least amount of dead space at the end
of the tape.
Program: The tracks are recorded in tlie order you program,
You mu.st ci-eate your program in the Edit Program menu tliat’s
in the DVD Player’s Play menu.
5. Use the arrow keys to highliglit the Segment Length box. When the
Segment Length box is highlighted, use the up/down arrow buttons
to enter the length of one side of the atidio cassette.
6. The order the tracks will be recorded in appears in the .‘ieginentlisi
on the right. Use the arrow keys to highlight the Start box and
press OK.
Chapter 3
7. Follow the instructions on the screen to begin recording.
49
Page 52

This page left intentionally blank.
Page 53

Playing MP3 Files
Chapter Overview:
• What is MP3?
• Using the Info Display
• The MP3 Display
• Selecting a Play Mode
Chapter 4
• Using the Program Play Feature
• The Repeat Feature
• Using IntroScan
• The MP3 Screen Saver
Changing Entertainment. Again.
Page 54

Playing MP3 Files
What is MP3?
MP3 is a format for storing digital audio. An audio CD-quality song can be compressed into MP3
format with very little loss of quality, while taking up much less space.
CD-R or a CD-RW discs that have been encoded in MP3 format can be played on your DVD player.
In this manual, CD-R and CD-RW discs will be referred to as MP3 discs. MP3 files, or songs, are
referred to as titles.
Obtaining MP3 files
There are two ways to obtain MP3 files:
• By using computer software to encode MP3 files from an audio CD - You can download the
software necessary to encode MP3 files from the internet.
When encoding MP3 files, you can include information such as title, artist, genre, and
comments that will be displayed by your DVD player at the time the title is played. This
information must be included at the time the file is encoded in order for it to be displayed at
the time you play it oh the player.
• Downloading MP3 files from the internet — There are many internet sites that allow you to
download MP3 files fro free, and many sites that require a fee.
Creating an MP3 Disc on Your Computer
Your DVD player handles MPEG-1, layer III audio. If you encode your own MP3 files from an
audio CD, avoid using the features of MPEG-2, such as the 22kHz sampling frequency.
Be sure to make a data CD rather than an audio CD. If you make an audio CD, you will lose the
extra features and compression of MP3.
When you burn a CD, take the following steps to get optimal use of the CD for playing in your
DVD player.
• In your CD burning software, select ISO-9660 for the file system.
Note: The Joliet file system is not recommended. Using the Joliet file system may result in
shortened file names.
• The DVD player can support up to 30-character names. Your computer software may let you
specify this option as ISO-9660 level 2, ISO-9660 with Rock Ridge extension, or simply as ISO9660 with long directory or file names. If your computer software doesn’t support the above
options, name your files and directories using eight characters or less.
Notes
For more information regarding MP3 encoding software and MP3 sites, visit http://
WWW. lyrazone. com.
Some transport modes (reverse and fast forward) are not available for MP3 CDs.
52
Chapter 4
Page 55

Playing IVIP3 Files
Using the Info Display
Io ;K(.'C.ss iIk' ¡Ilio l)l.sp|,iv w hik' ;in Ml'.’i tlist' is pl.n inp. pli'ss INI'() < m ilio [X'IimU' or iho Ironi 111
ilu.' phi\x‘i'. Tlu.' Info [)ispla\ .ippo.ii's arro.ss iIk' lop o1 iIk' snxx'n l'.uli o1 tho plavlxiok Ir'aiuix's
iX'pa'soiKotl hv an imn. lo atvos-. a Irailurv. usr' iIk' anow Inmons on iho ¡X'iiiotr' io liiphlinhl ilio
loon làuh IrMliin.' ihal (.an I». aior'.ssod Iroin iIk' (.)ii-Sonvn Inlii ili.^plav i> (k'sr i ihorl on ilio
lollowinp pagos. l'o oloai ihi- Inlo l )ispla\ Ironi iho '.nxx'n. proas INI < ) on ilio ix'inolr' (.oniiol or
iho Ironi ol ilio plawT,
Time Display
01:49:37
^PLAY
G1.49;37 ;
► play '
This Js tho li-nr dispìjy Viiniifiw.
Illk-N f ruirihllii’ flov.n
ArllM: jMtin
Alì)itin
Ci'nrr; kc»ók
ComrneMi:
Cit R.ìlo rjtJWi . SiM? 'K
t'dìlV Sul: Joliri‘4_niUVi.0ii'.hl‘/r I
T his ti Wllii/i- |î»ü two lifif.'S (<l coni 0*1 M. nielli vi: hf:l|S
b»; focdlei)
The MP3 display is shown urider the
Info Display.
Title
Repeat
IntroScan
The MP3 Display
NX'hen you play an MP.^ disc, the MP,^ display will appear below the Into
Di.splay. MP.X di.sc.s coniain in(.ll\ idual songs, called titles, A cli.se can hold
sev'cral litlos. Titles can ho organized into diroclories and subdirectories.
XX'lien you play an .MP.^ disc, the Info Display text bo.\ shows the auiiior
(T t!ie currently playing title (song) and the current title. The following
information ai^pears beneath ihe hifo Di.splay in the MP3 di.splay.
Title - Title of CLirrently paying file in playlist.
Artist - Anist of (he playing file in the playli.st.
Chapter 4
Aibum - The collection of songs the liile comes from.
Genre - The type ol music the title is classilied as (roc k, jazz, etc.).
Comment - Inlorination added at the time the file was compressed.
Bit rate - lilt rate the title is hetng irlayed at.
Size - .Size ol the eiinently playing title.
Patli - Place cm the disc where tile current title is stored.
53
Page 56

Playing MP3 Files
01:49:37
Using the Time Display
The C'!ock piii't of tlie Info Oisplay shows the current title time, Press INFO to dear the screen.
Note: To see the Info Disphty while playing MP3 CDs, you must turn 07i your '¡V and tune
it to its Video Input Channel. Tor more information about the T\ "s Video Input Chatinel,
.see Chapter /.
Selecting a Title
I’lvss to begin plttybtick. The pltiyer will Iregin playing the songs (titles) in ihe order they
were burned on the disc (unless youh'e created a program/playlist (see bek)\v).
1. Highlight and select the Title icon in the Inio Display.
2. Use the up,'down ari'ow buttons to highlight the desired title from the title list, A.s a title is
highlighted it will begin to play and the information as.soeiated with that title will be displayed
in the .VIP3 screen.
You can also select a title by entering in the number of the title.
After approximately one minute, the screen saver will be displayed instead of the MP3 Info
Display and screen. To bring up the MP3 menu again, press INFO on the remote.
Skipping Titles
Use tile CH+ ixitton to mo\'e to the next title. Use the CH- button to move to the beginning of the
currently playing title. Press CH- again to move to the previous title.
Selecting a Play Mode
The Play Mode feature lets you set up the order in which you want the titles on the MP3 disc to
play. There are three options;
Standard: the titles play in the order listed on the disc (starting with title 1).
Random: the titles on the disc play in random order.
Program: the titles on the disc play in the order you’ve programmed. You must first create a
program list in the Play menu of the DVD Player's main menu.
Standard (the order listed on the CD) is the default setting for your player. To change the
clefault setting:
1. Press INFO on the remote or the front of the player while a disc Ls playing. The Info
Display appears.
2, Highlight the Play Mode icon. The current play mode appears in the text box underneath the
icons. Press the up/down arrow buttons to scroll through the play mode choices until play
mode you want appears in the text box. The titles on the CD will now play in that order.
Note: The player defaults to Standard playback whenever you put a new disc into your
player.
54
Chapter 4
Page 57

Playing MP3 Files
Using the Program Play Feature
Creating a Program
To use the /‘rofimm /Vi-fi'you must uRMie a ]-)ioj>[am list (o set the in w im h you want
she Sitles on the disc to jilay.
Creating a Program List for an MP3 Disc
1. If the disc is ]-)lavini;. pix'ss ST()!’ to slop playliack (the plavci
main menu appears).
2, Higltliglit /Vrn'.Woi/e and press t)K (the /Yen'.'/oi/e menu apixsnsi
3 llighiight /'.V//Y aiui pi\-ss OK (the I’ro^miu screen
MyjiusiCl ■
I lislilh-<] ii^d
My.Ill» 2
h'af.MlicllM
Tdlli Sul- Athij'tj.iiii''!' riiji^ii*, ¿ I
lypti M.I'? Pi/-' PrHÍtt yiiif.t' aiiy.sliití
Tillo ridyGuil.il Ailu-í. Jolm MollciiuwiilY
Thi* IhSihwQ tln«a or cOnStid aénsitive liatp
will ba localad.
The Standard Playlist from the disc
displays the directories and titles
(songs) that are on the disc.
ti ¡spears)
On the left side of the screen the .standard playlist is displayed. Phis
is a scrollable list of all the directories and filenames cm the disc.
• To crpen a directop’, highlight it and pres.s OK (the directoiy will
open and the contents of the directory will be displayed m the
Standard Playlist).
• To close a directory, use the arrow keys to scroll to the terp of the
playlist until the UP Sl'BDIKECrORYOYAion is highlighted and
pre.ss OK.
Use the arrow keys to highlight the title (.song) you want to play
first, When you highlight a title the title information will be
displayed at the bottom of the screen.
Use the left/right arrow' buttons to highlight the drYcfbox. Press OK
to add that title to die Program ¿is/(the title number and time will
appear in the Program List).
Chapter 4
Note: If he highlight is on a directoiy when you use the Addoption, the entire contents of the directoty mil he added to the
Program List.
The highlight will move back to the Standard Playlist so you can
enter the next directory or title into the Program List.
Continue adding titles as explained in steps 4-7 until your program is
complete. You can play your program by highlighting Play and
pressing OK, or you can .save the program by highlighting Done and
pressing OK. If you save the program, you can select it from the
Info Display while the disc is playing. The program will be erased
when yoL! remove the disc from the player,
55
Page 58

Plaiyingi MP3 Files
Editing a Program
Deleting Titles
'!'o (iik's liom iIr- |iLiyhM:
L H'llu’ IS pus-, s| ( ¡p i,, |i|.i\I\k k ulu i )\ I) pLiwT ni.mi iiK'iiii .ippr.iisi
I /'///y W(if/r .mil pivss ( )K i llu' /Vi/)' Wni/y iiii-nii .ippi-.trs i.
.1 I li.sihliiihl /•.>/// I’nyynim ;!ikI pn-ss ( )K ulu' I’ni’ynini sni-i-n .ippisusk
I. ili.uliliglii llu iK'iii in ihi' I’lus^i'.itii l.isi \nu \i.ini 111 ilili'ii'-
1 liyihlipht DcL’h'. .iihI pmss ()K
0. Will'll \ou ,uv rinislii'il !i‘Lirijn;^inL; llii' pLii lisl. Iiiphlyuhl y7n;;i';niil pn''--' ( )K
Inserting Titles
To inseii tlllu.s inio the playlist
1, II the di.se is playing, pivss STOI^ to sio|-i playback (the DVD player
main menu appears)
: ni>3
|pnsS!B9H
Typo.Wl^i3 ' . St^O iiK . Paih .
THl6: Play GueIìjì • Aiitsl. Juljii M{t|i(?nciimp
Th43 wher« lAe iwo <in«s o1 cpniQxt s«n»in«/e tielp
will bA localAd.
In the illustration above, the contents
of the directory SU8-John's,.. will be
inserted in the Program List before the
song My^musicl.
2, lliyhliythi /Vr/r .U(jf/e and press OK Uhe /Vr(r .t/orO menu appeal's)
,y i-iiyhlight ¡uli! Pru^^raiu and pivss OK (the ¡:dil !’n>-^nuu sereen
appears).
1. I si’ ihe left right .iiTow keys in mine tiie highlight lo the hrogram
List. I'.se the up down .mow keys to niaik the .s]soi in the Program
List where you warn to insert a tille (the inserted title will ix" placed
before \hc highlighted tille).
s. Highlight the Slaiiibird i’/nylisi and use the iijs clow n arrow keys to
select ihe title you waiil lo in.serl
6. Higlilight /j/.ver/and press OK
When you are finished rearranging the playlist, highlight /Joweand
press OK.
Autoplay
You t an set tlie Aiitoplay option to iilay your disi antoinatically after yon
elo.se the disc iray.
1, I rom the !)V|) players main menu (player ON, no disc playing)
liighlighl the /'/«)'.Wiri/t'option anil ]iress OK.
Z. ['he Pla\' .Mode selections appeal', liighlighl the Aiiioplay option and
press OK lo toggle the option on/oll,
56
.Y Ih'ess the left anow bulKm lo ivturn lo the previous menu or pre.s.s
CrO BAC1K» A( IAIN to reltim to the main menu.
Chapter 4
Page 59

Playin0 MP3 Files
The Repeat Feature
The default mode for the Repeat feature is Off. There are two Repeat options for MP3 discs:
• Disc - repeats the disc or playlist (if you’ve created one) that is playing
• Title - repeats the title (song) that is playing
To Use Repeat:
1. while a disc is playing, press INFO on the remote or the front of the player to bring up the
Info Display. .
2. Highlight the Repeat icon. The text in the text box below the icons will read Repeat Mode: Off.
3. Press the up/down arrow buttons to scroll through the Repeat options until the Repeat option
you want is displayed in the text box.
4. Press OK. The selected repeat option will loop continually until you turn Repeat off. Repeat is
turned off by completing steps 1 through 3 above, and selecting the Off option.
Using IntroScan™
The IntroScan system plays the first ten seconds of each title (song) on the disc (similar to the scan
feature that’s on many car radios). To use the IntroScan system;
1. Press INFO on the remote or the front of the player (the Info Display appears).
2. Highlight the IntroScan icon. Press OK. The first ten seconds of each title will play.
• After the IntroScan system goes through all of the titles, it stops.
• If you want to stop the IntroScan system while it’s in progress, press PLAY on the remote.
The current title starts playing in its entirety.
• You can also access the IntroScan system from the Play Mode menu in the DVD Player’s
main menu.
The MP3 Screen Saver
The MP3 screen saver appears when an MP3 disc is in the player. Once you begin playback, the
screen saver disappears and the MP3 Info Display and screen appear. After one minute of no user
input, the Info Display and screen will disappear. Press any key to bring up the display again,
Press CLEAR or INFO to remove the Info Display and bring up the MP3 screen saver.
Chapter 4
57
Page 60

This page intentionally left blank.
Page 61

Playing Video CDs
Chapter Overview:
What is Video CD?
The Video CD Disc menu
The Video CD Info Display
Selecting a Specific Track
Chapter 5
Selecting a Specific Index
The Repeat Feature
Skipping Tracks
VIDEO CD
Changing Entertainment. Again.
Page 62

Playing Video CPs
What is a Video CD?
Like DVD video discs, Video CDs contain picture and sound content. Video CDs (VCDs) are
encoded in a different format. VCDs don’t hold as much information as DVD discs and the
picture quality is not as liigh.
VCDs are divided into tracks, and each track is divided into indexes. A track is similar to a title
and an index is similar to a chapter.
The Video CD Disc Menu
A Video CD disc is capable of having an on-screen menu that is separate from the DVD player’s
menu system and on-screen Info Display, If the disc has a menu, the menu will appear after the
disc is loaded into the player.
The content and operation of disc menus varies from disc to disc. Check the instructions that
accompany the Video CD for more information on how to use the playback control function for
that specific disc.
If a disc menu appears:
1. Use the number buttons on the remote to select a track (similar to a title).
2. Press OK or PLAY on the remote to begin playback of the selected track.
3- Press CH + »H or CH -'
through the tracks.
4. Press MENU to stop playback and return to the disc menu or press STOP to stop playback
and return to the DVD player menu.
To bring up the disc menu during disc play, press the MENU button on the remote.
on the remote (SKIP FWD or SKIP BACK on the player) to scroll
60
Chapter 5
Page 63

Playing Video CDs
Video CD Information Display
Your DVi;) playor you sc\ cr.il o(:itions when playing \'ideo CDs, including skipping tracks
and repeat play. You can access these ieatures tlimugh llie Into Hisplay.
The tm-screen Info nisjilay contains many playback Ieatures. The Into Display appears across tlie
top of the screen when you ¡rress the INI-'O button on tlie remote or tiic.’ front of the placer (while
a disc is playing), bach feattire is represented by an icon, bse the arrow buttons to move through
the different icons in the Info Display.
Time Display
When an icon is highlighted, use the l
Playing Video CPs
Selecting a Specific Track
1. I’rcss [NI'O on the remote to Irring up the Info Dis]j[;i\'.
1. I'se the ari'ow Inittons on the remote to higlilight the ieon from the Info Display.
3, I se the number btitton(s) on the remote to enter the trac k numlrer you want t(> pkiy. or u.se
the U]r/clo\\'n arrow button,s to scroll throujtir the tr:tck nunilrers. When a new track mjmber is
entered, tliat track will begin ]:ilaying.
Selecting a Specific Index
1. Pre.ss INI'O on the remote to bring up the Info Di.spla\
1. Highlight the /ui/e.v icon from the Info Display.
I'se the number button(s) on the remote to enter the index nutiiber yott wani to play, or use
the up/dmvn arrerw buttons to scroll through tiie index numbers. When a new index number
is entered, that index will begin playing.
The Repeat Feature
Y(xi can tell the player to repeat the entire di.se, a track, or an index. The default mode for the
Repeat feature is Off. There are three Repeat options:
• Disc - repeats the disc that is playing
• Track - repeat-s the track that is playing
• Index - repeats the index that is playing
To Use Repeat;
1. while a disc is playing, pre.ss INFO on the remote to bring up the Info Display.
2. Highlight the Repeat icon. The text in the text box below the icons will read Repeat Mode: Off.
3. Press the up/down arrow buttons to scroll through the Repeat options until the Repeat option
yc5u want is displayed in the text box.
4. The selected repeat option will begin immediately and loop continually until you turn Repeat
off. Repeat is turned off by completing steps 1 through 3 above, and selecting the Off option,
How to Cancel Repeat
There are three ways to cancel Repeat:
• Press STOP twice.
• Go to the Repeat icon in the Info Display and .select OJf.
62
• Eject the disc.
Note:
Your repeat settings are erased each time you remove a Video CD from the fdayer.
Chapter 5
Page 65

Playing Video CDs
Changing the Audio Channel Output
If you are playing a stereo Video CD, you can change the channel output from the player.
1. Press AUDIO (or INFO) on the remote to bring up the Info Display.
2. Highlight the Audio Channel icon on the Info Display,
3. The audio channel choices appear in the text box. Use the up/down arrow keys to scroll
through the choices: Stereo, Left, Right or Mono. Whatever choice is displayed becomes the
active choice.
Skipping Tracks
To skip forward to the beginning of the next track on a VCD, press CH + *** on the remote
(SKIP FWD on the front of the player). Press the button again to go to the beginning of the
next track.
To skip backward to the beginning of the track that is playing on a Video CD, press
CH + •*' on the remote (SKIP BACK on the front of the player). Press the button again to
go to the beginning of the preceding track.
Note: If the VCD disc was authored with Playback Control (indicated by the PBC light
on the front panel of the DVD player) navigating with CH + **• or CH- buttons may
not work.
Zoom
when playing Video CDs, you can magnify the screen during normal playback. Zoom has 2 levels
(lx, 2x). Zoom magnifies from the center of the screen. Once in Zoom mode, you can pan right,
left, up or down by using the arrow buttons.
1. Press ZOOM on the remote control to magnify. (The zoom level will be displayed in the
corner of the screen. Press CLEAR to clear the zoom Info Display from the screen.)
2. Press the ZOOM button again to go to the next level of magnification.
3. To turn Zoom off, press the ZOOM button until you cycle through all the levels and return to
normal playback.
Note: You can use the 1.5x zoom mode to alter a 16x9 letterbox movie (black bars top and
bottom) to a 4x3 format. This will eliminate the black bars at the top and bottom and allow
you to use left/right arrow keys to pan and scan.
Chapter 5
63
Page 66

This page intentionally left blank.
Page 67

Chapter 6
Using the DVD Player's Menu System
Chapter Overview:
• The DVD Player Menu System
• The Play Mode Menu
• The Lock Menu
• The Display Menu
• The Sound Menu
• The Languages Menu
• The Glossary
Changing Entertainment. Again
Page 68

Using the PVP Player's Menu System
The DVD Player Menu System
The DVD player menu system is not the same as the disc menu or the Info Display. The DVD
player menu comes up when there is no disc playing. If you are playing a disc, press STOP on the
remote control to stop playback and bring up the DVD player menu.
Two Types of Menu Items: Path and Action
Path Items
'.Dl¿iíUy
iffcr
Ckis'f«rv
TMf li:«vhcr« the tilM'ijáéí MuniC^bscn^tlve help
The Sound menu is an example of a
path menu item.
' ^TOi^lal Oulput ^Dolby Digtil
If 2 SR S/Tnf SufTOiMd
■ Sp*a*ier Setuo
' H Erifianc«n>ent4 Nona
OH
A path menu item has an arrot\' tJti the right side tt> let you know this
item is a path to MORE options. To see the path menu options, highlight
the path menu item and press OK, The next set of menu choices appears
to the right of the menu item.
The Sound menu is an example of a path menu item— when the Sound
menu is highlighted, press OK. The Sound options appear on the screen.
Action Items
Action menu items are used in two ways;
The Play option is an example of an
action menu item.
With an action menu item, what you see is what you get. When an action
menu item is highlighted, press OK and that action is taken. Resume Play
on your player’s menu system is an example of an action menu item.
Press OK when Resume Play is highlighted; the menu disappears and
playback is resumed,
Sometimes an action menu item is used as a “toggle." You highlight the
action menu item, press OK, and the selection (shown to the right of the
menu item) changes from one choice to another.
SRS/TruSurround in the
Sound menu is an example of an action menu item chat is a toggle. If you
highlight SRS/TruSurround and press OK, the selection changes from On
to Off and vice versa, each time you press OK. To return to the previous
screen, press the left arrow button.
The Play/Resume Play Option
To get to the DVD Player menu, press STOP on the remote control. The
DVD Player menu will appear whenever a disc stops playing. The first
item in the main menu is the Play/Resume Play option. If there isn’t a
disc in the player, the option reads Play with the prompt Insert Disc to
the right. If there is a disc in the player and it was previously playing, the
option reads Resume Play and the name of the disc is displayed on the
right.
66
Press OK to clear the screen and
resume play.
Any time you stop playback, you will be returned to the DVD player
menu, and the P/oy'option will read Resume Play. To resume play,
highlight the option and press OK, or press the PLAY button on the
remote.
Chapter 6
Page 69

Using the DVD Player's Menu System
The Play Mode Menu
'I'lio DV!) Flayer's Play Mode menu lets yots choose ciitTerent ways to play the disc, To see ¡Hay
.!/(«/('menu options, ;i disc mtist he in the 0\’0 pla\’er.
Selecting a Play Mode
'I’he first three options in the ¡day Mode menu determine in what order the titles or tracks w ill ¡tlav
on a disc.
Standard Play: plays the disc's titles, cha]iters, indexes, or tracks (de]X‘ndinj> on the type of
disc in the player) in tiieir default order (i.e., chapter f of Title 1 plays fir.st, then chttptcr 1 of
Title 1. etc.)
Random Play: plays the chapters of each title in random order.
Program Play: Flays the chapters trn the di.sc in the order you ha\'e programmed (you must
,select Edit Program and set up the order in which you w^ant the tracks on the disc to play ).
RbsUffl« Pity ||Stan(lard Play
5 «andoin Play
L»ck
Sound
iinguages
I Program Play
I Edit Program
I Dub AStift
I AutoPlay On
QlosMfv
This Is where lit« iwo lines of ceiuext sefltmve help
will be l«atad.
Selecting ftandom Play plays the
disc's tracks in random order.
1. If the disc is playing, pres.s STOP (the DVD Flayer's main menu
appears).
2. Highlight the Play Mode menu option
3. Press OK. The Play Mode menu itesns appetir.
a. Highlight the desired option and j^iress OK. Program Play wall ntjt
work unless you httve created a pi'ogram list.
Chapter 6
67
Page 70

Using the DVD Player's IVIenu System
_ __ __ __ __ __ __ __ _
How to Create a Program
To use llie Frof^miii Play option, you must cieute ;i program ii.si to set the order in which you want the tracks (or titles and
chajiters on a DVO \'itieo tlisc anti titles on an MP3 disc) on the disc to play. The I’rogram Play screen varies depending on
the type of tiisc (OVD, CO, or MP,^) you are playing.
Creating a Program List for a DVD Video Disc
Tille Chapter
When the Title box is highlighted, enter
the title number you want to place in
the list-
Pre^rarri
1. If the disc is playing, press STOP to st(t]i playback (the OVO pkiyer
main menu api^ears).
2. Highlight /•’/itr .l/of/e and jiress OK (the ¡‘¡ay Mode m<^nu appears).
.T Highlight Edit Proi>rcw! and press OK (the Hdil Prof^ram screen
appears).
4. The 77//e box is highlighted. l.i,se the up.'down arrows or the
numl.ier buttons on the remote to enter the title you want to play
first. The title number you entered appears in the Title box. The
number of chapters available appears under the Chapter box.
5. Highlight the Chapter bo-K and use the up/down arrows or the
number buttons on the remote to enter the chapter you want to
play first and press OK. The highlight jumps to the Add button.
6. Press OK to add that chapter to the Program List. The highlight
jumps back to the Title box so you can add more titles and/or
chapters. Make sure the Tttlebox is highlighted and enter your next
title and/or chapter.
7. Continue adding title,s/chapters as explained in steps 4-6 until your
program is complete. You can play your program by highlighting
Play and pressing OK, or you can save the program by highlighting
Done and pressing OK. If you save the program, you can select it
frcjm the Info Display while the disc is playing. The program will be
erased when you remtwe the disc from the player.
68
Chapter 6
Page 71

Using the DVD Player's Menu System
Creating a Program List for an Audio CD
1. If the disc is [ikiying, press STOP to stop playback (the DVD player main menu appears).
2. Highlight Play Mode press OK (the Play Made menvi appears).
Highlight Pdit Program and piess OK (the Edit Pwyram screen aiipears).
3.
4.
The Track box is highlighted- Hse the up/dovvn arrows or the number buttons on the lemoie
to enter the track you want to [ilay first. Press OK.
The highlight will mo\-e to the Add box. Press OK to add that
5.
¿/iV(ihe track number and time will appear in the Program List).
6.
The highlight will mow hack to the Tntck box so you can enter the next track into the
Program List. Make sure the Track box highliglited and enter your next track.
7. Continue adding titles as expktined in steps 4-5 until your program is complete. You can play
your program by highlighting Play and pressing OK. trr ytru can save the program by
highlighting Done and pressing OK. If you .save the program, you can select it from the Info
Display while the disc is playing. The program will be erased when you remove the disc frttm
the player.
track to tlie Program
Creating a Program List for an MP3 Disc
Pr<>0r»mfysti,
Cl
(24)
iFiies of conUKi sensMIve'l^lp;'
When the Track box is highlighted,
enter the track number you want to
place in the list.
1. If the disc is playing, pre.ss STOP to stop playbtick (the DVD player
main menu appears).
2. Highlight Play Mode'¿nd press OK (the Play Mode menti appears).
3. Highlight Edit Program and pre.ss OK (the Edit Program screeii
appears),
4. On the left side of the screen the standard playlist is displayed. This
is a scrollable list of all the directories and filemtmes. To open a
directory, highlight it and Press OK.
5. Highlight the title (song) you want to play fir.st. When you highlight a
title the title information is displayed ;tt the bottom of the .screen.
Chapter 6
6. Use the left/right arrow buttons to highlight the Add box. Press OK
to add that title to the Progratn List (the title number and time w'ill
appear in the Program List).
Note: If the highlight is on a directory when you use the Add option, the
entire contents of the directory will be acided to the playlist.
7. The highlight will move back to the Standard Playlist so you can
enter the next title into the Program List. Highlight and enter your
next title.
8. Continue adding titles as explained in steps 4-7 until your program is
complete. You can play your program by highlighting Play and
pressing OK, or you can save the program by highlighting Done and
pressing OK. If you save the program, you can select it fnrm the Infci
Display while the disc is playing. The program will be erased when
you remove the disc from the player.
69
Page 72

Using the DVD Player's IVIenu System
Editing a Program
Deleting Items from the Playlist
'I'o tlelctc keni.s trom tlic pl;iyli.si:
Tille Chapter Program List
To delete an entry from the Program
List, highlight it, then highlight Delete
and press OK.
1. If tin.' tli.se is piayin;.^. [Mvss STOP u> sioj’] ]i!a\hatk (ihe DVD player
main menu appears),
2. Hii;hlight Play Mode press CTK (the Play Mode appears).
3. I lighliiilit Pdif Program anti pi ess OK (ihe Pdil Proyi wii st reen
appears).
4. Mijililight the item in the Prtytiram List yoti want to delete.
5. Highlight Dtdete. and press OK.
6. Wlien you are finisheci rearranging the Program Li.st, highlight Done
and press OK.
Inserting Items in the Program List
To insert items into the Prtrgram List:
1. If the di.se is playing, press STOP to .sttip playback (the DVD player
main menu appears).
2. Highlight Play Modepre.ss OK (the Play Mode menu appears).
3- Highlight Edit Program and pre.ss OK (the Edit Program screen
appears).
4. Use the left/right arrow keys to move the liighlight to the program
list. Use the up/down arrow keys to mark the spot in the Program
List where you w'ant to insert an item (the inserted item will be
placed before the highlighted item).
70
5. Highlight the C/tap/er/Track/Standard Playlist box and use the up/
down arrows or the number buttons on the remote to enter the item
you want to play first.
6. Highlight insert and press OK.
7. When you are finished rearranging the Program List, highlight Done
and press OK.
Chapter 6
Page 73

Using the PVP Player's IVIenu System
Autopiay
You can set the Autoplay option to play your disc automatically after you close the disc tray.
1. From the DVD player's main menu (player ON, no disc playinj») highlight the Play Mode
option and press OK.
2. The Play Mode selectir^ns appear. Highlight the Autoplay option and press OK to toggle the
option on/off.
3. Press the left arrow button to rettirn to the previous menu or press GO BACK*AGAIN to
return to the main menu.
Dub Assist
Dub Assist helps you record an Audio CD onto an audio cassette tape by determining the number
of tracks that will fit on one side of the tape so you have time to turn the tape over to record on
the other side.
To use Dub Assist when you’re recording an Audio CD onto an audio cassette:
1. Press STOP if a CD is playing (the DVD Player's main menu
appears).
The Dub Assist Screen.
2. Highlight Play Mode and press OK (the Play Mode options appear).
3. Highlight Dub Assist'¿nd press OK (the Dub Assist appears).
4. The highlight should be in the Play Orc/er window. Choose
Standard, Optimized, or Program.
Standard: This is the default mode. The tracks are recorded in
the order on the CD (track 1 is recorded first, track 2 second, etc.)
Optimized: The tracks are recorded in the order that optimizes
the number of tracks that can fit on one side of the audio
cassette so you have the least amount of dead space at the end
of the tape.
Program: The tracks are recorded in the order you program.
You must create your program in the Edit Program menu that’s
in the DVD Player’s Play mono.
5. Use the arrow keys to highlight the Segment Length box. 'When the
Segment Length box is highlighted, use the up/down arrow buttons
to enter the length of one side of the audio cassette.
6. The order the tracks will be recorded in appears in the SegmentWsi.
Use the arrow keys to highlight the Start box and press OK.
7. Follow the instructions on the screen to begin recording.
Chapter 6
71
Page 74

Using the DVD Player's Menu System
The Lock Menu
Tile padlock icon on the front of your DVT) player .shows whether your player i.s lockerl or
unlocked.
Locked: A password is needed in order to play discs that aren’t includetl in the rating
limits yoLi have set. VXdien the player is locked, no one can access the Lock Menu items
without entering the passt\'ord.
1^ Unlocked: .A passworri isn’t required to play discs.
Locking Your DVD Player
glotk Playir
2 UihQik. Player
3 Chil(1t|4 1^ai¥WJri3
4 &c«n« 5nip
5 Ri)lin(|ti Liniil!i
6 From Tmir Loc*
7 Sy«lem Tesi
Enter Metir Password
Conl*rm New Password
appears).
2. Highlight Lock and pres.s OK (the Lock menu items appear),
3- Highlight Lock Player znA press OK. The Enter New Password scteen.
appears.
4. Press the number keys on the remote to enter the password you
want to use (similar to entering your PIN when you use a bank
machine).
1. If the di.se is playing, press STOP (the DVT) Player’s main menu
Use the numbers on the remote to
enter a password.
5. After you’ve entered the last number in the password, press OK,
Confirm Password appears.
6. Enter the numbers you entered the first time and press OK when
you're finished. You are returned to the main menu.
Unlocking Your DVD Player
1. If the disc is playing, press STOP (the D'VD Player's main menu appears).
2. Highlight Lock and press OK.
3- The Enter Password ho\ appears. Enter your password and press OK (the Lock menu options
appear).
4. Highlight Unlock Player and press OK. The locked icon changes to unlocked.
Changing Your Password
The player must be locked to change the password.
1. If the di.sc is playing, pre.ss STOP (the DV^D Player’s main menu appears).
2. Highlight Lock and press OK. Enter Password appears on the screen. Enter your password.
3- Highlight Change Password and pres.s OK. Enter New Password appears.
4. Press the number buttons on the remote to enter the new password you want to use and
press OK. Confirm Password -¿ppeiiTs.
5. Pre.ss the number keys to enter the pa.ssword again and press OK when you’re finished.
72
Chapter 6
Page 75

Using the DVD Player's IWenu System
Editing Your Scene Snip Disc Library
The Disc Library consists of a mimhered list of titles tliat have been edited. If no disc title is
available, the title will be DVD. If yon play a disc from the disc libraiy he player must he locketl in
order for the edits to take affect.
How to Edit the Disc Library
1. If the disc is [^laying, press STOP (the DVD Player's main menu
appears).
2, Highlight Lock and press OK {the menu appears).
,S. Highlight Scene Snip lidit and press OK (the Scene Snip Disc Library
screen appears).
This l8 where the two lines of context help
be (ocated.
Select a title and highlight Remove &
Restore to remove all edits and restore
the disc to its original version.
Note: Yon must edit a marie before it appears in the Disc
Lihraiy. Movies yon have not edited trill not appear in the
Lihrar]' (see chapter 2).
4. Highlight the title of the movie you want to remove from the list.
Highlight Remove & Restore and press OK.
• A message appears asking if you are sure you want to remove all
the edits and restore the disc to the original version.
5. Highlight Kesand press OK. The disc will be restored to its original
\ersion and removed from the Disc Libraiy.
6. Press the left arrow key to return to the main menu.
Setting the Ratings Limits
The Ratings Limits feature is a rating limit system, sort of like movie ratings. It works with
DVD discs that have been assigned a rating. This helps you control the types of DVD.s that
your family watches.
Note: The player alerts you when you try to play a movie with a rating that exceeds the
limit you’ve set. Some discs include a rating override feature. When you play a disc with
this feature, the message Override Limit or Cancel Selection appears on the screen. If
you choose to override the rating limit, you will need to enter your password to begin
playback.
Changing to a Different Country's Rating System
Some countries use different rating systems. The default for this DVD player is the United
States. You can change to a different country’s rating system through the ¿otifemenu.
1, If the disc is playing, press STOP (the DVD Player’s main menu is displayed).
2. From the main menu, highlight the Lock option and press OK (the Lock menu appears).
3- Highlight Ratings Limits and press OK (the Ratings Limits menu appears).
4. Highlight Country md press OK (a list of countries appears).
5. Highlight the country you want to change to and press OK (the country you selected appears
next to the Country path menu).
6. Press the left arrow key to return to the main menu.
Chapter 6
73
Page 76

Using the DVD Player's Menu System
Rated Titles
The Rated Titles option lets you determine how your player will react to discs that contain movies
that are rated (in the I'.S.A., the Motion Pictures Asstx'iation ttf America (MMPA) rates movies as G,
PG, PG-13, etc).
You decide which ratings require a password and which ttnes don’t. This system ranks the ratings 1
through 8 in order to accommodate different ccjuntries' ratings systems (1 is considered a movie title
with the least offensive material).
In order for the Rating Level feature to work, the disc must be encoded with rating information. If
the authtrr of the disc did not encode rating inlormation, then this feature will mA work fcrr that disc.
The DVD Player must be locked in order for it to enforce the .settings in the Ratings Limits part of
the Lock menu.
1. From the Lock menu, highlight Ratings Limits and press OK (the
Ratings Limits menu is displayed).
2. Highlight Rated Titles and press OK (the 8-ievel rating limits list
V appears).
3. To change the rating limit, press the up or down arrow button.
• The ratings that don’t require a password (free access) appear
under the bar, in the green part of the block.
Access
• The ratings that require a pa.ssword appear above the bar, in
the red part of the block.
The Rated Titles screen lets you set
the Rating Limit
4. When you have moved the bar to the desired setting, pres.s OK. You
are returned to the Rated Titles screen and the setting appears to the
right of the Rated Titles option, For example, if you set 3 as the
highest rating for Free Access (green), then the Rated Titles selection
appears as 3 (that’s the player’s number for PG in the 8-level system)
for the movie studio’s rating. This means when the player is locked,
it will require you to enter the password to play any discs that are
rated higher than 3 (i.e., PG-13 or NC-17),
5. Press the left arrow button to return to the main screen.
74
Chapter 6
Page 77

_ __ _ __ _ _ __ _ __ _ Using the DVD Player's B/leiiu System
Unrated Titles
Some titles (movies) aren’t rated, but may contain material that is unsuitable for children. You decide
how you want the Ratings Limits ie^lViK of your player to handle these discs: free access or
password required. To set the Unrated Titles option:
1.
From the Lock Menu, highlight Ratings Limits -dnd press OK.
2.
Highlight Unrated Titles and press OK. The Unrated Titles options
appear.
3.
Use the up/down arrow buttons to highlight your choice: Free Access
or Password Required. Press OK. You are returned to the previous
screen, and the option you chose is displayed next to the Unrated
Titles option.
4. Press the left arrow key to return to the main menu.
Choose Unrated Titles to set free access
or require a password for unrated titles.
Front Tray Lock
You can lock the front tray of the DVD player so it can’t be opened.
1. From the Lock menu, highlight Front Tray Lock. Press OK to toggle the Front Tray Lock
setting On or Off.
• “Tray is locked" appears when the player is locked (the Front Tray Lock feature is turned
on) and you try to open the front tray of the DVD player.
2. Press the left arrow key to return to the main menu.
Note: Lf the player is locked, you will be prompted for the password before you can access
the Tray Lock option from the Lock menu.
System Test
1. Highlight System Tasi within the Lock menu.
2. Press OK to display the System Test Results screen.
3. Press the left arrow key to return to the main menu.
Chapter 6
75
Page 78

Using the OVD Player's IVIeiiM System
The Display Menu
Thu Display muiiLi uontains tlie sutiiiij's that affuct how di.su content looks on your’IV and how
the honi display panel td the DVD player looks.
TV Image
The TV hnagu menu adjusts the wa>' a movie appears on yotir 1\. Standard TVs Lire -i x 3 Ibrmat.
Depencling on the tyiie ol television you ha\e. you irttiy want to atijust the screen .setting (also
called the aspect ratio).
1. From the DVD Player's main menu (player ON, no disc playing),
highlight Display :im\ j^russ OK (the Display opuons appear).
Z. Highlight 'H’liuape. Press OK. The 7V/t»fi,gc options appear.
• 4x3 Letterbox — ChcKxse this setting if you tt'ant to see movies in
their original aspect ratirt (height-to-width ratio). You’ll see the entire
frame of the movie, but it will take up a .smaller portion of the screen
vertically. The movie might appear with black bars at the top and
bottom of the screen.
_ __ _ __ _ __ __ _ __ _
4x3 Letterbox
4x3 Standard
16x9 Widescreen
4x3 Standard ~ Choose this setting if you want the movie to fill
the entire screen of your TV. This might mean that parts of the
picture (the left and right edges) won't be seen.
Most discs produced in a widescreen format can't be cropped in this
fashion. This means the black bars will appear at the top and the
bottom of the screen,
16 X 9 Widescreen — Choose this setting if your DVD Player is
connected to a widescreen TV. If you choose this setting and you
don’t have a widescreen TV, the images on the screen may appear
distorted due ttr vertical compre.ssion.
If you play a disc recorded in 4 x 3 format on a widescreen TV, the
left and right .side of the screen will appear black.
Some movies are actually slightly wider than 16 x 9. In this case,
black bars will appear at the top and bottom of the screen even in
■Widescreen mode.
Note: Some discs are already formatted with black bars so the
entire image can he seem on a standard TV screen. If you have a
widescreen TV and you are playing this type of disc, you will need
to set your TV to expand the image. See your TV User 's Manual.
76
Chapter €
Page 79

Usingf the PVP Player's Menu System
Front Display
This feature' lets you dioose how the frttnt display panel on your DVD Player appears.
1. From the' DVD Player's main menu (player ON. no eli.se playinsj). hii>liliiiht nis/)/ay :im\ press
OK (the Dixj}lay mmu appeals).
2. Highlight FroHi PispUi vAnd pre.ss OK. You can choose from s settings:
• Dim for Mf)vie.s (dims when disc is playing)
• Off for Movies (ntr display w'hen disc is playing)
• Alw'ays Hright
• Always Dim
The default is Dim for Mo\ ies.
5- Highlight the setting )-oti want to use anti j^ress OK. Press the left arrow button to return to
the previous menu. Your seleetitm is displayed next to the Front Display p:\i\i menu.
4. Press the left arrow button to go back to the main menu.
On-Screen Displays
Thi.s feature lets you select wdiether you want certain on-screen displays to appear on the screen.
It contains three choices with check boxes next to them:
• Information Display ~ When turned on, displays time transport inhrrmation when you are fast
foiwarding or reversing playback.
• Angle Indicator - When turned on, displays camera angle icon if more than one camera angle
is available.
• Scene Again Text - When turned on, displays subtitles when you use the Scene Again feature.
The default is to show all on-screen displays. To turn one of the options on or off:
Q IaIo Displays
QjAiigla lAdIcMor
itiix.irtM! Text
Dhplayitj'
The On-Screen Displays option lets you
choose which on-screen display items
appear on your TV screen.
From the main menu, highlight the Display option and pre.ss OK (the
Display menu appears).
Highlight the On-Screen Displays r>ption and press OK (the three on.screen display options appear on the right).
Highlight an option and press OK. Thi.s toggles the option on or off.
Pre.ss the left arrow key to return to the main menu.
Chapter 6
77
Page 80

Using the DVD Player's Menu System
The Sound Menu
Tlie Stnmtl niL-nu lets ycni select clilTeient sound settings to match the eciuipment you ha\ e
conneeietl to yotir HVO Player.
Digital Output
Digital outpLit lets you choose whit:h type of digital audio is output from your DVD player. If
yoLi've used an ojitical cable to connect a Dolby Pro bogie. Dolb\' Digital, oi' DTS recei\ er. you
must select a digital otUpta with this setting. There are two options:
• Doib\- Digital: Choose this setting if yoti connected a Dolby Digital receir er.
• DTS: Choo.se this setting il you connected a DTS receiver or decoder to your DVD Idayer.
You can check both options if your receiver is capable cjf decompressing btrth types trf audio. The
default is Dcrlby Digital. Ttr change the digital output:
R«tucnt PI«Y
PUy M4d«
Display < \ Diyiial Oatpul * Dolby Di0k>j
|V ' ; 1 IsRS/TriiJSurround j Off
Lartguages aSpeake/ Selup |
Clossafv S EnhapcaiTianls : Non^
This is where the two lines of context sensrtiire help
will be located.
Select the Digital Output option
from the Sound menu.
1. From the main menu, highlight and select the option and
press OK (the Sound menu is displayed).
2. Highlight the Digital Ott/ptii option and pre.ss OK.
i. Highlight the desired output and press OK.
4. Pre.ss the left arrow key to return to the main menu.
Notes:
If you set Digital Output to DTS. you must have your DVD Player
connected to a receiver or decoder with the DTS feature and the
disc you play must support the DTS audio format. If you choose
DTS and your receiver or decoder doe.'in t support DTS. you iron t
hear any audio.
78
Chapter 6
Page 81

_ __ __ __ __ __ __ _
Using the PVP Player^s iVleim System
TruSurround®
The TruSurround® option can he used to simulate a six-speaker listening experience through two speakers. It can be turned
on or off. The default is off. To turn the TruSurround® ciption on:
1. From the Sound menu, highlight the 7niSurround option and pres.s OK.
2. Highlight On and press OK,
3. Press the left arrow key to return to the previous menu.
Notes:
The TruSurroinuT opiivn should not he lunted on if you are using a Dolby Digital or DTS receiver. Your receiver
provides optimum sound cptality.
The TS Surround button on the Front Panel of the DVD Player can he also he used to change the TniSurrouncP'
setting. Each press of the button toggles the setting between on and off.
Speaker Setup
1. From the Sound menu, highlight the Speaker Setup option and press
OK (the Speaker Setup menu is displayed).
2. Highlight the Speakers option and press OK. (The Speaker Size
screen will be displayed. Representations of different types of
speakers will be displayed on the right side of the screen.)
ilintlMltd
¿p/down tliCjSlitetpf.thelriirnt’ ’
' ^i^eted to yoirr’sy»rem: oic to- «e№cr ■
Use this Speakers menu to select
and set up your attached speakers.
3. Highlight Front, Center, Subwoofer ot Surround. The highlighted
choice will also be highlighted in the graphic to the right of the list.
4. Use the right arrow button to move to the Speaker Size list
(underneath the graphic on the right). Select the size of your
speakers (or None if you don’t have that type of speaker hooked up)
and press OK.
5. Use the left arrow button to return to the speaker list and select the
next type of speaker, repeating the process above.
TruSurround and the C«) symbol are trademarks of SRS Labs, Inc. in the United States and selected foreign
countries. TruSurround technology is incorporated under license from SRS Labs, Inc.
Chapter 6
79
Page 82

Using the DVD Player's Menu System
Set the Distance of the Attached Speakers
Use tile Disldnee oplnm to set the distance of the attached speakers. By setting the di.stance, you are
letting the speakers know how far the sound lias to travel to reach your set listening point. This
allows the soLintl from each speaker to reach the listener at the same time.
1. I’roiii the Sound menu, higlilight the Speaber Setup o’piion and press
OK (the Speaker Setup menu is displayed).
2. Highlight the Distance option and press OK. (The Distance screen
will he displayed. Uepreseiitations of different types of speakers will
pistanc^.
Us« the <jp/down arrow keys to set the listening distance.
Adjust the Distance and Level of the
speakers.
he displayed on the right side oi’ the screen.)
3. Highlight Front. Center. Snbivoofer or Surround. The highlighted
choice will also he highlighted in tiie graphic to the right of the list.
The + synihol in the middle of the grajihic represents the distance
from the speaker to the listening point.
Note: Representations of different types of speakers are displayed
in a graphic on the right side of the screen. Speakers that you
have not hooked up will appear grayed out. )
4. Use the right arrow button to move to the Feet box displayed
underneath the graphic. Use the up/down arrow keys to adjust the
distance for the highlighted speakers. Press OK.
5. Use the left arrow button to return to the speaker list and select the
next type of speaker, repeating the process above.
Note: If you don’t want to make any changes, press CLEAR to
return to the main menu or GO BACK to return to the Speaker
Setup menu.
Set the Level of the Attached Speakers
Use the Level erption to set the volume of the attached speakers. You can set the volume level of
each speaker individually.
1. From the Sound menu, highlight the Speaker Setup option and press OK (the Speaker Setup
menu is displayed).
2. Highlight the Level option and press OK (The l.evel screen will appear).
Note: Representations of different typ>es of speakers are displayed in a graphic on the right
side of the screen. Speakers that you havenot hooked up will appear grayed out.)
3. The highlight will be on the left front speaker, and the text beneath the graphic will display
“left front speaker " with the setting for that speaker displayed under the text.
A te.st tone i.s emitted, beginning with the highlighted graphic. The tone rotates aremnd the
speakers, playing through each speaker for approximately 2.5 seconds. If you highlight a
speaker or change the setting on a speaker the te.st tone moves to that speaker.
4. Use the down arrow button to move to the Settings box. The .setting is measured in decibels.
Use the up/down arrows to change the level setting for the highlighted speaker. Press OK to
return the speaker graphic.
5. Use the left/right arrtrw buttons to navigate to the next speaker. As each .speaker is
highlighted, the text changes to indicate which speaker it is. Repeat steps 3 and 4 to set the
level for each speaker you have hooked u]5.
Note: If yon doti’t want to make any changes, press CLEAR to return to the main menu or
GO BACK to return to the .Speaker Setup menu.
80 Chapter 6
Page 83

Using the DVD Player's Menu System
Enhancements
The Enhancements feature compresses the dynamic raiiite (quietest sound to loudest stnmd) of a
disc’s soundtrack. For example, action scenes mijiht he veiy loud, while whispered dialog is
quiet. The Enhancements feature e\'ens out the range of the \'oiume by making loud sounds
quieter and soft .sounds louder. The Enhancements feature has three options.
• None - No change to the range. Sotind is played as it \\'as recorded on the disc.
• Compressed - The range between loud and soft is smaller.
• Voice+™ - Increases the volume of \aMces.
To change the Enhancement:
1. From the DVD Player's main menu, highlight Sound and pre.ss OK
(the Sound menu appears).
2. Highlight the Enhancements option and press OK (the
Enhancements options will appear).
|^«a|c«r âriup
:44 Enhancent«nta
3. Press the up/dowm arrocv buttons t(3 select the desired option.
4. Pres.s the left arrow buttcrn to return to the Scrund menu.
Select the Sound Logic option from the
Sound menu and press OK to toggle
Sound Logic on or off.
Note: The performance of the Enhancements feature varies
depending on the type of equipment yon have connected to your
D\~D Pla] er and the audio format of the disc you re playing.
Chapter €
81
Page 84

Using the DVD Player's Menu System
The Languages Menu
The Languages mernj enables you to choose different language options for audio, subtitles, Disc
Menu items and DVD player menu items. The default for all language menu items is English.
Changing the Player Menus Language Preferences
You can choose one of three languages for the text that appears within the on-.screen menu
system. The default is English. If you change the Player Menu language, the entire player menu
system will be displayed in the selected language.
1. From the main menu, highlight and select the Latigitages opuon fthe Languages menu is
displayed).
2. Highlight Player Menus and press OK (the language choices for the DVD Player’s menu are
displayed).
3- Highlight the language you want to use for the menu items and press OK. The menu appears
with your selection shown next to Player Menus.
4. Press the left arrow button or press GO BACK»AGAIN to return to the previous menu.
Changing the Disc Menus Language Preference
The Disc Menus option enables you to choose which language you want to use to display the disc
menus.
1. From the main mentt, highlight and select the Languages option (the Languages menu is
displayed).
2. Highlight Disc Menus and press OK (the Disc Menus language options are displayed).
3- Highlight the language you want to use for the disc menus and press OK. Press the left arrow
to return to the previous screen. The menu appears with your selection shown next to Disc
Menus.
4, Press the left arrow button or press GO BACK« AGAIN to return to the previous menu screen.
How to Set Other as an Disc Menus Language Option
If the language you want to use isn’t listed, you can use the OiAer option to select the language of
your choice,
1. From the main menu, highlight and select the Languages option (the Languages menu is
displayed).
2. Highlight LDisc Menus and press OK (the Disc Menus language options are displayed).
3. Highlight Other and pre.ss OK.
4. Enter the code from the Language Codes list at the end of this chapter and press OK (the
previous menu appears with your selection shown next to the Disc Menus path menu).
3- Press the left arrow button or press GO BACK «AGAIN to return to the previous menu screen.
NOTE: Remember, your player can't play the disc in the language you have chosen if the
disc wasn’t created with that language option.
82
Chapter 6
Page 85

Using the DVD Player's Menu System
Changing the Audio Language Preference
The Audio Language menu enables you to choose which language you want to listen to the
movie in.
1. From the main menu, highlight and select the Languages option (the Languages menu i.s
displayed).
2. Highlight Audio'An<\ pre.ss OK (the audio language options are displayed).
3- Highlight the language you want to use for the audio portion of the discs and press OK. Press
the left arrow button. The menu appears with your selection shown next to Audio.
4. Press the left arrow button or press GO BACK»AGAIN to return to the previous menu screen.
How to Set Other as an Audio Language Option
If the language you want to use isn't listed, you can use the Other option to select the language of
your choice.
1. From the Languages menu, highlight and select the Audio option (the Audio menu
is displayed).
2. From the Audio menu, highlight Other nnd press OK.
3. Enter the code from the Language Codes list at the end of this chapter and press OK. The
menu appears with your selection shown next to Audio.
4. Press the left arrow button or press GO BACK'AGAIN to return to the previous menu.
NOTE: Remember, your player can’t play the disc in the language you have chosen if the
disc wasn’t created with that language option.
Chapter 6
83
Page 86

Using the DVD Player's Menu System
Changing the Subtitle Language Preference
The Subtitles menu lets you choose a preferred language for the subtitles. The default is Auto. The
Auto preference defaults to the same language that has been set as the audio language preference.
To change the subtitle language preference:
1- From the main menu, highlight and select the Languages option (the
F PlayM Manus
2 Oifrc Msnua
3
O
^ English
^ French
^ Spanish
languages menu is displayed).
2. From the Languages menu, highlight Subtitles and press OK (the
Subtitle menu is displayed).
3. Highlight the language you want to use for subtitles and press OK.
Press the left arrow button. The menu appears with your selection
shown next t(3 Subtitles.
4. Press the left arrow button or press GO BACK »AGAIN to return to
Select Other and enter the
appropriate language code.
the previous menu.
Note: Remember, your player can't play the disc in the language
you have chosen if the disc wasn't created with that language
option.
How to Set Other as the Subtitle Language Preference
If the language you want to use isn’t listed, you can use the Oiiber option to select the language of
your choice.
1. From the main menu, highlight and select the Languages option (the Languages menu is
displayed).
2. Highlight and select the Subtitles option (the Subtitles menu is displayed).
3. From the Subtitles menn, highlight Other'¿nd press OK.
4. Enter the code from the Language Codes list at the end of the chapter and press OK (the
previous menu appears with your selection shown next to the Audio path menu).
5. Press the left arrow button or press GO BACK »AGAIN to return to the previous menu.
NOTE: Remember, your player can’t play the disc in the language you have chosen if the
disc wasn’t created with that language option.
84
Chapter 6
Page 87

Using the DVD Player's IVIemi System
Glossary
The glossary contains definitittns and information about titu tcatmvs aiul conuol.s on youi- 1>\T)
Player.
1 Resump Pl^y
2 Play Mode
3 Lock
Л Ui!t|>lay
5 Sound
6 Language»
Ecioss^rv
Sonio di--fs ti'
inuilij.'ie
l!.•!'.'k'' lI'-.'-Mir,-
ltHn:-.J.lll'iriS *;0 I
fiitJl I'lMnitC'l
ijr I Lit I 'Jijrj ij H
t у [ ! b .
i on
lliu niLiii (Imilli
uti-'l iNb-iJ
AlidfLi
The Glossary explains terms used
regarding your DVD player and discs.
1. IftlK- disc is playing. piL'ss S'l'ni' uhc 1)\ 1) Pla\\a's main menu
apiacaisl.
2. Higliliglu (i'/ii.\Si/rr and iin'-ss ( )K (llu- i iloss.ii v .ip|)c,trsc
.T 1 sc the atrov\ hunuus ou naiuili.' lo liigliligfn dilkrcnl tciiu.s.
rilc tlcflniti<iiis a])|H-.ii ( m 11 c ligl 11 side i >1 llu' s( i'cl’H
Some glossar\' di'l ill ii i'a Is .nv moiv iban чш.' page, liie stiotl коп
appears in the defiiiilion bo\ lo iel \a >u luiow w hi ii ihere's a
ser'oml page.
'I'o .see the rest ol the th-hnilion:
a. Pre.ss the right arrow bmion. I he glossary dehniiion is
Itighlighted.
b. Press the down ariow buiion, I lie second |xige of the
definition appears.
c. ihess tile up arro\> biiueii lo ninin lo iIk- liist page ot the
delinition or juess г К > И.Лг '.К ».Лг j.AIN lo reUirn to the main
menu
■ i. Press the left arrow liuinat to letnrn i.i tiie DN'bi Plarei's main
menu,
Chapter 6 85
Page 88

Code List
Don't forget to press the OK button after you enter the code.
Language
Abkhazian
..................................
Code Language Code Language
6566
Afar.............................................6565
Afrikaans
....................................
6570
Albanian.....................................8381
Ameharic
Arabic
Armenian
....................................
.........................................
....................................
6577
6582
7289
Assamese....................................6583
Aymara
Azerbaijani
Bashkir
Basque
Bengali; Bangla
Bhutani
.......................................
.................................
.......................................
........................................
..........................
.......................................
6588
6590
6665
6985
6678
6890
Dutch........................................................7876
English......................................................6978
Esperanto.................................................6979
Estonian
Farnese.....................................................7079
Fiji
Finnish
French
Frisian
Galician....................................................7176
Georgian...................................................7565
German....................................................6869
Greek........................................................6976
Greenlandic
...................................................
...........................................................
.....................................................
......................................................
......................................................
.............................................
6984
7074
7073
7082
7089
7576
Japanese
Javanese
Kannada
Kashmiri
Kazakh
.........
........
........
........
..........
Kinyarwanda ...
Kirghiz
Kirundi
Korean
Kurdish
Laothian
Latin
..........
..........
...........
..........
........
..............
Latvian, Lettish.
Lingala
..........
Code
.7465
.7487
.7578
.7583
.7575
.8287
.7589
.8278
.7579
,,7585
,.7679
..7665
„7686
,.7678
Bihari..........................................6672
Bislama.......................................6673
Breton.........................................6682
Bulgarian ...................................6671
Burmese......................................7789
Byelorussian
Cambodian
...............................
.................................
6669
7577
Catalan........................................6765
Chinese
.......................................
9072
Corsican......................................6779
Croatian
......................................
7282
Czech..........................................6783
Danish
.........................................
6865
Guarani....................................................7178
Gujarati
Hausa ......................................................
Hebrew.....................................................7387
Hindi.........................................................7273
Hungarian................................................7285
Icelandic...................................................7383
Indonesian
Interlingua
Interlingue
Inupiak.....................................................7375
Irish
Italian.......................................................7384
...................................................
...............................................
...............................................
...............................................
..........................................................
7185
7265
7378
7365
7369
7165
Lithuanian
.....
Macedonian
Malagsy
Malay
Malayalam
Maltese
Maori
Marathi
Moldavian
Mongolian
Naru
Nepali
.........
............
.....
..........
.............
..........
.....
.....
..............
...........
Norwegian.....
„7084
...
„7775
„7771
„7783
„7776
..7784
..7773
..7782
„7779
„7778
„7865
„7869
„7879
86
Chapter 6
Page 89

Don't forget to press the OK button after you enter the code.
Code Language Code Language Code
Code List
Occitan
........................................
7967
Oriya...........................................7982
Oromo (Afan).............................7977
Panjabi
Pashto, Pushto
.......................................
............................
8O65
8083
Persian.........................................7065
Polish..........................................8076
Portuguese
Quechua
..................................
.....................................
8084
8185
Rhaero-Romance........................8277
Romanian
Russian
...................................
.......................................
8279
8285
Samoan.......................................8377
Sangho........................................8371
Sanskrit
.......................................
8365
Sesotho ......................................8384
Setswana.....................................8478
Shona..........................................8378
Sindhi
..........................................
Singhalese
..................................
8368
8373
Siswati........................................8383
Slovak
........................................
Slovenian
Somali
Spanish
Sundanese
Swahili
Swedish
...................................
........................................
.......................................
..................................
.......................................
......................................
8375
8376
8379
6983
8385
8387
8386
Tagalog.......................................8476
Tajik
...........................................
8471
Thai
..........................................................
Tibetan
.....................................................
Tigrinya
Tonga
Tsonga .....................................................8483
Turkish.....................................................8482
Turkmen....................................................8475
Twi.
Ukrainian
Urdu.........................................................8582
Uzbek................................................8590
Vietnamese
Volapük....................................................8679
Welsh
Wolof........................................................8779
...................................................
.......................................................
................................................
..............................................
.......................................................
8472
6679
8473
8479
,8487
8575
8673
6789
Scots Gaelic................................7168
Serbian
ServO'Croatian
.......................................
.......................................
8382
8372
Tamil
..........................................
Tatar
...........................................
8465
8484
Telugu.........................................8469
Xhosa........................................................8872
Yiddish.....................................................7473
Yoruba
....................................................
8979
Zulu............................................9085
Chapter 6
87
Page 90

This page left intentionally blank.
Page 91

Other Information
Chapter Overview;
• Troubleshooting
• Care and Maintenance
• The Universal Remote
Chapter 7
• Front Panel Controls
Front Panel Display
Limited Warranty
Accessory Ordering Information
Changing Entertainment. Again
Page 92

other Information
Troubleshooting
If you are experiencing product operation problems, please review the troubleshooting section before you call for service. Refer
to the Limited Watrantyfor information on hoiv to obtain repair service.
Player won't work
Reset the DVD Player by unplugging the AC power cord and plugging it back in.
No Power
Plug in the DVD Player. Make sure botli ends of the AC power cord are securely plugged into the player and into an AC outlet.
Disc won't play
Insert a disc with the label side facing up.
Check the type of disc you put into the player. This player only plays DVD video discs, Video CDs, audio CDs, CD-R discs and CD-
RW discs.
If the disc is a DTS music CD, it requires a DTS decoder. If you have a DTS receiver hooked up to your DVD player and you are still
not getting sound, make sure the Trusurround* option is turned off.
Both the player and the disc are coded by region. If the regional codes don’t match, the disc can’t be played. This player is Region
No. 1. '
Play starts, but then stops immediately
The disc is dirty. Clean it.
Condensation has formed. Allow player to dry out.
No picture
Turn your TV to its Video Input Channel (see chapter 1).
Turn on the TV.
Make sure your player is connected properly. Make sure all cables are securely inserted into the appropriate jacks,
No sound or distorted sound
Make sure your player is connected properly. Make sure all cables are securely inserted into the appropriate jacks.
You may need to readjust the Digital Output or Analog settings from the Sound menu (see chapter 6).
Turn your TV to its Video Input Channel (see chapter 1).
Sound is muted during still, frame advance, or slow-motion play.
If you connected an audio or audio/video receiver to your DVD Player, make sure you chose the correct input setting on the
receiver.
If you are NOT using a stereo TV for your sound source, turn off the TruSurrouncP“ option (from the Analog Output menu or TS
SURROUND button on front of D’VD player). .
Make sure you have checked the Dolby Digital and DTS boxes in the Digital Output menu.
If you are playing an audio CD with DTS set as your digital output, Trusurround must be off.
Player skips over songs on my MP3 disc
Be sure that you have encoded the file as MPEG-1 layer III.
Increase the bit rate (quality) the next time you create a CD.
The ID3 information is not displayed for some files
• When creating a disc, use ID3 version 1 tags.
90
Chapter 7
Page 93

other Information
Troubleshooting
Remote control won't work
• If you are using a universal remote, you might be in the wrong mode, To operate your DVD Player, press DVD on the remote before
you press any other buttons. If you’re operating the TV, press the TV button first, etc,
• Insert new batteries in the remote.
• Operate the remote control at a distance of no more than 20 feet.
• Remove any obstacles between the remote and the DVD Player or other component. If your DVD Player is in an entertainment
cabinet, the glass doors may be obstructing the remote control from operating the unit. Open the doors.
• Reset the remote. Remove batteries and hold down one or more buttons for about one minute to drain the microproce.ssor inside the
remote to reset it. Reinstall batteries and try the remote again.
Can't advance through a movie
• You can't advance through the opening credits and warning information that appear at the beginning of movies because the di.sc is
programmed to prohibit that action.
The O icon appears on screen
• The feature or action canrjot be completed at this time because:
1. The disc's software restricts it.
2. The disc’s software doesn't support that feature (e.g., angles).
3. The feature is not available at the moment.
4. You've requested a title or chapter number that doesn’t exist.
The picture is distorted
• Did you connea your VCR to the DVD Player? Disconnea it. See chapter 1 for the correct setup and connection.
• The disc might be damaged. Try another disc.
Picture is distorted during forward and reverse scan
• It is normal for some distortion to appear while scanning.
A screen saver appears on the TV
• Your player is equipped with a screen saver that appears on the TV after your player has been idle for several minutes. Press STOP
or GO BACK» AGAIN on the remote to make the screen saver disappear from the screen and return to the player’s main menu.
Subtitle and/or audio language is not the one selected from the initial setting
• If the subtitle and/or audio language you’ve chosen as the default does not exist on the disc, the initial settings will not be seen/
heard. The disc's priority language is selected instead. Set the subtitle and/or audio language manually through the Info Display or
the player menu.
The menu is displayed in a foreign language
• The Menu Language preference is set to that language. From the DVD player's main menu, select the Languages option (In Spanish,
shown as Idiotnas] in French, as Langues). From the Languages menu, select the Player Menus option (In Spanish, shown as Mends
del lector, in French, as Menus Lecteur). Highlight the language you prefer and press OK.
Play doesn't begin
• The rating of the title on the disc exceeds the rating limit set in the Ratings Limits when you press PLAY. Unlock the player or
change the rating limit in those menus.
Chapter 7
91
Page 94

other Information
Troubleshooting
No forward or reverse scan
• Some discs bnve sc-ctions tliat [iroliibit rapid scanning, nr title and chapter .skip.
• If you're trying to ski]-) ilsiongh the war ning information and credits at the Iieginning of a movie, you won’t be able to. This part of
the movie is often programmed to prohibit ski])ping tliroirgh it.
Camera angle cannot be changed
• Some discs don t have the mrrlti-canrcra angles, and sftnre discs only have it in certain parts of the movie.
Picture is too tali and thin
• Change tire aspect ratio rrsrng tlie Ï Г.setting in tite Display menu (see chapter 6).
Picture is too short and wide
• Change the aspect ratio using tlie 71'/ntctgp .setting in tlie Display menu (see chapter 6).
Cannot copy discs to video tape
• You can't record 1.)VD discs onto vidéocassettes because the discs are encoded with anti-copy protection.
Disc tray won't open
• Di.sengage the retail lock leature. I’lc.s.s and lioltl a comi-)ination of buttons on the front panel at the same time. Press and hold SKIP
F’WD, OPEN*CI.OSK. and TS .SUPRCUiND for at least three .seconds.
• Front Tray Lod< feature is ttrrncd on t ailfK'k tire )->layer- from the Lock menu or turn Tray Lock feature off (see chapter 6).
Full Version of Disc Does Not Play
• If the DVD ]>layer i.s locked, tire disc may have Ireen edited using the Scene Snip feature. Unlock the player (see chapter 2),
Disc won't eject
• 'When you put a disc into tlie playcM'. tlie player may take up to 15 seconds to read the disc. You won’t be able to eject the disc
during this time. Wait 15 seconcLs and try again.
Forgot password
• Point tlie remote at the DVD player. Press and hold the STOP button on the front of the DVD Player and the STOP button on the
remote control at the same time (liold lioth buttons down at the same time for at least 3 seconds). The player will unlock. Follow the
instructions for locking your player and changing the password in Chapter 5.
92
Chapter 7
Page 95

other Information
Handling Cautions
• Before connecting other components to this player, be sure to turn all components off.
• Don’t move the player while a disc is being played. The disc may get scratched or broken, and the player's internal
parts may be damaged.
• Don’t put any container filled with liquid or any small metal objects on the player.
• Be careful not to put your hand into the disc tray.
• Don’t place anything other than the disc in the disc tray.
• Exterior influences such as lightning and static electricity can affect normal operation of this player. If this occurs, turn
the player off and on again with the ON*OFF button, or disconnect and then reconnect the AC power cord to the AC
power outlet. The player will operate normally.
• Be sure to remove the disc and turn off the player after use.
Maintenance of Cabinet
For safety reasons, when cleaning the cabinet be sure to disconnect the AC power cord from the AC outlet.
• Do not use benzene, thinner, or other solvents for cleaning.
• ’Wipe the cabinet with a soft cloth.
Formation of Condensation
• Due to sharp changes in temperature and humidity, condensation may form if warm air comes in contact with any cold
parts inside the player.
• 'When condensation forms inside the player, the player may not operate correctly. If this occurs, leave the player at
room temperature until the inside of the player becomes dry and operational.
• If condensation forms on a disc, wipe the disc with a soft, dry cloth by moving the cloth from the center hole toward
the outer edge.
Handling Discs
• Don’t touch the disc’s signal surfaces. Hold by the edges or by one edge and the hole in the center.
• Don’t affix labels or adhesive tape to label surfaces. Don’t scratch or damage the label.
• Do not use damaged (cracked or warped) discs.
Cleaning Discs
• Dirty discs can cause reduced video and audio performance. Always keep discs clean by wiping them gently with a soft
cloth from the inner edge toward the outer perimeter.
• If a disc becomes very dirty, wet a soft cloth in water, wring it out well. Wipe the dirt away gently, and remove any
water drops with a dry cloth.
• Do not use record-cleaning sprays or anti-static agents on discs. Also, never clean the discs with benzene, thinner, or
other volatile solvents which may cause damage to the disc surface.
Chapter 7
93
Page 96

other liiformation
Universal Remote
The universal remote can be programmed to control most brands (if
remote controllable TVs, VCRs, satellite receivers and cable boxes. The
remcite is already programmed to control most RCA, PROSCAN, and GE
TVs, VCRs, and satellite receivers.
The AUX biiturn can be programmed to control most brands of an
additional remote controllable TV, VCR, satellite receiver, or cable box.
Test the Remote
To determine whether the universal remote needs to be programmed,
turn a device ON, such as a VCR. Point the remote at the VCR, and press
the VCRl button. Then press ON»OFF or CH + (channel up) or CH (channel down) to see if the VCR responds to the remote commands. If
the component does not respond, the remote needs to be programmed.
Program the Remote
The remote may not operate all models of
all brands.
There are two ways to program the remote control:
• automatic code search
• direct entry
Automatic Code Search
The following instructions can be used to program the remote to operate
each of the components connected to your DVD Player. If you want to
exit the automatic code search without programming any of your
components, press CLEAR until the red light on the remote turns off.
1.
Turn on the component you want to operate (VCR, TV, etc.)
2.
Press and hold the component button you want to program (VCRl,
VCR2, etc.). While holding the component button, press and hold
ON »OFF until the red light on the remote turns on, then release both
buttons.
3.
Point the remote at the component. Press and release PLAY, then wait
5 seconds or until the red light on the remote stops flashing.
At this point the remote is searching for the correct code to program.
If, after 5 seconds, the component you want to operate does not turn
off, press PLAY again to tell the remote to search the next set of
codes.
94
Continue pressing PLAY until the component turns off or you have
searched through all of the codes. There are 20 total sets of codes. If
the component does not turn off after pressing PLAY 20 times, then
the remote cannot can’t be programmed to operate that component.
Chapter 7
Page 97

other Information
If the component you want to control does turn off:
1. Press and release REVERSE, then wait 2 seconds. Repeat this step until tlie device turns
back ON.
2. To finish, press and hold STOP until the red light on the remttte turn.s off.
Important Tips!
You must continue pressing
the component button while
you enter the code.
Direct Entry
1. Turn on the component to be programmed.
2. Look up the brand and code number(s) for the component (jn the code list in tliis
section.
3. Point the DVD Player’s remote at the component.
4. Press and hold the component button on the remote you want to program.
5. Enter the code from the Remote Control code list on the following pages.
6. Release the component button, and then press ON*OFF to see if the component
responds to the command. If it doesn’t, try pressing the component button and then
ON*OFF again.
7. If you get no response, repeat these steps using the next code listed for your brand,
until the component responds to the remote commands.
Operate Components after Programming the
Remote
Because this universal remote can control several different components (TV, DVD, VCR,
satellite receiver, etc.) it uses operational modes triggered by the component buttons. For
example if you want the remote to control the TV, you would press the TV button to put
the remote into TV mode before you could control the TV.
Let’s say you have a Zenith
TV. To program the universal
remote to operate the TV
you would:
Press and hold the TV button
while you enter the first
code listed for Zenith in the
TV Codes column.
Release the TV button. Press
ON-OFF to see if the TV
responds. If it doesn't follow
the same steps, but enter the
second code instead of the
first
1. Press the appropriate component button (DVD, TV, VCRl, VCR2, SAT*CABLE, or AUX)
to set the remote to control the component.
2. Press ON »OFF to turn the component ON or OFF.
3. Use the remote buttons that apply to that component.
Note: This remote may not be compatible with ail brands and models of
components.
Chapter 7
95
Page 98

Code List
TV Codes
Abex
...........
Admiral......
Adventura .
Aiko
...........
Aileron
........
Amtron
......
Akai
...........
Anam National
AOC
Audiovox.............................................
Belcor.........................................................................
Bell a Howell
Bradford
Brokwood
Candle ..............
Capehart............
Celebrity
Centurion
Citizen............................................................. 1004, 1006, 1008,
......................................... 1016, 1038, 1105, 1171, 1174. 1177
Clairtone........................................................................................П7б
Colortyme................................................................... 1004, 1006
Concerto..................................................................... 1004, 1006
Contec/Cony
Craig .
Crown
Curtis Maihes..
CXC
Daewoo .
Daytron
Dimensia ......
Dumont
Dynatech.......
Electroband .
Electrohome
Emerson
Envision.
Fisher......
Fujitso ....
Funai
Futurelec
GE
..........
.................................................
......................................... 1164, 1165. 1166, 1167, 1168,
Gibralter
Goldstar...................................... 1004, 1005, 1006, 1012,
..............................
Gmndy
Hallmark
Harvard................................................................................
Hitachi
..................................................
......................................... 1137, 1138, 1139,1140, 1141,
.............................
IMA
Infinity.................................................................................
Janeil
JBL.......................................................................................
JCB.......................................................................................
JC Penny.........................
Jensen .
JVC
......
..............................
Kawasho
Kaypani
Kenwood.......................................................... 1004, 1006,
Kloss Novabeam
...........................................................
.................................
...........
........
...........
..........
...............................
..............
1004, 1005, 1006, 1007. 1175, 1176
...................................................................
.................................
..................................1004
.............
..................................
................................. 1004
1004, 1006, 1008. 1174
..................................1175
..................................
1012, 1013, 1014, 1038, 1176
..............
.......
.......
.........
........
..................................................................
.............................
........
.................. 1004, 1006, 1012, 1014, 1023,
........
1025, 1026, 1027, 1028, 1029,1030,
......
1032, 1033, 1034, 1035, 1036, 1037,
.......
1039, 1041, 1042, 1043, 1044, 1046,
1123, 1124, 1162, 1171, 1176, 1177. 1179
.............................................................1004
...................
......
.............................................. 1000, 1003, 1004,
.....................................................................
.............................................................
....................................................................
.................................................
.....................................................................................
....................................................................................
..........................................................
..............................................................................
1048, 1049, 1050, 1051, 1162,
1056, 1057, 1058, 1155, 1156, 1171
1143, 1144, 1145, 1146, 1148, 1150,
.
......................
...........
1022, 1052, 1054, 1058, 1063,
... 1072, 1087, 1105, 1128, 1171, 1172,
....................................................... 1004,
10Ó6, 1067, 1089, 1157, 1158, 1159,
...................................
. 1015, 1105, 1162,
.................... 1004, 1005,
, 1016, 1017, 1018, 1127,
..................... 1004, 1006,
1003, 1004, 1006, 1019
- 1022, 1052, 1054, 1055,
1004, 1006, 1012,
1059, 1060, 1061, 1135,
1000, 1004, 1005, 1006,
1068, 1069, 1174,
.........
1172
. 1001,1173
.........
1174
......... 1016
.........
1046
.........
1Û3S
..........
1002
1003, 1038
1038
1001. 1083, 1162
loop, 1004,
1038,
, 1004
1002
. 1038,
1038
1002
1009
. 1038
1171
1006,
1171
. 1038
1006,
1171
1171
.1000
1151
.1178
1176
1022
1024,
1031,
1038,
1047,
1191
1006
1180
1046
1046
1006,
1087,
1181
1004,
1151
1019,
1004,
1060,, 1012, 1013, 1054,
1172
1171
1006
1038
1013,
1136,
1142,
1179
1038
1062
1174
1062
1002
1008,
1064,
1181
1006
1065,
1182
1006
1175
1019
1183
1038, 1046,
1002, 1004,
1038
KTV........
Loewe -
Logik
......
Luxman.
Lxi
.........
....................................... 1062, 1071, 1072, 1073,
Magnavox
..................................
...................................... 1068, 1069, 1074, 1075,
........................................1088, 1089, 1130, 1131,
Majestic
.................................
Marants
..................................
Marantz
......................................
Megatron ...............................
Mei.........................................
Memorex .................................... 1001, 1006, 1082,
MGA
...................................................
................................................. 1022, 1051, 1079
Midland....................................... 1054, 1151, 1171
Minutz................................................................
Mitsubishi
Montgomery Ward
Motorola
MTC
Multitech
Multivision
NAD..................................................... 1006. 107Г
NEC
Nikko
MTC...................................................
Onwa
Optimus..............................................
Optonica.............................................
Orion
Panasonic.............................................. Ю03, 1054
Philco
Philips
Pilot...........................................................................
Pioneer ..
Portland
Price Club....................
Prism
PROSCAN
Proton
Pulsar...........................
Pulser
Quasar
Radio Shack/Realistic
RCA .
Rhapsody..
Runco
Sampo
Samsung ..
Samsux
Sansui ......................................................................
Sanyo
Scotch
Scott
Sears
Sharp.............................................................. 1004,
Shogun
Signature
Simpson
...................................
.........................................1051, 1079. 1080. 1081,
.................................
............................................
.................................................
......................................................
............................. ....................
..................................................
..............
...................................................
.................................................
.......................................
...................................................1076, 1086, 1087
.......................
...........................
..........................
...........................
.........................
......
.......
..............................
...............
..........................................
.........................................
......................................................................
.......................
................................
........................................
....................-
..............................
.....................................................................
....................................................................
................
...................................................................
........................................................
............
............................................
......................... 1008, 1012, 1019, 1062,
..................
1012, 1038, 1049, 1095, 1162,
.......
1019, 1096, 1098, 1099, 1100,
................. 1103, 1129, 1179:
.........................1004, 1006, 1171,
.................................
1015, 1019, 1104, 1105, 1106,
.......................................................
1004, 1006, 1012, 1024, 1035:
.........
1072, 1109, 1110, 1162, 1180:
1029, ini, 1112, 1113, 1122:
.........................................................
.1038, 1070, 1171
...................
1000,
1004, 1006, 1008.
................ 11,34,
1004, 1006
1004, 1005,
1004, 1005, 1006,
...................................
1004, 1005, 1006. 1105,
1003, 1004, 1005:
1074, 1075, 1077
1019, 1062, 1068, 1069,
1004, 1005, 1006
.1004, 1006, 1012
.............. 1003, 1054,
..........................................
1000, 1003, 1004, 1005,
........
1080, 1107, 1108, 1162:
1000, 1004, 1006, 1013,
1048, 1049, 1050, 1051,
..........
1ЮЗ, 1004,
1003, 1004,
1004, 1006,
..........
1092
1000,
1004, 1005,
1004, 1048,
1001
.......
......
1176, 1177
.........
1062
.........
1083
1004, 1006
1006, 1049,
1162, 1181
1019, 1062,
1076, 1077,
1132, 11,33,
1183. 1184
.........
1083
.........
1062
1062, 1078
1006, 1059
.........
1176
1083, 1162
1006, 1019,
1080, 1082
1172, 1181
.........
1052
1019, 1022,
1082, 1125
.........
1083
1003, 1173
1176, 1178
1038, 1178
.........
1084
1072, 1185
1006, 1089
1006, 1016
.........
1016
.........
1038
.........
1185
1095, 1173
1035, 1191
1062, 1170
1СЮ5, 1006,
1068, 1069,
1183, 1184
1008, 1012,
1074, 1075,
1088, 1089
1004, 1171
1090, 1091,
1179, 1185
1016, 1171
.........
1105
.........
1054
1000, 1181
1093. 1175
.........
1151
.........
1004
1070, 1094
1004, 1006,
1171, 1172
1006, 1007,
1101, 1102
1181, 1187
.........
1176
.........
1151
1172, 1175
1006, 1012,
1171, 1172
.........
1171
.........
1191
1049, 1050,
1169, 1180
.
.........
1006
1038, 1046
1019, 1046,
1066, 1071,
1181, 1189
1006, 1012,
1171, 1173
.........
1004
1083, 1115
.........
1008
Sonic
............
Sony
.............
Soundesign.
Squareview.
SSS
.............
Starlite
.........
Supre^macy..
Supreme
Sylvania
.............................
.................... 1076, 1077, Ш88, 1116, 1161, 1183:
Symphonic.............................................. 1033, 1038:
Tandy.......................................................................
Tatung........................................................... 1003:
Technics
Techwixxl.............................................. 1004, 1006,
Teknlka.......................................1004, 1005, 1006,
.............................
.........................................
Telecaption...............................................................
TMK............................................................. 1004,
Toshiba.......................................1049, 1071, 1072,
...............................
Totevision.................................................................
Universal
Victor............................................................ 1066,
Vidtech
Viking.......................................................................
Wards..........................................1000, 1001, 1004, 1005,
.............................. 1019, 1024, 1033, 1046, 1052,
................... 1068, 1069, 1074, 1075, 1076, 1083,
.........................................
Yamaha
Zenith
.
.......
.......
...................................................................
......................................................
................................................
.................................................
....................
___________
Admiral
......
Adventura -
Aiko
...........
Aiwa
...............................................................
Akai
.................................
............................................................ 2111, 2112, 2113
American High....................................................... 2021
Asha..........................................................................2013
Audio Dynamics
Audiovox...............................................
Bel] & Howell
Beaumark
..............................................
Broksonic .........................................
Calix.........................................................................2014
Candle
.......................................
............................................................
Canon....................................................2021, 2022, 2114
Capehart......................................................... 2020, 2110
Carver...................................................................... 2062
CCE................................................................ 2027, 2061
Citizen
...........................................................
..............................
Colortyme................................................................ 2009
Colt.......................................................................... 2061
Craig...........................................2013, 2014, 2023, 2061
Curtis-Mathes............................2000, 2002, 2009, 2013,
..............................
Cybernex..................................................................2013
Daewoo
...........................
Daytron.....................................................................2110
DBX
................
Dimensia .........
Dynatech
.........
Flectrohome ,,,
Electrophonic .
, 1004, 1006, 1008, 1038,
................................... 1004, 1006,
1019. 1062, 1068, 1069, 1074,
1012, 1013, 1016, 1038, 1046,
1082, 1083, 1105, 1170:
1105, 1109, 1117, 1118, 1160,
1004, 1005,
1088, 1095, 1119, 1120,
1004, 1005, 1006,
1004, 1083, 1151, 1152, 1153,
y« Codes
2003, 2004, 2005. 2007, 2008,
...................................
.....................................
.
2013, 2014, 2015, 2016,
2017, 2018, 2019
2015, 2016, 2017, 2018, 2019, 2027
2016, 2018, 2021, 2022, 2024, 2115
2015, 2017, 2019. 2025, 2026,
2027, 2028,2110
П76
1002
1046
1189
1004:
1038
1038
1174
1002
1008,
1075.
1184
1189
.
1173
1178
10Я
1054
1008,
1076,
1171
1117
1006
1089,
1162
1171
Ю52,
1087
1182
1006
1174
1006,
1062,
1087,
1184
1019
1154
.....
2131
.
...
2026
....
2027
2002, 2026
2009, 2010
........
2014
.......
2011
........
2013
2012, 2025
2013, 2014,
2009, 2010
.......
2000
2002, 2026
2014, 2029
........
2014
96
Chapter 2
Page 99

Code List
VCR Codes
EmefSOO
..............
............................... 2026, 2029, 20Э0, 2032, 2033. 2034, 2035,
..........................................
..........................................
.................................................................
Fisher
...................................................................
.......................................................2049, 2050, 2051, 2052, 2118
Fuji...................................................................................2021. 2119
Ring!
...............................................................................
Garrard.......................................................................................2026
GE........................................................................2000, 2001, 2013,
....................................................... 2021, 2022, 2053, 2115, 2120
Goldstar
Gradienle............................................................................................2026 .
Hatley Davidson.........................................................................2026
Hannan Kardon.........................................................................2009
Harwotxl.....................................................................................2061
Headquarter...............................................................................2011
Hitachi.................................................................2002, 2055, 2056,
....................................................... 2057, 2107, 2111, 2120, 2122
Hi-Q.............................................................................................2023
Instant Replay............................................................................2021
JCL .............................................................................................2021
JC Penney.................................................2009, 2010, 2011, 2013,
...................................................... 2014, 2021, 2022, 2055, 2056,
.......................................................2058, 2059, 2060, 2107, 2118
Jensen......................................................................2055, 2056, 2111
JVC
..........................
Kenwood............................................................
...................................................... 2016, 2018, 2058, 2111, 2123
KLH............................................................................................2061
Kodak...............................................................................2014. 2021
Lloyd
Logik ..........................................................................................
LXl...............................................................................................2014
Magnavox ..
..................................................................
Magnin........................................................................................2013
Marantz.................................................................2009, 2010, 2011,
..........................................
Marta...........................................................................................2014
Masushita............................................................................... 2021
Mei...............................................................................................2021
Memorex
...........................................
MGA......................................................................2029,2065, 2113
MGN Techtralogy......................................................................2013
Midland.......................................................................................2053
Minolta
Mitsubishi
...................
Montgomery 9Fard
Motorola......................................................................................2021, 2131
MTC
.....................................................................
Multitcch............................ 2002, 2013, 2016, 2026, 2053, 2061
NEC
...............................................
................................
Nikko...........................................................................................2014
Nolrfcx.........................................................................................2013
Olympus......................................................................................2021
Optimus.......................................................................................2014, 2131
Optoniea......................................................................................2096
Orion...........................................................................................2035
Panasonic
Pentax
Pentex Research.........................................................................2018
Philco...........................................................2021, 2022, 2062, 2063
PhUips.........................................................2021, 2062, 2096, 2124
Pilot
.............................................................................................
Pioneer...........................................2010, 2055. 2080, 2081, 2123
Portland........................................................2016, 2017, 2019, 2110
PROSCAN..................................................................................2000, 2001
Protec..........................................................................................2061
Pulsar......................................................................................... 2104
2002, 2012, 2014, 2015, 2021, 2024, 2025,
2036. 2037, 2038, 2039, 2040, 2041,
2042, 2044, 2045, 2047, 2065, 2105
.........................................
2009, 2010, 2011, 2018, 2058, 2111, 2123
..........................................................................
.............................................*.........
2016, 2018, 2021, 2058, 2062, 2064
..............................................................
.................................................................
..............
2070, 2071, 2072, 2073, 2074, 2106, 2113, 2123
...........................
............................................
2014, 2021, 2023, 2026, 2104, 2131
2029, 2055, 2056, 2065, 2066, 2067, 2069.
.........................................................
2058, 2064, 2076, 2078, 2079, 2111, 2123
2113, 2116, 2117, 2130
2011, 2023, 2048,
2009, 2014, 2018, 2054, 2121
2009, 2010, 2011,
2021, 2022, 2062,
2063, 2104, 2108, 2124
2002, 2011, 2013,
2055,2056.2107
2002, 2013, 2026
2009, 2010, 2011,2016, 2018,
2021, 2022. 2109, 2125, 2126, 2127
2016, 2055, 2056, 2107, 2120
2002, 2026
2002, 2026
2061
2075, 2131
2014
Quarter........................................................................................2011
Quartz..........................................................................................2011
Quasar..................................................................2021, 2022, 2125
RCA........................2000, 2001, 2003, 2013, 2021, 2055, 2056,
..................
2082, 2083, 2084, 2085, 2086, 2087, 2088, 2089,
...........................................
Radioshack/Realistic...................2002, 2011, 2013, 2014, 2021,
..................... 2022, 2023, 2026, 2029, 2049, 2050, 2096, 2131
Radix..................................................................................... 2014
Randex........................................................................................2014
Ricoh
...........................................................................................
Runco........................................................................................ 2104
Samsung............................. 2005, 2013, 2015, 2033, 2053. 2112
Sanky................................................................................2104, 2131
Sansui........................................................2010. 2092, 2111, 2123
Sanyo
....................................................................
Scott
..............................................
Sears .............................................2011, 2014, 2021, 2023, 2048,
...............................
Sharp....................... 2002, 2017, 2029, 2094, 2095, 2096, 2131
Shintom.......................................................2004, 2056, 2061, 2098
Shogun.................................................................................... 2013
Signature
.........................................................................
Singer.................................................................................2021, 2061, 2128
Sony
....................................
STS.....................................................................................2021, 2107
Sylvanla
...............................................................
...................................................... 2026, 2062, 2063, 2065, 2124
Symphonic...................................................................................2002, 2026
Tandy .............................................................................
Tashiko........................................................................................2014
Tatung......................................................................................... 2058, 2111
TEAC.............................................2002, 2026, 2058, 2085, 2111
Technics.......................................................................................2021, 2109
Teknika...............................2002, 2014, 2021, 2026, 2100, 2129
TMK...................................................................................2013, 2024, 2047
Toshiba..............................................................................2015, 2049, 2051,
................................................................... 2055, 2065, 2093, 2116
Totevsion......................................................................................2013, 2014
Unitech........................................................................................2013
Vector Research
Victor...........................................................................................2010
Video Concepts
Vldeosonic
..................................................................................
Wards
...........................................
.........................................
............................... 2096, 2101, 2102, 2103, 2107, 2116, 2131
XR-1000................................................................2021, 2026, 2061
Yamaha
..............................
Zenith.............................................2004. 2098, 2104, 2119, 2128
2090, 2091, 2107, 2115, 2120, 2125
2012, 2015, 2025, 2032, 2035,
2049, 2050, 2051, 2055, 2056, 2107. 2118
2002, 2004, 2098, 2099, 2119, 2128
..........................................
.............................
2009, 2010, 2015, 2016, 2113
2002, 2013, 2014, 2015, 2021,
2023, 2026, 2029, 2055, 2056, 206l,
2009, 2010, 2011, 2018, 2058, 2111
2011, 2013, 2023
2038, 2065, 2093, 2116
2002, 2021, 2022,
2009, 2010, 2015, 2016
2128
2002, 2131
2002, 2011
2013
Cable Boxes
ABC
.........................
Antronix.......................................................................................5008, 5009
Archer........................................................5008, 5009, 5010, 5011
Cabletenna..................................................................................5008
Cableview....................................................................................5008
Century.......................................................................................5011
Citizen.........................................................................................5011
Colour Voice................................................................................5012, 5013
Comtronics..................................................................................5014, 5015
Contec..........................................................................................50l6
Eastern........................................................................................5017
Garrard.......................................................................................5011
GE Electronics
Gemini..................................................................5018, 5019, 5049
General Instrument...................................................................5003
Hamlin
...........................................
Hitachi................................................................................... 5003
Hytex...........................................................................................5002
Jasco............................................................................................ 5011
Jenold........................................................5003, 5005, 5007, 5018,
..................................................................
Magnavox...................................................................................5025
5002, 5003, 5004, 5005, 5006, 5007. 5053
...........................................................................
5020, 5021, 5022, 5035, 5045
5023, 5024, 5046, 5053
5009
Memotex .......................................................................... 5026
Movie Time
...................................................
5002, 5027, 5028
NSC................................................................5002, 5027, 5028
Oak.................................................................5002, 5016, 5029
Panasonic.................................................................5048, 5052
Paragon
.............................................................................
5026
Philips............................................................ 5011, 5012, 501.1,
.................................................. 5019, 5025, 50.10, 5031, 5032
Pioneer...................................................................... 5033, 5034
Pulsar.................................................................................5026
RCA...............................................................5047, 5049. 5052
Realistic.............................................................................. 5009, 5049
Regal
.....
-............................................................................5022, 5035
Regency
.............................................................................
5017
Rembrandt..........................................................................5003
Runco ............................................................................... 5026
Samsung ...................................................................5014, 50.14
Scientific Atlanta
.................................
5006, 5036, 5037, 50.18
Signal....................................................................... 5014, 5018
Signature............................................................................5003
SI Marx..............................................................................5014
Spiucer............................................................................. 5052
Starcom
..........................................................
5007, 5018, 5053
Stargate...............................................................................5014, 5018
Starquest.............................................................................5018
Tandy................................................................................. 5040
Teleview.............................................................................5014
Tocom............................................................5004, 5023, 5041
Toshiba .............................................................................5026
Tusa....................................................................................5018
TV86 ................................................................................ 5027
Unika
.............................................................
5008, 5009, 5011
United Artists.................................................................... 5002
United Cable .....................................................................5053
Universal
..............................................
5008, 5009, 5010, 5011
Videoway...........................................................................5044
Viewstar
...............................................
Zenith
......................................................................
5015, 5025, 5027, 5040
5026, 5050, 5051
Satellite Receiver Codes
Chapparal......................................................... —.. 5006, 5057
Drake........................................................................ 5058, 5059
GE..............................................................................5000, 5001
General Instuments
Panasonic........................................................................... 5075
Primestar........................................................................... 5076
PROSCAN.................................................................5000, 5001
RCA...........................................................................5000, 5001
Realistic
Sony................................................................................... 5072
STSl................................................................................... 5064
STS2
..................................................................................
STS3 ..................................................................................5066
STS4...................................................................................5067
Toshiba
......................................................................
Uniden................................................................................5069
RCA and Dimensia
AM/FM.........................................................................4003
AUX
Phono............................................................................4005
Tape...............................................................................4006
CD.................................................................................4007
Sony................................................................................... 4266
Kenwood
Aiwa...................................................................................4261
.......................................
5060, 5061, 5062
.............................................................................
5068, 5073
Audio Codes
____________
.............................................................................
......................................................................... 4264
5063
5065
4004
Chapter 2
9:
Page 100

other Information
Front Panel Controls
OPEN<LOSE button
SKIP BACK
button
STOP button
PLAY button
SKIP FWD button
PAUSE button
ON»OFF
button and
indicator light
Front panel
display
UU UUUUU
Fleadphone
Disc tray
Navigational
controls
MENU button
RANDOM button
volume control
Headphone jack
TS SURROUND button
(listed alphabetically)
Disc tray Press OPEN «CLOSE to open and close the disc tray.
Front panel display (See following page for details.)
Headphone jack Plug in headphones here.
Headphone volume control Controls volume to headphones.
INFO Brings up the Info Display,
MENU Brings up the DVD disc menu.
Navigation controls Use to navigate through Info Display or menus.
ON »OFF button and ON «OFF indicator light Turns the player on and off. The ON »OFF indicator lights when
INFO button
the player is on.
OPEN»CIX>SE Press to open and close the disc tray.
PAUSE Pauses disc play, Advances playback one frame at a time during pause mode.
PLAY Begins disc play (and closes disc tray if it’s open).
RANDOM Changes Play Mode to Random (plays disc tracks, chapters or MP3 titles in random order).
Shuttle Rotate clockwise to search forward through a disc. Rotate counterclockwise to search backward through
a disc. The farther you turn the shuttle, the faster the speed of the search.
SKIP BACK Allows you to move to the beginning of the preceding title, chapter, track or MP3 title on a disc (in
effect, “skipping” the title, chapter, track or MP3 title).
SKIP FWD Allows you to move to the beginning of the next title, chapter, track or MP3 title on a disc (in effect,
“skipping” the title, chapter, track or MP3 title).
STOP Stops disc play.
TS SURROUND Use the TS SURROUND button to simulate surround sound. Each press of the button toggles the
setting between on and off.
98
Chapter 7
 Loading...