

Page 1
USER'S
GUIDE
E z'52.o_
C O
Page 2
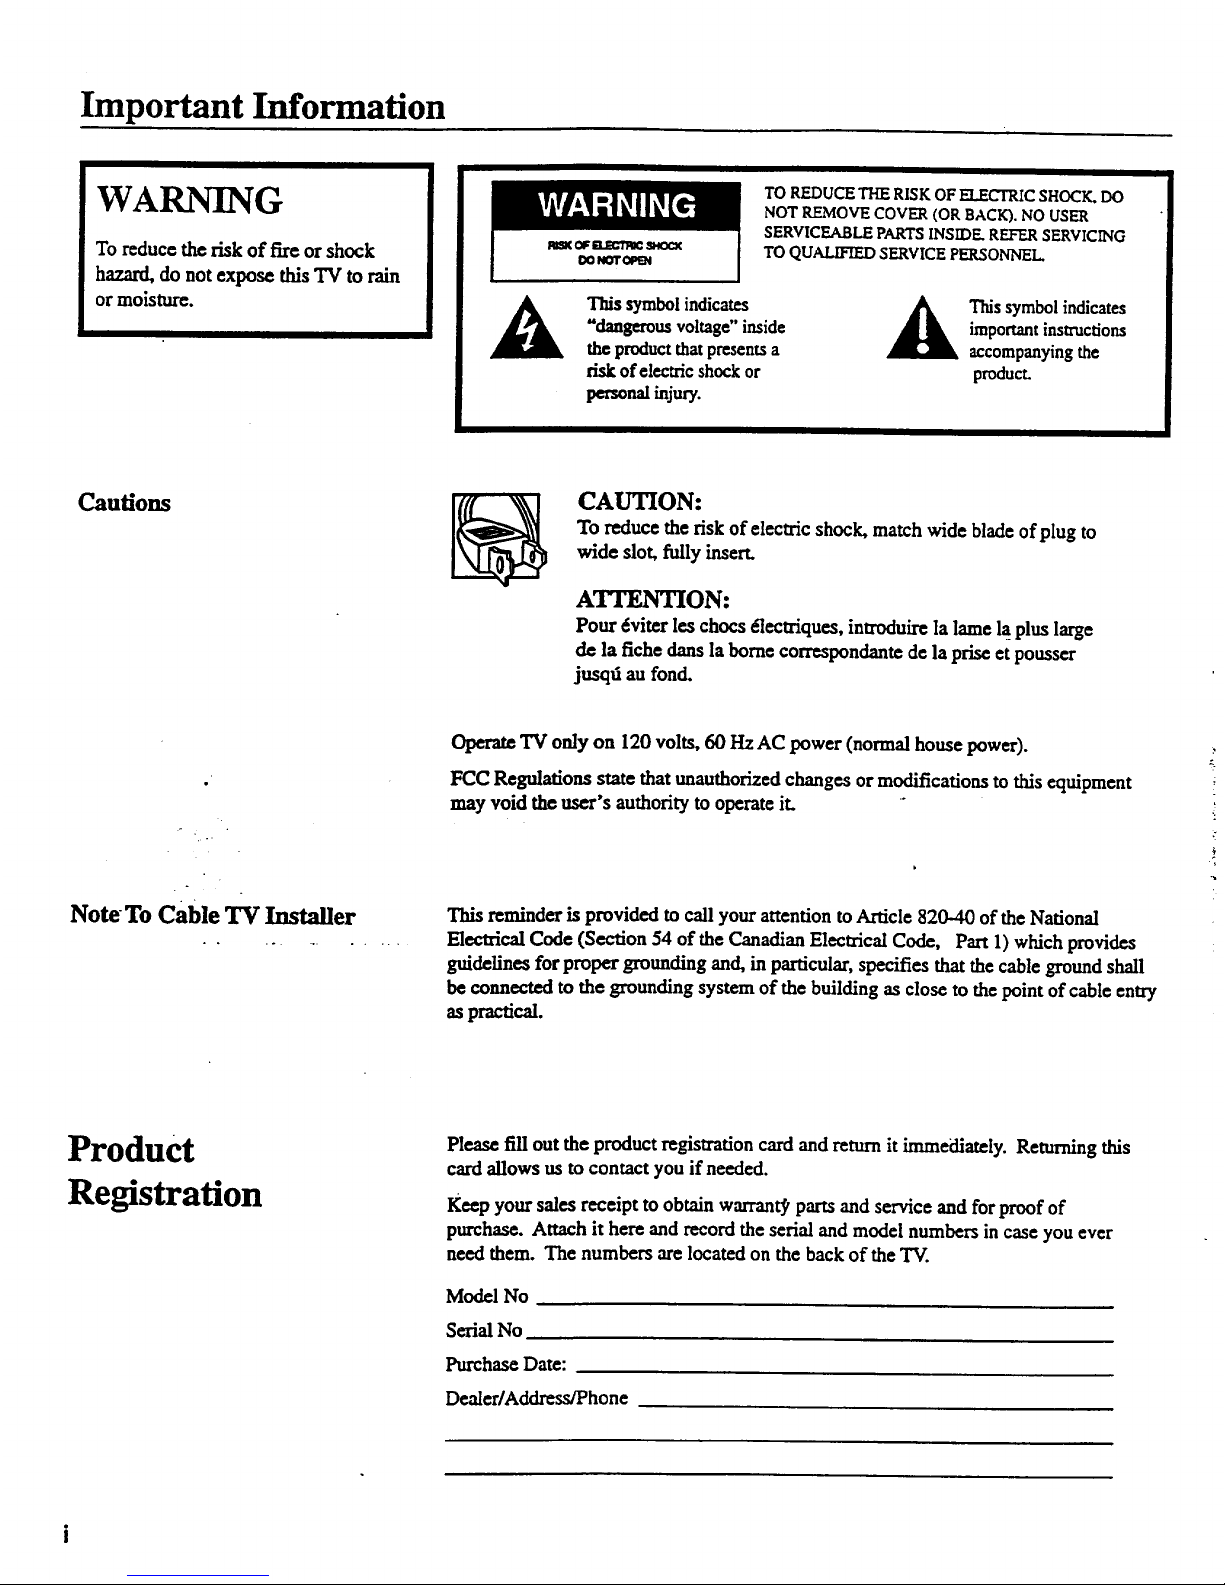
Important Information
WARNING
To reduce the risk of fire or shock
hazard, do not expose this TV to rain
or moisture.
A
TO REDUCE THE RISK OF ELECTRIC SHOCK. DO
NOT REMOVE COVER (OR BACK). NO USER
SERVICEABLE PARTS INSIDE. REFER SERVICING
TO QUALIFIED SERVICE PERSONNEL
symbolindicates
"dangerous voRage"inside
t_ productthat presentsa
riskof electricshock or
personalinjury.
Thissymbolindicates
importantinstructions
accompanyingthe
product.
Cautions
CAUTION:
To reduce the risk of electric shock, match wide blade of plug to
wide slot, fully insert.
A_ON:
Pour €_viterles chocs e'lectriques, inu'oduirc la lame la_plus large
dc la fiche dartsla borne correspond,antede la prise et pousser
jusqd au fond.
Note To Cable TV Installer
TV only on 120 volts, 60 HzAC power (normal house power).
FCC Regulations state that unauthorized changes or modifications to this equipment
may void the user's authority to operate it.
This reminder is provided to call your attention to Article 820-40 oftbe National
Electrical Code (Section 54 of the Canadian Electrical Code, Part 1) which provides
guidcfincs for proper grounding and, in particular, specifies that the cable ground shall
be connected to the grounding system of the building as close to the point of cable entry
as practical.
Product
Registration
Please fill out the product registration card and return it immediately. Returning this
card allows us tocontact you if needed.
Keep your sales receipt to obtain warrant_ parts and service and for proof of
purchase. Attach it here and record the serial and model numbers in case you ever
need them. The numbers are located on the back of the TV.
Model No
Serial No
Purchase Date:
Dealer/Address/Phone
Page 3
Introduction
Thank you for choosing RCA
Your television is designed for long
life and superior operation. Despite its
sophistication, your new TV is
amazingly simple to operate because it
has so many automatic features.
Table of Contents
Getting Started
First-Time Operation .................................................................. 2-3
Controlling Your TV
Front Panel ..................................................................................... 4
On-Screen Displays ....................................................................... 5
Remote Operation .......................................................................... 6
Operating Features
VIDEO Menu ................................................................................. 7
Closed Captioning ......................................................................... 8
Languages (English, French, Spanish) .......................................... 8
SETUP Menu ................................................................................. 9
Sleep Timer Operation ................................................................. 10
Alarm Tuner Operation ............................................................... 11
Autoprogramming Channel Memory ........................................ ,. 12
Editing Channel Memory ............................................................. 12
Connecting Your TV
Antenna/CableInformation......................................................... 13
DipoleAntennaConnection......................................................... 13
HomeAntenna Connections........................................................ 14
Cable-TVConnections................................................................ 15
Cable-TVOperation .......................................................:............ 16
Accessories
Accessories .................................................................................. 17
Order Form ............................................................................. 17-18
Caring for Your "IT
Cleaning & Care .......................................................................... 19
Trouble Checks .......................................................................... 20
Limited Warranty .................................................................... 21
Page 4
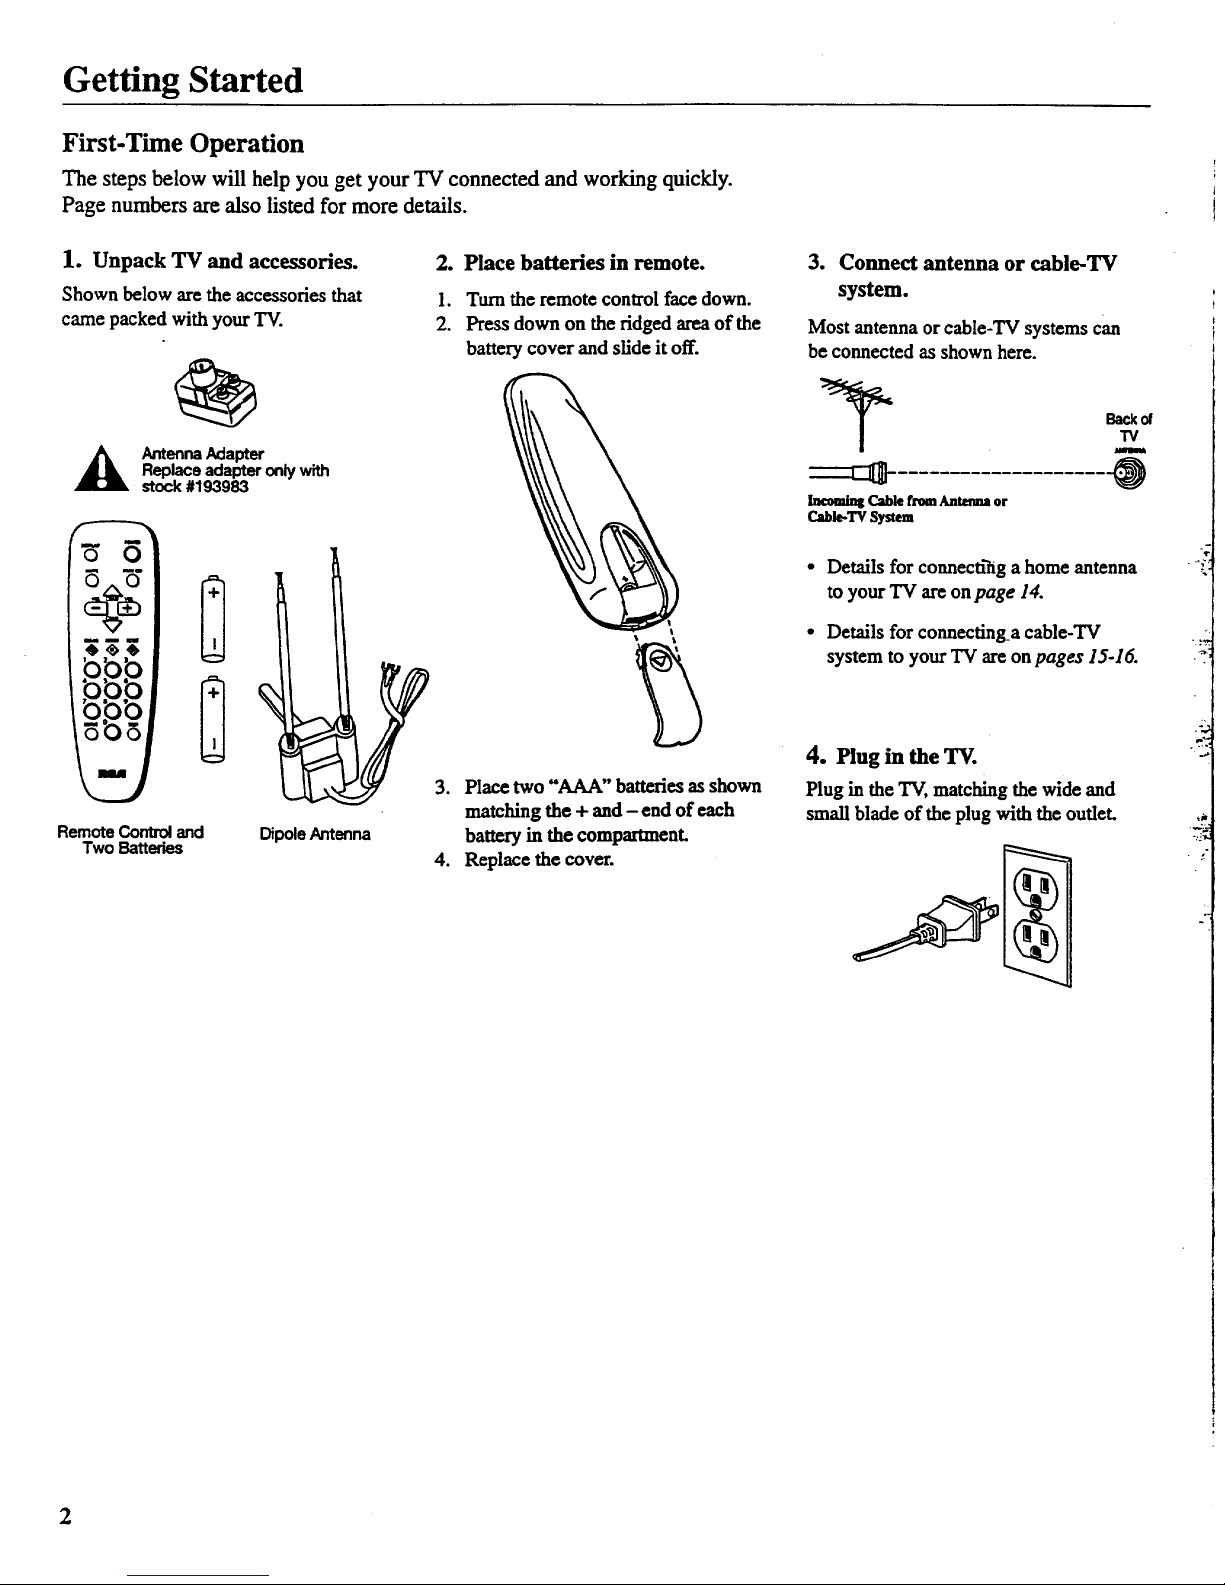
Getting Started
First-Time Operation
The steps below will help you get your TV connected and working quickly.
Page numbers are also listed for more details.
1. Unpack TV and accessories.
Shown below are the accessories that
came packed with your TV.
_ AntennaAdapter
Replaceadapteronlywith
stock#193983
RemoteControland
Two Batteries
Dipole Antenna
2. Place batteries in remote.
I. Turn the remote control face down.
2. Press down on the ridged areaof the
battery cover and slide it off.
3. Place two "AAA" batteries as shown
matching the + and - end of each
battery in the compartment.
4. Replace the cover.
3. Connect antenna or cable-TV
system.
Most antenna or cable-TV systems can
be connected as shown here.
Back of
TV
Incoming Cable from Antenma or
Ctble-TV System
• Details for connectihg a home antenna
to your"IV are on page 14.
• Details for cormectLnga cable-TV
system to your TV are on pages 15-16.
4. Plug in the TV.
Plug in the TV, matching the wide and
small blade of the plug with the oudet. _k
2
Page 5

Getting Started
First-Time Operation
5. Turn on TV and place channels
in memory.
Your TV is designed to place active
channels into'your TV's memory the first
time you turn it on.
79 .
• Press POWER on the TV or remote to
turn on the "IV.
• The TV automaticaUy cycles through all
channel numbers and places active
channels into the channel memory.
When your "IV is finished, it tunes to
the lowest channel number in its
channel memory.
6. Edit the channel memory.
You can add and erase channels from
memory as desired.
• Press MENU repeatedly to highlight
SETUP. Then press + to select the
SETUP menu.
• Press MENU repeatedly to highlight
EDIT CHANNELS.
Ill Ill Illl Illl
PressMENU
repeatedly to
see2ridsetup
menuL
• Press + to select EDIT CHANNELS.
• Select the desired channel number by
pressing the CHAN up or down button
or by pressing two number buttons.
7. Set the clock.
• Press MENU repeatedly until SETUP is
highlighted. Then press + to select the
SETUP menu.
• Repeatedly press MENU to select
CLOCK.
• Press and hold - to set the correct hour.
Then press and hold + to set the correct
minutes.
• Press CLEAR to remove the menu from
the screen.
Then press + to add a channel, or
press- to erase a channel. Details
are on page 12.
Press CLEAR to remove the menu from
the screen.
3
Page 6

Controlling Your TV
Front Panel
Shown here axe the front-panel buttons.
Remote Sensor
• When using the remote control, point it toward this sensor.
CH v and ^ Buttons (Channel Up and Down)
• Press Channel up to see the next higher channel in memory.
• Press Channel down to see the next lower channel in memory.
• You can add orerase channels in memory as desired. Details
are on page 12.
VOL Buttons (Volume Up and Down)
(Also + and - Buttons)
• Press VOL + to increase volume, or press VOL - to decrease
volume.
• Press + or - to adjust the setting of an item that is highlighted
in the menu.
• The volume display will automatically appear on the screen
when you press the VOL buttons.
MENU Button
• Press repeatedly until the item you want is highlighted, then
press + or- to enter the menu.
• Press repeatedly to move down each menu screen and then
press + or- to adjust each setting.
• To mute the TV, press once and then press +.
POWER Button
• Press to turn the TV on or off.
RESET Button
• Press to return all video settings (color, tint, contrast, bright-
ness and sharpness) back to the original settings.
DISPLAY Button
• Press to display the time and channel number on the screen.
• Press to see if the Sleep Timer and/or Alarm Timer is set.
• Press to quickly remove menus from the screen.
4
Page 7

ontrolling Your TV
)n-Screen Displays
Q Slee I
Q Alarm Tuner
(_) MUTE
Q Channel Number
Q Sleep Tuner
This display appears when the sleep timer has been set.
Details are on page 10.
Q T'une
This display appears after the clock is set whenever you
change channels or press DISPLAY
!
Q larm Tuner
This display appears when the alarm timer has been set.
Details are on page 11.
Q hannel Number
This display appears whenever you change channels or press
DISPLAY.
Q MUTE
This display appears when the TV's sound is muted. Press
MUTE on the remote. Details are on page 6.
5
Page 8

Controlling Your TV
Remote Operation
When operating the remote, point it
directly at the front of the TV.
Objects between the remote and the
remote sensor can block the signal to
the TV.
POWER
MUTE PREVCH
O O
VOL CHAN VOL
CHAN
CLEAR MENU RESET
neA
POWER Button
• Press to turn the TV on or off.
PREV CH Button (Previous Channel)
• Pressing this button switches the TV
back to the last tuned channel. This is
useful if you want to watch two
channels.
• Select the first channel you wish to
watch. Then select the other channel by
pressing two number buttons.
• The "IV changes back and forth between
the two channels each time you press
this button.
DISPLAY Button
• Press to display the time and channel
number on the screen.
• Press to see if the Sleep Timer and/or
Alarm Timer is set.
• Press to quickly remove menus from the
screen.
MUTE Button
• Press to quickly reduce sound to
minimum level. Closed captioning (C1)
automaticaUy appears on the screen
when you press MUTE.
• To restore sound and normal picture,
press MUTE again or press VOL up.
CHAN.VIA Buttons (Channel Up and
Down)
• Press to select the next higher or lower
channel in memory.
• You can add or erase channels in
memory as desired.
Details are onpage 12.
VOL Buttons (Volume Up and Down)
(Also - and + Buttons)
• Press VOL + to increase volume, or
press VOL - to decrease volume.
• Press + or - to adjust the setting of an
item that is highlighted in a menu.
• The volume display appears on the
screen when you press the VOL buttons.
MENU Button
• Press repeatedly until the item you want
is highlighted, then press + or- to enter
the menu.
• Press repeatedly to move down each
menu screen and then press + or- to
adjust each setting.
RESET Button
• Press to return all video settings (color,
tint, contrast, brightness, and sharpness)
back to the original settings.
CLEAR Button
• Press to clear the screen of all on-screen
displays except MUTE.
Number Buttons (0-9)
• Press to access any channel number.
• To select a channel, press two number
buttons. For example, press 0 then 6 for
channel 6.
• To select a 3-digit number, press and
hold number button I until 1-- appears
on the screen. Then press the other two
numbers.
INPUT Button
• Switches the TV to channel 03. This is
useful if you have a VCR connected to
your TV.
SKIP Button (Commercial Skip)
• Allows you to look at other channels
during commercials using the
CHAN buttons.
• Each press adds 30 seconds. The TV
switches back to original channel when
dmeruns out.
6
Page 9

Operating Features
VIDEO Menu
Press MENU until VIDEO is highlighted. Then press + to select the
VIDEO menu. Press MENU to move down the menu and + and - to
adjust each function.
Press
MENU to
select
,VIDEO
Press +
for1st
VIDEO
Menu
Screen
The VIDEO RESET function changes all the video functions (color, tint,
contrast, brightness, sharpness) back to the factory settings. Press + or- to
reset the video functions. RESET appears on the TV screen momentarily
while the functions are being adjusted.
Press
MENU
until the
second
VIDEO
Menu
appears
!The COLOR function adjusts the amount of color in the picture. Press + or-
to select COLOR, then press + to increase or press - to decrease color.
The T/NT function adjusts the color of flesh tones. Press + or - to select
T/N/:. Press + to add more green tint or press - to add more red tint.
The CONTRASTfuncdon adjusts the overall brighmess and contrast of
the picture. Press + or- to select CONTRASZ Press + to increase or
press - to decrease contrast.
The BRIGHTNESS function adjusts the brightness of the dark portions
of the picture. Press + or - to select BRIGHTNESS. Press + to increase
or press - to decrease brightness.
The SHARPNESS function adjusts picture sharpness. Press + or- to
select SHARPNESS. Press + to increase or press - to decrease.
Adjustment
Displays
These functions are displayed individually at the bottom of the screen
once they have been selected. The setting can be adjusted at that time by
pressing either the + or- button.
7
Page 10

Operating Features
Languages
The on-screen displays in this TV can
be displayed in three languages:
English, French, and Spanish. When
you select a language, most of the
displays will be shown on the screen
in your preferred language.
Selecting a Language
1. Press MENU once to bring up the
main menu and highlight ENGLISH.
ISH
2. Press + or - to select FRANCAIS
(French), ESPANOL (Spanish),
or ENGLISH.
Closed Captioning
Closed captioning lets you display the
audio portion of a program as text on
the "IV screen. This is useful to the
hearing impaired or anyone who wants
to watch a program without the sound.
There are tWOtypes of closed
captioning available: C1 (Caption 1)
and C2 (Caption 2). C1 displays the
full translation of the primary lan-
guage in your area. C2 may be used
as a source for secondary languages,
simplified English, or other transla-
tions transmitted in your area.
The closed captioning feature in this
'IV does not support a Text Mode.
Typically, the Text Mode consists of
program information, weather
bulIetins, local activities, etc.
Closed captioning is not available on
all channels or at all times. Only
specific programs are encoded with
closed captioning information (CC).
Setting Closed Captioning
1. Press MENU until CAPTION
OFFis highaghted.
2. Press + or- to select OFF, C1, or C2.
3. The screen displays the "IV program's
audio portion as text if the program
has closed captioning.
Page 11

Operating Features
SETUP Menu
Press MENU until SETUP is highlighted. Then press + to select the
SETUP menu. Press MENU to move down the menu and + and - to
adjust each function.
Press
MENU
to select
• SETUP
1st
SETUP
Menu
Screen
By setting the Sleep function, you program your"IV to turn itself off after a
certain period of time. This is useful whenever you want to watch "IV for an
hour or so before going to sleep. Press the + or - button to select the length
of time you want the TV to stay on. Details are on page 10.
You can program your TV to turn itself on at a specific time by setting the
ALARM time function and turning the ALARM: ON/OFF function ON.
Details are on page ll.
The ALARM: ON/OFF function lets you turn the alarm on or off by pressing
the + or-button. Details are on page 11.
After setting the CLOCK function, the time is displayed on the TV screen
whenever you change channels or press DISPLAY. Press and hold - to set
the correct hours and + to set the correct minutes. Details are onpage 3.
Press
MENU
until the
second
SETUP
_enu
appears
AUTOPROGRAM
When youpress+ or- m startthe AUTOPROGRAM function, the TV cycles
through all channelsandplacesonly the activechannelsfor your areain its
channel memory. The channel memory is the list of channels the TV stops on
when you press CHAN up or down. Details are on page 12.
The EDIT CHANNELS function allows you to edit the channel memory by
adding or erasing channels. Details are onpage 12.
iThe ANTENNA: CABLEIAIR function tells your "IV whether you have cable
or a home antenna connected to it. The TV adjusts this function for you
when you start the AUTOPROGRAM function. If you wish to adjust it
manually, press + or- to switch between the CABLE and AIR setting.
9
Page 12

Operating Features
Sleep Timer Operation
By setting the Sleep T'maer, you can
program your TV to turn itself off
after a certain period of time (up to
four hours). This is useful whenever
you want to watch TV for an hour or
so before going to sleep.
Setting the Sleep Thner
1. Press MENU until SETUP is high-
righted. Then press + to select the
SETUP menu.
4. When the Sleep Ttmer is turned on, the
letters SLP appear on the screen
whenever you change channels or
stations or press DISPLAY.
%
L'.
€."
g
_.?."
t
2"
2. Press + to select the length of time you
want the "IV to stay on. Each press of
the + button adds 30 minutes. Each
press of the- button subtracts 30
minutes.
SLEEP 2:00
5, Repeat step 1 to see the amount of time
remaining before the TV shuts itself off.
t-
rema_ning
3. When finished, the display disappears
from the screen in a few seconds. To
make it disappear more quickly, press
CLEAR on the remote.
6. When the Sleep T'tmer counts down to
one minute, the Sleep Timer display
appears on the screen. When this
display appears, press CLEAR to cancel
the Sleep T'maer if you want the TV to
remain on.
Cancelling Sleep Timer
Press MENU until SETUP is highlighted.
Then press + to select the SETUP menu.
Press the - button until the screen
shows" " "
10
Page 13

Operating Features
Alarm Timer Operation
The TV can be programmed to turn
itself on at a specific time within a 24-
hour period by setting the Alarm
Timer. This is useful for using the "IV
as an alarm clock. Instead of waking
up to a buzz, wake up to a favorite "IV
program. You may also set the timer
,for a special program that you might
otherwise forget.
Once you set the Alarm Timer, the TV
turns on at the preset drne, stays on for
one hour, and then shuts off. You may
need to adjust the channel and volume
level before activating the Alarm
Tuner. The Alarm Tuner turns on the
TV to the TV channel station and the
volume level that was selected the last
time the "IV was on.
Setting the Alarm Timer
1. Press MENU until SETUP is high-
lighted. Then press + to select the
SETUP menu.
2. Press MENU until ALARM is high-
lighted. Press - to select the correct
hour and press + to select the correct
minutes.
4. When the Alarm Timer is turned on,
the letters ALM appear on the screen
whenever you change channels or press
DISPLAY.
e
o
The "IV turns onat the presettime and
automaticallysetsthe SleepTmaerto 1
hour (60 minutes). It operates for 60
minutes then shuts off.
To turn the TV off before the 60
minutes is up, just press POWER on
the "IV or the remote. If you wish to
watch TV longer than 60 minutes, then
cancel the Sleep Timer by setting it
to "-:----". Details are on page 10.
3. Aft_ you set the ALARM time, press
MENU to select ALARM: ONIOFF.
Press + or- to switch this setting to the
ON position.
Turning the Alarm On and Off
1. Press MENU until the ALARM:
ON/OFF function is selected.
2. Press + or- to switch between ON and
OFE
11
Page 14

Operating Features
AutoProgramming Channel Memory
The Channel Memory is the list of TV
channel numbers your TV will stop on
when you press the CHAN up or down
button. You can program any list of
channels into the channel memory
although your TV is so automatic that
you will probably never need to
manually operate this feature. If you
do, follow the instructions at the fight.
The first time you turn on the TV, it
cycles through all channels and places
active channels into the channel
memory. You can then add or erase
channels as desired by following the
instructions in the "Editing Channel
Memory" section at the fight.
1. Connect home antenna(s) or cable to
your set.
2. Press MENU until SETUP is
highlighted. Press + to select the
SETUP menu.
SETUP
3. Repeatedly press MENU until
AUTOPROGRAM is highlighted.
Editing Channel Memory
Follow these instructions to erase and add
channels.
1. Press MENU until SETUP is high
lighted. Press + toselect the SETUP
menu.
SETUP
2. Repeatedly press MENU until EDIT
CHANNELS is highlighted. Press + to
select EDIT CHANNELS.
Notes:
• Signals from scrambled cable channels and
some cable channels having unusual signal
conditions may not be autoprogrammed.
• To prevent the TV from losing its channel
memory, make sure the outlet you plug your
TV into is "on" all the time. Do not plug
the TV into an outlet that can be turned on
and off by a wall switch. Also do not plug
the TV into an outlet on the back of another
device (such as a cable-TV converter box)
that is turned off when the device is turned
off.
• If there is an extended power failure, your
TV will automatically reprogram active
channelsthe first time you tom it on after
the power failure.
2rid
SETUP
Menu
4. Press + to begin AutoProgramming.
The "IV cycles through all channels
and places only active channels into
memory.
5. When the TV finishes cycling, you can
cheek the channels in memory by
pressing CHAN up or down.
2nd
SETUP
Menu
3.
Select the channel number by pressing
CHAN up or down or two number
buttons on the remote.
When "+" appears next to the channel
number, the channel is in the channel
list. Press - to erase the channel.
When "-" appears next to the channel
number, the channel is not in the
channel list. Press + to add the
channel.
4. Press - to erase or press the + to add.
12
Page 15

Connecting Your TV
Antenna/Cable Information
Most modem "IV antennas receive both
VHF (Very High Frequency) and UHF
(Ultra High Frequency) channels. Chan-
nels 2-13 are VHF channels, and channels
14-69 are UHF channels.
,/- Typical
Indoor
Antenna
Ty_c_
Outdoor
Antenna
In most situations you will get better
picture quality if you usean outdoor
antenna or connect your"IVto a cable-TV
system. If this is not possible, connect the
indoorantenna supplied with your "IV.
Cable-TV delivers both VHF and UI-IF
channels and other channels not available
from your antenna.
Shown below are two basic types of
antenna cables. Signals from a home
antenna may be conducted through either
type. Cable-TV signals, however, are
always conducted through round, 75-ohm
coaxial cable.
Types of Antenna Cables
Rat300-ohm
twin-leadcable
Round 75-ohm
coaxial cable
Slip-onEnd
Screw-onEnd
Use the connector shown below to connect
your antenna or cable-TV system to the
back of the "IV.
_Washer
Antenna
Connector _ Nut
IMPORTANT NOTE: Antenna
connector, nut, and washer must be
in place when TV is in use.
• Follow the instructions below if you
intend to connect the indoor antenna
supplied with your "IV.
-or-
" Follow the instructions on page 14 if
you intend to connect an indoor or
outdoor antenna to your TV.
.-or-
- Follow the instructions on page 15 if
you intend to connect a cable- TV
system to your "IV.
Dipole Antenna Connection
Follow the steps to connect the indoor antenna supplied with
your"IV (only ff you do not connect an outdoor antenna or a
cable-TV system).
0)
Insert the antenna base into the pocketed slot on the back
of your set. Stand at the back of your set with the antenna
twin-lead facing you, and press the base of the antenna
into the slot until it locks in place.
Connect the ends of the twin-lead to the Antenna Adapter
(supplied).
,_ Connect the Antenna Adapter to the ANTENNA connector
on the back of the TV.
®
Later, after you've turned on the TV, adjust the length and
position of the antenna rods for best reception.
• For viewing VHF channels, extend the rods fully.
* For viewing UHF channels, shorten the rods for best
reception.
Dipole Antenna (Supplied)
4
Slot
"'-., Base
Antenna Adapter
(Suppled) J <
Twin Lead
13
Page 16

Connecting Your TV
Home Antenna Connections
Follow one of the steps below to connect an indoor or outdoor antenna to your TV (not a cable-TV system).
A If the antenna cable coming from your home antenna is a 7S-ohm round coaxial cable that carries only VII (channels 2-13),
only UHF (channels 14-69), or VHF and URF channels, connect it to your set like this:
Cable _-ttmu_ Back
From. _ [_. _ of
Home
TV
Antenna VHF or UHF Only
or
VHF/UHF Combination
-OR-
B If the antenna cable coming from your home antenna is a 300-ohm fiat twin lead that carries only VHF (channels 2-13),
only UHF (channels 14-69), or VI-IFand UHF channels, connect it to your set like this:
Cable
Home _ __
Antenna
VHF or UHF Only
or Adapter
VHF/UHF Combination (supplied)
Back
of
TV
-OR-
C If the antenna cables coming from your home antenna(s) are a
75-ohm
round coaxial cable that carries VHF
(channels
2-13)
and a 300-ohm flat twin-lead cable for UHF (channels 14-69), connect them to your set like this:
Push OI1
UHF ; _ ......
...... Back
Cables
From and _ ..... of
Antenna(s) VHF I ....
Antenna Mixer*
Transformer* (use only #193984)
Note: Be sure to connect the UHF antenna cable to the (such as #AH011)
screws on the Antenna Mixer and the VHF antenna
cable to the screws marked VHF.
-OR-
D If the antenna wires coming from your home antenna(s) are two 300-ohm flat twin-lead cables as shown here, connect them
to your set like this:
Cables UHF
From
Home and
Antenna(s) VHF
Push on
Note: Be sure to connect the UHF antenna cable to the UHF screws on the Antenna
IVlixerand the VHF antenna cable to the screws marked VHE
MCftNNA
Back
..... (_ of
TV
Antenna Mixer*
(use only #193984)
t
14
Optional accessory available from your dealer.
Only use Antenna Mixer (Stock #193984).
Page 17

LiJ Acces
Remote C,
Wh_ This is the
*An_ with yourI
order form
if desired.
For
• 90
• On
•Tw
The
Optional
This rcmo
Wb T9 but c_
• Pa'. of remote.
tel, boxes, an(
.Pa:
re[
Connecting Your TV
Cable-TV Connections
Follow one of these steps to connect a cable-TV system to your TV instead of a home antenna. Since cable-TV
vary, you may wish to consult your local cable-TV company for additional information.
A Follow this diagram if your cable company does notrequire a cable box (no scrambled channels):
Incoming _ [_. @
Cable r
B Follow this diagram if your cable company requires a cable box that can be controlled by remote control:
Hov
•Fo
T_
•Fo
Re
•To
in
• Sh
.Q
an
• S[,
•D;
•Rt
-A
-A
.A(
Dipole A
Designed
yourTV.
and
Antem
Screw..o
Attaches
connect(
on theb_
ends sc_
SeCUre C
M_rlEN_
Incoming
Cable
Remember to runeyour TV to the
outputchannelof the cable box (usually
2, 3, or 4) when selecting channels via
the cablebox.
C Follow this diagram if your cable company requires a cable box that cannot be controlled by remote control:
Incoming
Cable
©
®
Note: These optional accessories (2-way
splktcr(_), A/B switchC_, and three coaxial
cables ©) are available as a kit under
#AH041BL.*
©
CAIR_ BOX
©
®
Push-oz
Attache
connect
on the Ic
Ends p_
connect
Note: /
subject'
The "A" position on the A/B switch lets you select all
non-scrambled channels by the TV's remote.
The "B" position allows you to select scrambl
via the cable box. Remember to tune your T_
output channel of the cable box (usually 2, 3,
when selecting channels via the cable box.
* Optional accessories are available from most dealers or electronics supply stores.
Page 18

3
E
"!
If you would like a copy of this manual in French, please follow the instructions below.
Si un livret d'instructions en franqais n'est pas inclus avec votm appareil, vous pouvez
en obtenir un (INDIQUER LE _O DE MODULE, VOTRE NOM, ET VOTRE
ADRESSE) en vous adressant _:
Thomson i_lectronique Grand Public du Canada
Service des donnees techniques
6540 Tomken Road
Mississauga, Ontario, Canada
LST 2E9
If your TV needs service, please contact your dealer orthe nearest servicenter. Please do
not send any products to the Indianapolis address listed below or on the box. This only
adds delays for service of your TV. For service information refer to the warranty page.
f_ 111'IOMSONCON.._I,IMF_ 13.1_ffI'RONICS
10330 N. Meridian St.
Indianapolis, IN 46290
°1995 Thomson Consumer Electronics, Inc.
Trademark(s) *Registered
Mama(s) Registrada(s)
Printed in Singapore
TOCOM 2013809C
 Loading...