

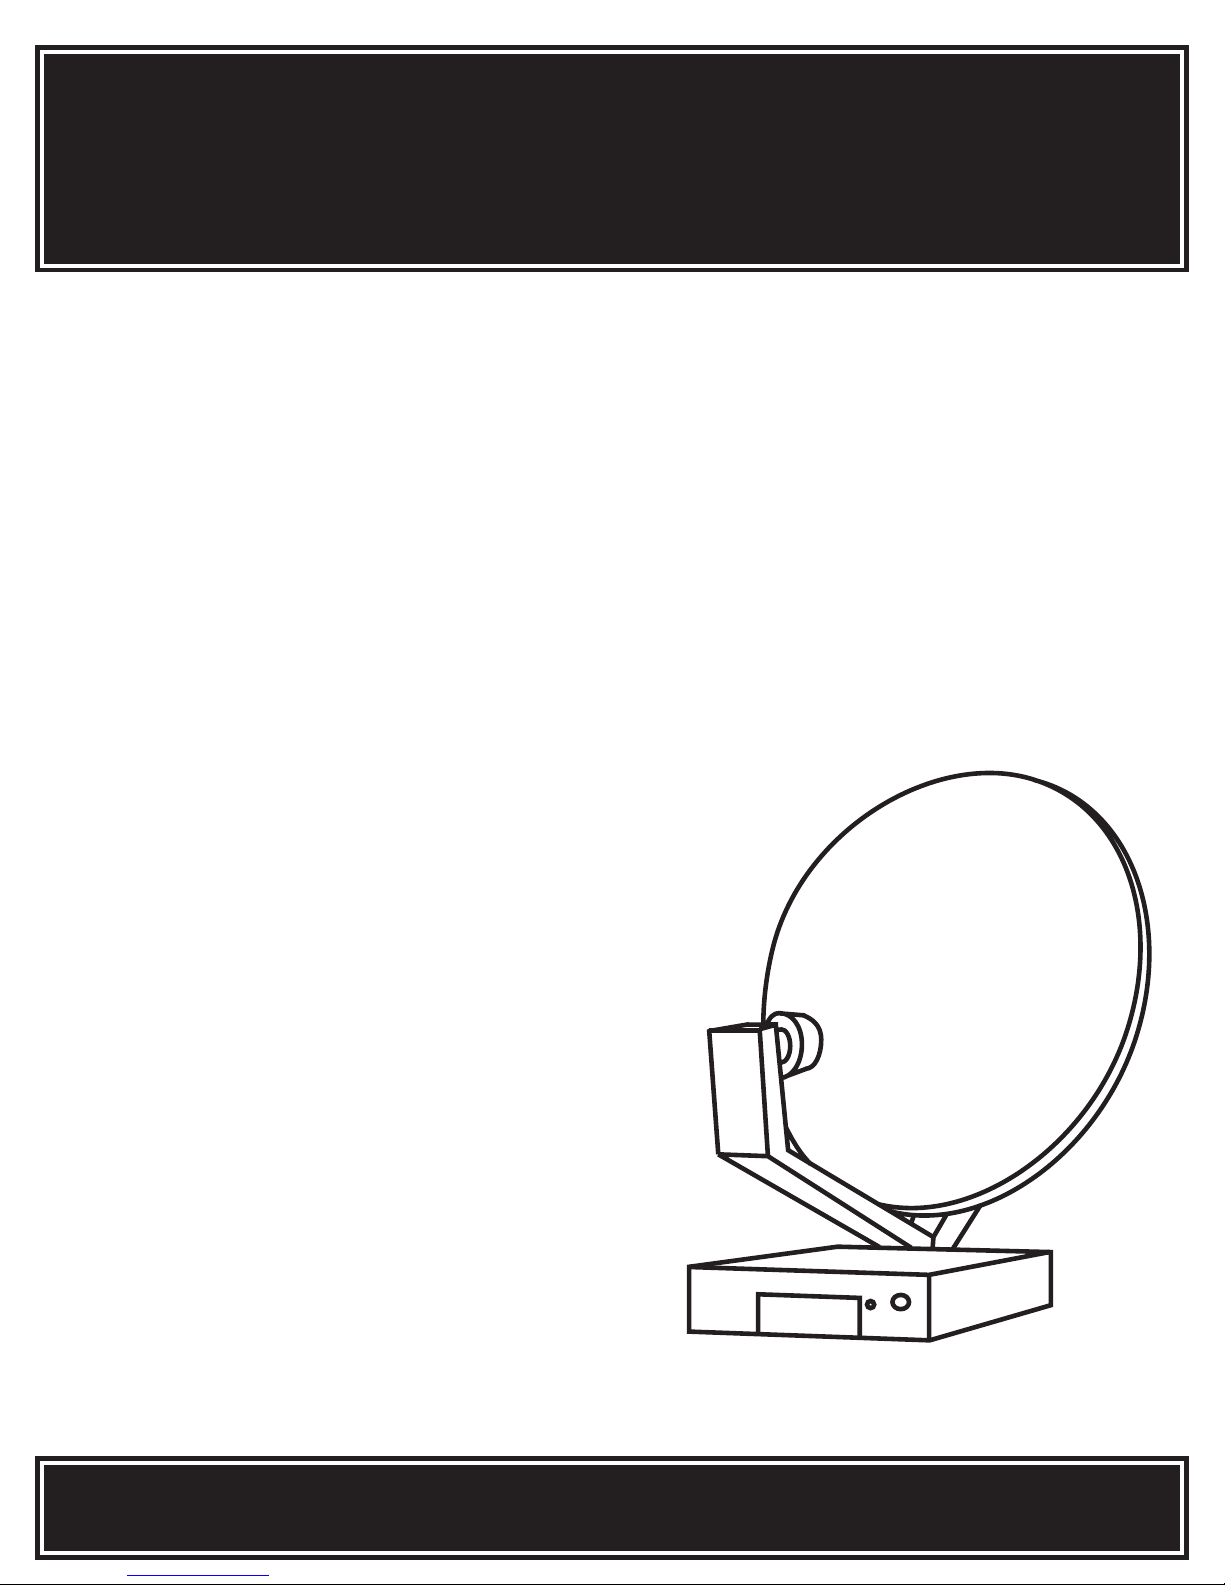
SATELLITE RECEIVER
Models:
DXD406RD
DXD426RD
DXD506RD
Please read these instructions
before operating this product
for the first time.
TOCOM 15390330
USER'S GUIDE

Safety Information
WARNING
To reduce risk of fire
or shock hazard, do
not expose this
receiver to rain or
moisture. Do not place
any objects filled with
liquid, such as vases,
on the receiver.
Cautions
WARNING
RISK OF ELECTRIC SHOCK
DO NOT OPEN
This symbol indicates
“dangerous voltage” inside the
product that presents a risk of
electric shock or personal injury.
Do not stack electronic components or other objects on top of
the digital satellite receiver. The slots on top of the receiver must be
left uncovered to allow proper airflow to the unit. Blocking the airflow
to the unit could impair performance or damage your receiver and other
components.
Do not stack the digital satellite receiver on top of a “hot component”
such as an audio power amplifier.
Power Consumption: 120-240V~50-60Hz AC
20 Watts
This symbol indicates
important instructions
accompanying the product.
IMPORTANT NOTICE: This device incorporates an anticopy process technology that is protected
by U.S. patents and other intellectual property rights. The anticopy
process is licensed for non-commercial, home use only. Reverse
engineering or disassembly is prohibited.
Care and Cleaning: Use a soft cloth or dusting attachment of your vacuum cleaner to dust
your
digital satellite receiver. Remove dust from the ventilation holes on
the top and bottom.
Plastic surfaces are easily scratched and can be marred by alcohol and
various solvents. Avoid excessive use of oil-based furniture polishes since
the materials used in the cabinet will accumulate more dust. A nonabrasive, anti-static cleaner/polisher is recommended.

Table of Contents
Setup and Connections ........................................ 3
Step 1: Unpack the System ............................................................. 4
Step 2: Connect Your Receiver to Your TV and Other Devices ..... 4
Things to Know Before Connecting Components .................. 4
Jacks and Cables........................................................................ 5
Back of the Receiver ................................................................. 6
Basic Connection ....................................................................... 7
Advanced Connection .............................................................. 7
Step 3: Connect the VCR Controller ............................................... 8
Locating the VCR’s Infrared Remote Control Sensor .............. 8
Selecting a VCR Type ................................................................ 8
Step 4: Find the Video Input Channel on Your TV ........................ 9
Step 5: Interactive Setup ............................................................... 10
Step 6: Place Batteries in the Remote Control ............................ 10
Step 7: Plug in and Turn on the System ....................................... 10
Using the Remote ............................................... 11
Remote Control Buttons ............................................................... 12
The Point and Select Method ....................................................... 14
Programming the Remote Control .............................................. 14
Testing the Remote Control ................................................... 14
Using the Remote to Control a Device .................................. 16
Modes of Operation ............................................................... 16
Using the Remote to Control a Second
Digital Satellite Receiver ........................................................ 16
Program Guides .................................................. 19
Anatomy of a Program Guide ...................................................... 20
The Channel Banner ...................................................................... 21
Using the GUIDE Button ......................................................... 22
Getting Around in the Guides ............................................... 22
Tuning to a Program ............................................................... 23
Additional Program Guides.................................................... 24
Sorting the Guides .................................................................. 26
The Menu System ............................................... 31
Using the Menu System ................................................................ 32
Exit and Help ........................................................................... 32
Menu Descriptions .................................................................. 33
Don’t Be Afraid to Explore ..................................................... 33
The Program Guide ....................................................................... 34
Anatomy of a Program Guide ................................................ 34
The Mailbox ................................................................................... 35
How to Tell When you Have Mail .......................................... 35
Checking Your Mail................................................................. 35
1

Table of Contents
Pay-Per-View Programs ................................................................. 36
Purchasing and Previewing .................................................... 36
Tuning to a PPV Program ....................................................... 36
Using the Program Guide for PPV Programs......................... 37
Using the Attractions Guide................................................... 37
Using the Purchases Menu ..................................................... 38
Reviewing and Canceling an Upcoming Purchase ...................... 39
Spending Limits....................................................................... 39
Paying for a Pay-per-view Program ....................................... 40
Languages Menu ........................................................................... 41
Timers Feature ............................................................................... 42
Profiles ........................................................................................... 42
Creating a Profile Channel List .............................................. 43
Setting the Rating Limit ......................................................... 43
Viewing Hours......................................................................... 44
Setting Up Spending Limits .................................................... 45
Locking a User’s Profile........................................................... 45
Locking the System ................................................................. 46
Choosing Your Profile ............................................................. 47
Options .......................................................................................... 47
Interactive Setup ..................................................................... 48
System Info .............................................................................. 48
Preferences .............................................................................. 48
System Options ....................................................................... 49
Format ..................................................................................... 49
Alternate Data ........................................................................ 49
The Dish Pointing Menu Screen ................................................... 50
Using the On-Screen Signal Meter......................................... 51
Edit Fetch Menu ............................................................................ 52
Customizing the Fetch Menu ................................................. 52
Customizing the FETCH Button.............................................. 53
Tips & Troubleshooting ...................................... 55
Running the System Test ............................................................... 56
Fine-Tuning the Signal .................................................................. 56
How Signal Flow works ................................................................. 57
Appendix ............................................................. 59
Index .................................................................... 60
StarSight-Licensed: The manufacture and sale of the television schedule feature of this product was licensed
under one or more of the following patents of StarSight Telecast, Inc.; U.S. Patent Nos. 4,706,121; 4,977,455;
5,151,789; 5,335,277: and 5,353,121.
2

Setup and Connections
Setup and Connections
Getting Started
This manual is designed to get you started quickly. The first
three sections of the manual introduce you to your satellite
system and show you how to use the on-screen guides and
menus.
In Setup and Connections, you’ll learn:
• different ways to connect the receiver to your TV
• how to connect the VCR controller
• how to program the remote control
Using the Remote defines the buttons of the remote and how
to program it to control other components.
Program Guides details the items and features associated with
the different guides.
The Rest Of The Manual
The rest of the book includes menu information,
troubleshooting information—such as running a system test—
and an index.
Setup and Connections
1
➣
Using the Remote
2
➣
3
Program Guides
➣
The Menu System
4
➣
Tips & Troubleshooting
5
3
Setup and Connections
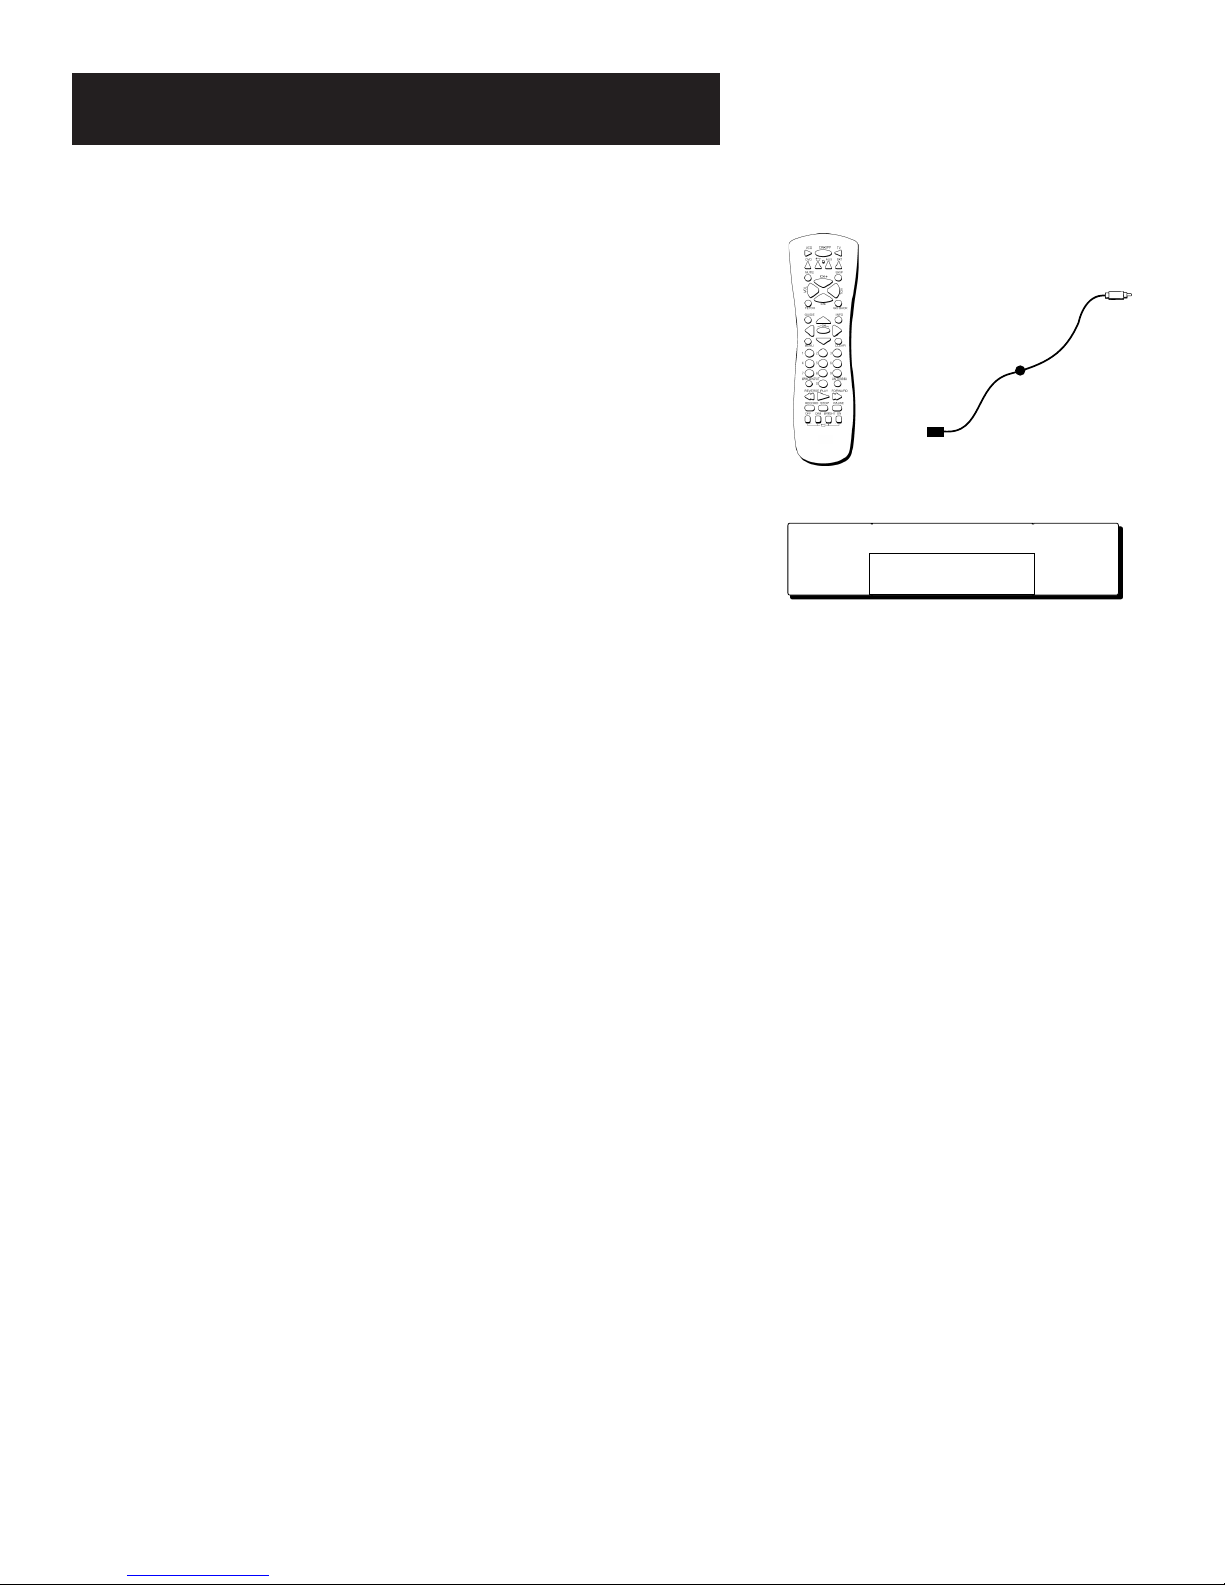
Step 1: Unpack the System
Make sure to locate the remote control and the VCR controller.
Step 2: Connect Your Receiver to
Your TV and Other Devices
During the satellite dish antenna installation, the receiver may have
been connected to your TV with just a coaxial cable for the system test.
Depending on what components you have, another connection may
provide better picture and audio quality. The following sections provide
cable and connection information to help you decide what connection is
best for you.
Things to Know Before Connecting
Components
Protect Your Components from Power Surges
• Connect all components before plugging any power cords into the
wall outlet.
• Always turn off the receiver, TV, and other components before you
connect or disconnect any cables.
Position Cables Correctly to Avoid Audio Hum or
Interference
• Insert all cable plugs firmly into their jacks.
• Place the audio/video cables to the sides of the TV’s back panel
instead of straight down the middle after you connect your
components.
Remote Control
VCR Controller
Receiver
• Try not to coil any twin-lead cables; keep them away from the
audio/video cables as much as possible.
• Make sure all antennas and cables are properly grounded. Refer to
the safety sheet packed with your unit.
Protect Your Components from Overheating
• Do not block ventilation holes in any of the components. Arrange
the components so that air can circulate freely.
• Do not stack components.
• Allow adequate ventilation when placing your components in a
stand.
• Place an amplifier or receiver on the top shelf of the stand so that
heated air rising from it will not flow around other components.
4
Setup and Connections
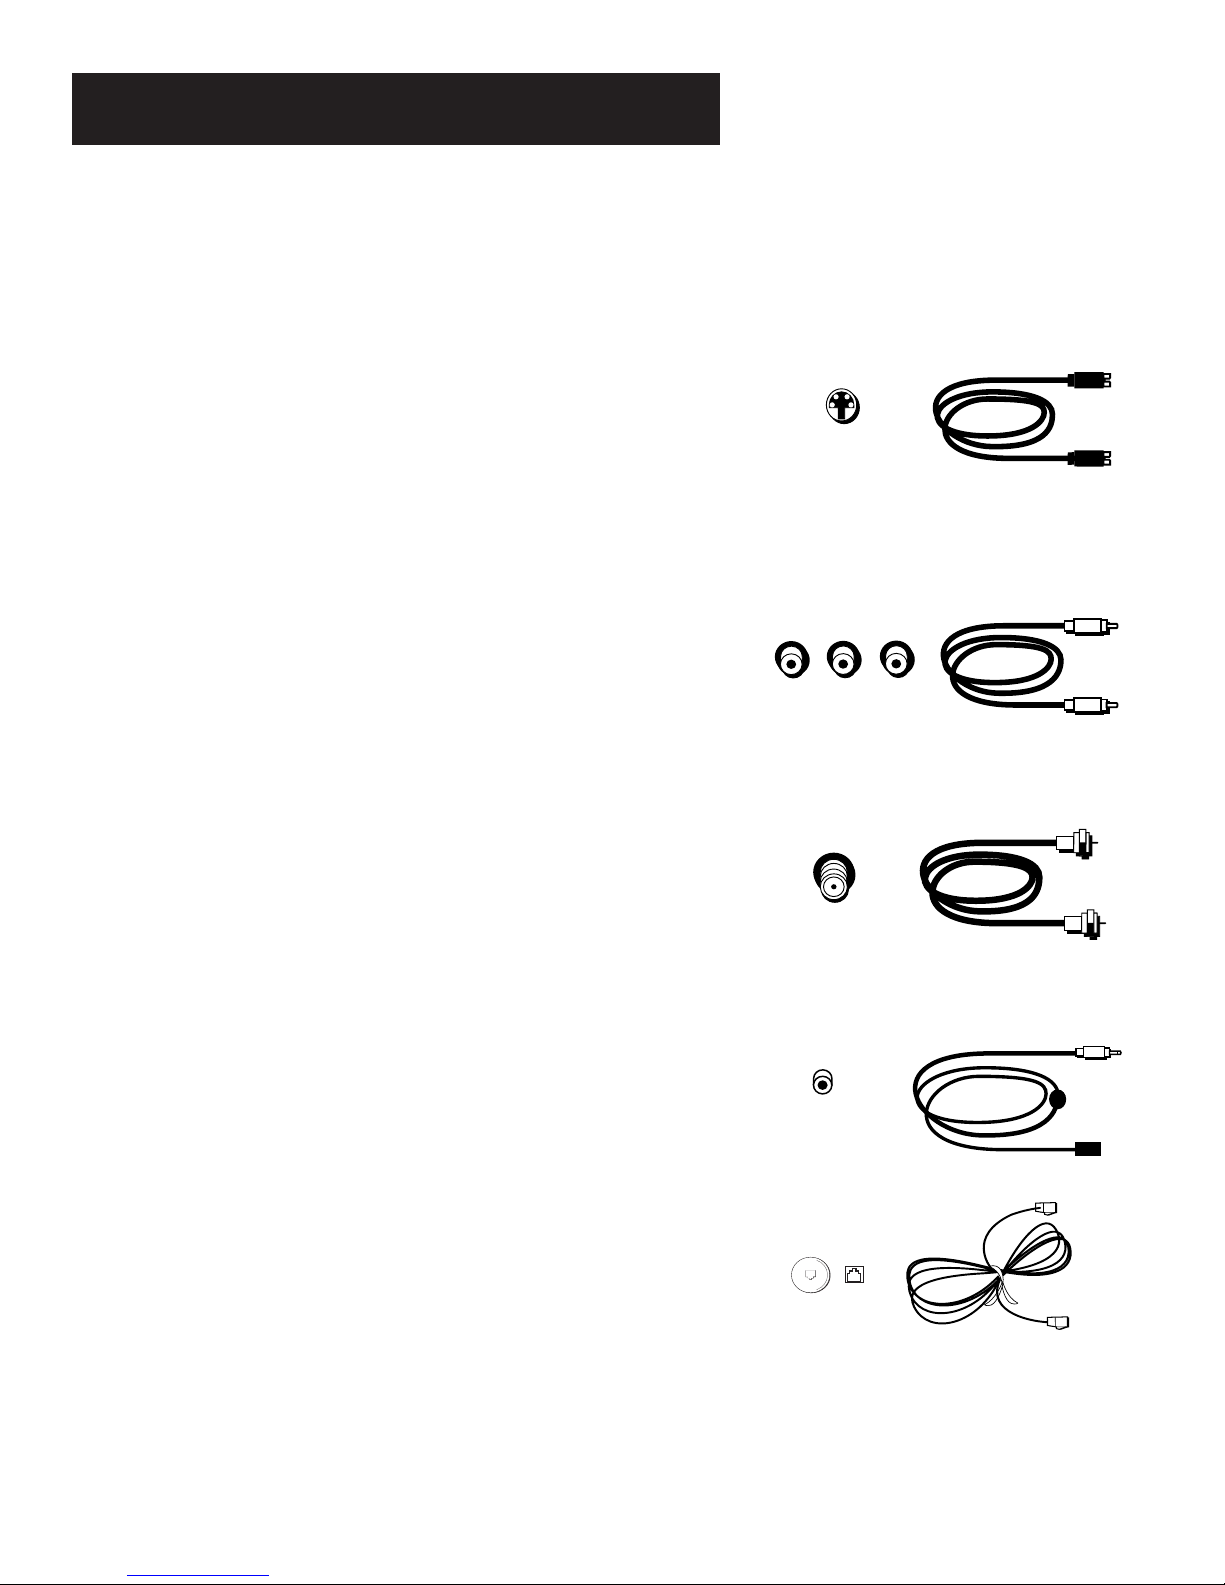
Jacks and Cables
Below is a description of the jacks and cables you can use to make
connections. Note that not all cables come with your satellite system.
S-Video Jack and Cable
The S-Video jack provides the best picture quality for your satellite
system.
This jack is available on many TVs and is used in conjunction with audio
cables to connect the receiver to your TV. Remember also to connect the
left and right audio cables because the S-Video jack carries only the
picture signal, not the sound.
Audio/Video Jacks and Cables (RCA-type)
The audio/video jacks provide very good picture and stereo sound
quality, and should be used if your TV has no S-Video jack.
S-Video Jack
Theses jacks are used for most audio/video connections between
components. The receiver audio/video jacks are color coded (yellow for
video, red for right audio, and white for left audio). If your TV has only
one input for audio (mono), connect it to the right (red) audio jack on
the receiver.
RF Jacks and Coaxial Cables (F-type)
The RF jacks provide good picture and mono sound quality, and are to
be used if audio/video connections are not available for your TV.
These jacks are required for antenna or cable-TV connections. The RF
jacks on the receiver are labeled IN FROM ANT and OUT TO TV. The
coaxial cable supplied with your system is used to connect the RF jacks
between the receiver and your TV’s antenna input.
VCR Controller Jack and Cable
The VCR controller cable plugs into a jack on the receiver’s back panel.
The other end of the cable affixes to your VCR’s remote sensor.
Telephone Jack and Cord
The telephone line cord is required to connect your TV to a phone line.
The phone line connection is used to periodically call out to DIRECTV™.
You will need an RJ11 type modular jack, which is the most common
type of phone jack and might look like the one pictured here. If you
don’t have a modular jack, contact DIRECTV to find out how to get one
installed.
Audio/Video Jacks
RF Jack
VCR Controller Jack
Phone Jacks
5

Setup and Connections
Back of the Receiver
The diagram below describes each of the back panel jacks found on your
receiver. When connecting A/V cables, be sure to connect corresponding
OUTPUTS and INPUTS (Video to Video, Right Audio to Right Audio, etc.).
AUDIO (R and L)
Provide better sound
quality than the OUT TO
TV jack. If your TV has
audio/video capability,
use these jacks to
connect the receiver to
your TV. You must also
connect the VIDEO jack.
SATELLITE IN
Use to connect
the receiver to
the satellite
dish antenna.
OUT TO TV Use to
connect the receiver
to your TV. However,
if your TV has audio/
video jacks, you
should use those
jacks to get better
picture and sound
quality.
SATELLITE
IN
VIDEO Provides better
picture quality than the OUT
TO TV jack. If your TV has
audio/video capability, use
this jack to connect the
receiver to your TV. You must
also connect the AUDIO jacks.
R
AUDIO
OUT
TO
TV
FROM
IN
ANT
VIDEO
L
IN FROM ANT Use to
connect the system to
an off-air antenna or
cable TV signal.
VCR CONTROL
Allows the receiver
to control your VCR.
VCR
S-VIDEO
LOW
SPEED
DATA
PHONE JACK
S-VIDEO Provides the
best picture quality. If
your TV has S-VIDEO
capability, use this jack
along with the audio/
video jacks to connect
the receiver to your TV.
PHONE JACK Use to
connect the receiver
to a phone line. The
system requires a
phone line
connection to
periodically call out
to DIRECTV.
6
Setup and Connections
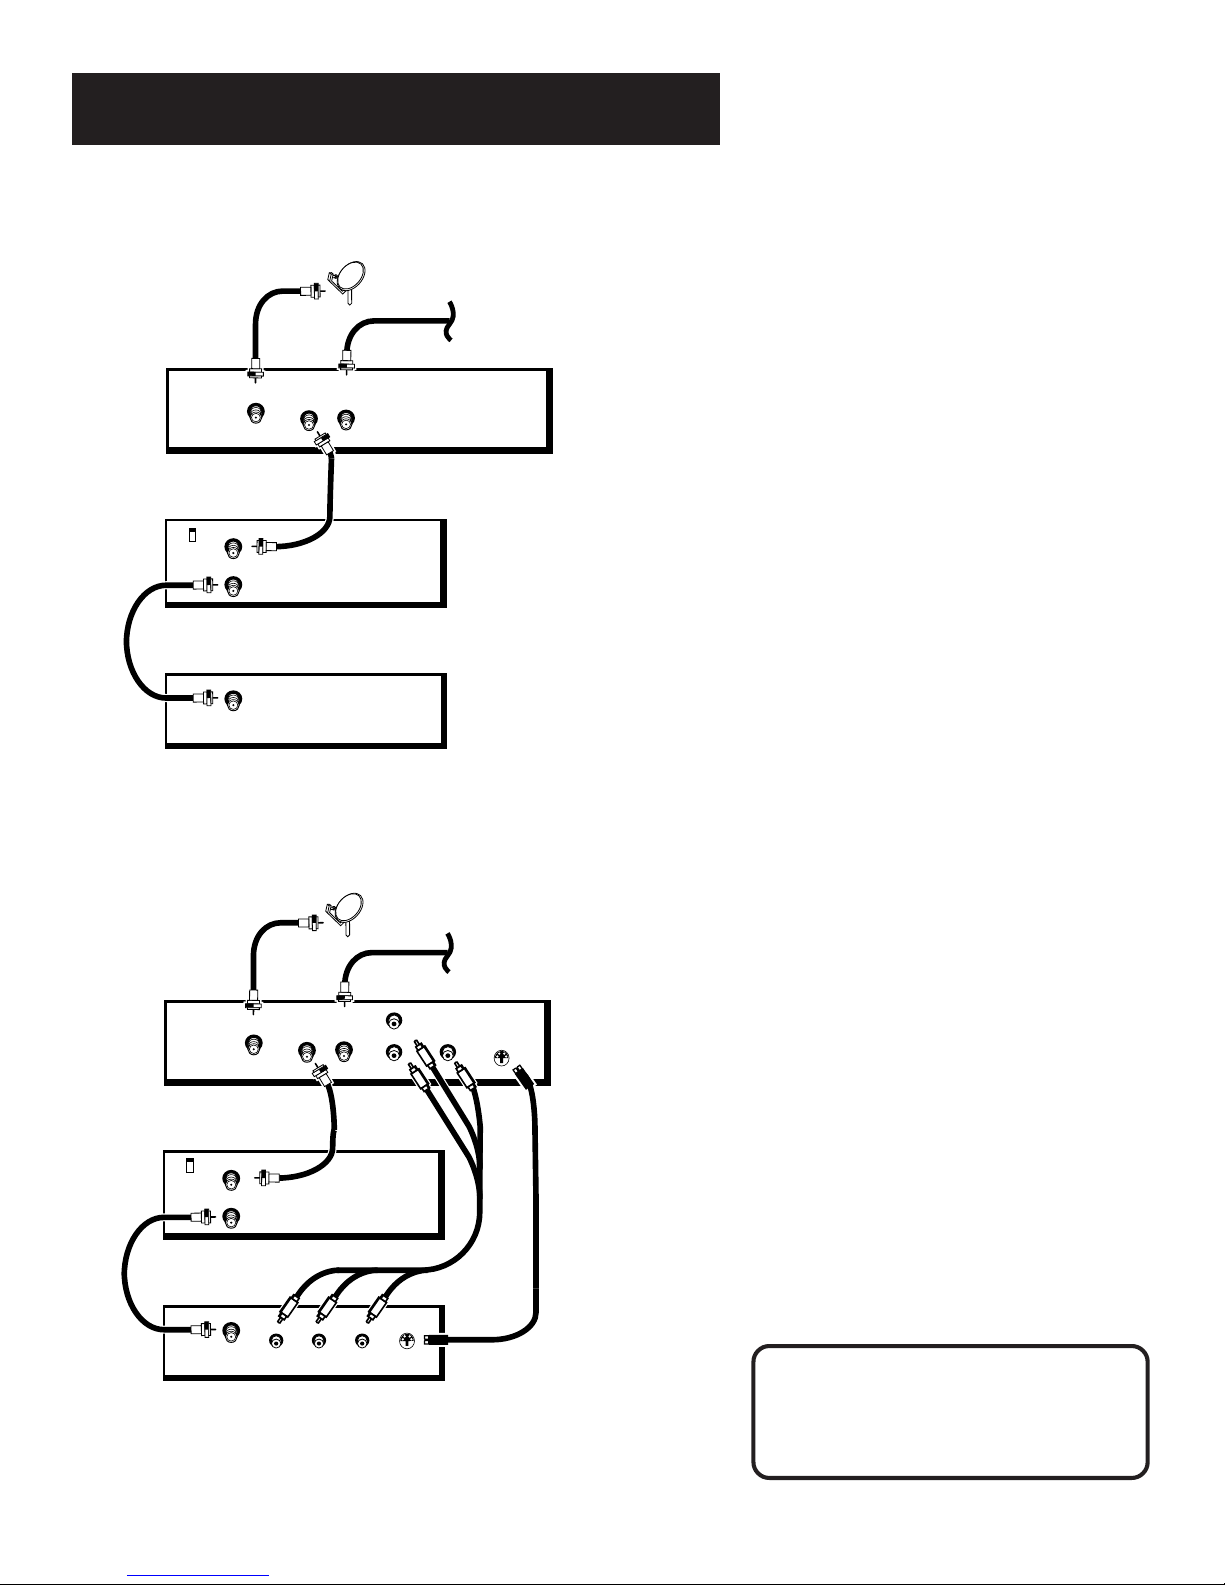
Basic Connection
SATELLITE
RECEIVER
IN
OUT
FROM
TO
ANT
TV
VCR
TV
SATELLITE IN
IN FROM ANT
CH3
CH4
OUT TO TV
IN
SATELLITE
DISH
CABLE OR
OFF-AIR ANTENNA
How to View Your Components
To watch satellite programming with this
connection, tune the TV to either channel 3 or
4. (The default is channel 3.) You may change
the output channel to 4 by choosing Systems
Options from the Options menu and selecting
Output Channel.
To record satellite programming, tune the
receiver to the desired channel and set your
VCR to record on channel 3 or 4.
To view VCR recordings, tune the TV to the
VCR output channel (usually channel 3 or 4)
and set your VCR to play. If your VCR is a
brand other than RCA, GE, or P
may need to program the remote to control
the VCR. See the next section, “Using the
Remote.”
ROSCAN, you
Advanced Connection
SATELLITE
DISH
SATELLITE
RECEIVER
IN
VCR
TV
OUT
SATELLITE IN
CH3
IN FROM ANT
CH4
OUT TO TV
IN
TO
TV
LR
FROM
ANT
R
AUDIO
L
VIDEOAUDIO
S-VIDEO
CABLE OR
OFF-AIR ANTENNA
VIDEO
S-VIDEO
How to View Your Components
To watch satellite programming with this
connection, tune the TV to the Video Input
Channel. (To find your TV’s Video Input
Channel, follow Step 3 on the next page). Then
tune the receiver to the desired channel.
To record satellite programming, tune the
receiver to the desired channel. Then set your
VCR to record on channel 3 or 4.
To view VCR recordings, tune the TV to the
VCR Output Channel (usually channel
3 or 4—CH3 or CH4 on the back of the VCR)
and set your VCR to play. If your VCR is a brand
other than RCA, GE, or P
ROSCAN, you may need
to program the remote to control the VCR. See
the next section, “Using the Remote.”
CAUTION
Do not stack electronic components or
other objects on top of the receiver. See
Safety Information, inside front cover.
7
Setup and Connections
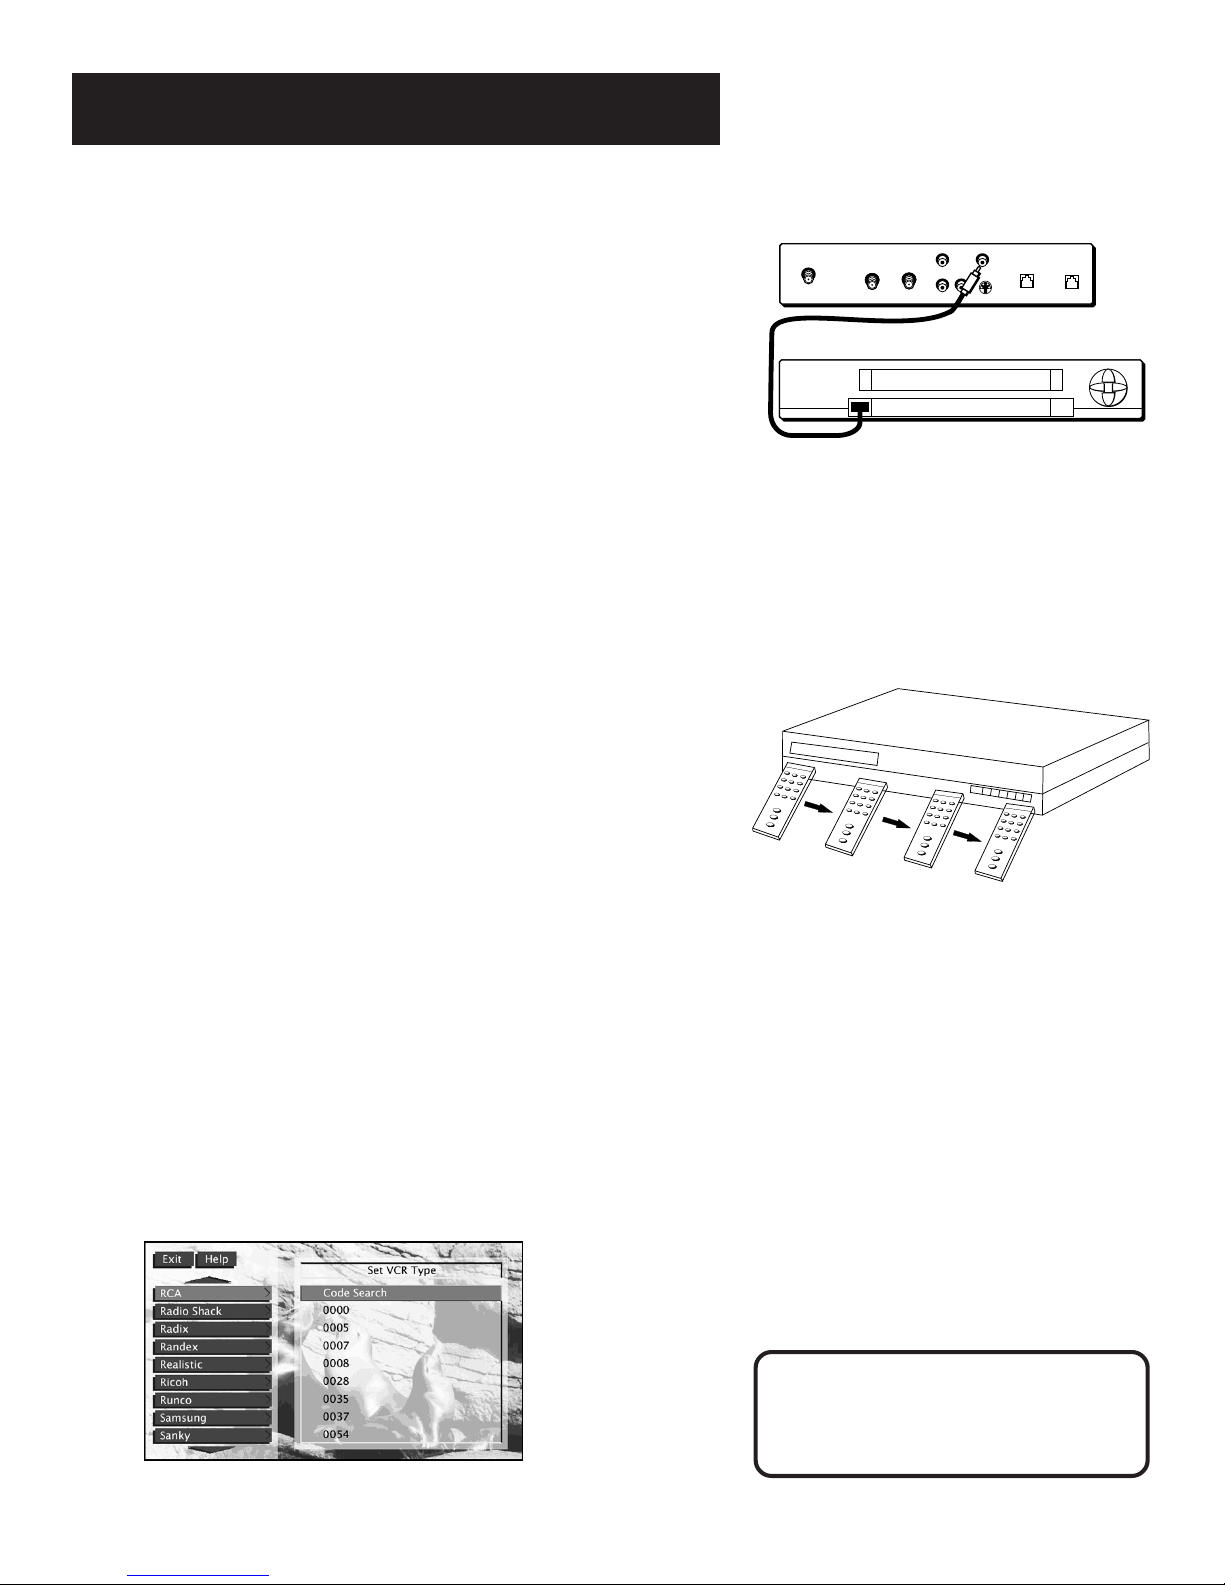
Step 3: Connect the VCR Controller
In order for the receiver and VCR to communicate, you need to attach the
VCR Controller to the back of the receiver.
1. Plug the VCR Controller into the VCR CONTROL jack on the back of
the receiver.
2. Affix the other end to the remote sensor on your VCR.
Locating the VCR’s Infrared Remote
Control Sensor
The VCR Controller must be affixed directly over the infrared remote
sensor on your VCR.
Some VCRs have a label that identifies the infrared remote sensor, and
others do not. If the IR sensor is labeled on your VCR, affix the VCR
controller directly over the sensor.
For VCRs that do not label the remote sensor, you need to use the VCR’s
remote to locate the sensor before affixing the VCR controller.
1. Hold the VCR’s remote control so that it is touching the front
of the VCR.
2. Slowly move the remote over the front of the VCR while pressing the
remote power button on and off.
Back of Receiver
SATELLITE IN
Front of VCR
REMOTE SENSOR
OUT
IN
TO
TV
R
FROM
ANT
L
AUDIO
VIDEO
S-VIDEO
VCR
HOME CONTROL
PHONE JACK
VCR
3. When your VCR turns off or on, you have located the sensor.
To test the VCR controller, use a piece of clear tape to temporarily attach
the VCR controller to the spot where you think the sensor is located, and
then follow the steps described under “Selecting a VCR Type.”
Selecting a VCR Type
You need to tell the receiver which VCR brand you are using.
1. Press MENU on the remote to bring up the Main menu.
2. Point to Options and press OK.
3. Point to System Options and press OK.
4. Point to Set VCR Type and press OK.
If the Main menu doesn’t appear when
you press MENU, the remote might not be
in satellite mode. Try pressing the SAT
button on the remote, and then MENU.
The Set VCR Type screen lets you enter a code for
your VCR.
8

Setup and Connections
5. There are three ways to input the code for your VCR:
• Locate the manufacturer of your VCR from the list on the screen
using the up and down arrows on the remote control.
• Select the Code Search button to automatically test all codes.
• Select Other to enter the codes manually.
6. Follow the on-screen instructions to ensure that you are using the
correct code. If the VCR automatically stops, then you know that the
receiver and the VCR are communicating.
• Some VCR brands may not be capable of being controlled by the
receiver.
Step 4: Find the Video Input Channel
on Your TV
• Note: You do not have to complete this step if you used the basic
connection.
If you used the advanced connection, you must tune your TV to the Video
Input Channel to see the screens. Since there are so many brands and
models of TVs, there are just as many ways to access a TV’s Line Input
Channel. Below are some things you can try.
• If your TV brand is RCA, GE, or P
came with your receiver. Then press the WHO•INPUT button on the
remote.
• If your TV brand is not RCA, GE, or P
Manual.
If you cannot find your TV Owner’s Manual, you will have to
investigate. You might access the TV’s Video Input Channel by:
• pressing a button on the remote
• finding it through the TV’s menu system
• tuning directly to it by pressing a specific channel number
• going through all channels in the list by pressing the channel up
or down buttons on the TV
Below are lists of some of the different ways manufacturers label
the Video Input Channel.
ROSCAN, press TV on the remote that
ROSCAN, consult your TV Owner’s
Video Channel Variations
Button/switch
on the TV
VIDEO
SIGNAL
VID 1
VID 2
S-VID
S-VIDEO
Button on the
TV Remote
VID 1
LINE
VID
VIDEO
S-VID
INPUT
SOURCE
AUX
Channel #
00
90
91
92
VID 1
VID 2
Signal Flow
The decision to choose a Line Input
Channel or Video Input Channel should be
made with an understanding of Signal
Flow—the way the signal flows through
your components and ends up as a picture
on your TV screen.
To learn more about how signal flow
works, see the example in the
“Troubleshooting” section.
9

Setup and Connections
Step 5: Interactive Setup
If you need to run the interactive setup, select Options from the
Main menu, then select Interactive Setup.
If you just want to check your dish pointing coordinates, or run the
signal strength meter, select Dish Pointing from the Main menu.
Step 6: Place Batteries in the
Remote Control
Follow these steps whenever you need to install or change the
batteries in your digital satellite receiver’s remote.
1. Remove the cover from the battery compartment.
2. Insert batteries into the battery compartment, matching
the + and – end of each battery.
3. Replace the cover.
STEP 7: Plug in and Turn on the
System
Plug the end into the wall outlet. Be sure to insert the plug
completely.
To turn on the system, press the SAT button on the remote or on the
ON•STBY button on the front panel. If your TV brand is RCA, GE, or
P
ROSCAN, press the TV button on the remote to turn on the TV. If your
TV brand is not RCA, GE, or P
Remote, for details on how to use the remote to control your TV.
NOTE: Your receiver is not completely turned off as long as it is
receiving power from the wall outlet. To shut the receiver off
completely, unplug it from the wall.
ROSCAN, see the next section, Using the
10

Using the Remote
Using the Remote
How to use your Universal Remote
This section defines the buttons on the remote control
and describes how to program it.
The universal remote can be programmed to control most
brands of remote controllable TVs, VCRs and cable boxes.
If you have an RCA, GE, or PROSCAN TV, you probably don’t
need to program it at all.
Setup and Connections
1
➣
Using the Remote
2
➣
Program Guides
3
➣
The Menu System
4
➣
Tips & Troubleshooting
5
11
Using the Remote
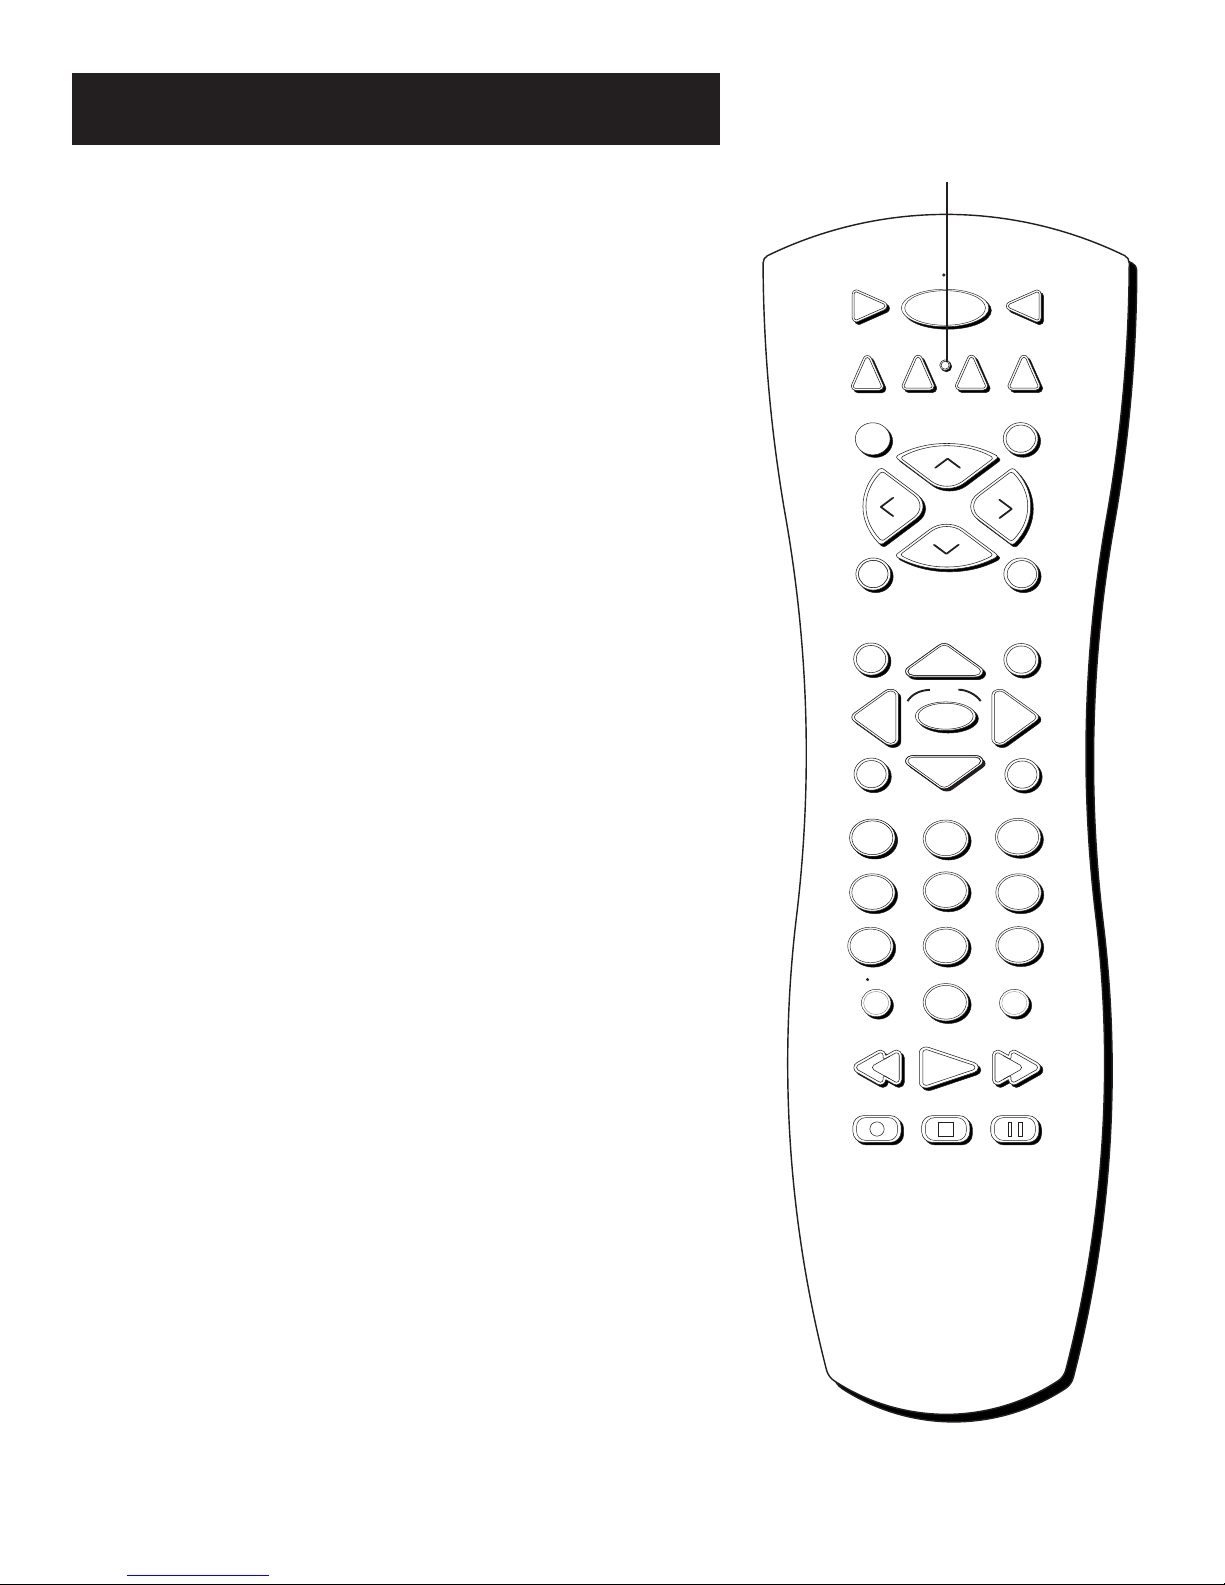
Remote Control Buttons
LED
ON•OFF Turns the device you are controlling on or off. You can also
use the power button on the top of the digital satellite receiver to turn
it on and off. When pressed twice within two seconds, all devices that
are on will be turned off (this feature only works with most RCA,
ProScan and GE products).
VCR1 Tells the remote to control the VCR.
VCR2 Tells the remote to control a second VCR (or other
programmable component).
TV Tells the remote to control the TV.
DVD Tells the remote to control the DVD player.
LED Light which indicates programming mode when programming the
remote. (The LED on the front panel of the receiver flashes when you
have mail). The LED on the remote also flashes when a valid remote
button is pressed.
AUX Tells the remote to control other devices, such as a cable box or
laser disk player.
SAT Tells the remote to control the receiver (on older remotes, this
feature may be labelled “SAT1”).
MUTE Reduces the TV’s volume to its minimum level. Press again to
restore the volume.
1
VCR1
DVD
L
O
V
FETCH
GUIDE
MENU
VCR2
2
ON OFF
H
C
C
H
OK
AUX
+
-
GO BACK
INFO
CLEAR
3
SAT
SKIPMUTE
TV
V
O
L
SKIP This key is not used by the receiver.
CHAN UP/DOWN Use to scan up and down through the channels in
the current channel list. If you are in the Program Guide or menu system,
use the CHAN UP/DOWN buttons to page up and down a screen at a
time. You can also use the CHAN UP/DOWN buttons on the top of the
digital satellite receiver to change the channel.
VOL UP/DOWN Adjusts the audio volume on the TV.
FETCH This key can be used to either execute a specific function that
you have assigned to it, or to bring up a list of your favorite functions to
choose from. It can be set to automatically open the Channel Guide, for
instance, or bring up the control panel for the translucency of the
displays. This key will either execute the function you have assigned to
it, or it will bring up the Fetch menu for you to assign a function.
GO BACK Moves you back and forth between your last two selected
channels. In the menu system, returns you to the previous screen.
GUIDE Brings up the on-screen program guide. Press the GUIDE button
several times to toggle through the different types of guides.
INFO Brings up the on-screen channel banner. Press again to get
program details.
ARROWS Use the navigation arrows to move the on-screen highlight
up, down, left, or right. Using the arrows to highlight a menu item is
also called “pointing.”
4
7
WHO INPUT
RECORD
5
8
0
PLAY FORWARDREVERSE
STOP PAUSE
6
9
ANTENNA
12

Using the Remote
OK Selects a highlighted choice in the menu system.
MENU Brings up the Main menu. If you are already in the menu system,
press OK or MENU to select a highlighted choice.
CLEAR Removes the on-screen displays and returns to normal viewing.
DIGIT KEYS (0 - 9) Use the digit keys to tune directly to a channel. If you
are in the menu system, use the digit keys to enter numbers for the time,
date, channel and passwords.
WHO•INPUT Press the WHO•INPUT button one or more times to toggle
through your user profiles. It also accesses the video input channel when in
TV mode.
ANTENNA Lets you switch the source of the video signal from satellite
signals to an off-air antenna or cable signal when using the OUT TO TV jack.
TRANSPORT KEYS (REVERSE, PLAY, FORWARD, RECORD, STOP,
PAUSE) Use when controlling an auxiliary device, such as a VCR or
Laserdisc player.
13
Using the Remote
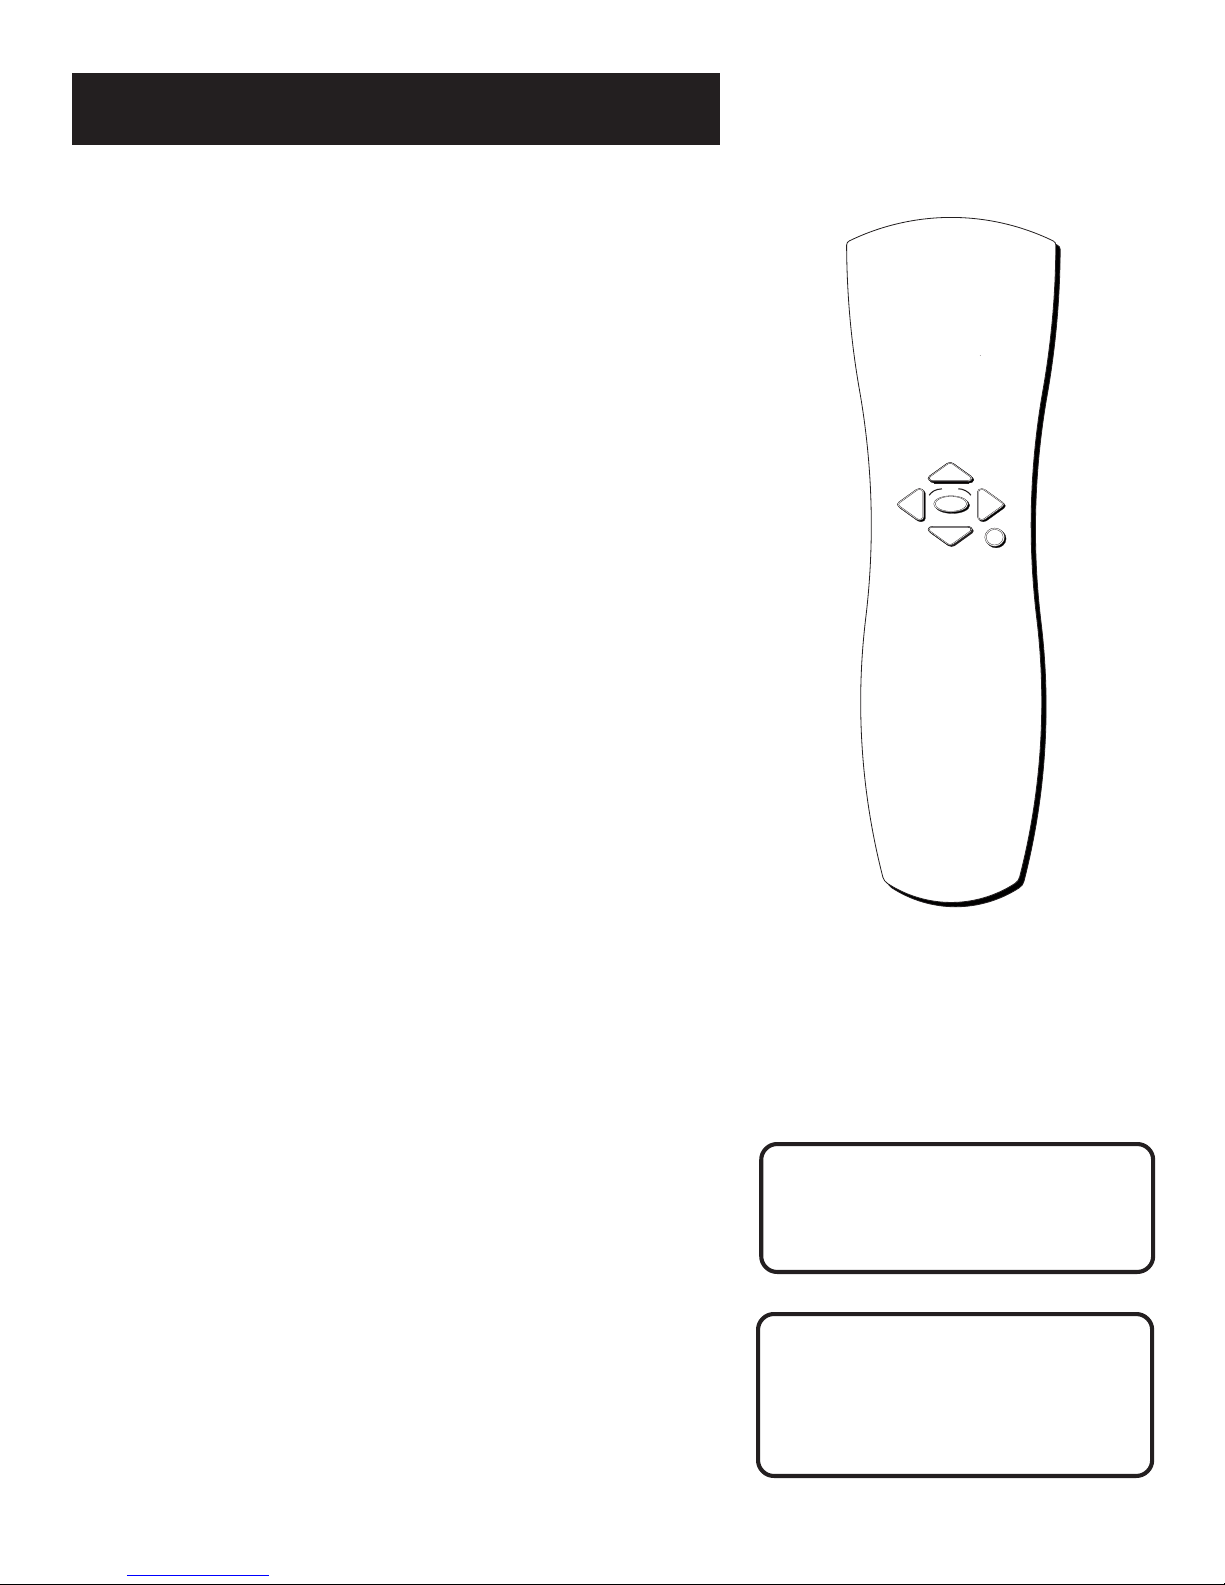
The Point and Select Method
Point and Select is the two-step method you use to navigate through the
menu system and program guides. Once you know how to point and
select, you can explore the menus.
1. Point
You point by pressing the arrow keys on the remote control. Pressing
the arrow keys moves the on-screen highlight to different items in the
program guide and the menu screens. Pressing an arrow once moves the
highlight one space in the direction of the arrow.
OK
For example, to point down (that is, to move the highlight toward the
bottom of the screen), press the down arrow. To point right, press the
right arrow.
2. Select
Once you have pointed to an item on the screen, select it by pressing the
OK button on the remote. Selecting an item tells the menu system to go
ahead and make the change you have indicated.
For example, the instructions in the User’s Manual might tell you to
Point to the Exit button and press OK.
Programming the Remote Control
The satellite receiver’s remote can be programmed to control most
brands of remote controllable TVs. The remote is programmed to
control most RCA, GE and P
remote needs to be programmed to control other manufacturers’
brands.
Testing the Remote control
ROSCAN TVs, VCRs and cable boxes. The
CLEAR
To determine whether the universal remote needs to be programmed,
turn on the TV, point the remote at the device you want to control, and
press the button corresponding to that device. Then press ON•OFF or
CH ^ (channel up) or CH v (channel down) to see if the TV responds to
the remote commands. If not, the remote needs to be programmed.
14
Don’t worry about getting stuck inside a
menu. Pressing the CLEAR button on the
remote control takes you out of the menu
system and back to the program you were
watching.
NOTE
This remote control may not operate all
models of the brands that are shown. Use
the codes at the end of this section, or
those on the sheet packed with your
remote, to control these models.

Using the Remote
Using Automatic Code Search
The following instructions can be used to program the remote to control
each of the devices connected to your TV. (The AUX key cannot be
programmed using the automatic code search.) If you want to exit the
automatic code search without programming any of your devices, press
CLEAR until the LED turns off.
1. Turn on the device you want to control (VCR, satellite receiver, etc.)
2. Press and hold the device’s button (VCR, SAT, etc.). While holding
the device button, press and hold ON•OFF until the red light on the
remote control turns on, then release both buttons.
3. Press and release PLAY, then wait 5 seconds or until the LED stops
flashing.
At this point the remote control is searching for the correct code to
program. If, after 5 seconds, the device you want to control does
not turn off, press PLAY again to tell the remote to search the next
set of codes.
This remote control may not operate all
models of the brands that are shown. Use
the codes shown in this manual, or on
the sheet packed with your remote.
Continue pressing PLAY until the device turns off or you have
searched through all of the codes. There are 20 total sets of codes. If
the device does not turn off after pressing PLAY 20 times, then the
remote cannot control that particular device.
If the device you want to control does turn off:
1. Press and release REVERSE, then wait 2 seconds. Repeat this step
until the device turns back on.
2. To finish, press and hold STOP until the red light on the remote
control turns off.
Using Direct Entry
1. Turn on the component to be programmed.
2. Look up the brand and code number(s) for the component on the
code list on the last page of this section, Using the Remote.
3. Press and hold the button of the device on the remote control you
want to program.
4. Enter the code from the code list.
5. Release the button, and then press ON•OFF to see if the component
responds to the remote commands. If it doesn’t, try pressing the
component button and then ON•OFF again.
6. If you get no response, repeat these steps using the next code listed
for your brand, until the component responds to the remote
commands.
15

Using the Remote
Using the Remote to Control a Device
Once the remote has been programmed successfully, you are ready to
use it to control your devices.
To operate the device:
1. Press the device button (TV, VCR, SAT, DVD, or AUX) to set the
remote to control the device.
2. Press ON•OFF to turn the device on or off.
3. Use the remote control buttons that apply to that device.
Modes of Operation
Because this universal remote can control several different components
(DVD player, VCR, Cable Box, etc.) it uses operational modes triggered by
the component buttons. For example, if you want the remote to control
the TV, you would press the TV button to put the remote into TV mode
before you could control the TV.
Using the Remote to Control a Second
Digital Satellite Receiver
The remote can control two receivers. From the Main menu, select
Options, then System Options, then Remote Setup. Have the AUX button
control the second receiver, while the first receiver is controlled by the
SAT button.
Cable Box Codes
ABC ........................ 5002, 5003, 5004, 5005, 5006, 5007, 5053
ANTRONIX ................................................................ 5008, 5009
ARCHER ................................................ 5008, 5009, 5010, 5011
CABLETENNA ...................................................................... 5008
CABLEVIEW .......................................................................... 5008
CENTURY ............................................................................... 5011
CITIZEN .................................................................................. 5011
COLOUR VOICE ....................................................... 5012, 5013
COMTRONICS .......................................................... 5014, 5015
CONTEC ................................................................................ 5016
EASTERN ................................................................................ 5017
GARRARD .............................................................................. 5011
GC ELECTRONICS .............................................................. 5009
GEMINI .............................................................. 5018, 5019, 5049
GENERAL INSTRUMENT ....................................... 5003, 5053
HAMLIN ...................................... 5020, 5021, 5022, 5035, 5045
HITACHI.................................................................................. 5003
HYTEX .................................................................................... 5002
JASCO ...................................................................................... 5011
JERROLD .... 5003, 5005, 5007, 5018, 5023, 5024, 5046, 5053
MAGNAVOX .......................................................................... 5025
MEMOREX ............................................................................. 5026
MOVIE TIME ..................................................... 5002, 5027, 5028
NSC .................................................................... 5002, 5027, 5028
OAK .................................................................... 5002,5016, 5029
PANASONIC .............................................................. 5048, 5052
PARAGON .............................................................................. 5026
PHILIPS ....... 5011, 5012, 5013, 5019, 5025, 5030, 5031, 5032
PIONEER ...................................................................... 5033, 5034
PULSAR ................................................................................... 5026
RCA .................................................................... 5047, 5049, 5052
REALISTIC ................................................................... 5009, 5049
REGAL .......................................................................... 5022, 5035
REGENCY ............................................................................... 5017
REMBRANDT ........................................................................ 5003
RUNCO .................................................................................. 5026
SAMSUNG ................................................................... 5014, 5034
SCIENTIFIC ATLANTA ....................... 5006, 5036, 5037, 5038
SIGNAL ........................................................................ 5014, 5018
SIGNATURE ........................................................................... 5003
SL MARX ................................................................................ 5014
SPRUCER ............................................................................... 5052
STARCOM ....................................................... 5007, 5018, 5053
STARGATE.................................................................. 5014, 5018
STARQUEST .......................................................................... 5018
TANDY ................................................................................... 5040
TELEVIEW ............................................................................. 5014
TOCOM ........................................................... 5004, 5023, 5041
TOSHIBA ............................................................................... 5026
TUSA ....................................................................................... 5018
TV86 ........................................................................................ 5027
UNIKA .............................................................. 5008, 5009, 5011
UNITED ARTISTS ................................................................ 5002
UNITED CABLE ................................................................... 5053
UNIVERSAL .......................................... 5008, 5009, 5010, 5011
VIDEOWAY ........................................................................... 5044
VIEWSTAR ............................................ 5015, 5025, 5027, 5040
ZENITH ............................................................ 5026, 5050, 5051
16

Using the Remote
ABEX ....................................................................................... 1172
ADMIRAL .......................................................... 1001, 1173,1192
ADVENTURA ....................................................................... 1174
ALBA ....................................................................................... 1198
AIKO ....................................................................................... 1016
ALLERON .............................................................................. 1046
AMTRON............................................................................... 1038
AKAI ........................................................................................ 1002
ANAM ..................................................................................... 1199
ANAM NATIONAL .................................................. 1003, 1038
AOC ....................... 1004, 1005, 1006, 1007, 1175, 1176, 1208
ASA .......................................................................................... 1192
AUDIOVOX .......................................................................... 1038
AUTOVOX ............................................................................ 1192
BANG & OLUFSEN ............................................................. 1192
BELCOR ................................................................................. 1004
BELL & HOWELL ............................................ 1001,1083, 1162
BRADFORD .......................................................................... 1038
BRIONVEGA ......................................................................... 1192
BROKWOOD ....................................................................... 1004
BRUNS .................................................................................... 1192
CANDLE ............................................... 1004, 1006, 1008, 1174
CAPEHART ................................................................ 1175, 1208
CCE .............................................................................. 1215, 1216
CELEBRITY ............................................................................ 1002
CENTURION ........................................................................ 1009
CENTURY .............................................................................. 1192
CITIZEN .... 1004, 1006, 1008, 1016, 1038, 1105, 1171, 1174,
CLAIRTONE .......................................................................... 1176
COLORTYME ............................................................ 1004, 1006
CONCERTO .............................................................. 1004, 1006
CONTEC/CONY ..................... 1012, 1013, 1014, 1038, 1176
CRAIG .................................................................................... 1038
CROSLEY ............................................................................... 1192
CROWN .......................................................... 1038, 1171, 1207
CURTIS MATHES 1000, 1004, 1006, 1015, 1105, 1162, 1171,
CXC ........................................................................................ 1038
DAEWOO . 1004, 1005,1006, 1016, 1017, 1018, 1127, 1171,
DAYTRON ............................................ 1004, 1006, 1171, 1207
DECCA ................................................................................... 1213
DECCA NICAM ................................................................... 1213
DIMENSIA .............................................................................. 1000
DIXI ......................................................................................... 1199
DUMONT ........................................................ 1004, 1151, 1192
DYNATECH .......................................................................... 1178
ELECTROBAND ....................................................... 1002, 1176
ELECTROHOME ............ 1003, 1004, 1006, 1019, 1022, 1207
EMERSON . 1004, 1006, 1012, 1014, 1023, 1024, 1025, 1026,
1027, 1028, 1029, 1030, 1031, 1032,1033, 1034, 1035, 1036,
1037, 1038, 1039, 1041, 1042, 1043, 1044, 1046, 1047, 1123,
1124, 1162, 1171, 1176, 1177, 1179, 1191, 1192, 1207
ENVISION ................................................................... 1004, 1006
ERRES ...................................................................................... 1194
FERGUSON ........................................................................... 1210
FINLUX .................................................................................. 1192
FISHER .............................. 1048, 1049, 1050, 1051, 1162, 1180
FORMENTI ............................................................................ 1192
FUJITSO .................................................................................. 1046
FUNAI .......................................................................... 1038, 1046
FUTURETEC ......................................................................... 1038
GE .... 1000, 1003, 1004, 1006, 1022, 1052, 1054, 1055, 1087,
GEC ......................................................................................... 1213
GENEXXA ............................................................................. 1198
GIBRALTER ................................................................ 1004, 1151
GOLDSTAR 1004,1005, 1006, 1012, 1019, 1056, 1057, 1058,
GOODMANS ....................................................................... 1213
GRANADA ............................................................................ 1213
GRUNDY ......................................................... 1038, 1046, 1171
HALLMARK ................................................................ 1004, 1006
1164, 1165, 1166, 1167, 1168, 1181
1155, 1156, 1171, 1172, 1207
1177, 1207
HARVARD ............................................................................ 1038
HITACHI ... 1004, 1006, 1012, 1013, 1059, 1060, 1061, 1135,
1136, 1137, 1138, 1139,1140, 1141, 1142, 1143, 1144, 1145,
IMA ......................................................................................... 1038
INFINITY ............................................................................... 1062
JANEIL ................................................................................... 1174
JBL ........................................................................................... 1062
JCB .......................................................................................... 1002
JC PENNY 1000, 1004, 1005, 1006, 1008, 1022, 1052, 1054,
1058, 1063, 1064, 1072, 1087, 1105, 1128, 1171, 1172, 1181
JENSEN ....................................................................... 1004, 1006
JVC .. 1012, 1013, 1054, 1060, 1065, 1066, 1067, 1089, 1157,
KAWASHO ..................................................... 1002, 1004, 1006
KAYPANI ............................................................................... 1175
KENWOOD .................................................. 1004, 1006, 1019
KLOSS NOVABEAM .............. 1068, 1069, 1174, 1183, 1202
KORTING............................................................................. 1192
KTV ................................. 1038, 1070, 1171, 1176, 1177, 1207
LLOYTRON .......................................................................... 1207
LOEWE.................................................................................. 1062
LOEWE OPTA ..................................................................... 1192
LOGIK ................................................................................... 1083
LUXMAN ................................................................... 1004, 1006
LXI .. 1000, 1006, 1049, 1062, 1071, 1072, 1073, 1162, 1181
MAGNADYNE ..................................................................... 1192
MAGNAVOX...... 1004, 1006, 1008, 1019, 1062, 1068, 1069,
1074, 1075, 1076, 1077, 1088, 1089, 1130, 1131, 1132, 1133,
MAJESTIC .............................................................................. 1083
MARANTS ............................................................................ 1062
MARANTZ .......................................... 1004, 1006, 1062, 1078
MARELLI ................................................................................ 1192
MATSUI ................................................................................. 1213
MEGATRON ............................................................. 1006, 1059
MEI .......................................................................................... 1176
MEMOREX ............................... 1001, 1006, 1082, 1083, 1162
1207
METZ ..................................................................................... 1192
MGA 1004, 1005, 1006, 1019, 1022, 1051, 1079, 1080, 1082
MIDLAND ................................ 1054, 1151, 1171, 1172, 1181
1207
MINUTZ ................................................................................ 1052
MITSUBISHI ........ 1004, 1005, 1006, 1019, 1022, 1051, 1079,
MONTGOMERY WARD ................................................... 1083
MOTOROLA ............................................................. 1003, 1173
MTC ................................ 1004, 1005, 1006, 1105, 1176, 1178
MULTITECH .............................................................. 1038, 1178
MULTIVISION ...................................................................... 1084
NAD ...................................................... 1006, 1071, 1072, 1185
NEC ............................................ 1003, 1004, 1005, 1006, 1089
NECKERMANN .................................................................. 1192
NIKKAI ....................................................................... 1206, 1213
NIKKO ........................................................................ 1006, 1016
NTC ....................................................................................... 1016
ONWA .................................................................................. 1038
OPTIMUS .............................................................................. 1185
OPTONICA .............................................................. 1095, 1173
ORION ....................................................................... 1035, 1191
OSAKI ......................................................................... 1206, 1213
PANASONIC ...................................... 1003, 1054, 1062, 1170
PENNEY ................................................................................ 1207
PENNY .................................................................................. 1206
PHILCO .... 1003, 1004, 1005, 1006, 1008, 1012, 1019, 1062,
PHILIPS ..... 1003, 1004, 1008, 1012, 1019, 1062, 1068, 1069,
1074, 1075, 1076, 1086, 1087, 1088, 1089, 1192, 1194, 1209
PHOENIX ............................................................................. 1192
PHONOLA ................................................................ 1192, 1209
PILOT .......................................................................... 1004, 1171
PIONEER ............. 1004, 1006, 1090, 1091, 1092, 1179, 1185
PORTLAND .................. 1004, 1005, 1006, 1016, 1171, 1207
PRICE CLUB ......................................................................... 1105
PRISM ..................................................................................... 1054
TV Codes
1146, 1148, 1150, 1179, 1207
1158, 1159, 1182
1134, 1183, 1184, 1202
1080, 1081, 1082, 1083, 1125, 1201
1068, 1069, 1074, 1075, 1077, 1183, 1184, 1192, 1202
PROSCAN .......................................................... 1000, 1181
PROTON ...... 1004, 1006, 1012, 1093, 1175, 1207, 1208
PULSAR .......................................................................... 1151
PULSER ................................................................ 1004, 1195
PYE .................................................................................. 1194
QUASAR ....................................... 1003, 1054, 1070, 1094
RADIOMARELLI .......................................................... 1192
RADIO SHACK/REALISTIC .... 1000, 1004, 1006, 1012,
1038, 1049, 1095, 1162, 1171, 1172, 1206, 1207
RCA .... 1000, 1003, 1004, 1005, 1006, 1007, 1019, 1096,
1098, 1099, 1100, 1101, 1102, 1103, 1129, 1179, 1181,
RHAPSODY ................................................................... 1176
RUNCO ......................................................................... 1151
SABA ............................................................................... 1192
SAMPO ............................... 1004, 1006, 1171, 1172, 1175
SAMSUNG ... 1004, 1005, 1006, 1012, 1015, 1019, 1104,
SAMSUX ......................................................................... 1171
SANSUI ........................................................................... 1191
SANYO ......... 1004, 1048, 1049, 1050, 1080, 1107, 1108,
SBR ....................................................................... 1194, 1209
SCHNEIDER ..................................................................1209
SCOTCH........................................................................ 1006
SCOTT.......... 1004, 1006, 1012, 1024, 1035, 1038, 1046
SEARS . 1000, 1004, 1006, 1013, 1019, 1046, 1048, 1049,
1050, 1051, 1066, 1071, 1072, 1109, 1110, 1162, 1180,
SEI .................................................................................... 1192
SAISHO .......................................................................... 1200
SHARP 1004, 1006, 1012, 1029, 1095, 1111, 1112, 1113,
SHOGUN....................................................................... 1004
SIAREM ........................................................................... 1192
SIGNATURE ............................................ 1001, 1083, 1115
SIMPSON ....................................................................... 1008
SINGER ........................................................................... 1192
SINUDYNE .................................................................... 1192
SONIC ............................................................................ 1176
SONY ................................................................... 1002, 1200
SOUNDESIGN ................. 1004, 1006, 1008, 1038, 1046
SQUAREVIEW ..............................................................1189
SSS ......................................................................... 1004, 1038
STARLITE ....................................................................... 1038
SUPRE-MACY ............................................................... 1174
SUPREME ....................................................................... 1002
SYLVANIA .... 1004, 1006, 1008, 1019, 1062, 1068, 1069,
1074, 1075, 1076, 1077, 1088, 1116, 1161, 1183, 1184,
SYMPHONIC .......................................... 1033, 1038, 1189
TANDY .......................................... 1173, 1198, 1207, 1213
TATUNG .................................................. 1003, 1178, 1213
TECHNICS .................................................................... 1054
TECHWOOD ......................................... 1004, 1006, 1054
TEKNIKA ..... 1004, 1005, 1006, 1008, 1012, 1013, 1016,
1038, 1046, 1076, 1082, 1083, 1105, 1170, 1171, 1207
TELECAPTION ............................................................ 1117
TERA ............................................................................... 1205
TMK ...................................................................... 1004, 1006
TOSHIBA ..... 1049, 1071, 1072, 1089, 1105, 1109, 1117,
TOTEVISION ..................................................... 1171, 1207
UNIVERSAL ........................................................ 1052, 1087
VICTOR ............................................................... 1066, 1182
VIDTECH ................................................. 1004, 1005, 1006
VIKING ........................................................................... 1174
VOXSON ....................................................................... 1192
WARDS ........ 1000, 1001, 1004, 1005, 1006, 1019, 1024,
1033, 1046, 1052, 1062, 1068, 1069, 1074, 1075, 1076,
WEGA ............................................................................ 1192
YAMAHA ....................................... 1004, 1005, 1006, 1019
ZENITH ........ 1004, 1083, 1151, 1152, 1153, 1154, 1195
1083, 1087, 1088, 1095, 1119, 1120, 1184
1105, 1106, 1171, 1172, 1206,
1187, 1188, 1190
1162, 1169, 1180, 1213
1181, 1189
1122, 1171, 1173, 1207
1202
1118, 1160, 1162
17

Using the Remote
ADMIRAL ................................................................................ 2131
ADVENTURA ........................................................................ 2026
AIKO ........................................................................................ 2027
AIWA ............................................................................ 2002, 2026
AKAI ............ 2003, 2004, 2005, 2007, 2008, 2111, 2112, 2113
AMERICAN HIGH ................................................................ 2021
ASHA ....................................................................................... 2013
AUDIO DYNAMICS .................................................. 2009, 2010
AUDIOVOX ........................................................................... 2014
BELL & HOWELL .................................................................. 2011
BEAUMARK ........................................................................... 2013
BROKSONIC .............................................................. 2012, 2025
CALIX ...................................................................................... 2014
CANDLE ............... 2013, 2014, 2015, 2016, 2017, 2018, 2019
CANON ............................................................ 2021, 2022, 2114
CAPEHART ................................................................. 2020, 2110
CARVER .................................................................................. 2062
CCE ............................................................................... 2027, 2061
CITIZEN ..... 2013, 2014, 2015, 2016, 2017, 2018, 2019, 2027
COLORTYME ........................................................................ 2009
COLT ....................................................................................... 2061
CRAIG .................................................... 2013, 2014, 2023, 2061
CURTIS-MATHES 2000, 2002, 2009, 2013, 2016, 2018, 2021,
CYBERNEX ............................................................................ 2013
DAEWOO . 2015, 2017, 2019, 2025, 2026, 2027, 2028, 2110
DAYTRON .............................................................................. 2110
DBX ............................................................................... 2009, 2010
DIMENSIA ............................................................................... 2000
DYNATECH ................................................................ 2002, 2026
ELECTROHOME ........................................................ 2014, 2029
ELECTROPHONIC .............................................................. 2014
EMERSON .. 2002, 2012, 2014, 2015, 2021, 2024, 2025, 2026,
2029, 2030, 2032, 2033, 2034, 2035, 2036, 2037, 2038, 2039,
2040, 2041, 2042, 2044, 2045, 2047, 2065, 2105, 2113, 2116,
FISHER ........ 2011, 2023, 2048, 2049, 2050, 2051, 2052, 2118
FUJI ................................................................................ 2021, 2119
FUNAI ........................................................................... 2002, 2026
GARRARD .............................................................................. 2026
GE ................ 2000, 2001, 2013, 2021, 2022, 2053, 2115, 2120
GOLDSTAR ................................ 2009, 2014, 2018, 2054, 2121
GRADIENTE .......................................................................... 2026
HARLEY DAVIDSON ........................................................... 2026
HARMAN KARDON ........................................................... 2009
HARWOOD ........................................................................... 2061
HEADQUARTER ................................................................... 2011
HITACHI ..... 2002, 2055, 2056, 2057, 2107, 2111, 2120, 2122
HI-Q ......................................................................................... 2023
2022, 2024, 2115
2117, 2130
INSTANT REPLAY ................................................................2021
JCL ............................................................................................ 2021
JC PENNEY 2009, 2010, 2011, 2013, 2014, 2021, 2022, 2055,
JENSEN .............................................................. 2055, 2056, 2111
JVC .......................... 2009, 2010, 2011, 2018, 2058, 2111, 2123
KENWOOD ....... 2009, 2010, 2011, 2016, 2018, 2058, 2111,
KLH .......................................................................................... 2061
KODAK ........................................................................ 2014, 2021
LLOYD ..........................................................................2002, 2026
LOGIK ..................................................................................... 2061
LXI ............................................................................................ 2014
MAGNAVOX ........ 2021, 2022, 2062, 2063, 2104, 2108, 2124
MAGNIN .................................................................................2013
MARANTZ 2009, 2010, 2011, 2016, 2018, 2021, 2058, 2062,
MARTA..................................................................................... 2014
MASUSHITA ...........................................................................2021
MEI ............................................................................................2021
MEMOREX 2002, 2011, 2013, 2014, 2021, 2023, 2026, 2104,
MGA ................................................................... 2029, 2065, 2113
MGN TECHNOLOGY ......................................................... 2013
MIDLAND .............................................................................. 2053
MINOLTA ..........................................................2055, 2056, 2107
MITSUBISHI 2029, 2055, 2056, 2065, 2066, 2067, 2069, 2070,
MONTGOMERY WARD .......................................... 2075, 2131
MOTOROLA ............................................................... 2021, 2131
MTC ................................................................... 2002, 2013, 2026
MULTITECH .................... 2002, 2013, 2016, 2026, 2053, 2061
NEC . 2009, 2010, 2011, 2016, 2018, 2058, 2064, 2076, 2078,
NIKKO ..................................................................................... 2014
NOBLEX ................................................................................. 2013
OLYMPUS ............................................................................... 2021
OPTIMUS ..................................................................... 2014, 2131
OPTONICA ........................................................................... 2096
ORION ....................................................................................2035
PANASONIC .................. 2021, 2022, 2109, 2125, 2126, 2127
PENTAX ...................................... 2016, 2055, 2056, 2107, 2120
PENTEX RESEARCH ........................................................... 2018
PHILCO .................................................. 2021, 2022, 2062, 2063
PHILIPS ................................................... 2021, 2062, 2096, 2124
PILOT ....................................................................................... 2014
PIONEER ..................................... 2010, 2055, 2080, 2081, 2123
PORTLAND .......................................... 2016, 2017, 2019, 2110
PROSCAN ................................................................... 2000, 2001
VCR Codes
2056, 2058, 2059, 2060, 2107, 2118
2123
2064
2131
2071, 2072, 2073, 2074, 2106, 2113, 2123
2079, 2111, 2123
PROTEC ................................................................................ 2061
PULSAR ................................................................................. 2104
QUARTER .............................................................................2011
QUARTZ ...............................................................................2011
QUASAR ......................................................... 2021, 2022, 2125
RCA 2000, 2001, 2003, 2013, 2021, 2055, 2056, 2082, 2083,
2084, 2085, 2086, 2087, 2088, 2089, 2090, 2091, 2107,
RADIOSHACK/REALISTIC . 2002, 2011, 2013, 2014, 2021,
RADIX ................................................................................... 2014
RANDEX...............................................................................2014
RICOH ...................................................................................2128
RUNCO ................................................................................ 2104
SAMSUNG ..................... 2005, 2013, 2015, 2033, 2053, 2112
SANKY ....................................................................... 2104, 2131
SANSUI ................................................. 2010, 2092, 2111, 2123
SANYO ............................................................ 2011, 2013, 2023
SCOTT..... 2012, 2015, 2025, 2032, 2035, 2038, 2065, 2093,
SEARS ....... 2011, 2014, 2021, 2023, 2048, 2049, 2050, 2051,
SHARP ................. 2002, 2017, 2029, 2094, 2095, 2096, 2131
SHINTOM ............................................ 2004, 2056, 2061, 2098
SHOGUN..............................................................................2013
SIGNATURE .............................................................. 2002, 2131
SINGER ............................................................ 2021, 2061, 2128
SONY .............................. 2002, 2004, 2098, 2099, 2119, 2128
STS ............................................................................... 2021, 2107
SYLVANIA 2002, 2021, 2022, 2026, 2062, 2063, 2065, 2124
SYMPHONIC ............................................................ 2002, 2026
TANDY ....................................................................... 2002, 2011
TASHIKO...............................................................................2014
TATUNG .................................................................... 2058, 2111
TEAC .......................................... 2002, 2026, 2058, 2085, 2111
TECHNICS ................................................................ 2021, 2109
TEKNIKA ....................... 2002, 2014, 2021, 2026, 2100, 2129
TMK .................................................................. 2013, 2024, 2047
TOSHIBA ............ 2015, 2049, 2051, 2055, 2065, 2093, 2116
TOTEVSION ..............................................................2013, 2014
UNITECH ............................................................................. 2013
VECTOR RESEARCH ........................ 2009, 2010, 2015, 2016
VICTOR.................................................................................2010
VIDEO CONCEPTS ............... 2009, 2010, 2015, 2016, 2113
VIDEOSONIC ......................................................................2013
WARDS ... 2002, 2013, 2014, 2015, 2021, 2023, 2026, 2029,
2055, 2056, 2061, 2096, 2101, 2102, 2103, 2107, 2116, 2131
XR-1000 .......................................................... 2021, 2026, 2061
YAMAHA ........................ 2009, 2010, 2011, 2018, 2058, 2111
ZENITH ..................................... 2004, 2098, 2104, 2119, 2128
2022, 2023, 2026, 2029, 2049, 2050, 2096, 2131
2115, 2120, 2125
2116
2055, 2056, 2107, 2118
CHAPPARAL ................................................................. 5056, 5057
DRAKE ........................................................................... 5058, 5059
GE .................................................................................... 5000, 5001
GENERAL INSTUMENTS ............................... 5060, 5061, 5062
PANASONIC ........................................................................... 5075
PRIMESTAR............................................................................... 5076
18
Satellite Receiver Codes
PROSCAN ................................................................ 5000, 5001
RCA ............................................................................ 5000, 5001
REALISTIC ........................................................................... 5063
SONY .................................................................................... 5072
STS1 ....................................................................................... 5064
STS2 ....................................................................................... 5065
STS3 ........................................................................................... 5066
STS4 ........................................................................................... 5067
TOSHIBA ...................................................................... 5068, 5073
UNIDEN ................................................................................... 5069
 Loading...