

Page 1

TV/DVD
User's Guide
Changing Entertainment. Again.
Page 2
WARNING
TO REDUCE THE RISK OF FIRE OR ELECTRIC
SHOCK, DO NOT EXPOSE THIS PRODUCT
TO RAIN OR MOISTURE.
CAUTION
RISK OF ELECTRIC SHOCK
DO NOT OPEN
CAUTION
THIS PRODUCT UTILIZES A LASER. USE OF
CONTROLS OR ADJUSTMENTS OR
PERFORMANCE OF PROCEDURES OTHER
THAN THOSE SPECIFIED HEREIN MAY
RESULT IN HAZARDOUS RADIATION
EXPOSURE. DO NOT OPEN COVERS AND
DO NOT REPAIR YOURSELF. REFER
SERVICING TO QUALIFIED PERSONNEL.
Note:
This DVD player is designed and
manufactured to respond to the Region
Management Information. If the Region
number of a DVD disc does not
correspond to the Region number of this
DVD player, this DVD player cannot play
the disc. The Region number for this
DVD player is Region No 1.
CAUTION: TO REDUCE THE RISK OF ELECTRIC SHOCK,
DO NOT REMOVE COVER (OR BACK).
NO USER SERVICEABLE PARTS INSIDE.
REFER SERVICING TO QUALIFIED SERVICE PERSONNEL.
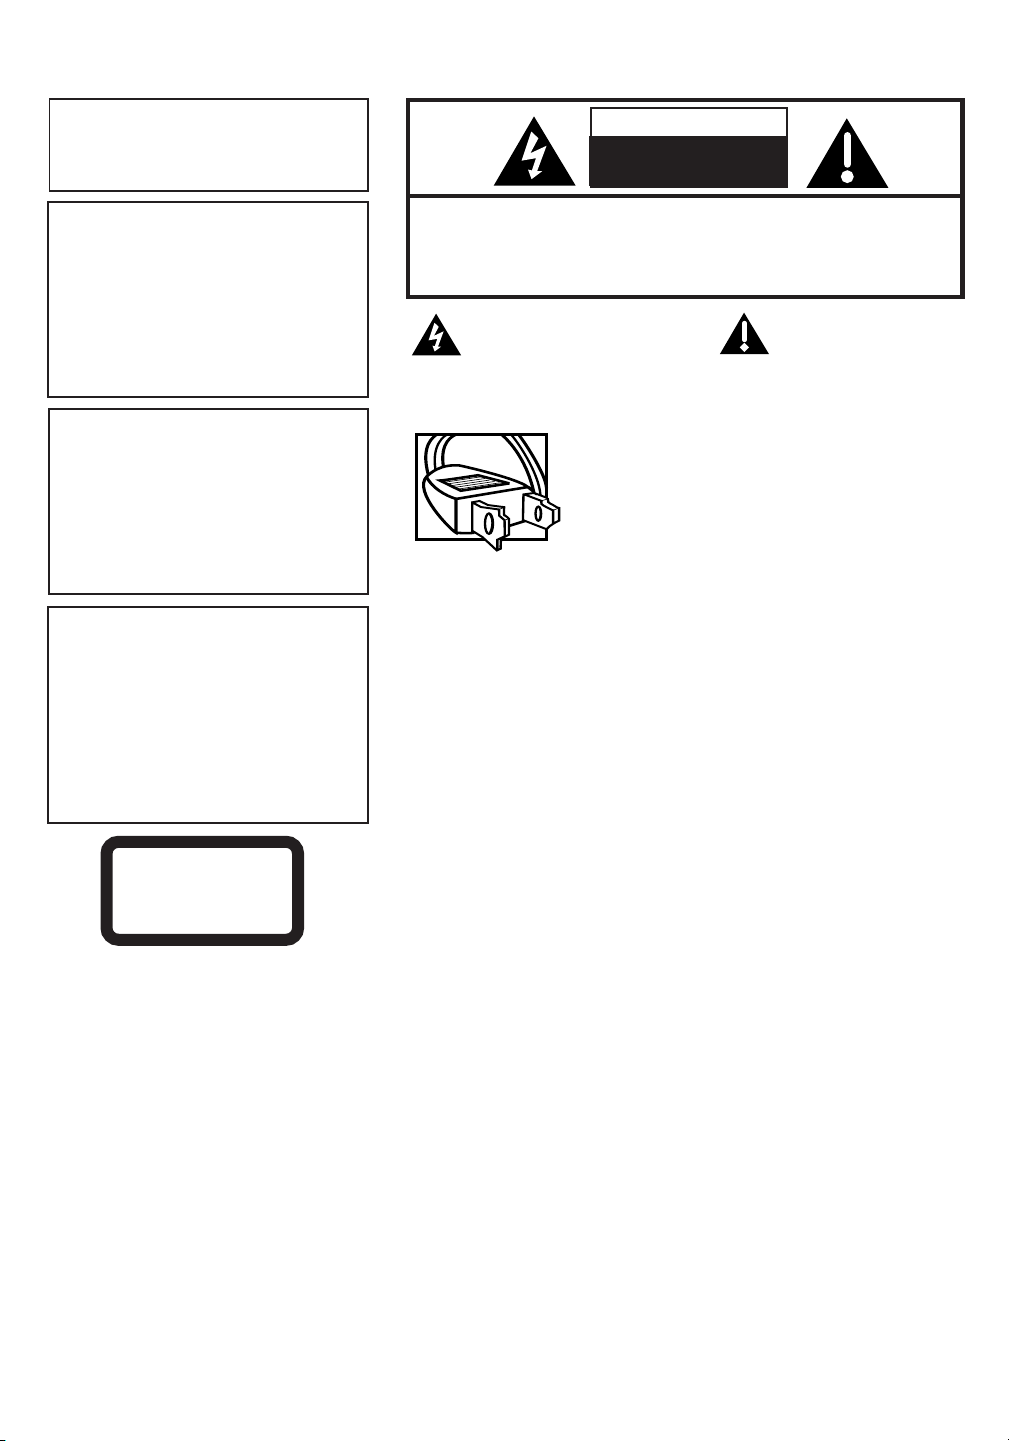
This symbol indicates
"dangerous voltage"
inside the product that
presents a risk of electric
shock or personal injury.
This symbol indicates
important
instructions
accompanying the
product.
Caution: To prevent electric shock, match wide
blade of plug to wide slot, fully insert.
Attention: Pour éviter les chocs électriques,
introduire la lame la plus large de la fiche dans
la borne correspondante de la prise et pousser
jusqú au fond.
Refer to the identification/rating label located on the back panel of
your product for its proper operating voltage.
Note:
This device is protected by U.S. patent
numbers 4,631,603 amd 4.577,216 amd
4,819,098 and other intellectual property
rights. The use of Macrovision's copy
protection technology in the device must be
authorized by Macrovision and is intended
for home and other limited pay-per-view
uses only, unless otherwise authorized in
writing by Macrovision. Reverse
engineering or disassembly is prohibited.
CLASS 1
LASER
PRODUCT
FCC Regulations state that unauthorized changes or modifications to
this equipment may void the user’s authority to operate it.
This Class B digital apparatus complies with Canadian ICES-003.
Caution: Using video games or any external accessory with
fixed images for extended periods of time can cause them to be
permanently imprinted on the picture tube (or projection TV
picture tubes). ALSO, some network/program logos, phone
numbers, etc. may cause similar damage. This damage is not
covered by your warranty.
Cable TV Installer: This reminder is provided to call your attention to
Article 820-40 of the National Electrical Code (Section 54 of the
Canadian Electrical Code, Part 1) which provides guidelines for proper
grounding and, in particular, specifies that the cable ground shall be
connected to the grounding system of the building as close to the point
of cable entry as practical.
Information
This equipment has been tested and found to comply with the limits for a Class B digital device, pursuant to Part 15 of the FCC Rules. These
limits are designed to provide reasonable protection against harmful interference in a residential installation. This equipment generates,
uses and can radiate radio frequency energy and, if not installed and used in accordance with the instructions, may cause harmful
interference to radio communications. However, there is no guarantee that interference will not occur in a particular installation. If this
equipment does cause harmful interference to radio or television reception, which can be determined by turning the equipment off and on,
the user is encouraged to try to correct the interference by one or more of the following measures:
• Reorient or relocate the receiving antenna.
• Increase the separation between the equipment and receiver.
• Connect the equipment into an outlet on a circuit different from that to which the receiver is connected.
• Consult the dealer or an experienced radio/TV technician for help.
Product Registration
Please fill out the product registration card (packed separately) and return it immediately. Returning the card allows us to
contact you if needed.
Product Information
Keep your sales receipt to obtain warranty parts and service and for proof of purchase. Attach it here and record the
serial and model numbers in case you need them. These numbers are located on the product.
Model No. _____________________________________ Serial No.______________ Purchase Date:____________
Dealer/Address/Phone:______________________________________________________________________________
Page 3
IMPORTANT SAFEGUARDS
In addition to the careful attention devoted to quality standards in the manufacture of your product, safety is
a major factor in the design of every product. However, safety is your responsibility too.
This sheet lists important information that will help to assure your enjoyment and proper use of the product
and accessory equipment. Please read them carefully before operating and using your product.
Installation
1 Read and Follow Instructions—All the safety and operating instructions should be read
before the product is operated. Follow all operating instructions.
2 Retain Instructions—The safety and operating instructions should be retained for future
reference.
3 Heed Warnings—Comply with all warnings on the product and in the operating instructions.
4 Polarization/Grounding—This product is equipped with either a polarized, non-polarized, or a
grounding type power cord plug. If equipped with the non-polarized type (two blades of identical size),
the following does not apply.
•A polarized power plug (two blades, one wider than the other) will fit into a power receptacle only
one way. This is a safety feature. Do not defeat it. If you are unable to insert the plug fully, try
reversing it, or have an electrician change the receptacle. If you need an extension cord, use only a
polarized extension cord.
•A grounding type power plug (two blades and a round pin) will fit only into a grounding type
receptacle with matching openings. This is a safety feature. Do not defeat it. You may need an
electrician to install a grounding type receptacle. If you need an extension cord, use only a
grounding type extension cord.
5 Power Sources—This product should be operated only from the type of power source indicated on the
product's marking label. If you are not sure of the type of power supply to your home, consult your dealer
or local power company. For products intended to operate from battery power, or other sources, refer to
the operating instructions.
6 Overloading—Do not overload wall outlets or extension cords as this can result in a risk of
fire or electric shock. Overloaded AC outlets, extension cords, frayed power cords, damaged
or cracked wire insulation, and broken plugs are dangerous. They may result in a shock or
fire hazard. Periodically examine the cord, and if its appearance indicates damage or
deteriorated insulation, have it replaced by your service technician.
7 Power-Cord Protection—Power-supply cords should be routed so that they are not likely to be walked
on or pinched by items placed upon or against them. Pay particular attention to cords where they are
attached to plugs, convenience receptacles and at the point where they exit from the product.
8Ventilation—Slots and openings in the enclosure are provided for ventilation to ensure reliable
operation of the product and to protect it from overheating. These openings must not be blocked or
covered. These openings should never be blocked by placing the product on a bed, sofa, rug, or other
similar surface. This product should never be placed near or over a radiator or heat register, or another
heat source (including amplifiers). This product should not be placed in a built-in installation such as a
bookcase or equipment rack unless proper ventilation is provided or the product manufacturer’s
instructions have been followed.
9 Attachments—Do not use attachments unless recommended by the product manufacturer as they may
cause hazards.
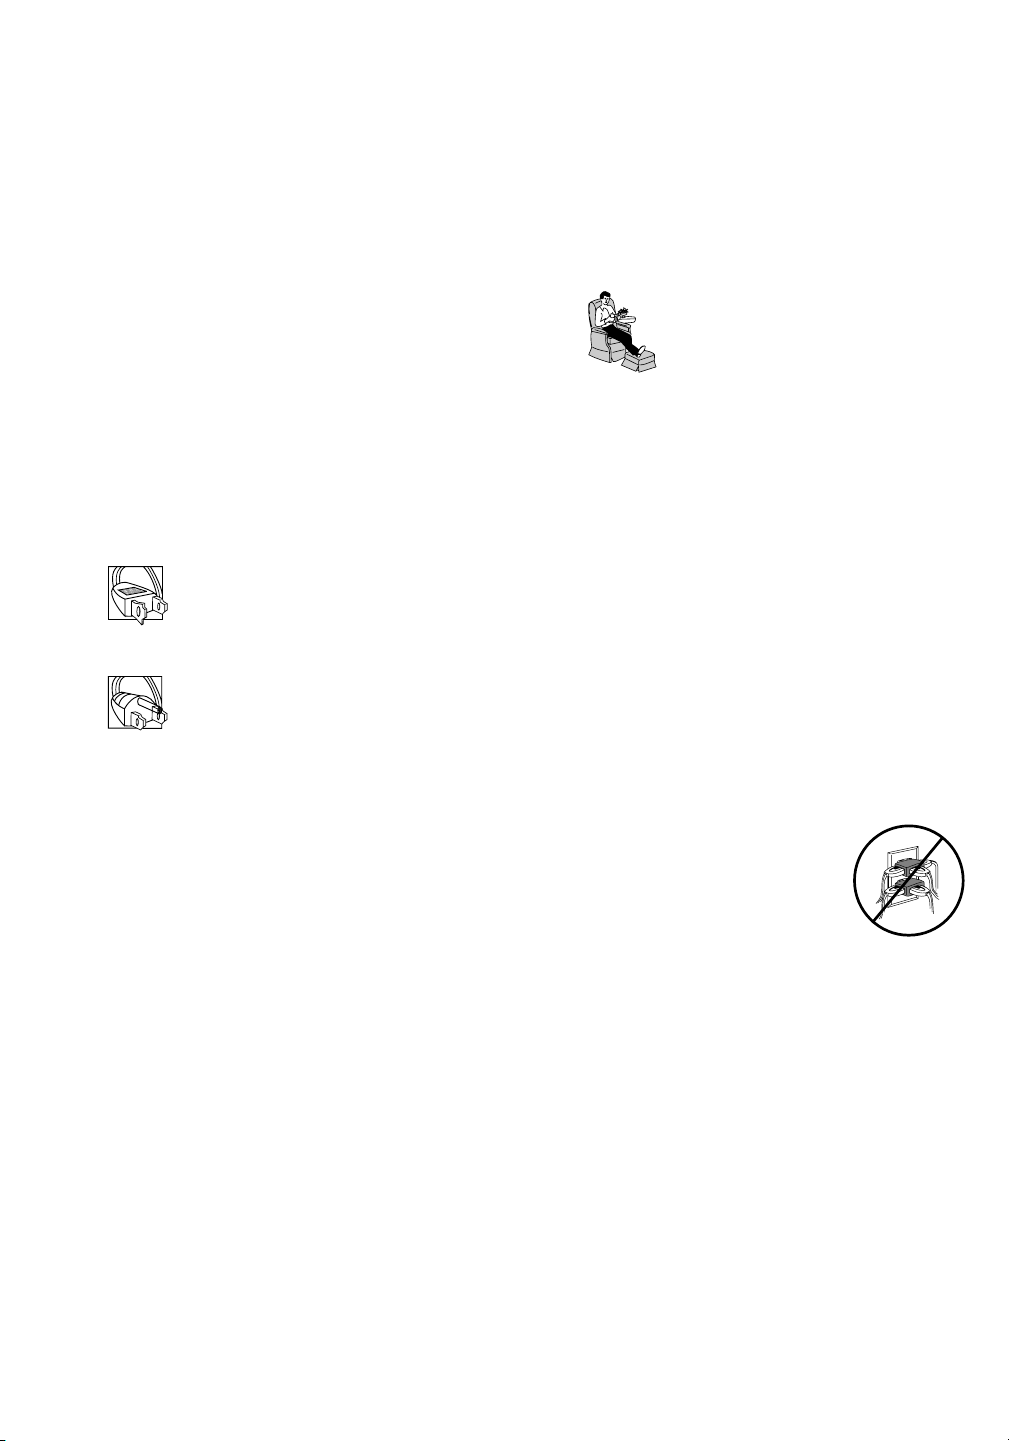
10 Water and Moisture—Do not use this product near water—for example, near a bath tub, wash bowl,
kitchen sink or laundry tub, in a wet basement, or near a swimming pool and the like.
11 Accessories—Do not place this product on an unstable surface or support. The product may fall, causing
serious injury to a child or adult as well as serious damage to the product. Any mounting of the product
should follow the manufacturer’s instructions and use only a mounting accessory recommended by the
manufacturer.
Page 4
IMPORTANT SAFEGUARDS
11AA product and cart combination should be moved with care. Quick stops, excessive force, and
uneven surfaces may cause the product and cart combination to overturn.
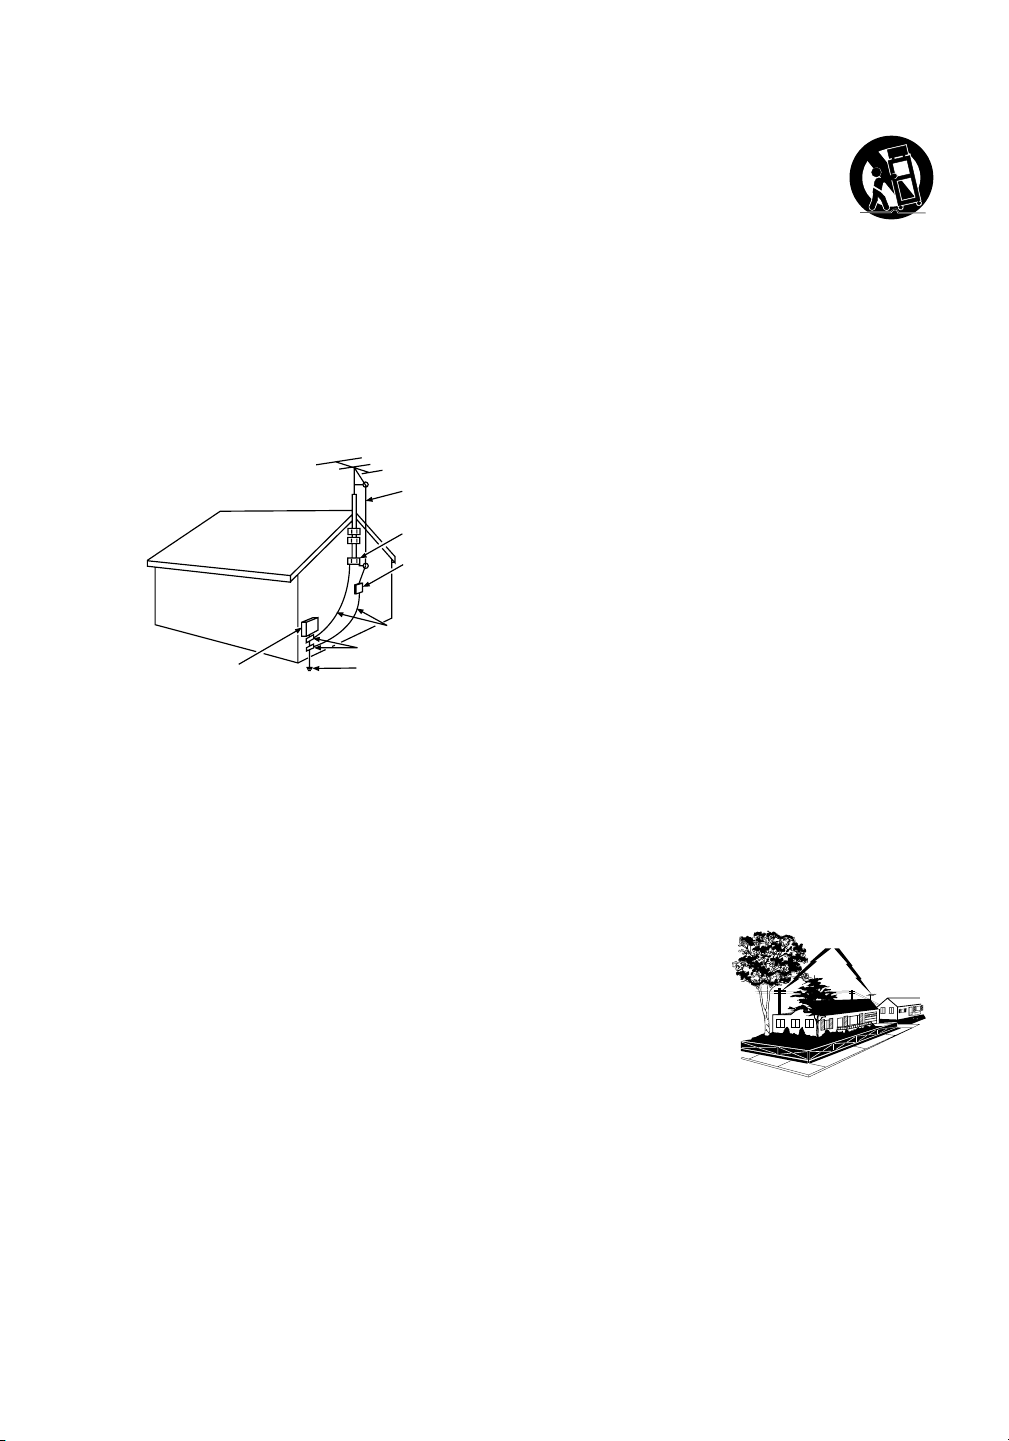
12 Outdoor Antenna Grounding—If an outside antenna or cable system is connected to the product, be
sure the antenna or cable system is grounded so as to provide some protection against voltage surges and
built-up static charges. Section 810 of the National Electrical Code, ANSI/NFPA No. 70-1984 (Section 54 of
Canadian Electrical Code, Part 1) provides information with respect to proper grounding of the mast and
supporting structure, grounding of the lead-in wire to an antenna-discharge unit, size of grounding
conductors, location of antenna-discharge unit, connection to grounding electrodes, and requirements for
the grounding electrode. See following example.
Example of Antenna Grounding
ANTENNA
LEAD IN
WIRE
GROUND CLAMP
ANTENNA
DISCHARGE UNIT
(NEC SECTION 810-20)
GROUNDING CONDUCTORS
(NEC SECTION 810-21)
ELECTRIC SERVICE
EQUIPMENT
GROUND CLAMPS
POWER SERVICE GROUNDING
ELECTRODE SYSTEM
(NEC ART 250, PART H)
13 Power Lines —An outside antenna system should not be located in the vicinity of overhead power lines,
other electric light or power circuits, or where it can fall into such power lines or circuits. When installing
an outside antenna system, extreme care should be taken to keep from touching or approaching such
power lines or circuits as contact with them might be fatal. Installing an outdoor antenna can be hazardous
and should be left to a professional antenna installer.
Use
14 Cleaning —Unplug this product from the wall outlet before cleaning. Do not use liquid cleaners or aerosol
cleaners. Use a damp cloth for cleaning.
15 Object and Liquid Entry—Never push objects of any kind into this product
through openings as they may touch dangerous voltage or “short-out” parts
that could result in a fire or electric shock. Never spill liquid of any kind on the
product.
16 Lightning —For added protection for this product during a lightning storm, or
when it is left unattended and unused for long periods of time, unplug it from
the wall outlet and disconnect the antenna or cable system. This will prevent
damage to the product due to lightning and power line surges.
Service
17 Servicing —Do not attempt to service this product yourself as opening or removing covers may expose you
to dangerous voltage or other hazards. Refer all servicing to qualified service personnel.
18 Conditions Requiring Service — Unplug this product from the wall outlet and refer servicing to
qualified service personnel under the following conditions.
A. When the power-supply cord or plug is damaged.
B. If liquid has been spilled, or objects have fallen into the product.
C. If the product has been exposed to rain or water.
Page 5

IMPORTANT SAFEGUARDS
D. If the product does not operate normally by following the operating instructions. Adjust only those controls
that are covered by the operating instructions. Improper adjustment of other controls may result in damage
and will often require extensive work by a qualified technician to restore the product to its normal
operation.
E. If the product has been dropped or the cabinet has been damaged.
F. When the product exhibits a distinct change in performance, such as the inability to perform basic
functions — this indicates a need for service.
19 Replacement Parts —When replacement parts are required, have the service technician verify that the
replacement parts he uses have the same safety characteristics as the original parts. Use of replacements
specified by the product manufacturer can prevent fire, electric shock, or other hazards.
20 Safety Check— Upon completion of any service or repairs to this product, ask the service technician to
perform safety checks recommended by the manufacturer to determine that the product is in safe
operating condition.
Important Stand and Base Safety Information
Choose the location for your TV/DVD carefully. Place the TV/DVD on a stand or base that is of adequate size
and strength to prevent the TV/DVD from being accidentally tipped over, pushed off, or pulled off. This could
cause personal injury and/or damage the TV/DVD. Refer to the Important Safety Instructions on page 3 of this
manual.
Page 6

Features
High Quality Picture
Horizontal Resolution
More than 500 lines. It exceeds Super VHS (400 lines) or Laser Disc (430 lines) in resolution.
Compatible with a wide range of DVD audio outputs
Digital Audio Jack (Coaxial)
• When a component with a built-in Dolby Digital decoder is connected, Dolby Digital sound can produce the effect
of being in a movie theatre or a concert hall.
• The DTS format is already in use in many theatres. By connecting this unit to a DTS decoder or an AV amplifier
with a built-in DTS decoder, the DTS audio of DVD discs recorded in this format can be enjoyed. However, audio
will not be output from the analog audio output jacks.
• By connecting this unit to an AV amplifier with a built-in MPEG decoder, the MPEG audio of DVD discs recorded
in this format can be enjoyed.
• The Linear PCM sound of a 48 kHz/24 bit through 96 kHz/24 bit exceeds audio CD sound.
Convenience Features
Direct selection of your desired scenes using Title/Chapter/Time/Track - You can play back from the desired
scene.
Recalling Up to 3 Scenes (DVD only) - You can program up to 3 scenes in memory and recall the marked scenes.
Frame Advance - The PAUSE/STILL moves one frame at a time.
Slow Motion - The SLOW moves you back and forth through the program by 4 steps of 1/8-1/2 times.
Repeat Playback - You can repeat chapter, track, title, sides or material between two selected points.
Program Playback (Audio CD) - You can play back tracks in programmed sequences.
Zoom (DVD only) - You can zoom in the selected subject on the screen during playback.
Note: Make sure that suitable discs are used.
Disc Warning
The DVD player will only play back commercially available prerecorded DVD and Audio discs. Other discs such as
CD-R, VCD, or photo discs may be damaged if played in this unit.
Note: Make sure that discs are suitable for the following functions.
Multi-Language - Maximum 32 language subtitles and maximum 8 language soundtracks can be played back for
movies or programs.
Multi-Angle - Pictures of Sports or a Live Concert are recorded with many cameras. When you play such a disc,
you can change the angles during playback.
Parental Control - You can limit the play back of scenes or sounds of adult DVD discs which have parental level.
Video Aspect Ratio - You can change the aspect ratio of the screen for your monitor.
TV Features
120V AC or DC Operation - This TV/DVD is designed to operate from household AC current or from a 12V DC
car cigarette lighter socket.
181 Channel Tuner - Receives standard VHF and UHF broadcast channels and up to 113 cable channels. The
actual number of channels received depends upon channel reception in your area or your cable system.
Closed Caption Decoder With Full Text Mode - Displays text captions or full screen text on the screen for
hearing impaired viewers.
Picture Adjustments Using The Remote Control - The On-Screen display allows precise remote control adjustment of BRIGHTNESS, CONTRAST, COLOR, TINT and SHARPNESS.
Programmable TV Sleep Timer - Operable from the remote control, the TV can be programmed up to 120
minutes to turn off automatically.
On-Screen 3 Language Display - You can select one of 3 languages, English, Spanish or French for onscreen programming.
V-Chip - The V-Chip function can read the rating of a TV program or movie content if the program is encoded
with this information. V-chip will allow you to set a restriction level.
This product incorporates copyright protection technology that is protected by method claims of certain U.S.
patents and other intellectual property rights owned by Macrovision Corporation and other rights owners. Use
of this copyright protection technology must be authorized by Macrovision Corporation and is intended for
home and other limited viewing uses only unless otherwise authorized by Macrovision Corporation. Reverse
engineering or disassembly is prohibited.
6
Page 7

Contents
Before using your unit
IMPORTANT SAFEGUARDS .............................................. 3
Features ............................................................................... 6
Contents ............................................................................... 7
Safety precautions ............................................................... 8
Parts and functions .............................................................. 9
Remote control ................................................................... 10
Power sources ................................................................... 11
Antenna connections.......................................................... 12
Cable TV connections ........................................................ 13
TV operation
Setting the on screen display language ............................. 14
TV operation....................................................................... 15
Closed caption ................................................................... 17
To memorize channels ....................................................... 18
Setting the V-Chip .............................................................. 20
Picture control adjustment.................................................. 23
Stereo and second audio program (SAP) .......................... 24
Playback operation
Disc .................................................................................... 25
Preparation/Status display of disc ...................................... 26
Playback procedure ........................................................... 27
Special playback ................................................................ 28
Advanced Function
Zooming/Locating desired scene ....................................... 29
Repeat/Random/Program playback and Repeat A-B......... 30
Marking desired scenes ......................... ........................... 31
Changing soundtrack language/Subtitles .......................... 32
Changing angles/Title selection/DVD menu....................... 33
Additional Information
Setting language ................................................................ 34
Setting the aspect ratio of TV screen/
Setting on screen display ................................................... 35
Dynamic Range Control ..................................................... 36
Parental control setting ..................................................... 37
To change the parental level .............................................. 38
Temporary disabling of rating level by DVD disc ................ 39
Language code list ............................................................. 40
Connections to other equipment ........................................ 41
Problems and troubleshooting .............................................
Specifications ..................................................................... 45
Warranty............................................................................. 46
43
7
Page 8

Safety precautions
WARNING!
INSTALL THE TV/DVD IN YOUR CAR
• For a car equipped with air bags, be sure to follow the manufacturer’s instructions whenever performing any
electrical wiring work. Incorrect wiring can cause the air bag system of a car to malfunction.
• Never cut the insulation from the power supply lead in an attempt to draw power for another device.
Doing so can overload the current capacity of the lead, creating the danger of fire and electric shock.
• For proper installation and wiring special technical knowledge is required. If you have any doubts about
where to position or how to install components, contact the retailer where you purchased the product, your
automobile dealership, or an automotive service provider. Note that you will be charged separately for
installation work.
• Use all of the components that come with this product only as directed. Improper use of components can
damage interior components or result in improper anchoring of components, which creates the danger of
accident and personal injury.
• Improper installation creates the danger of fire and accident.
• Make sure wires are not pinched between chassis parts, by screws or by the seat as it slides on its rails, etc.
Such conditions can cut wires and cause shorts, creating the danger of accident, electric shock, and fire.
•Avoid installation in areas subject to strong vibration and areas where secure anchoring cannot be achieved.
Components installed in such areas can become loose, creating the danger of accident and personal injury.
• Never install the TV/DVD on the dashboard or in any other location where it obstructs forward vision.
• Never attach the stand to the roof of your car. Doing so creates the danger of the TV/DVD falling down.
• Never attach the stand to a sharply angled surface or to a surface that causes the TV/DVD to face downwards.
Such installation can cause the TV/DVD to fall.
• Be sure to turn the ignition key of the car to the “OFF” position before connecting or disconnecting wires and
cables. Failure to do so creates the danger of electric shock and personal injury.
DRIVING SAFETY
• Never watch the TV/DVD or try to adjust settings while driving. Doing so creates the danger of traffic accident.
Before operating the TV/DVD, be sure to stop the car in a safe area.
• Never install the unit on the dashboard or in any other location where it obstructs forward vision. Items that
obstruct forward vision in a motor car may be illegal.
Also, make sure that all components are installed where they do not interfere with operation of the steering
wheel, shift lever, brake pedal, under the driver’s seat, etc. Where they do not endanger passengers.
Improper installation creates the danger of traffic accident and personal injury.
• Make sure all cables are bundled together so they do not interfere with car operation, as described in this
manual. Improperly installed cables create the danger of entanglement with the steering wheel, shift lever,
brake pedal, etc.
IMPORTANT NOTES:
• The unit is designed for use with a 12V DC automotive power supply. Never use it in a truck, bus, or any
other car that has a 24V power supply.
• Be sure to stop your car in a safe area before watching or adjusting the TV/DVD.
• Operating the TV/DVD for a long time with the engine of your car stopped can run down your car’s battery.
• Never leave the TV/DVD in areas exposed to temperature extremes or strong direct sunlight. Leaving it in a
closed car, in direct sunlight, near a heater, etc. can cause deformation of the case. Using this product in
areas that are colder than 5°C (41°F) or hotter than 40°C (104°F) can result in poor image quality.
• Never use benzene or other chemical agents for cleaning.
Chemicals can damage the case and remove markings. Use a soft cloth moistened with a weak solution of
water and mild neutral detergent. Wring out all excess moisture from the cloth before wiping.
• Never drop the TV/DVD or otherwise subject it to strong impact.
• Should the TV/DVD ever begin to emit smoke, abnormal odor, or a strange noise, immediately turn off power
and unplug the unit from the cigarette lighter socket. Continued use of the TV/DVD under any of these
conditions creates the danger of fire and electric shock.
• Do not continue to use the TV/DVD if it is malfunctioning and does not produce a video image or sound.
Whenever you notice such symptoms, immediately turn off power, unplug the TV/DVD from the cigarette
lighter socket. Continued use of the TV/DVD creates the danger of fire and electric shock.
• When you leave your car unattended for long periods, be sure to unplug the TV/DVD from the cigarette
lighter socket. Leaving the TV/DVD plugged in can run down the car’s battery.
8
Page 9
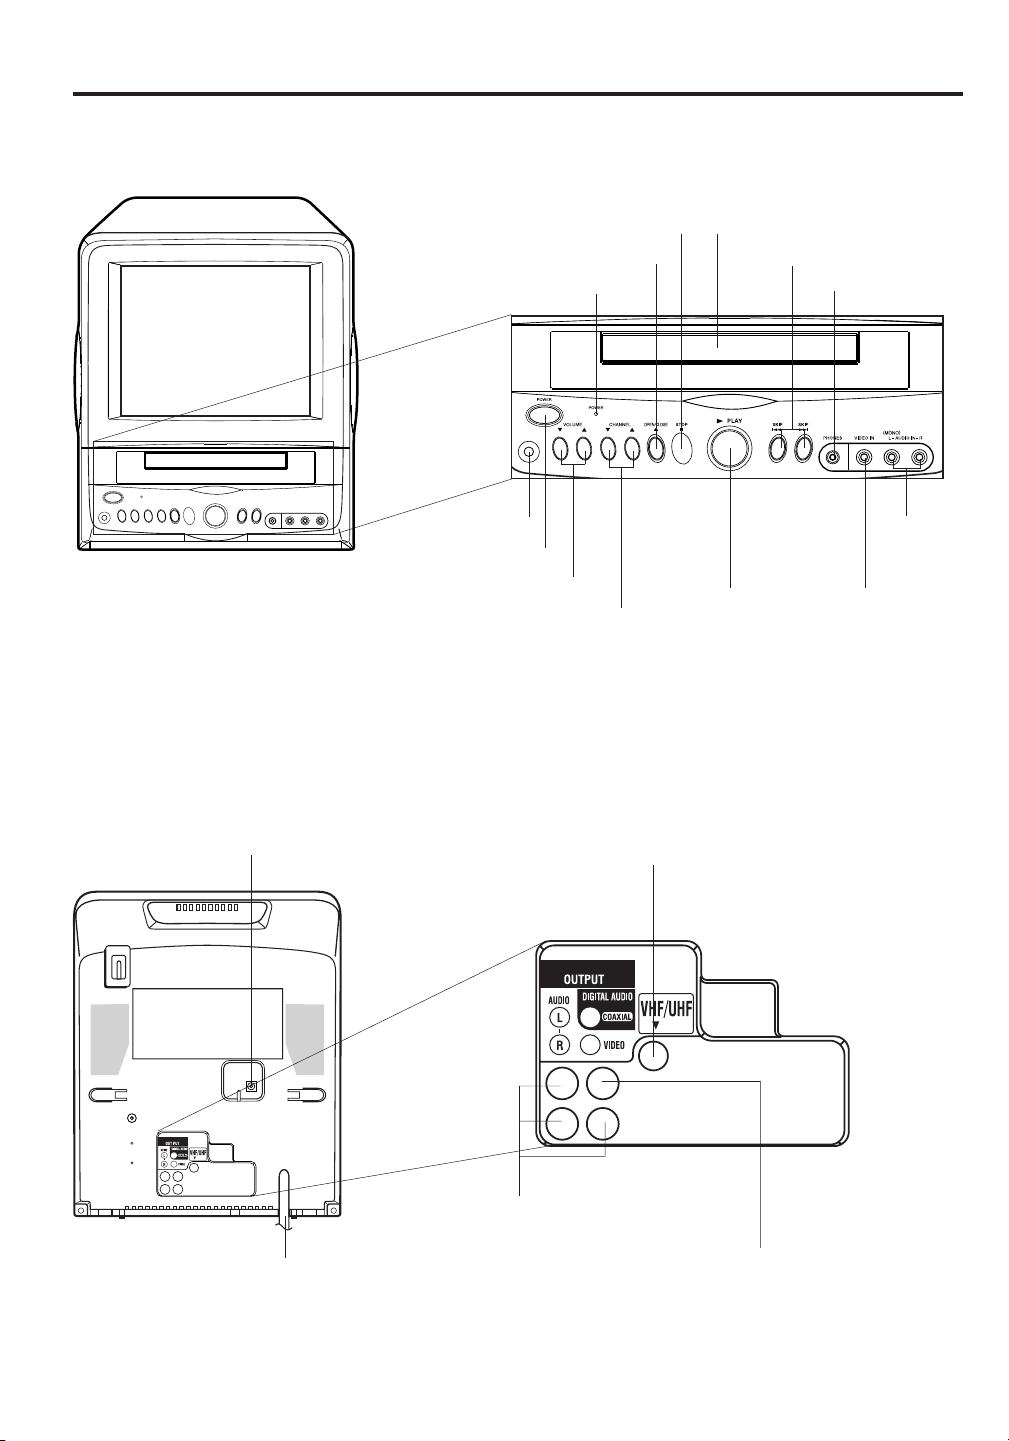
Front
Parts and functions
STOP button
OPEN/CLOSE button
Power indicator
Remote sensor
POWER button
VOLUME UP/DOWN buttons
CHANNEL UP/DOWN buttons
Disc tray
SKIP buttons
PLAY button
Headphones jack
AUDIO IN
L (MONO)/
R jacks
VIDEO IN jack
Back
DC input jack
AC power cord
RF IN jack
AUDIO (L/R)/ VIDEO OUT jacks
COAXIAL DIGITAL AUDIO OUT jack
9
Page 10
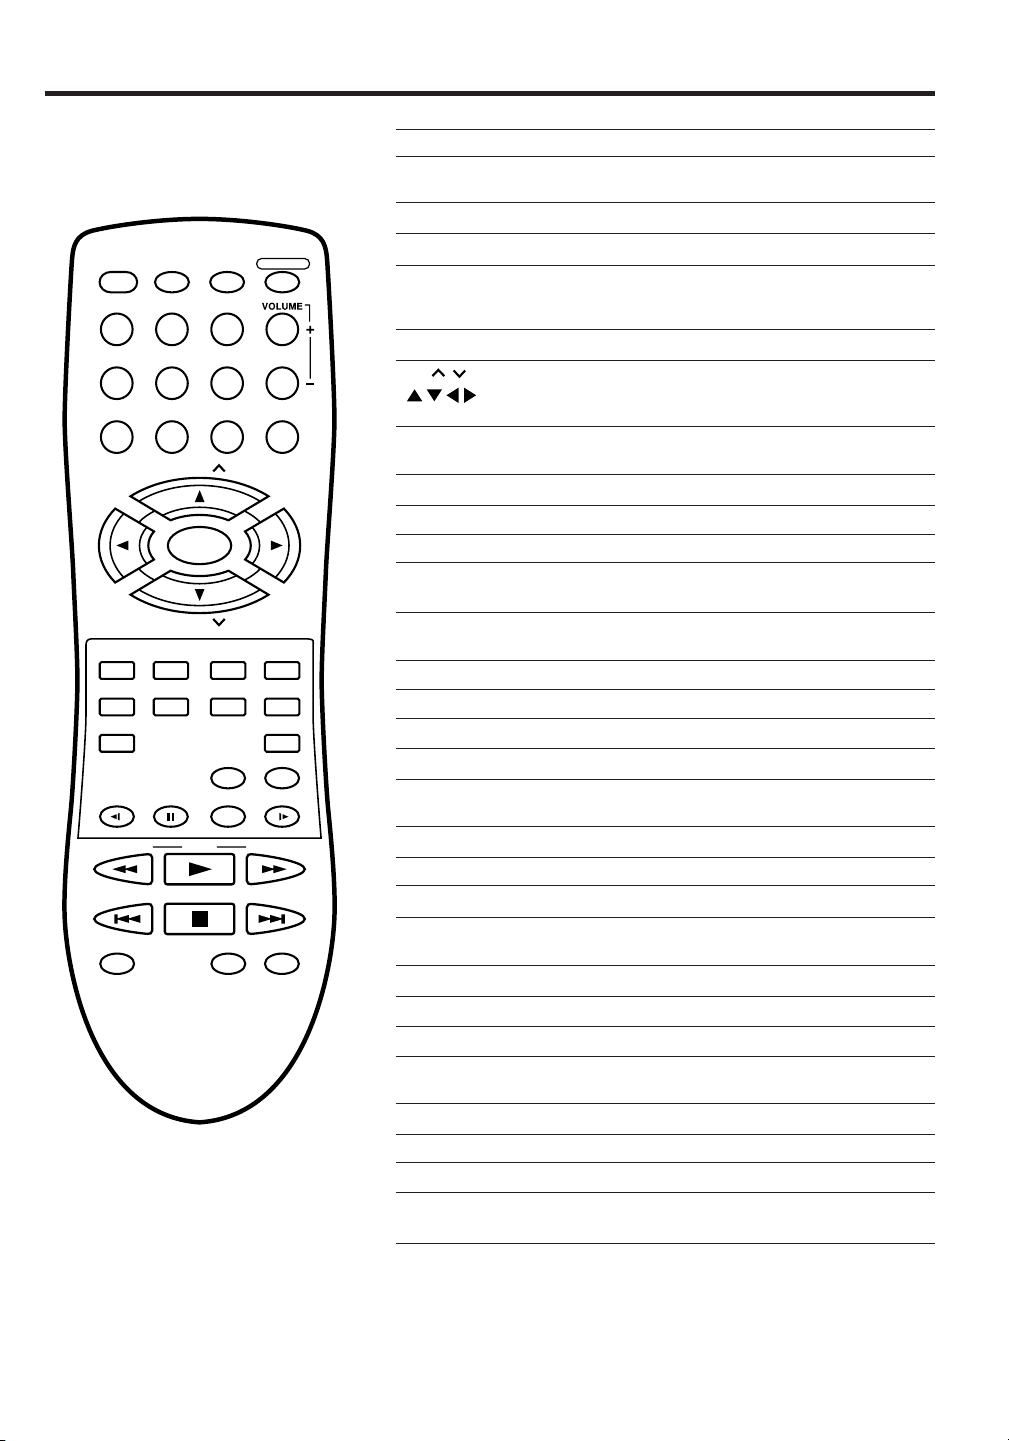
Remote control
DISPLAY/
CALL TV/DVDPOWER
123
456
789 0
CH
SELECT/
ENTER
CH
MUTE
DVD MENU
ANGLE
AUDIO
TOP MENU
SLOW SLOW
SEARCH SEARCH
SKIP
MARKER JUMP
PLAY
STOP
RETURN
SUB TITLE
INPUT
SELECT
PLAY MODEPAUSE/STILL
TV/CAP/TEXT
OPEN/CLOSE
SETUP/
TV MENU
CANCEL
QUICK VIEW/
ZOOM
SLEEP
SKIP
REPEAT A-B
Page
POWER Power On/Off 14,15,26
DISPLAY/CALL Call TV information 16
TV/DVD Switch between TV/AV and DVD 26
OPEN/CLOSE Open or Close the tray (DVD) 27,39
0-9 Number buttons on TV 15,19
VOLUME +/– Adjust volume of TV 15
CH
/ Select channel of TV 16
SELECT/ENTER Enter information in the menu 14,18~22
MUTE Switch off the sound 16
DVD MENU Display DVD menu 33
RETURN Remove DVD set up menu 34~39
SETUP/TV MENU
AUDIO Switch the sound of TV 24
ANGLE Change playback angle (DVD) 33
SUB TITLE Set subtitle (DVD) 32
CANCEL
TOP MENU Select title (DVD) 33
QUICK VIEW/ZOOM Switch between current/previous channel 16
INPUT SELECT Switch between TV/AV 42
SLEEP Sleep timer 16
SLOW Forward/Reverse- slow motion (DVD) 28
PAUSE/STILL Pause CD sound 28
PLAY MODE Select playback mode (DVD) 30
SEARCH Fast Forward/Review playback (DVD) 28
PLAY Playback (DVD) 27,28,30,33,39
SKIP Skip to previous or next chapter (DVD) 28
Call DVD information 26
Input setting 29,30
Enter a password 20,22,37~39
Arrow buttons for navigation 14,18~23
27,29,31,33~38
27,29~31,33~39
TV mode - Display menu of TV
DVD mode - Call up initial setup mode
14,18~23,25
34~38
Change sound track language 32
Reset information in the menu 20,22,23,29~31,37,38
Zoom 29
Still picture of DVD
10
STOP Stop (DVD) 27
MARKER Index (DVD) 31
JUMP Locate the desired scene (DVD) 29
TV/CAP/TEXT Switch between TV/Caption/Text in 17
Closed Caption mode
REPEAT A-B Repeat playback between A and B (DVD) 30
Page 11
Power sources
Inserting Batteries
Open the battery compartment cover.
Install two "AAA" batteries (supplied), paying attention
to the polarity diagram in the battery compartment.
Replace the compartment cover.
Operation
• Aim the remote control at the remote sensor and
press control buttons to operate.
• Operate the remote control within 30° angle on
either side of the remote sensor, up to a distance of Approx. 16 feet (5 meters).
TO USE AC POWER
Use the AC polarized line cord provided for operation
on AC. Insert the AC cord plug into a standard 120V
60Hz polarized AC outlet.
NOTES:
• Never connect the AC line cord plug to anything other
than the specified voltage (120V 60Hz). Use the
attached power cord only.
• If the polarized AC cord does not fit into a non-
polarized AC outlet, do not attempt to file or cut the
blade. It is the user's responsibility to have an
electrician replace the obsolete outlet.
• If you cause a static discharge when touching the
unit, and the unit fails to function, simply unplug the
unit from the AC outlet, wait a few minutes, and
plug it back in. The unit should return to
normal operation.
AC Outlet
Wider Hole
and Blade
Approx. 16 feet
(5 meters).
NOTES:
•
Do not leave the remote control unit exposed to
direct sunlight or in hot or humid places.
•
The remote control unit uses infrared beams to
transmit signals, so sunlight or fluorescent light on
the remote sensor may shorten operating distance.
•
Incorrect use of batteries may cause them to leak or
burst. Read the battery warnings and use the
batteries properly.
•
Do not mix old and new batteries.
•
Remove batteries if the remote control will not be
operated for an extended period of time.
Polarized AC Cord Plug
(One blade is wider than the other)
TO USE DC POWER
By using the DC car cord supplied with the TV/DVD,
you can operate this TV/DVD from a cigarette lighter
socket in any car that utilizes a negative ground
system.
The fused 12V DC car cord has been designed to
power the set from the external DC power (12 volt
negative ground) through the TV/DVD DC input jack.
Connect the smaller plug on the end of the cord to the
DC input jack on the back of the TV/DVD, then insert
the other end of the car cord into the cigarette lighter
socket of your car. Make sure that the cord makes a
firm connection. It may be necessary to try several
insertions, rotating the plug for proper electrical
connection.
TV/DVD
To Cigarette
Lighter Socket
To DC Input Jack
CAR
Car Cord (supplied)
11
Page 12
Power sources
Antenna connections
NOTES: • ALWAYS TURN THE TV/DVD TO “OFF”
BEFORE SWITCHING THE IGNITION OF
THE CAR ENGINE.
• Make sure that the negative terminal of the
battery is grounded.
This set is designed for use with negative
grounding systems only.
• Use the supplied car cord only.
When the TV/DVD is not in use, always discon-
•
nect it from the car cigarette lighter socket to
avoid a battery drain.
• If the TV/DVD is to be directly connected to a
12V DC power source, for example, recreational vehicle (RV) applications, make sure
the power cord is connected after the ignition
switch to avoid battery drain.
Do not operate the TV/DVD if the car battery is
•
weak. Peak current from the car alternator could
blow the DC fuse.
• Check the battery’s charge level regularly
when the TV/DVD is used in a vehicle.
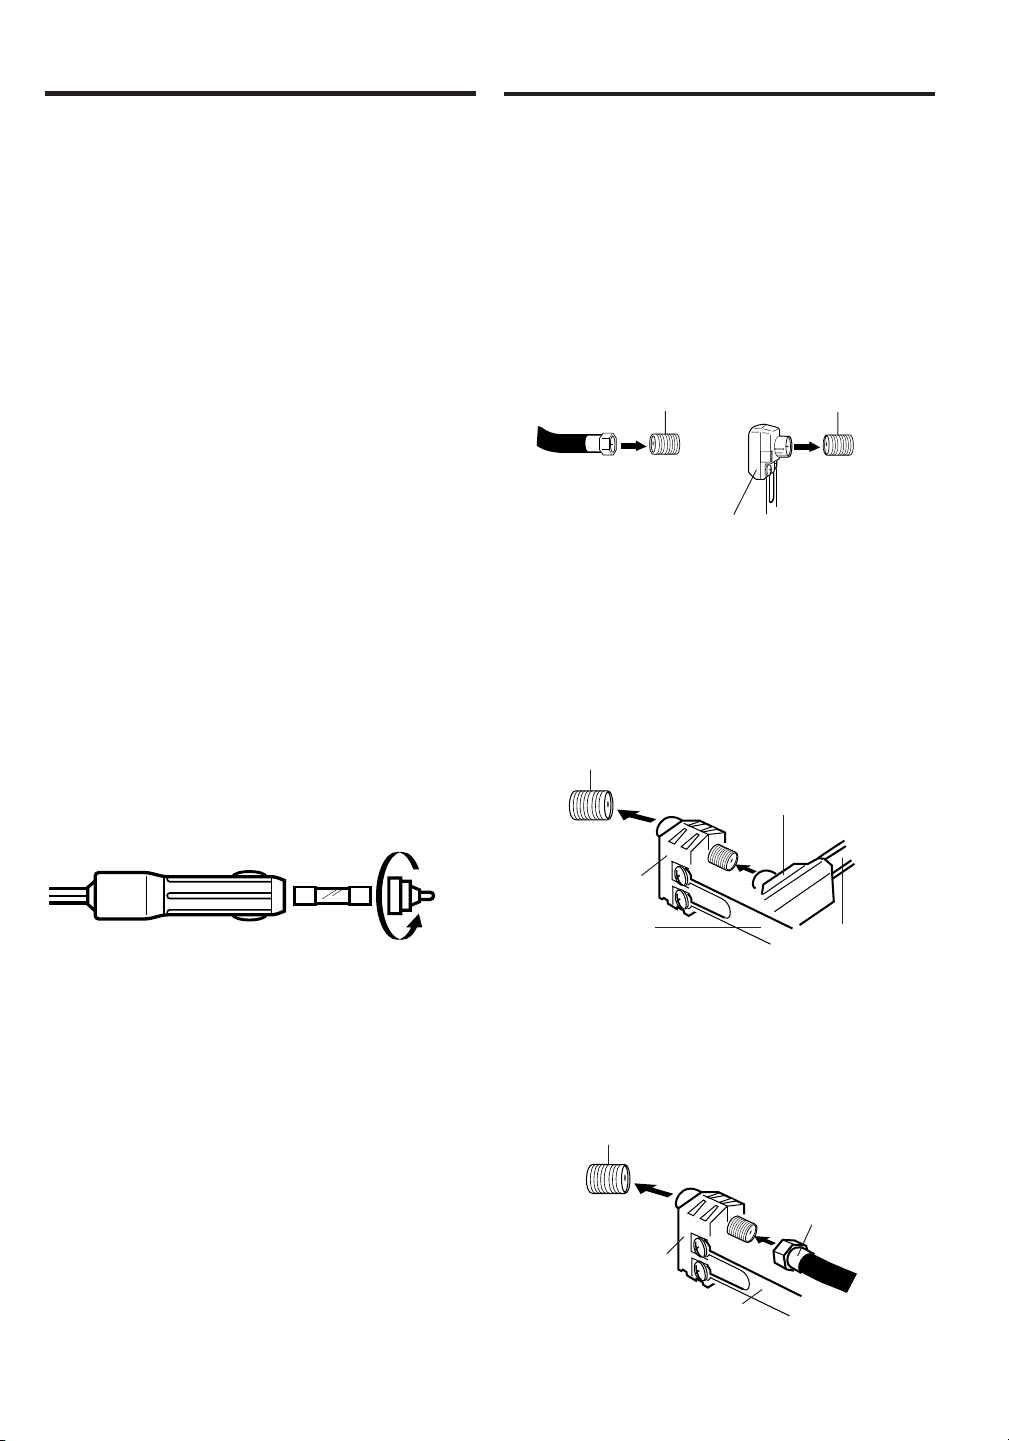
REPLACING THE FUSE IN THE CAR
BATTERY CORD PLUG
If the fuse in the car battery cord plug blows, replace
it with a new 8 A fuse (Fast Blow Type) as shown
below. Unscrew the tip of the plug to remove.
If you are using an indoor or outdoor antenna, follow the instructions below that correspond to your
antenna system. If you are using a cable TV service
(CATV), see page 13 for Cable TV connections.
Combination VHF/UHF Antenna
(
Single 75 ohm cable or 300 ohm
twin-lead wire
Connect the 75 ohm cable from the combination VHF/
UHF antenna to the Antenna Jack.
If your combination VHF/UHF antenna has a 300 ohm
twin-lead wire, the use of the 300-75 ohm Matching
Transformer may be necessary.
75 ohm
Coaxial
Cable
)
Antenna Jack Antenna Jack
300-75 ohm Matching Transformer
Combination VHF/UHF Antenna
(
Separate VHF and UHF 300 ohm
twin-lead wires
Connect the UHF 300 ohm twin-lead wire to the Combiner
(not supplied). Connect the VHF 300 ohm twin-lead
wire to the 300-75 ohm Matching Transformer. Attach
the Transformer to the Combiner, then attach the
Combiner to the Antenna Jack.
Antenna Jack
)
300-75 ohm Matching
Transformer
PLUG
8A FUSE
TIP
Combiner
UHF 300 ohm
VHF 300 ohm
Separate VHF/UHF Antennas
(
75 ohm VHF cable and 300 ohm UHF
twin-lead wires
Connect the VHF 75 ohm cable and UHF 300 ohm
twin-lead wire to the Combiner (not supplied). Attach
the Combiner to the Antenna Jack.
Antenna Jack
Combiner
)
VHF 75 ohm
UHF 300 ohm
IMPORTANT: Go to page 18 to choose the signal and search for channels.
12
Page 13

Cable TV connections
This TV/DVD has an extended tuning range and can tune most cable channels without using a Cable
TV Converter box. Some cable companies offer “premium pay channels” in which the signal is
scrambled. Descrambling these signals for normal viewing requires the use of a descrambler device
which is generally provided by the cable company.
Note for U.S. customers: If you prefer, we can provide you with the name of an Authorized Service Representative who will visit your
home for a fee to install your electronic entertainment system and to instruct you in its operation. For details about this service, call
1-888-206-3359.
For additional assistance while using your RCA product, please visit
FOR SUBSCRIBERS TO BASIC CABLE TV SERVICE
www.rca.com/customersupport.
For basic cable service not requiring a Converter/Descrambler
box, connect the CATV 75 ohm Coaxial Cable directly to the
Antenna Jack on the back of the TV/DVD.
75 ohm
Coaxial Cable
Antenna
Jack
FOR SUBSCRIBERS TO SCRAMBLED CABLE TV SERVICE
If you subscribe to a cable TV service which requires the use of a Converter/Descrambler box, connect the
incoming 75 ohm Coaxial Cable to the Converter/Descrambler box. Using another 75 ohm Coaxial Cable,
connect the output jack of the Converter/Descrambler box to the Antenna Jack on the TV/DVD. Follow the
connections shown below. Set the TV/DVD to the output channel of the Converter/Descrambler box (usually
channel 3 or 4) and use the Converter/Descrambler box to select channels.
Incoming
75 ohm
CATV Cable
Converter/
Descrambler
75 ohm Cable to
TV/DVD
Antenna
Jack
FOR SUBSCRIBERS TO UNSCRAMBLED BASIC CABLE TV SERVICE WITH
SCRAMBLED PREMIUM CHANNELS
If you subscribe to a cable TV service in which basic channels are unscrambled and premium channels require the
use of a Converter/Descrambler box, you may wish to use a signal Splitter and an A/B Switch box (available from
the Cable company or an electronics supply store). Follow the connections shown below. With the switch in the “B”
position, you can directly tune any nonscrambled channels on your TV/DVD. With the switch in the “A” position, tune
your TV/DVD to the output of the Converter/Descrambler box (usually channel 3 or 4) and use the Converter/
Descrambler box to tune scrambled channels.
Incoming
75 ohm
CATV Cable
Splitter
Converter/
Descrambler
A/B Switch
75 ohm Cable
A
to TV/DVD
B
Antenna
Jack
IMPORTANT: Go to page 18 to choose the signal and search for channels.
13
Page 14

<
/ / / /MENU
>
V-CHIP SET
LANGUAGE/IDIOMA/LANGUE
<
/ / / /MENU
>
V-CHIP SET
LANGUAGE/IDIOMA/LANGUE
Setting the on screen display language
<
/ /ENTER/MENU
>
LANGUAGE/IDIOMA/LANGUE
ENGLISH
ESPAÑOL
FRANCAIS
You can choose from three different languages (English, French and Spanish) for the on-screen displays.
Adjustment menus and messages will appear in the language of your choice.
On-screen language selection (step 5) will automatically appear on the screen when you press the TV MENU
button initially. Select the language you prefer first, then proceed with the other menu options.
To turn on the TV/DVD, press POWER. The Power indicator
1
will light.
DISPLAY/
CALL TV/DVDPOWER
123
OPEN/CLOSE
Press TV MENU in the TV mode.
2
The TV menu screen will appear.
456
789 0
CH
SELECT/
ENTER
CH
SETUP/
TV MENU
ANGLE
RETURN
SUB TITLE
INPUT
SELECT
PLAY MODEPAUSE/STILL
PLAY
STOP
TV/CAP/TEXT
CANCEL
QUICK VIEW/
ZOOM
SLEEP
SKIP
REPEAT A-B
MUTE
DVD MENU
AUDIO
TOP MENU
SLOW SLOW
SEARCH SEARCH
SKIP
MARKER JUMP
Press or until the OPTION
3
menu appears.
Press
4
“LANGUAGE” option, then press
or to select the
or button.
Press or to select the
5
desired language: English
(ENGLISH), Spanish
(ESPAÑOL) or French
(FRANCAIS), then press
ENTER.
Press TV MENU until the MENU
disappears.
NOTES:
If the TV/DVD does not operate
•
properly (by the buttons on the unit
and/or the remote control) disconnect
the AC cord, wait a few minutes and
plug it back in. Static electricity, etc., may
have affected the player's operation.
The TV section has its own menu and the
•
DVD section has its own menu (see page
34).
14
Page 15
VOLUME 32
CH 012
DISPLAY/
CALL TV/DVDPOWER
123
456
789 0
CH
SELECT/
ENTER
CH
MUTE
DVD MENU
AUDIO
ANGLE
TOP MENU
SLOW SLOW
SEARCH SEARCH
SKIP
MARKER JUMP
PLAY
STOP
RETURN
SUB TITLE
INPUT
SELECT
PLAY MODEPAUSE/STILL
TV/CAP/TEXT
OPEN/CLOSE
SETUP/
TV MENU
CANCEL
QUICK VIEW/
ZOOM
SLEEP
SKIP
REPEAT A-B
NOTES:
If a channel with no broadcast is
•
selected, the sound will automatically be muted.
If a station being viewed stops
•
broadcasting, the TV will automatically shut itself off after 15 minutes.
To turn on the TV/DVD, press
1
POWER.
Adjust the volume level by
2
pressing VOLUME + or – . The
volume level appears on screen.
Set the TV/CATV menu
3
option to the appropriate
position. (See page 18.)
Press the numbers buttons to
4
select the channel.
Channels can be instantly
selected by using two buttons.
(for example, to select channel
2, press “0”, then “2”. If you
press only “2”, channel
selection will be delayed for a
few seconds.)
For channels 10 and above,
press the 2 digits in order.
For 3 digit numbers, press the
3 digits in order. For example,
to select channel 120, just
press “120”.
NOTE:
To view channels above 69 the
TV must be set to CATV mode.
Go to page 18 for more
information.
TV
VHF
2-13
UHF
14-69
CATV
VHF
2-13
STD/HRC/IRC
14-36
(A) (W)
37-59
(AA) (WW)
60-85
(AAA) (ZZZ)
86-94
(86) (94)
95-99
(A-5) (A-1)
100-125
(100) (125)
01
(5A)
TV operation
TV - VHF/UHF channels
CATV - CABLE TV channels
15
Page 16
SLEEP
120
STEREO SAP CH 012
SEL. MONO+SAP
MUTE
TV operation
DISPLAY/
CALL TV/DVDPOWER
123
456
789 0
OPEN/CLOSE
CHANNEL /
Press and release CH or . The
channel automatically stops at the
next channel set into memory.
For proper operation, before selecting channels, they should be set into
the memory. See pages 18 and 19
“To memorize channels”
CH
SELECT/
ENTER
CH
ANGLE
RETURN
SUB TITLE
INPUT
SELECT
PLAY MODEPAUSE/STILL
PLAY
STOP
TV/CAP/TEXT
QUICK VIEW/
REPEAT A-B
MUTE
DVD MENU
AUDIO
TOP MENU
SLOW SLOW
SEARCH SEARCH
SKIP
MARKER JUMP
SETUP/
TV MENU
CANCEL
ZOOM
SLEEP
SKIP
CALL
Press DISPLAY/CALL to display the
current information on the screen.
Press DISPLAY/CALL again to clear
the call display.
• Channel number or VIDEO mode
• Stereo or SAP (second audio
program) audio status
• Audio output status
QUICK VIEW
Press QUICK VIEW again to return
to the last channel you were watching.
MUTE
Press MUTE to switch off the sound.
The TV/DVD’s sound will be silenced
and “MUTE” will briefly appear on the
screen. The sound can be switched
back on by pressing MUTE again or
the VOLUME + or – buttons.
16
SLEEP
To set the TV/DVD to turn off after a
preset amount of time, press SLEEP
on the remote control. The clock will
count down 10 minutes each time you
press SLEEP (120, 110, ...10, 0). After
the sleep time is programmed, the display will appear every ten minutes to
remind you that the sleep timer is
operating. To confirm the sleep timer
setting, press SLEEP and the remaining time will be displayed for a few
seconds. To cancel the sleep timer,
press SLEEP repeatedly until the dis-
play turns to 0.
Page 17
Closed caption
WHAT IS CLOSED CAPTIONING?
This television has the capability to decode and display Closed Captioned television programs. Closed Captioning
displays text on the screen for hearing impaired viewers or translates and displays text in another language.
Captions: This Closed Caption Mode will display text on the
DISPLAY/
CALL TV/DVDPOWER
123
456
789 0
CH
SELECT/
ENTER
CH
MUTE
DVD MENU
AUDIO
ANGLE
TOP MENU
SLOW SLOW
RETURN
SUB TITLE
INPUT
SELECT
PLAY MODEPAUSE/STILL
OPEN/CLOSE
SETUP/
TV MENU
CANCEL
QUICK VIEW/
ZOOM
SLEEP
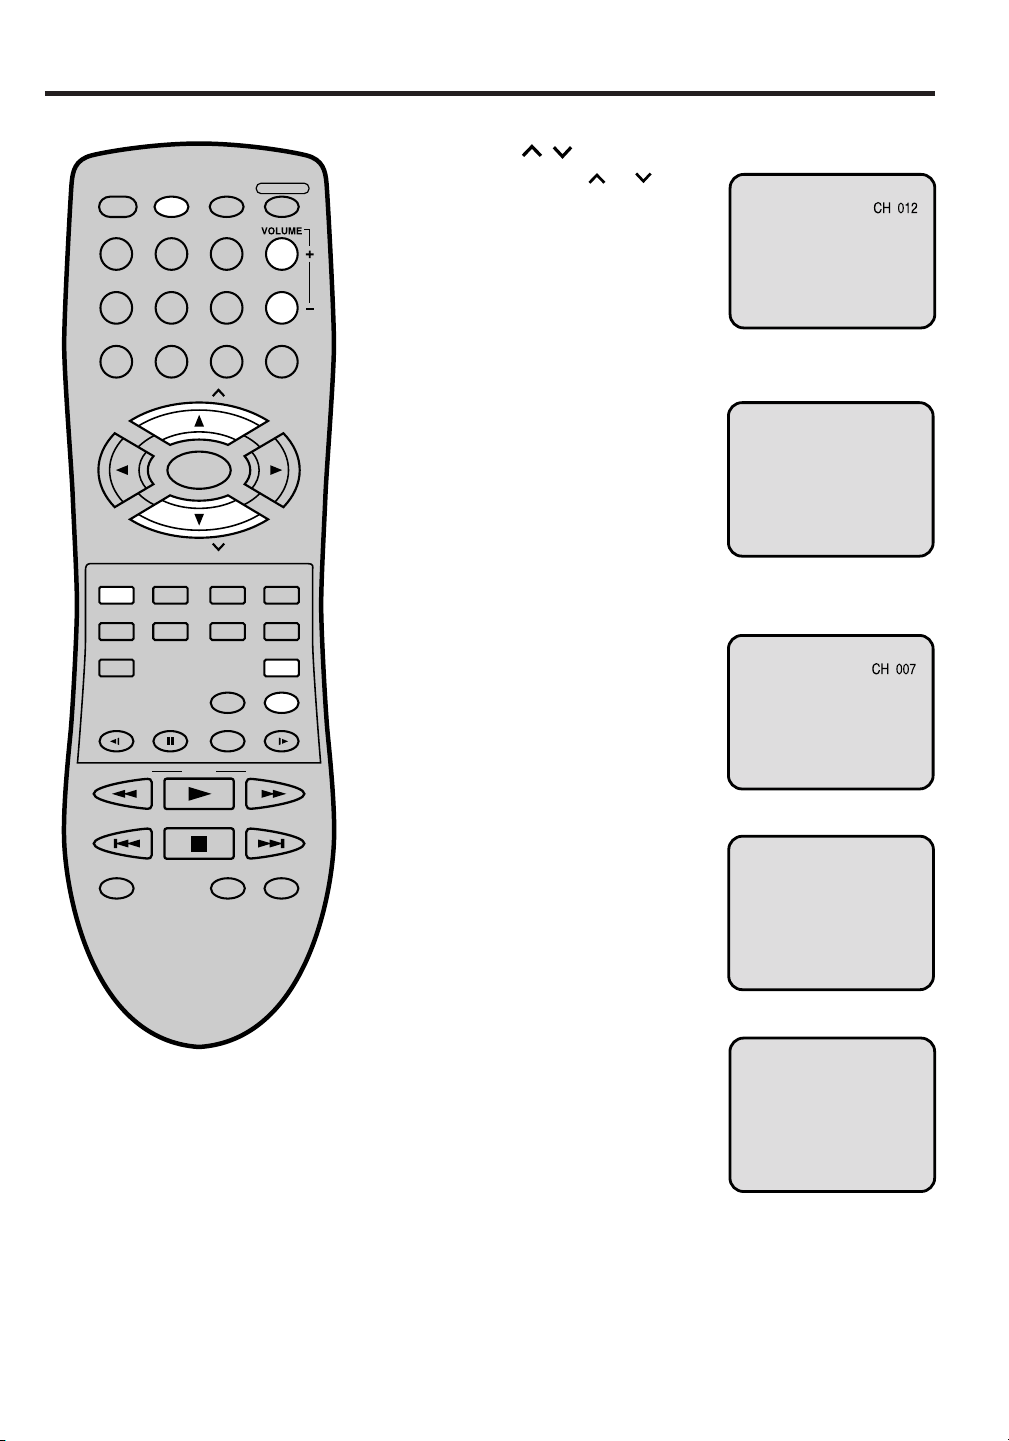
screen in English or another language (depending on the setting of the Closed Captions).
Generally, Closed Captions in English are transmitted on Captions Channel 1 and Closed Captions in other languages are
transmitted on Captions Channel 2.
The Captions will appear in places on the screen where they will
least interfere with the picture, usually on the bottom of the screen.
News programs will usually show three-line Closed Captions
which scroll onto the screen.
Most other shows provide two or three lined Captions placed
near the character who is speaking so the viewer can follow the
dialogue. Words in italics or underlined describe titles, words in
foreign languages or words requiring emphasis. Words that are
sung usually appear enclosed by musical notes.
Text: The Text Closed Caption Mode will usually fill the screen
with a programming schedule or other information.
After selecting a Closed Caption Mode, it will stay in effect until
it is changed, even if the channel is changed.
If the Captions signal is lost due to a commercial or a break in
the signal, the Captions will reappear when the signal is received
again. If the channels are changed, the Captions will be delayed
approximately 10 seconds.
For television programs broadcasting with Closed Captions, look
in your TV guide for the Closed Captions symbol (CC).
SEARCH SEARCH
PLAY
TO VIEW CLOSED CAPTIONS
SKIP
MARKER JUMP
STOP
TV/CAP/TEXT
SKIP
REPEAT A-B
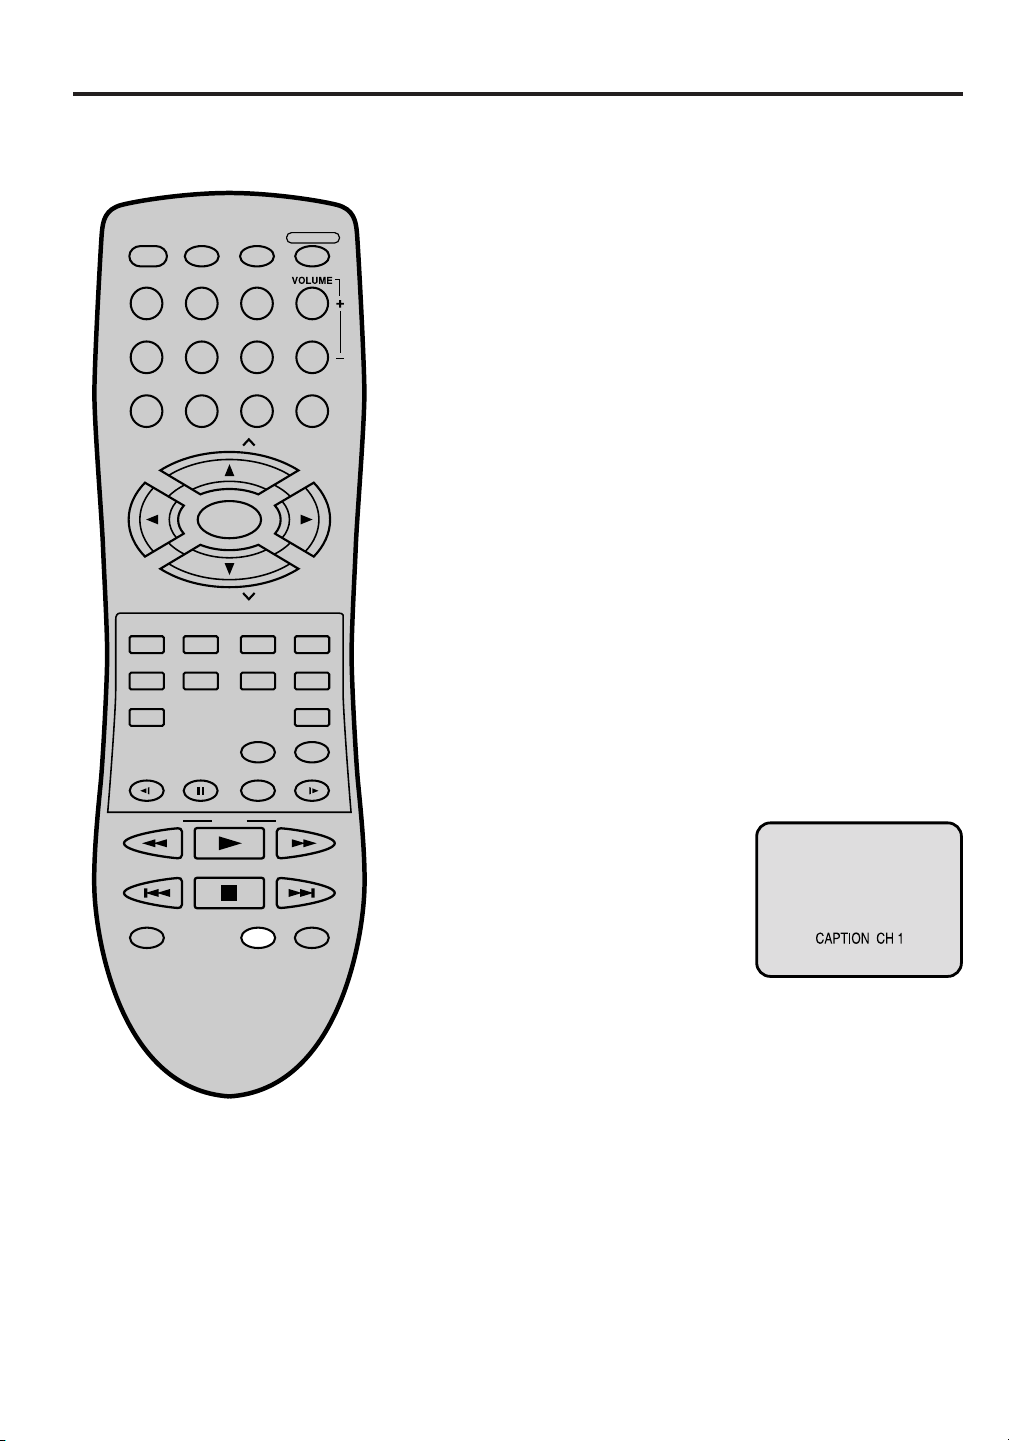
Press TV/CAP/TEXT to switch
between normal TV and the two
closed caption modes (captions
and full screen text). Closed
captioning will display text on the
screen for hearing impaired
viewers.
NOTES:
• When selecting Closed Captions, the captioning will be delayed approximately 10 seconds.
• If no caption signal is received, no captions will appear, but the television will remain in the Caption Mode.
• Misspellings or unusual characters may occasionally appear during Closed Captioning. This is normal with
Closed Captioning, especially with live programs. This is because during live programs, captions are also
entered live. These transmissions do not allow time for editing.
• When Captions are being displayed, on-screen displays, such as volume and mute may not be seen or may
interfere with Closed Captions.
• Some cable systems and copy protection systems may interfere with the Closed Captioned signal.
• If using an indoor antenna or if TV reception is very poor, the Closed Caption Decoder may not appear or
may appear with strange characters or misspelled words. In this case, adjust the antenna for better reception
or use an outdoor antenna.
17
Page 18
<
/ / / /MENU
>
TV/CATV
ADD/DELETE
CATV
ADD
AUTO CH MEMORY
<
/ / / /MENU
>
TV/CATV
ADD/DELETE
CATV
ADD
AUTO CH MEMORY
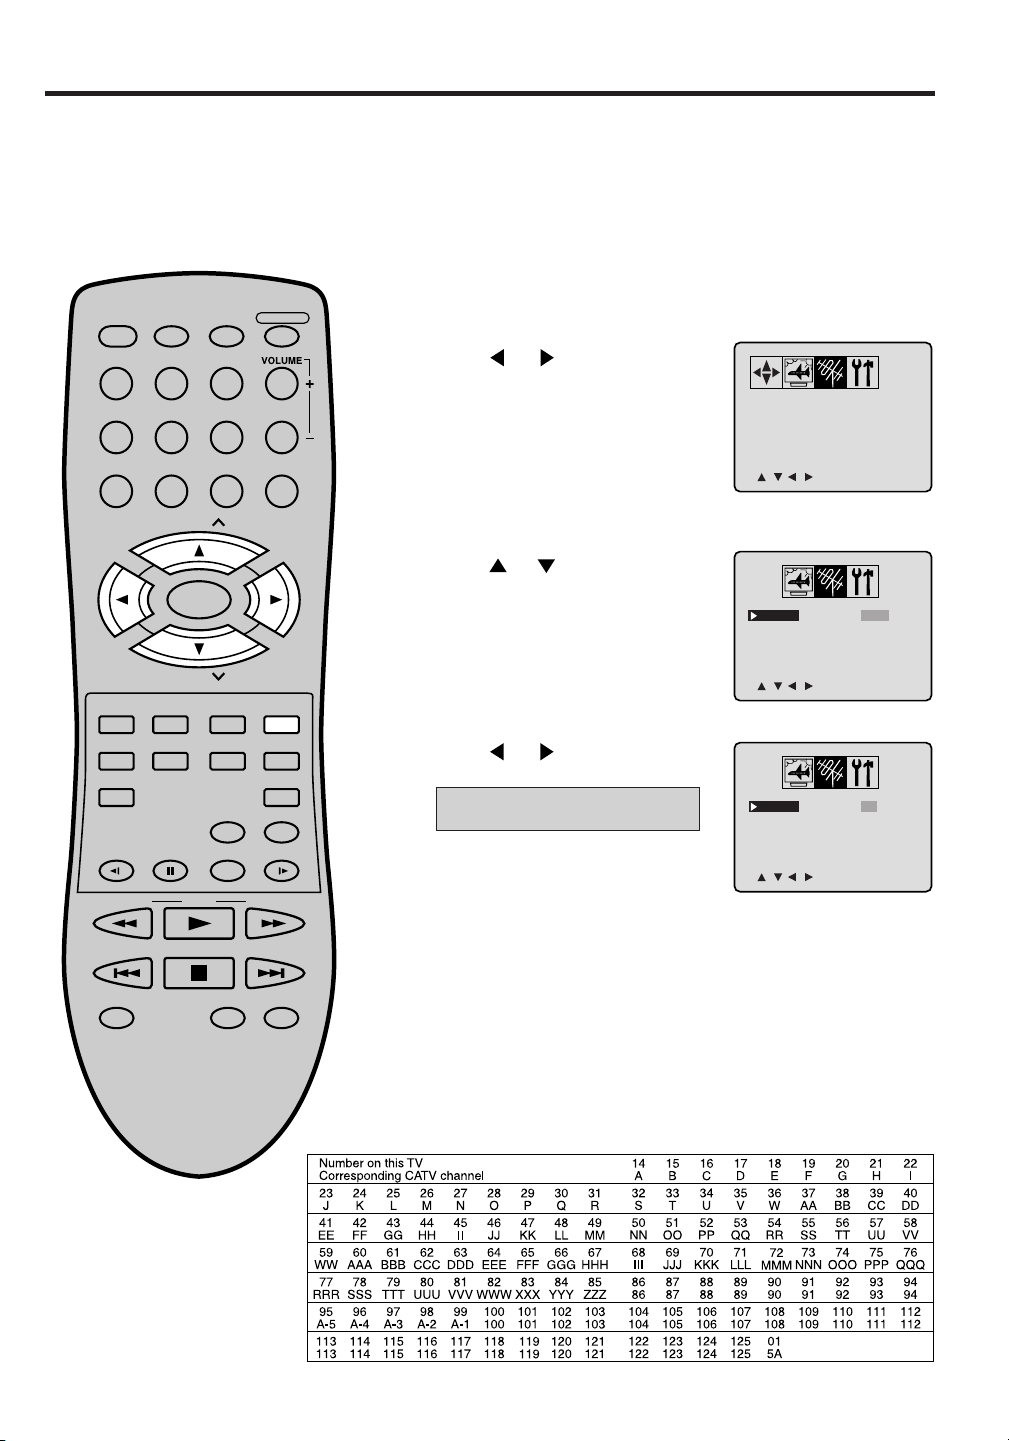
To memorize channels
<
/ / / /MENU
>
TV/CATV TV
ADD/DELETE ADD
AUTO CH MEMORY
This TV/DVD is equipped with a channel memory feature which allows channels to skip up or down to the next
channel set into memory, skipping over unwanted channels. Before selecting channels, they must be programmed into the TV/DVD’s memory. In addition to normal VHF and UHF channels, this TV/DVD can receive
up to 113 Cable TV channels. To use this TV/DVD with an antenna, set the TV/CATV menu option to TV mode.
When shipped from the factory, this menu option is in the CATV mode.
TV/CATV SELECTION
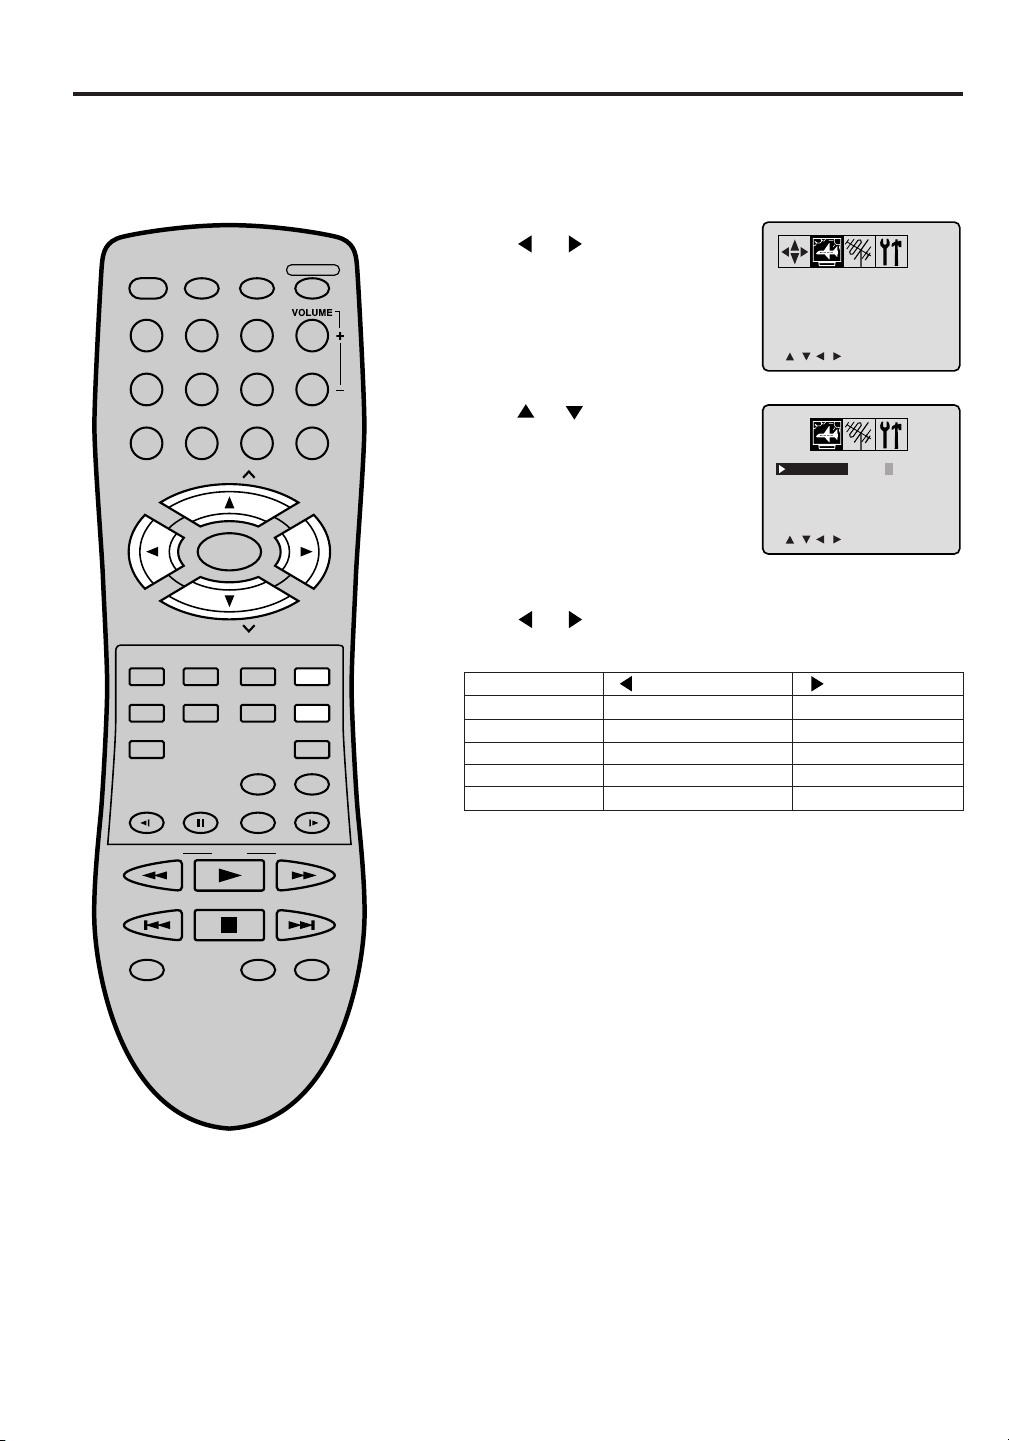
Press TV/DVD. Press TV MENU.
1
DISPLAY/
CALL TV/DVDPOWER
OPEN/CLOSE
The TV menu screen will appear.
123
456
789 0
CH
SELECT/
ENTER
CH
SETUP/
MUTE
DVD MENU
AUDIO
ANGLE
TOP MENU
SLOW SLOW
SEARCH SEARCH
SKIP
PLAY
STOP
RETURN
SUB TITLE
INPUT
SELECT
PLAY MODEPAUSE/STILL
TV MENU
CANCEL
QUICK VIEW/
ZOOM
SLEEP
SKIP
Press
2
menu appears.
Press
3
“TV/CATV” option. If you
or until the SET UP
or to select the
connected an antenna, select
TV. If you have cable service,
select CATV.
Press or to select the TV
4
or CATV mode.
TV - VHF/UHF channels
CATV - CABLE TV channels
Press TV MENU until the MENU
5
disappears.
MARKER JUMP
18
REPEAT A-B
TV/CAP/TEXT
CATV CHART
The chart below is typical of many cable system channel allocations.
Page 19
DISPLAY/
CALL TV/DVDPOWER
123
456
789 0
CH
OPEN/CLOSE
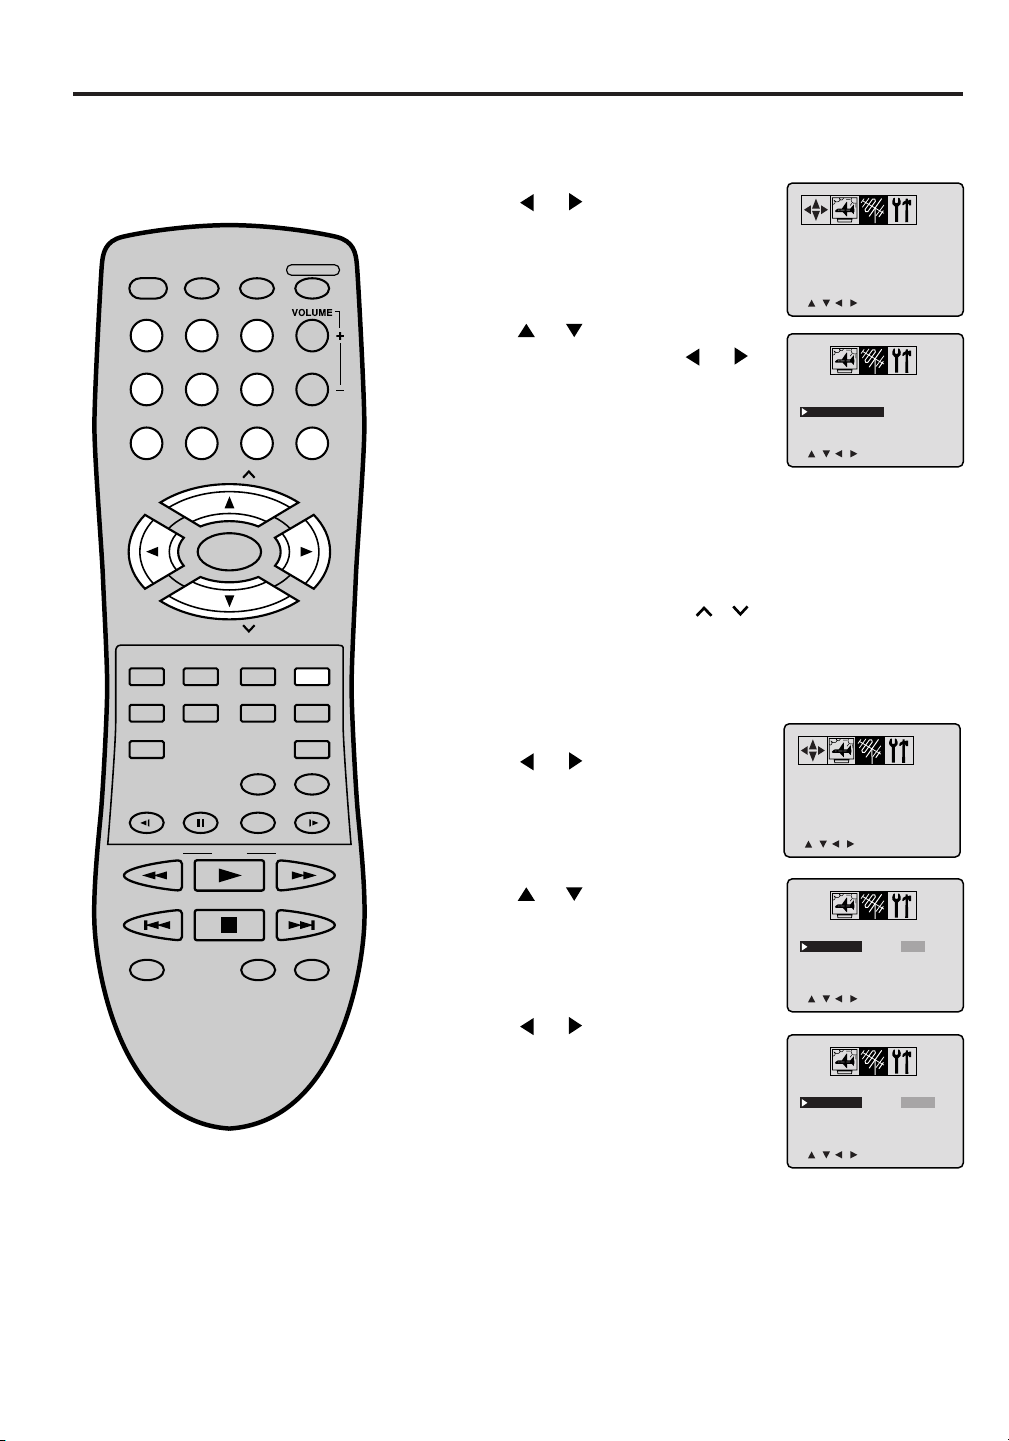
To memorize channels
AUTOMATIC MEMORY TUNING
Press TV/DVD. Press TV MENU. The TV menu screen
1
will appear.
Press
2
appears.
Press or to select the “AUTO
3
CH MEMORY”, then press
The TV will begin memorizing all the
channels available in your area.
Press TV MENU until the MENU
4
disappears.
or until SET UP menu
or .
TV/CATV
ADD/DELETE
AUTO CH MEMORY
<
/ / / /MENU
TV/CATV
ADD/DELETE
AUTO CH MEMORY
<
/ / / /MENU
CATV
ADD
>
CATV
ADD
>
SELECT/
ENTER
CH
MUTE
DVD MENU
AUDIO
TOP MENU
SLOW SLOW
SEARCH SEARCH
SKIP
MARKER JUMP
ANGLE
RETURN
SUB TITLE
INPUT
SELECT
PLAY MODEPAUSE/STILL
PLAY
STOP
TV/CAP/TEXT
QUICK VIEW/
REPEAT A-B
SETUP/
TV MENU
CANCEL
ZOOM
SLEEP
SKIP
TO ADD/DELETE CHANNELS
Select the desired channel to be
1
memorized or deleted using the
number buttons
Press TV MENU. The TV
2
menu screen will appear.
Press or until SET UP menu
3
appears.
Press or to select the “ADD/
4
DELETE”.
Press or to select ADD or
5
DELETE, whichever function you
want to perform.
(0-9), or CH
or
.
TV/CATV
ADD/DELETE
AUTO CH MEMORY
<
/ / / /MENU
TV/CATV
ADD/DELETE
AUTO CH MEMORY
<
/ / / /MENU
TV/CATV
ADD/DELETE
AUTO CH MEMORY
CATV
ADD
>
CATV
ADD
>
CATV
DELETE
Press TV MENU until the MENU
6
disappears.
Repeat steps 1-6 for other channels
7
you want to add or delete.
<
/ / / /MENU
>
19
Page 20
<
0 9/ENTER/CANCEL/MENU
>
V-CHIP SET
CONFIRM
PASSWORD :
<
0 9/ENTER/CANCEL/MENU
>
V-CHIP SET
NEW
PASSWORD
:
<
/ / / /MENU
>
V-CHIP SET
LANGUAGE/IDIOMA/LANGUE
Setting the V-Chip
<
/ / / /MENU
>
V-CHIP SET
LANGUAGE/IDIOMA/LANGUE
This TV/DVD is equipped with a V-Chip Controller which provides you with channel viewing access
controls and restrictions. This function is to prevent your children from watching violence or sexual
scenes, that you may choose to exclude.
To use the V-Chip function, you must set a password.
DISPLAY/
CALL TV/DVDPOWER
123
456
789 0
CH
SELECT/
ENTER
CH
MUTE
DVD MENU
AUDIO
ANGLE
TOP MENU
SLOW SLOW
SEARCH SEARCH
PLAY
RETURN
SUB TITLE
INPUT
SELECT
PLAY MODEPAUSE/STILL
OPEN/CLOSE
SETUP/
TV MENU
CANCEL
QUICK VIEW/
ZOOM
SLEEP
SET THE PASSWORD
Press TV/DVD. Press TV MENU. The TV menu
1
screen will appear.
Press or until the OPTION
2
menu appears.
Press or to select the
3
“V-CHIP SET”, then press
.
Enter the password (4 digits)
4
using the number buttons (0-9),
then press ENTER.
• If you enter an incorrect number,
press CANCEL.
or
SKIP
MARKER JUMP
STOP
REPEAT A-B
TV/CAP/TEXT
NOTES:
The V-Chip feature is available only
•
for the U.S.V-Chip system. The
Canadian V-Chip system is not
supported.
To avoid forgetting the password, write
•
it down and keep in a safe place.
If you forget the password....
•
1. Turn the volume to a minimum
level.
2. Press VOLUME
0 on the remote control for more
than 1 second simultaneously.
20
on the unit and
SKIP
Enter the same password again
5
for confirmation, then press
ENTER.
Now the password is set and the
V-Chip setting menu appears.
" " appears instead of the number.
Page 21
TO SET THE V-CHIP
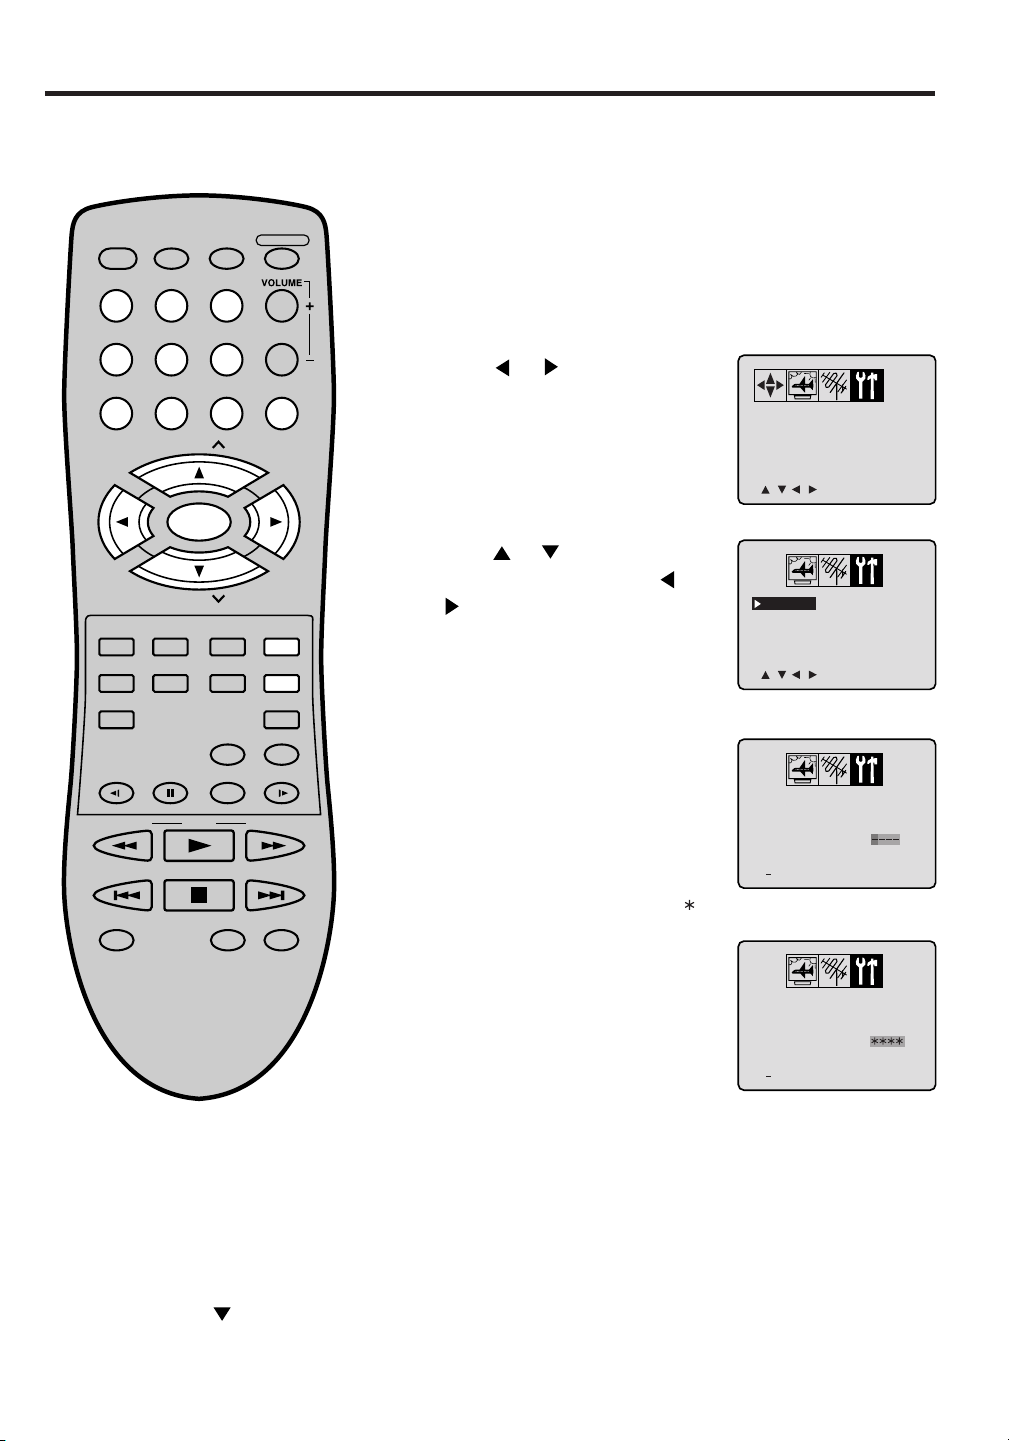
In the V-CHIP SET menu, press
1
or to select the “TV
RATING”.
Setting the V-Chip
V-CHIP SET
V-CHIP
TV RATING
MOVIE RATING
CHANGE PASSWORD
: OFF
: OFF
: OFF
DISPLAY/
CALL TV/DVDPOWER
123
456
789 0
CH
SELECT/
ENTER
CH
MUTE
DVD MENU
AUDIO
ANGLE
TOP MENU
SLOW SLOW
SEARCH SEARCH
PLAY
RETURN
SUB TITLE
INPUT
SELECT
PLAY MODEPAUSE/STILL
OPEN/CLOSE
SETUP/
TV MENU
CANCEL
QUICK VIEW/
ZOOM
SLEEP
Use the TV after V-Chip is activated
When a program is received with
V-Chip activated, enter the password.
Protection can be temporarily
overridden.
NOTES:
• The V-Chip function is activated only
on programs that support the rating
system.
• If you are changing channels using
a VCR or a cable box, while the TV
remains on channel 3 or 4, the VChip operates differently. When you
enter your password to temporarily
release the block on any channel,
you have completely disabled the VChip function for all stations. To
reset the V-Chip turn your TV off
and back on.
• Some cable boxes are built with a
delay feature, in some cases it can
take up to 10 seconds for a program
to appear after the password has
been input.
<
/ / / /MENU
Press or to display the
2
desired setting.
OFF : TV RATING is not set
TV-Y : All children
V-CHIP SET
V-CHIP
TV RATING
MOVIE RATING
CHANGE PASSWORD
TV-Y7 : 7 years old and above
TV-G : General Audience
<
TV-PG: Parental guidance
/ / / /MENU
TV-14 : 14 years old and above
TV-MA: 17 years old and above
When you select TV- Y7, TV-PG, TV-14 or TV-MA, press
DISPLAY/CALL to show the contained rating. Press
/ to select the desired item you want.
Press
3
“MOVIE RATING”.
Press or to select
4
rating.
OFF : MOVIE RATING is not set
G:All ages
or to select the
desired
V-CHIP SET
V-CHIP
TV RATING
MOVIE RATING
CHANGE PASSWORD
<
/ / / /MENU
V-CHIP SET
V-CHIP
TV RATING
MOVIE RATING
CHANGE PASSWORD
PG : Parental guidance
PG-13 : Parental guidance
<
less than 13 years old
/ / / /MENU
R:Under 17 years old
Parental guidance suggested
NC-17 : 17 years old and above
X:Adult only
Press
5
“V-CHIP”.
Press
6
Now your settings were set into
the memory.
Press TV MENU until the MENU
7
screen is cleared.
or to select
or to Display “ON”.
V-CHIP SET
V-CHIP
TV RATING
MOVIE RATING
CHANGE PASSWORD
<
/ / / /MENU
V-CHIP SET
V-CHIP
TV RATING
MOVIE RATING
CHANGE PASSWORD
<
/ / / /MENU
>
: OFF
: TV-Y
: OFF
>
/ or
: OFF
: TV-Y
: OFF
>
: OFF
: TV-Y
: PG-13
>
: OFF
: TV-Y
: PG-13
>
: ON
: TV-Y
: PG-13
>
21
Page 22

MOVIE RATING
CONFIRM
PASSWORD
CHANGE PASSWORD
V-CHIP SET
V-CHIP
TV RATING
: OFF
:
: OFF
: OFF
<
0 9/ENTER/CANCEL/MENU
>
MOVIE RATING
NEW
PASSWORD
CHANGE PASSWORD
V-CHIP SET
V-CHIP
TV RATING
: OFF
:
: OFF
: OFF
<
0 9/ENTER/CANCEL/MENU
>
<
/ / / /MENU
>
V-CHIP SET
LANGUAGE/IDIOMA/LANGUE
<
/ / / /MENU
>
V-CHIP SET
LANGUAGE/IDIOMA/LANGUE
<
/ / / /MENU
>
MOVIE RATING
CHANGE PASSWORD
V-CHIP SET
V-CHIP
TV RATING
: OFF
: OFF
: OFF
<
0 9/ENTER/CANCEL/MENU
>
V-CHIP SET
PASSWORD
:
Setting the V-Chip
CHANGE THE PASSWORD
Press TV/DVD. Press TV MENU.
1
The TV menu screen will appear.
DISPLAY/
CALL TV/DVDPOWER
123
456
789 0
CH
SELECT/
ENTER
CH
MUTE
DVD MENU
AUDIO
ANGLE
TOP MENU
SLOW SLOW
SEARCH SEARCH
PLAY
RETURN
SUB TITLE
INPUT
SELECT
PLAY MODEPAUSE/STILL
OPEN/CLOSE
SETUP/
TV MENU
CANCEL
QUICK VIEW/
ZOOM
SLEEP
2
Press
or until OPTION
menu appears.
Press
3
“V-CHIP SET”, then press
or to select the
.
Enter the Password using the
4
number buttons (0-9), then
press ENTER.
• If you enter an incorrect number,
press CANCEL.
Press or to select
5
“CHANGE PASSWORD”, then
press
or .
or
SKIP
MARKER JUMP
22
STOP
TV/CAP/TEXT
SKIP
REPEAT A-B
Enter a new password using the
6
number buttons (0-9), then
press ENTER.
Enter the new password again
7
for confirmation, then press
ENTER.
Press TV MENU repeatedly to
8
return to normal screen.
Page 23
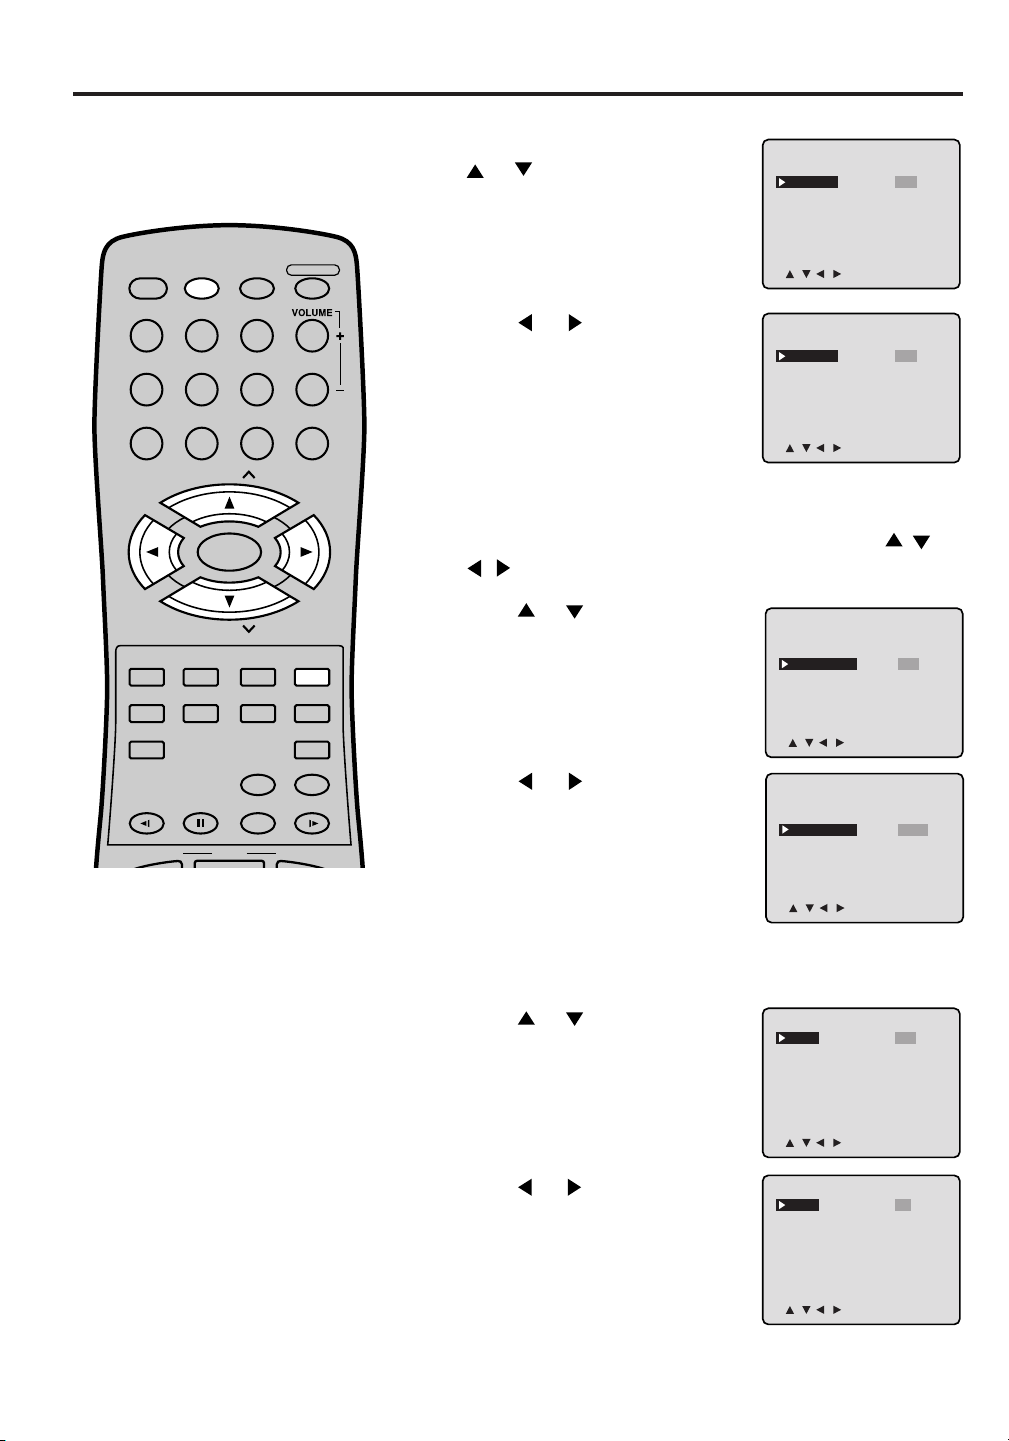
Picture control adjustment
Picture controls are factory preset but you can adjust them individually:
Press TV MENU.
1
The TV menu screen will appear.
Press or until the
DISPLAY/
CALL TV/DVDPOWER
123
456
OPEN/CLOSE
2
PICTURE menu appears.
BRIGHTNESS
CONTRAST0+32
COLOR
TINT
SHARPNESS
<
/ / / /MENU
0
0
0
>
789 0
CH
SELECT/
ENTER
CH
SETUP/
MUTE
DVD MENU
AUDIO
ANGLE
TOP MENU
SLOW SLOW
SEARCH SEARCH
SKIP
MARKER JUMP
PLAY
STOP
TV/CAP/TEXT
RETURN
SUB TITLE
INPUT
SELECT
PLAY MODEPAUSE/STILL
TV MENU
CANCEL
QUICK VIEW/
ZOOM
SLEEP
SKIP
REPEAT A-B
Press
3
you want to adjust.
or to select the item
Press or to adjust the
4
setting.
BRIGHTNESS
CONTRAST
COLOR
TINT
SHARPNESS
After changing your desired
5
setting press TV MENU until the
decrease brightness
decrease contrast
pale color
reddish color
makes picture softer
MENU disappears
CANCEL
To return all settings to factory
levels, press CANCEL while you’re
in the PICTURE menu.
BRIGHTNESS
CONTRAST0+32
COLOR
TINT
SHARPNESS
<
/ / / /CANCEL/MENU
0
0
0
increase brightness
increase contrast
brilliant color
greenish color
makes picture clearer
>
NOTE:
The CONTRAST default setting is set
to maximum at the factory.
23
Page 24

Stereo and second audio program (SAP)
STEREO SAP CH 013
STEREO CH 013
SEL. STEREO
The TV/DVD is equipped with a feature known as Multi-channel TV Sound or MTS. MTS broadcasts greatly
enhance TV viewing by bringing you programs with high fidelity stereo sound.
MTS also provides an extra channel called the Second Audio Program or SAP which broadcasters can use to
transmit a second language for bilingual transmission or for other purposes.
LISTENING TO STEREO SOUND
DISPLAY/
CALL TV/DVDPOWER
123
456
789 0
OPEN/CLOSE
When the TV is turned on or a
channel selection is made,
select AUDIO for the desired
sound. When SEL. STEREO or
STEREO appears on the screen,
this means that the broadcast is
available in "Stereo". You can
enjoy stereo sound from the left
and right speakers.
CH
SELECT/
ENTER
CH
MUTE
DVD MENU
AUDIO
TOP MENU
SLOW SLOW
SEARCH SEARCH
SKIP
MARKER JUMP
ANGLE
RETURN
SUB TITLE
INPUT
SELECT
PLAY MODEPAUSE/STILL
PLAY
STOP
TV/CAP/TEXT
QUICK VIEW/
REPEAT A-B
SETUP/
TV MENU
CANCEL
ZOOM
SLEEP
SKIP
• When "Mono" broadcasting is
received, no indication is
displayed.
• If the broadcast signal is not
strong enough or clear stereo
sound is not available, press
AUDIO to change to mono
sound. The noise should be
eliminated. Press it again to
return to the stereo sound.
LISTENING TO SAP (SECOND AUDIO PROGRAM)
When the TV is turned on or a
channel selection is made,
select AUDIO for the desired
setting. When SAP appears on
the screen, this means that the
"Second Audio Program”
broadcasting is available.
24
Page 25
Disc
The unit detects whether the disc loaded is a DVD disc or Audio CD and automatically sets the mode.
DISC WARNING
Do not play DVD-ROM, DVD-Audio, CD-ROM, CD-R, CDV, CD-G, Video CD or Photo CD to prevent accidental
erasure of prerecorded material.
This unit applies to DVD discs from Region 1 only. Other Region number discs cannot be played with this unit.
This unit does not play mp3 files.
Title/Chapter/Track
Title
When two or more movies are recorded on a disc,
the disc is divided into two or more sections. Each
section is called a “TITLE”.
TITLE1 TITLE2
CHAPTER 1
CHAPTER 2 CHAPTER 2 CHAPTER 3CHAPTER 1
DVD DISC
Chapter
The titles can be subdivided into many sections. Each section is called a “CHAPTER”.
Track
An Audio CD can contain several items.
These are assigned to the tracks.
TRACK 1 TRACK 2 TRACK 3 TRACK 4 TRACK 5
Removing Disc from Case
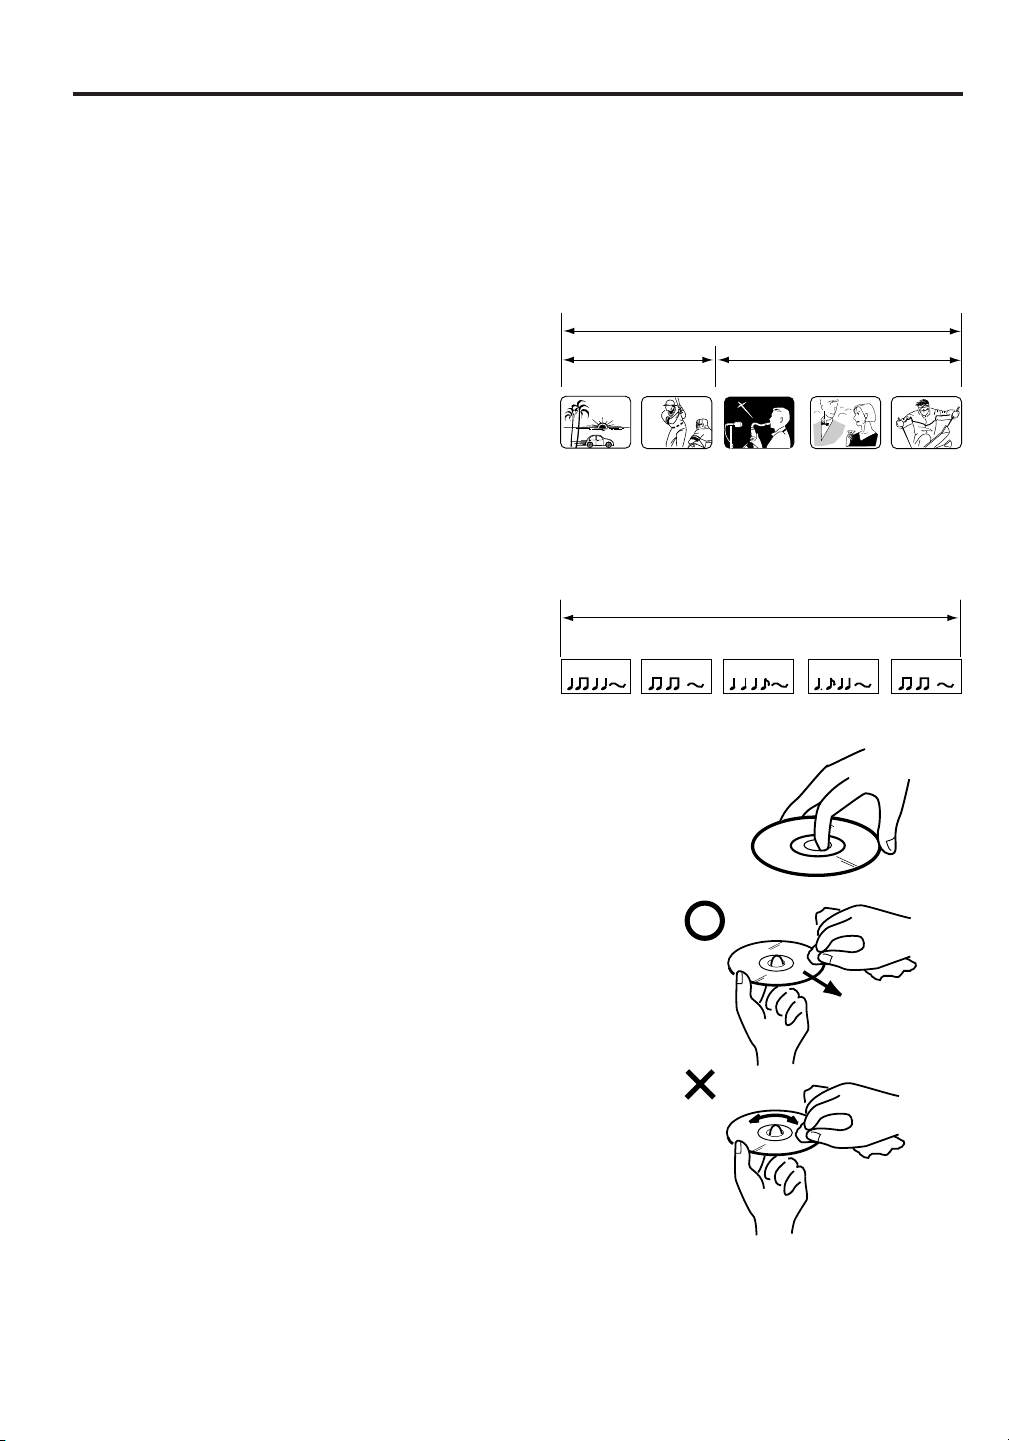
Be sure to hold the edge of disc. Do not touch the surface of the disc.
Pick up the disc gently from the case.
• Do not scratch the disc.
• Do not get dirt on the surface of the disc.
• Do not stick a label or adhesive tape on the disc.
• Do not drop or bend the disc.
CD
Storing Disc
• Store the disc in the case to avoid risk of scratches, dirt or damage.
• Do not leave disc exposed to direct sunlight or in hot or humid places.
Cleaning Disc
Wipe the disc with a clean, dry cloth from center to edge.
• Do not wipe the disc in a circular motion.
• Do not use liquid or aerosol cleaners.
25
Page 26
Preparation/Status display of disc
The following pages describe the
setup/operation in DVD mode.
DISPLAY/
CALL TV/DVDPOWER
123
456
789 0
CH
SELECT/
ENTER
CH
MUTE
DVD MENU
AUDIO
ANGLE
TOP MENU
SLOW SLOW
RETURN
SUB TITLE
INPUT
SELECT
PLAY MODEPAUSE/STILL
OPEN/CLOSE
SETUP/
TV MENU
CANCEL
QUICK VIEW/
ZOOM
SLEEP
Preparation
Before DVD/CD operation, please make preparations as follows.
Insert the AC cord plug into a standard 120V 60Hz polarized
1
AC outlet.
• If the AC cord plug is plugged in for the first time, wait for
about 5 seconds before pressing POWER.
NOTE: When connecting to other equipment, unplug the unit
from the AC outlet.
Press POWER on the unit or on the remote control to turn on
2
the unit. The POWER indicator will light.
• Every time you press POWER, the TV/DVD starts from TV
mode.
• When using an amplifier, switch on the amplifier.
Press TV/DVD to select DVD
3
mode.
The DVD startup screen will appear on the screen.
Status display of disc
Press DISPLAY/CALL. The status display of the disc will appear
on the screen.
DVD
Title number
Chapter number
Title elapsed playing time
Title total time
SEARCH SEARCH
SKIP
MARKER JUMP
PLAY
STOP
TV/CAP/TEXT
SKIP
REPEAT A-B
NOTE:
If the unit does not operate properly:
Static electricity, etc., may affect the player's operation. Disconnect the AC power
cord once, then connect it again.
Disc operation
1/8
1/19
C
T
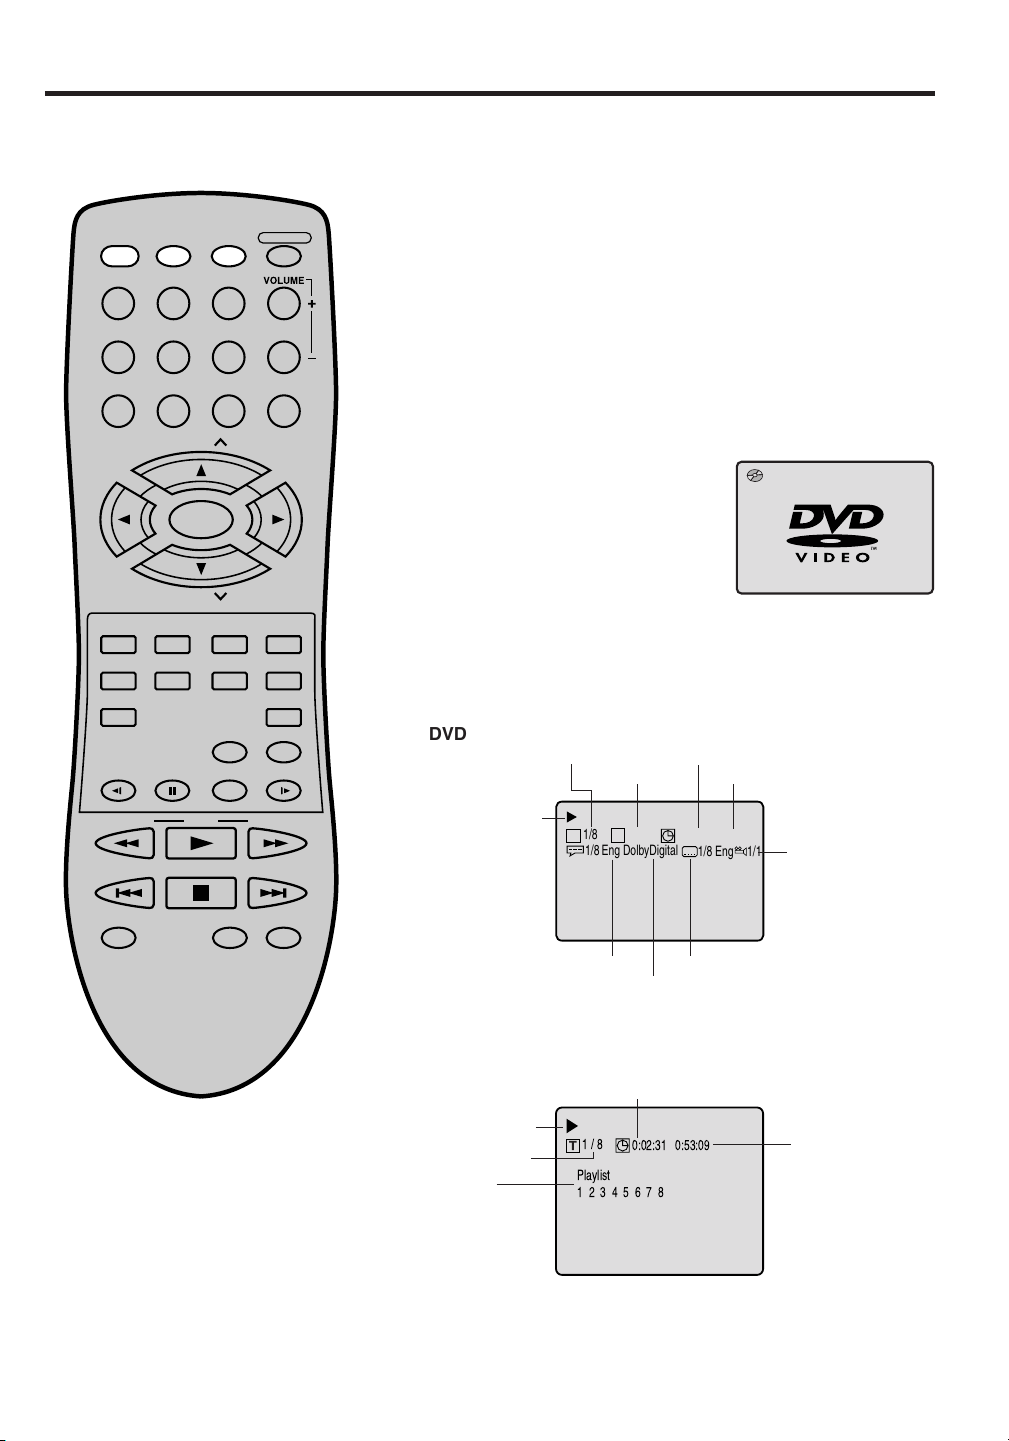
1/8 Eng DolbyDigital
Audio language
Type of audio
0:07:18 2:02:31
Subtitle language
1/8 Eng
1/1
Camera angle
To make status display disappear, press DISPLAY/CALL again.
Audio CD
Track elapsed playing time
Disc operation
Track number
Playlist
6
Track total time
• When you play a CD disc, the status display will appear
and remain on the screen.
26
Page 27
DISPLAY/
CALL TV/DVDPOWER
123
456
789 0
SELECT/
ENTER
MUTE
DVD MENU
AUDIO
ANGLE
TOP MENU
SLOW SLOW
SEARCH SEARCH
SKIP
MARKER JUMP
CH
CH
RETURN
SUB TITLE
INPUT
SELECT
PLAY MODEPAUSE/STILL
PLAY
STOP
TV/CAP/TEXT
OPEN/CLOSE
SETUP/
TV MENU
CANCEL
QUICK VIEW/
ZOOM
SLEEP
SKIP
REPEAT A-B
Playback procedure
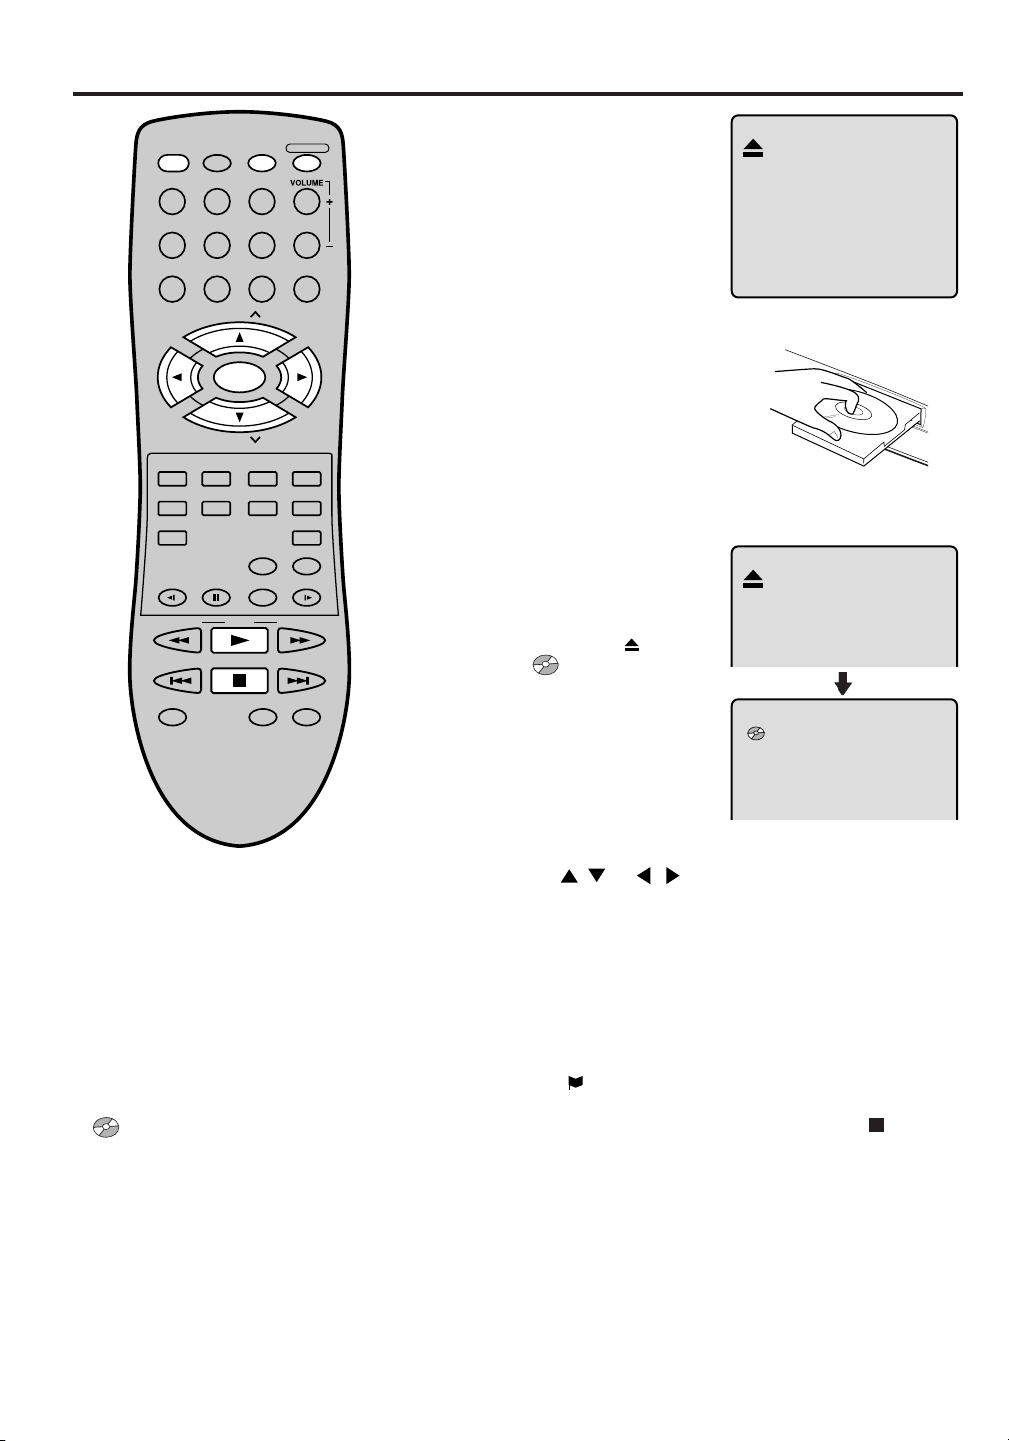
Press TV/DVD to select
1
DVD mode.
Press OPEN/CLOSE on
the unit or the remote control. The disc tray will open.
Place a disc onto the tray.
2
Position it with the printed
label side up, align it with
the guides, and place it in
its proper position.
Press OPEN/CLOSE or
3
PLAY.
The disc tray closes automatically.
The TV-screen,
to “ ” and then playback
commences.
• A menu screen will
appear on the TV screen,
if the disc has a menu
feature.
changes
NOTES:
• If a non-compatible disc is loaded, “Incorrect Disc”, “Region Code Error” or “Parental Error” will appear on the TV screen according to the type of loaded disc. If these
appear, check your disc again (see pages
25 and 37).
• Some discs may take a minute or so to
start playback.
• When you set a single-faced disc label
downwards (i.e. the wrong way up) and
press PLAY or OPEN/CLOSE on the unit,
“ ” will appear on the display for about
6 seconds and then “No Disc” or “Incorrect Disc” will be displayed.
• Some playback operations of DVDs may
be intentionally fixed by software producers. Since this unit plays DVDs according
to the disc contents the software producers designed, some playback features
may not be available. Also refer to the instructions supplied with the DVDs.
Press / or / to make a selection.
4
Press SELECT.
5
• Title is selected and play commences.
Press STOP to end playback.
6
• The unit memorizes the stopped point, depending on the
disc. “
” appears on the screen. Press PLAY to resume
playback (from the scene point).
• If you press STOP again or unload the disc (“
on the screen.), the unit will clear the stopped point.
Press OPEN/CLOSE.
7
The disc tray opens.
Remove the disc and press OPEN/CLOSE then press
POWER.
The disc tray closes automatically and unit turns off.
” appears
27
Page 28

Special playback
Note: There may be a slight delay between when you press the button and
when the function is activated.
DISPLAY/
CALL TV/DVDPOWER
123
456
789 0
CH
SELECT/
ENTER
CH
MUTE
DVD MENU
AUDIO
ANGLE
TOP MENU
SLOW SLOW
RETURN
SUB TITLE
INPUT
SELECT
PLAY MODEPAUSE/STILL
OPEN/CLOSE
SETUP/
TV MENU
CANCEL
QUICK VIEW/
ZOOM
SLEEP
Fast Forward Playback
Press SEARCH during normal playback.
Each press of the SEARCH
button will increase the speed
of the search (x 2), (x 4), (x 8), (x 15).
[(CD: (x 2), (x 4), (x 8), (x 20)]
• To resume normal playback, press PLAY.
Review Playback
Press SEARCH during normal playback.
Each press of the SEARCH
of the search
[(CD:
(x 2), (x 4), (x 8), (x 20)]
(x 2), (x 4), (x 8), (x 15).
button will increase the speed
• To resume normal playback, press PLAY.
Still Playback
Press PAUSE/STILL during
normal playback to pause playback.
To resume normal playback,
press PLAY.
Frame Advance
Press PAUSE/STILL during still playback.
One frame is advanced each time you press PAUSE/STILL.
SEARCH SEARCH
SKIP
MARKER JUMP
PLAY
STOP
TV/CAP/TEXT
SKIP
REPEAT A-B
WARNING:
The unit is capable of holding a still video
image or on-screen display image on your
television screen indefinitely. If you leave
the still video image or on-screen display
image displayed on your TV for an extended period of time, you risk permanent
damage to your television screen.
28
To resume normal playback, press PLAY.
Slow-motion Playback
Press SLOW
normal playback or still playback.
Each press of SLOW will change the speed of the slow x1/2,
x1/4, x1/6, x1/8.
• To resume normal playback, press PLAY.
• To resume the still playback, press PAUSE/STILL.
( )
Reverse or SLOW
( )
Forward during
Locating a chapter or track
Press SKIP( ) Forward or SKIP( ) Reverse during
playback to locate a chapter that you want to watch.
Each time you press the button, a chapter or track is
skipped.
Page 29
DISPLAY/
CALL TV/DVDPOWER
123
456
789 0
CH
SELECT/
ENTER
CH
MUTE
DVD MENU
RETURN
OPEN/CLOSE
SETUP/
TV MENU
Zooming/Locating desired scene
Zooming
This unit will allow you to zoom in on the frame image. You
can then make selections by switching the position of the
frame.
Press ZOOM during play-
1
back.
The center part of the
image will be zoomed in.
Each press of ZOOM will
change the ZOOM
(x 2),
2 (x 3) and 3
(x 4).
Press / / / to view a different part of the frame.
2
You may move the frame from the center position to UP,
DOWN, LEFT or RIGHT direction.
In the zoom mode press ZOOM repeatedly to return to a
3
1:1 view (
Off).
1
1
AUDIO
ANGLE
TOP MENU
SLOW SLOW
SEARCH SEARCH
SKIP
MARKER JUMP
PLAY
STOP
TV/CAP/TEXT
SUB TITLE
INPUT
SELECT
PLAY MODEPAUSE/STILL
CANCEL
QUICK VIEW/
ZOOM
SLEEP
SKIP
REPEAT A-B
NOTES:
•You can select the Pause, Slow or
Search playback in the zoom mode.
• Some discs may not respond to zoom
feature.
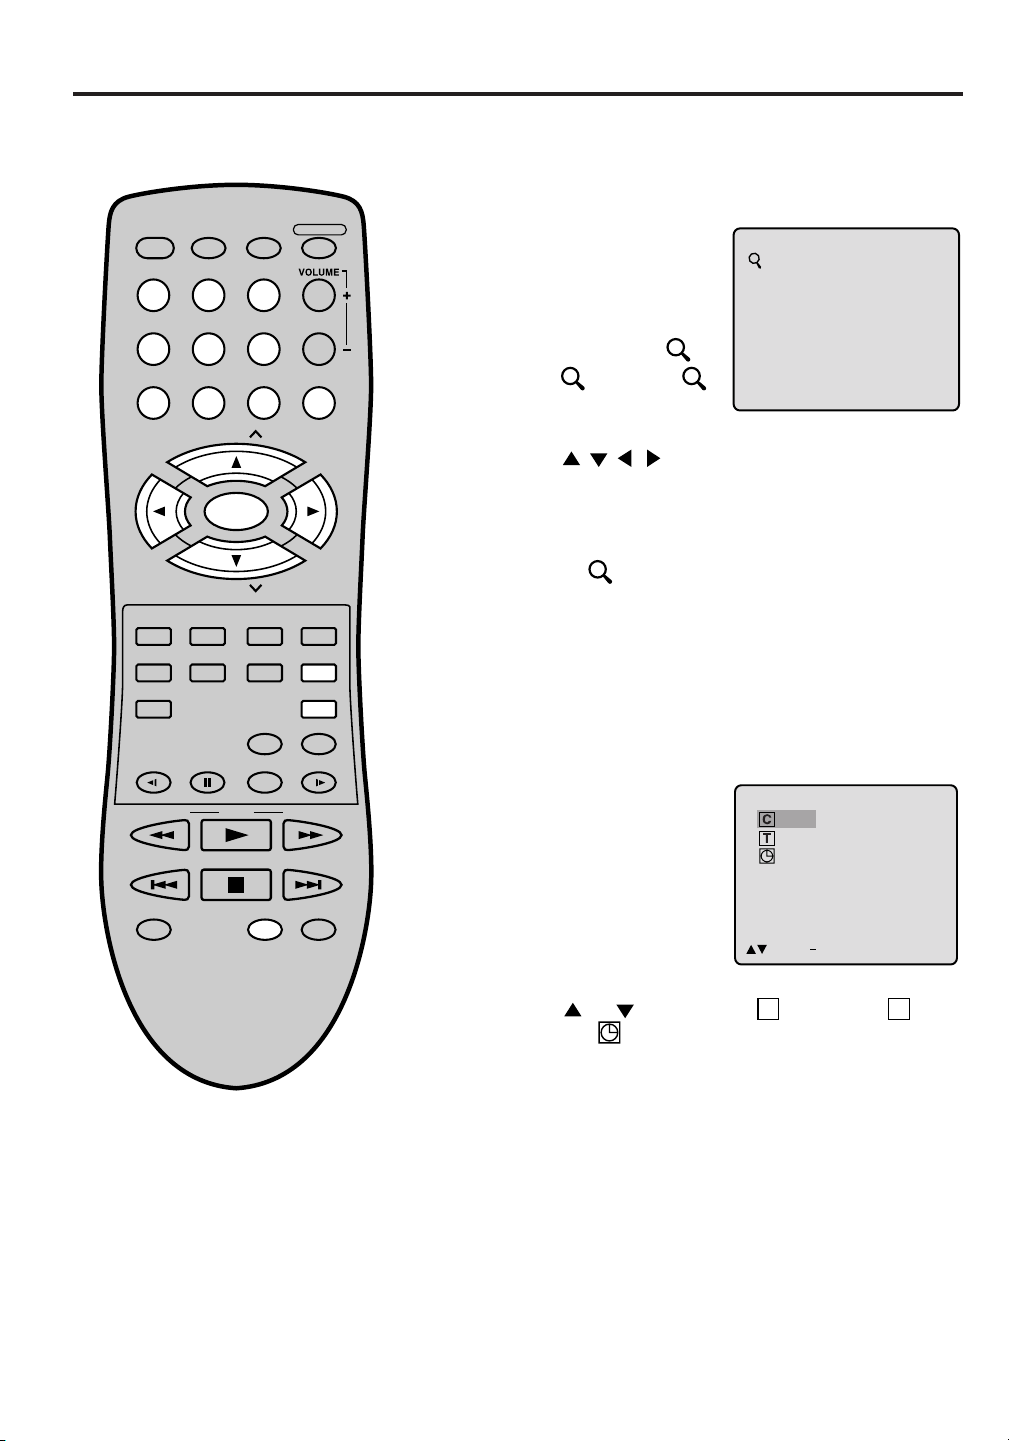
Locating Desired Scene
Use the title, chapter and time recorded on the disc to
locate the desired point to play back.
Press JUMP during play-
1
back.
Press or to select the “C (Chapter)”, “T (Title/
2
Track)” or “
Press Number buttons (0–9) to input the number.
3
(Time)”.
• If you input a wrong number, press CANCEL.
• Refer to the package supplied with the disc to check the
numbers.
Press ENTER.
4
• Playback starts.
• When you change the title, playback starts from
Chapter 1 of the selected title.
• Some discs may not work in the above operation.
Jump
_ _ / 19
1 / 8
0:00:00 / 2:02:31
/Enter/0 9/Cancel/Jump
29
Page 30

Repeat/Random/Program playback and Repeat A-B
Press PLAY MODE during playback or stop mode.
Each time you press PLAY MODE, playback mode changes as follows.
DVD
On screen
display
→ Title: Repeats the current title.
↓
Chapter: Repeats the current chapter.
↓
Off: Resumes normal playback.
• During stop mode, PLAY MODE key is not effective.
SELECT/
ENTER
CH
MUTE
DVD MENU
AUDIO
TOP MENU
SLOW SLOW
SEARCH SEARCH
SKIP
MARKER JUMP
ANGLE
PLAY
STOP
RETURN
SUB TITLE
INPUT
SELECT
PLAY MODEPAUSE/STILL
SETUP/
TV MENU
CANCEL
QUICK VIEW/
ZOOM
SLEEP
SKIP
REPEAT A-B
Operation
*Program menu
Use number buttons (0–9) to
enter the track’s number you
want to program, then press
ENTER. The track number and
total time are displayed. Repeat
this step to enter additional
tracks. When you have finished
entering tracks, press PLAY to
start Program playback.
A playlist of your programmed
tracks is displayed.
Audio CD
On screen
display
→ All: Repeats entire disc.
↓
Track: Repeats the current track.
↓
Random Play:
Plays the tracks in random order.
↓
*Program: Plays the tracks in program order.
↓
(Status display)
: Resumes normal playback.
• During stop mode, you cannot select “
Operation
T
Track”.
NOTES:
• If you enter an incorrect number – press CANCEL.
•To cancel program play, press STOP 3 times.
•To clear the programs on the program menu – press CANCEL until all programs
are cleared.
• The program is cancelled when you open the disc tray or turn off the power.
Repeat A-B
Repeat A-B playback allows you to repeat material between two selected points.
Press REPEAT A-B during playback.
1
The start point is selected.
Press REPEAT A-B again.
2
The end point is selected. Playback starts at the point that you selected. Playback
stops at the end point, returns to Point A automatically, then starts again.
To resume normal playback press REPEAT A-B again. “ Off” appears on the
screen.
NOTES:
• Some discs may not work with the repeat operation.
• In Repeat A-B mode, subtitles near point A or B may not appear.
•You may not be able to set Repeat A-B, depending on the scenes of the DVD.
• Repeat A-B does not work with interactive DVDs.
30
A
AB
Page 31
Marking desired scenes
The TV/DVD stores the points that you
want to watch again. You can resume
playback from that scene.
DISPLAY/
CALL TV/DVDPOWER
123
456
789 0
CH
SELECT/
ENTER
CH
MUTE
DVD MENU
AUDIO
ANGLE
TOP MENU
SLOW SLOW
RETURN
SUB TITLE
INPUT
SELECT
PLAY MODEPAUSE/STILL
OPEN/CLOSE
SETUP/
TV MENU
CANCEL
QUICK VIEW/
ZOOM
SLEEP
Marking the Scenes
Press MARKER during
1
playback.
Select the blank Marker
2
using
/ , then press
ENTER at the desired
scene.
• Up to 3 scenes can be
selected.
• Repeat this procedure to
set the other 2 scenes.
Press MARKER to remove this display.
3
Returning to the Scenes
Press MARKER during
1
playback or stop mode.
Marker
Marker
Marker
C
T
1
C
T
2
C
T
3
/Enter/Cancel/Marker
C
T
1
C
T
2
C
T
3
/Enter/Cancel/Marker
C
T
1
1
2
3
3
C
T
1
4
C
T
1
6
08 50013
08 500
12 270
17 040
SEARCH SEARCH
SKIP
MARKER JUMP
PLAY
STOP
TV/CAP/TEXT
SKIP
REPEAT A-B
NOTES:
•
The marking is canceled when you open
the disc tray or turn the power off.
•
Some subtitles recorded around the
marker may fail to appear. [DVD]
Press or to select
2
Marker
the Marker 1-3.
Press SELECT.
3
Playback starts from the marked scene.
To Cancel the Mark
Press MARKER.
1
Press or to select the Marker 1-3.
2
Press CANCEL.
3
/Enter/Cancel/Marker
C
T
1
1
2
3
3
C
T
1
4
C
T
1
6
/Enter/Cancel/Marker
08 500
12 270
17 040
31
Page 32
Changing soundtrack language/Subtitles
Changing soundtrack language
You can select the language when you play a multilingual
disc.
Press AUDIO during play-
DISPLAY/
CALL TV/DVDPOWER
OPEN/CLOSE
1
back.
2/8 Fra Dolby Digital
123
456
789 0
CH
SELECT/
ENTER
CH
SETUP/
TV MENU
ANGLE
RETURN
SUB TITLE
INPUT
SELECT
PLAY MODEPAUSE/STILL
CANCEL
QUICK VIEW/
ZOOM
SLEEP
MUTE
DVD MENU
AUDIO
TOP MENU
SLOW SLOW
NOTES:
• If the desired language is not heard after pressing the SUB TITLE button several times, the language is not recorded
on the disc.
• Changing soundtrack language is cancelled when you open the disc tray. The
initial default language or available language will be heard if the disc is played
back again.
• Changing subtitle language is cancelled
when you open the disc tray.
• Some functions may not work on some
DVDs. You may not be able to turn subtitles on or off or change subtitles. While
playing the DVD, the subtitle may
change when:
- you open or close the disc tray
- you change the title.
• In some cases, the subtitle language is
not changed to the selected one immediately.
The current soundtrack
language will appear.
Press AUDIO repeatedly
2
until the desired language
is selected.
1/8 Eng Dolby Digital
The on-screen display will
disappear after a few seconds.
Subtitles
Turning the Subtitles On and Off
When playing back a disc recorded with subtitles, you
can turn the subtitles on or off.
Press SUB TITLE during playback until “Off” appears.
Changing the subtitle language
You can select the language when playing back a disc
recorded with multi-lingual subtitles.
Press SUB TITLE repeat-
1
edly during playback until
your desired language appears.
The on-screen display will disappear after a few seconds.
2
Off
1/32 Eng
32
Page 33

Changing angles/Title selection/DVD menu
Changing angles
When playing back a disc recorded with multi-angle facility, you can change the view angle.
DISPLAY/
CALL TV/DVDPOWER
123
456
789 0
CH
SELECT/
ENTER
CH
MUTE
DVD MENU
AUDIO
ANGLE
TOP MENU
SLOW SLOW
SEARCH SEARCH
PLAY
RETURN
SUB TITLE
INPUT
SELECT
PLAY MODEPAUSE/STILL
OPEN/CLOSE
SETUP/
TV MENU
CANCEL
QUICK VIEW/
ZOOM
SLEEP
Press ANGLE during play-
1
back.
1/9
The current angle will appear.
Press ANGLE repeatedly until the desired angle is selected.
2
Title selection
Two or more titles are recorded on some discs. If the title
menu is recorded on the disc, you can select the desired
title.
Press TOP MENU during playback.
1
Title menu appears on the screen.
Press / or / to select the desired title.
2
Press ENTER or PLAY.
3
The playback of the selected title will start.
SKIP
MARKER JUMP
STOP
TV/CAP/TEXT
SKIP
REPEAT A-B
NOTES:
• Depending on the DVD, you may not
be able to change the angles even if
multi-angles are recorded on the DVD.
• Depending on the DVD, you may not
be able to select the title. Depending
on the DVD, a “title menu” may simply
be called a “menu” or “title” in the instructions supplied with the disc.
DVD menu
Some DVDs allow you to select the disc contents using the
menu.
When you play back these DVDs, you can select the subtitle language and sound-track language,etc. using the
DVD menu.
Press DVD MENU during playback.
1
The DVD menu appears on the screen.
• Press DVD MENU again to resume playback at the scene
when you pressed DVD MENU.
Press / or / to select the desired item.
2
Press ENTER.
3
The menu continues to another screen. Repeat steps 2
and 3 to set additional items if any.
33
Page 34

Setting language
You can change the default settings
to customise performance to your
preference.
DISPLAY/
CALL TV/DVDPOWER
123
456
789 0
CH
SELECT/
ENTER
CH
MUTE
DVD MENU
AUDIO
ANGLE
TOP MENU
SLOW SLOW
SEARCH SEARCH
SKIP
MARKER JUMP
PLAY
STOP
RETURN
SUB TITLE
INPUT
SELECT
PLAY MODEPAUSE/STILL
OPEN/CLOSE
SETUP/
TV MENU
CANCEL
QUICK VIEW/
ZOOM
SLEEP
SKIP
REPEAT A-B
Press TV/DVD to select
1
DVD mode.
Press SETUP in the stop
mode or No Disc.
Press or to select
“Language”, then press
or ENTER.
Press or to select
2
“OSD Language”, then
press
Press or to select de-
3
sired language (e.g. Eng-
or ENTER.
lish), then press ENTER.
The menu returns to “Lan-
Main Menu
Language
Picture
Sound
Parental
/Enter/Setup/Return
Language
OSD Language English
Menu English
Audio English
Subtitle English
/Enter/Setup/Return
OSD Language
English
Francais
Espanol
guage” menu automatically.
• If you want to return to the
/Enter/Setup/Return
previous menu, press
or RETURN.
Repeat steps 2-3 for other “Language” setting.
4
Other Selection: (Menu/Audio/Subtitle)
If you want to select another language, enter the language
code (see the Language code list on page 40).
Off: (subtitle)
Subtitles do not appear.
TV/CAP/TEXT
NOTES:
• If the selected soundtrack language is
not recorded on the disc, the original
language will be heard.
• If the selected subtitle language is not
recorded on the disc, the first-priority
language is selected.
34
Press SETUP to remove the Menu screen.
5
Page 35

Setting the aspect ratio of TV screen/Setting on screen display
Setting the aspect ratio of TV screen
You can select the aspect ratio for your TV.
DISPLAY/
CALL TV/DVDPOWER
123
456
789 0
CH
SELECT/
ENTER
CH
MUTE
DVD MENU
AUDIO
ANGLE
TOP MENU
SLOW SLOW
SEARCH SEARCH
SKIP
PLAY
STOP
RETURN
SUB TITLE
INPUT
SELECT
PLAY MODEPAUSE/STILL
OPEN/CLOSE
SETUP/
TV MENU
CANCEL
QUICK VIEW/
ZOOM
SLEEP
SKIP
Press TV/DVD to select
1
DVD mode.
Press SETUP in the stop
mode or No Disc.
Press
or to select
“Picture”, then press
ENTER.
Press or to select
2
“TV Screen”, then press
or ENTER.
Press or to select
3
your desired screen type,
then press ENTER.
or
Main Menu
Language
Picture
Sound
Parental
/Enter/Setup/Return
Picture
TV Screen
Display
On
TV Screen
16:9
4:3
4:3
4:3
You have the following screen sizes to choose from:
16:9
Wide screen
Select this mode when connecting to a wide-screen TV.
A wide screen picture is displayed full size.
4:3
Letterbox
Select this mode when connecting to a conventional TV.
When playing back a wide screen-DVD disc, it displays the
wide picture with black bands at the top and bottom of screen.
4:3 Panscan
It displays the wide picture on the whole screen with left
and right edges automatically cut off.
• If you want to return to the previous menu, press or
RETURN.
Press SETUP to remove the Menu screen.
4
MARKER JUMP
REPEAT A-B
TV/CAP/TEXT
NOTE:
If the DVD disc is not formatted in the pan
& scan style, it displays 4:3 style.
Status on screen display
On screen display can be switched on or off when you
press the buttons.
Press TV/DVD to select DVD mode.
1
Press SETUP in the stop mode or No Disc.
Press or to select “Picture”, then press or ENTER.
Press or to select
2
“Display”.
Press or ENTER to
3
select “On” or “Off”.
On: On screen displays appear when you press the
buttons (factory setting).
Off: On screen displays do not appear when you press
any buttons.
• If you want to return to the previous menu, press
RETURN.
Press SETUP to remove the Menu screen.
4
Picture
TV Screen
On
Display
Picture
TV Screen
Display
Off
4:3
4:3
or
35
Page 36

Dynamic Range Control
DRC (Dynamic Range Control) enables you to control the dynamic range
so as to achieve a suitable sound for
your equipment.
DISPLAY/
CALL TV/DVDPOWER
123
456
789 0
CH
SELECT/
ENTER
CH
MUTE
DVD MENU
AUDIO
ANGLE
TOP MENU
RETURN
SUB TITLE
INPUT
SELECT
OPEN/CLOSE
SETUP/
TV MENU
CANCEL
QUICK VIEW/
ZOOM
SLEEP
Press TV/DVD to select
1
DVD mode.
Press SETUP in the stop
mode or No Disc.
Press
or to select
Main Menu
Language
Picture
Sound
Parental
“Sound”.
/Enter/Setup/Return
Press or ENTER to
2
select “DRC”.
Press or ENTER to
3
select “On” or “Off”.
Sound
DRC On
/Enter/Setup/Return
Sound
DRC Off
/Enter/Setup/Return
• If you want to return to the previous menu, press or
RETURN.
SLOW SLOW
SEARCH SEARCH
SKIP
MARKER JUMP
PLAY MODEPAUSE/STILL
PLAY
STOP
TV/CAP/TEXT
SKIP
REPEAT A-B
NOTES:
• This function works only during playback of Dolby Digital recorded discs.
• The level of Dynamic Range Reduction
may differ depending on DVD video
disc.
Press SETUP to remove the Menu screen.
4
36
Page 37

Parental control setting
Some discs are specified not suitable
for children. Such discs can be prevented from play back with the unit.
DISPLAY/
CALL TV/DVDPOWER
123
456
789 0
CH
SELECT/
ENTER
CH
MUTE
DVD MENU
AUDIO
ANGLE
TOP MENU
SLOW SLOW
RETURN
SUB TITLE
INPUT
SELECT
PLAY MODEPAUSE/STILL
OPEN/CLOSE
SETUP/
TV MENU
CANCEL
QUICK VIEW/
ZOOM
SLEEP
Press TV/DVD to select
1
DVD mode.
Press SETUP in the stop
mode or No Disc.
Press or to select
“Parental”, then press or
ENTER.
Press or to select
2
“Parental Level”, then press
or ENTER.
Press or to select a
3
level from Off or 1–8. Press
or ENTER to set the se-
lected level.
Main Menu
Language
Picture
Sound
Parental
/Enter/Setup/Return
Parental
Password Off
Parental Level Off
Parental Level
Off
1
2
3
4
5
/Enter/Setup/Return
• Level Off: The parental control setting does not function.
• Level 8: Almost all DVD software can be played back.
• Level 1: DVD software for adults cannot be played
back.
• Select from the level 1 to level 8. The limitation will be
more severe as the level number is lower.
SEARCH SEARCH
SKIP
MARKER JUMP
PLAY
STOP
TV/CAP/TEXT
SKIP
REPEAT A-B
NOTES:
• If each setup (P.34–38) has been
completed, the unit can always be
operated under the same conditions
(especially with DVD discs).
Each setup will be retained in the
memory when you turn the power off.
• If the disc is not rated the unit cannot
limit playback.
• Some discs may not be encoded with
specific rating level information though
its disc jacket says “adult.” For those
discs, the age restriction will not work.
Press or to select
4
“Password”, then press
or ENTER.
Press number buttons
5
(0–9) for the password.
Don’t forget the password.
Parental
Password Off
Parental Level 1
Password
Password 1234
• If you input a wrong
number, press CANCEL.
Press ENTER to store the
6
password.
Note: Now the rating is
locked and the setting can-
Parental
Password On
Parental Level 1
not be changed unless you
enter the correct password.
• If you want to return to the previous menu, press
or RETURN.
Press SETUP to remove the parental control screen.
7
37
Page 38

To change the parental level
Press TV/DVD to select DVD mode.
1
Press SETUP in the stop mode or No Disc.
Press
ENTER.
DISPLAY/
CALL TV/DVDPOWER
123
456
789 0
CH
OPEN/CLOSE
Press or to select
2
“Password”, then press
or ENTER.
Press number buttons
3
(0–9) to enter the password
you have stored.
• If you input a wrong number, press CANCEL.
or to select “Parental”, then press or
Parental
Password On
Parental Level 1
Password
Password ____
SELECT/
ENTER
CH
ANGLE
RETURN
SUB TITLE
INPUT
SELECT
PLAY MODEPAUSE/STILL
PLAY
STOP
TV/CAP/TEXT
QUICK VIEW/
REPEAT A-B
MUTE
DVD MENU
AUDIO
TOP MENU
SLOW SLOW
SEARCH SEARCH
SKIP
MARKER JUMP
SETUP/
TV MENU
CANCEL
ZOOM
SLEEP
SKIP
Press ENTER.
4
The password is now Off.
Press or to select
5
“Parental Level”. Then
press or ENTER. The
Parental Level screen is
displayed.
Press or to select a
6
level from Off or 1–8 and
then press or ENTER.
Press or to select
7
“Password” and then press
or ENTER.
Press number buttons
8
(0–9) to enter a 4-digit password.
Parental
Password Off
Parental Level 1
Parental
Password Off
Parental Level1
Parental
Password Off
Parental Level 8
Password
Password 1234
NOTE:
If you forget the password....
In the No Disc DVD mode, press and
hold STOP on the unit, and
simultaneously press and hold 7 on the
remote control for more than 3 seconds.
“PASSWORD CLEAR” appears on the
screen. The password has been
cleared.
38
Note: You can enter a new password.
Press ENTER.
9
The parental level is now
changed and locked.
Parental
Password On
Parental Level 8
• If you want to return to the previous menu, press or
RETURN.
Press SETUP to remove the parental control screen.
10
Page 39

Temporary disabling of rating level by DVD disc
Depending on the DVD disc, the disc
may try to temporarily cancel the
rating level that you have set.
It is up to you to decide whether to
cancel the rating level or not.
DISPLAY/
CALL TV/DVDPOWER
123
456
789 0
CH
SELECT/
ENTER
CH
MUTE
DVD MENU
AUDIO
ANGLE
TOP MENU
RETURN
SUB TITLE
INPUT
SELECT
OPEN/CLOSE
SETUP/
TV MENU
CANCEL
QUICK VIEW/
ZOOM
SLEEP
Load a DVD disc and press
1
PLAY (see page 27).
If the DVD disc has been designed to temporarily cancel
2
the Rating level, the screen which appears after inserting
a DVD will change, depending on which disc is played. If
you select “YES” with the ENTER key, “Your disc exceeds
the parental control level.” screen will then appear.
Your disc exceeds the parental control level.
Password
____
Enter/0–9/Cancel/Return
If you wish to cancel the set rating level temporarily, enter
3
the 4-digit password.
Then press ENTER.
Alternatively, if the password has not been set, playback
will commence. If you don’t know (or have forgotten) the
password, select “STOP”.
The setting screen will disappear. Press OPEN/CLOSE to
remove the disc.
SLOW SLOW
SEARCH SEARCH
SKIP
MARKER JUMP
PLAY MODEPAUSE/STILL
PLAY
STOP
TV/CAP/TEXT
SKIP
REPEAT A-B
NOTE:
The rating level will remain disabled until the
disc is ejected.
When the disc is ejected, the original rating
level will be set again automatically.
To quit entering, press RETURN.
Playback will commence if the entered password was cor-
4
rect.
39
Page 40

Language code list
Enter the appropriate code number for the initial settings "AUDIO", "SUBTITLE" and/or "MENU LANGUAGE"
(see page 34).
Language Name Code Language Name Code Language Name Code
Abkhazian 1112 Fiji 1620 Lingala 2224 Singhalese 2919
Afar 1111 Finnish 1619 Lithuanian 2230 Slovak 2921
Afrikaans 1116 French 1628 Macedonian 2321 Slovenian 2922
Albanian 2927 Frisian 1635 Malagasy 2317 Somali 2925
Amharic 1123 Galician 1722 Malay 2329 Spanish 1529
Arabic 1128 Georgian 2111 Malayalam 2322 Sundanese 2931
Armenian 1835 German 1415 Maltese 2330 Swahili 2933
Assamese 1129 Greek 1522 Maori 2319 Swedish 2932
Aymara 1135 Greenlandic 2122 Marathi 2328 Tagalog 3022
Azerbaijani 1136 Guarani 1724 Moldavian 2325 Tajik 3017
Bashkir 1211 Gujarati 1731 Mongolian 2324 Tamil 3011
Basque 1531 Hausa 1811 Nauru 2411 Tatar 3030
Bengali; Bangla 1224 Hebrew 1933 Nepali 2415 Telugu 3015
Bhutani 1436 Hindi 1819 Norwegian 2425 Thai 3018
Bihari 1218 Hungarian 1831 Oriya 2528 Tibetan 1225
Breton 1228 Icelandic 1929 Panjabi 2611 Tigrinya 3019
Language Name Code
Bulgarian 1217 Indonesian 1924 Pashto, Pushto 2629 Tonga 3025
Burmese 2335 Interlingua 1911 Persian 1611 Turkish 3028
Byelorussian 1215 Irish 1711 Polish 2622 Turkmen 3021
Cambodian 2123 Italian 1930 Portuguese 2630 Twi 3033
Catalan 1311 Japanese 2011 Quechua 2731 Ukrainian 3121
Chinese 3618 Javanese 2033 Rhaeto-Romance 2823 Urdu 3128
Corsican 1325 Kannada 2124 Romanian 2825 Uzbek 3136
Croatian 1828 Kashmiri 2129 Russian 2831 Vietnamese 3219
Czech 1329 Kazakh 2121 Samoan 2923 Volapük 3225
Danish 1411 Kirghiz 2135 Sanskrit 2911 Welsh 1335
Dutch 2422 Korean 2125 Scots Gaelic 1714 Wolof 3325
English 1524 Kurdish 2131 Serbian 2928 Xhosa 3418
Esperanto 1525 Laothian 2225 Serbo-Croatian 2918 Yiddish 2019
Estonian 1530 Latin 2211 Shona 2924 Yoruba 3525
Faroese 1625 Latvian, Lettish 2232 Sindhi 2914 Zulu 3631
40
Page 41

Connections to other equipment
The exact arrangement you use to interconnect various video and audio components to the TV/DVD is dependent on the model and features of each component. Check the Owner's Manual provided with each component
for the location of video and audio inputs and outputs.
Using an Audio Amplifier
Back of TV/DVD
Amplifier
Audio (L) Output
Audio (R) Output
AUDIO cord (not supplied)
To Audio (L) InputTo Audio (R) Input
Using an AV Amplifier with built-in digital surround
If you are using an Amplifier with a built-in digital surround as shown below, you can enjoy the various audio
systems including Dolby Digital Surround audio that sounds just like the movie.
Connect an AV amplifier with built-in Dolby Digital decoder, DTS decoder, MPEG decoder as shown
below.
Back of TV/DVD
Coaxial Digital
Audio Output
Coaxial digital cable (not supplied)
To Coaxial Digital Audio Input
Front
Speaker
(Left)
TV/DVD
Subwoofer
Center Speaker
Front
Speaker
(Right)
Surround
AV Amplifier with built-in digital surround
decoder as listed above
*
Manufactured under license from Dolby Laboratories. “Dolby” and the double-D symbol are trademarks of Dolby
Speaker (Left)
Surround
Speaker
(Right)
Laboratories. Confidential unpublished works. © 1992-1997 Dolby Laboratories, Inc. All rights reserved.
*
“DTS” and “DTS Digital Out” are trademarks of Digital Theater Systems, Inc.
NOTES:
When you make the connection above, on the AV Amplifier, do not set DOLBY DIGITAL to DOLBY DIGITAL, or
•
MPEG to MPEG “ON”. If you do, a loud noise will emit from the speakers possibly causing damage to your
hearing or to the speakers.
Some DTS decoders which do not support DVD-DTS interface may not work properly with the unit.
•
41
Page 42

Connections to other equipment
Using the audio/video inputs
If you connect the TV/DVD to VCR, camcorder or video game console, you must access the Line Input Channel by
pressing INPUT SELECT.
Press INPUT SELECT repeatedly to select the desired mode.
“LINE” or TV channel will display on the screen.
To connect the TV/DVD to a VCR
Press the INPUT SELECT to select the desired mode to use the TV as a monitor.
Operate your VCR as usual.
NOTE:
In the DVD mode this key will not
operate.
LINE
VCR
VIDEO IN
To Audio/Video
OUT
Audio/Video cord (not supplied)
Front of TV/DVD
(MONO)
PHONES VIDEO IN L – AUDIO IN – R
AUDIO IN (R)
AUDIO IN (L)
To connect the TV to a camcorder
To playback from the camcorder, connect the camcorder to the TV/DVD as shown.
Camcorder
VIDEO IN
To Audio/Video OUT
Audio/Video cord (not supplied)
Front of TV/DVD
(MONO)
PHONES VIDEO IN L – AUDIO IN – R
AUDIO IN (R)
AUDIO IN (L)
To connect the TV to a Video Game Console
The TV/DVD can also be used as a display for many video games. However, due to the wide variety of different
they have not all been included
in the connection diagrams. You'll need to consult each component's Owner's Manual for
additional information.
formats,
42
VIDEO GAME CONSOLE
To Audio/Video OUT
Audio/Video cord (not supplied)
VIDEO IN
Front of TV/DVD
(MONO)
PHONES VIDEO IN L – AUDIO IN – R
AUDIO IN (R)
AUDIO IN (L)
Page 43

Problems and troubleshooting
Use the following check list for troubleshooting when you have problems with your unit. Consult your local
dealer or service outlet if problems persist.
Be sure all connections are properly made when using with other units.
SYMPTOMS POSSIBLE SOLUTIONS
POWER
TV/DVD does not operate.
TV BROADCAST RECEPTION
Poor sound or No sound
Poor picture or No picture
Poor reception on some channels
Poor color or no color
Picture wobbles or drifts
No CATV reception
Horizontal or diagonal bars on
screen
No reception above channel 13
TV shuts off
Closed - Caption is not activated.
Display is not shown in your
language.
• Make sure the power cord is plugged in.
• Try another AC outlet.
• Power is off, check fuse or circuit breaker.
• Unplug unit, then plug it back in.
• Connect the DC car cord to the cigarette lighter socket.
• The DC car cord fuse is blown, replace fuse.
• Station or CATV experiencing problems, tune to another station.
• Check Volume adjustments.
• Station or CATV experiencing problems, tune to another station.
• Check antenna or CATV connections, reorient antenna.
• Check picture control adjustments.
• Station or CATV experiencing problems, tune to another station.
• Station signal is weak, reorient antenna to receive weaker station.
• Station or CATV experiencing problems, tune to another station.
• Make sure channels are set into memory.
• Check picture control adjustments.
• Check antenna or CATV connections, reorient antenna.
• Station or CATV experiencing problems, tune to another station.
• Make sure channels are set into memory.
• CATV company is scrambling signal.
• Check antenna orientation.
• Check all CATV connections.
• Set TV/CATV menu option to the CATV mode.
• Station or CATV system problems, try another station.
• Check antenna connections, reorient antenna.
• Make sure TV/CATV menu option is in the appropriate mode.
• If using antenna, check UHF antenna connections.
• No broadcast on station tuned.
• Sleep Timer is set.
• Power interrupted.
• TV station experiencing problems or program tuned is not
closed captioned. Try another channel.
• Check CATV connection or VHF/UHF antenna, reposition or
rotate antenna.
• Press TV/CAP/TEXT button to turn on the closed caption decoder.
• Select proper language in the menu options.
PAGE
11,12
15
15
15
12,13
23
15
12,13
15
19
23
12,13
15
19
–
12
13
18
15
12,13
18
12
19
16
–
15
12,13
17
14
43
Page 44

Problems and troubleshooting
SYMPTOMS POSSIBLE SOLUTIONS
DVD
Playback doesn’t start.
No picture
No sound
Picture is distorted during CUE or
REVIEW.
Stopping playback, search, slowmotion play, repeat play, or
program play, etc. cannot be
performed.
No 4:3 (16:9) picture
No on-screen display
No surround sound
The unit or remote operation key
is not functioning.
Playback does not start when the
title is selected.
Audio soundtrack and/or subtitle
language is not changed when
you play back a DVD.
No subtitle
Angle cannot be changed.
“ ” appears on the screen.
• No disc is inserted.
• The disc may be dirty. Clean up the disc.
• The unit cannot play CD-ROMs, etc.
• TV/DVD selector is not set correctly.
• Check the input selector of the amplifier is set properly.
• The unit is in the Special playback mode.
• Select the correct Audio Output position on AV amplifier.
• The picture will be distorted occasionally.
• Some discs may not do some of the functions.
• The setup does not match your TV.
• Select Display On.
• The setup does not match your stereo system.
• Turn off the unit and unplug the AC power cord for several
minutes, then replug it.
• Check the RATING LEVEL setup.
• Multilingual language is not recorded on the DVD disc.
• Some discs have no subtitles.
• Subtitles are cleared. Press SUB TITLE.
• Multi-angles are not recorded on the DVD disc.
• The function is prohibited with the unit or the disc.
PAGE
27
25
6, 25
26
–
28
41
–
–
35
35
41
–
37~39
34
32
33
–
REMOTE CONTROL
The remote control does not
function.
44
• Aim at the remote control at the remote sensor.
• Operate within approx. 16 feet (5 meters) or reduce the light in
the room.
• Clear the path of the beam.
• The batteries are weak. Replace the batteries.
• Make sure the batteries are inserted correctly.
11
Page 45

GENERAL
Power supply:
Power consumption:
Weight:
Dimensions:
Operating temperature:
Operating humidity:
TELEVISION
Picture tube:
Tuner type:
Receiving channels:
Antenna input:
Speaker:
Audio output power:
Specifications
AC 120V 60Hz
DC 12V
Operation: 55W (AC120V, DC12V)
Stand by: 5W (AC120V), 3W (DC12V)
17.6lbs (8 kg)
Width : 10-15/16 inches (278 mm)
Height: 12-1/4 inches (311.5 mm)
Depth : 12-5/16 inches (312.5 mm)
5°C - 40°C
Less than 80%
9” (229 mm diagonal)
Quartz PLL Frequency Synthesized
VHF 2-13
UHF 14-69
CATV 14-36 (A)-(W)
37-59 (AA)-(WW)
60-85 (AAA)-(ZZZ)
86-94 (86)-(94)
95-99 (A-5)-(A-1)
100-125 (100)-(125)
01 (5A)
VHF/UHF In 75 ohm coaxial
3" (76 mm), 8 ohm x 2
1.2W + 1.2W
DVD/CD player
Signal system:
Applicable disc:
Audio characteristics
frequency response:
S/N Ratio:
Harmonic distortion:
Wow and flutter:
Input/Output:
Digital audio out:
Pickup:
ACCESSORIES:
NTSC
1. DVD (12cm, 8cm)
2. CD (12cm, 8cm)
DVD: 4Hz - 22KHz
CD: 4Hz - 20KHz
90dB
0.06%
Below Measurable Level
Inputs : Video : (RCA) 1 Vp-p/75ohm
Audio : (RCA) –8 dBm/50Kohm
Outputs : Video : (RCA) 1 Vp-p/75ohm
Audio : (RCA) –12 dBm/1Kohm
0.5Vp-p 75ohms terminated
CD : Wavelength: 775 - 815 nm
Maximum output power: 0.5 mW
DVD : Wavelength: 650 - 666 nm
Maximum output power: 2.0 mW
Remote control
Batteries (AAA) x 2
Telescopic Antenna
12V DC Car Cord
45
Page 46

RCA TV/DVD Combination Limited Warranty
What your warranty covers:
• Defects in materials or workmanship.
For how long after your purchase:
• 90 days from date of purchase for labor charges.
• One year from date of purchase for parts.
• Two years from date of purchase for picture tube.
The warranty period for rental units begins with the first rental or 45 days from date of shipment to the rental
firm whichever comes first.
What we will do:
Pay an Authorized RCA Television Service Center the labor charges to repair your unit.
Pay an Authorized RCA Television Service Center for the new or, at our option, rebuilt replacement parts and
picture tube required to repair your unit.
How you get service:
• For screen sizes of 26” and smaller: Take your RCA unit to any Authorized RCA Television Service Center
and pickup when repairs are complete.
• For screen sizes larger than 26”: Request home or pick up, repair and return service from any Authorized
RCA Television Service Center, provided that your unit is located within the geographic territory covered by
an Authorized RCA Television Service Center. If not, you must take your TV/DVD to the Service Center
location at your own expense, or pay for the cost the Service Center may charge to transport your unit to and
from your home.
• To identify your nearest Authorized RCA Service Center, ask your dealer, look in the Yellow Pages, visit , or
call 1-800-336-1900.
• Proof of purchase in the form of a bill of sale or receipted invoice which is evidence that the product is within
the warranty period must be presented to obtain warranty service. For rental firms, proof of first rental is also
required.
What your warranty does not cover:
• Customer instruction. (Your Owner’s Manual describes how to install, adjust, and operate your product. Any
additional information should be obtained from your dealer.)
• Installation and related adjustments.
• Signal reception problems not caused by your TV/DVD.
• Damage from misuse or neglect.
• Batteries.
• Images burnt onto the screen.
•A TV/DVD that has been modified or incorporated into other products or is used for institutional or other
commercial purposes.
•A unit purchased or serviced outside the U.S.A.
• Acts of nature, such as but not limited to lightning damage.
Product Registration:
• Please complete the online Product Registration on or complete and mail the Product Registration Card
packed with your unit. It will make it easier to contact you should it ever be necessary. The return of the card
is not required for warranty coverage.
46
Page 47

Limitation of Warranty:
THE WARRANTY STATED ABOVE IS THE ONLY WARRANTY APPLICABLE TO THIS PRODUCT. ALL
OTHER WARRANTIES, EXPRESS OR IMPLIED (INCLUDING ALL IMPLIED WARRANTIES OF
MERCHANTABILITY OR FITNESS FOR A PARTICULAR PURPOSE) ARE HEREBY DISCLAIMED. NO
VERBAL OR WRITTEN INFORMATION GIVEN BY THOMSON INC., ITS AGENTS OR EMPLOYEES SHALL
CREATE A GUARANTY OR IN ANY WAY INCREASE THE SCOPE OF THIS WARRANTY.
REPAIR OR REPLACEMENT AS PROVIDED UNDER THIS WARRANTY IS THE EXCLUSIVE REMEDY OF
THE CONSUMER. THOMSON INC. SHALL NOT BE LIABLE FOR INCIDENTAL OR CONSEQUENTIAL
DAMAGES RESULTING FROM THE USE OF THIS PRODUCT OR ARISING OUT OF ANY BREACH OF ANY
EXPRESS OR IMPLIED WARRANTY ON THIS PRODUCT. THIS DISCLAIMER OF WARRANTIES AND
LIMITED WARRANTY ARE GOVERNED BY THE LAWS OF THE STATE OF INDIANA. EXCEPT TO THE
EXTENT PROHIBITED BY APPLICABLE LAW, ANY IMPLIED WARRANTY OF MERCHANTABILITY OR
FITNESS FOR A PARTICULAR PURPOSE ON THIS PRODUCT IS LIMITED TO THE APPLICABLE
WARRANTY PERIOD SET FORTH ABOVE.
How state law relates to this warranty:
Some states do not allow the exclusion nor limitation of incidental or consequential damages, or limitations on
how long an implied warranty lasts, so the above limitations or exclusions may not apply to you.
This warranty gives you specific legal rights, and you also may have other rights that vary from state to state.
If you purchased your product outside the United States:
This warranty does not apply. Contact your dealer for warranty information.
Service calls which do not involve defective materials or workmanship are not covered by this warranty.
Costs of such service calls are the sole responsibility of the purchaser.
47
Page 48

Visit the RCA web site at www.rca.com
Please do not send any products to the Indianapolis address listed in this manual or on the carton.
This will only add delays in service for your product.
Thomson Inc.
10330 North Meridian Street
Indianapolis, IN 46290
©2003 Thomson Inc.
Trademark(s)® Registered
Marca(s) Registrada(s)
Printed in Thailand
TOCOM 16255890
THOMSON
Page 49

Téléviseur/DVD
Guide de
l’utilisateur
Transforme encore le divertissement.
Page 50

AVERTISSEMENT
AFIN DE RÉDUIRE LE RISQUE D’INCENDIE ET
DE CHOC ÉLECTRIQUE, NE PAS EXPOSER CE
PRODUIT À LA PLUIE OU L’HUMIDITÉ.
ATTENTION
CE PRODUIT UTILISE UN LASER. L’UTILISATION
DES COMMANDES OU DES RÉGLAGES OU
L’EXÉCUTION DE PROCÉDURES AUTREMENT
QUE DÉCRIT DANS CE MANUEL POURRAIT
CAUSER UN RAYONNEMENT DANGEREUX.
NE PAS OUVRIR LES COUVERCLES NI RÉPARER
SOI-MÊME. TOUTE RÉPARATION DOIT ÊTRE
FAITE PAR UN TECHNICIEN SPÉCIALISÉ.
ATTENTION
RISQUE DE CHOC
ÉLECTRIQUE,
NE PAS OUVRIR
CAUTION : AFIN DE RÉDUIRE LE RISQUE DE CHOC ÉLECTRIQUE,
NE PAS ENLEVER LE COUVERCLE (OU L’ARRIÈRE). NE CONTIENT
AUCUNE PIÈCE RÉPARABLE PAR L’UTILISATEUR. CONFIEZ
L’ENTRETIEN À DU PERSONNEL QUALIFIÉ.
Ce symbole indique une «
tension dangereuse » dans le
produit qui présente un risque
d’électrocution ou de blessure.
Ce symbole indique des
instructions importantes
accompagnant le produit.
Nota :
Ce lecteur DVD est conçu et fabriqué en
fonction de l’application de l’information
de gestion régionale (RMI). Si le numéro
de région d’un disque DVD est différent de
celui de ce lecteur DVD, l’appareil ne peut
lire ce disque. Le numéro de région de ce
lecteur DVD est Région n° 1.
Se reporter à l’étiquette d’identification/capacité nominale située sur le
Caution: To prevent electric shock, match wide
blade of plug to wide slot, fully insert.
Attention : Pour éviter les chocs électriques,
introduire la lame la plus large de la fiche dans
la borne correspondante de la prise et pousser
jusqu’au fond.
panneau arrière du produit pour connaître la tension de fonctionnement
adéquate.
Nota :
Cet appareil est protégé en vertu des brevets
américains numéros 4 631 603 et 4.577 216
et 4 819 098 et d'autres droits de propriété
intellectuelle. L'utilisation de la technologie
de protection contre la copie de Macrovision
dans cet appareil doit être autorisée par
Macrovision et est destinée à l'utilisation au
foyer ou à d'autres utilisations limitées de
télévision payante, à moins d'autorisation
écrite de Macrovision."L'ingénierie inverse
et le désassemblage sont interdits.
Le règlement de la FCC stipule que toute modification non autorisée de
ce produit peut annuler le privilège d’utilisation de l’utilisateur.
Cet appareil numérique de classe B est conforme à la NMB-003 (Norme
sur le matériel brouilleur) du Canada.
Attention : L’utilisation de jeux vidéo ou tout autre accessoire
projetant des images fixes pendant des périodes prolongées peut
entraîner une impression permanente sur l’écran (ou sur l’écran
des téléviseurs à projection). DE PLUS, certains logos de réseaux/
programmes, numéros de téléphone, etc., peuvent entraîner des
dommages similaires. Ces dommages ne sont pas couverts par
votre garantie.
APPAREIL
AU LASER
DE CLASSE 1
À l’installateur de câble : L’article 54 du Code canadien de l’électricité,
partie 1 (article 820-40 du code de l’électricité des États-Unis) énonce des
directives de mise à la terre et stipule que le fil de terre du câble doit être
connecté au système de mise à la terre de l’édifice, aussi près que possible
du point d’entrée.
Information
Cet équipement a été soumis à des essais sur prototype et déclaré conforme aux limites stipulées pour un dispositif numérique de classe B,
conformément aux spécifications de la partie 15 du Règlement de la FCC. Ce règlement a pour but d’assurer une protection raisonnable
contre le brouillage nuisible dans une installation résidentielle. Cet équipement produit, utilise et peut émettre de l’énergie en radiofréquence et, s’il n’est pas installé et utilisé conformément aux directives, il peut causer une interférence nuisible dans les communications
radio. Cependant, il est impossible de garantir qu’aucune interférence ne se produira dans une installation particulière. Si cet équipement
cause un brouillage de la réception de radio ou de télévision (que vous pouvez déterminer en éteignant puis en rallumant l’appareil),
l’utilisateur est prié d’essayer de corriger l’interférence au moyen de l’une ou de plusieurs des mesures suivantes :
• Réorienter ou déplacez l’antenne de réception.
• Éloigner davantage l’appareil du récepteur.
• Brancher l’équipement dans une prise dont le circuit est différent de celui où est branché le récepteur.
• Consulter votre dépositaire ou un technicien expérimenté en radio / télévision pour obtenir de l’aide.
Enregistrement du produit
Veuillez remplir la carte d’enregistrement du produit (emballée séparément) et la retourner immédiatement. Le renvoi de cette carte nous
permet de vous contacter si nécessaire.
Information sur le produit
Conservez votre facture comme preuve d’achat ainsi que pour obtenir des pièces ou un service sous garantie. Attachez-la ici et inscrivez le
numéro de série et de modèle au cas où vous en auriez besoin. Ces numéros se trouvent sur le produit.
N° de modèle ____________________________________ N° de série : _________________________ Date d’achat : ___________________________
Détaillant / Adresse / Téléphone : ___________________________________________________________________________________________________
2
Page 51

MISES EN GARDE IMPORTANTES
En plus de l’attention portée aux normes de qualité dans la fabrication de votre produit, la sécurité constitue un facteur
des plus importants lors de la conception de chaque produit. Toutefois, la sécurité implique aussi votre responsabilité.
Cette feuille présente la liste d’informations importantes qui vous aideront à profiter et à utiliser correctement le produit
et ses accessoires. Veuillez lire attentivement avant de faire fonctionner et d’utiliser votre produit.
Installation
1 Lire et suivre les instructions — Toutes les instructions portant sur la sécurité doivent être lues avant
d’utiliser l’appareil. Suivre toutes les instructions d’utilisation.
2 Conserver ces instructions — Les instructions portant sur la sécurité et l’utilisation doivent être conservées pour
référence future.
3Avertissements de mise en garde — Respecter tous les avertissements apposés sur le produit et ceux indiqués
dans les instructions d’utilisation.
4 Polarisation / Mise à la terre — Ce produit est équipé d’une fiche de cordon d’alimentation qui est ou n’est pas
polarisée ou qui est munie d’une mise à la terre. S’il est équipé d’une prise non polarisée (deux lames de taille
différente), les instructions qui suivent ne s’appliquent pas.
• Une fiche polarisée (deux lames de taille différente) s’insère dans une prise d’une seule manière. Ceci est une
fonction de sécurité. Ne pas tenter de la modifier. Si la fiche ne peut être complètement insérée dans la
prise, essayer d’inverser la fiche ou demander à un électricien de changer la prise. Lors de l’utilisation d’une
rallonge, utiliser seulement une rallonge avec fiche polarisée.
• Une fiche d’alimentation avec mise à la terre (deux lames et une broche cylindrique) s’adapte à une prise avec
5 Sources d’alimentation — Utiliser cet appareil seulement avec le type d’alimentation électrique figurant sur la
plaque signalétique du produit. En cas de doute sur le type d’alimentation électrique de votre maison, consulter
le détaillant de votre appareil ou votre fournisseur local d’électricité. En ce qui concerne les appareils conçus pour
fonctionner avec des piles ou avec d’autres sources d’alimentation électrique, se reporter aux instructions
d’utilisation.
6 Surcharge — Ne pas surcharger les prises murales et les rallonges afin d’éviter les risques d’incendie
ou de choc électrique. Des prises secteur c.a. ou des rallonges surchargées, des cordons d’alimentation
effilochés ou de l’isolation de fil craquelée et des fiches brisées constituent un danger. Ils peuvent
entraîner des risques de choc électrique ou d’incendie. Examiner régulièrement le cordon et s’il a
l’air endommagé ou si son isolation est détériorée, le faire remplacer par votre technicien de service.
7Protection du cordon d’alimentation — Les cordons d’alimentation doivent être acheminés de manière à ce que
l’on ne puisse marcher dessus ou les pincer avec des articles placés sur ou contre eux. Porter une attention particulière
aux cordons rattachés à des prises, à des prises de courant d’entretien et au point où ils sortent du produit.
8Ventilation — Les fentes et les ouvertures du boîtier sont conçues pour assurer la ventilation et le fonctionnement
fiables du produit, de même que pour le protéger contre la surchauffe. Ne pas bloquer ou couvrir ces ouvertures. Ne
jamais bloquer ces ouvertures en plaçant l’appareil sur un lit, un sofa, un tapis ou sur une autre surface de ce type.
Ne jamais placer ce produit à proximité d’un radiateur, d’un registre d’air ou d’une autre source de chaleur (y compris
un amplificateur). Ne pas placer cet appareil dans un bâti, comme sur une étagère à livres ou sur un support sans vous
assurer qu’il est ventilé adéquatement ou que les instructions du fabricant sont respectées.
9 Attaches — Ne pas utiliser des attaches qui ne sont par recommandées par le fabricant de l’appareil, car d’autres
attaches pourraient entraîner des risques de blessures.
10 Eau et humidité — Ne pas utiliser ce produit à proximité d’eau, comme près d’une baignoire, d’un bac de lavage,
d’un évier de cuisine ou de salle de lavage, dans un sous-sol humide ou près d’une piscine.
11 Accessoires — Ne pas placer ce produit sur une surface ou sur un support instable. L’appareil pourrait tomber
et entraîner de graves blessures à un enfant ou un adulte et de graves dommages à l’appareil lui-même. Toute
installation de l’appareil doit respecter les instructions du fabricant et utiliser un accessoire de montage
recommandé par le fabricant.
mise à la terre. Ceci est une fonction de sécurité. Ne pas tenter de la modifier. Vous pourriez avoir besoin
d’un électricien pour faire installer une prise avec mise à la terre. Lors de l’utilisation d’une rallonge,
n’utiliser que le type muni d’une mise à la terre.
3
Page 52

MISES EN GARDE IMPORTANTES
11A Un appareil sur un chariot doit être déplacé avec prudence. Les arrêts rapides, une force excessive et
des surfaces inégales peuvent entraîner le renversement de l’appareil et du chariot.
12 Mise à la terre d’une antenne extérieure — Si une antenne extérieure est connectée à l’appareil, s’assurer
que le système d’antenne ou de câble est mis à la terre afin de garantir un certain degré de protection contre
les poussées momentanées de tension et les accumulations de charges statiques. La section 810 du Code national
de l’électricité ANSI/NFPA numéro 70-1984 (Section 54 du Code canadien de l’électricité, partie 1), fournit des
informations relatives à la mise à la terre adéquate du mât supportant la structure, à la mise à la terre de
l’entrée de courant vers un dispositif de décharge d’antenne, à la taille des conducteurs de mise à la terre,
à l’emplacement du dispositif de décharge d’antenne, à la connexion et aux exigences s’appliquant à des
électrodes de mise à la terre. Voyez les exemples suivants.
Exemple de mise à la terre d’une antenne
FIL D’ENTRÉE D’ANTENNE
COLLET
DISPOSITIF DE
DÉCHARGE D’ANTENNE
(CNE SECTION 810-20)
CONDUCTEURS
DE MISE LA TERRE
(CNE SECTION 810-20)
ÉQUIPEMENT DU
FOURNISSEUR D’ÉLECTRICITÉ
COLLETS
ÉLECTRODE DE MISE À
LA TERRE POUR L’ALIMENTATION
ÉLECTRIQUE (CNE ART. 250, PARTIE H)
13 Lignes haute tension — Ne pas installer un système d’antenne extérieure à proximité de lignes électriques,
d’autres lumières ou circuits électriques ou dans un endroit où l’antenne pourrait tomber sur des lignes ou sur des
circuits. Lors de l’installation d’un système d’antenne extérieure, prendre toutes les précautions nécessaires pour
que l’antenne soit située loin de toute ligne ou de tout circuit électrique, car un tel contact pourrait s’avérer fatal.
L’installation d’une antenne extérieure peut comporter des risques et doit être effectuée par un installateur
d’antenne professionnel.
Utilisation
14 Nettoyage — Débrancher l’appareil de la prise murale avant de le nettoyer. Ne pas utiliser de nettoyants liquides
ou en aérosol. Utiliser un linge mouillé pour le nettoyage.
15 Intrusion d’objets ou de liquides — N’introduire aucun objet par les ouvertures
de cet appareil, car ils peuvent entrer en contact avec des points de tension
dangereux ou court-circuiter des pièces qui pourraient entraîner un incendie
ou un choc électrique. Ne verser aucun liquide sur le produit.
16 Éclairage — Afin de mieux protéger votre appareil pendant des orages électriques
ou pendant une longue période sans surveillance, le débrancher de la prise murale et
débrancher l’antenne ou le système de câble. Cette précaution évite les dommages à
l’appareil résultant de la foudre ou des surtensions.
Entretien
17 Entretien — Ne pas essayer de réparer vous-même cet appareil, car son ouverture ou l’enlèvement du couvercle
pourrait vous exposer à des tensions dangereuses ou à d’autres risques. Confier l’entretien à du personnel
qualifié.
18 Conditions exigeant un entretien — Débrancher cet appareil de la prise murale et consulter du personnel de
service qualifié dans les cas suivants :
A. Lorsque le cordon d’alimentation ou la prise est endommagé(e).
B. Si du liquide a été renversé ou si des objets sont tombés dans l’appareil.
C. Si l’appareil a été exposé à la pluie ou à l’eau.
4
Page 53

MISES EN GARDE IMPORTANTES
D. Si l’appareil ne fonctionne pas normalement selon les instructions d’utilisation. Régler seulement les commandes
couvertes dans les instructions d’utilisation. Un réglage incorrect des autres commandes pourrait entraîner des
dommages qui vont exiger un travail intensif par un technicien qualifié afin de rétablir l’état de fonctionnement
normal de l’appareil.
E. Si le produit est tombé ou que le boîtier a été endommagé.
F. Lorsque la performance du produit change, comme lorsqu’il est impossible d’exécuter des fonctions de base;
un entretien et nécessaire.
19 Pièces de rechange — Si des pièces de rechange sont requises, s’assurer que le technicien utilise des pièces de
rechange avec les mêmes caractéristiques de sécurité que le pièces d’origine. Utiliser des pièces de rechanges
du fabricant peut prévenir un incendie, un choc électrique ou d’autres risques.
20 Vérification de sécurité — Après tout entretien ou réparation ce cet appareil, demander au technicien de
service d’effectuer des vérifications de sécurité recommandées par le fabricant pour déterminer si le produit
est sécuritaire et fonctionne correctement.
Informations de sécurité importantes concernant le support et la base
Choisissez minutieusement l’emplacement de votre téléviseur/DVD. Placez le téléviseur sur une base ou un meuble
suffisamment grand et solide pour que le téléviseur/DVD ne soit pas renversé, poussé ou tiré. La chute du téléviseur/
DVD pourrait entraîner des blessures et (ou) endommager le téléviseur/DVD. Consulter les Instructions importantes
sur la sécurité à la page 3 de ce manuel.
5
Page 54

Fonctions
Grande qualité d’image
Résolution horizontale
Plus de 500 lignes. Elle excède la résolution du Super VHS (400 lignes) ou des disques au laser (4340 lignes).
Compatible avec une grande variété de sortie audio pour DVD
Prise audio numérique (coaxiale)
• Lorsqu’un composant avec décodeur Dolby Digital incorporé est connecté, le son Dolby Digital peut produire l’effet d’une
salle de théâtre ou de concert.
• Le format DTS est déjà utilisé dans plusieurs salles de théâtre. En connectant cet appareil à un décodeur DTS ou à un
amplificateur AV avec décodeur DTS intégré, vous pouvez profiter de l’audio DTS des disques DVD enregistrés dans ce
format. Toutefois, l’audio ne pourra sortir de prises de sortie audio analogiques.
• En connectant cet appareil à un amplificateur AV avec décodeur MPEG intégré, vous pouvez profiter de l’audio MPEG des
disques DVD enregistrés dans ce format.
• Le son linéaire PCM d’une plage de 48 kHz/24 bits à 96 kHz/24 bits excède le son d’un CD audio.
Fonctions pratiques
Sélection directe des scènes désirées en utilisant Titre/Chapitre/Heure/Piste - Vous pouvez faire rejouer la dernière scène.
Rappel d’un maximum de trois scènes (DVD seulement) - Vous pouvez programmer en mémoire jusqu’à trois scènes et
rappeler les scènes marquées.
Avance image-par-image - La fonction PAUSE/STILL permet un déplacement d’une image à la fois.
Ralenti - La fonction SLOW permet un déplacement au ralenti vers l’avant ou vers l’arrière par pas de 1/8 à 1/2 fois.
Répétition de lecture - Vous pouvez répéter un chapitre, une piste, un titre, un côté ou un segment sélectionné
d’enregistrement
Lecture programmée (CD audio) - Vous pouvez lire des pistes dans des séquences programmées.
Zoom (DVD seulement) - Vous pouvez agrandir un sujet sélectionné à l’écran pendant la lecture.
Nota : Assurez-vous que les disques corrects sont utilisés.
Avertissement au sujet du disque
Le lecteur DVD ne peut lire que les disques DVD et audio préenregistrés commerciallement. Les autres disques, comme les
CD-R, les VCD ou les disques avec photo pourraient être endommagés s’ils sont lus par cet appareil.
Nota : Assurez-vous que les disques sont conformes pour les fonctions suivantes.
Multilingue - Un maximum de 32 langues de sous-titres et de huit pistes de langue peut être lu pour les films ou pour les
émissions.
Angles multiples - Les images de sport ou de concerts en direct sont enregistrées à partir de plusieurs caméras. Lorsque
vous faites jouer un tel disque, vous pouvez changer les angles pendant la lecture.
Contrôle parental - Vous pouvez restreindre la lecture de scènes ou de sons provenant de disques DVD pour adultes qui ont
un niveau de contrôle parental.
Rapport hauteur / largeur vidéo - Vous pouvez modifier le rapport hauteur / largeur de l’écran du téléviseur.
Fonctions du téléviseur
Alimentation c.a. (120 V) ou c.c. - Ce téléviseur/DVD est conçu pour fonctionner avec le courant c.a. domestique ou à partir
d’une prise pour voiture 12 V c.c.
Syntoniseur de 181 canaux - Reçoit les canaux de télédiffusion standard VHF et UHF et jusqu’à 113 canaux de
câblodistribution. Le nombre réel de canaux reçus dépend des conditions de réception dans votre région ou de votre système
de câblodistribution.
Décodeur de sous-titrage avec mode texte plein écran - Affiche le sous-titrage en sous-titres ou en texte plein écran pour
les utilisateurs malentendants.
Réglage de l’image par télécommande - L’affichage à l’écran permet un réglage précis de la BRILLANCE, du
CONTRASTE, de la COULEUR, de la TEINTE et de la NETTETÉ au moyen de la télécommande.
Minuteur de mise en veille du téléviseur - Au moyen de la télécommande, le téléviseur peut être programmé de façon à
s’éteindre automatiquement après un délai de jusqu’à 120 minutes.
Affichage à l’écran en trois langues - Vous pouvez sélectionner l’une de trois langues, français, anglais ou espagnol, pour
la programmation à l’écran.
V-Chip - La fonction de puce V-Chip peut lire la classification du contenu d’une émission télévisée ou d’un film s’ils sont
encodés avec cette information. La puce V-Chip vous permet de définir un niveau de restriction.
Ce produit comporte une technologie de protection des droits d’auteur protégée en vertu de revendications de procédé
liées à certains brevets des États-Unis et autres droits de propriété intellectuelle détenus par Macrovision Corporation
et par d’autres titulaires de droits. L’utilisation de cette technologie de protection de droits d’auteurs doit être autorisée par
Macrovision Corporation et est conçue seulement pour un usage à domicile et pour d’autres utilisations de visionnement
limité, à moins d’autorisation contraire par Macrovision Corporation. L’ingénierie inverse et le désassemblage sont interdits.
6
Page 55

Contenu
Avant d’utiliser cet appareil
MISES EN GARDE IMPORTANTES ................................... 3
Fonctions.............................................................................. 6
Contenu................................................................................ 7
Précautions de sécurité........................................................ 8
Pièces et fonctions ............................................................... 9
Télécommande .................................................................. 10
Sources d’alimentation ....................................................... 11
Connexions d’antenne ....................................................... 12
Connexion de câble TV ...................................................... 13
Utilisation du téléviseur
Programmation de la langue d’affichage............................ 14
Utilisation du téléviseur ...................................................... 15
Sous-titres .......................................................................... 17
Mise en mémoire des canaux ............................................ 18
Réglage de la puce V-Chip ................................................ 20
Réglages des contrôles de l’image .................................... 23
Stéréo et deuxième piste audio (SAP) ............................... 24
Utilisation de la lecture
Disque ................................................................................ 25
Préparation/État d’affichage de disque .............................. 26
Procédure de lecture .......................................................... 27
Lecture spéciale ................................................................. 28
Fonctions avancées
Agrandissement/Repérage de la scène désirée ................ 29
Lecture répétée/aléatoire/programmée et répétition A-B ..... 30
Marquage des scènes désirées ......................................... 31
Changement de la langue de la piste sonose/
des sous-titres ................................................................. 32
Changement d’angles/Sélection de titres/Menu du DVD ... 33
Informations supplémentaires
Sélection de la langue ........................................................ 34
Réglage du rapport hauteur/largeur de l’écran du
téléviseur/l’affichage à l’écran ......................................... 35
Contrôle de la plage dynamique ........................................ 36
Réglage du contrôle parental ............................................. 37
Modification du contrôle parental ....................................... 38
Suspension temporaire du niveau de catégorie
par le disque DVD ........................................................... 39
Liste des codes de langue ................................................. 40
Connexion vers d’autres équipements ............................... 41
Problèmes et dépannage .....................................................
Fiche technique .................................................................. 45
Garantie ............................................................................. 46
43
7
Page 56

Précautions de sécurité
AVERTISSEMENT!
INSTALLATION DU TÉLÉVISEUR/DVD DANS VOTRE VOITURE
• Si la voiture est équipée de sacs gonflables, assurez-vous de suivre les instructions du fabricant lors de toute modification
impliquant des fils électriques. Des fils mal branchés peuvent causer une défaillance du système de sacs gonflables du
véhicule.
• Ne coupez jamais de l’isolation du fil d’alimentation pour essayer d’obtenir du courant à partir d’un autre appareil. Ceci
pourrait surcharger la capacité actuelle du fil et créer un danger d’incendie ou de choc électrique.
•L’installation et le câblage exigent des connaissances techniques spécifiques. Si vous avez des doutes sur la position
ou sur la manière d’installer des composants, contactez le détaillant qui vous a vendu le produit, votre concessionnaire
automobile ou un fournisseur de services pour automobiles. Veuillez noter que les frais d’installation sont facturés
séparément.
• Utilisez tous les composants fournis avec ce produit, seulement selon les instructions fournies. Une utilisation incorrecte
des composants peut endommager les composants intérieurs ou entraîner un ancrage incorrect des composants, ce qui
peut créer un risque d’accident et de blessures.
• Une installation incorrecte crée un risque d’incendie et d’accident.
•Veillez à ce que les fils ne soient pas pincés entre des pièces du châssis, par des vis ou par le siège qui glisse sur ses
rails, etc. De telles conditions peuvent couper des fils, provoquer des courts-circuits et ainsi créer des risques d’accident,
de choc électrique et d’incendie.
• Évitez d’installer dans des endroits sujets à de fortes vibrations ou qui ne permettent pas un ancrage sécuritaire. Les
composant installés dans de tels emplacements peuvent se desserrer et créer un risque d’accident et de blessures.
• N’installez jamais le téléviseur/DVD sur le tableau de bord ou dans un emplacement susceptible d’obstruer la vision.
• Ne fixez jamais le support sur le toit de votre véhicule. Ceci crée un danger de chute pour le téléviseur/DVD.
• Ne fixez jamais le support sur une surface à angle prononcé ou sur une surface qui fait que le téléviseur/DVD a la face
vers le bas. Une telle installation peut entraîner la chute du téléviseur/DVD.
• Assurez-vous de placer la clé de contact du véhicule à la position d’arrêt « OFF » avant de connecter ou de déconnecter
des fils et des câbles. Négliger cette précaution crée un danger de choc électrique et de blessures.
SÉCURITÉ LORS DE LA CONDUITE
• Ne visionnez jamais le téléviseur/DVD ou n’essayez pas de le régler pendant que vous conduisez. Ceci crée un danger
d’accident automobile. Avant d’utiliser le téléviseur/DVD, assurez-vous d’arrêter le véhicule dans un endroit sécuritaire.
• N’installez jamais l’appareil sur le tableau de bord ou dans un emplacement susceptible d’obstruer la vision vers l’avant.
Les articles qui obstruent la vision vers l’avant dans un véhicule peuvent être illégaux.
Assurez-vous également que tous les composants sont installés de manière à ne pas nuire à l’utilisation du volant, du
levier de vitesses, de la pédale de frein, etc., par exemple sous le siège du conducteur ou dans un endroit qui ne crée
pas de risques pour les passagers. Une installation incorrecte crée un risque d’accident automobile et de blessures.
• Assurez-vous que tous les câbles sont regroupés ensemble afin de ne pas nuire à l’utilisation du véhicule, tel que
décrit dans ce manuel. Des câbles mal installés risquent de s’emmêler avec le volant, le levier de vitesses, la pédale
de frein, etc.
NOTA IMPORTANTS :
•L’appareil est conçu pour une utilisation avec une alimentation 12 V c.c. pour voiture. N’utilisez jamais dans un camion,
un autobus ou toute autre véhicule équipé d’une alimentation de 24 V.
• Assurez-vous d’arrêter votre voiture dans un endroit sécuritaire avant de visionner ou de régler le téléviseur/DVD.
•L’utilisation du téléviseur/DVD pendant des périodes prolongées lorsque le moteur du véhicule est arrêté peut épuiser
la batterie de la voiture.
• Ne laissez jamais le téléviseur/DVD dans un emplacement sujet à des températures extrêmes ou directement sous les
rayons du soleil. Laisser l’appareil dans une voiture fermée, directement sous les rayons du soleil, à proximité d’une
chaufferette, etc., peut déformer le boîtier. L’utilisation de ce produit dans des endroits dont la température est inférieure
à 5 ºC (41 ºF) ou supérieure à 40 ºC (104 ºF) peut causer une image de piètre qualité.
• N’utilisez jamais de benzène ou d’autre produit chimique pour le nettoyage. Les produits chimiques peuvent endommager
le boîtier et enlever les marques. Utilisez un chiffon doux imbibé d’eau et de détergent neutre et doux. Enlevez toute
humidité excessive du chiffon avant d’essuyer.
• Ne faites jamais tomber le téléviseur/DVD ou ne le soumettez pas à des chocs violents.
• Si le téléviseur/DVD venait à produire de la fumée, une odeur anormale ou un bruit étrange, éteignez-le et débranchez-le
immédiatement de l’allume cigare. Continuer d’utiliser le téléviseur/DVD dans l’une de ces conditions crée un danger
d’incendie et de choc électrique.
• Ne continuez pas à utiliser le téléviseur/DVD s’il fonctionne mal et ne produit pas d’image vidéo ou de son. Lorsque vous
remarquez de tels symptômes, éteignez immédiatement et débranchez le téléviseur/DVD de l’allume cigare. Continuer
d’utiliser le téléviseur/DVD dans de telles conditions crée un danger d’incendie ou de choc électrique.
• Si votre voiture est laissée sans surveillance pendant de longues périodes, assurez-vous de débrancher le téléviseur/
DVD de la prise d’allume cigare. Le fait de laisser le téléviseur/DVD branché peut épuiser la batterie du véhicule.
8
Page 57

Avant
Pièces et fonctions
Bouton OPEN/CLOSE
Voyant d’alimentation
Capteur de
télécommande
Bouton d’alimentation POWER
Boutons de volume VOLUME UP/DOWN
Boutons de canal CHANNEL UP/DOWN
Bouton STOP
Plateau de disque
Boutons de saut SKIP
Prise de casque
d’écoute
Prise VIDEO IN
Prises AUDIO IN (L/R)
(gauche et droite)
Bouton PLAY
Arrière
Prise d’entrée c.c.
Cordon d’alimentation c.a.
Prise RF IN
Prises AUDIO (L/R)/ VIDEO OUT
Prise COAXIAL DIGITAL AUDIO OUT
9
Page 58
Télécommande
DISPLAY/
CALL TV/DVDPOWER
123
456
789 0
CH
SELECT/
ENTER
CH
MUTE
DVD MENU
ANGLE
AUDIO
TOP MENU
SLOW SLOW
SEARCH SEARCH
SKIP
MARKER JUMP
PLAY
STOP
TV/CAP/TEXT
RETURN
SUB TITLE
INPUT
SELECT
PLAY MODEPAUSE/STILL
OPEN/CLOSE
SETUP/
TV MENU
CANCEL
QUICK VIEW/
ZOOM
SLEEP
SKIP
REPEAT A-B
Page
POWER Allume ou éteint. 14, 15, 26
DISPLAY/CALL Affiche l’information du téléviseur 16
TV/DVD Alterne entre le téléviseur et le lecteur DVD 26
OPEN/CLOSE Ouvre ou referme le plateau de
0-9 Touches numériques du téléviseur 15, 19
VOLUME +/– Règle le volume du téléviseur 15
CH / Sélectionne un canal du téléviseur 16
SELECT/ENTER Entre les informations dans le menu 14, 18~22
MUTE Coupe le son 16
DVD MENU Affiche le menu du lecteur DVD 33
RETURN Enlève le menu de réglage du lecteur DVD 34~39
SETUP/TV MENU
AUDIO Change le son du téléviseur 24
ANGLE Change d’angle de lecture (lecteur DVD) 33
SUB TITLE Règle les sous-titres (lecteur DVD) 32
CANCEL Réinitialise les informations
TOP MENU Sélectionne un titre (lecteur DVD) 33
QUICK VIEW/ZOOM Alterne entre le canal en cours et le canal précédent 16
INPUT SELECT Alterne entre le téléviseur et l’audio/vidéo 42
SLEEP Minuteur de mise en veille 16
SLOW Lecture avant et (ou) arrière au ralenti
PAUSE/STILL Effectue une pause de son sur un disque CD 28
PLAY MODE Permet de sélectionner le mode de lecture
SEARCH Lecture rapide vers l’avant et (ou) vers
PLAY Lecture (lecteur DVD) 27, 28, 30, 33, 39
SKIP Saute au chapitre précédent ou
STOP Arrête le lecteur DVD 27
MARKER Crée un index (lecteur DVD) 31
JUMP Repère la scène désirée (lecteur DVD) 29
TV/CAP/TEXT Alterne entre le téléviseur, les sous-titres 17
REPEAT A-B Répète la lecture d’un segment déterminé
Affiche l’information du lecteur DVD 26
disque (lecteur DVD) 27, 39
Réglage de l’entrée 29, 30
Entrer un mot de passe 20, 22, 37~39
Touches à flèche pour la navigation 14,18~23
27, 29, 31, 33~38
27, 29~31, 33~39
En mode TV - affiche le menu du
téléviseur
14, 18~23, 25
En mode DVD - Affiche le mode de
réglage initial
34~38
Change de piste de langue 32
du menu 20, 22, 23, 29~31, 37, 38
Zoom 29
(lecteur DVD) 28
Effectue un arrêt sur image sur un disque DVD
(lecteur DVD) 30
l’arrière (lecteur DVD) 28
suivant (lecteur DVD) 28
et le texte mode de sous-titres
entre A et B (lecteur DVD) 30
10
Page 59

Sources d’alimentation
Insertion des piles
Ouvrez le couvercle du compartiment à piles.
Insérez deux piles « AAA » (fournies) dans le compartiment
à piles en suivant le schéma de polarité.
Remettez en place le couvercle du compartiment.
Fonctionnement
• Pointez la télécommande vers le capteur et appuyez sur
les touches de commande pour utiliser.
• Utilisez la télécommande dans un angle de 30º à gauche
ou à droite du capteur de télécommande, jusqu’à une
distance approximative de 5 mètres (16 pieds).
UTILISATION DE L’ALIMENTATION C. A.
Utiliser un cordon d’alimentation c.a. polarisé fourni pour une
utilisation avec le courant alternatif. Insérez le cordon
d’alimentation c.a. dans une prise standard polarisée 120 V,
60 Hz.
NOTA :
• Ne connectez jamais le cordon d’alimentation c.a. dans une
prise de tension autre que la tension spécifiée (120 V, 60 Hz).
Utiliser seulement le cordon relié à l’appareil.
• Si le cordon d’alimentation c.a. polarisé ne s’insère pas dans
la prise polarisée c.a., n’essayez pas de limer ou de couper
la lame. Il incombe à l’utilisateur de recourir aux services d’un
électricien pour faire remplacer la prise désuète.
• Si vous causez une décharge d’électricité statique en touchant
l’appareil et qu’il cesse de fonctionner, débranchez-le simplement de la prise murale, attendez quelques minutes et
rebranchez-le. L’appareil devrait alors fonctionner
normalement.
Prise secteur c.a.
Trou et lame
plus grands
Environ 5 mètres
(16 pieds)
NOTA :
• Ne laissez pas la télécommande exposée à la lumière
directe du soleil ou dans des endroits chauds ou humides.
• La télécommande utilise des rayons infrarouges pour
émettre des signaux et la lumière du soleil ou fluorescente
pourrait réduire sa distance de fonctionnement.
• Une utilisation incorrecte des piles pourrait les faire couler
ou éclater. Lisez les avertissements à propos des piles et
utilisez-les correctement.
• Ne mélangez pas de vieilles piles avec des nouvelles.
• Enlevez les piles de la télécommande si vous prévoyez
ne pas l’utiliser pendant une période prolongée.
Cordon c.a. avec fiche polarisée
(Une lame est plus large que l’autre)
UTILISATION DE L’ALIMENTATION C. C.
En utilisant le cordon d’alimentation c.c. pour voiture, fourni
avec le téléviseur/DVD, vous pouvez l’alimenter à partir de
la prise d’allume cigare de toute voiture pourvue d’un
système électrique à pôle négatif à la masse.
Le cordon pour voiture de 12 V c.c. à fusible est conçu pour
alimenter l’appareil à partir d’une source d’alimentation c.c.
externe (12 volts, négatif à la masse) en utilisant la prise
d’entrée c.c. du téléviseur/DVD.
Branchez la petite fiche du cordon à la prise d’entrée c.c.
à l’arrière du téléviseur/DVD et insérez l’autre fiche du
cordon pour voiture dans la prise de l’allume cigare de votre
voiture. Assurez-vous que le cordon établit une connexion
ferme. Vous pourriez avoir à essayer plusieurs connexions
et tourner la prise pour établir la bonne connexion électrique.
Téléviseur/DVD
À la prise d’allume cigare
À la prise d’entrée c.c.
VOITURE
Cordon pour voiture (fourni)
11
Page 60

Sources d’alimentation
Connexions d’antenne
NOTA : • ÉTEIGNEZ TOUJOURS LE TÉLÉVISEUR/DVD
(OFF) AVANT D’UTILISER L’ALLUMAGE DU
MOTEUR DE LA VOITURE.
• Assurez-vous que la borne négative de la batterie est
mise à la terre.
Cet ensemble est conçu pour être utilisé avec des
systèmes de mise à la masse négative seulement.
• Utilisez uniquement le cordon pour voiture fourni.
• Lorsque le téléviseur/DVD n’est pas utilisé,
débranchez-le toujours de la prise de l’allume cigare
pour éviter d’affaiblir la batterie.
• Si le téléviseur/DVD est branché directement à une
source d’alimentation de 12 V c.c., par exemple dans
un véhicule pour loisir, assurez-vous que le cordon
d’alimentation est connecté après la mise en marche
du véhicule, pour éviter d’affaiblir la batterie.
• N’utilisez pas le téléviseur/DVD si la batterie de la
voiture est faible. Un courant de crête provenant de
l’alternateur de la voiture pourrait griller le fusible c.c.
• Vérifiez le niveau de charge de la batterie lorsque le
téléviseur/DVD est utilisé dans la voiture.
REMPLACEMENT DU FUSIBLE DU
CORDON D’ALIMENTATION POUR
BATTERIE
Si le fusible du cordon d’alimentation pour batterie venait à
griller, remplacez-le par un nouveau fusible (à fusion rapide)
de 8 A, comme il est illustré ci-dessous. Dévissez le bout de
la prise à enlever.
PRISE
FUSIBLE
DE 8 A
CONSEIL
Si vous utilisez une antenne intérieure ou extérieure,
suivez les instructions ci-dessous qui correspondent
à votre système d’antenne. Si vous utilisez un service
de câblodistribution (CATV), voyez à la page 13 les
connexions de câble.
Antenne combinée VHF/UHF
(Câble simple de 75 ohms ou d’une
descente à deux conducteurs de 300 ohms)
Connectez le câble 75 ohms de l’antenne combinée VHF/
UHF à la prise d’antenne.
Si votre antenne combinée VHF/UHF est pourvue d’une
descente deux conducteurs 300 ohms, vous n’aurez
probablement pas besoin du transformateur d’adaptation
300-75 ohms.
Prise d’antenne Prise d’antenne
Câble coaxial
de 75 ohms
Transformateur d’adaptation de 300-75 ohms
Antenne combinée VHF/UHF
(Câbles doubles séparés VHF et UHF à
descente deux conducteurs de 300 ohms)
Connectez la descente deux fils UHF de 300 ohms au
combinateur (non fourni). Connectez la descente deux fils
VHF de 300 ohms au transformateur d’adaptation 300-75
ohms. Connectez le transformateur au combinateur, puis le
combinateur à la prise d’antenne.
Prise d’antenne
Transformateur
d’adaptation 300-75 ohms
Combinateur
UHF 300 ohms
Antennes VHF/UHF séparées
(Câble simple de 75 ohms ou descente à
deux conducteurs 300 ohms)
Connectez le câble VHF de 75 ohms et la descente deux fils
UHF de 300 ohms au combinateur (non fourni). Connectez
le combinateur à la prise de l’antenne.
Prise d’antenne
Combinateur
UHF 300 ohms
IMPORTANT : Voyez la page 18 pour choisir le signal et rechercher les canaux.
12
VHF 300 ohms
VHF 75 ohms
Page 61

Connexion de câble TV
Ce téléviseur/DVD comporte une plage étendue de syntonisation et peut syntoniser la plupart des canaux de
câblodistribution sans câblosélecteur. Certains câblodistributeurs offrent des « canaux payants » dont le signal
est crypté. Pour décrypter et visionner ces canaux, vous devez utiliser un décrypteur généralement fourni par le
câblodistributeur.
Nota pour les clients des États-Unis : Si vous préférez, nous pouvons vous fournir le nom d’un représentant de service autorisé qui,
moyennant des frais, se rendra chez vous pour installer votre système de divertissement électronique et pour vous montrer à l’utiliser.
Pour obtenir des détails sur ce service, appelez le 1 888 206-3359.
Pour obtenir de l’aide supplémentaire sur la façon d’utiliser votre produit RCA, veuillez visiter le site
POUR LES ABONNÉS À UN SERVICE DE CÂBLODISTRIBUTION DE BASE
Pour un service de câblodistribution de base ne nécessitant pas de
Prise d’antenne
Câble coaxial
de 75 ohms
convertisseur/décrypteur, connectez le câble coaxial 75 ohms CATV
directement à la prise d’antenne à l’arrière du téléviseur/DVD.
POUR LES ABONNÉS À UN SERVICE DE CÂBLODISTRIBUTION CRYPTÉ
Si vous être abonné à un service de câblodistribution nécessitant l’utilisation d’un convertisseur/décrypteur, connectez le
câble coaxial d’entrée de 75 ohms au convertisseur/décrypteur. Avec un autre câble coaxial de 75 ohms, connectez la prise
de sortie du convertisseur/décrypteur à la prise Antenna du téléviseur/DVD. Suivez les instructions ci-dessous. Syntonisez
le téléviseur/DVD au canal de sortie du convertisseur/décrypteur (normalement le canal 3 ou 4) et utilisez le
convertisseur/décrypteur pour sélectionner les canaux.
www.rca.com/customersupport.
Câble d’entrée
CATV de 75 ohms
Convertisseur/décrypteur
Câble 75 ohms au
téléviseur/DVD
Prise d’antenne
POUR LES ABONNÉS À UN SERVICE DE CÂBLODISTRIBUTION DE BASE NON CRYPTÉ
AVEC CANAUX PAYANTS CRYPTÉS
Si vous être abonné à un service de câblodistribution dont les canaux de base sont décryptés et les dont canaux payants
nécessitent un convertisseur/décrypteur, vous pouvez utiliser un répartiteur de signal et une boîte de commutation A/B
(disponibles chez votre câblodistributeur ou chez un détaillant de matériel électronique). Suivez les instructions ci-dessous.
Avec le sélecteur à la positon « B », vous pouvez syntoniser directement tous les canaux non cryptés sur votre téléviseur/
DVD. Lorsque le commutateur est à la position « A », syntonisez votre téléviseur/DVD à la sortie du convertisseur/
décrypteur (normalement le canal 3 ou 4) et utilisez le convertisseur/décrypteur pour syntoniser les canaux cryptés.
Câble d’entrée
CATV de 75 ohms
Convertisseur/décrypteur
Répartiteur
Sélecteur A/B
Câble 75 ohms au
A
téléviseur/DVD
B
Prise d’antenne
IMPORTANT : Voyez la page 18 pour choisir le signal et rechercher les canaux.
13
Page 62
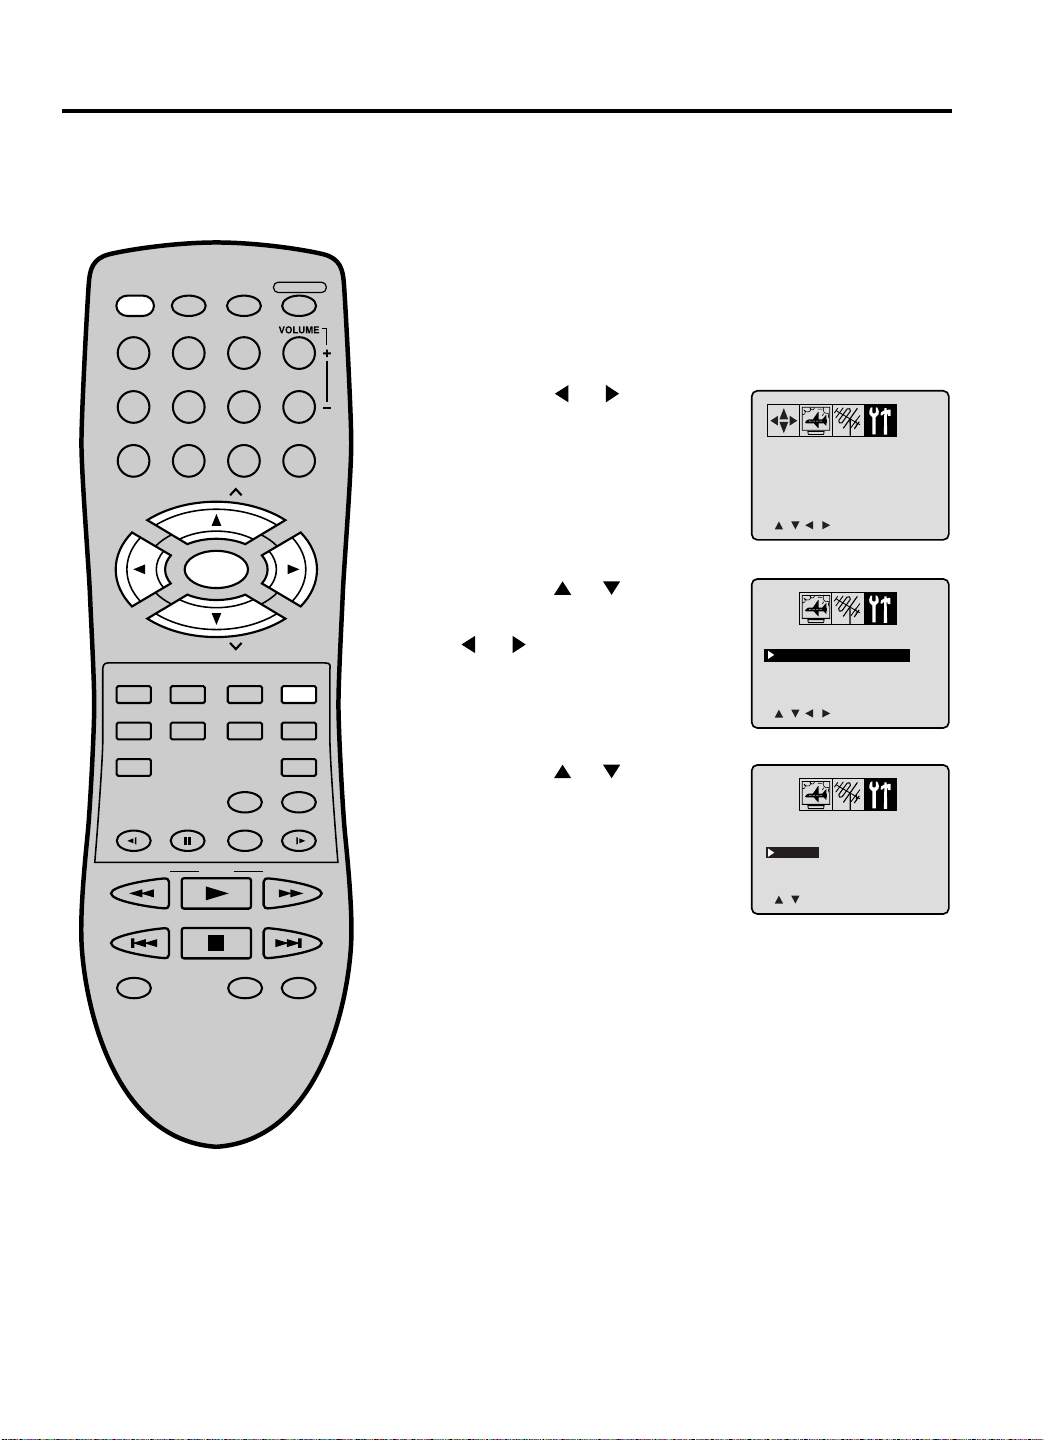
<
/ / / /MENU
>
V-CHIP SET
LANGUAGE/IDIOMA/LANGUE
<
/ / / /MENU
>
V-CHIP SET
LANGUAGE/IDIOMA/LANGUE
Programmation de la langue d’affichage
<
/ /ENTER/MENU
>
LANGUAGE/IDIOMA/LANGUE
ENGLISH
ESPAÑOL
FRANCAIS
Vous pouvez choisir entre trois langues d’affichage différentes (l’anglais, le français et l’espagnol). Les menus de réglage
et les messages apparaîtront dans la langue de votre choix.
Le menu de sélection de la langue (étape 5) apparaît automatiquement à l’écran la première fois que vous appuyez sur
la touche TV MENU. Sélectionnez d’abord votre langue préférée, puis continuez avec les autres options de menu.
1 Pour allumer le téléviseur/DVD, appuyez sur POWER.
DISPLAY/
CALL TV/DVDPOWER
OPEN/CLOSE
L’indicateur d’alimentation s’allume.
123
456
789 0
CH
SELECT/
ENTER
CH
SETUP/
TV MENU
ANGLE
SUB TITLE
PLAY MODEPAUSE/STILL
PLAY
RETURN
INPUT
SELECT
CANCEL
QUICK VIEW/
ZOOM
SLEEP
MUTE
DVD MENU
AUDIO
TOP MENU
SLOW SLOW
SEARCH SEARCH
2 Appuyez sur TV MENU en mode TV. Le menu du
téléviseur apparaît.
3 Appuyez sur ou jusqu’à ce
que le menu OPTION apparaisse.
4 Appuyez sur ou pour
sélectionner l’option de langue «
LANGUAGE », puis sur la touche
ou .
5 Appuyez sur ou pour
sélectionner la langue désirée : Anglais
(ENGLISH), espagnol (ESPAÑOL) ou
français (FRANÇAIS) et appuyez sur
ENTER.
SKIP
MARKER JUMP
STOP
TV/CAP/TEXT
NOTA :
• Si le téléviseur/DVD ne fonctionne pas
correctement (en utilisant les boutons
sur l’appareil et [ou] les touches de la
télécommande) débranchez le cordon c.a.
et attendez quelques minutes avant de le
rebrancher. L’électricité statique, etc., pourrait
avoir nui au fonctionnement du lecteur.
• La section téléviseur et la section DVD ont
chacune leur propre menu (voyez la page 34).
14
SKIP
REPEAT A-B
Appuyez sur TV MENU jusqu’à ce
que le MENU disparaisse.
Page 63

Utilisation du téléviseur
VOLUME 32
CH 012
DISPLAY/
CALL TV/DVDPOWER
123
456
789 0
CH
SELECT/
ENTER
CH
MUTE
DVD MENU
AUDIO
ANGLE
TOP MENU
SLOW SLOW
SEARCH SEARCH
SKIP
MARKER JUMP
PLAY
STOP
TV/CAP/TEXT
RETURN
SUB TITLE
INPUT
SELECT
PLAY MODEPAUSE/STILL
OPEN/CLOSE
SETUP/
TV MENU
CANCEL
QUICK VIEW/
ZOOM
SLEEP
SKIP
REPEAT A-B
1 Pour allumer le téléviseur/DVD,
appuyez sur POWER.
2 Réglez le volume en appuyant sur
VOLUME + ou –. Le niveau de
volume apparaît à l’écran.
3 Réglez l’option de menu TV/CATV
à la position correcte. (Voyez la
page 18.)
4 Appuyez sur les touches
numériques pour sélectionner
le canal.
Les canaux peuvent être sélectionnés
instantanément en utilisant deux
touches. (par exemple, pour
sélectionner le canal 2, appuyez sur «
0 » puis sur « 2 ». Si vous appuyez
uniquement sur « 2 », la sélection de
canal est retardée pendant quelques
secondes.)
Pour les canaux 10 et plus, appuyez
sur les deux chiffres dans l’ordre.
Pour les canaux à trois chiffres,
appuyez sur les trois chiffres
dans l’ordre. Par exemple, pour
sélectionner le canal 120, appuyez
simplement sur « 120 ».
NOTA :
Pour visionner des canaux supérieurs à
69, le téléviseur doit être réglé au mode
CATV. Voyez la page 18 pour obtenir
des renseignements supplémentaires.
TV - Canaux VHF/UHF
CATV - Canaux de
CÂBLODISTRIBUTION
NOTA :
• Si vous sélectionnez un canal sans diffusion, le son
est automatiquement coupé.
• Si une station visionnée ne diffuse plus, le téléviseur
s’arrête automatiquement après 15 minutes.
TV
VHF
2-13
UHF
14-69
CATV
VHF
2-13
STD/HRC/IRC
14-36
(A) (W)
37-59
(AA) (WW)
60-85
(AAA) (ZZZ)
86-94
(86) (94)
95-99
(A-5) (A-1)
100-125
(100) (125)
01
(5A)
15
Page 64

SLEEP
120
STEREO SAP CH 012
SEL. MONO+SAP
MUTE
Utilisation du téléviseur
DISPLAY/
CALL TV/DVDPOWER
123
456
OPEN/CLOSE
CHANNEL /
Appuyez sur et relâchez CH ou .
Le syntoniseur s’arrête automatiquement
au canal suivant en mémoire. Pour
obtenir un bon fonctionnement, les canaux
doivent être mis en mémoire avant de les
sélectionner. Voyez les pages 18 et 19 «
Mise en mémoire des canaux ».
789 0
CH
SELECT/
ENTER
CH
SETUP/
TV MENU
ANGLE
RETURN
SUB TITLE
INPUT
SELECT
PLAY MODEPAUSE/STILL
PLAY
STOP
TV/CAP/TEXT
CANCEL
QUICK VIEW/
ZOOM
SLEEP
SKIP
REPEAT A-B
MUTE
DVD MENU
AUDIO
TOP MENU
SLOW SLOW
SEARCH SEARCH
SKIP
MARKER JUMP
CALL
Appuyez sur DISPLAY/CALL pour
afficher l’information en cours à l’écran.
Appuyez de nouveau sur DISPLAY/CALL
pour effacer cette information.
• Numéro de canal ou mode VIDÉO
• État de l’audio en stéréo ou en
deuxième piste audio (SAP)
• État de la sortie audio
VISIONNEMENT RAPIDE
Appuyez de nouveau sur cette QUICK
VIEW pour revenir au dernier canal
visionné.
MUTE
Appuyez sur MUTE pour couper le son.
Le son du téléviseur/DVD est coupé et «
MUTE » apparaîtra brièvement à l’écran.
Le son peut être réactivé en appuyant de
nouveau sur MUTE ou sur les touches
VOLUME + ou –.
16
SLEEP
Afin de régler le téléviseur/DVD de façon
qu’il s’éteigne après un délai prédéterminé,
appuyez sur la touche SLEEP de la
télécommande. L’horloge soustrait 10
minutes du compte à rebours chaque fois
que vous appuyez sur la touche SLEEP
(120, 110, ...10, 0). Une fois la minuterie
programmée, l’affichage apparaît à toutes
les dix minutes pour vous rappeler que la
minuterie est activée. Pour confirmer le
réglage du minuteur, appuyez sur SLEEP
et le temps restant s’affiche pendant
quelques secondes. Pour désactiver le
minuteur, appuyez plusieurs fois sur la
touche SLEEP jusqu’à ce que l’affichage
revienne à 0.
Page 65

Sous-titres
QU’EST-CE QUE LE SOUS-TITRAGE?
Ce téléviseur peut décoder et afficher les émissions télévisées avec sous-titres. Les sous-titres affichent le texte à l’écran
pour les malentendants ou traduit et affiche le texte dans une autre langue.
DISPLAY/
CALL TV/DVDPOWER
OPEN/CLOSE
123
456
789 0
CH
SELECT/
ENTER
CH
SETUP/
TV MENU
ANGLE
RETURN
SUB TITLE
INPUT
SELECT
PLAY MODEPAUSE/STILL
CANCEL
QUICK VIEW/
ZOOM
SLEEP
MUTE
DVD MENU
AUDIO
TOP MENU
SLOW SLOW
Sous-titres : Ce mode de sous-titrage affiche du texte à l’écran, en
anglais ou dans une autre langue (selon le réglage des sous-titres
Close Caption).
En général, les sous-titres en anglais sont transmis sur les canaux de
sous-titres 1 et les sous-titres dans d’autres langues sont transmis sur
les canaux de sous-titres 2.
Les sous-titres apparaissent à l’écran là où ils affectent l’image le
moins possible, normalement au bas de l’écran. Les émissions de
nouvelles affichent trois lignes de sous-titres qui défilent à l’écran.
La plupart des autres émissions affichent les sous-titres sur deux ou
trois lignes, près du personnage qui parle, afin que le téléspectateur
puisse suivre le dialogue. Les mots en italiques ou soulignés indiquent
des titres, les mots en langues étrangères ou les mots accentués.
Les mots chantés sont généralement entourés de Nota de musique.
Texte : Le mode de sous-titrage Texte remplit normalement l’écran
avec un horaire de programmation ou d’autres informations.
Une fois le mode de sous-titrage sélectionné, il reste activé tant
qu’il n’est pas modifié, même si vous changez de canal.
Si le signal de sous-titrage est perdu pendant une annonce ou une
coupure de signal, les sous-titres réapparaissent après le retour
du signal. Si vous changez de canal, les sous-titres sont retardés
d’environ 10 secondes.
Pour connaître les émissions télédiffusées avec sous-titres, consultez
votre horaire TV et recherchez le symbole de sous-titrage (CC).
SEARCH SEARCH
PLAY
POUR AFFICHER LES SOUS-TITRES
Appuyez sur TV/CAP/TEXT pour
SKIP
STOP
SKIP
passer du mode TV normal à l’un
des deux modes de sous-titrage
(sous-titres et texte plein écran).
MARKER JUMP
REPEAT A-B
Le sous-titrage affiche le texte à
l’écran pour les malentendants.
TV/CAP/TEXT
NOTA :
• Lors de la sélection des sous-titres, le sous-titrage est retardé d’environ 10 secondes.
• Si aucun signal de sous-titrage n’est reçu, aucun sous-titre n’apparaît, mais le téléviseur reste en mode de sous-titrage.
• Des fautes ou des caractères inhabituels peuvent parfois apparaître dans le sous-titrage. C’est normal pour le sous-titrage, surtout
pour les émissions en direct. En effet, lors des émissions en direct, le sous-titrage est également produit en direct. Ces
transmissions ne permettent pas un temps d’édition.
• Lorsque le sous-titrage est affiché, les affichages à l’écran, comme le volume et le silence, pourraient rester invisibles ou masquer
les sous-titres.
• Certains systèmes de câblodistribution et de protection contre la copie peuvent affecter ou supprimer le signal de sous-titrage.
• Si vous utilisez une antenne intérieure ou si la réception de télévision est faible, le décodeur de sous-titrage pourrait être désactivé
ou afficher des caractères étranges ou des fautes d’orthographe. Dans ce cas, ajustez l’antenne pour obtenir une meilleure
réception ou utilisez une antenne extérieure.
17
Page 66

<
/ / / /MENU
>
TV/CATV
ADD/DELETE
CATV
ADD
AUTO CH MEMORY
<
/ / / /MENU
>
TV/CATV
ADD/DELETE
CATV
ADD
AUTO CH MEMORY
Mise en mémoire des canaux
<
/ / / /MENU
>
TV/CATV TV
ADD/DELETE ADD
AUTO CH MEMORY
Ce téléviseur/DVD est pourvu d’une mémoire de canaux qui vous permet de sauter au canal suivant ou précédent en
mémoire et d’ignorer les canaux non désirés. Avant de sélectionner des canaux, vous devez les programmer dans la
mémoire du téléviseur/DVD. En plus des canaux VHF et UHF habituels, ce téléviseur/DVD peut recevoir jusqu’à 113
canaux de câblodistribution. Pour utiliser ce téléviseur/DVD avec une antenne, réglez l’option de menu TV/CATV au
mode TV. Le mode CATV est l’option par défaut réglée à l’usine.
SÉLECTION TV/CATV
1 Appuyez sur TV/DVD. Appuyez sur TV
DISPLAY/
CALL TV/DVDPOWER
123
456
789 0
CH
OPEN/CLOSE
MENU. Le menu du téléviseur apparaît.
2 Appuyez sur ou jusqu’à ce que
le menu de réglage SET UP apparaisse.
3 Appuyez sur ou pour
sélectionner l’option « TV/CATV ».
Si vous être connecté à une antenne,
sélectionnez TV. Si vous souscrivez
à un service de câblodistribution,
sélectionnez CATV
MUTE
SELECT/
DVD MENU
ENTER
CH
RETURN
SETUP/
TV MENU
AUDIO
ANGLE
SUB TITLE
INPUT
SELECT
PLAY MODEPAUSE/STILL
TV/CAP/TEXT
QUICK VIEW/
REPEAT A-B
TOP MENU
SLOW SLOW
SEARCH SEARCH
SKIP
MARKER JUMP
PLAY
STOP
CANCEL
ZOOM
SLEEP
SKIP
Numéro sur ce téléviseur
Canal CATV correspondant
4 Appuyez sur ou pour
sélectionner le mode TV ou CATV.
Canaux TV - VHF/UHF
Canaux de
CÂBLODISTRIBUTION CATV
5 Appuyez sur TV MENU jusqu’à ce que
le MENU disparaisse.
TABLEAU CATV
Le tableau ci-dessous indique les affectations typiques de canaux
des systèmes de câblodistribution.
18
Page 67

DISPLAY/
CALL TV/DVDPOWER
123
OPEN/CLOSE
Mise en mémoire des canaux
SYNTIONISATION AUTOMATIQUE
À L’AIDE DE LA MÉMOIRE
1 En mode TV, appuyez sur TV MENU.
Le menu du téléviseur appraît.
2 Appuyez sur ou jusqu’à ce que
le menu SET UP apparaisse.
TV/CATV
ADD/DELETE
AUTO CH MEMORY
<
/ / / /MENU
CATV
ADD
>
456
789 0
CH
SELECT/
ENTER
CH
SETUP/
MUTE
DVD MENU
AUDIO
ANGLE
TOP MENU
SLOW SLOW
SEARCH SEARCH
SKIP
MARKER JUMP
PLAY
STOP
TV/CAP/TEXT
RETURN
SUB TITLE
INPUT
SELECT
PLAY MODEPAUSE/STILL
TV MENU
CANCEL
QUICK VIEW/
ZOOM
SLEEP
SKIP
REPEAT A-B
3 Appuyez sur ou pour sélectionner
AUTOCH MEMORY, puis sur
Le téléviseur commence à mémoriser tous
les canaux disponibles dans votre région.
ou .
4 Appuyez sur TV MENU jusqu’à ce que
MENU disparaisse.
TO ADD/DELETE CHANNELS
1 Sélectionnez le canal que vous voulez
mémoriser ou supprimer en utilisant les
touches numériques (0 à 9) ou CH ou .
2 Appuyez sur TV MENU. Le menu du
téléviseur apparaît.
3 Appuyez sur ou jusqu’à ce que
SET UP apparaisse.
4 Appuyez sur ou pour sélectionner
ajouter/supprimer « ADD/DELETE ».
TV/CATV
ADD/DELETE
AUTO CH MEMORY
<
/ / / /MENU
TV/CATV
ADD/DELETE
AUTO CH MEMORY
<
/ / / /MENU
TV/CATV
ADD/DELETE
AUTO CH MEMORY
<
/ / / /MENU
CATV
ADD
>
CATV
ADD
>
CATV
ADD
>
5 Appuyez sur ou pour sélectionner
ADD ou DELETE selon la fonction
désirée.
6 Appuyez sur TV MENU jusqu’à ce que le
menu disparaisse.
7 Répétez les étapes 1 à 6 pour chaque
canal que vous voulez ajouter ou
supprimer.
TV/CATV
ADD/DELETE
AUTO CH MEMORY
<
/ / / /MENU
>
CATV
DELETE
19
Page 68

<
0 9/ENTER/CANCEL/MENU
>
V-CHIP SET
CONFIRM
PASSWORD :
<
0 9/ENTER/CANCEL/MENU
>
V-CHIP SET
NEW
PASSWORD
:
<
/ / / /MENU
>
V-CHIP SET
LANGUAGE/IDIOMA/LANGUE
Réglage de la puce V-Chip
<
/ / / /MENU
>
V-CHIP SET
LANGUAGE/IDIOMA/LANGUE
Ce téléviseur/DVD est équipé avec un contrôleur de puce V-Chip qui fournit un visionnement de canal pouvant être
contrôlé par des restrictions. Cette fonction sert à éviter que vos enfants ne visionnent des films contenant de la
violence ou des scènes sexuelles, que vous pourriez choisir d’exclure.
Pour utiliser la fonction Puce V, vous devez enregistrer un mot de passe.
DISPLAY/
CALL TV/DVDPOWER
123
456
789 0
CH
SELECT/
ENTER
CH
MUTE
DVD MENU
AUDIO
ANGLE
TOP MENU
SLOW SLOW
SEARCH SEARCH
PLAY
RETURN
SUB TITLE
INPUT
SELECT
PLAY MODEPAUSE/STILL
OPEN/CLOSE
SETUP/
TV MENU
CANCEL
QUICK VIEW/
ZOOM
SLEEP
ENREGISTREMENT DU MOT DE PASSE
1 En mode TV, appuyez sur TV MENU.
Le menu du téléviseur appraît.
2 Appuyez sur ou jusqu’à ce que
le menu OPTION apparaisse.
3 Appuyez sur ou pour
sélectionner « V-CHIP SET »,
puis sur
ou .
4 Entrez un mot de passe (4 chiffres) en
utilisant les touches numériques
(0 à 9) et appuyez sur ENTER.
• Si vous entrez un numéro incorrect,
appuyez sur CANCEL.
SKIP
MARKER JUMP
STOP
TV/CAP/TEXT
SKIP
REPEAT A-B
NOTA :
• La fonction de puce V-chip est disponible pour le
système américain de puce V-Chip. Le système de
puce V-chip canadien n’est pas supporté.
• Pour éviter d’oublier le mot de passe, écrivez-le et
placez-le dans un endroit sûr.
• Si vous oubliez votre mot de passe…
1. Réduisez le volume au minimum.
2. Appuyez simultanément sur le bouton
VOLUME de l’appareil et sur la touche 0 de
la télécommande pendant plus d’une seconde.
20
« » apparaît à la place du chiffre.
5 Entrez de nouveau le même mot de
passe pour confirmer et appuyez sur
ENTER.
Le mot de passe est maintenant
enregistré et le menu de la puce
V-Chip apparaît.
Page 69

Réglage de la puce V-Chip
RÉGLAGE DE LA PUCE V-CHIP
DISPLAY/
CALL TV/DVDPOWER
OPEN/CLOSE
123
456
789 0
CH
SELECT/
ENTER
CH
SETUP/
MUTE
DVD MENU
AUDIO
ANGLE
TOP MENU
SLOW SLOW
SEARCH SEARCH
PLAY
RETURN
SUB TITLE
INPUT
SELECT
PLAY MODEPAUSE/STILL
TV MENU
CANCEL
QUICK VIEW/
ZOOM
SLEEP
Utilisez le téléviseur une fois la puce V-Chip
activée
Lorsqu’une émission est reçue et que la puce
V-Chip est activée, entrez le mot de passe. La
protection temporaire peut être contournée.
NOTA :
• La fonction de puce V-chip est activée
uniquement pour les émissions supportant le
système de cote.
• Si vous changez de canal en utilisant un magnétoscope ou un câblosélecteur, tandis que
le téléviseur reste au canal 3 ou 4, la puce
V-Chip fonctionne différemment. Lorsque
vous entrez votre mot de passe pour débloquer
temporairement un canal, vous avez complètement désactivé la fonction de puce V-Chip
pour toutes les stations. Pour réinitialiser la
puce V-Chip, éteingez et rallumez le téléviseur.
• Certains câblosélecteurs sont construits avec
une fonction de délai; dans certains cas une
émission peut prendre jusqu’à dix secondes
avant d’apparaître après l’entrée d’un mot de
passe.
1 Dans le menu V-CHIP SET, appuyez
sur ou pour sélectionner
« TV RATING ».
2 Appuyez sur ou pour
sélectionner le réglage désiré.
OFF : Le CODE TV n’est pas réglé
TV-Y : Enfants de tous âges
V-CHIP SET
V-CHIP
TV RATING
MOVIE RATING
CHANGE PASSWORD
<
/ / / /MENU
V-CHIP SET
V-CHIP
TV RATING
MOVIE RATING
CHANGE PASSWORD
TV-Y7 : 7 ans et plus
TV-G : Tout public
TV-PG : Surveillance parentale
TV-14 : 14 ans et plus
<
/ / / /MENU
TV-MA : 17 ans et plus
Lorsque vous sélectionnez TV-Y7, TV-PG, TV-14 ou TV-MA,
appuyez sur la touche DISPLAY/CALL pour afficher la cote
enregistrée. Appuyez sur / ou / pour sélectionner
l’article désiré.
3 Appuyez sur ou pour
sélectionner l’option « MOVIE RATING
».
4 Appuyez sur ou pour
sélectionner la cote désirée.
OFF : Le CODE FILM n’est pas réglé
G:Tous les âges
V-CHIP SET
V-CHIP
TV RATING
MOVIE RATING
CHANGE PASSWORD
<
/ / / /MENU
V-CHIP SET
V-CHIP
TV RATING
MOVIE RATING
CHANGE PASSWORD
PG : Surveillance parentale
PG-13 : Surveillance parentale
moins de 13 ans
<
/ / / /MENU
R:Moins de 17 ans
Surveillance parentale suggérée
NC-17 : 17 ans et plus
X:Adultes seulement
5 Appuyez sur ou pour
sélectionner la puce « V-CHIP ».
6 Appuyez sur ou pour afficher
activé « ON ». Vos réglages sont
maintenant mémorisés.
V-CHIP SET
V-CHIP
TV RATING
MOVIE RATING
CHANGE PASSWORD
<
/ / / /MENU
V-CHIP SET
V-CHIP
TV RATING
MOVIE RATING
CHANGE PASSWORD
<
/ / / /MENU
: OFF
: OFF
: OFF
>
: OFF
: TV-Y
: OFF
>
: OFF
: TV-Y
: OFF
>
: OFF
: TV-Y
: PG-13
>
: OFF
: TV-Y
: PG-13
>
: ON
: TV-Y
: PG-13
>
7 Appuyez sur TV MENU jusqu’à ce que
le MENU disparaisse.
21
Page 70

MOVIE RATING
CONFIRM
PASSWORD
CHANGE PASSWORD
V-CHIP SET
V-CHIP
TV RATING
: OFF
:
: OFF
: OFF
<
0 9/ENTER/CANCEL/MENU
>
MOVIE RATING
NEW
PASSWORD
CHANGE PASSWORD
V-CHIP SET
V-CHIP
TV RATING
: OFF
:
: OFF
: OFF
<
0 9/ENTER/CANCEL/MENU
>
<
/ / / /MENU
>
V-CHIP SET
LANGUAGE/IDIOMA/LANGUE
<
/ / / /MENU
>
V-CHIP SET
LANGUAGE/IDIOMA/LANGUE
<
/ / / /MENU
>
MOVIE RATING
CHANGE PASSWORD
V-CHIP SET
V-CHIP
TV RATING
: OFF
: OFF
: OFF
<
0 9/ENTER/CANCEL/MENU
>
V-CHIP SET
PASSWORD
:
Réglage de la puce V-Chip
CHANGEMENT DE MOT DE PASSE
1 En mode TV, appuyez sur TV MENU.
Le menu du téléviseur appraît.
2 Appuyez sur ou jusqu’à ce
que le menu OPTION apparaisse.
DISPLAY/
CALL TV/DVDPOWER
123
456
OPEN/CLOSE
789 0
CH
SELECT/
ENTER
CH
SETUP/
MUTE
DVD MENU
AUDIO
ANGLE
SUB TITLE
TOP MENU
SLOW SLOW
SEARCH SEARCH
SKIP
MARKER JUMP
PLAY MODEPAUSE/STILL
PLAY
STOP
TV/CAP/TEXT
RETURN
INPUT
SELECT
TV MENU
CANCEL
QUICK VIEW/
ZOOM
SLEEP
SKIP
REPEAT A-B
3 Appuyez sur ou pour
sélectionner « V-CHIP SET »,
puis sur
ou .
4 Entrez le mot de passe en utilisant
les touches numériques (0 à 9)
et appuyez sur ENTER.
• Si vous entrez un numéro incorrect,
appuyez sur CANCEL.
5 Appuyez sur ou pour
sélectionner « CHANGE
PASSWORD », puis sur ou .
6 Entrez un mot de passe en utilisant
les touches numériques (0 à 9)
et appuyez sur ENTER.
22
7 Entrez de nouveau le même mot de
passe pour confirmer et appuyez sur
ENTER.
8 Appuyez plusieurs fois sur la touche
TV MENU pour revenir à l’écran normal.
Page 71

Réglages des contrôles de l’image
Les commandes de l’image sont préréglées en usine, mais vous pouvez les régler individuellement :
1 Appuyez sur TV MENU.
Le menu du téléviseur appraît.
2
Appuyez sur ou jusqu’à ce que
DISPLAY/
CALL TV/DVDPOWER
123
456
OPEN/CLOSE
le menu d’image PICTURE apparaisse.
BRIGHTNESS
CONTRAST0+32
COLOR
TINT
SHARPNESS
<
/ / / /MENU
0
0
0
>
789 0
CH
SELECT/
ENTER
CH
SETUP/
MUTE
DVD MENU
AUDIO
ANGLE
TOP MENU
SLOW SLOW
SEARCH SEARCH
SKIP
MARKER JUMP
PLAY
STOP
TV/CAP/TEXT
RETURN
SUB TITLE
INPUT
SELECT
PLAY MODEPAUSE/STILL
TV MENU
CANCEL
QUICK VIEW/
ZOOM
SLEEP
SKIP
REPEAT A-B
3 Appuyez sur ou pour
sélectionner l’article que vous
voulez régler.
4 Appuyez sur ou pour
sélectionner le réglage désiré.
BRIGHTNESS
CONTRAST
COLOR
TINT
SHARPNESS
réduit la brillance
réduit le contraste
couleur pâle
couleur rougeâtre
adoucit l’image
5 Après avoir modifié vos réglages,
appuyez sur TV MENU jusqu’à ce
que MENU disparaisse.
CANCEL
Pour revenir aux réglages usine, appuyez sur
la touche d’annulation CANCEL lorsque vous
êtes dans le menu d’image PICTURE.
BRIGHTNESS
CONTRAST0+32
COLOR
TINT
SHARPNESS
<
/ / / /CANCEL/MENU
0
0
0
augmente la brillance
augment le contraste
couleur brillante
couleur verdâtre
rend l’image plus claire
>
NOTA :
Par défaut, le CONTRASTE est réglé
au maximum à l’usine.
23
Page 72

Stéréo et deuxième piste audio (SAP)
STEREO SAP CH 013
STEREO CH 013
SEL. STEREO
Votre téléviseur/DVD comporte une fonction appelée « son multivoies » (MTS). Les émissions MTS rehaussent la qualité
du visionnement en ajoutant aux émissions un son stéréophonique haute fidélité.
Le système MTS comporte également une voie supplémentaire appelée deuxième piste audio (SAP) que les télédiffuseurs
peuvent utiliser afin de transmettre une deuxième piste sonore pour les émissions bilingues ou pour d’autres raisons.
ÉCOUTE DE SON STÉRÉO
DISPLAY/
CALL TV/DVDPOWER
123
456
OPEN/CLOSE
Lorsque le téléviseur est allumé ou
qu’une sélection de canal est effectuée,
sélectionnez AUDIO pour obtenir le son
désiré. Lorsque SEL.STEREO apparaît
à l’écran, ceci signifie que la diffusion en
stéréo est disponible. Vous pouvez profiter
du son stéréo des haut-parleurs gauche et
droit.
789 0
CH
SELECT/
ENTER
CH
SETUP/
MUTE
DVD MENU
AUDIO
ANGLE
TOP MENU
SLOW SLOW
SEARCH SEARCH
SKIP
MARKER JUMP
PLAY MODEPAUSE/STILL
PLAY
STOP
TV/CAP/TEXT
RETURN
SUB TITLE
INPUT
SELECT
TV MENU
CANCEL
QUICK VIEW/
ZOOM
SLEEP
SKIP
REPEAT A-B
• À la réception d’une diffusion en
« Mono », rien n’est affiché.
• Si le signal de diffusion est trop faible
ou que le son en stéréo n’est pas
disponible, appuyez sur AUDIO pour
passer au son mono. Le bruit devrait
être éliminé. Appuyez de nouveau
pour revenir au son stéréo.
ÉCOUTE D’UNE DEUXIÈME PISTE AUDIO (SAP)
Lorsque le téléviseur est allume ou
qu’une sélection de canal est effectuée,
sélectionnez AUDIO pour le réglage
désiré. Lorsque SAP apparaît à l’écran,
la diffusion d’une « deuxième piste audio »
est disponible.
24
Page 73

Disque
L’appareil détecte si le disque chargé est un DVD ou un CD audio et passe automatiquement dans le bon mode.
AVERTISSEMENT À PROPOS DES DISQUES
Afin d’éviter un effacement accidentel des données enregistrées, ne faites pas jouer des DVD-ROM, DVD-Audio, CD-ROM,
CD-R, CDV, CD-G, CD vidéo ou CD photo.
Cet appareil s’applique aux disques DVD de la région 1 seulement. Les disques des autres régions ne peuvent être lus avec
cet appareil.
Cet appareil ne peut lire des fichiers mp3.
Titre/Chapitre/Piste
Titre
Lorsque plus d’un film est enregistré sur le disque, il est divisé en
plus d’une section. Chaque section est appelée un titre « TITLE »
TITRE1 TITRE2
CHAPITRE 1
Chapitre
Les titres peuvent être subdivisés en plusieurs sections.
Chaque section est appelée un chapitre « CHAPTER »
Piste
Un disque CD audio contient plusieurs articles.
Ils sont assignés aux pistes.
PISTE 1 PISTE 2 PISTE 3 PISTE 4 PISTE 5
Retrait du disque de son boîtier
Assurez-vous de tenir les rebords du disque. Ne touchez pas la surface du disque.
Retirez avec précaution le disque de son boîtier.
• N’égratignez pas le disque.
• Ne laissez pas de saleté sur la surface du disque.
• Ne collez pas d’étiquette ou de collant sur le disque.
• Ne laissez pas tomber et ne pliez pas le disque.
DISQUE DVD
CHAPITRE 2 CHAPITRE 2 CHAPITRE 3CHAPITRE 1
CD
Rangement du disque
• Rangez le disque dans son boîtier pour éviter de l’égratigner, de le salir ou de
l’endommager.
• Ne laissez pas le disque exposé à la lumière directe du soleil ou dans des
endroits chauds ou humides.
Nettoyage du disque
Essuyez le disque avec un chiffon propre et sec à partir du centre vers le rebord.
• N’essuyez pas le disque avec un mouvement circulaire.
• N’utilisez pas de nettoyants liquides ou en aérosol.
25
Page 74
Préparation/État d’affichage de disque
Les pages suivantes décrivent le réglage
et le fonctionnement en mode DVD.
DISPLAY/
CALL TV/DVDPOWER
123
456
789 0
CH
SELECT/
ENTER
CH
MUTE
DVD MENU
AUDIO
ANGLE
TOP MENU
SLOW SLOW
RETURN
SUB TITLE
INPUT
SELECT
PLAY MODEPAUSE/STILL
OPEN/CLOSE
SETUP/
TV MENU
CANCEL
QUICK VIEW/
ZOOM
SLEEP
Préparation
Avant de faire fonctionner le DVD/CD, veuillez effectuer les
préparations suivantes.
1 Insérez le cordon d’alimentation c.a. dans une prise standard
polarisée de 120 V, 60 Hz.
• Si le cordon d’alimentation c.a. est branché pour la première
fois, attendez environ cinq secondes avant d’appuyer sur
POWER.
NOTA : Lorsque vous connectez d’autres équipements, débranchez
l’appareil de la prise secteur c.a.
2 Appuyez sur le bouton POWER de l’appareil ou sur la touche
correspondante de la télécommande pour allumer l’appareil.
L’indicateur d’alimentation POWER s’allume.
• Chaque pression sur POWER allume le téléviseur/DVD en
mode TV.
• Si vous utilisez un amplificateur, allumez-le.
3 Appuyez sur TV/DVD pour sélectionner
le mode DVD.
L’écran de démarrage du lecteur DVD
apparaît.
Affichage de l’état du disque
Appuyez sur DISPLAY/CALL. L’affichage de l’état du disque apparaît.
DVD
Numéro de titre
Numéro de chapitre
Temps de lecture échu
Temps total du titre
SEARCH SEARCH
SKIP
MARKER JUMP
PLAY
STOP
TV/CAP/TEXT
SKIP
REPEAT A-B
NOTA :
Si l’appareil ne fonctionne pas correctement :
L’électricité statique, etc., pourrait avoir nui
au fonctionnement du lecteur. Débranchez
l’alimentation c.a. une fois, puis rebranchez-la.
26
Fonctionnement
du disque
1/8
C
T
1/8 Eng DolbyDigital
Langue de l’audio
Type d’audio
1/19
0:07:18 2:02:31
1/8 Eng
Langue des sous-titres
Angle de caméra
1/1
Pour effacer l’affichage de l’état, appuyez de nouveau sur DISPLAY CALL.
CD audio
Temps de lecture échu sur la piste
Fonctionnement
du disque
Numéro de piste
Liste de lecture
1 / 8
T
0:02:31 0:53:09
Playlist
1 2 3 4 5 6 7 8
• Lorsque vous faites jouer un disque CD, l’affichage de l’état apparaît et
reste à l’écran.
Temps total de la piste
Page 75

Procédure de lecture
DISPLAY/
CALL TV/DVDPOWER
123
456
789 0
SELECT/
ENTER
MUTE
DVD MENU
AUDIO
ANGLE
TOP MENU
SLOW SLOW
SEARCH SEARCH
SKIP
MARKER JUMP
CH
CH
RETURN
SUB TITLE
INPUT
SELECT
PLAY MODEPAUSE/STILL
PLAY
STOP
TV/CAP/TEXT
OPEN/CLOSE
SETUP/
TV MENU
CANCEL
QUICK VIEW/
ZOOM
SLEEP
SKIP
REPEAT A-B
1 Appuyez sur TV/DVD pour
sélectionner le mode DVD.
Appuyez sur le bouton OPEN/
CLOSE de l’appareil ou sur la
touche correspondante de la
télécommande. Le plateau de
disque s’ouvre.
2 Placez un disque dans le plateau.
Placez-le avec l’étiquette imprimée
vers le haut et alignez-le avec les
guides pour le placer dans la
position correcte.
3 Appuyez sur OPEN/CLOSE ou
sur PLAY.
Le plateau de disque se referme
automatiquement.
L’écran du téléviseur passe à
« » et la lecture commence.
• Un menu apparaît si le disque
comporte un menu.
NOTA :
• Si un disque non compatible est chargé, «
Incorrect Disc » (Disque illisible), « Region Code
Error » (Erreur de code de région) ou « Parental
Error » (Erreur de contrôle parental) apparaît à
l’écran selon le type de disque chargé. Si ces
affichages apparaissent, vérifiez votre disque
(voyez les pages 25 et 27).
• Certains disques pourraient prendre une minute
ou plus avant de commencer la lecture.
• Si vous insérez un disque avec l’étiquette vers
le bas (donc dans le mauvais sens) et que vous
appuyez sur PLAY ou sur OPEN/CLOSE sur
l’appareil, « » est affiché pendant environ
six secondes puis « No disc » (Pas de disque)
ou « Incorrect Disc » (Disque illisible) apparaît.
• Certaines opérations de lecture de DVD
peuvent être configurées délibérément par les
producteurs de logiciel. Étant donné que cet
appareil lit les disques DVD conformément au
contenu du disque conçu par les producteurs de
logiciels, certaines fonctions de lecture pourraient
ne pas être disponibles. Consultez également les
instructions fournies avec les disques DVD.
4 Appuyez sur / ou / pour effectuer une sélection.
5 Appuyez sur SELECT.
• Le titre est sélectionné et la lecture commence.
6 Appuyez sur STOP pour arrêter la lecture.
•L’appareil mémorise le point d’arrêt, selon le disque. « » apparaît
à l’écran. Appuyez sur PLAY pour reprendre la lecture (à partir du
point d’arrêt de la scène).
• Si vous appuyez encore une fois sur STOP ou retirez le disque
(« » apparaît), l’appareil efface le point d’arrêt.
7 Appuyez sur OPEN/CLOSE.
Le plateau de disque s’ouvre.
Enlevez le disque et appuyez sur OPEN/CLOSE, puis sur POWER.
Le plateau de disque se referme automatiquement et l’appareil
s’éteint.
27
Page 76
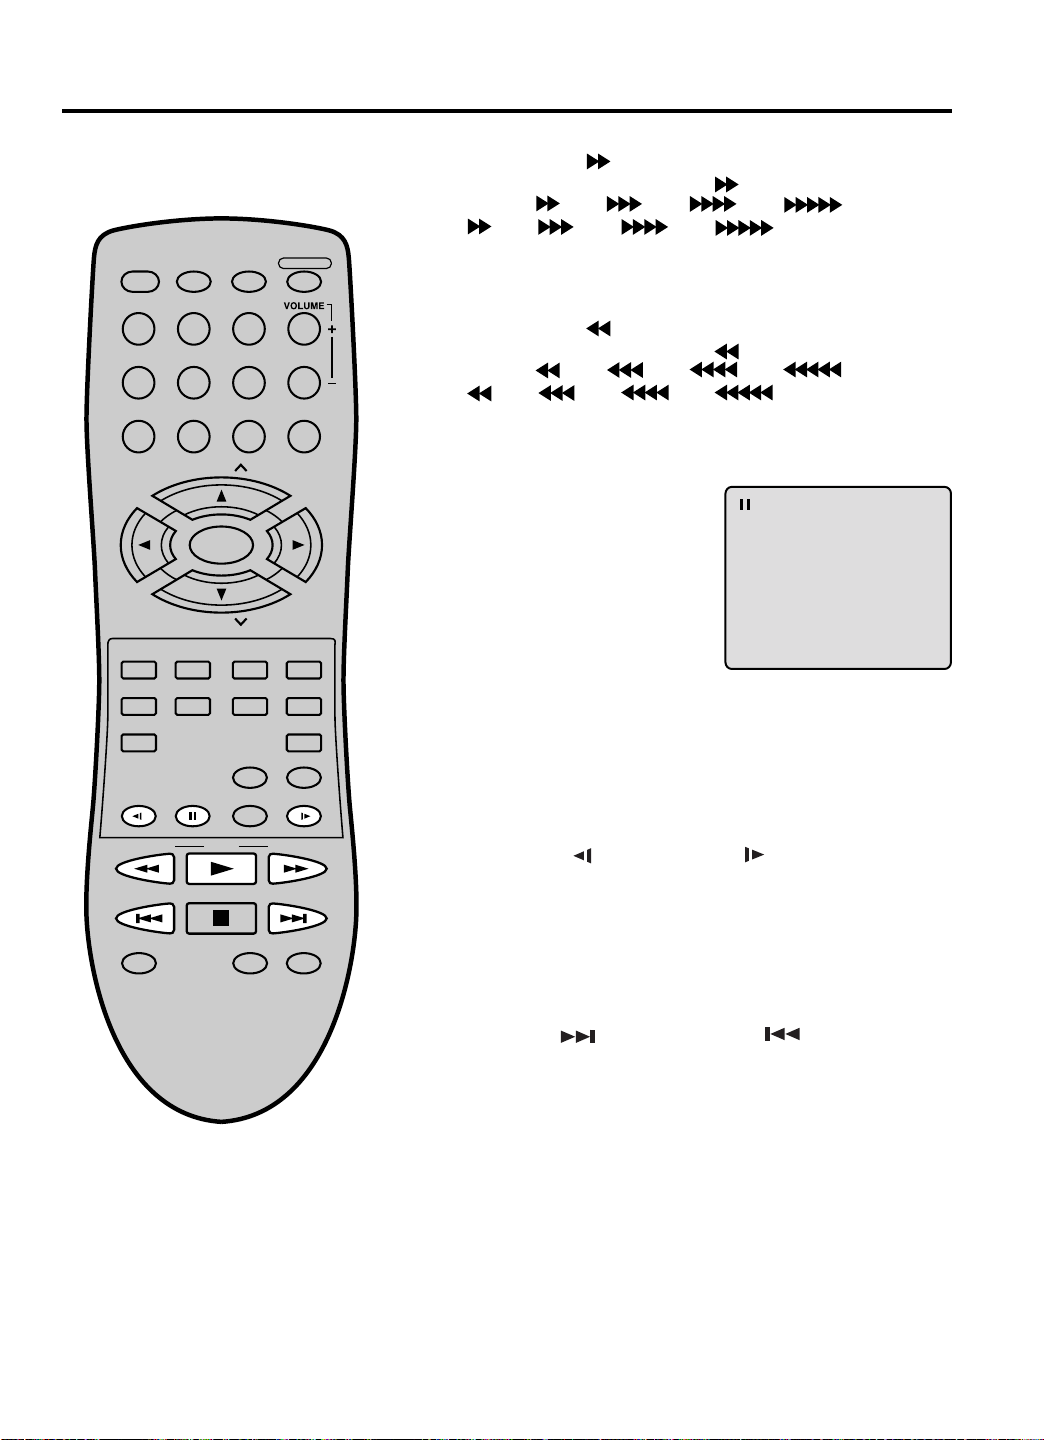
Lecture spéciale
Nota : Il pourrait y avoir un léger délai
entre la pression sur la touche et
l’activation de la fonction.
DISPLAY/
CALL TV/DVDPOWER
123
456
789 0
CH
SELECT/
ENTER
CH
MUTE
DVD MENU
AUDIO
ANGLE
TOP MENU
SLOW SLOW
SEARCH SEARCH
SKIP
MARKER JUMP
PLAY
STOP
TV/CAP/TEXT
RETURN
SUB TITLE
INPUT
SELECT
PLAY MODEPAUSE/STILL
OPEN/CLOSE
SETUP/
TV MENU
CANCEL
QUICK VIEW/
ZOOM
SLEEP
SKIP
REPEAT A-B
Avance rapide
Appuyez sur SEARCH pendant la lecture normale.
Chaque pression sur la touche SEARCH augmente la vitesse
de la recherche (x 2), (x 4), (x 8), (x 15).
[(CD : (x 2), (x 4), (x 8), (x 20)]
• Pour reprendre la lecture normale, appuyez sur PLAY.
Lecture de revue
Appuyez sur SEARCH pendant la lecture normale.
Chaque pression sur la touche SEARCH
de la recherche
[(CD :
(x 2), (x 4), (x 8), (x 20)]
(x 2), (x 4), (x 8), (x 15).
augmente la vitesse
• Pour reprendre la lecture normale, appuyez sur PLAY.
Lecture d’images fixes
Appuyez sur PAUSE/STILL pendant la
lecture normale pour faire une pause
de lecture.
Pour reprendre la lecture normale,
appuyez sur PLAY.
Avance image-par-image
Appuyez sur PAUSE/STILL pendant la lecture d’images fixes.
Chaque pression sur PAUSE/STILL fait avancer d’une image.
Pour reprendre la lecture normale, appuyez sur PLAY.
Lecture au ralenti
Appuyez sur SLOW ( ) Arrière ou SLOW ( ) Avant pendant la lecture
normale ou la lecture d’images fixes.
Chaque nouvelle pression sur SLOW ralentit la vitesse de x1/2, x1/4,
x1/6, x1/8.
• Pour reprendre la lecture normale, appuyez sur PLAY.
• Pour reprendre la lecture d’images fixes, appuyez sur PAUSE/STILL.
Repérage d’un chapitre ou d’une piste
Appuyez sur SKIP ( ) vers l’avant ou SKIP ( ) vers l’arrière
pendant la lecture pour repérer un chapitre que vous désirez visionner.
Chaque nouvelle pression sur la touche permet de sauter un chapitre
ou un e piste.
AVERTISSEMENT :
L’appareil peut afficher indéfiniment une image fixe
vidéo ou un affichage à l’écran du téléviseur. Si
vous laissez l’image vidéo fixe l’affichage à l’écran
affichée sur le téléviseur pendant une longue
période, vous risquez d’endommager l’écran
de façon permanente.
28
Page 77

Agrandissement/Repérage de la scène désirée
Agrandissement
Cet appareil vous permet d’agrandir sur l’image dans le cadre.
Vous pouvez alors effectuer des sélections en alternant la
position du cadre.
DISPLAY/
CALL TV/DVDPOWER
123
456
789 0
CH
OPEN/CLOSE
1 Appuyez sur ZOOM pendant la
lecture.
La portion centrale de l’image est
agrandie.
Chaque nouvelle pression sur
ZOOM change le ZOOM de
1 (x 2), 2 (x 3) à 3
(x 4).
1
2 Appuyez sur / / / pour visionner une portion
différente du cadre. Vous pouvez déplacer le cadre du
SELECT/
ENTER
centre vers le HAUT, le BAS, la GAUCHE ou la DROITE.
3 En mode d’agrandissement, appuyez plusieurs fois sur ZOOM
pour revenir au visionnement 1:1 ( désactivé).
CH
SETUP/
TV MENU
MUTE
DVD MENU
RETURN
AUDIO
ANGLE
TOP MENU
SLOW SLOW
SEARCH SEARCH
SKIP
MARKER JUMP
NOTA :
•Vous pouvez utiliser la pause, le ralenti ou la
recherche en mode zoom.
• Certains disques pourraient ne pas répondre
à la fonction de zoom.
PLAY
STOP
TV/CAP/TEXT
SUB TITLE
INPUT
SELECT
PLAY MODEPAUSE/STILL
CANCEL
QUICK VIEW/
ZOOM
SLEEP
SKIP
REPEAT A-B
Repérage d’une scène particulière
Utilisez le titre, le chapitre et l’heure enregistrée sur le disque
pour repérer le point que vous voulez faire jouer.
1 Appuyez sur JUMP pendant la
lecture.
2 Appuyez sur ou pour sélectionner «
Jump
_ _ / 19
1 / 8
0:00:00 / 2:02:31
/Enter/0 9/Cancel/Jump
(Chapitre) »,
C
« T (Titre/Piste) » ou « (Heure) ».
3 Appuyez sur les touches numériques (0 à 9) pour entrer le numéro.
• Si vous entrez un numéro incorrect, appuyez sur CANCEL.
• Consultez l’emballage fourni avec le disque pour vérifier les
numéros.
4 Appuyez sur ENTER.
• La lecture commence.
• Lorsque vous changez de titre, la lecture commence au chapitre 1
du titre sélectionné.
• Certains disques ne se prêtent pas à l’opération ci-dessus.
29
Page 78

Lecture répétée/aléatoire/programmée et répétition A-B
Appuyez sur PLAY MODE pendant la lecture ou pendant le mode d’arrêt.
Chaque nouvelle pression sur PLAY MODE modifie le mode de lecture comme suit :
DVD
Affichage
à l’écran
Fonctionnement
→ Title: Répète le titre en cours de lecture.
↓
Chapter: Répète le chapitre en cours de lecture.
↓
Off: Reprend la lecture normale.
• En mode d’arrêt, la touche PLAY MODE ne fonctionne pas.
SELECT/
ENTER
CH
SETUP/
TV MENU
DVD MENU
ANGLE
PLAY
STOP
RETURN
SUB TITLE
INPUT
SELECT
PLAY MODEPAUSE/STILL
CANCEL
QUICK VIEW/
ZOOM
SLEEP
SKIP
*Menu de programmation
Utilisez les touches numériques (0 à 9)
pour entrer le numéro de piste que vous
voulez programmer et appuyez sur
ENTER. Le numéro de piste et le temps
total sont affichés. Répétez cette étape
pour entrer des pistes supplémentaires.
Lorsque vous avez terminé d’entrer
des pistes, appuyez sur PLAY pour
commencer la lecture programmée.
Une liste de lecture de vos pistes
programmées est affichée.
MUTE
AUDIO
TOP MENU
SLOW SLOW
SEARCH SEARCH
SKIP
MARKER JUMP REPEAT A-B
NOTA :
• Si vous entrez un numéro incorrect, appuyez sur CANCEL.
• Pour annuler une programmation, appuyez trois fois sur STOP.
• Pour effacer les programmations du menu de programmation, appuyez sur CANCEL
jusqu’à ce que toutes les programmations soient effacées.
• La programmation est annulée lorsque vous ouvrez le plateau de disque et coupez
l’alimentation.
CD audio
Affichage
à l’écran
Fonctionnement
→ All: Répète l’intégralité du disque.
↓
Track: Répète la piste en cours de lecture.
↓
Random Play: Lit les pistes au hasard.
↓
*Program: Lit les pistes dans l’ordre programmé.
↓
(Status display): Reprend la lecture normale.
• En mode d’arrêt, vous ne pouvez sélectionner de
piste « Track ».
Program
1 5 8:29
2 8 8:54
3 3 7:31
__
4
Total 3 0:24:54
/Enter/0 9/Cancel/Play/PlayMode
5 / 8
T
Playlist
5 8 3
Program Playback
0:02:31 0:08:29
Répétion A-B
La Répétition A-B vous permet de répéter un segment sélectionné entre deux points.
1 Appuyez sur REPEAT A-B pendant la lecture.
A
Le point de départ est sélectionné.
2 Appuyez de nouveau sur REPEAT A-B.
Le point d’arrivée est sélectionné. La lecture commence au point de départ que
vous avez sélectionné. La lecture arrête au point d’arrivée, revient automatiquement
au point A et recommence.
Pour reprendre la lecture normale, appuyez de nouveau sur REPEAT A-B.
« Off » apparaît à l’écran.
NOTA :
• Certains disques ne se prêtent pas à l’opération de répétition.
• En mode de Répétition A-B, les sous-titres à proximité du point A ou B pourraient ne pas s’afficher.
• Certaines scènes d’un disque DVD pourraient ne pas pouvoir être répétées avec la fonction de Répétition A-B.
• La Répétition A-B ne fonctionne pas avec les disques DVD interactifs.
AB
30
Page 79

Marquage des scènes désirées
Le téléviseur/DVD sauvegarde les points
que vous voulez visionner de nouveau.
Vous pouvez reprendre la lecture à partir
de cette scène.
DISPLAY/
CALL TV/DVDPOWER
123
456
789 0
CH
SELECT/
ENTER
CH
MUTE
DVD MENU
AUDIO
ANGLE
TOP MENU
RETURN
SUB TITLE
INPUT
SELECT
OPEN/CLOSE
SETUP/
TV MENU
CANCEL
QUICK VIEW/
ZOOM
SLEEP
Marquage de scènes
1 Appuyez sur MARKER pendant la
lecture.
2 Sélectionnez le marqueur vide en
utilisant / et appuyez sur
ENTER à la scène désirée.
•Vous pouvez sélectionner jusqu’à
trois scènes.
• Répétez ces étapes pour régler
les deux autres scènes.
3 Appuyez sur MARKER pour effacer
l’affichage.
Retour aux scènes
1 Appuyez sur MARKER pendant la
lecture ou pendant le mode d’arrêt.
Marker
C
T
1
C
T
2
C
T
3
/Enter/Cancel/Marker
Marker
C
T
1
C
T
2
C
T
3
/Enter/Cancel/Marker
Marker
C
T
1
1
C
T
1
2
C
T
3
1
08 50013
3
4
6
08 500
12 270
17 040
SLOW SLOW
SEARCH SEARCH
SKIP
MARKER JUMP
NOTA :
• Le marquage est annulé lorsque vous ouvrez le
plateau de disque et coupez l’alimentation.
• Certains sous-titres enregistrés autour du
marqueur pourraient ne pas apparaître. [DVD]
PLAY MODEPAUSE/STILL
PLAY
STOP
TV/CAP/TEXT
SKIP
REPEAT A-B
/Enter/Cancel/Marker
Marker
C
T
1
2 Appuyez sur ou pour
sélectionner le marqueur 1 à 3.
1
2
3
3
C
T
1
4
C
T
1
6
3 Appuyez sur SELECT.
La lecture commence à partir
de la scène marquée.
Pour annuler la marque
/Enter/Cancel/Marker
1 Appuyez sur MARKER.
2 Appuyez sur ou pour sélectionner le marqueur 1 à 3.
3 Appuyez sur CANCEL.
08 500
12 270
17 040
31
Page 80

Changement de la langue de la piste sonore/des sous-titres
Changement de la langue de la piste sonore
Vous pouvez sélectionner la langue lorsque vous lisez un disque
multilingue.
DISPLAY/
CALL TV/DVDPOWER
123
456
789 0
CH
SELECT/
ENTER
CH
MUTE
DVD MENU
AUDIO
ANGLE
TOP MENU
SLOW SLOW
RETURN
SUB TITLE
INPUT
SELECT
PLAY MODEPAUSE/STILL
OPEN/CLOSE
SETUP/
TV MENU
CANCEL
QUICK VIEW/
ZOOM
SLEEP
1 Appuyez sur AUDIO pendant la
lecture.
La langue de la piste sonore en
cours apparaît.
2/8 Fra Dolby Digital
2 Appuyez plusieurs fois sur AUDIO
jusqu’à ce que la langue voulue
soit sélectionnée.
Le menu disparaît après quelques
secondes.
Sous-titres
Activation et désactivation des sous-titres
Pendant la lecture d’un disque enregistré avec des sous-titres,
vous pouvez les activer ou les désactiver.
Appuyez sur SUB TITLE pendant la
lecture jusqu’à ce que « Off » apparaisse.
1/8 Eng Dolby Digital
Off
NOTA :
• Si vous n’entendez pas la langue voulue après
avoir appuyé plusieurs fois sur SUB TITLE, elle
n’est pas enregistrée sur le disque.
• Le changement de la langue de la piste sonore
est annulé lorsque vous ouvrez le plateau de
disque. La langue par défaut initiale ou la langue
disponible est entendue si le disque est lu de
nouveau.
• Le changement de la langue des sous-titres est
annulé lorsque vous ouvrez le plateau de disque.
• Certaines fonctions pourraient ne pas opérer sur
certains disques DVD. Il pourrait être impossible
d’activer, de désactiver ou de changer les soustitres. Pendant la lecture d’un disque DVD, les
sous-titres peuvent changer lorsque :
- vous ouvrez ou fermez le plateau de disque
- vous changez le titre.
• Dans certains cas, la langue des sous-titres
sélectionnée ne change pas immédiatement.
32
Changement de la langue des sous-titres
Vous pouvez sélectionner la langue lorsque vous faites jouer
un disque enregistré avec des sous-titres en plusieurs langues.
1 Appuyez plusieurs fois sur
SUB TITLE pendant la lecture
jusqu’à ce que la langue désirée
apparaisse.
1/32 Eng
2 Le menu disparaît après quelques secondes.
Page 81

Changement d’angles/Sélection de titres/Menu du DVD
Changement d’angle
Pendant la lecture d’un disque enregistré avec plusieurs angles,
vous pouvez changer l’angle de vision.
DISPLAY/
CALL TV/DVDPOWER
123
456
789 0
OPEN/CLOSE
1 Appuyez sur ANGLE pendant
la lecture.
L’angle actuel apparaît.
1/9
CH
SELECT/
ENTER
CH
ANGLE
RETURN
SUB TITLE
INPUT
SELECT
PLAY MODEPAUSE/STILL
PLAY
STOP
TV/CAP/TEXT
QUICK VIEW/
REPEAT A-B
MUTE
DVD MENU
AUDIO
TOP MENU
SLOW SLOW
SEARCH SEARCH
SKIP
MARKER JUMP
SETUP/
TV MENU
CANCEL
ZOOM
SLEEP
SKIP
2 Appuyez plusieurs fois sur ANGLE jusqu’à ce que l’angle
voulu soit sélectionné.
Sélection de titre
Certains disques sont enregistrés avec plus d’un titre. Si le menu
du titre est enregistré sur le disque, vous pouvez sélectionner
celui de votre choix.
1 Appuyez sur TOP MENU pendant la lecture.
Le menu du titre apparaît à l’écran.
2 Appuyez sur / ou / pour sélectionner le titre voulu.
3 Appuyez sur ENTER ou sur PLAY.
La lecture du titre sélectionné commence.
Menu DVD
Certains disques DVD vous permettent de sélectionner leur contenu
à partir du menu.
Pendant la lecture de ces disques DVD, vous pouvez sélectionner la
langue des sous-titres et lalangeu de la piste sonore, etc., à partir du
menu du disque DVD.
1 Appuyez sur DVD MENU pendant la lecture.
Le menu du disque DVD apparaît à l’écran.
• Appuyez de nouveau sur DVD MENU pour reprendre la lecture à la
scène où vous avez appuyé sur DVD MENU.
NOTA :
• Certains disques DVD pourraient ne pas
permettre de changer d’angles, même si
des angles multiples y sont enregistrés.
• Sur certains disques DVD, il pourrait être
impossible de sélectionner un titre. Sur certains
disques DVD, un « menu de titre » pourrait
simplement être appelé un « menu » ou un « titre
» dans les instructions fournies avec
le disque.
2 Appuyez sur / ou / pour sélectionner l’article voulu.
3 Appuyez sur ENTER.
Le menu continue vers un autre écran. Répétez les étapes 2 et 3
pour régler d’autres articles au besoin.
33
Page 82

Sélection de la langue
Vous pouvez changer les réglages par
défaut pour personnaliser la performance
selon vos préférences.
DISPLAY/
CALL TV/DVDPOWER
123
456
789 0
CH
SELECT/
ENTER
CH
MUTE
DVD MENU
AUDIO
ANGLE
TOP MENU
SLOW SLOW
SEARCH SEARCH
SKIP
MARKER JUMP
PLAY
STOP
RETURN
SUB TITLE
INPUT
SELECT
PLAY MODEPAUSE/STILL
OPEN/CLOSE
SETUP/
TV MENU
CANCEL
QUICK VIEW/
ZOOM
SLEEP
SKIP
REPEAT A-B
1 Appuyez sur TV/DVD pour
sélectionner le mode DVD.
Appuyez sur SETUP en mode
d’arrêt ou Pas de disque.
Appuyez sur ou pour
sélectionner la langue « Language
», puis sur
Main Menu
Language
Picture
Sound
Parental
/Enter/Setup/Return
ou sur ENTER.
2 Appuyez sur ou pour
sélectionner la langue d’affichage «
OSD Language », puis sur
ou sur ENTER.
Language
OSD Language English
Menu English
Audio English
Subtitle English
/Enter/Setup/Return
3 Appuyez sur ou pour
sélectionner la langue (par ex.
English), puis sur ENTER.
Le menu revient automatiquement
au menu des langues « Language ».
OSD Language
English
Francais
Espanol
• Si vous voulez revenir au menu
précédent, appuyez sur ou
/Enter/Setup/Return
RETURN.
4 Répétez les étapes 2 et 3 pour les autres réglages de langue «
Language ».
Autre sélection : (Menu/Audio/Sous-titres)
Si vous voulez sélectionnez une autre langue, entrez le code
de langue (Voyez la liste des codes de langue à la page 40).
Off: (Sous-titres)
Les sous-titres n’apparaissent pas.
5 Appuyez sur SETUP pour effacer l’écran de menu.
TV/CAP/TEXT
NOTA :
• Si la langue de la piste audio sélectionnée
n’est pas enregistrée sur le disque, vous
entendez la langue originale.
• Si la langue des sous-titres sélectionnée n’est
pas enregistrée sur le disque, la langue
prioritaire est sélectionnée.
34
Page 83

Réglage du rapport hauteur/
largeur de l’écran du téléviseur/affichage à l’écran
Réglage du rapport hauteur / largeur de l’écran
du téléviseur
Vous pouvez sélectionner le rapport hauteur/largeur de votre téléviseur.
DISPLAY/
CALL TV/DVDPOWER
123
456
789 0
CH
SELECT/
ENTER
CH
MUTE
DVD MENU
AUDIO
ANGLE
TOP MENU
SLOW SLOW
SEARCH SEARCH
SKIP
MARKER JUMP
PLAY
STOP
TV/CAP/TEXT
RETURN
SUB TITLE
INPUT
SELECT
PLAY MODEPAUSE/STILL
OPEN/CLOSE
SETUP/
TV MENU
CANCEL
QUICK VIEW/
ZOOM
SLEEP
SKIP
REPEAT A-B
1 Appuyez sur TV/DVD pour
sélectionner le mode DVD.
Appuyez sur SETUP en mode
d’arrêt
Appuyez sur ou pour sélectionner
l’image « Picture », puis sur ENTER.
ou Pas de disque.
2 Appuyez sur ou pour
sélectionner l’image « Picture »,
puis sur
ou sur ENTER.
3 Appuyez sur ou pour
sélectionner le type d’écran puis
sur ENTER.
Vous pouvez choisir entre les
formats d’écran suivants :
16:9
Sélectionnez ce mode si vous connectez l’appareil à un téléviseur
à grand écran. Une image en format grand écran est affichée
entièrement.
4:3 Boîte à lettres
Sélectionnez ce mode si vous connectez l’appareil à un téléviseur à
écran conventionnel. Pendant la lecture d’un disque DVD pour grand
écran, il affiche l’image élargie avec des bandes noires en haut et en
bas de l’écran.
4:3 Panoramique et balayage
Affiche une grande image sur tout l’écran et les côtés gauche
et droit sont automatiquement coupés.
• Si vous voulez revenir au menu précédent, appuyez sur
ou sur RETURN.
Grand écran
Main Menu
Language
Picture
Sound
Parental
/Enter/Setup/Return
Picture
TV Screen
Display
TV Screen
16:9
4:3
4:3
4:3
On
4 Appuyez sur SETUP pour effacer l’écran de menu.
État de l’affichage
L’affichage à l’écran peut être activé ou désactivé lorsque vous
appuyez sur les boutons.
NOTA :
Si le disque DVD n’est pas formaté dans le style
panoramique et balayage, il affiche le style 4:3.
1 Appuyez sur TV/DVD pour sélectionner le mode DVD.
Appuyez sur SETUP en mode d’arrêt ou Pas de disque.
Appuyez sur ou pour sélectionner l’image « Picture »,
puis sur ou ENTER
2 Appuyez sur ou pour
sélectionner l’affichage « Display ».
3 Appuyez sur ou ENTER pour
sélectionner d’activer « On »
ou de désactiver « Off ».
On : L’affichage à l’écran apparaît lorsque vous appuyez sur
les boutons (réglages usine).
Off: Les affichages à l’écran n’apparaissent pas lorsque vous
appuyez sur les boutons.
• Si vous voulez revenir au menu précédent, appuyez sur
ou sur RETURN.
Picture
TV Screen
Display
On
Picture
TV Screen
Display
Off
4 Appuyez sur SETUP pour effacer le menu à l’écran.
4:3
4:3
35
Page 84

Contrôle de la plage dynamique
DRC (Dynamic Range Control) vous
permet de contrôler la plage dynamique
en vue d’atteindre un son qui convient à
votre équipement.
DISPLAY/
CALL TV/DVDPOWER
123
456
789 0
CH
SELECT/
ENTER
CH
MUTE
DVD MENU
AUDIO
ANGLE
TOP MENU
SLOW SLOW
RETURN
SUB TITLE
INPUT
SELECT
PLAY MODEPAUSE/STILL
OPEN/CLOSE
SETUP/
TV MENU
CANCEL
QUICK VIEW/
ZOOM
SLEEP
1 Appuyez sur TV/DVD pour
sélectionner le mode DVD.
Appuyez sur SETUP en mode
d’arrêt ou Pas de disque.
Appuyez sur ou pour
sélectionner le son « Sound ».
Main Menu
Language
Picture
Sound
Parental
/Enter/Setup/Return
2 Appuyez sur ou ENTER
pour sélectionner « DRC ».
Sound
DRC On
/Enter/Setup/Return
3 Appuyez sur ou ENTER
pour activer « On » ou
désactiver « Off ».
Sound
DRC Off
/Enter/Setup/Return
• Si vous voulez revenir au menu précédent, appuyez sur ou sur
RETURN.
4 Appuyez sur SETUP pour effacer le menu à l’écran.
SEARCH SEARCH
SKIP
MARKER JUMP
PLAY
STOP
TV/CAP/TEXT
SKIP
REPEAT A-B
NOTA :
• Cette fonction opère seulement pendant la lecture
des disques enregistrés en Dolby Digital.
• Le niveau de réduction de la plage dynamique varie
d’un disque DVD à l’autre.
36
Page 85

Réglage du contrôle parental
Certains disques sont spécifiés comme
ne convenant pas à des enfants. La
lecture de tels disques peut être
bloquée par l’appareil
DISPLAY/
CALL TV/DVDPOWER
123
456
789 0
CH
SELECT/
ENTER
CH
MUTE
DVD MENU
AUDIO
ANGLE
TOP MENU
SLOW SLOW
SEARCH SEARCH
PLAY
RETURN
SUB TITLE
INPUT
SELECT
PLAY MODEPAUSE/STILL
OPEN/CLOSE
SETUP/
TV MENU
CANCEL
QUICK VIEW/
ZOOM
SLEEP
1 Appuyez sur TV/DVD pour
sélectionner le mode DVD.
Appuyez sur SETUP en mode
d’arrêt ou Pas de disque.
Appuyez sur ou pour
sélectionner « Parental », puis
sur ou sur ENTER.
2 Appuyez sur ou pour
sélectionner « Parental Level »,
puis sur ou sur ENTER.
3 Appuyez sur ou pour
sélectionner un niveau de
désactivation (Off) ou 1 à 8.
Appuyez sur ou ENTER pour
valider le niveau sélectionné.
Main Menu
Language
Picture
Sound
Parental
/Enter/Setup/Return
Parental
Password Off
Parental Level Off
Parental Level
Off
1
2
3
4
5
/Enter/Setup/Return
• Niveau désactivé : Le contrôle parental est désactivé.
• Niveau 8 : Presque tous les logiciels de disque DVD peuvent
être lus.
• Niveau 1 : Le logiciel de disque DVD pour adultes ne peut être lu.
• Sélectionnez entre le niveau 1 et 8. La limite sera plus rigoureuse
vers les chiffres plus bas.
4 Appuyez sur ou pour
sélectionner l’option de mot de
passe « Password », puis
sur ou sur ENTER.
Parental
Password Off
Parental Level 1
SKIP
MARKER JUMP
NOTA :
• Si chaque réglage (pp. 34 à 38) a été complété,
l’appareil peut toujours fonctionner dans les
mêmes conditions (surtout avec les disques
DVD).
Chaque réglage est mémorisé à l’extinction.
• Si le disque n’a pas de code, l’appareil ne peut
restreindre sa lecture.
• Certains disques pourraient ne pas être codés
selon un niveau spécifique de classification, bien
que la pochette du disque indique « adulte ».
Pour ces disques, les restrictions d’âge ne
fonctionneront pas.
STOP
TV/CAP/TEXT
SKIP
REPEAT A-B
5 Appuyez sur les touches numériques
(0 à 9) pour entrer le mot de passe.
N’oubliez pas votre mot de passe.
Password
Password 1234
• Si vous entrez un numéro
incorrect, appuyez sur CANCEL.
6 Appuyez sur ENTER pour enregistrer
le mot de passe.
Nota : Le niveau de classification
est maintenant verrouillé et ne
Parental
Password On
Parental Level 1
peut être changé sans entrer le
bon mot de passe.
• Si vous voulez revenir au menu précédent, appuyez sur
ou sur RETURN.
7 Appuyez sur SETUP pour effacer le menu de contrôle parental.
37
Page 86

Modification du contrôle parental
Appuyez sur TV/DVD pour sélectionner le mode DVD.
1
Appuyez sur SETUP en mode d’arrêt ou Pas de disque.
DISPLAY/
CALL TV/DVDPOWER
123
OPEN/CLOSE
Appuyez sur
puis sur
2 Appuyez sur ou pour
sélectionner l’option de mot de
passe « Password », puis
sur ou sur ENTER.
ou pour sélectionner « Parental »,
ou sur ENTER.
Parental
Password On
Parental Level 1
456
789 0
CH
SELECT/
ENTER
CH
SETUP/
TV MENU
ANGLE
RETURN
SUB TITLE
INPUT
SELECT
PLAY MODEPAUSE/STILL
PLAY
STOP
TV/CAP/TEXT
CANCEL
QUICK VIEW/
ZOOM
SLEEP
SKIP
REPEAT A-B
MUTE
DVD MENU
AUDIO
TOP MENU
SLOW SLOW
SEARCH SEARCH
SKIP
MARKER JUMP
3 Appuyez sur les touches
numériques (0 à 9) pour entrer
le mot de passe.
• Si vous entrez un numéro
incorrect, appuyez sur CANCEL.
4 Appuyez sur ENTER.
Le mot de passe est maintenant
désactivé (Off).
5 Appuyez sur ou pour
sélectionner le niveau de restriction
« Parental Level ». Appuyez ensuite
sur ou sur ENTER. Le niveau
de restriction parentale est affiché.
6 Appuyez sur ou pour
sélectionner un niveau entre
désactivé (Off) et 1 à 8, puis
appuyez sur ou sur ENTER.
7 Appuyez sur ou pour
sélectionner le mot de passe
« Password », puis sur ou
sur ENTER.
Password
Password ____
Parental
Password Off
Parental Level 1
Parental
Password Off
Parental Level1
Parental
Password Off
Parental Level 8
NOTA :
Si vous oubliez votre mot de passe…
En mode DVD Pas de disque, maintenez
simultanément appuyé le bouton STOP sur
l’appareil et le chiffre 7 sur la télécommande
pendant plus de trois secondes. « PASSWORD
CLEAR » apparaît à l’écran. Le mot de passe
est effacé.
38
8 Appuyez sur les touches
numériques (0 à 9) pour entrer
le mot de passe à quatre chiffres.
Nota : Vous pouvez entrer un
nouveau mot de passe.
9 Appuyez sur ENTER.
Le niveau de restriction est alors
modifié et verrouillé.
• Si vous voulez revenir au menu
précédent, appuyez sur ou
sur RETURN.
10
Appuyez sur SETUP pour effacer l’écran du contrôle parental.
Password
Password 1234
Parental
Password On
Parental Level 8
Page 87

Certains disques DVD pourraient essayer
Your disc exceeds the parental control level.
Password
____
Enter/0–9/Cancel/Return
de désactiver temporairement le niveau
de restriction que vous avez réglé.
Il vous appartient de décider d’annuler
ou non le niveau de restriction.
Suspension temporaire du niveau
de catégorie par le disque DVD
1 Insérez un disque DVD et appuyez
sur PLAY (voyez la page 27).
DISPLAY/
CALL TV/DVDPOWER
123
456
789 0
CH
SELECT/
ENTER
CH
MUTE
DVD MENU
AUDIO
ANGLE
TOP MENU
SLOW SLOW
RETURN
SUB TITLE
INPUT
SELECT
PLAY MODEPAUSE/STILL
OPEN/CLOSE
SETUP/
TV MENU
CANCEL
QUICK VIEW/
ZOOM
SLEEP
2 Si le disque DVD a été créé pour annuler temporairement le
niveau de restriction (ou de classification), l’écran qui apparaît
après son insertion va changer, selon le disque lu. Si vous
sélectionnez oui « YES » avec la touche ENTER le message «
Your disc exceeds the parental control level. » (Votre disque
dépasse la limite du contrôle parental.) apparaît.
3 Si vous voulez annuler temporairement le niveau de restriction,
entrez le mot de passe à quatre chiffres.
Appuyez ensuite sur ENTER.
Par contre, si le mot de passe n’a pas été défini, la lecture
commence. Si vous ne connaissez pas (ou avez oublié) le
mot de passe, sélectionnez « STOP ».
L’écran de réglage disparaît. Appuyez sur OPEN/CLOSE
pour retirer le disque.
Pour quitter l’entrée, appuyez sur RETURN.
SEARCH SEARCH
SKIP
MARKER JUMP
NOTA :
Le niveau de restriction reste désactivé jusqu’à
ce que le disque soit éjecté.
Lorsque le disque est éjecté, le niveau de
restriction original est automatiquement rétabli.
PLAY
STOP
TV/CAP/TEXT
4 La lecture commence si le mot de passe entré est correct.
SKIP
REPEAT A-B
39
Page 88

Liste des codes de langue
Entrez le code de langue qui correspond aux réglages initiaux « AUDIO », « SUBTITLE » et (ou) « MENU LANGUAGE »
(voyez la page 34).
Code du nome langue
Abkhazian 1112
Afar 1111
Afghan 2629
Afrikaans 1116
Aïmara 1135
Albanais 2927
Allemand 1415
Amharique 1123
Anglais 1524
Arabe 1128
Arménien 1835
Assamais 1129
Azerbaïdjanais 1136
Bachkir 1211
Basque 1531
Bengali 1224
Code du nome langue Code du nome langue Code du nome langue
Espagnol 1529
Espéranto 1525
Estonien 1530
Féringien 1625
Fidjien 1620
Finnois 1619
Français 1628
Frison 1635
Gaélique d’Écosse 1714
Galicien 1722
Gallois 1335
Géorgien 2111
Grec 1522
Groenlandais 2122
Guarani 1724
Gujarati 1731
Laotien 2225
Latin 2211
Letton 2232
Lingala 2224
Lituanien 2230
Macédonien 2321
Malais 2329
Malayalam 2322
Malgache 2317
Maltais 2330
Maori 2319
Marathi 2328
Mashona 2924
Moldave 2325
Mongol 2324
Nago 3525
Sanskrit 2911
Serbe 2928
Serbo-croate 2918
Siamois 3018
Sindhi 2914
Slovaque 2921
Slovène 2922
Somali 2925
Soudanais 2931
Suédois 2932
Swahili 2933
Tadjik 3017
Tagalog 3022
Tamoul 3011
Tatar 3030
Tchèque 1329
Bhoutanais 1436
Biélorusse 1215
Bihari 1218
Birman 2335
Breton 1228
Bulgare 1217
Cambodgien 2123
Canara 2124
Catalan 1311
Chinois 3618
Cinghalais 2919
Coréen 2125
Corse 1325
Croate 1828
Danois 1411
Haoussa 1811
Hébreu 1933
Hindi 1819
Hongrois 1831
Indonésien 1924
Interlangue 1911
Irlandais 1711
Islandais 1929
Italien 1930
Japonais 2011
Javanais 2033
Kachméré 2129
Kazakh 2121
Kirghiz 2135
Kurde 2131
Nauru 2411
Néerlandais 2422
Népalais 2415
Norvégien 2425
Oriya 2528
Ouolof 3325
Panjabi 2611
Persan 1611
Polonais 2622
Portugais 2630
Quechua 2731
Rhéto-roman 2823
Roumain 2825
Russe 2831
Samoan 2923
Telugu 3015
Tibétain 1225
Tigrigna 3019
Tongan 3025
Turc 3028
Türkmène 3021
Twi 3033
Ukrainien 3121
Urdu 3128
Uzbek 3136
Vietnamien 3219
Volapük 3225
Xhosa 3418
Yiddish 2019
Zoulou 3631
40
Page 89
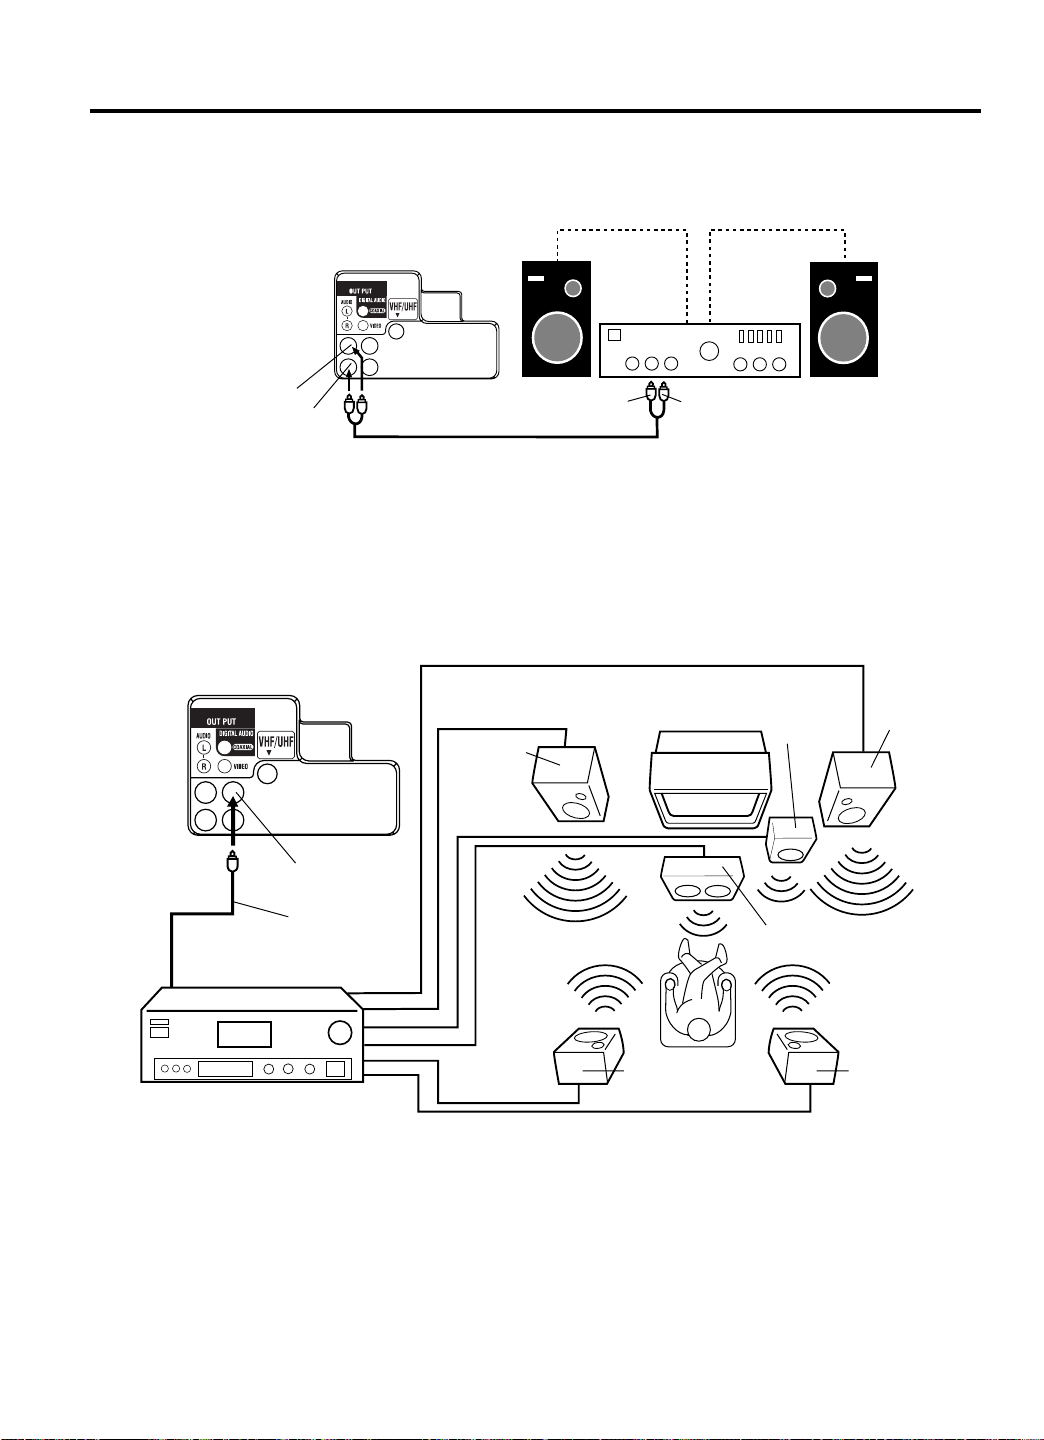
Connexion vers d’autres équipements
La configuration exacte que vous utilisez pour interconnecter plusieurs composants vidéo et audio au téléviseur/DVD dépend
du modèle et des fonctions de chaque composant. Consultez le manuel de l’utilisateur fourni avec chaque composant pour
repérer l’emplacement des entrées et des sorties vidéo et audio.
Utilisation d’un amplificateur audio
Arrière du téléviseur/DVD
Amplificateur
Sortie Audio (L) (gauche)
Sortie Audio (R) (droite)
Vers l’entrée Audio
(R) (droite)
Cordon AUDIO (non fourni)
Vers l’entrée Audio
(L) (gauche)
Utilisation d’un amplificateur AV avec ambiophonie intégrée
Si vous utilisez un amplificateur avec ambiophonie numérique intégrée, comme il est illustré ci-dessous, vous pouvez
profiter de plusieurs système audio, dont l’ambiophonie Dolby Digital qui produit un son comparable à celui du film.
Connexion d’un amplificateur A/V avec décodeur Dolby Digital intégré, décodeur DTS, décodeur MPG comme il
est illustré ci-dessous.
Arrière du téléviseur/DVD
Haut-parleur
avant (droite)
numérique coaxiale
Câble numérique
coaxial (non fourni)
Vers l’entrée audio
numérique coaxiale
Sortie audio
Haut-
parleur
avant
(gauche)
Téléviseur/DVD
Extrêmes
graves
Haut-parleur du centre
Haut-parleur
ambiophonique
Amplificateur AV avec décodeur
ambiophonique numérique intégré,
tel qu’il est indiqué plus haut.
* Fabriqué sous licence de Dolby Laboratories. « Dolby » et le symbole à double D sont des marques de commerce de
Dolby Laboratories. Travaux confidentiels non publiés. ©1992-1997 Dolby Laboratories, Inc. Tous droits réservés.
*« DTS » et « DTS Digital Out » sont des marques de commerce déposées de Digital Theater Systems, Inc.
NOTA :
• Lorsque vous effectuez les connexions ci-dessus avec l’amplificateur A/V, ne réglez pas DOLBY DIGITAL à DOLBY DIGITAL
ou MPEG à MPEG activé « ON ». Sinon les haut-parleurs émettront un son très fort qui pourrait endommager votre ouïe ou les
haut-parleurs.
• Certains décodeurs DTS qui ne supportent pas l’interface DVD-DTS pourraient ne pas fonctionner correctement avec cet appareil.
(gauche)
Haut-parleur
ambiophonique
(droite)
41
Page 90

Connexion vers d’autres équipements
Utilisation des entrées audio/vidéo
Si vous connectez le téléviseur/DVD à un magnétoscope, un camescope ou à une console de jeux vidéo, vous devez
accéder au canal d’entrée de ligne en appuyant sur la touche INPUT SELECT.
Appuyez sur plusieurs fois sur INPUT SELECT pour sélectionner le mode désiré.
« LINE » ou TV Channel sera affiché à l’écran.
Pour connecter le téléviseur/DVD à un magnétoscope.
Appuyez sur la touche INPUT SELECT pour sélectionner le mode désiré afin d’utiliser le téléviseur comme moniteur.
Utilisez votre magnétoscope comme d’habitude.
NOTA :
Cette touche ne fonctionne
pas en mode DVD.
LINE
Magnétoscope
ENTRÉE VIDÉO
Vers Audio/Video OUT
Avant du téléviseur/DVD
(MONO)
PHONES VIDEO IN L – AUDIO IN – R
ENTRÉE AUDIO (DROITE)
ENTRÉE AUDIO (GAUCHE)
Cordon audio/vidéo (non fourni)
Pour connecter le téléviseur à un camescope
Pour lire à partir du camescope, connectez le camescope au téléviseur/DVD, comme il est illustré.
Camescope
ENTRÉE VIDÉO
Vers Audio/Video OUT
Avant du téléviseur/DVD
(MONO)
PHONES VIDEO IN L – AUDIO IN – R
ENTRÉE AUDIO (DROITE)
ENTRÉE AUDIO (GAUCHE)
Cordon audio/vidéo (non fourni)
Pour connecter le téléviseur à une console de jeux vidéo
Le téléviseur/DVD peut également être utilisé comme afficheur pour plusieurs jeux vidéo. Toutefois, la grande variété des
formats ne permet pas de tous les inclure dans les schémas de connexions. Vous aurez besoin de consulter le manuel
de l’utilisateur de chaque composant pour obtenir des informations supplémentaires.
42
CONSOLE DE JEUX VIDÉO
Vers Audio/Video OUT
Cordon audio/vidéo (non fourni)
ENTRÉE VIDÉO
Avant du téléviseur/DVD
(MONO)
PHONES VIDEO IN L – AUDIO IN – R
ENTRÉE AUDIO (DROITE)
ENTRÉE AUDIO (GAUCHE)
Page 91

Problèmes et dépannage
Utilisez la liste de vérification ci-dessous pour vous dépanner si vous éprouvez des problèmes avec votre appareil.
Consultez votre détaillant local ou un centre de service si le problème persiste.
Assurez-vous que toutes les connexions sont effectuées correctement lorsque vous utilisez d’autres appareils.
SYMPTÔMES SOLUTIONS POSSIBLES
ALIMENTATION
• Assurez-vous que le cordon d’alimentation est branché.
• Essayez une autre prise secteur c.a.
Le téléviseur/DVD ne fonctionne pas.
•L’alimentation est coupée, vérifiez les fusibles ou le disjoncteur.
• Débranchez l’appareil, puis rebranchez-le.
• Connectez le cordon c.c. pour voiture dans l’allume cigare.
• Le fusible du cordon c.c. pour voiture est noyé, remplacez le fusible.
RÉCEPTION D’ÉMISSIONS TÉLÉDIFFUSÉES
Son faible ou inexistant
Image de piètre qualité ou inexistante.
Piètre réception sur certains canaux
Piètre couleur ou pas de couleur
L’image vacille ou dérive
Aucune réception CATV
• La station ou CATV a des problèmes, syntonisez une autre station.
• Vérifiez les réglages de volume.
• La station ou CATV a des problèmes, syntonisez une autre station.
• Vérifiez les connexions CATV; réorientez l’antenne.
• Vérifiez le réglage des commandes de l’image.
• La station ou CATV a des problèmes, syntonisez une autre station.
• Le signal de la station est faible, réorientez l’antenne pour recevoir
une station plus faible.
• La station ou CATV a des problèmes, syntonisez une autre station.
• Assurez-vous que les canaux sont mémorisés.
• Vérifiez le réglage des commandes de l’image.
• Vérifiez les connexions CATV; réorientez l’antenne.
• La station ou CATV a des problèmes, syntonisez une autre station.
• Assurez-vous que les canaux sont mémorisés.
• Le fournisseur CATV brouille le signal
• Vérifiez l’orientation de l’antenne.
• Vérifiez toutes les connexions CATV.
• Réglez l’option de menu TV/CATV au mode CATV.
• La station ou le système CATV a des problèmes,
essayer une autre station.
PAGE
11,12
15
15
15
12,13
23
15
12,13
15
19
23
12,13
15
19
–
12
13
18
15
Lignes horizontales ou diagonales
à l’écran
Aucune réception après le canal 13
Le téléviseur est éteint
Fermé – les sous-titres ne sont
pas activés.
L’affichage n’est pas dans la
langue voulue.
• Vérifiez les connexions d’antenne; réorientez l’antenne.
• Assurez-vous que l’option de menu TV/CATV est dans le mode approprié.
• Si vous utilisez une antenne, vérifiez les connexions d’antenne UHF.
• Aucune diffusion sur la station syntonisée
• Le minuteur est activé.
• Coupure de courant
• La station de télévision a des problèmes ou l’émission syntonisé n’a
pas de sous-titres. Essayez un autre canal.
• Vérifiez la connexion CATV ou l’antenne VHF/UHF, repositionnez ou
déplacez l’antenne.
• Appuyez sur la touche TV/CAT/TEXT ou activez le décodeur de
sous-tirtres.
• Sélectionnez la langue qui convient dans les options de menu.
12,13
18
12
19
16
–
15
12,13
17
14
43
Page 92

Problèmes et dépannage
SYMPTÔMES SOLUTIONS POSSIBLES
DVD
La lecture ne commence pas.
Absence d’image
Pas de son
L’image est déformée pendant
l’exécution des fonctions CUE ou
REVIEW.
Impossible d’arrêter la lecture, la
recherche, la lecture au ralenti, la
répétition ou la lecture programmée, etc.
Pas d’image 4:3 (16:9)
Aucun affichage à l’écran
Pas de son ambiophonique
Cet appareil ou cette touche
d’exécution ne fonctionne pas.
• Aucun disque n’est inséré.
• Le disque est peut-être sale. Nettoyez le disque.
•L’appareil ne peut lire des CD-ROM, etc.
• Le sélecteur du téléviseur/DVD n’est pas réglé correctement.
• Vérifiez si le sélecteur d’entrée de l’amplificateur est réglé
correctement.
•L’appareil est en mode de lecture spéciale.
• Sélectionnez la position correcte de sortie audio sur l’amplificateur AV.
•L’image sera déformée à l’occasion.
• Certains disques pourraient ne pas exécuter ces fonctions.
• Le réglage ne correspond pas à votre téléviseur.
• Sélectionnez l’activation de l’affichage.
• Le réglage ne correspond pas à votre système stéréo.
• Éteignez l’appareil et débranchez le cordon d’alimentation c.a.
pendant quelques minutes puis rebranchez-le.
PAGE
27
25
6, 25
26
–
28
41
–
–
35
35
41
–
Playback does not start when the title
is selected.
La piste audio et (ou) la langue des
sous-titres ne change pas lorsque
vous faites jouer un disque DVD.
Pas des sous-titres
L’angle ne peut être changé.
« » apparaît à l’écran
TÉLÉCOMMANDE
La télécommande ne fonctionne pas.
• Vérifiez le réglage du niveau de filtrage RATING LEVEL.
• Des langues multiples ne sont pas enregistrées sur le disque DVD.
• Certains disques ne contiennent pas de sous-titres.
• Les sous-titres sont effacés. Appuyez sur SUB TITLE
• Des angles multiples ne sont pas enregistrés sur le disque DVD.
• La fonction est interdite avec l’appareil ou avec le disque.
• Pointez la télécommande vers son capteur.
• Utilisez-la à environ 5 m (16 pieds) ou réduisez l’éclairage dans la
pièce.
• Dégagez l’aire de passage du faisceau.
• Les piles sont faibles. Remplacez les piles.
• Vérifiez que les piles sont insérées correctement.
37~39
34
32
33
–
11
44
Page 93

Fiche technique
GÉNÉRALITÉS
Source d’alimentation :
Consommation d’énergie :
Poids :
Dimensions :
Température de
fonctionnement :
Humidité de
fonctionnement :
TÉLÉVISEUR
Tube à image :
Type de syntoniseur:
Canaux de réception :
Entrée d’antenne :
Haut-parleur :
Alimentation
de sortie audio :
c.a. 120 V 60 Hz
c.c. 12 V
Fonctionnement : 55 W (c.a. 120 V, c.c. 12 V)
Mise en attente : 5 W (c.a. 120 V, 3 W (c.c. 12 V)
8 kg (17,61 lb)
Largeur : 278 mm (10-15/16 po)
Hauteur : 311,5 mm (12-1/4 po)
Profondeur : 312,5 mm (12-5/16 po)
5°C à 40°C
Moins de 80 %
229 mm diagonale (9 po)
Synthétiseur au quartz à boucle d’asservissement en phase
VHF 2-13
UHF 14 à 69
CATV 14 à 36 (A)-(W)
37 à 59 (AA)-(WW)
60 à 85 (AAA)-(ZZZ)
86 à 94 (86) à (94)
95 à 99 (A-5)-(A-1)
100 à 125 (100) à (125)
01 (5A)
VHF/UHF In 75 ohms coaxial
76 mm (3 po), 8 ohms x 2
1,2 W + 1,2 W
Lecteur DVD/CD
Système de signal :
Disque applicable :
Caractéristiques audio
réponse de fréquence :
Ratio S/N :
Distorsion harmonique :
Vacillement et
papillotement :
Entrée/Sortie :
Sortie audio numérique :
Prise :
ACCESSOIRES :
NTSC
1. DVD (12 cm, 8 cm)
2. CD (12 cm, 8 cm)
DVD : 4 Hz -22 KHz
CD : 4 Hz -20 KHz
90 dB
0,06 %
Inférieur au niveau mesurable
Entrées : Vidéo : (RCA) 1 Vp-p/75 ohms
Audio : (RCA) –8 dBm/50 Kohms
Sorties : Vidéo : (RCA) 1 Vp-p/75 ohms
Audio : (RCA) –12 dBm/1 Kohms
0,5Vp-p 75 ohms fermé
CD : Longueur d’one : 775 - 815 nm
Alimentation de sortie maximale : 0,5 mW
DVD : Longueur d’onde : 650 - 666 nm
Alimentation de sortie maximale : 2,0 mW
Télécommande
Piles (AAA) x 2
Antenne télescopique
Cordon d’alimentation pour voiture de 12 V c.c.
45
Page 94

Garantie limitée RCA du téléviseur/DVD
Ce que couvre votre garantie :
• Les défauts de matériaux ou de fabrication.
Durée après l’achat :
• 90 jours à partir de la date d’achat pour les frais de main-d’œuvre.
• Un (1) an à partir de la date d’achat pour les pièces.
• Deux (2) ans à partir de la date d’achat pour le tube cathodique.
La période de garantie pour les appareils loués commence à la première location ou 45 jours après la date d’expédition à
l’entreprise de location, la première date prévalant.
Ce que nous ferons :
Nous rembourserons à un centre de service agréé pour les téléviseurs RCA les frais de main-d’œuvre encourus pour
réparer votre appareil.
Nous rembourserons à un centre de service agréé pour les téléviseurs RCA le coût du tube à image et des pièces de
rechange neuves ou remises à neuf, à notre choix, que nécessitera la réparation de votre appareil.
Pour obtenir le service :
• Pour les écrans de 26 po et moins : Apportez votre appareil RCA dans un centre de service agréé pour les téléviseurs
RCA et retournez le chercher lorsqu’il est réparé.
• Pour les écrans de plus de 26 po : Demandez un service à domicile ou de cueillette et retour d’un centre de service
agréé pour les téléviseurs RCA, à condition que votre appareil se situe dans un territoire géographique couvert par le
centre de service agréé pour les téléviseurs RCA. Dans le cas contraire, vous devez apporter votre téléviseur/DVD, à
vos frais, dans un centre de service ou payer le coût facturé par le centre de service pour le transport du téléviseur/DVD
entre votre domicile et le centre.
• Pour connaître le centre de service autorisé RCA le plus près de chez vous, demandez à votre détaillant, consultez les
Pages Jaunes ou téléphonez au 1 800 336-1900.
• Un preuve d’achat, comme une facture ou une quittance de facture qui indique que le produit respecte la période de la
garantie, doit être présentée pour obtenir un service sous garantie. Pour les entreprises de location, la preuve de la
première location est également exigée.
Ce que ne couvre pas votre garantie :
• La formation client. (Votre Manuel de l’utilisateur décrit l’installation, les réglages et le fonctionnement de votre produit.
Toute information supplémentaire devrait être obtenue auprès de votre dépositaire).
•L’installation et les réglages connexes.
• Les problèmes de réception de signal qui ne sont pas causés par votre téléviseur/DVD.
• Les dommages dus au mauvais usage ou à la négligence.
• Les piles.
• Les images brûlées sur l'écran.
• Les téléviseur/DVD modifiés, incorporés à d’autres produits ou utilisés à des fins institutionnelles ou commerciales.
• Les appareils achetés ou réparés à l’extérieur des États-Unis.
• Les cas de force majeure tels que, mais sans s’y limiter, les dommages par la foudre.
Enregistrement du produit :
•Veuillez remplir le formulaire en ligne d’enregistrement du produit sur ou remplir et poster la carte d’enregistrement
emballée avec l’appareil. Nous pourrons alors vous contacter plus facilement, si nécessaire. Le retour de la carte
n’est pas obligatoire aux fins de la garantie.
46
Page 95

Limitation de la garantie :
LA GARANTIE ÉNONCÉE CI-DESSUS EST LA SEULE GARANTIE APPLICABLE POUR CE PRODUIT. TOUTE AUTRE
GARANTIE EXPRESSE OU IMPLICITE (Y COMPRIS TOUTE GARANTIE IMPLICITE DE QUALITÉ MARCHANDE
OU D’ADAPTATION À UN USAGE PARTICULIER) EST DÉCLINÉE PAR LA PRÉSENTE. AUCUNE INFORMATION
DONNÉE VERBALEMENT OU PAR ÉCRIT PAR THOMSON INC., PAR SES AGENTS OU PAR SES EMPLOYÉS NE
CONSTITUERA UNE GARANTIE OU N’ÉTENDRA LA PORTÉE DE LA PRÉSENTE GARANTIE.
LA RÉPARATION OU LE REMPLACEMENT, TELS QU’OFFERTS PAR CETTE GARANTIE CONSTITUENT LE SEUL
RECOURS DU CONSOMMATEUR. THOMSON INC. NE SERA AUCUNEMENT RESPONSABLE DES DOMMAGES
INDIRECTS OU CONSÉCUTIFS RÉSULTANT DE L’UTILISATION DE CE PRODUIT OU DE L’INOBSERVATION DE
QUELQUE GARANTIE QUE CE SOIT IMPLICITE OU EXPLICITE POUR CE PRODUIT. CETTE EXONÉRATION DE
GARANTIES ET LA PRÉSENTE GARANTIE LIMITÉE SONT RÉGIES PAR LES LOIS DE L’ÉTAT D’INDIANA. SAUF POUR
LES DISPOSITIONS PROHIBÉES PAR LES LOIS APPLICABLES, TOUTE GARANTIE IMPLICITE DE QUALITÉ
MARCHANDE OU D’ADAPTATION À UN USAGE PARTICULIER RELATIVE À CE PRODUIT EST LIMITÉE À LA
PÉRIODE DE GARANTIE APPLICABLE TELLE QUE DÉCRITE CI-DESSUS.
L’effet des lois provinciales sur cette garantie :
Certaines provinces ou juridictions ne permettent pas l’exclusion ou la limitation des dommages indirects ou consécutifs,
non plus que les limitations implicites quant à la durée d’une garantie, de sorte que les limitations ou exclusions énoncées
ci-dessus pourraient être nulles dans votre cas.
Cette garantie vous confère des droits juridiques spécifiques qui s’ajoutent aux autres droits éventuels qui peuvent varier
d’une province à l’autre.
Si vous avez acheté votre appareil à l’extérieur des États-Unis :
Cette garantie est nulle. Renseignez-vous auprès de votre détaillant au sujet de la garantie.
Les visites de service ne concernant pas un défaut de matériaux ou de fabrication ne sont pas couvertes en vertu
de cette garantie. L’acheteur est entièrement responsable des coûts de telles visites de service.
47
Page 96

Visitez le site Web RCA à l’adresse www.rca.com
Nous vous prions de ne pas envoyer de produits à l’adresse d’Indianapolis indiquée dans ce
manuel ou sur l’emballage, ce qui ne ferait que retarder la réparation de votre produit.
Thomson Inc.
10330 North Meridian Street
Indianapolis, IN 46290
©2003 Thomson Inc.
Marque(s) de commerce® déposée(s)
Marca(s) Registrada(s)
Imprimé en Thaïlande
TOCOM 16255890
THOMSON
 Loading...