

Rain Bird STP-400i Installation, Programming & Operation Manual
Simple To Program (STPi) Controller
Installation, Programming & Operation Guide
637418-01 Rev B (STP user manual) source.indd 1 3/7/2008 5:23:54 PM

Hole provided to hang manual next to controller.
637418-01 Rev B (STP user manual) source.indd 2 3/7/2008 5:23:54 PM

1
STPi Controller Operation Manual
Thank you for Purchasing the Rain Bird Simple To Program Controller! In the following pages, you
will find step by step instructions on how to use every function included in your STPi Controller.
Thanks again and we hope you enjoy your new Controller.
Welcome! Simple To Program (STPi) Controller
Contents
Controller Functions ........................................................... 2
Set Clock .............................................................................. 3
Set Date ............................................................................... 4
Schedule Watering ............................................................. 5
Water Now ........................................................................... 6
Rain Delay ........................................................................... 7
Adjust Water ........................................................................ 8
Normal Operation ............................................................... 9
Mounting Controller......................................................... 10
Connecting Power Cord ................................................... 11
Master Valve or Pump Start Relay ................................... 12
Connecting Rain Sensor ................................................... 14
Troubleshooting ............................................................... 15
Programming Chart.......................................................... 16
637418-01 Rev B (STP user manual) source.indd 1 3/7/2008 5:23:54 PM
STPi Controller Operation Manual
2
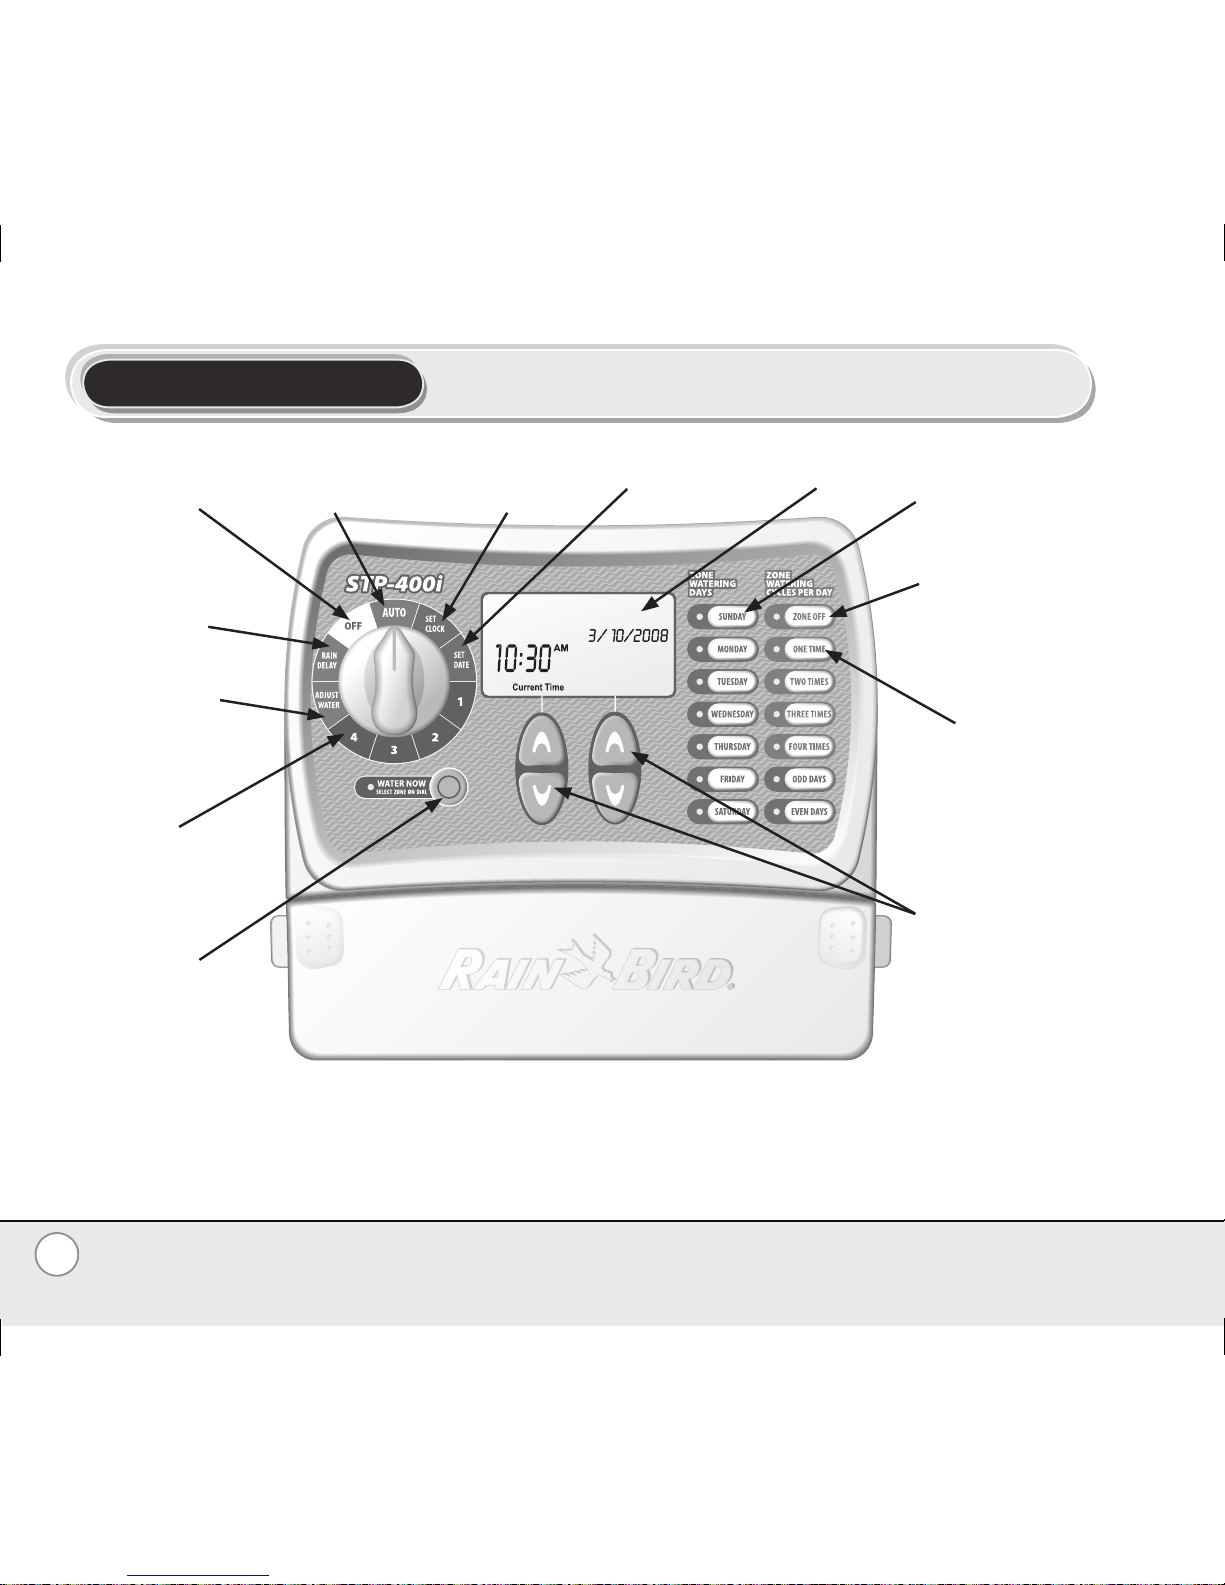
Controller Functions
The diagram below shows the controls and displays for your new
Controller. Use this to become familiar with the Controller functions.
NOTE: Always begin by turning the dial to the position you want to make a change to and then make your changes
!
using the options and information displayed to the right of the dial. For example, if you want to set a schedule for
Zone 1 in your yard, first turn the dial to “1” and then make your changes using the buttons to the right and below the
display screen.
OFF
Turns off
ALL watering
AUTO
Set dial here to run your
programmed settings
SET CLOCK
Set current
time of day
SET DATE
Set current date
DISPLAY
SCREEN
RAIN DELAY
Delays watering
up to 72 hours
ADJUST WATER
Adjusts watering
amount (%) as
seasons change
ZONES 1-9
Program watering
for each zone (4 Zone
model shown)
WATER NOW
Manually waters
any zone
WATERING DAYS
Select which day(s)
the displayed zone
is watered
ZONE OFF
Shuts off the
displayed watering
zone
WATERING TIMES
Select how many
times per day the
displayed zone is
watered
UP/DOWN
ARROWS
Use UP/DOWN
arrows on left or
right to set time,
date, run time,
start time, etc.
637418-01 Rev B (STP user manual) source.indd 2 3/7/2008 5:23:56 PM

3
STPi Controller Operation Manual
Set Clock
To input the current time into the Controller, follow these steps below:
Step 1
Turn dial to
SET CLOCK
Step 2
Use left UP/
DOWN arrow
keys to adjust
current time
NOTE: Reset dial to AUTO position after making
!
any adjustments to the programming.
NOTE: Verify that the AM/PM setting
!
is correct when setting time
637418-01 Rev B (STP user manual) source.indd 3 3/7/2008 5:23:57 PM
STPi Controller Operation Manual
4
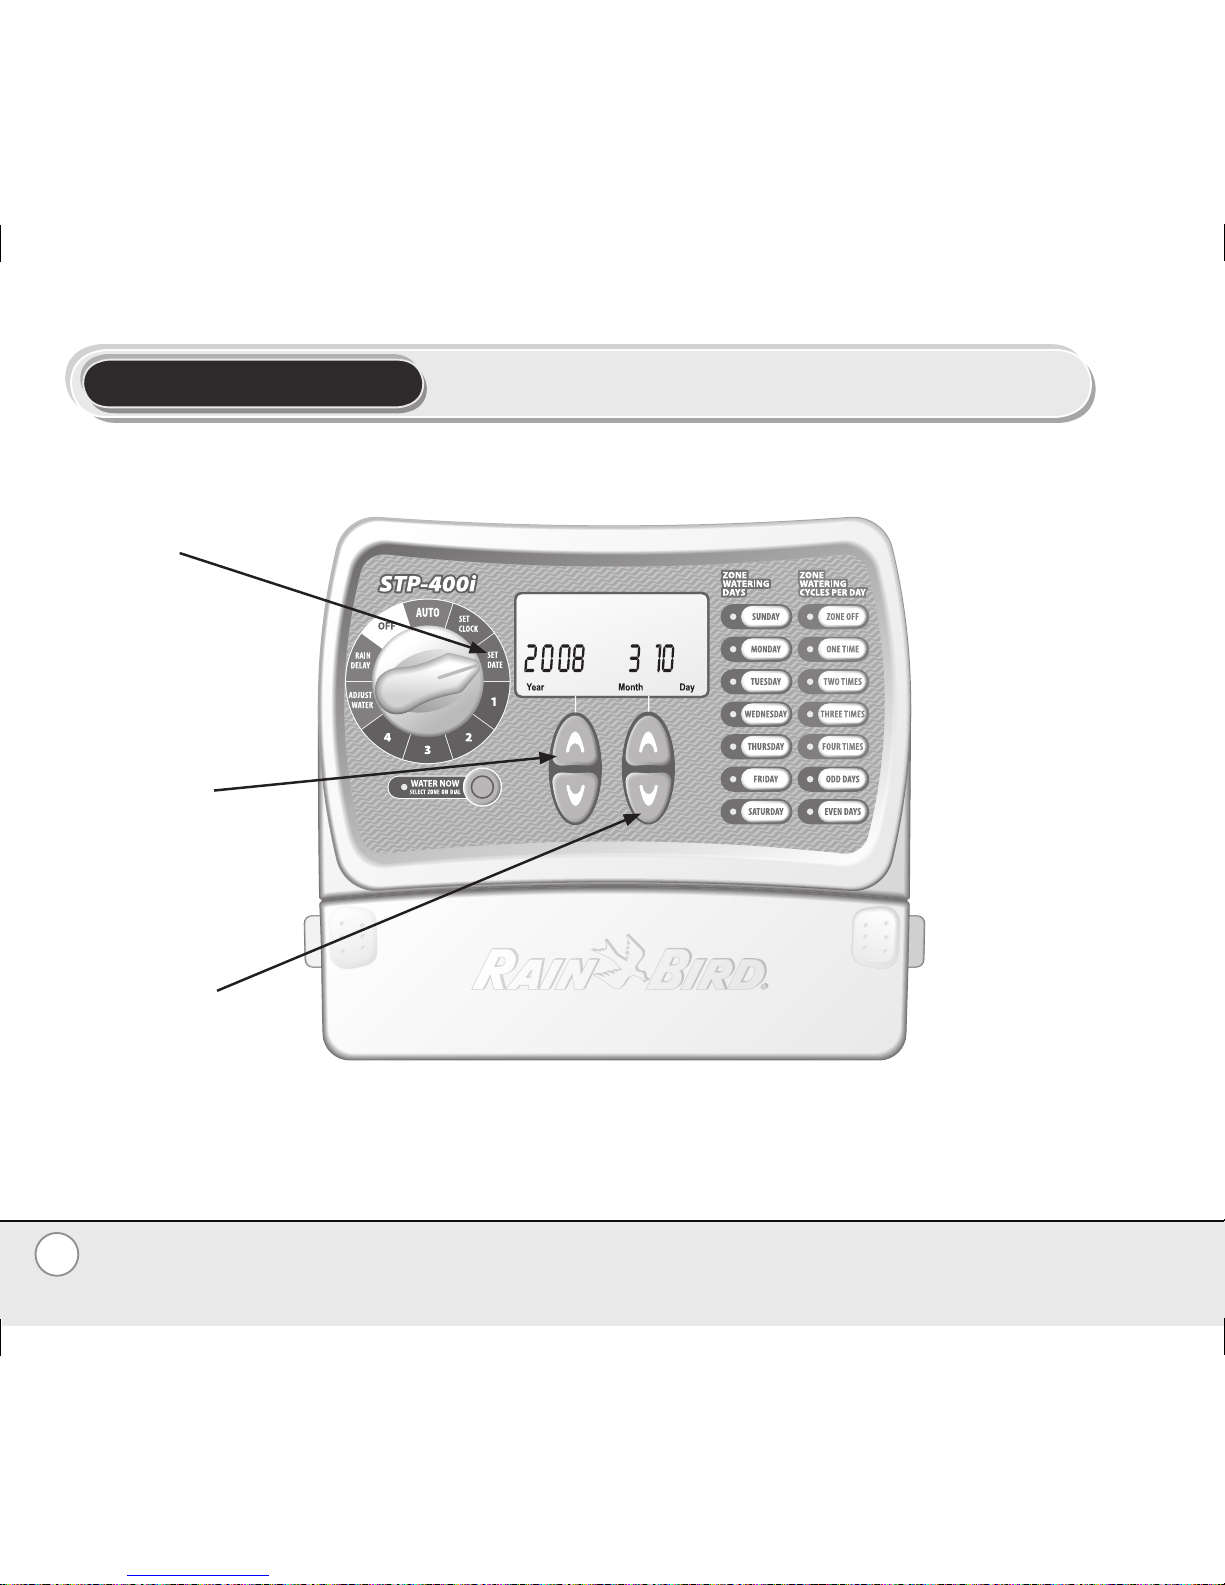
Set Date
To input the current date into the Controller, follow these steps below:
Step 1
Turn dial to
SET DATE
Step 2
Use left UP/
DOWN arrow
keys to select
current year
NOTE: Reset dial to AUTO position after making
!
any adjustments to the programming.
Step 3
Use right UP/
DOWN arrow
keys to select
current month
and day
637418-01 Rev B (STP user manual) source.indd 4 3/7/2008 5:23:59 PM
 Loading...