

Page 1

Golf Rotor Sod Cup Kit Installation Instructions
Align wide tab on ange cover with wide
➊
space on case.
Using a Phillips head screw driver remove
➌
screws from top of rotor.
Press ange cover onto case ange working
➋
from wide tab towards valve switch, until
ange cover snaps into place.
Align the adjustment ports on sod cup with
➍
the adjustment screws on rotor.
Place sod cup on top of rotor and secure
➎
with screws.
www.rainbird.com
Using a standard golf hole cutter cut a sod
➏
plug. Trim plug to a sod depth of 1 ¼ inches.
Trim plug to clear nozzle relief ramp. Place a
small slice in the center of the plug to accept
the pull up tab.
Install sod into cup
and press rmly
into place.
® Registered Trademark of Rain Bird Corporation © 2018 Rain Bird Corporation 12/18 P/N: 213851
1¼"
Page 2
Golf Rotor Sod Cup Kit Rotor Adjustment
PRS / Valve Adjustment
Access OFF/ON/Auto and PRS adjustment
➊
through tooling tower.
Push tool through X shaped access port.
➋
Full/Part Circle Adjustment
Remove sod plug from sod cup.
➊
Using at head screw driver, press through
➋
x shaped access port, and select full or part
circle mode.
Replace sod plug.
➌
Arc Adjustment
Remove sod plug from sod cup.
➊
Using at head screw driver , press through
➋
x shaped access port, adjust arc to desired
angle.
Replace sod plug.
➌
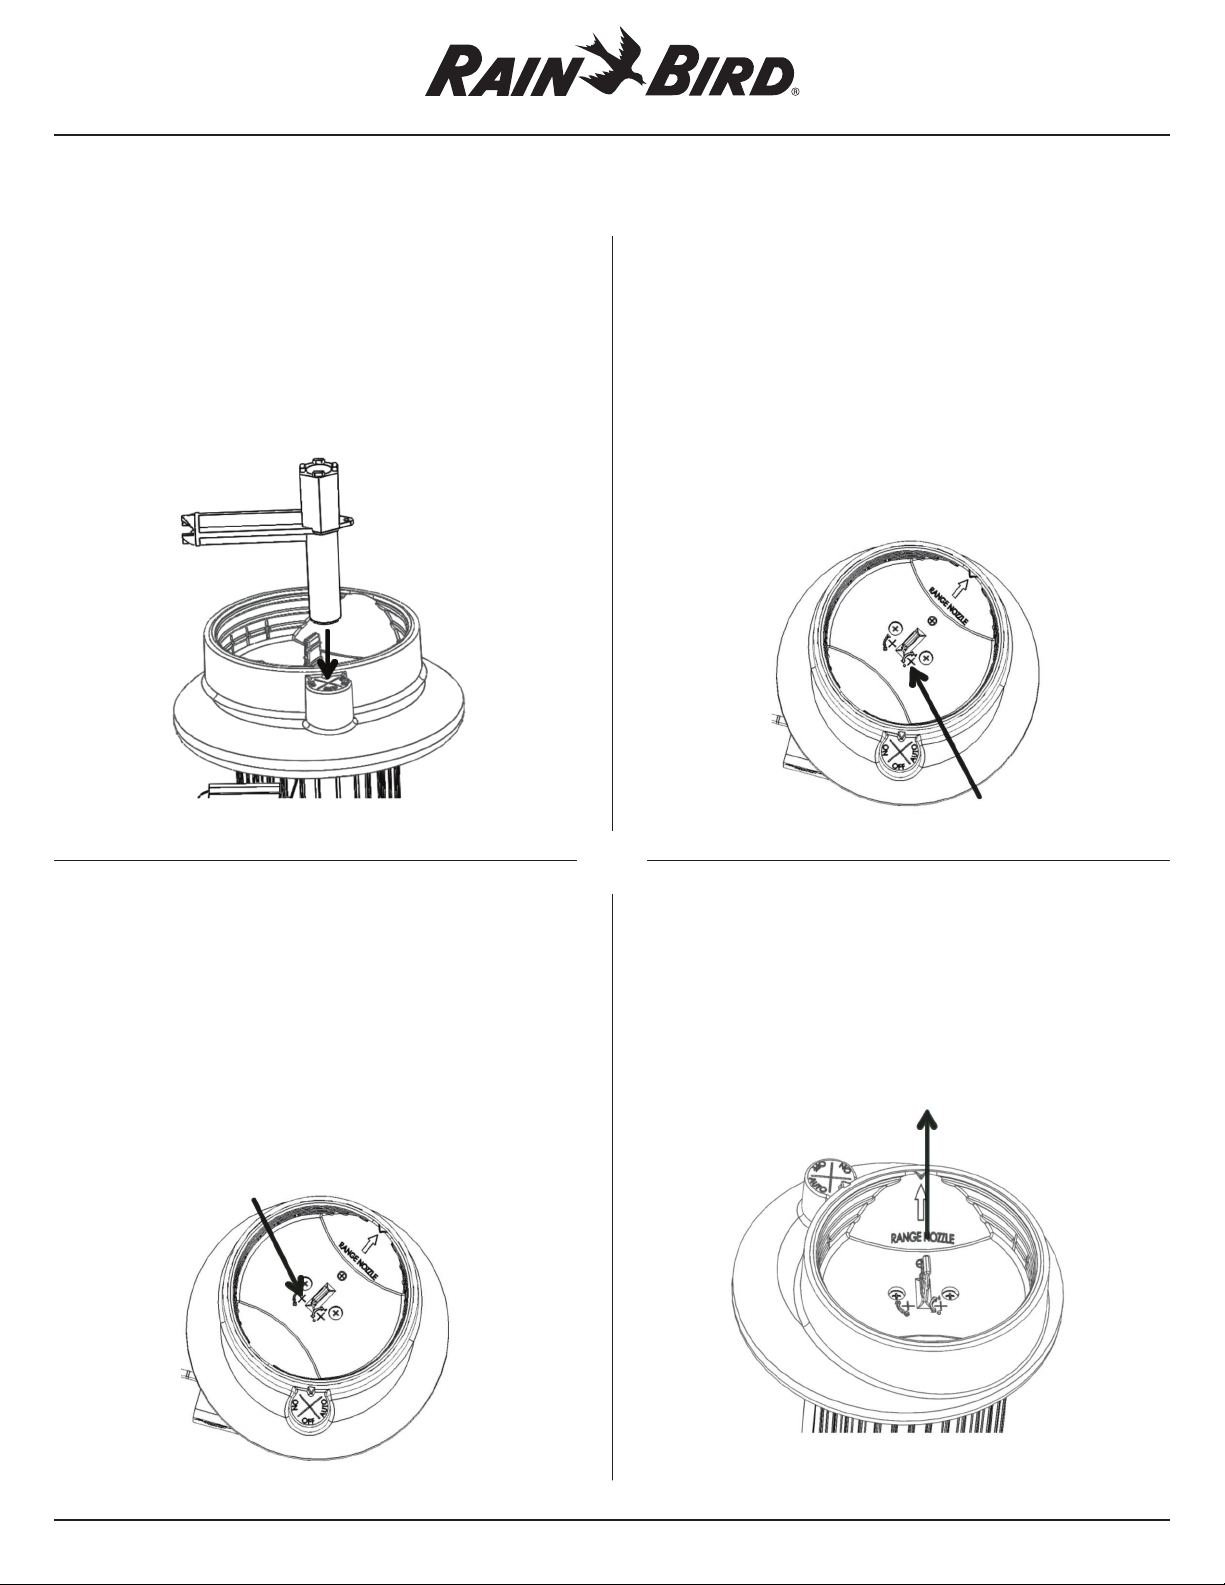
Nozzle Inspection
Remove sod plug from sod cup.
➊
Use pull up tab to pull sprinkler head up to
➊
inspect nozzle.
www.rainbird.com
® Registered Trademark of Rain Bird Corporation © 2018 Rain Bird Corporation 12/18 P/N: 213851
 Loading...