

Page 1
CY CLIK™ Micro
Programming Guide
Mode A
This mode is used to permit
watering or prevent any valve
from opening. It overrides
both manual or programmed
valve opening.
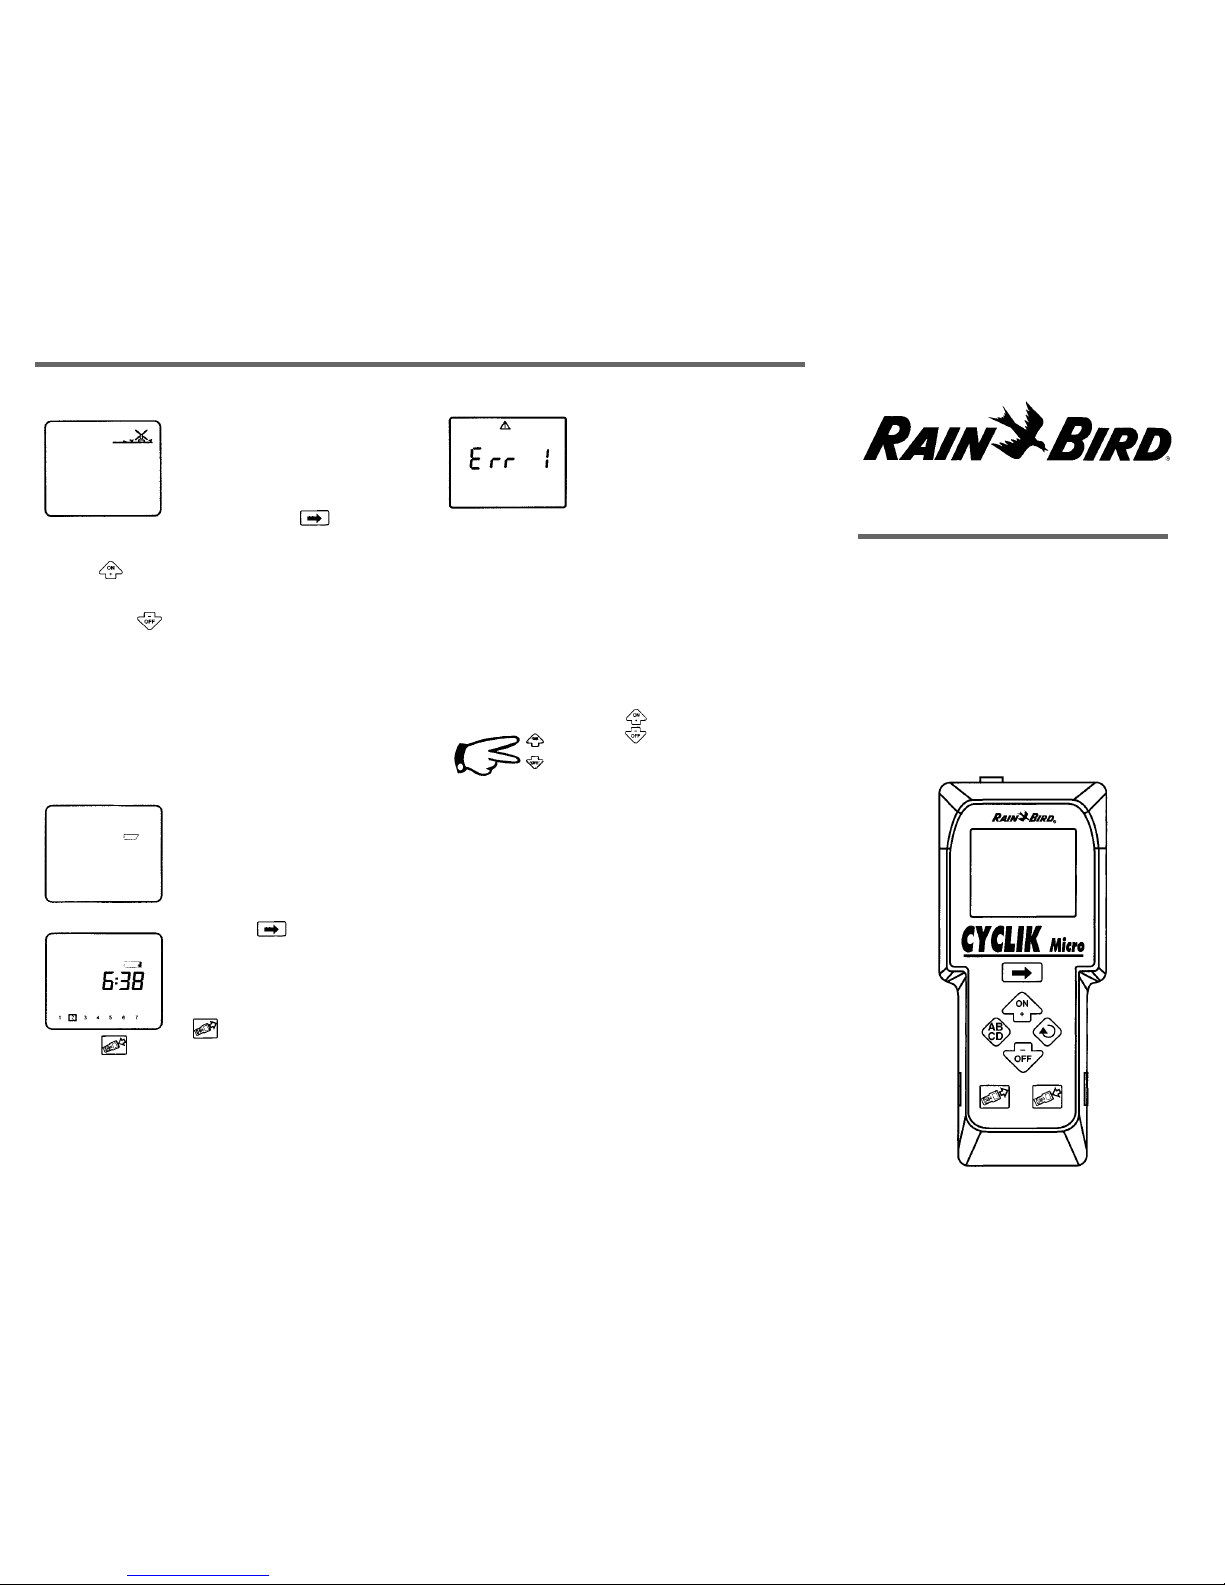
Repeatedly press until
this screen (N.11) appears with a blinking cross on the
sprinkler. Connect the transmitter to the module and
press the key to place the module in the "ON"
module. The cross will disappear. Any programmed or
manual irrigation will take place.
If you press the key, the module will be placed in
the "OFF" mode. A non-blinking cross appears on the
sprinkler and all irrigation, either programmed or
manual, will be prevented. This mode is useful during
rainy weather (rainy weather shutdown). The
irrigation program remains stored in the module.
Important: Make sure that the control module is in the
"ON" mode before trying to manually open a valve with the
field transmitter.
N.11
■ MODE ON/OFF
a) Low battery in the field
transmitter
If the battery is low in the
field transmitter, this screen
(N.12) with the blinking low
battery icon will appear after
you press . Replace
the battery in the field
transmitter.
b) Low battery in the control
module
After you transmit a program
to a module or monitor a
program in a module, this screen (N.13) will
appear if the battery in the module must be replaced.
■ LOW BATTERY ICON
N.12
N.13
If the transmitter is
incompatible with the control
module, the Err 1 message
will be displayed on the LCD.
These are the possible
reasons:
• New Micro 2000 field transmitter connected to a
control module with a date code prior to October 2,
2000.
• In the manual mode, the number of the station
entered to open or close a valve is higher than the
number of stations in the module.
■ ERR 1 MESSAGE (N.14)
N.14
This function erases all program data (MODE A and
MODE B) in the transmitter except current time and
day.
Press the keys simultaneously
and hold them down for at least 3
seconds.
■ ERASE PROGRAM DATA IN THE TRANSMITTER
PN L364
■
■ DAILY OPERATION OF SOLENOIDS
In order to stop a potential build-up of mineral
deposits on the solenoids, Cyclik control modules will
ensure that all solenoids open and close at least once
every 24 hours, even during a long off-cycle. The Cyclik
control modules will cycle all solenoids on and off for
no more than 3 seconds, every 24 hours after the last
valve closure. Whenever programmed operation is
already opening or closing a solenoid within 24 hours,
the 3 second anti-mineral cycle will not occur.
Rain Bird Corporation
Agri-Products Division
633 W. Foothill Blvd.
Glendora, CA 91741-2469
Phone: (800) 435-5624
Fax: (626) 852-7310
Rain Bird International, Inc.
145 N. Grand Ave.
Glendora, CA 91741-2469
Phone: (626) 963-9311
Fax: (626) 963-4287
www.rainbird.com
Rain Bird. The Intelligent Use of Water.
™
® Registered trademark of Rain Bird Corporation
© 2003 Rain Bird Corporation 3/03
Page 2
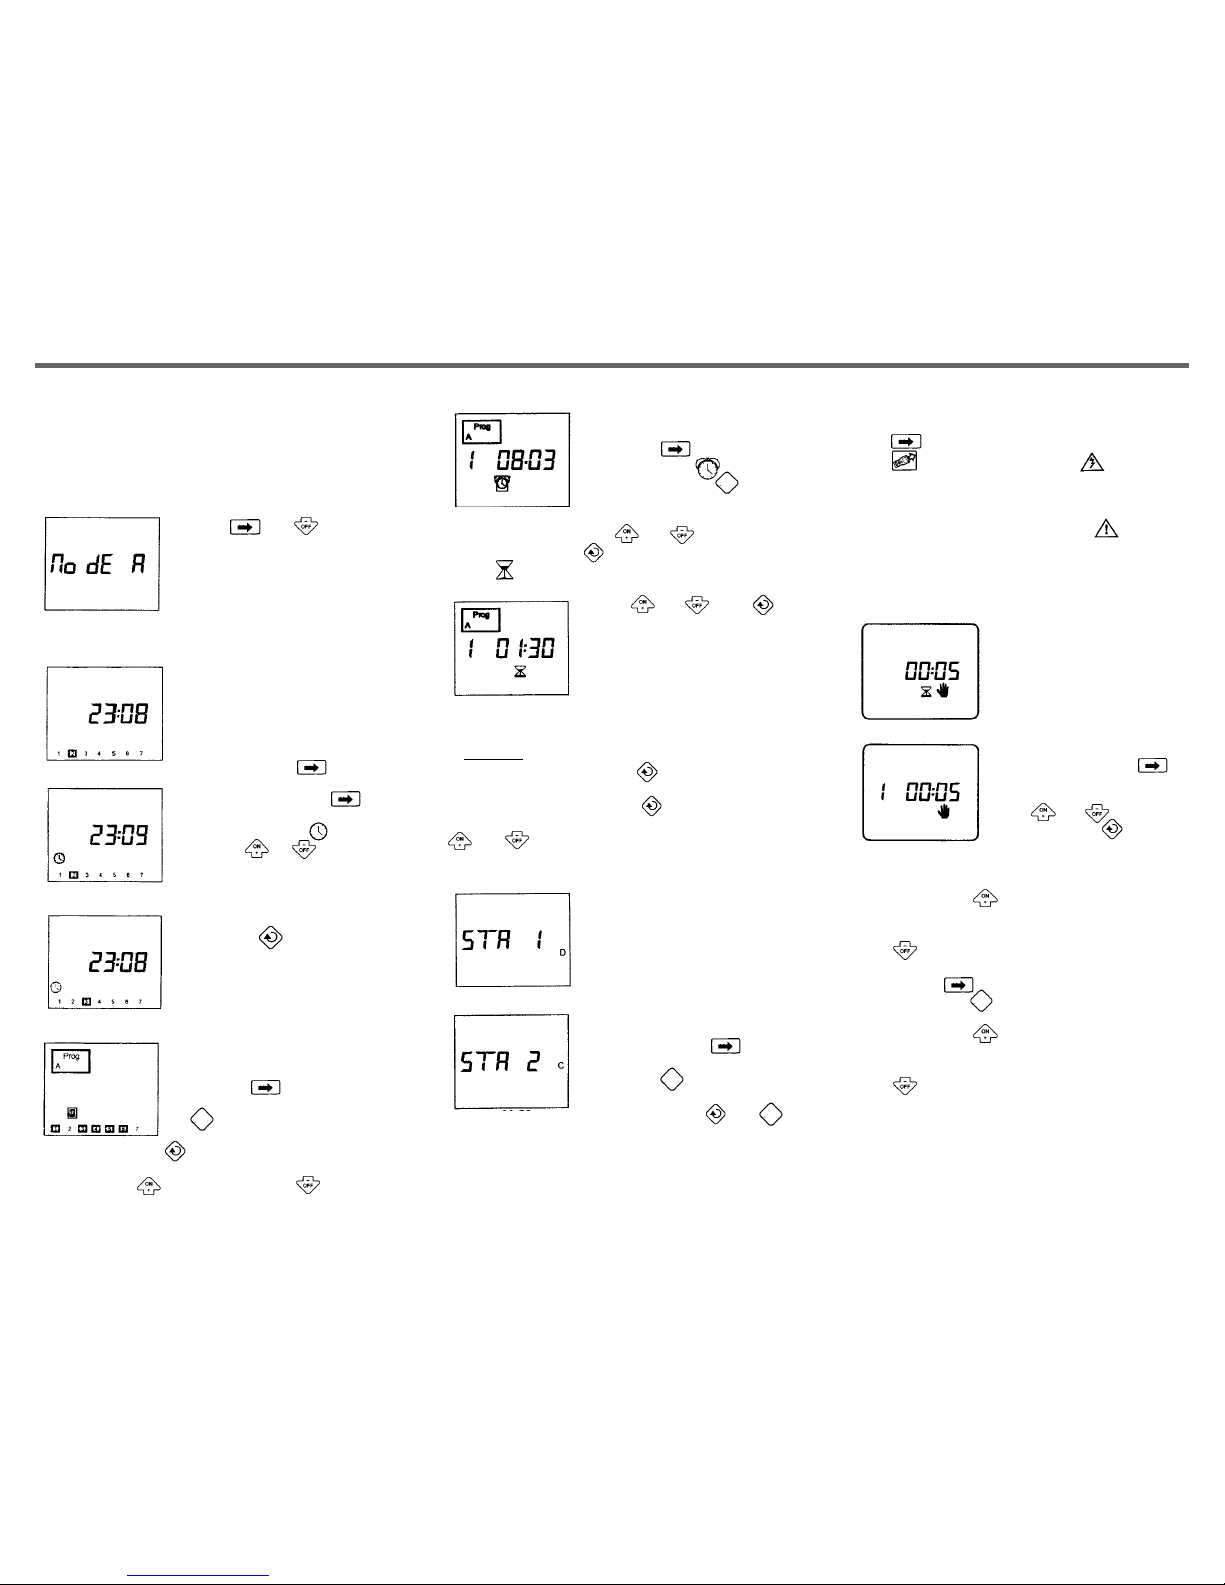
Mode A Quick-Start Programming
Use with a 1,2,or 4 station control module
■ INSTALL BATTERY
CYCLIK™ Micro A
Press the key to display
the calendar icon (N.5). Use the
key to select the program
(4 different programs are
possible). Use the key to move through the days
(1 to 7, 1 = Monday). The number/day you are on will
blink. Use the key to maintain and to cancel
watering on that day. A day with a square around it is a
water day.
■ SET IRRIGATION START
TIMES (1-8) AND RUN TIMES
Press the display the
start time icon . Select the
program with the key.
The number on the left
indicates the start time (1-8).
1 = 1
st
start time (N.6). Use and to set the first
start time, then press . The run time icon will
appear.
Set the desired run time (N.7)
with and . Press to
program the start time and run
time for the 2
nd
start time.
Repeat the above procedure
for all start times that are
required. Repeat for all
programs (A,B,C, or D) you plan to use.
Important: If you do not plan to use all of the available
programs (A, B, C or D), be sure to enter --l--as the start time
for all unused programs.
To cancel a start time, use the key to slowly display
all the start times. When the start time you wish to
cancel appears, hold down the key for at least 2
seconds. A start time can also be cancelled by using the
and keys to move the --l-- position between
11:59 and 12:00 or 23:59 and 00:00.
N.6
N.7
■ CHOOSE MODE A
Press and
simultaneously to select
MODE A. The selected Mode
will appear for 3 seconds.
Afterwards, no icon indicating
the selected Mode will appear
while the transmitter is being used (N.1).
■ SET DAYS OF THE WEEK
TO WATER
After entering the program
(A, B, C and D) start times and
run times, you must decide
which stations are assigned to
the programs when using a
control module with more
than one station.
Repeatedly press until
you see the screen STA 1. Then
press the key to assign
station 1 to the program you
wish (N.8a). Use and
to assign the other stations in the control module to a
program (N.8b).
Important: If you want to operate stations simultaneously,
you may do this by using different programs (A,B,C, or D) for
the stations that need to operate at the same time.
Caution: If the same program is assigned to several stations,
they will not operate simultaneously, but will operate only in
sequential order.
N.8a
■ ASSIGN PROGRAMS
TO STATIONS
You can manually start a
station either by entering an
irrigation run time or by
starting a pre-assigned
program. To start manually
(independent of a program),
repeatedly press the
key to display this screen
(N.9). Enter a run time with
the and keys (N.9).
Next, push the key to
select a station. The station
number is shown to the left of the manual run time
(N.10). Connect the field transmitter to the control
module and press to start irrigation. You may
stop a manual irrigation by selecting the station,
connect the transmitter to the control module, and
press .
To start a pre-assigned combination of program and
station, press until N.9 appears. Next
repeatedly press until the desired program
appears. Connect the field transmitter to the control
module and press to start irrigation. You may
stop a manual irrigation by selecting the station,
connect the transmitter to the control module, and
press .
■ TRANSMISSION TO CYCLIK CONTROL MODULES
Connect the field transmitter to the Control Module.
Press to activate the LC screen if it is blank.
Press . The transmission icon will appear
for 2 seconds.
Note: If there is a transmission problem (poor connection,
dirty connector, lack of battery or dead battery, etc.) you will
hear 3 "beeps" and this screen will appear.
Important: If the blinking battery icon is displayed on the
LCD during program transmission, replace the 9V battery in
the Cyclik control module.
N.9
N.1
N.8b
N.10
N.5
■ SET CURRENT TIME
As soon as the battery is
connected, the standby
screen appears (N.2). The
field transmitter can now be
programmed. If the screen is
blank, press the key
once to activate the field
transmitter. Press the
key again. The clock symbol
will appear (N.3).
Use the or keys to
set the current time.
N.3
Using the key to place the
square on the current day of
the week (N.4).
Monday = 1...Sunday = 7
Example: 11:08PM, Wednesday
N.2
N.4
■ SET CURRENT DAY
AB
CD
AB
CD
AB
CD
AB
CD
MANUAL FUNCTIONS
■ MODE A: MANUAL START
AB
CD
Note: When operating in manual, the field transmitter and
the control module must be in the same mode (mode A or
mode B). If the field transmitter is in a different mode than
the control module, the control module will send a signal
back and will put the transmitter in the same mode as the
control module. If this happens, refer to the manual start
instructions for the mode that the control module is in.
 Loading...