

Page 1

PROGRAMMING AND OPERATING INSTRUCTIONS
CRC-8A, CRC-6A, CRC-4A
The CRC-A Controller has some important features you should be aware of before you begin programming. Details on how to implement these features will be described in the step-by-step instructions on the following pages.
• The CRC-A has a DUAL PROGRAM capability which allows watering of grass areas more often
and/or on different days than shrub areas.
• The CRC-A has a PRESET PROGRAM which is built into the controller at the factory. If you do
not wish to establish your own program, after updating the clock, the controller will operate each
station for 10 minutes each day beginning at 8 A.M.
• The CRC-A has a DEFAULT MODE in which the controller will revert back to the PRESET PROGRAM should your own program be lost due to a prolonged power failure.
• The CRC-A has a 14 - day cycle. After completing watering on the 14th day, it will automatically
repeat the cycle beginning with day 1.
• The controller has a backup battery circuit which will keep your program from being lost for up to
24 hours in the event of a power failure. Should the battery you supply go dead the entire display will blink to indicate the need for a new battery. Install a 9-volt alkaline battery to the battery
SETTING THE CONTROLLER CLOCK
Setting the Day................................................................. 2
Setting the Hour................................................................ 2
Setting the Minute............................................................. 3
ESTABLISHING YOUR OWN PROGRAM
Which days to water.......................................................... 3
What time to start............................................................. 4
How long at each station.................................................... 4
THE 'B' PROGRAM.............................................................
ELIMINATING A START TIME............................................
WRITING YOUR PROGRAM...............................................
OPERATING INSTRUCTIONS.............................................
Display Time of Day.......................................................... 9
Display Day of Week......................................................... 9
Display Station Water Times............................................. 9
Display Start Time............................................................. 10
Display Water Days.......................................................... 10
Manually Start a Program.................................................. 10
Manually Advance to Another Station................................ 10
Manually Start a Single Station.......................................... 11
Manually Cancel a Program............................................... 11
Rain Shutdown................................................................... 11
5
7
7
9
1
Page 2
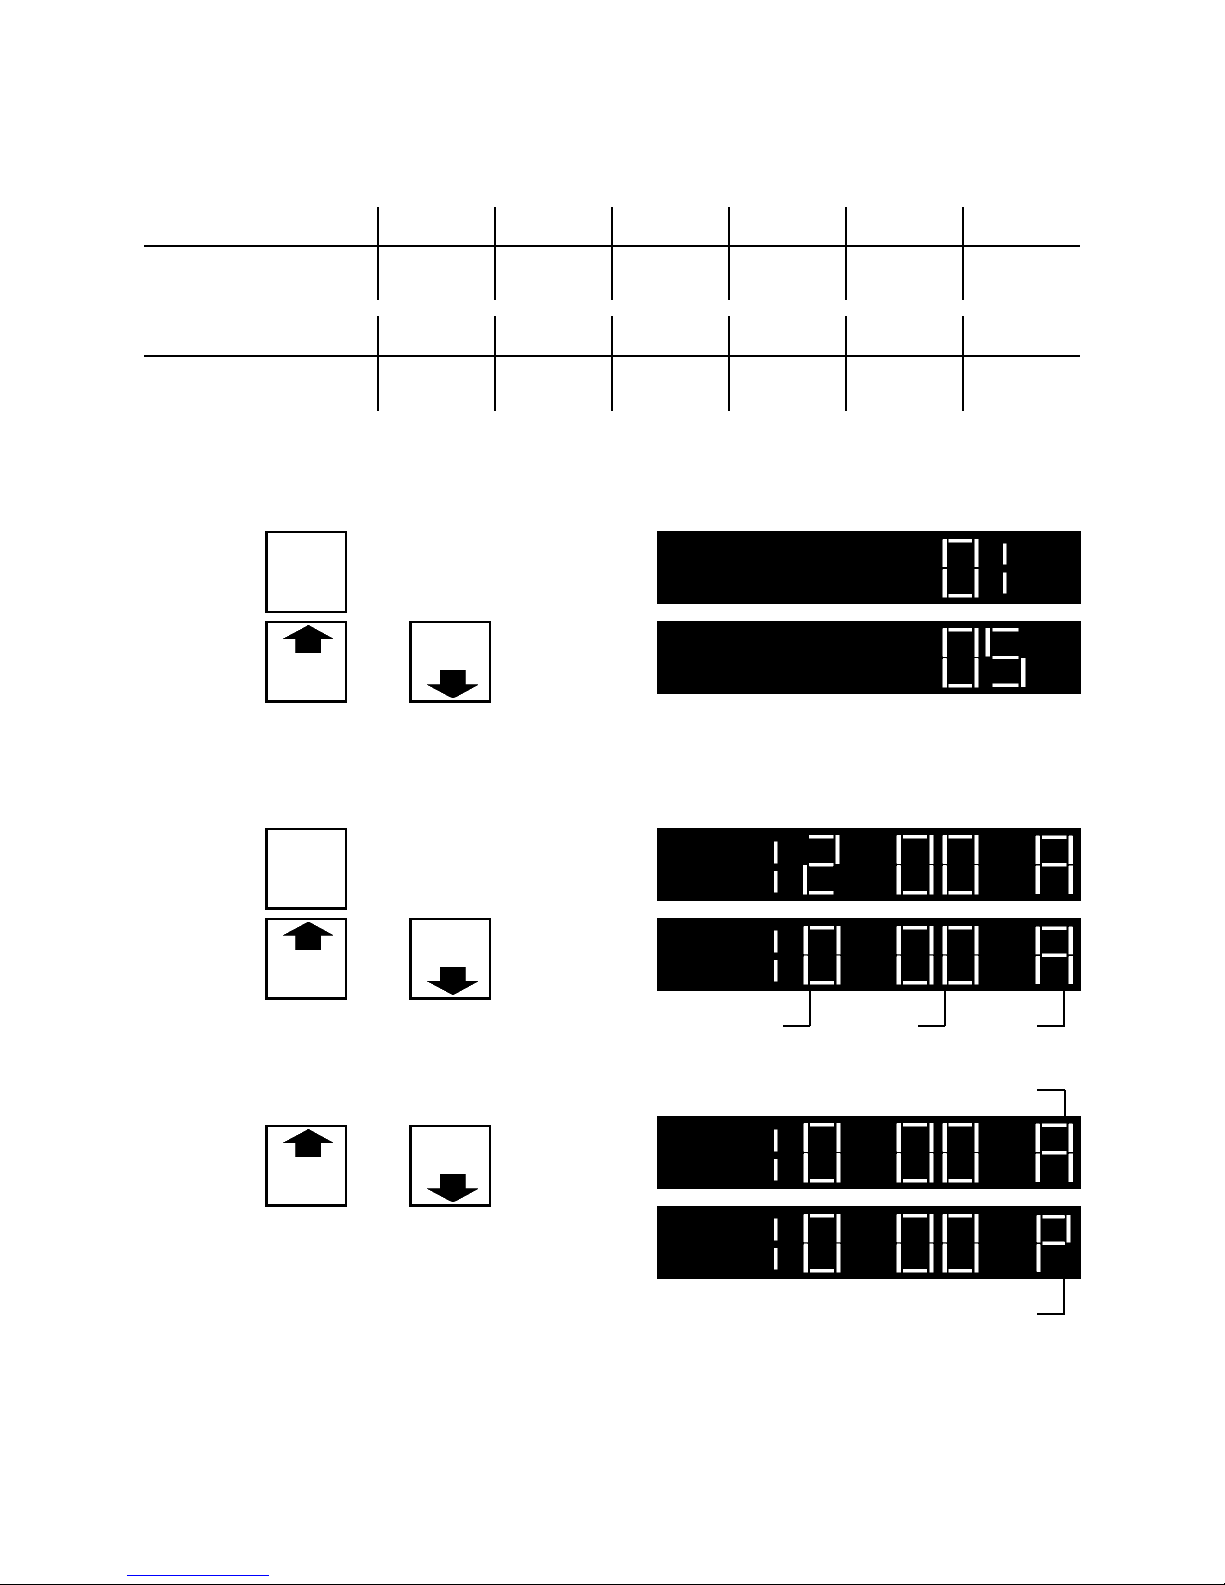
Setting the Controller Clock
Determine the current day’s code number from the chart below.
MON TUES WED THUR FRI SAT SUN
WEEK 1
WEEK 2
SET DAY
1. Press
2. Press
01 02 03 04 05 06 07
MON TUES WED THUR FRI SAT SUN
08 09 10 11 12 13 14
EXAMPLE: Today is Friday (05)
SET
CLOCK
DAY
CHANGE
CHANGE
TIME
or
TIME
repeatedly
until correct code number appears in the display.
SET HOUR
EXAMPLE: Current Time of Day is 10:33 A.M.
DISPLAY WILL INDICATE:
1. Press
2. Press
SET
CLOCK
HOUR
CHANGE
TIME
or
CHANGE
TIME
repeatedly
until current hour appears in the display.
To change A to P or P to A:
CHANGE
Press
CHANGE
TIME
or
TIME
repeatedly
until correct letter appears in the display.
hour minutes
A.M.
A.M.
P.M.
2
Page 3
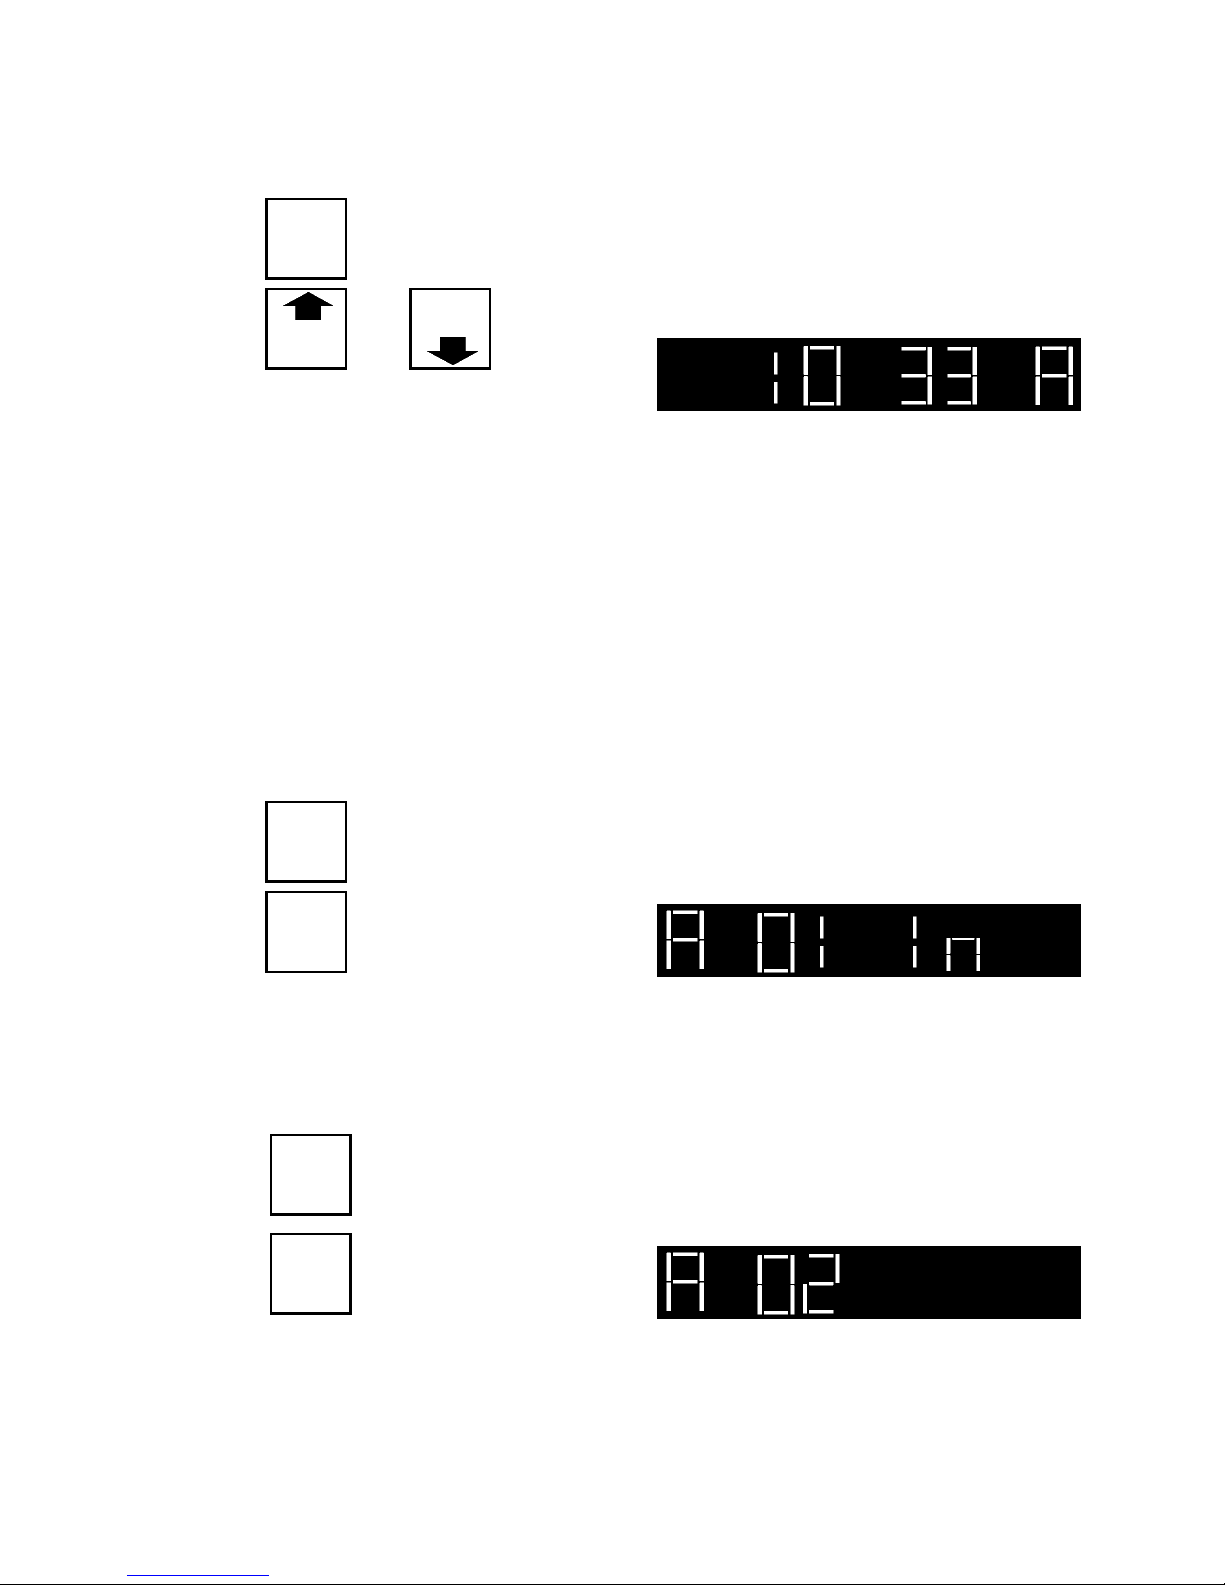
SET MINUTES
EXAMPLE: Current Time of Day is 10:33 A.M.
1. Press
2. Press
SET
CLOCK
MINUTE
CHANGE
TIME
or
CHANGE
TIME
repeatedly
until correct minutes appears in the display.
AT THIS POINT, THE CONTROLLER WILL OPERATE ON THE FACTORY PRESET
PROGRAM; THIS WILL OPERATE ALL STATIONS FOR 10 MINUTES EACH, EVERYDAY OF THE WEEK, BEGINNING AT 8:00 A.M.
IF YOU WISH TO ESTABLISH YOUR OWN PROGRAM, FOLLOW THE PROGRAMMING INSTRUCTIONS WHICH FOLLOW.
Establishing Your Own Program
1. Which days to water...
EXAMPLE: To water on Monday of the first week (Day 01)
PROGRAM
1. Press
2. Press
A
WATER
DAYS
Program
A
DISPLAY WILL INDICATE:
Monday of
Week 1
EXAMPLE: To NOT water on Tuesday of the first week (Day 02)
DISPLAY WILL INDICATE:
1. Press
2. Press
WATER
DAYS
YES/NO
Watering will
occur when
“In” appears
Watering will not
occur when “In”
does not appear
Repeat the above steps 1 and 2 for each of the remaining days in the 14 - day cycle.
3
Page 4
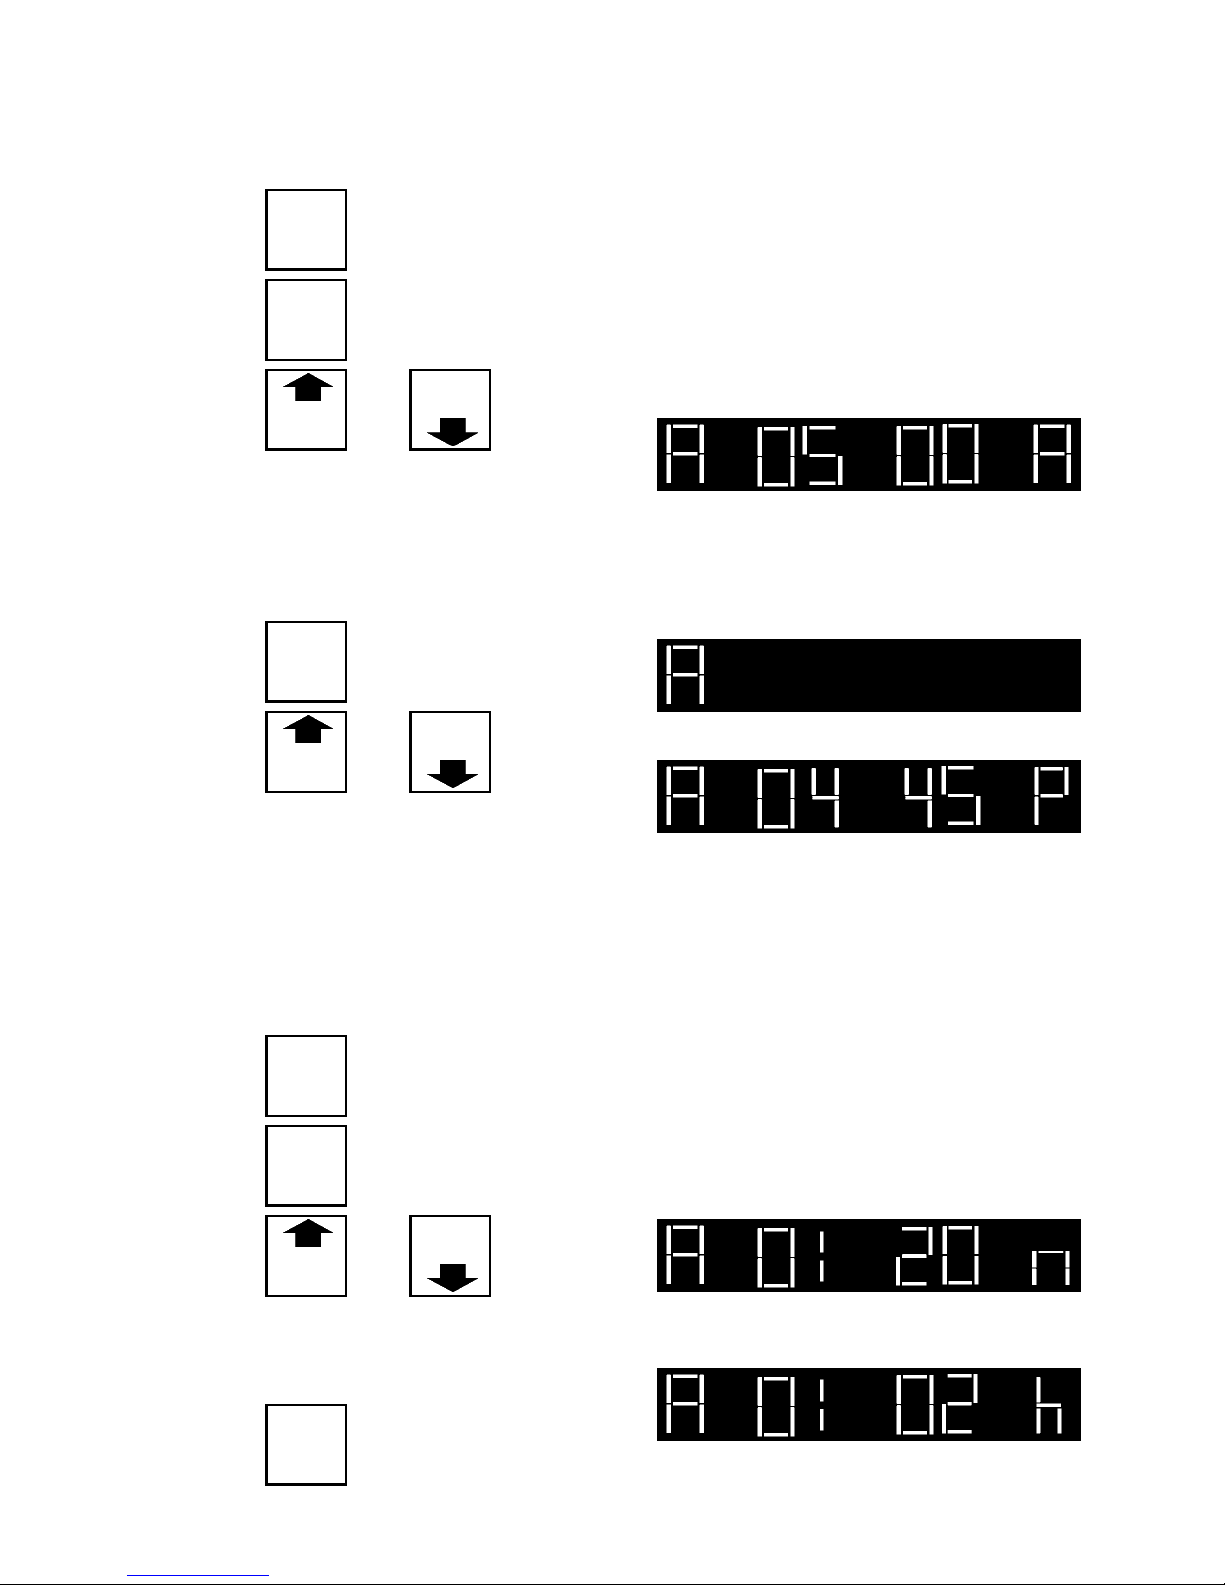
2. What time to start...
EXAMPLE: You want to start watering at 5:00 A.M.
PROGRAM
1. Press
A
2. Press
3. Press
WATER
TIMES
PER DAY
CHANGE
TIME
or
CHANGE
TIME
repeatedly
DISPLAY WILL INDICATE:
until display shows:
If you wish to water more than once a day (for a maximum of 3 times per day)
EXAMPLE: 2nd watering time at 4:45 P.M.
1. Press
2. Press
WATER
TIMES
PER DAY
CHANGE
TIME
or
CHANGE
TIME
repeatedly
DISPLAY
until display shows:
For a 3rd watering time, repeat steps 1 and 2 above.
3. How long at each station...
You may water from 1 minute up to 6 hours at each station.
EXAMPLE: To operate station #1 for 20 minutes
PROGRAM
1. Press
2. Press
3. Press
until display shows:
A
STATION
WATER
TIME
CHANGE
TIME
or
CHANGE
TIME
repeatedly
Program
A
To change from minutes to hours or hours to
minutes:
Press
WATER
TIME
UNITS
Program
A
DISPLAY WILL INDICATE:
Station Watering
Time
Station Watering
Time
Minutes
Hours
4
Page 5

4. Set watering time for next station.
EXAMPLE: Set watering time for station #2 for 30 minutes.
PROGRAM
1. Press
A
DISPLAY WILL INDICATE:
2. Press
3. Press
STATION
WATER
TIME
CHANGE
TIME
or
CHANGE
TIME
Program
A
Station Watering
until display shows:
Set watering times for remaining stations by repeating steps 2 and 3.
NOTE: If you do not want a station to operate, set the time to zero.
EXAMPLE: No watering at Station #3.
PROGRAM
1. Press
2. Press
A
STATION
WATER
TIME
DISPLAY WILL INDICATE:
Minutes
Time
CHANGE
3. Press
CHANGE
TIME
or
TIME
until display shows:
The 'B' Program
The B Program provides added flexibility to your watering schedule. It can be used in
conjunction with the A Program to provide up to 6 start times per day, per station, or it
can be used independently to provide start times and watering times different than
those of the A Program.
EXAMPLE: On the A Program, we set Station #1 to water twice on Monday, @ 5:00
A.M. and again @ 4:45 P.M. for 20 minutes each time.
If you want to add a 3rd start time for Station #1 on Monday, but would like
it to remain on for one hour rather than 20 minutes, you can use the B Program as follows: (continued on the next page)
5
Page 6
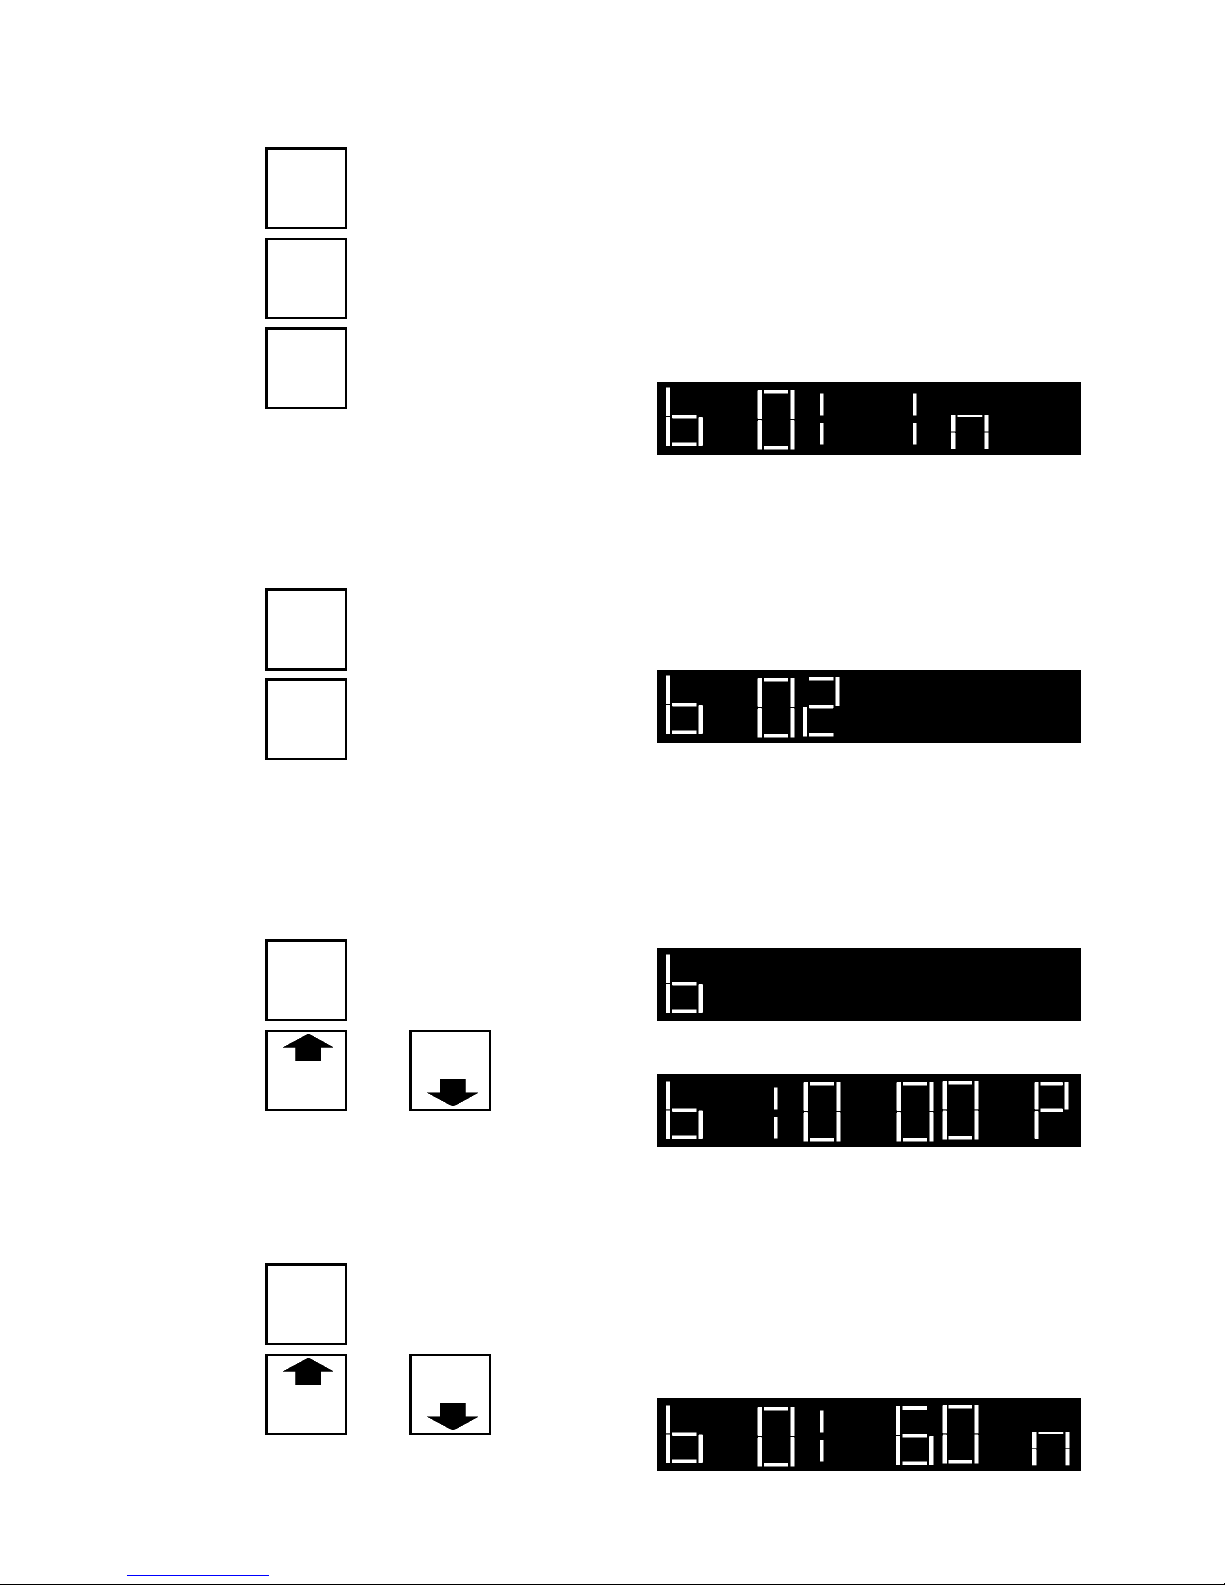
EXAMPLE: To water on MONDAY (@ 10:00 P.M. for 1 hour)
PROGRAM
1. Press
B
2. Press
3. Press
WATER
DAYS
YES/NO
DISPLAY WILL INDICATE:
until display shows:
Program
B
Monday of
Week 1
Watering will
occur
EXAMPLE: NO watering on Tuesday.
1. Press
2. Press
WATER
DAYS
YES/NO
until display shows:
Program
B
Monday of
Week 1
Watering will not
occur
Repeat the above steps for each of the remaining days in the 14 - day cycle.
EXAMPLE: To START TIME for 10:00 P.M.
1. Press
2. Press
WATER
TIMES
PER DAY
CHANGE
TIME
or
CHANGE
TIME
until display shows:
EXAMPLE: To set WATERING TIME for 60 minutes
1. Press
2. Press
STATION
WATER
TIME
CHANGE
TIME
or
CHANGE
TIME
until display shows:
6
Page 7

Writing Your Program
After Programming Is Complete
Once you have completed programming your CRC-A controller, you can return it to
displaying the correct time of day as it waits in the automatic mode for the correct time
to start. To do this,
Press either
SET
CLOCK
HOUR
or and your programming is complete.
SET
CLOCK
MINUTE
Tidbits and Items to remember:
The nine-volt, alkaline battery you supply will protect the program memory for up to 24
hours during a power outage. Without a battery, even a momentary power interruption
(fractions of a second) will cause memory loss. Studies have shown that such momentary power interruptions happen many times per day in the average household. Remember to install a nine-volt alkaline battery to the battery clip (in the bottom compartment of the controller cabinet) as noted in the installation instructions for this unit.
In the event of a long power outage completely using up your battery's power, the default program will be in effect when power resumes. This default program will automatically operate a special "A" program only, and water every station of the controller
once a day for 10 minutes each. (See the DEFAULT PROGRAM section at the back of
this manual for details.)
In item #2 of this manual "What time to start..." you learned how to set, how to change,
and how to add starting times for your CRC-A controller to begin a cycle. If you wish to
ELIMINATE A START TIME from a program, the procedure is quite simple. First,
press the "Program A" or "Program B" key so the controller knows which program you
desire to change. Then press the "Water Times Per Day" key one, two, or three times
until the start time you wish to eliminate appears in the display. Now press either the
"Change Time" up or "Change Time" down key until the time in the display reaches
the blank point at midnight. The start time is now eliminated.
If you were eliminating this start time and the controller was in a cycle, touch the
"Monitor While On" key to get back to a display of the cycle's progress. If the controller was not operating a cycle, simply touch either the "Set Clock Hour" or "Set
7
Page 8

Writing Your Program
These program tables may be cut out and affixed to the inside of the controller
door for handy reference.
1. Which days to water
DAYS TO OPERATE
Day "A" "B"
(M) 1
(Tu) 2
(W) 3
(Th) 4
(F) 5
(Sa) 6
(Su) 7
(M) 8
(Tu) 9
(W) 10
(Th) 11
(F) 12
(Sa) 13
2. What time to start
START TIMES
"A" "B"
(Su) 14
3. How long at each station
STATION TIMES
Sta.# "A" "B"
1
2
3
4
5
6
7
8
8
Page 9

Operating Instructions
Whenever the Controller is in operation (in a cycle) the display will show the station
number (for the station in operation) and the remaining time it has left to operate (time
is "counting down").
While the Controller is in operation you can display - “Time of Day” - “Start Times" (for
"A" or "B" programs) - “Water Days" or "Station # and Time” - without interrupting the
actual operation of the cycle in progress.
1. Display Time of Day
Time of day may be displayed at any time by pressing
either
SET
CLOCK
HOUR
or
SET
CLOCK
MINUTE
To get back to “Station in Operation”
Press
MONITOR
WHILE
ON
Display will revert back to the program it had been operating before
interrupted and display will indicate its current status in the program.
2. Display Day of Week
Press
SET
CLOCK
DAY
to display the day of the week
To get back to “Station in Operation”
MONITOR
Press
WHILE
ON
3. Display Station Water Times
PROGRAM
A
or
PROGRAM
B
to display station water times for either “A” or “B” programs.
STATION
Each time you press
WATER
TIME
thenPress
STATION
WATER
TIME
the next station will be displayed.
9
Page 10

4. Display Start Times
(For “A” and “B” Programs)
PROGRAM
A
or
PROGRAM
B
thenPress
WATER
TIMES
PER DAY
to display start times for either “A” or “B” programs.
To display all three (3) start times of the program, press
WATER
Each time
TIMES
PER DAY
5. Display Water Days
PROGRAM
A
is pressed, the next start time will be displayed.
(A “blank” display indicates no start time programmed.)
(For “A” and “B” Programs)
or
PROGRAM
B
thenPress
WATER
DAYS
to display water days for either “A” or “B” programs.
Each time
WATER
DAYS
is pressed, the next day of the 14 day cycle will be displayed.
(“In” indicates watering; “blank” indicates no watering.)
WATER
TIMES
PER DAY
two (2) more times.
6. Manually Start a Program
PROGRAM
A
or
PROGRAM
B
thenPress
MANUAL
START
Each station will operate in sequence for its programmed watering time.
7. Manually Advance to Another Station
Press
MANUAL
ADVANCE
and the station currently operating will stop.
The next station in sequence will then operate for its programmed watering time.
Each time
ADVANCE
is pressed, the controller will advance to the next station, which
MANUAL
will then operate for its programmed watering time.
10
Page 11

8. Manually Start a Single Station
PROGRAM
STATION
Press
Then press
A
WATER
TIME
STATION
WATER
TIME
SINGLE
STATION
PROGRAM
or
B
to display the desired program.Press
to display the station you desire to operate.
is pressed, the next station will be displayed.Each time
Now, the station selected will operate for the regular programmed
time (either program A or B) and shut off. The controller will then
revert to its normal automatic mode.
9. Manually Cancel a Program
To “cancel” a program that is in operation, press
AUTO
then press
again. The controller will revert to its normal automatic mode.
AUTO
to “OFF” (flashing “A” or
10. Rain Shutdown
AUTO
Press
and the display will revert to “time of day.”
Example:
The “A” (A.M.) or “P” (P.M.) character will blink to indicate that the controller is in rain
shutdown condition.
NOTE: Rain Shutdown will keep the normal clock running and the current programming intact, but all output will be interrupted.
11
Page 12

The following DEFAULT program will be in effect at the time of initial power "UP" or
any time that set programs are lost.
DEFAULT PROGRAM
DAYS TO OPERATE
Day "A" "B"
(M) 1 Yes (Tu) 2 Yes (W) 3 Yes (Th) 4 Yes (F) 5 Yes (Sa) 6 Yes (Su) 7 Yes (M) 8 Yes (Tu) 9 Yes (W) 10 Yes -
START TIMES
"A" "B"
8:00 A.M. -
- -
- -
* If clock is set to correct time of day.
Otherwise, program
will start 8 hours after
power is applied.
STATION TIMES
Sta.# "A" "B"
1 10 mins. 0
2 10 mins. 0
3 10 mins. 0
4 10 mins. 0
5 10 mins. 0
6 10 mins. 0
7 10 mins. 0
8 10 mins. 0
(Th) 11 Yes (F) 12 Yes (Sa) 13 Yes (Su) 14
Yes
-
This controller generates radio frequency energy and may cause interference to radio
and television reception. It has been type tested and found to comply with the limits for
a Class B computing device in accordance with the specifications in Subpart J of Part
15 of FCC Rules, which are designed to provide reasonable protection against such
interference in a residential installation. However, there is no guarantee that interference will not occur in a particular installation. If this equipment does cause interference to radio or television reception, which can be determined by turning the equipment off and on, the user is encouraged to try to correct the interference by one or
more of the following measures:
• reorient the receiving antenna
• move the controller away from the receiver
• Plug the controller into a different outlet so that controller and receiver are on dif-
ferent branch circuits
•
If necessary, the user should consult the dealer or an experienced radio/ television
technician for additional suggestions. The user may find the following booklet prepared by the Federal Communications Commission helpful:
"How To Identify and Resolve Radio - TV Interference Problems"
This booklet is available from the U.S. Government Printing Office, Washington, D.C.
© 1986 Rain Bird Corporation
Customer Support Center uu 6991 E. Southpoint Rd., Bldg. #1
Tucson, AZ 85706 uu 1-800-RAIN-BIRD
12
 Loading...