

Page 1

12-1626.fm Page 1 Friday, January 14, 2000 9:32 AM
Cat. No. 12-1626
OWNER’S MANUAL
Please read before using this equipment.
ACR-326
Atomic Clock Radio
Page 2
12-1626.fm Page 2 Friday, January 14, 2000 9:32 AM
FEATURES
Your Optimus Atomi c Clock Radi o combines a simple design with advanced
technology. It automati cally updates the
clock setting by receiving a 60 kHz longwave radio signal from station WWVB
which broadcasts the t ime according to
the U.S. government’s atomic clock in
Boulder, Colorado. The clock checks this
continuous signal several times each
day, giving you the mo st accurate time
possible. Its features include:
World Times Display
— lets you see
the current time for the United States
time zones and up to 24 world cities.
NASA (National Aeronautics and
Space Administration) and Military
Time Accuracy
— the Colorado radio
signal provides an exact standard for
your home or business.
WWVB External Antenna
— receives
the atomic clock signal wi th no installation.
Display Shows Home Time, World
Times, Date, and Calendar
— to provide you with accurate, complete information.
3" Speaker
— provides excellent r adio
fidelity.
AM/FM Radio
— lets you wake to pro-
grams on your favorite broadcast station.
Backlit Display
— lets you see the dis-
play in low light situations.
Sleep Timer
— lets you set the radio to
play as you fa ll as leep, t hen aut omat ically turn off.
Snooze Bar
— lets you temporarily turn
off the alarm or radio for about 9 minutes
so you can get a few extra minutes of
sleep.
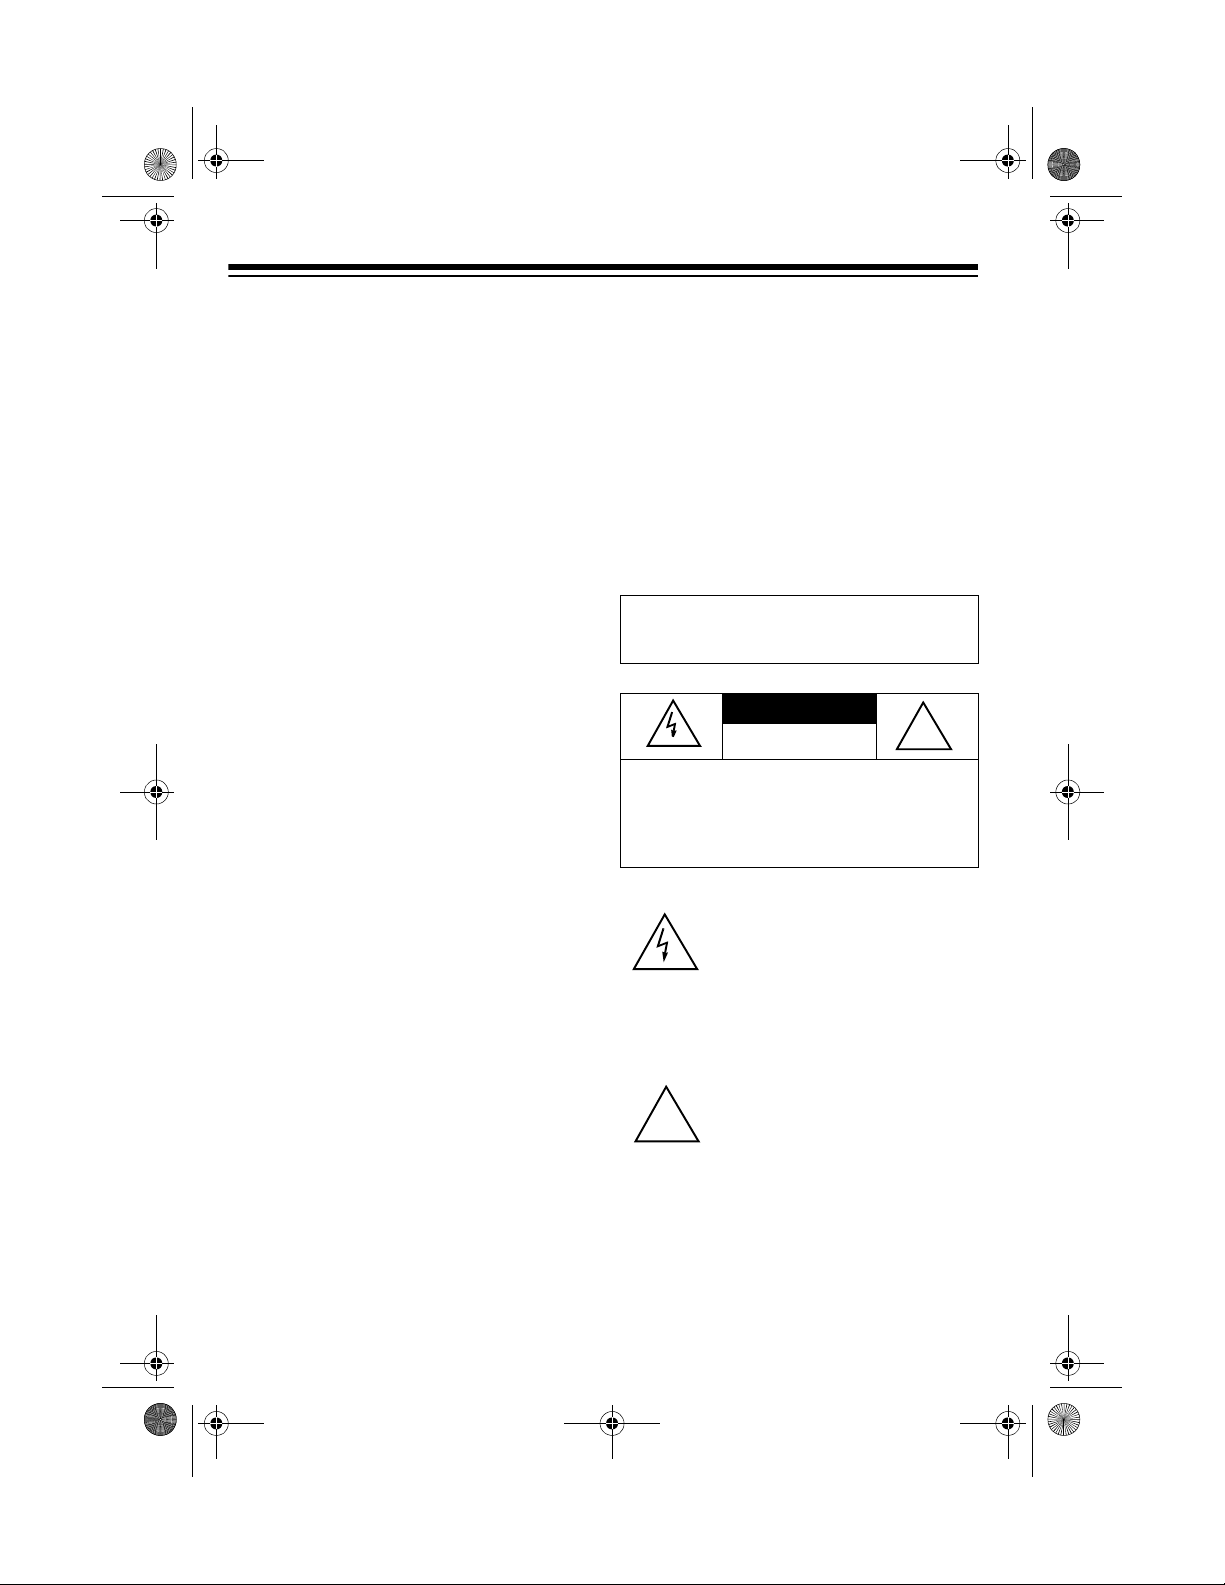
WARNING:
hazard, do not expose this product to rain or
moisture.
CAUTION:
ELECTRIC SHOCK, DO NOT REMOVE
COVER OR BACK. NO USER-SERVICEABLE PARTS INSIDE. REFER SERVICING
TO QUALIFIED PERSONNEL.
!
To reduce the risk of fire or shock
CAUTION
RISK OF ELECTRIC SHOCK.
DO NOT OPEN.
TO REDUCE THE RISK OF
This symbol is intended to alert
you to the presence of uninsu-
lated dangerous voltage within
the product’s enclosure that might
be of sufficient magnitude to con-
stitute a risk of electric shock. Do
not open the product’s case.
This symbol is intended to inform
you that important operating and
maintenance instructions are
included in the literature accom-
panying this product.
!
Dual Alarm
— lets you set a separate
daily alarm for weekd ays a nd week ends
(for example).
©
1999 Tandy Corporation.
Optimus and RadioShack are registered trademarks used by Tandy Corporation.
All Rights Reserved.
2
Page 3
12-1626.fm Page 3 Friday, January 14, 2000 9:32 AM
PREPARATION
CONNECTING AC POWER/
SETTING Y OUR LOCAL
TIME ZONE
Plug the clock radio’s power cord into a
standard AC outlet. As soon as you connect AC power, all display segments
briefly appear, then the following appear:
•
(indicating the time zone for
LAX
Los Angeles) flashes for about 15
seconds and flashes. While
flashes, set yo ur local time zone at
this point by selec ting a city in your
time zone from the char t on Pag e 8,
repeatedly pressing
until that city appears, then pr es sing
MODE
once to store your selection.
If
Note:
you press
clock radio, wait abou t 30 seconds,
then plug the clock radio back in and
repeat the above procedure.
stops flashing before
LAX
UP
or
UP
DOWN
, unplug the
or
LAX
DOWN
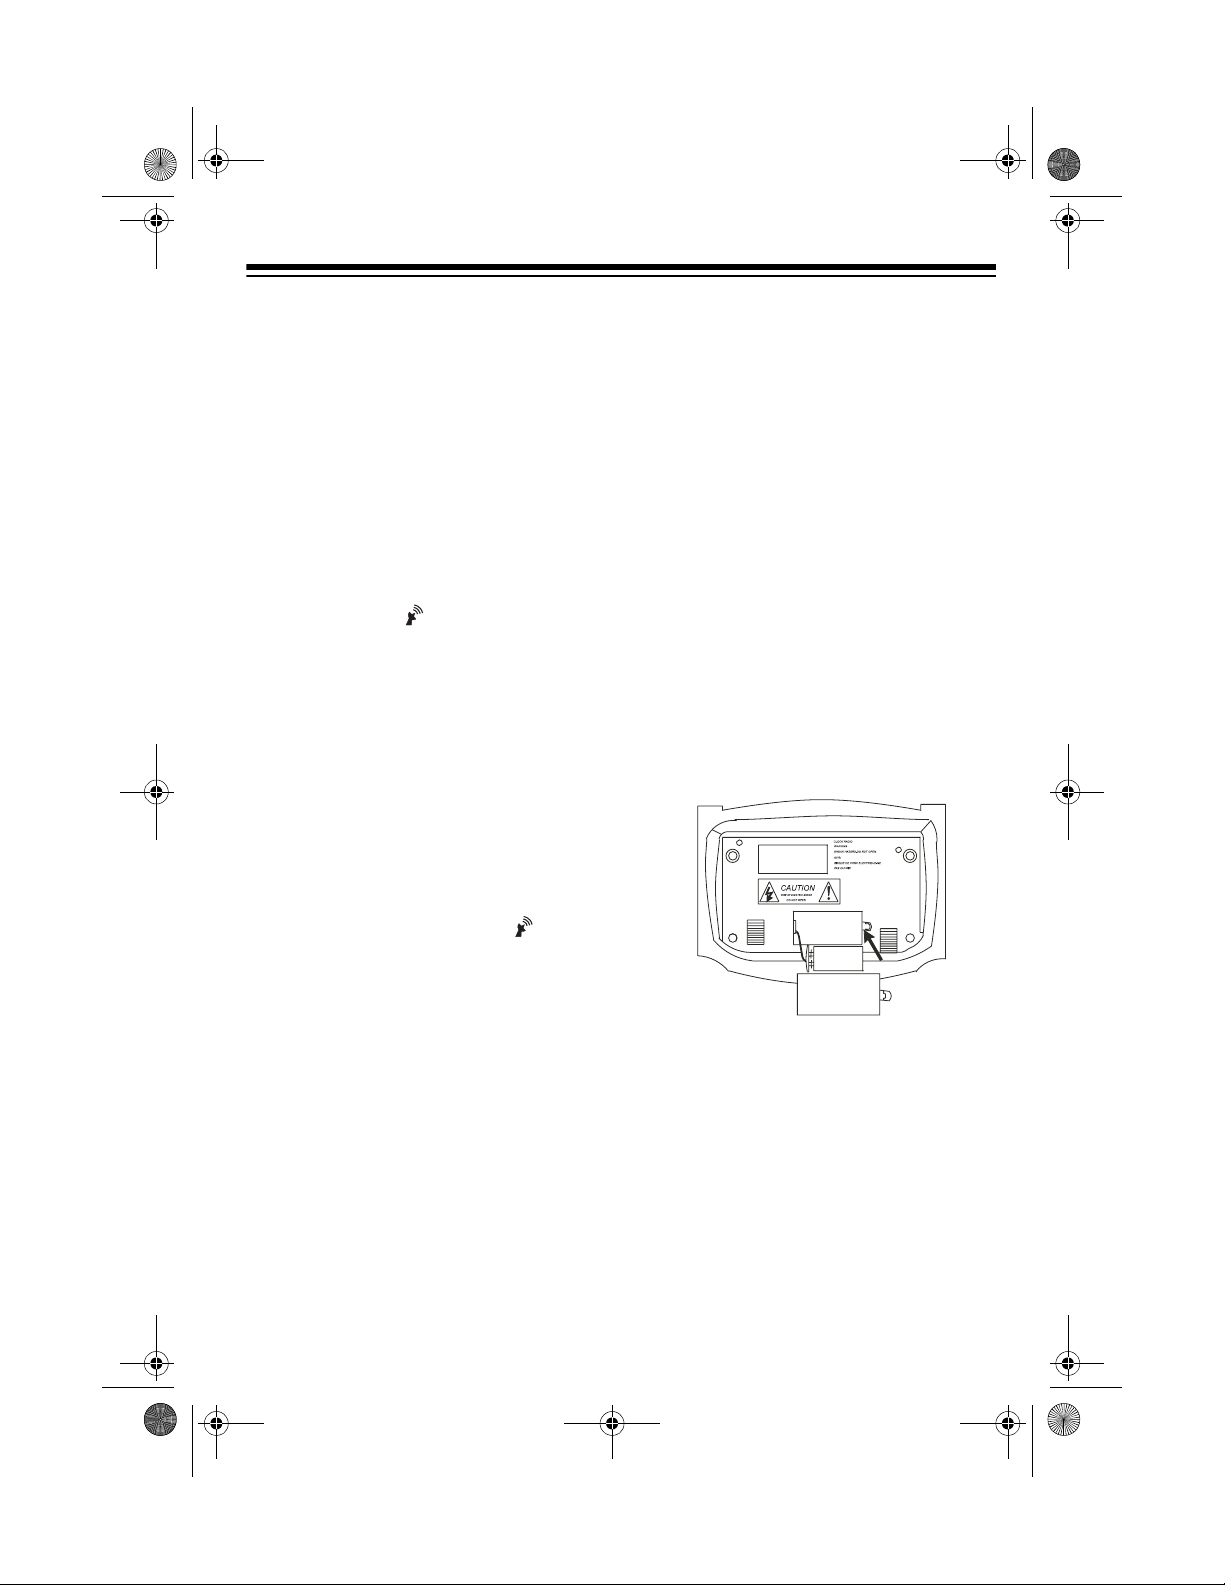
INSTALLING A BACKUP
BATTERY
To keep the clock running for up to 8
hours during an AC powe r fail ure, inst all
a 9-volt battery (not sup plied) i n the b attery compartment. For the longest life,
we recommend a RadioShack alkaline
battery.
Caution:
required size and recommended type.
Note:
the battery, plug in the power cord
install the battery.
Follow these steps to install a back-up
battery.
Use only a fresh batte ry o f the
To prevent unne cessary drain on
then
•
Caution:
cord is equipped with a polarized plug to
prevent electric shock. One blade on the
cord’s plug is wider than the other and
the plug only fits an outlet one way. If you
can not easily insert the plug, turn it over
and try again. Do not force it.
and
-:--
every two seconds. The seconds
start to count up from
while the radio searches for a good
WWVB signal. See “Automatic
Time/Date Setting” on Page 6 and
“Checking the Signal Status” on
Page 7
The clock radio’s AC power
appear and flashes
00
00
to
59
1. Slide the battery compartment cover
in the direction of the arrow and
remove it.
2. Snap the battery onto the connec tor
in the compartment and place the
battery in the compartment.
3. Replace the cover.
3
Page 4
12-1626.fm Page 4 Friday, January 14, 2000 9:32 AM
When appears, check or replace the
backup battery. When you connect a
new battery, disappears. Press
SNOOZE
to reset the backup battery
monitor if the does not disappear
with a new battery ins talled. Under normal conditions, a battery lasts about 6
months.
Warning:
Always dispose of a n old bat tery promptly and pro perly. Do not burn
or bury it.
Caution
: Always remove an old or weak
battery. Batteries can leak chemicals
that can destroy electronic parts.
Notes:
• The display does no t light when the
ACR-326 is operating only on battery power.
• A prolonged power failure can drain
the battery. If the display flashes
after an AC power failure, the battery is too low to run the clock.
Replace the battery and reset the
clock.
4
Page 5
12-1626.fm Page 5 Friday, January 14, 2000 9:32 AM
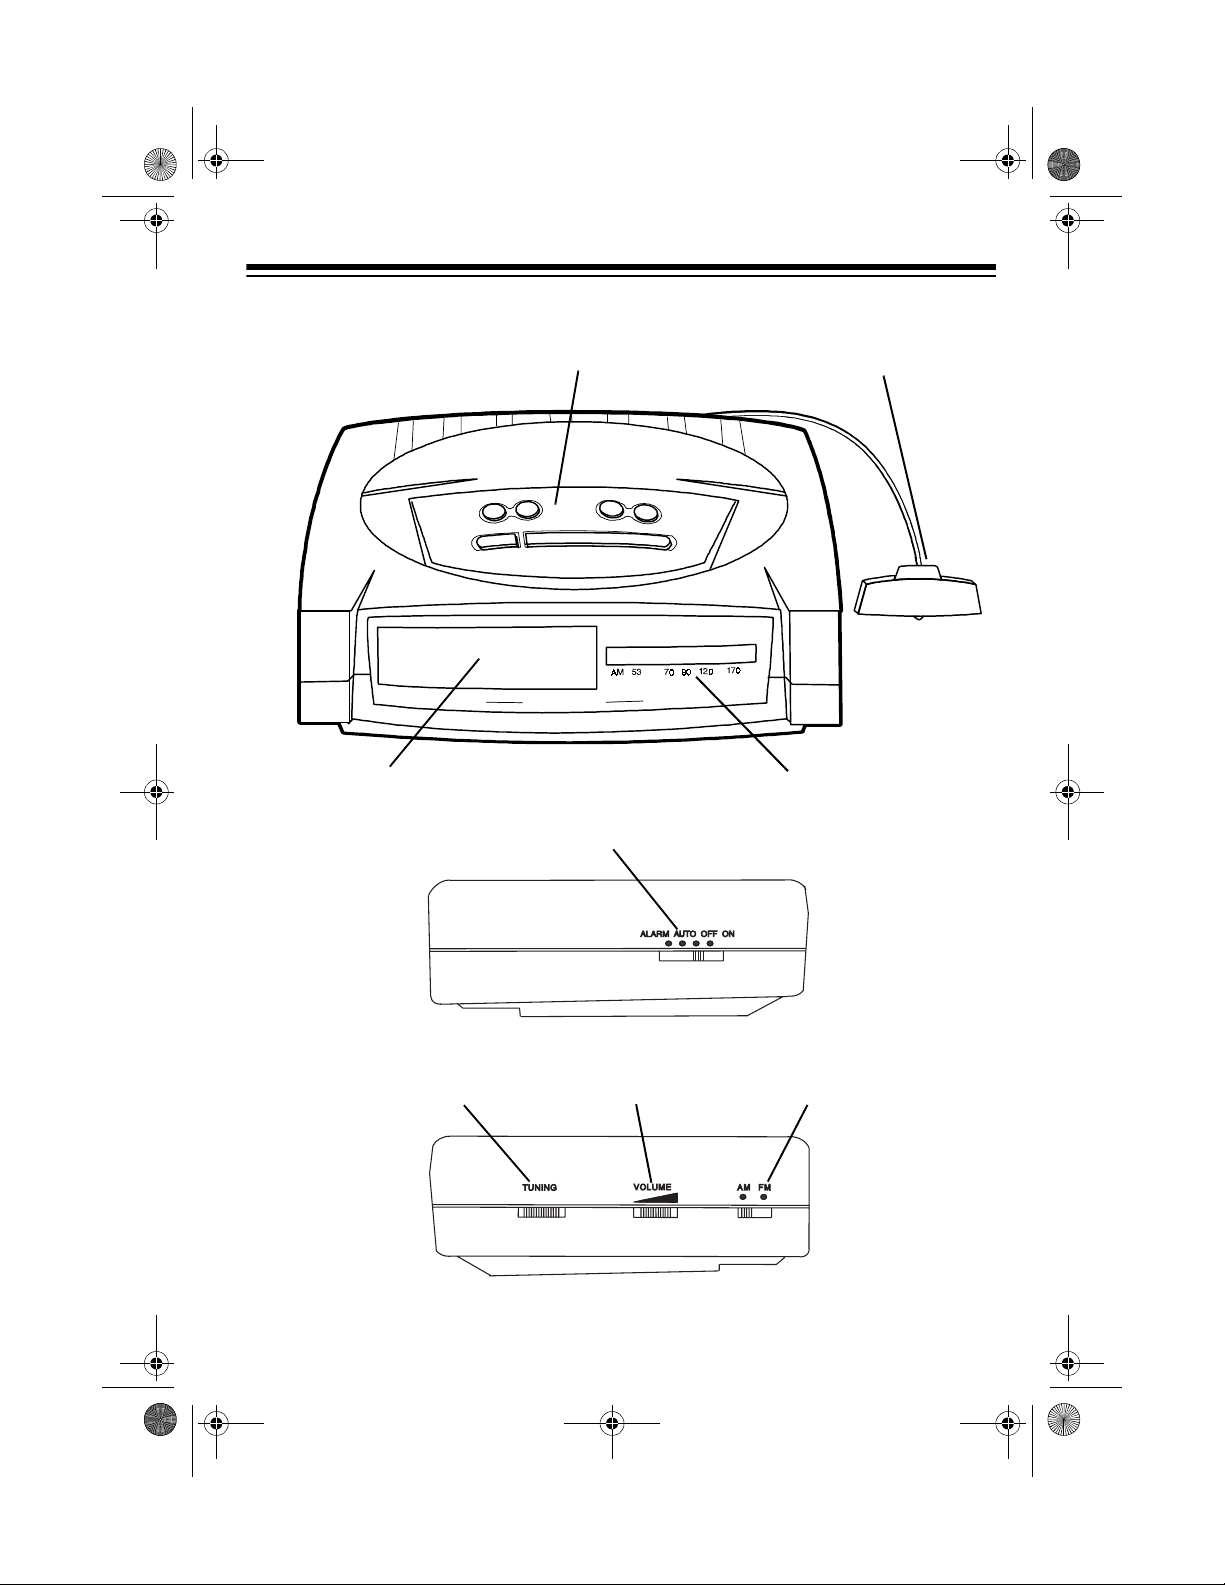
A QUICK LOOK AT THE CONTROLS
BATTERY
SENTINEL
Display
Control Panel Switches
DAILY-WEEKDAY
SNOOZE
RX
ALARM ON/OFF
UP
FM 88 94 100 106 108
MODE
DISPLAY
DOWN
SLEEP
ATOMIC CLOCK RADIO
Alarm, Radio, Operation
Antenna Bar
MHz
x10kHz
Radio Tuning Dial
(Left Side View)
TUNING Control VOLUME Control FM/AM Switch
(Right Side View)
5
Page 6

12-1626.fm Page 6 Friday, January 14, 2000 9:32 AM
PREPARATION
AUTOMATIC TIME/DATE
SETTING
The ACR-326 checks the WWVB time
signal four times a day, at midnight, 6
AM, noon, and 6 PM. When the clock receives a good signal, it automatically
sets the time an d date. You can obtain
more information about WWVB on the
World Wide Web at:
www.bldrdoc.gov/timefreq/wwvstatus.htm
You can also set the ACR-326 manually.
See “Manually Setting the Clock” on
Page 8.
Setting Up the Antenna
To ensure good reception, fully extend
the antenna bar’s cable away from the
clock and as near a window as possible.
After you have found the best location for
reception, attach the antenna bar to a
window or to a wall using the appropriate
hardware or double-sided tape (neither
supplied).
Do not place the c lock near a TV,
Note:
high power cable, or metal table, because thes e items co uld inter fere with r adio signal reception.
Auto-Setting the Clock
Once you have plugged the clo ck into a
standard AC outlet and ha ve positioned
the clock to receive a strong signal,
and
-:--
every two seconds. Seconds should start
to count up from 00 to 59 in one complete
cycle without stopping or resetting. If the
signal is poor, counting stops or starts
over.
Reposition the antenna un til a complete
count-up cycle finishes, then secure the
antenna to the selected location. See
“Setting Up the Antenna”.
If the clock re ceives a strong radio signal, the clock’s time and date are set automatically.
process takes from 2 to 5 minutes.
: On very cloud y and stormy days,
Note
the signal might not be strong enough to
reset the clock.
ed,-:-- appears and you should manually
set the clock (see “Manu ally Setting the
Clock” on Page 8).
To turn off automatic time setting, repeatedly press
bol disappears.
appear and flashes
00
appears steadily. This
If the signal is interru pt-
RX
until the antenna sym-
6
Page 7

12-1626.fm Page 7 Friday, January 14, 2000 9:32 AM
Checking the Signal Status
The following chart sho ws the symbols
for the current or last update to the radio
reception
.
Not Flashing
Flashing
Not Flashing
Within the last 6
hours, the signal
reception was poor
and the clock settings were not set
or updated.
The clock is now
receiving a WWV B
signal.
Within the last 6
hours the signal
reception was
strong enough to
automatically set
the clock’s time and
date.
Daylight Savings Time (DST)
The WWVB radio si gnal ad justs for da ylight saving time so the time displayed on
the clock is accurate , regardless of the
time of year. When the signal contains
DST information, appears.
If you are in an area that does not
Hint:
use daylight saving time, press
five times then press
DOWN
MODE
once to set
your local time (city) to one time zone
west
of where you are located. When
DST ends, reset the c lock to your city’s
usual time zone.
RESETTING Y OUR LOCAL
TIME ZONE
The clock radio is preset to the Pacific
Standard (LAX) time zone.
Follow these steps to select a different
local time zone if you hav e al re ady set a
time zone.
The time zone you set will take ef-
Note:
fect the next time the clock synchronizes
with WWVB.
1. Select a city in yo ur time zone from
the chart at the end of this section.
Time zones designated by
Note:
their UTC number indicate that no
known city exists in that part of the
globe. Typically these zones i nclud e
major sections of ocean.
2. Press
MODE
five times. The currently selecte d city flashes while the
time setting disappears.
7
Page 8

12-1626.fm Page 8 Friday, January 14, 2000 9:32 AM
3. Press
UP
to select a city (time zone)
east of your location, or
DOWN
to
select a city west of your location.
4. Press
MODE
twice to store your set-
ting and resume normal operation.
To select a second (world) time zone,
see “Setting the World Times” on
Page 9.
Yo u See City
LON
MUN
CAI
MOW
DXB
KHI
DAC
BKK
HKG
TYO
SYD
NOU
WLG
-11
HNL
ANC
LAX
(default)
DEN
CHI
NYC
CCS
RIO
–2H
London 0
Munich +1
Cairo +2
Moscow +3
Dubai +4
Karachi +5
Dhaka +6
Bangkok +7
Hong Kong +8
Tokyo +9
Sydney +10
Noumea +11
Wellington +12
GMT -1 1 –11
Honolulu
(HST)
Anchorage
(AST)
Los Angeles
(PST)
Denver (MST) –7
Chicago (CST) –6
New York (EST) –5
Caracas –4
Rio De Janeiro –3
GMT –2 –2
UT
Difference
–10
–9
–8
You See C ity
–1H
GMT –1 –1
UT
Difference
MANUALLY SETTING THE
CLOCK
You can manually set the time and calendar (month, day, year, and da y of the
week). The radio signal automatically updates the clock the next time the clock receives it.
Follow these steps to manually set the
time and the calendar.
1. Press
and minutes flash while the seconds
continue to count.
2. Repeatedly press
change the time in 1 minute increments. Hold down
change the time in 10 minute increments.
Note:
within 15 seconds throughout this
process, the clock stores any settings changed to that point and
returns to normal operation.
3. Press
ting. The month, date, day of the
week, and year flash.
4. Repeatedly press
change the calendar date in 1 day
increments. Hold down
to change the date in 10 day increments.
MODE
. The displayed hours
UP
UP
or
or
DOWN
DOWN
to
to
If you do not press any button
MODE
to store the time set-
UP
or
UP
DOWN
DOWN
or
to
8
Page 9

12-1626.fm Page 9 Friday, January 14, 2000 9:32 AM
Changing the date automati-
Note:
cally changes the month, the day of
the week, and the year. The calendar automatica lly adjusts for a le ap
year, also.
MODE
5. Press
to store the setting.
SETTING THE WORLD
TIMES
For the purpose of timekeeping, the
globe is divided into 24 time zones. T he
zone where Greenwich, England is located is considered the starting zone
(represented by 12:00 in the chart on
Page 15). The time in every other zone
is set based on the time in Greenwich,
England; therefore, the times were described as “Greenwich Mean Time”
(GMT).
For clarity, the “GMT” reference was recently changed to “UTC,” which stands
for Universal Time Coordinate. The radio station WWVB transmits the time
based on the starting UTC time zone
(12:00). By setting your local city, you
program the clock a certain number of
hours ahead or behind th e UTC starting
point. The clock’s initial setting of
(for example) is –8 hours wit h r es pect to
the UTC.
LAX
“Resetting Your Local Time Zone”
on Page 7.
3. Press
4. Press
UP
to select a city (time zone)
east of your location. Press
to select a city west of your location.
MODE
to store your selection.
DOWN
Follow these steps to set a second
(world) time zone.
1. Press
appears and another city (in a different time zone) appears.
2. Select a city that is in the desired
world time zone from the chart in
MODE
six times. The time
9
Page 10

12-1626.fm Page 10 Friday, January 14, 2000 9:32 AM
OPERATION
SELECTING THE DISPLAY
FORMAT
The AM antenna is built-in. To
Note:
improve the AM re cept ion , rot ate the
clock radio.
The Atomic Clock has fou r different display formats. To select the desired display, hold down (or repeatedly press)
DISPLAY
until the clock displays the de-
sired format.
Select This
Format
- -
D -
-W
DW
The Clock Shows
The local time and
day of the week.
The local time, day of
the week, then the
month, date, and
year.
The local time, day of
the week, then the
selected world time
zone.
The local time, day of
the week, then the
month, date, and
year, followed by the
selected world time
zone.
5. Rotate
VOLUME
to the desired
sound level.
6. To turn off the radio, slide
AUTO/OFF/ON
to
OFF
.
ALARM
USING THE ALARMS
Setting the Alarms
You can set two indepen dent alarms to
sound each day of the week (Monday t o
Sunday) or from Monday to Friday.
or
MODE
three times to set
appears to confirm the
AL2
UP
or
DOWN
to change the
UP
or
DOWN
to
1. Press
Alarm-1 or four times to set Alarm-2.
AL1
selected alarm. The time and the
days of the week flash.
2. Press
alarm time setting in 1 minute inc rements, or hold down
change the time in 10 minute increments.
/
USING THE RADIO
1. Fully extend the AC power cord
which also serves as the FM
antenna.
2. Slide
3. Slide
4. Rotate
tion.
10
ALARM/AUTO/OFF/ON
AM/FM
to the desired band.
TUNING
to the desired sta-
to
ON
3. Press
DAILY/WEEKDAY
to have the
alarm sound eit her Sunday through
Saturday (daily) or only Monday
through Friday (weekday). Either
Mo Tu We Th Fr Sa
We Th Fr
.
display to confirm your sele ction.
4. Repeatedly press
appear at the top o f the
MODE
or Mo Tu
Su
until the
normal time display appears, or simply wait about 15 seconds. The
clock stores the setting then
resumes operation.
Page 11

12-1626.fm Page 11 Friday, January 14, 2000 9:32 AM
Using the Alarms
1. Repeatedly press
desired alarm’s display
appears, then press
AL2
)
ON/OFF
to set the selected a larm to
sound. or appears to confirm
that one or both alarms are set to
sound.
2. Repeatedly press
normal time display appe ars or wait
15 seconds. The clock stores the
setting and resumes normal operation.
3. To wake to the alarm sound, slide
ALARM/AUTO/OFF/ON
the preset time, the alarm sounds
for up to 60 minutes then it turns off.
To stop it sooner, press
OFF
or slide
OFF
to
.
4. To wake to the radio, slide
AUTO/OFF/ON
set alarm time, the radio automatically turns on for u p to 60 minutes.
To turn off the radio sooner, press
ALARM ON/OFF
AUTO/OFF/ON
MODE
until the
or
AL1
(
ALARM
MODE
until the
ALARM.
to
ALARM ON/
ALARM/AUTO/OFF/ON
AUTO
to
. At the pre-
or slide
OFF
to
.
At
ALARM
ALARM/
Using Snooze
To temporarily silence the ala rm (or the
radio), press
alarm (or the radio) for ab out 9 minute s.
You can press
as you like.
SNOOZE
SNOOZE
. This silences the
as many times
USING THE SLEEP TIMER
You can set the radio to play for up to 1
hour and 59 minutes then automa tically
turn off. You can use this feature to have
the radio play as you go to sleep.
Follow these steps to set the sleep timer.
1. Set
2. Press
3. To change the sleep timer’s duration
/
4. To turn off the radio before th e set
ALARM/AUTO/OFF/ON
desired setting (
OFF)
.
SLEEP
ALARM, AUTO
.
and
appear, and the radio turns on.
to less than 1 hour, repeatedly press
DOWN.
to
edly
Notes
• If you do not pres s
To set the sleep timer for u p
1 hour and 59 minutes
UP.
press
:
UP
within 3 seconds, the s leep timer
is set to 1 hour. Press
again to change the setting.
• If the clock reaches a preset
alarm time while the sleep timer is
counting down, the alarm cancels the balance of the sleep
timer setting.
sleep time has elapsed, press
SNOOZE.
at any time, slide
ON
To cancel the sleep timer
ALARM/AUTO/OFF/
to ON.
to the
1:00
,
repeat-
DOWN
or
SLEEP
, or
11
Page 12

12-1626.fm Page 12 Friday, January 14, 2000 9:32 AM
RESETTING THE CLOCK
On rare occasions, your clock might not
work properly or it might lock up. If that
happens, follow the se steps to reset the
clock. If you still encounter difficulties,
take it to your local RadioShack store for
assistance.
1. Disconnect the AC power cord and
remove the back-up battery.
2. Reconnect the clock radio to AC
power and reinstall the battery.
THE FCC WANTS YOU TO
KNOW
Your clock radio might cause TV or radio
interference even when it is operating
properly. To determine whether your
clock radio is causing the interference,
turn off your clock radio. If the interference goes away, your clock radio is
causing it. Try to eliminate the interference by:
• moving your cloc k radio away from
the TV or radio
• connecting your clock radio to an
outlet that is on a different electr ical
circuit from the TV or radio
• contacting your local RadioShack
store for help
If you cannot eliminate t he interference ,
the FCC requires that you stop using the
clock radio.
12
Page 13

12-1626.fm Page 13 Friday, January 14, 2000 9:32 AM
CARE AND MAINTENANCE
Your Atomic Clock Radio i s an example of sup erior d esign an d cr aftsmans hip. T he
following suggesti ons will help you care for yo ur clock radio so you can enjo y it for
years.
Keep the clock radio d ry. If it gets wet, wi pe it dry immedi ately. Liquids
might contain minerals that can corrode the electronic circuits.
Use and store the clock radio only in normal temperature environments.
Temperature extremes can s horten the life of electronic dev ices, damage batteries, and distort or melt plastic parts.
Keep the clock radio away from dus t and di rt, which c an caus e premature wear of parts.
Handle the clock radio gently and carefully. Dropping it can damage circuit boards and ca se s and can c ause the cloc k radi o to wo rk i mproper ly.
Use only a fresh bat tery of the required size and re commended type.
Batteries can lea k chemicals tha t damage your clock radio’s electroni c
parts.
Wipe the clock ra dio with a damp cloth oc casionally to keep it looking
new. Do not use h arsh chemicals, cleaning solv ents, or strong detergents to clean the clock radio.
Modifying or tampering with the Atomic Clock Radio’s internal components can
cause a malfunction and might invalidate its warranty and void your FCC authorization to operate it. If your clock radio is no t pe rf orming as it should, t ake i t to your local RadioShack store for assistance.
13
Page 14

12-1626.fm Page 14 Friday, January 14, 2000 9:32 AM
SPECIFICATIONS
Bands ........................................................................................... AM: 530–1710 kHz
FM: 88–108 MHz
Power Output ............................................................................. 360 mW (maximum)
Speaker ........................................................................................... 3 Inches (7.6 cm)
Ferrite Dynamic-Type 8 ohms
Power Requirements .......................................................... 120V AC, 60 Hz, 8 Watts
DC 9V (Battery Backup)
Dimensions (HWD): ............................................................. 2
Weight ......................................................................................................... 2 lbs 5 oz
Specifications are typical; individual units might vary. Specificatio ns are subject to
change and improvement without notice.
13
/16 × 77/8 × 71/16 inches
(72 × 200 × 180 mm)
(1058 g)
14
Page 15

12-1626.fm Page 15 Friday, January 14, 2000 9:32 AM
UTC TIME ZONE CHART
15
Page 16

12-1626.fm Page 16 Friday, January 14, 2000 9:32 AM
Limited Ninety-Day Warranty
This product is warrante d by RadioSha ck against manufac turing defect s in material and wor kmanship under normal u se for ninety ( 90) days fro m the date o f purchase fro m RadioShac k companyowned stores and authorized RadioShack franchisees and dealers. EXCEPT AS PROVIDED
HEREIN, RadioShack MAKES NO EXPRESS WARRANTIES AND ANY IMPLIED WARRANTIES,
INCLUDING THOSE OF MERCHANTABILITY AND FITNESS FOR A PARTICULAR PURPOSE,
ARE LIMITED IN DURATION TO THE DURATION OF THE WRITTEN LIMITED WARRANTIES
CONTAINED HEREIN. EXCEPT AS PROVIDED HEREIN, RadioShack SHALL HAVE NO LIABILITY OR RESPONSIBILITY TO CUSTOMER OR ANY OTHER PERSON OR ENTITY WITH RESPECT TO ANY LIABILITY, LOSS OR DAMAGE CAUSED DIRECTLY OR INDIRECTLY BY USE
OR PERFORMANCE OF THE PRODUCT OR ARISING OUT OF ANY BREACH OF THIS WARRANTY, INCLUDING, BUT NOT LIMITED TO, ANY DAMAGES RESULTING FROM INCONVENIENCE, LOSS OF TIME, DATA, PROPERTY, REVENUE, OR PROFIT OR ANY INDIRECT,
SPECIAL, INCIDENTAL , OR CONSEQUENTIAL DAMAGES, EVEN IF RadioSh ack HAS BEEN ADVISED OF THE POSSIBILITY OF SUCH DAMAGES.
Some states do not allow limitations on how long an implied warranty lasts or the exclusion or limitation of incidental or consequential damages, so the above limitations or exclusions may not apply to
you.
In the event of a pr oduct defect durin g the warranty pe riod, take the pro duct and the RadioShack
sales receipt as proof of purchase date to any RadioShack store. RadioShack will, at its option, unless otherwise provid ed by la w : ( a) correct the defect by pr odu ct r epa i r wit hout charge for parts a nd
labor; (b) replace the product wi th one of the same or similar design; or (c) refund the purch ase
price. All replace d parts a nd prod ucts, and p roducts o n which a refund is made, become th e property of RadioShack. New or recond itioned parts a nd products may be used in the performance of
warranty service. Re paired or replace d parts and pro ducts are warran ted for the rem ainder of the
original warranty period. You will be charged for repair or replacement of the product made after the
expiration of the warranty period.
This warranty does not cover: (a) damage or failure caused by or attributable to acts of God, abuse,
accident, misuse, i mproper or abnormal usag e, fa ilu re to fo ll ow i nstructi o ns, imp rop er installation or
maintenance, altera tion, lightning or othe r incidence of excess voltage or current; (b ) any repairs
other than those provided by a RadioShack Authorized Service Facility; ( c) consumables such as
fuses or batteries; (d) cosmetic dam age; (e) tra nsportation , shipping or insurance costs; or (f) costs
of product removal, installation, set-up service adjustment or reinstallation.
This warranty give s you specific l egal rights, an d you may al so have other r ights which var y from
state to state.
RadioShack Customer Relations, 200 Taylor Street, 6th Floor, Fort Worth, TX 76102
We Service Wh at We Sell
12/99
RadioShack
A Division of Tandy Corporation
Fort Worth, Texas 76102
12A99 Printed in China
 Loading...