

15-1995.fm Page 1 Thursday, March 2, 2000 7:40 AM
7-in-One IR/RF
Remote Control
Owner’s Manual
Please read before using this equipment.

15-1995.fm Page 2 Thursday, March 2, 2000 7:40 AM
INTRODUCTION
Your RadioShack 7-in-One IR/RF Remote
Control can replace up to seven infrared remote controls. You can use it to control your
TV, VCR, cable converter, satellite receiver,
CD player, tuner, phonograph, video accessory, digital audio tape, cassette, laser disc
player, or DVD player.
Unlike some universal remote controls, this
remote control is preprogrammed with the
most commonly used commands and does
not have to learn its commands from the original remote controls. All you have to do is tell
it which device’s remote controls you want to
replace (by entering 4-digit codes).
This manual includes a list of many manufacturers’ 4-digit codes for your devices. After
you enter the codes for your original remotes, the 7-in-One IR/RF Remote is ready
to operate the original remotes’ most used
functions.
The 7-in-One transmits both infrare d (IR) and
radio frequency (RF) signals, so you don’t
need to be within “line-of-sight” to control d evices. With the supplied IR/RF Command
Center, you can use the remote to control devices in any room of your home.
©
2000 Tandy Corporat ion.
Plug ’n Power and RadioShack are registered trademarks
RadioShack.com is a trademark used by Tandy Corporation.
Need help? Call 1-800-763-9232
2
All Rights Reserved.
used by Tandy Corporation.

15-1995.fm Page 3 Thursday, March 2, 2000 7:40 AM
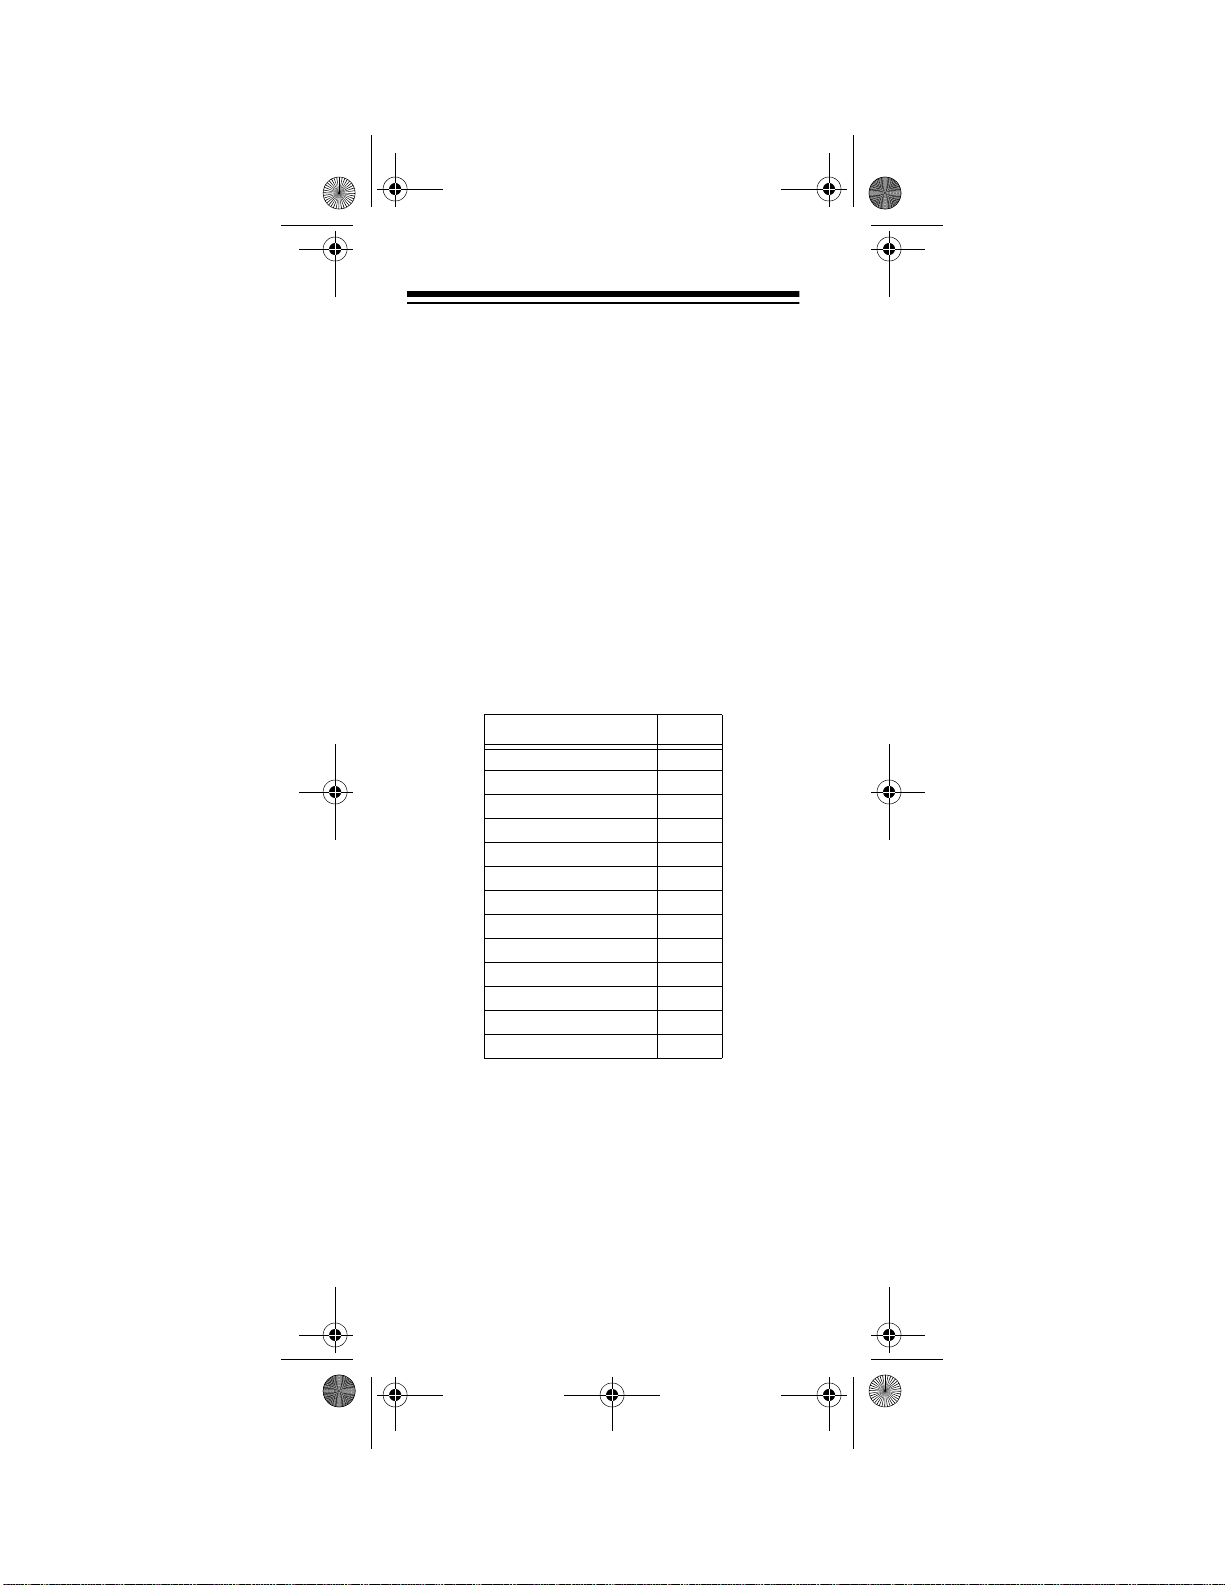
CONTENTS
Preparation ..................................................... 5
Installing Batteries ..................................... 5
Setting the Clock ....................................... 6
Quick Setup ............................................... 7
A Look at Your Remote ................................. 9
Setting Up the 7-in-One ............................... 14
To Operate Your TV ................................. 14
To Operate Your VCR .............................. 15
To Operate Your TV/VCR Combination ... 16
To Operate Your Cable Converter ........... 17
To Operate Your Satellite Receiver ......... 18
To Operate Your CD Player ..................... 19
To Operate Your Tuner/Receiver ............. 20
To Operate Your Amplifier ....................... 21
To Operate Other Devices ....................... 22
Special Features .......................................... 24
Searching for a Code .............................. 24
Using Favorite Channel Scan .................. 25
Clearing Favorite Channel Scan ............. 27
Using the Sleep Function ........................ 27
Converting Device Keys .......................... 29
Punch-Through ........................................ 29
Using the Macro Keys ............................. 31
Setting Up Timed Sequences .................. 32
Setting Up the Home Theater Key .......... 34
Clear All ..................................... .............. 36
Using the IR/RF Command Center ......... 36
Manufacturer Codes .................................... 39
Amplifiers ........................................ ......... 39
Cable Converters .................................... 40
Cassette Decks ....................................... 42
CD Players .............................................. 44
Digital Audio Tape Players ...................... 48
DVD Players ............................................ 48
Home Automation .................................... 48
Laser Disc Players .................................. 49
Miscellaneous Audio ............................... 50
Phonographs ........................................... 50
Satellite Receivers ................................... 51
Televisions ............................................... 52
Tuners/Receivers .................................... 60
Need help? Call 1-800-763-9232
3

15-1995.fm Page 4 Thursday, March 2, 2000 7:40 AM
TV/VCR Combinations ............................. 64
VCRs......................................................... 65
Video Accessories ................................... 72
Troublesho oti ng .................................. ......... 73
Care ...................................................... ... ... ... 75
Specifications ............................................... 76
Need help? Call 1-800-763-9232
4

15-1995.fm Page 5 Thursday, March 2, 2000 7:40 AM
PREPARATION
INSTALLING BATTERIES
Your RadioShack 7-in-One requires four
AAA batteries (not supplied), available at
your local RadioShack store.
Cautions:
• Use only fresh batteries of the required
size and recommended type.
• Do not mix old and new batteries, different types of batteries (standard, alkaline, or rechargeable), or rechargeable
batteries of different ca pacities.
To install the batteries:
1. Press the battery compartment cover’s
tab and lift off the cover.
2. Place the batteries in the compartment
as indicated by the polarity symbols (+
and –) marked inside.
3. Replace the cover.
If the batteries are installed correctly and the
red indicator does not light when you press
POWER
Note:
quire you to reprogram your remote control
because the 7-in-One IR/RF Remote Control
has unlimited memory backup.
Cautions:
, replace the batteries.
Removing the batteries will not re-
• Dispose of old batteries promptly and
properly. Do not burn or bury them.
• Always remove old or weak batteries.
Batteries can leak chemicals that can
destroy electronic parts.
Need help? Call 1-800-763-9232
5

15-1995.fm Page 6 Thursday, March 2, 2000 7:40 AM
Notes:
• After you install batteries, the remote
performs a test of the display for 10 seconds or until you press a key.
• To extend battery life, the display turns
off after 10 seconds of keypad inactivity
and turns on again when you pres s any
key.
• Device codes you have programmed
into the 7-in-One remain stored in memory while you replace the batteries.
However, you must reset the clock.
SETTING THE CLOCK
Follow these steps to set the clock on the 7in-One’s display.
P
1. Hold down
2. Press twice.
3. Press
SELECT
4. Press again.
5. Press
SELECT
TIMED SEQ
until
CONFIGURE
THEATR SEL
.
TIME SETUP
TIME
.
appears.
appears.
appears.
appears.
appears and the
first digit in the time flashes. Enter the
time in 12-hour format.
AM/PM
flashes.
6. If necessary, press to toggle between
AM and PM, then press
SELECT
. The
day of the week display appears.
7. Use and to toggle through the
days of the week until the current day
appears, then press
SELECT
. The currently selected device and the correct
time appear.
Need help? Call 1-800-763-9232
6

15-1995.fm Page 7 Thursday, March 2, 2000 7:40 AM
QUICK SETUP
The steps in this section tell you how to
quickly set up the 7-in-One to operate all of
your devices.
To set up devices individually, or add a device after you have set up the 7-in-One, see
the appropriate section unde r “Setting Up the
7-in-One” on Page 14.
Note:
For the best operation, you should be
within 15 feet of the device you want to control.
Follow these steps for quick setup:
1. Turn on all of the devices you ar e setting
up.
2. Press
3. Hold down
4. Press .
5. Press
6. Press
TV
.
P
until
CODE SETUP
SELECT
SELECT
TIMED SEQ
appears.
appears.
DEV SET UP
.
appears.
again. TV appears.
7. Enter the fist four-digit TV code listed for
your TV’s brand in “Televisions” on
Page 52 then press
Note:
If the 4-digit code begins with
SELECT
.
zero, only the last 3-digits will appear on
the display.
8. Point the remote at your TV and press
POWER
. Yo ur TV should turn off. If it
does not, enter the next code from the
list and press
SELECT
then
POWER
again. When your TV turns off, press
VCR
VCR
.
appears.
Need help? Call 1-800-763-9232
7
15-1995.fm Page 8 Thursday, March 2, 2000 7:40 AM
9. Enter the first four-digit VCR code listed
for your VCR’s brand in “VCRs” on
Page 65 or “TV/VCR Combinations” on
Page 64 then press
SELECT
.
10. Point the remote at your VCR and press
POWER
. Your VCR should turn off. If it
does not, enter the next code from the
list and press
SELECT
then
POWER
again. When your VCR turns off, press
CBL
CABLE
.
appears.
11. Continue setting up devices by pressing
the appropriate device key, entering
your device’s code and pressing
SELECT
. Refer to the code list for the
type of device you want to set up:
Setup Codes for Page
Amplifiers 39
Cable Converters 40
Cassette Decks 42
CD Players 44
DAT Players 48
DVD Players 48
Home Automation 48
Laser Disc Players 49
Miscellaneous Audio 50
Phonographs 50
Satellite Receivers 51
Tuner/Receivers 60
Video Accessories 72
12. Once the 7-in-One is operating all of
your devices, press
ESCAPE
to stop pro-
gramming.
Need help? Call 1-800-763-9232
8
15-1995.fm Page 9 Thursday, March 2, 2000 7:40 AM
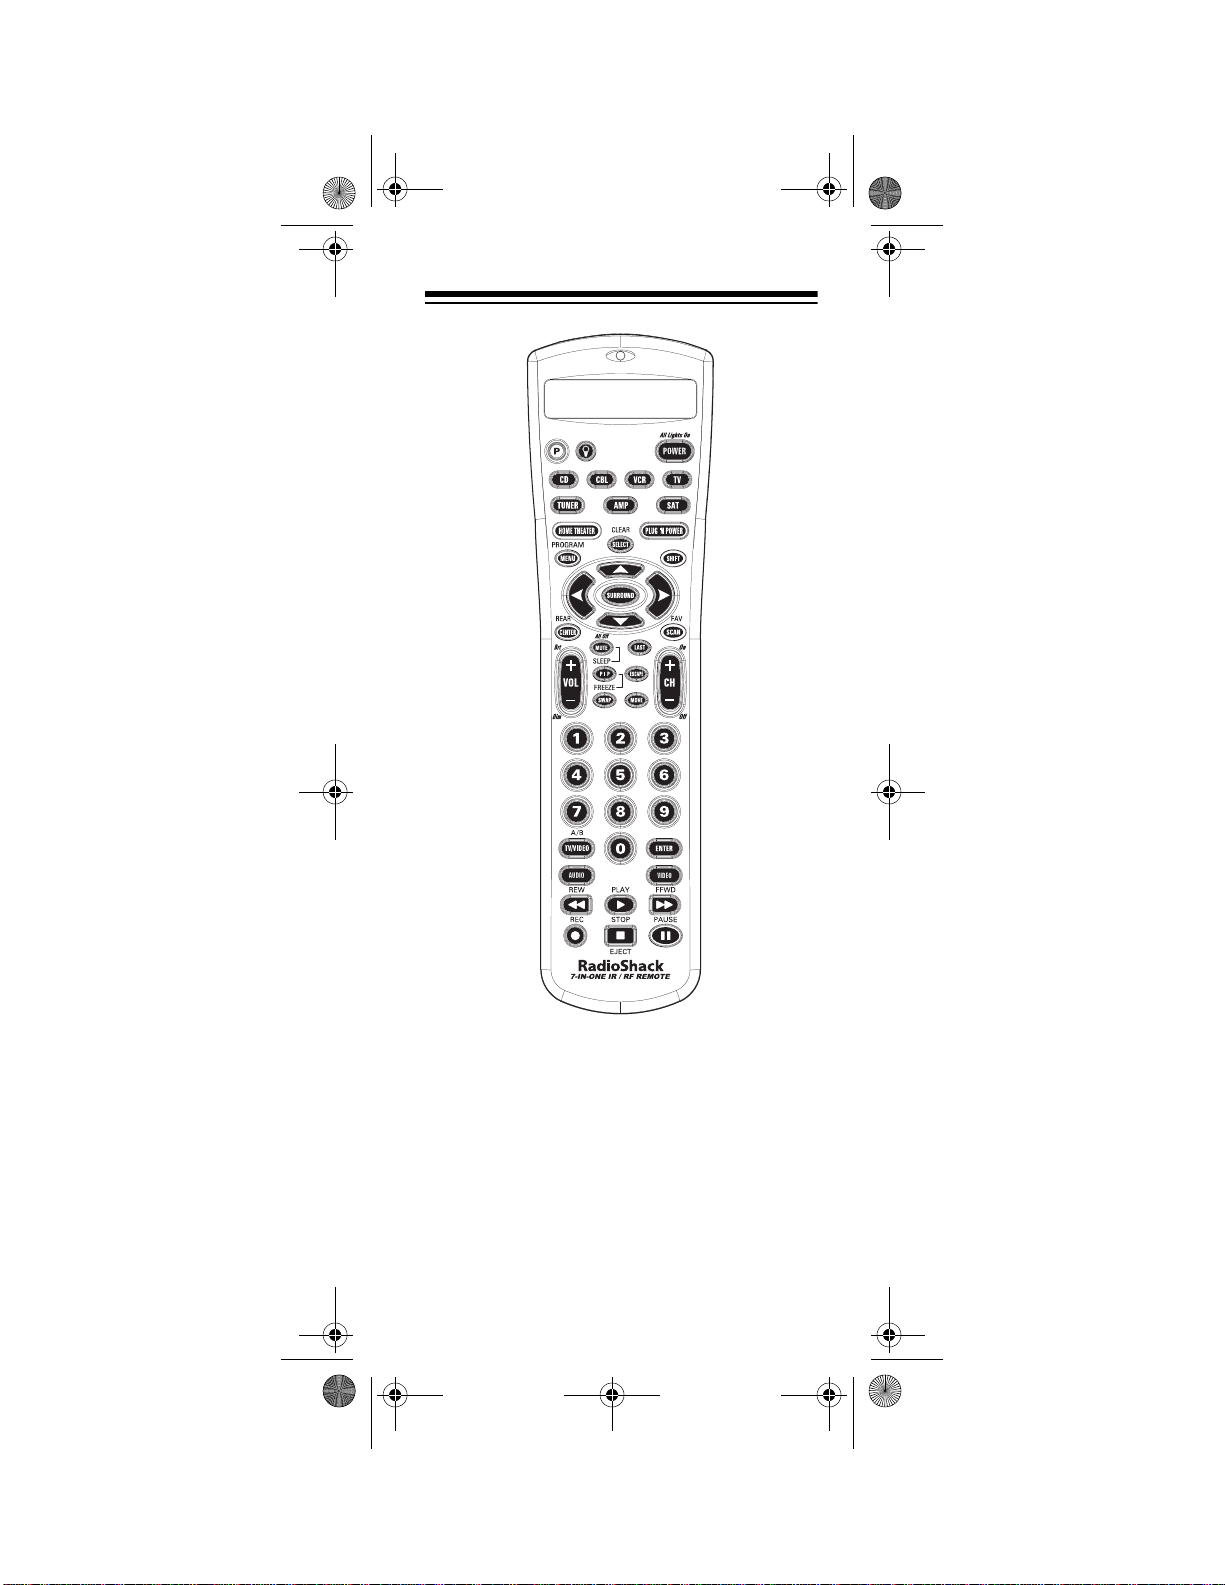
A LOOK AT YOUR REMOTE
AMP, TUNER, TV, CBL, CD, VCR, SA T
— lets
you select the device you want to control.
PLUG ’N POWER
— allows you to control
lamps and appliances with your 7-in-One IR/
RF Remote Control. This feature requires
additional equipment that is available at your
local RadioShack store.
Need help? Call 1-800-763-9232
9

15-1995.fm Page 10 Thursday, March 2, 2000 7:40 AM
HOME THEA TER
— lets you operate all of the
most commonly used home theater functions
in one mode.
POWER
controls
— turns the remote on and off, and
All Lights On
in the PLUG ‘N POW-
ER mode.
MENU
— works like the Menu or OSD (onscreen display) key on your original remote.
Use , , , and (Menu Up, Down,
Right, and Left) to navigate your on-screen
menus. If your original remote had a Select
SELECT
+
SELECT
) to exit/
in its
key to select menu options, use
place. Use
CLEAR (SHIFT
clear menus. See your device’s original owner’s manual for more detailed instructions on
using menus.
Notes:
• , , , and also control the Rear
Level +/– and Balance Right/Left functions in AMP or TUN mode, and Disc +/–
and Track +/– in CD mode.
SELECT
•
also controls Tape Mon in AMP
or TUN mode, Disc Select in CD m ode,
and the Fetch function in the on-screen
menu of an RCA satellite system.
PROGRAM (SHIFT
+
MENU
) — operates your
satellite system’s and cable converter’s
Guide function, as well as any device’s secondary menus.
SURROUND
— operates the surround m o de.
It also operates the favorite channel function
in SAT and CBL modes, 10+ (to access
tracks numbered higher that 10) in CD mode,
and the DISC function of a laser disc player.
Need help? Call 1-800-763-9232
10
15-1995.fm Page 11 Thursday, March 2, 2000 7:40 AM
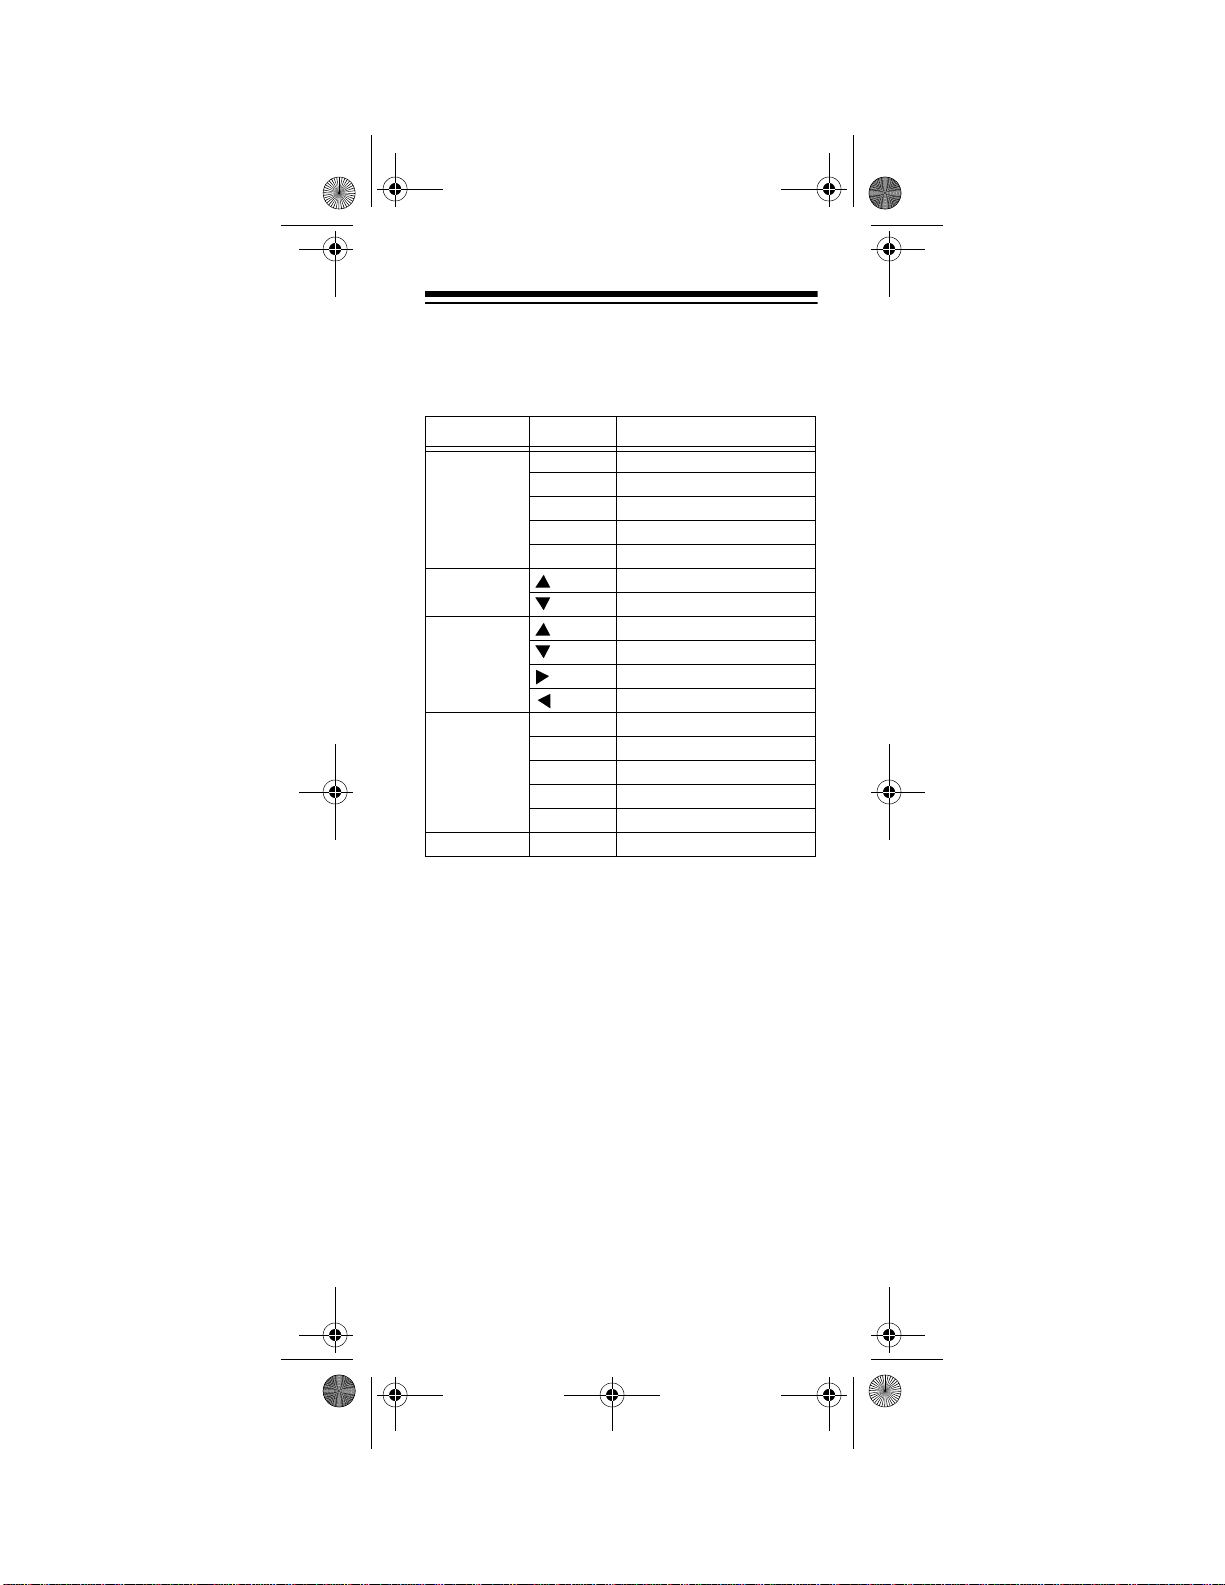
SHIFT
— besides those functions described
elsewhere in this manual, works with these
keys to control advanced features:
Mode Key Function
VCR PLAY SLOW
REW REW SLOW (SLOW –)
FFWD FFWD SLOW (SLOW +)
STOP EJECT
PAUSE X2
Satellite
Receiver
Receiver/
Tuner/Amplifier
Laser Disc/
Cassette/
DVD
CD STOP EJECT
PLAY REVERSE PLAY
REW REW SLOW
FFWD FFWD SLOW
STOP EJECT
PAUSE X2
AUDIO +
AUDIO –
CENTER LEVEL +
CENTER LEVEL –
DELAY +
DELAY –
ESCAPE
— lets you exit the remote’s dis-
played menu.
CENTER
and
REAR (SHIFT
+
CENTER
) —
work like the Add and Delete keys on your
original TV remote, the DISC A and B keys
on your laser disc remote, or the SAT and
AUDIO keys of a satellite system remote.
VOL +
(Volume Up),
MUTE
and
— control the volume like the Vol-
VOL –
(Volume Down)
ume Up and Down and Mute keys on your
original remote. In the PLUG ‘N POWER
mode,
and
VOL +/ VOL –
MUTE
operates ALL OFF.
operates Bright and Dim
Need help? Call 1-800-763-9232
11

15-1995.fm Page 12 Thursday, March 2, 2000 7:40 AM
SLEEP (SHIFT
+
MUTE
) — controls the Sleep
Timer in TV, CABLE, SAT, and AMP or TUN
modes for devices which have this feature. If
your device does not have a Sleep Timer,
SLEEP
activates the remote’s built-in sleep
timer.
CH +
(Channel Up) and
CH –
(Channel
Down) — work like the Channel Up and
Down keys on your original remote.
CH –
also control preset Up/Preset Down in
CH +
and
AMP or TUNER mode and ON/OFF in the
PLUG ‘N POWER mode.
Digit Keys
(0–9) — work like the digit keys
on your original remote. They also control Input Selections in AMP or TUNER mode.
ENTER
— works like the Enter key on your
original remote (for example, direct channel
access).
TV/VIDEO
— works like the TV/Video key on
your original TV remote, and TV/SAT key on
your original satellite remote.
TV/VIDEO
also
controls TV/VCR in VCR mode, A/B in cable
and CD modes, and Input Select in AMP or
TUN mode.
LAST
(Last Channel) — works like the Previous Channel or Recall key on your original
remote. It also operates the RANDOM functions in the CD and AMP or TUNER modes.
AUDIO
and
VIDEO
(Macro Keys) — memorize up to 15 keystrokes, so you can repeat
them in sequence in any mode at the press
of a single key.
Need help? Call 1-800-763-9232
12
15-1995.fm Page 13 Thursday, March 2, 2000 7:40 AM
REW
REC
(Rewind),
(Record),
PLAY, FFWD
STOP
, and
(Fast Forward),
PAUSE
— work like
the transport keys on your original VCR or
Laser Disc player remotes. To guard against
accidental recording, you must press
REC
twice before recording.
PIP
— controls your TV or VCR’s Picture-inPicture feature. Works like the VIEW key on
your Satellite receiver’s remote.
FREEZE (SHIFT
PIP
+
) — freezes your Pic-
ture-in-Picture window.
SWAP
— swaps the Picture-in-Picture win-
dow and the main picture.
FAV/SCAN
(Scan or Favorite Channel Scan)
— can be programmed to scan through your
ten favorite channels or left unprogrammed
to scan all channels.
MOVE
— moves the Picture-in-Picture window around the screen. Works like the Nest
key on your satellite receiver’s remote.
— lets you turn the remote’s backlight
and display on and off. When you press
to turn on the backlight, the backlight stays lit
for 5 seconds then lights again anytime you
press a key. To turn off the backlight feature,
press again.
P
— lets you use the remote’s displayed
menu to program your 7-in-One.
Need help? Call 1-800-763-9232
13

15-1995.fm Page 14 Thursday, March 2, 2000 7:40 AM
SETTING UP THE 7-IN-ONE
Note:
For the best operation, you should be
within 15 feet of the device you want to operate.
TO OPERATE YOUR TV
Locate the codes for your TV in “Televisions”
on Page 52 and write them down on the supplied label.
Note:
Some manufacturers have several
codes listed. Try each until you find the right
one. The brands are listed in alphabetical order, with the most popular codes listed first.
Then follow these steps to program the 7-inOne to operate your TV.
1. Turn on your TV.
2. Press
SEQ
3. Press .
TV
then hold down P until
appears.
CODE SETUP
4. Repeatedly press
appears.
SELECT
TIMED
until
appears.
5. Enter the first four-digit code listed for
your TV’s brand, then press
Note:
If the 4-digit code begins with
SELECT
.
zero, only the last 3-digits will appear on
the display.
6. Point the 7-in-One at your TV and press
POWER
. Your TV should turn off. If it
does not, enter the next code from the
list and press
SELECT
then
POWER
again. When your TV turns off, press
ESCAPE
14
to stop programming.
Need help? Call 1-800-763-9232
TV

15-1995.fm Page 15 Thursday, March 2, 2000 7:40 AM
TO OPERATE YO UR VCR
Locate the codes for your VCR in “VCRs” on
Page 65 and write them down on the supplied label.
Note:
Some manufacturers have several
codes listed. Try each until you find the right
one. The brands are listed in alphabetical order, with the most popular codes listed first.
Then follow these steps to program the 7-inOne to operate your VCR.
1. Turn on your
2. Press
TIMED SEQ
3. Press .
4. Repeatedly press
VCR
and insert a tape.
VCR
then hold down P until
appears.
CODE SETUP
appears.
SELECT
until VCR
appears.
5. Enter the first four-digit code listed for
your VCR’s brand, then press
Note:
If the 4-digit code begins with
SELECT
.
zero, only the last 3-digits will appear on
the display.
6. Point the 7-in-One at your VCR and
press
POWER
or
PLAY
. Your VCR
should turn off or start to play. If it does
not, enter the next code from the list and
press
SELECT
then
POWER
or
PLAY
again. When your VCR turns off or
plays, press
ESCAPE
to stop program-
ming.
Need help? Call 1-800-763-9232
15

15-1995.fm Page 16 Thursday, March 2, 2000 7:40 AM
TO OPERATE YOUR TV/VCR
COMBINATION
Locate the codes for your TV/VCR Combination in “TV/VCR Combinations” on Page 64
and write them down on the supplied label.
Notes:
Then follow these steps to program the 7-inOne to operate your TV/VCR Combination.
• Some manufacturers have several
codes listed. Try each until you find the
right one. The brands are listed in
alphabetical order , with the most popu lar
codes listed first.
• Some TV/VCR combinations require a
second code to control volume. If you
cannot get the volume to work, use the
TV code listed in the “TV/VCR Combinations” on Page 64.
1. Turn on your TV/VCR Combo and insert
a tape.
2. Press
TIMED SEQ
3. Press .
4. Repeatedly press
appears.
5. Enter the first four-digit code listed for
your TV/VCR Combo’s brand, then
press
Note:
zero, only the last 3-digits will appear on
the display.
VCR
then hold down P until
appears.
CODE SETUP
SELECT
If the 4-digit code begins with
.
appears.
SELECT
until VCR
16
Need help? Call 1-800-763-9232

15-1995.fm Page 17 Thursday, March 2, 2000 7:40 AM
6. Point the 7-in-One at your TV/VCR
Combo and press
POWER
or
PLAY
Your TV/VCR Combo should turn off or
start to play. If it does not, enter the next
code from the list and press
then
POWER
or
PLAY
again. When your
SELECT
TV/VCR Combo turns off or plays, press
ESCAPE
to stop programming.
TO OPERATE YOUR CABLE
CONVERTER
Locate the codes for your cable converter in
“Cable Converters” on Page 40 and write
them down on the supplied label.
Note:
Some manufacturers have several
codes listed. Try each until you find the right
one. The brands are listed in alphabetical order, with the most popular codes listed first.
.
Then follow these steps to program the 7-inOne to operate your cable converter.
1. Turn on your cable converter.
2. Press
TIMED SEQ
3. Press .
4. Repeatedly press
CBL
then hold down P until
appears.
CODE SETUP
appears.
SELECT
until
CABLE
appears.
5. Enter the first four-digit code listed for
your cable converter’s brand, then press
SELECT
Note:
.
If the 4-digit code begins with
zero, only the last 3-digits will appear on
the display.
Need help? Call 1-800-763-9232
17

15-1995.fm Page 18 Thursday, March 2, 2000 7:40 AM
6. Point the 7-in-One at your cable converter and press
POWER
. Your cable
converter should turn off. If it does not,
enter the next code from the list and
press
SELECT
then
POWER
again.
When your cable converter turns off,
ESCAPE
press
Note:
If your original cable converter remote
does not have an ON key, press
to stop programming.
CH+
on the
7-in-One to turn on your cable converter.
TO OPERATE YO UR
SATELLITE RECEIVER
Locate the codes for your satellite receiver in
“Satellite Receivers” on Page 51 and write
them down on the supplied label.
Note:
Some manufacturers have several
codes listed. Try each until you find the right
one. The brands are listed in alphabetical order, with the most popular codes listed first.
Then follow these steps to program the 7-inOne to operate your satellite receiver.
1. Turn on your satellite receiver.
SEQ
SA T
then hold down P until
appears.
CODE SETUP
2. Press
3. Press .
4. Repeatedly press
DSS
appears.
appears.
SELECT
until
TIMED
SAT/
5. Enter the first four-digit code listed for
your satellite’s brand, then press
SELECT
18
.
Need help? Call 1-800-763-9232

15-1995.fm Page 19 Thursday, March 2, 2000 7:40 AM
Note:
If the 4-digit code begins with
zero, only the last 3-digits will appear on
the display.
6. Point the 7-in-One at your satellite
receiver and press
POWER
. Your satellite receiver should turn off. If it does
not, enter the next code from the list and
press
SELECT
then
POWER
again.
When your satellite receiver turns off,
ESCAPE
press
to stop programming.
TO OPERATE YOUR CD
PLAYER
Locate the codes for your CD player in “CD
Players” on Page 44 and write them down on
the supplied label.
Note:
Some manufacturers have several
codes listed. Try each until you find the right
one. The brands are listed in alphabetical order, with the most popular codes listed first.
Then follow these steps to program the 7-inOne to operate your CD player.
1. Turn on your CD player and insert a
disc.
SEQ
CD
then hold down P until
appears.
CODE SETUP
2. Press
3. Press .
4. Repeatedly press
appears.
SELECT
TIMED
until
CD
appears.
5. Enter the first four-digit code listed for
your CD player’s brand, then press
SELECT
.
Need help? Call 1-800-763-9232
19

15-1995.fm Page 20 Thursday, March 2, 2000 7:40 AM
Note:
If the 4-digit code begins with
zero, only the last 3-digits appear.
6. Point the 7-in-One at your CD Player
and press
PLAY
. Your CD player sh ould
start to play. If it does not, enter the next
code from the list and press
PLAY
then
to play, press
again. When your CD starts
ESCAPE
to stop program-
SELECT
ming.
TO OPERATE YOUR TUNER/
RECEIVER
Locate the codes for your Tuner/ Receiver in
“Tuners/Receivers” on Page 60 and write
them down on the supplied label.
Note:
Some manufacturers have several
codes listed. Try each until you find the right
one. The brands are listed in alphabetical order, with the most popular codes listed first.
Then follow these steps to program the 7-inOne to operate your Tuner/Receiver.
1. Turn on your Tuner/Receiver.
2. Press
TIMED SEQ
3. Press .
4. Repeatedly press
TUNER
then hold down P until
appears.
CODE SETUP
appears.
SELECT
until
TUNER
appears.
5. Enter the first four-digit code listed for
you tuners/receiver’s brand, then press
SELECT
Note:
.
If the 4-digit code begins with
zero, only the last 3-digits will appear on
the display.
Need help? Call 1-800-763-9232
20

15-1995.fm Page 21 Thursday, March 2, 2000 7:40 AM
6. Point the 7-in-One at your Tuner/
Receiver and press
POWER
. Your
Tuner/Receiver should turn off. If it
does not, enter the next code from the
list and press
SELECT
then
POWER
again. When your Tuner/Receiver turns
off, press
ESCAPE
to stop programming.
TO OPERATE YO UR
AMPLIFIER
Locate the codes for your Amplifier in “Amplifiers” on Page 39 and write them down on
the supplied label.
Note:
Some manufacturers have several
codes listed. Try each until you find the right
one. The brands are listed in alphabetical order, with the most popular codes listed first.
Then follow these steps to program the 7-inOne to operate your amplifier.
1. Turn on your amplifier.
2. Press
TIMED SEQ
3. Press .
4. Repeatedly press
AMP
then hold down P until
appears.
CODE SETUP
appears.
SELECT
until
AMP
appears.
5. Enter the first four-digit code listed for
your amplifier’s brand, then press
SELECT
Note:
.
If the 4-digit code begins with
zero, only the last 3-digits will appear on
the display.
Need help? Call 1-800-763-9232
21
15-1995.fm Page 22 Thursday, March 2, 2000 7:40 AM
6. Point the 7-in-One at your amplifier and
press
POWER
. Your amplifier should
turn off. If it does not, enter the next
code from the list and press
POWER
then
fier turns off, press
again. When your ampli-
ESCAPE
SELECT
to stop pro-
gramming.
TO OPERATE OTHER
DEVICES
In addition to the labeled devices (
ER, TV, CD, CBL, VCR
or
SAT
AMP, TUN-
), the 7-in-One
can also operate digital video disc players
(DVD), laser disc players (LPD), cassette
decks, digital audio tape (DAT) players, video accessories, and miscellaneous audio devices (graphic equalizers and digital audio
service terminals for example).
To access device codes for: Use:
Digital Video Disc Players, Laser
Disc Players, Cassette Decks,
Digital Audio Tape Players
Phonographs
Video Accessories
Miscellaneous Audio
Home Automation
Note:
The PLUG ‘N POWER feature re-
VCR
CD
CBL
AMP
PLUG ‘N
POWER
quires additional equipment that is available
at your local RadioShack store.
For example, to set up a laser disc player:
1. Turn on your laser disc player and insert
a disc.
22
Need help? Call 1-800-763-9232

15-1995.fm Page 23 Thursday, March 2, 2000 7:40 AM
2. Press
TIMED SEQ
3. Press .
4. Repeatedly press
VCR
then hold down P until
appears.
CODE SETUP
appears.
SELECT
until
VCR
appears.
5. Press or to toggle between
LDP, TAPE
6. When
LDP
DAT
, and
.
appears, enter the first fo ur-
VCR
digit code listed for your laser disc
player’s brand in “Laser Disc Players”
on Page 49, then press
Note:
If the 4-digit code begins with
SELECT
.
zero, only the last 3-digits will appear on
the display.
7. Point the 7-in-One at your lase r disc a nd
press
PLA Y
. Your laser disc player
should play. If it does not, enter the next
code from the list and press
PLAY
then
player plays, press
again. When your laser disc
ESCAPE
SELECT
to stop pro-
gramming.
,
Need help? Call 1-800-763-9232
23
 Loading...