

Page 1

Digital Telephone
Answering System
A
43-3801
Owner’s Manual
Please read before using this equipment.
Page 2
Your system is ETL listed to UL standards and meets all
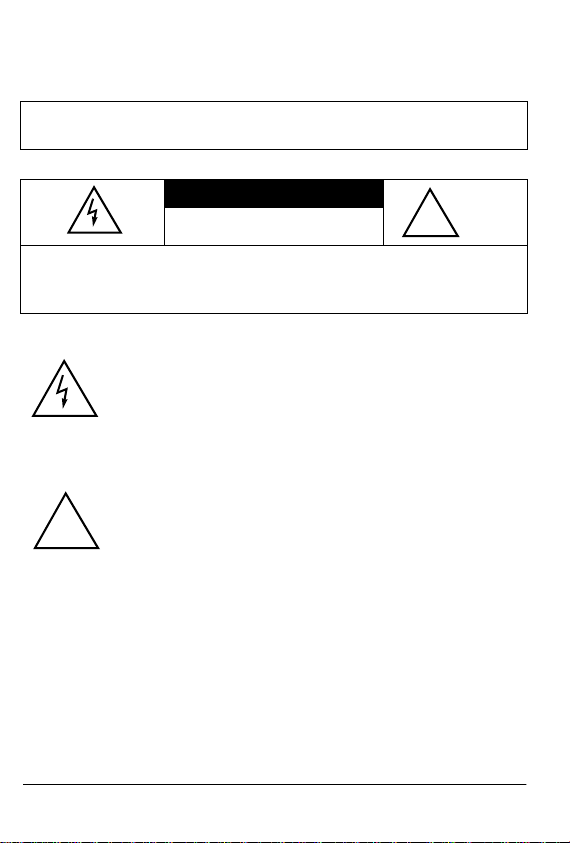
!
applicable FCC standards.
WARNING:
expose this product to rain or moisture.
CAUTION:
NOT REMOVE COVER OR BACK. NO USER-SERVICEABLE
PARTS INSIDE. REFER SERVICING TO QUALIFIED PERSONNEL.
!
To reduce the risk of fire or shock hazard, do not
CAUTION
RISK OF ELECTRIC SHOCK. DO
NOT OPEN.
TO REDUCE THE RISK OF ELECTRIC SHOCK, DO
This symbol is intended to alert you to the
presence of uninsulated dangerous voltage
within the product’s enclosure that might be of
sufficient magnitude to constitute a risk of electric
shock. Do not open the product’s case.
This symbol is intended to inform you that
important operating and maintenance
instructions are included in the literature
accompanying this product.
©
RadioShack and RadioShack.com are trademarks used by RadioShack Corporation.
2
2001 RadioShack Corporation. All Rights Reserved.
Page 3

ˆ
Contents
Introduction ........................................................................... 4
Installation ............................................................................. 6
Installing the Backup Battery ........................................... 6
Connecting the System to a Phone Line ......................... 7
Connecting AC Power ..................................................... 8
Preparation ............................................................................ 8
Turning the System On/Off .............................................. 8
Adjusting the Volume ....................................................... 9
Setting the Day and Time ................................................ 9
Setting the Incoming Message Length .......................... 10
Recording the Outgoing Message (OGM) ..................... 10
Setting the Number of Rings ......................................... 11
Operation ..................................... ................................. ... .... 12
Setting the System to Answer Calls .............................. 12
Using Announce-only .................................................... 13
Screening Calls ............................................................. 14
Recording a Memo ........................................................ 15
Recording a Two-way Phone Conversation .................. 15
Playing Incoming Messages/Memos/
Two-way Phone Conversations ..................................... 16
Deleting Messages ........................................................ 17
Remote Operation .............................................................. 18
Remote Operation Security Code .................................. 18
Operating the System from a Remote Location ............ 19
Remote Commands ....................................................... 19
Troubleshooting .................................................................. 20
Care ............................................................................... 21
Contents
3
Page 4

ˆ
Introduction
Thank you for purchasing the RadioShack Digital Telephone
Answering System. Your system is a sophisticated, fully digital
message center. Fully digital means the system stores all
messages on a computer chip. This gives you advanced
capabilities over a tape-based answering machine. For
example, you can save or delete individual messages. Because
your system is fully digital, there are no tape mechanisms to
wear out and no tapes to bother with. Your system has:
High Capacity
messages, memos, and two-way phone conversations.
Day/Time Stamp
was recorded.
Call Screening
decide whether or not to answer a call.
Phone Pick-Up Detection
message when you pick up any phone on the same line as the
system, so you can talk to the caller.
Multiple Outgoing Message (OGM)
to play your message or the prerecorded message, or just play
your announcement without recording the caller’s message.
Memo Recording
others in your home or office.
Two-Way Recording
telephone conversation.
4
— lets you record up to 10 minutes of
— records the day and time each message
— lets you listen to incoming calls so you can
— stops recording a caller’s
— lets you set the system
— lets you leave a message for yourself or
— lets you record both sides of a
Introduction
Page 5

Voice Activated Recording (VOX) Detection
stops recording when the caller hangs up or after 7 seconds of
silence to help conserve memory space.
— the system
Remote Operation
rotary phone and pocket tone dialer) to operate the system
while you are away from your home or office.
Remote Answer-on
location and set it to answer calls.
Adjustable Ring Number
after two, four, or seven rings.
Toll-Saver
calling long-distance to check your messages.
Selectable Incoming Message Length
maximum length of a caller’s message to 1 or 5 minutes.
Memory Full Warning
memory is full.
Message Indicator
messages.
— lets you avoid unnecessary toll charges when
— lets you use a touch-tone phone (or
— lets you call the system from a remote
— you can set the system to answer
— lets you set the
— lets you know when the system’s
— flashes to let you know you have new
READ THIS BEFORE INSTALLATION
Your system conforms to federal regulations, and you can
connect it to most telephone lines. However, each device that
you connect to the phone line draws power from the phone line.
We refer to this power draw as the device’s ringer equivalence
number, or REN. The REN is on the bottom of the system.
Introduction
5
Page 6

If you use more than one phone or other device on the line, add
up all the RENs. If the total is more than five (or three in rural
areas), your phone might not ring and your system might not
answer. If ringer operation is impaired, remove a device from
the line.
ˆ
Installation
INSTALLING THE BACKUP BATTERY
If AC power fails or you unplug the system, one 9V alkaline
battery (not supplied) is required to save any recorded
messages and the settings for the day and time. For the best
performance and longest life, we recommend a RadioShack
alkaline battery.
Caution:
recommended type.
1. Use a Phillips screwdriver to remove the screw on the
2. Attach a 9V alkaline battery to the terminals and place the
3. Replace the cover and secure it with the screw.
Replace the battery when the LOW BATT indicator flashes
while the system is connected to AC power.
Warning:
not burn or bury it.
6
Use a fresh battery of the required size and
battery compartment cover and remove the cover.
battery in the compartment.
Dispose of the old battery promptly and properly. Do
Installation
Page 7

Cautions:
• To avoid losing stored information, be sure the AC adapter
is plugged into an AC outlet before you replace the battery.
• If you do not plan to use the system with batteries for a
month or longer, remove the batteries. Batteries can leak
chemicals that can destroy electronic parts.
CONNECTING THE SYSTEM TO A PHONE
LINE
Select a location for the system that is near both a telephone
jack and an easily accessible AC outlet, and out of the way of
normal activities.
Your telephone connects directly to a modular telephone line
jack. If your telephone wiring does not have a modular jack, you
can update the wiring yourself using jacks and adapters
(available at your local RadioShack store), or have the
telephone company update the wiring for you. You must use
compatible modular jacks that are compliant with Part 68 of
FCC Rules
Note:
(or RJ11W for a wall plate jack).
.
The USOC number of the jack to be installed is RJ11C
Installation
7
Page 8

1. Plug the system’s modular phone line cord into the wall
jack.
2. Plug the modular phone line cord (not supplied) from your
telephone into the modular phone jack on the back of the
system.
CONNECTING AC POWER
Plug the AC adapter into a standard AC outlet. The MESSAGE
indicator lights.
Notes:
• If you did not install a backup battery, the MESSAGE
indicator lights, and the LOW BATT indicator flashes. The
system initializes, then you hear 4 tones.
• Do not press any of the system’s buttons while you are
plugging the adapter into the AC outlet. If you accidentally
press a button, reset the system by unplugging the adapter
from the AC outlet and reinserting it.
• The system cannot operate without AC power.
ˆ
Preparation
TURNING THE SYSTEM ON/OFF
To turn on the system, press
indicator lights and the system beeps.
8
STOP/ON/OFF
Preparation
. The MESSAGE
Page 9

When the MESSAGE indicator lights continuously, the system
is ready to answer calls.
To turn off the system, press
indicator turns off and the system beeps.
You can also turn on the system remotely (see “Setting the
System to Answer Calls” on Page 12).
STOP/ON/OFF
. The MESSAGE
ADJUSTING THE VOLUME
Press or hold down
decrease the volume. The system beeps when you press either
volume button so you can hear the volume level as it changes.
VOLUME
8888
to increase or
VOLUME
9999
to
SETTING THE DAY AND TIME
You must set the day and time before the system will record the
day/time voice stamp on each memo and incoming message.
The day/time voice stamp automatically defaults to Monday,
12:00 AM, when you connect the system to power, and does
not advance until you set the correct day and time.
1. Hold down
Step 4.
2. Repeatedly press
the correct day.
3. Repeatedly press
correct hour.
TIME/SKIP
(a tone sounds) continuously through
DA Y/REPEAT
HOUR/ANNOUNCE
until the system announces
until you hear the
Preparation
9
Page 10

4. Repeatedly press or hold down
hear the correct minute.
MINUTE/TWO WAY
until you
Note:
When you hold down
moves forward in 10 minute intervals until it reaches 00.
5. Release
time you set.
To hear the current day and time, press
system is on or off.
If you have not set the day and time and you press
the system announces “Please set time”.
TIME/SKIP
. The system announces the day and
MINUTE/TWO WAY
TIME/SKIP
, the system
while the
TIME/SKIP
,
SETTING THE INCOMING MESSAGE
LENGTH
INCOMING MSG
Slide
(minutes) to choose the length of incoming messages.
When you slide
only), the system plays your outgoing message, but the caller
cannot record a message. After the system answers, it monitors
the line for 10 seconds for any remote code entry.
on the back of the system to 1 or 5
INCOMING MSG
ANN ONLY
to
(announcement
MIN
RECORDING THE OUTGOING MESSAGE
(OGM)
You can use the system’s prerecorded outgoing message,
“Hello, please leave a message after the tone,” or record your
own.
To record an outgoing message:
10
Preparation
Page 11

1. Hold down
HOUR/ANNOUNCE
. The system beeps.
2. Speak clearly into the microphone from about 10 inches in
front of the system. The MESSAGE indicator flashes.
3. When you finish your message, release
HOUR/ANNOUNCE
The system sounds a tone and automatically plays back
your recorded message.
Notes:
• The maximum length for an outgoing message is about 30
seconds. When it reaches the maximum outgoing message
length, the system sounds a tone and plays back the
message. If you want to record a new OGM, simply repeat
these steps.
• If you record your own message and subsequently decide
to use the prerecorded message, press
to play your OGM. While it is playing, press
HOUR/ANNOUNCE
DELETE
to
erase the message you recorded.
• To hear the outgoing message at any time, press
ANNOUNCE
press
. To stop the outgoing message before it ends,
STOP/ON/OFF
.
HOUR/
SETTING THE NUMBER OF RINGS
RING SELECT
long the system waits before it answers a call. Slide
SELECT
2
– The system answers after two rings.
, located on the back of the system, controls how
RING
to the desired position.
.
Preparation
11
Page 12

4
– The system answers after four rings.
7
– The system answers after seven rings.
TS
(Toll Saver) – If there are new messages, the system
answers after two rings. Otherwise, the system answers
after four rings. This lets you avoid unnecessary charges
when calling by long distance to check your messages. If
you hear more than two rings, you know you can hang up
because the system has no new messages.
ˆ
Operation
SETTING THE SYSTEM TO ANSWER CALLS
To set the system to answer calls, press
on the system. The MESSAGE indicator lights.
When the system answers a call, it plays the outgoing
message, then beeps and begins recording.
The caller can leave a message for 1 minute or up to 5 minutes
in length (see “Setting the Incoming Message Length” on
Page 10). After the caller hangs up or is silent for more than 7
seconds, or the maximum message length is reached, the
system hangs up and resets to answer the next call. The
MESSAGE indicator flashes to indicate an incoming message.
When the system is answering a call or recording a message, if
any phone on the same line is picked up or the system detects
a Calling Party Control (CPC) signal, it stops playing the
12
Operation
ON/OFF/STOP
to turn
Page 13

outgoing message or recording an incoming message and
resets to answer another call.
Notes:
• If the system’s memory is full, it answers calls after 10
rings. The caller hears “No one is available to take your
call,” the system sounds a beep, and the caller cannot
leave a message. The system cannot record additional
messages until you delete some of the old messages (see
“Deleting Messages” on Page 17).
• Many local phone companies use CPC to signal that the
caller has hung up. Your system can recognize a CPC
signal and release the line. If the system records phone
company messages or dial tones, your local phone
company probably does not use CPC.
USING ANNOUNCE-ONLY
Announce-only sets the system to play a message for the caller,
then automatically disconnects without letting the caller leave a
message.
To select announce-only, slide
INCOMING MSG
ANN ONLY
to
.
When the system receives a call, it answers after two rings and
plays the announce-only message, a long beep sounds, then it
monitors the phone line for remote codes received within about
10 seconds.
You can use the system’s prerecorded announce-only OGM
“No one is available to take your call,” or record your own.
Operation
13
Page 14

To record a message, slide
hold down
HOUR/ANNOUNCE
INCOMING MSG
. After the beep, speak clearly into
ANN ONLY
to
, then
the microphone from about 10 inches in front of the system.
(The message can be about 30 seconds long.) Release
ANNOUNCE
to stop recording. The system automatically plays
HOUR/
back your recorded message.
Notes:
• The announce-only OGM does not affect your original
OGM that tells callers to leave a message. Each OGM can
be recorded, played back, or deleted independently.
• The maximum length for an announce-only OGM is about
30 seconds. When it reaches the maximum outgoing
message length, the system sounds a tone and plays back
the message.
• If you record your own message and subsequently decide
to use the prerecorded message, press
HOUR/ANNOUNCE
to play the message you recorded. While it is p laying, press
DELETE
to erase your message.
• To hear the outgoing message at any time, press
ANNOUNCE
press
. To stop the outgoing message before it ends,
ON/OFF/STOP
.
HOUR/
• When the system is set for announce-only, you cannot set
it to record incoming messages using the remote
commands.
To turn off announce-only so callers can leave messages, slide
INCOMING MSG
14
to either 1 or 5
MIN
Operation
.
Page 15

SCREENING CALLS
To screen your calls, let the system answer. Listen to the
caller’s message through the system’s speaker. If you decide to
answer the call, pick up any phone connected to the same
phone line as the system. The system stops recording and
resets to answer the next call.
Notes:
• If you pick up the phone just as the system answers, the
system might not stop playing the message. If this
happens, press
ON/OFF/STOP
to stop playing the message.
• When
VOLUME
incoming caller’s messages cannot be heard. However, the
standard voice prompts, beep tone, and recorded message
should be audible at minimum volume when any of the
buttons are pressed.
8/9is set to the minimum level, the
RECORDING A MEMO
A memo is a message that you record by speaking directly into
the system, without calling in on the phone. To record a memo
up to 1 minute,
MEMO
hold down
microphone from about 10 inches in front of the system.
When you finish speaking, release
The message indicator flashes until you play the memo.
. After the beep, speak clearly into the
MEMO
. The system beeps.
Operation
15
Page 16

RECORDING A TWO-WAY PHONE
CONVERSATION
You can record both sides of a conversation on any phone
connected to the same phone line as the system.
At any time during the conversation, press
After a beep, the system starts recording. Press
WAY
again to stop recording the conversation. The system
sounds a tone and the MESSAGE indicator flashes until you
play the two-way phone conversation.
Important:
recording of conversations over the telephone. Be sure to check
your local, state and federal laws before using this product to
record any telephone conversation in order to determine your
use is in compliance with such laws or guidelines.
Every state has different regulations governing the
MINUTE/TWO WAY
MINUTE/TWO
.
PLAYING INCOMING MESSAGES/MEMOS/
TWO-WAY PHONE CONVERSATIONS
The MESSAGE indicator flashes after the system records one
or more incoming messages, recorded memos, or two-way
phone conversations.
To listen to all messages (including memos and two-way phone
conversations), press
message in sequence. The system announces the day and
time, the message was recorded. After you play all the new
messages, the MESSAGE indicator lights steadily and the
system automatically saves the messages and resets to answer
calls.
PLA Y/P AUSE
. The system plays each new
16
Operation
Page 17

Note:
If there are no messages, the system beeps.
To replay the messages, press
listening to messages, press
resumes when you press
PLAY/PAUSE
PLAY/PAUSE
PLAY/PAUSE
. To pause while
. The playback
again. The system
returns to the answer-ready mode after 7 seconds if you do not
press
PLAY/PAUSE
again.
During message playback, you can:
• Press
• Hold down
• Press
DAY/REPEAT to
DAY/REPEAT
TIME/SKIP
To stop message playback at any time, press
Note:
Each message is treated as a new message until you
repeat the current message.
to repeat the previous message.
to skip forward to the next message.
STOP/ON/OFF
.
play back the entire message.
DELETING MESSAGES
You can delete messages individually during playback, or all at
once after playback.
To delete a particular incoming message, memo, or two-way
phone conversation (after listening to it), press
playback.
DELETE
during
To delete all messages after playback, hold down
system sounds a tone.
Operation
DELETE
. The
17
Page 18

Note:
If you press
system sounds tones to alert you. You cannot delete all
messages until you playback all new messages.
ˆ
Remote Operation
While you are away from your home or office, you can use a
touch-tone phone or a pulse (rotary) phone with a pocket tone
dialer to enter your remote operation security code and do any
of the following:
• set the system to answer calls
• listen to your messages
• record a new OGM
• record a memo
• delete an individual message
DELETE
before playback of all messages, the
REMOTE OPERATION SECURITY CODE
To use your system from a remote telephone, you must first
enter a 3-digit remote operation security code. The security
code label is located at the bottom of the system. Enter the
security code after the system answers and sounds two beeps.
Within 7 seconds, enter one of the remote commands.
Note:
If you do not have CPC service and you hang up while
the system is playing back the messages, the system might not
recognize that you disconnected. If someone calls while the
18
Remote Operation
Page 19

system continues to play the messages, the caller hears a busy
signal. We recommend that you exit remote access using the
appropriate remote command until the system beeps once
before you hang up.
OPERATING THE SYSTEM FROM A
REMOTE LOCATION
1. Dial your phone number. Even if the system is off, it will
turn on and answer after about ten rings.
2. After the outgoing message plays and the system beeps,
enter your remote operation security code.
Note:
If you pause for 10 seconds between digits, the
system disconnects.
3. Enter the desired remote command (see “Remote
Commands”).
5#
4. When you finish, press
Notes:
• If you enter an incorrect or invalid command, press 5# to
stop and return to the remote main menu.
• Remote message playback pauses about every two
minutes. You must press any key on the handset to
continue playing the message.
to end remote access.
Remote Operation
19
Page 20

REMOTE COMMANDS
Press To
1#
2#
3#
4#
5#
6#
7#
8#
9#
0#
ˆ
We do not expect you to have any problems with your system,
but if you do, try these suggestions. If the system still does not
Play new messages.
Play all messages.
Delete current message.
Repeat previous message.
Stop and exit.
Skip and exit.
Turn off/on the system. (If the system is off, it will turn on and
answer after about ten rings. You can turn it of f and on again
with this command.)
Record an OGM.
Record a memo.
Monitor the room.
Troubleshooting
20
Troubleshooting
Page 21

operate properly, take it to your local RadioShack store for
assistance.
Problem Remedy
The system does not
answer calls.
The system does not
answer calls.
The outgoing
announcement is distorted.
The system does not
respond to remote
commands.
Check all phone line connections.
Make sure AC power is properly
connected.
The system is full of messages. Delete
some messages
The system is off. Press
OFF
to turn on the system.
Check the number of devices
connected to your phone line and add
up the RENs. See “Read This Before
Installation” on Page 5.
Record the announcement speaking in
a normal tone about 10 inches from the
system.
Reenter your remote operation security
code.
Check for a power failure and make
sure AC power is connected.
Do not enter commands while the
system is making announcements or
sounding tones.
STOP/ON/
CARE
Keep the system dry; if it gets wet, wipe it dry immediately. Use
and store the system only in normal temperature environments.
Troubleshooting
21
Page 22

Handle the system carefully; do not drop it. Keep the system
away from dust and dirt, and wipe it with a damp cloth
occasionally to keep it looking new.
Modifying or tampering with the system’s internal components
can cause a malfunction and might invalidate its warranty and
void your FCC authorization to operate it. If your system is not
performing as it should, take it to your local RadioShack store
for assistance. If the trouble is affecting the telephone lines, the
phone company can ask you to disconnect your system until
you have resolved the problem.
FCC STATEMENT
Your system complies with Part 68 of
upon request, provide the FCC registration number and the
REN to your phone company. Both numbers are on the bottom
of your system.
Note:
You must not connect your system to:
• coin-operated systems
• party-line systems
• most electronic key phone systems
This equipment complies with the limits for a Class B digital
device as specified in Part 15 of the
provide reasonable protection against radio and TV interference
in a residential area. However, your equipment might cause TV
or radio interference even when it is operating properly. To
eliminate interference, you can try one or more of the following
corrective measures:
• Reorient or relocate the TV or radio’s receiving antenna.
22
Troubleshooting
FCC Rules
FCC Rules
. You must,
. These limits
Page 23

• Increase the distance between the equipment and the radio
or TV.
• Use outlets on different electrical circuits for the equipment
and the radio or TV.
Consult your local RadioShack store if the problem continues.
THE FCC WANTS YOU TO KNOW
In the unlikely event that your system causes problems on the
phone line, the phone company can temporarily discontinue
your service. If this happens, the phone company attempts to
notify you in advance. If advance notice is not practical, the
phone company notifies you as soon as possible and advises
you of your right to file a complaint with the FCC.
Also, the phone company can make changes to its lines,
equipment, operations, or procedures that could affect the
operation of your system. The telephone company notifies you
of these changes in advance, so you can take the necessary
steps to prevent interruption of your telephone service.
LIGHTNING
Your system has built-in protection circuits to reduce the risk of
damage from surges in telephone line and power line current.
These protection circuits meet or exceed the FCC
requirements. However, lightning striking the telephone or
power lines can damage your system.
Lightning damage is not common. Nevertheless, if you live in an
area that has severe electrical storms, we suggest that you
unplug your system when storms approach to reduce the
possibility of damage.
Troubleshooting
23
Page 24

Limited One-Year Warranty
This product is warranted by RadioShack against manufacturing defects in material and workmanship under nor mal use for one (1) ye ar from th e date of p urchase from RadioShack company-owned stores and authorized RadioShack
franchisees and dealers. EXCEPT AS PROVIDED HEREIN, RadioShack
MAKES NO EXPRESS WARRANTIES AND ANY IMPLIED WARRANTIES, INCLUDING THOSE OF MERCHANTABILITY AND FITNESS FOR A PARTICULAR PURPOSE, ARE LIMITED IN DURATION TO THE DURATION OF THE
WRITTEN LIMITED WARRANTIES CONTAINED HEREIN. EXCEPT AS PROVIDED HEREIN, RadioShack SHALL HAVE NO LIABILITY OR RESPONSIBILITY TO CUSTOMER OR ANY OTHER PERSON OR ENTITY WITH RESPECT
TO ANY LIABILITY, LOSS OR DAMAGE CAUSED DIRECTLY OR INDIRECTLY BY USE OR PERFORMANCE OF THE PRODUCT OR ARISING OUT
OF ANY BREACH OF THIS WARRANTY, INCLUDING, BUT NOT LIMITED TO,
ANY DAMAGES RESULTING FROM INCONVENIENCE, LOSS OF TIME,
DATA, PROPERTY, REVENUE, OR PROFIT OR ANY INDIRECT , SPECIAL, INCIDENTAL, OR CONSEQUENTIAL DAMAGES, EVEN IF RadioShack HAS
BEEN ADVISED OF THE POSSIBILITY OF SUCH DAMAGES.
Some states do not allow limitations on how long an implied warranty lasts or
the exclusion or limitation of incidental or conseq uent ial damag es, so th e abov e
limitations or exclusions may not apply to you.
In the event of a product defect during the warranty period, take the product and
the RadioShack sales receipt as proof of pu rchase date to any RadioShack
store. RadioShack will, at its option, un less otherwise provid ed by law: (a) correct the defect by product repair without charge for parts and labor; (b) replace
the product with one of the same or similar design; or (c) re fund the purchase
price. All replaced parts and products, and prod ucts on whic h a refu nd is ma de,
become the property of RadioShack. New or r econditioned parts and products
may be used in the performance of warranty service. Repaired or replaced parts
and products are warranted for the remainder of the original warranty period.
You will be charged for repair or replacement of the product made after the expiration of the warranty period.
This warranty does not cover: (a) damage or failure cause d by or attributa ble to
acts of God, abuse, accident, misuse, improp er or abno rmal usa ge, fai lure to f ollow instructions, improper installation or maintenance, alteration, lightning or
other incidence of excess voltage or curren t; (b) any repairs other than those
provided by a RadioShack Authorized Service Facility; (c) consumables such as
fuses or batteries; (d) cosmetic damage ; (e) transportation, shipping or insurance costs; or (f) costs of product removal, installa tion, set-up service adjustment or reinstallation.
This warranty gives you specific legal rights, and you may also have other rights
which vary from state to state.
RadioShack Customer Relations, 200 Taylor Street,
6th Floor, Fort Worth, TX 76102
12/99
02A02
43-3801
A
Printed in China
 Loading...