

Quantum BARRACUDA BAR811, BARRACUDA BAR844, BARRACUDA BAR822, BARRACUDA BAR833 Operating Instructions Manual
Page 1

OPERATING INSTRUCTIONS
Page 2

BAR811/ BAR844
1000 meter Automatic
Helium Escape Valve
BAR822/ BAR833
1000 meter Manual
Helium Escape Valve
BAR81/Automatic Helium Escape Valve
SCREW CHRONO BU TTON
CHRONOGRAPH/S TART and STOP
SCREW CROWN/CLOSE
CALENDAR AD JUSTMENT
HELIUM ESCAPE VALVE
HOUR ADJUS TMENT
SCREW CROWN/O PEN
CHRONOGRAPH/S TART POINT
SCREW CHRONO BU TTON
BARRACUDA
Your Barracuda Diver is the watch for
professional and amateur divers, as
well as demanding sportsmen. The new
helium escape valve together with all the
protection systems, offer optimal security
and reliability. In order to ensure that your
watch remains watertight, we recommend
that you have it checked by an authorised
service center.
ALWAYS MUST BE CL OSED POSIT ION
Helium escape valve
When carrying out work at great depths, professional divers stay in a diving bell for several days, breathing a mixture of
gases containing a high proportion of helium. The pressure is gradually increased to reach the pressure at the working
depth. The divers, still inside the bell, are then lowered to the working site. They leave the bell to carry out their work.
Once their work is complete, they re-enter the bell, whic
h is then raised to the surface. Pressure is then returned to
atmospheric levels and this is when the valve must be opened (only for deep-sea dives lasting several days) The helium
molecules diffuse and penetrate the material of the gas kets. The quantity is sufficient to push out the crystal during the
return to atmospheric pressure. To avoid this, the Barracuda Diving watch is equipped with a valve specially produced
by Quantum
Watches.
CAUTION:
PLEASE PAY MORE ATTENTION TO KEEP CLOSED HELIUM ESCAPE VALVE, CHRONO BUTTONS AND SCREW
CROWN. OTHERWISE YOUR WATCH WILL LOSE IT’S WATERPROOF SPESIFICATION.
Page 3

BAR822/Manual Helium Escape Valve
BAR833/Manual Helium Escape Valve
SCREW CHRONO BUTTON
CHRONOGRAPH/ START and ST OP
SCREW CHRO NO BUTTO N
CALENDAR ADJUSTMENT
SCREW CHRONO BU TTON
CHRONOGRAPH/S TART and STOP
SCREW CHRONO BUTTON
CALENDAR AD JUSTMENT
SCREW CROWN/OP EN
HOUR ADJUS TMENT
HOUR ADJUS TMENT
SCREW CROWN/O PEN
CHRONOGRAPH/START POINT
CHRONOGRAPH/S TART POINT
HELIUM ESCAPE VALVE
SCREW CHRO NO BUTTON
HELIUM ESCAPE VALVE
ALWAYS MUST BE CLOSED POSITION
SCREW CHRONO BU TTON
ALWAY S MUST BE CLOSED P OSITION
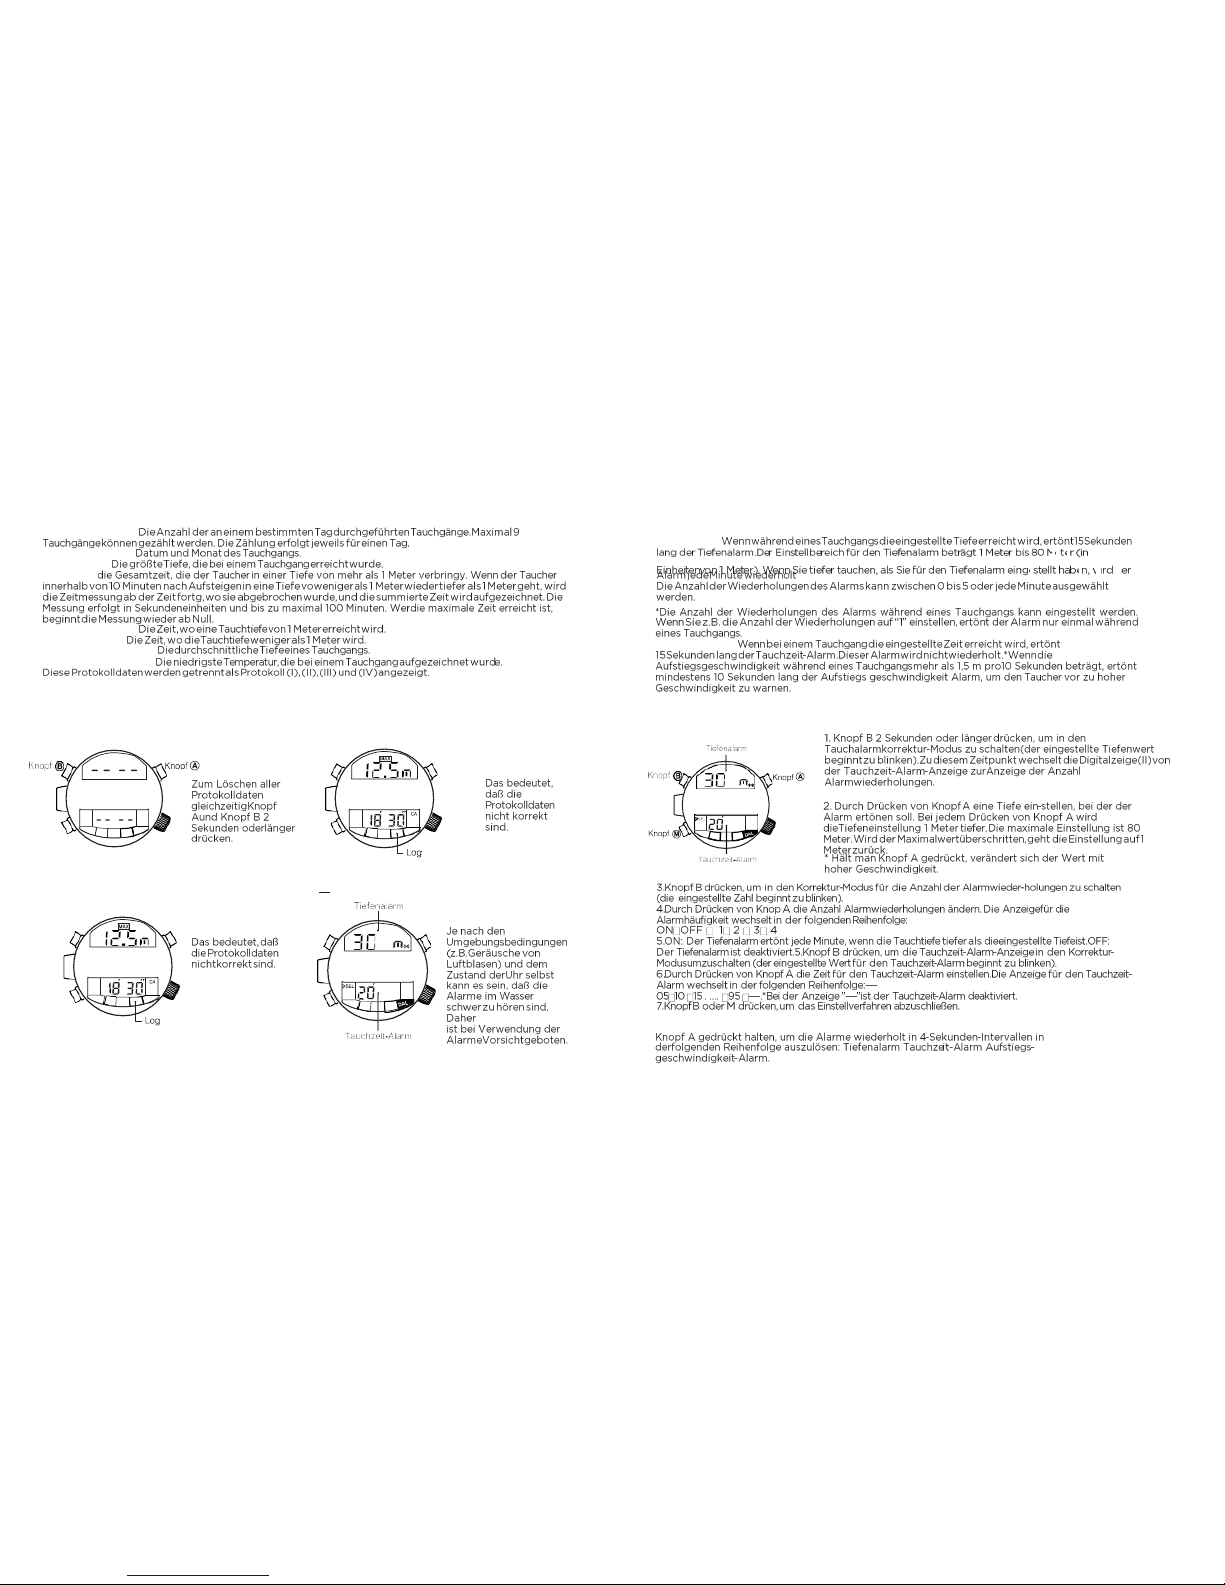
How to use the helium escape valve? (fig.2)
In its normal position (fig.2.1), the helium escape
valve is perfectly watertight thanks to the gaskets
During the decompression phase, unscrew the crown of the
valve in order to release the mechanism (fig.2.2). The valve is now
watertight from the outside. As the interior pressure becomes
greater than the exterior pressure, it pushes the gasket (A) out of
its seating, thus releasing the gas (fig.2.3). Once the pressure is
equali
sed, gasket (A) returns to its original position, pushed by the
SCREW CHRONO BU TTON
SCREW CROWN/C LOSE
HELIUM ESCAPE VALVE
(B), but it is not functional, since it is screwed down. spring (C) (fig.2.2).This operation is automatically repeated several
times during the decompression phase. Once atmospheric
pressure is reached, screw down the crown of the valve (fig. 2.1).
Note: Even if the valve is unscrewed, we strongly recommend that
the valve remains screwed down whenever the watch is immersed
in water, the watch is still water-resistant to a relative pressure of
in water, the watch is still water-resistant to a relative pressure of
5 Bar (50 metres). However, complete water-resistance to the dial
depth can only be achieved with gasket (B) and the valve in the
screwed down position.
Automatic helium escape valve: if your watch is equipped with an
automatic helium escape valve, no manipulation is required.
NOTE: Automatic helium escape
valve: if your watch is equipped
with an automatic helium escape
valve, no manipulation is required.
CALENDAR AD JUSTMENT
HOUR ADJUSTMENT
SCREW CROWN/O PEN
SCREW CHRONO BU TTON
BAR844/Automatic
Helium Escape Valve
Page 4

NSOR
ONO
BAR855/ BAR866200 meter Ana-
DigiCitizen CS00 Diving Movement
SCREW CHRONO BUTTO N
SCREW CHRONO
BUTTO N
PRESS URE SENSOR
SCREW CHRONO
BUTTO N
SCREW CROWN/
CLOSE
SCREW CROWN/
OPEN
SCREW CHRONO BUTTON
SCREW CHRONO
BUTTON
PRESSURE SE
SCREW CHR
BUTTON
SCREW CROWN/
CLOSE
SCREW CROWN/
OPEN
BAR866/Citizen CS00 Diving Movement
BAR855/Citizen CS00 Diving Movement
Page 5

Cal. No CS00
INSTRUCTION MANUAL
Highly reliable water resistance for use at depths of up to 200 meters
A. Diving with this Watch
WARNING:
Safe diving
Do not use the depth meter when...
Page 6

CAUTION:
Stop using this product while diving when...
B. Name of Parts
D. Time/Calendar Mode
Switching in the digital display (II)
When manipulating the crown...About the screw lock
Screw locked position
Freed from the screw locked position
C.Switching Modes
From any mode shown in
the box below:
Setting the Time and Calendar
a. Always perform the Digital setting �irst, then the
Analog setting.
a. Digital setting
Setting the Time
A
SEL
SET
CA
SEL
Page 7

b. A nalog setting Setting
the Analog Time
E. Alarm Mode
F. Chronograph Mode
Using the chronograph
<Standard measurement>
Setting the alarm
<Split time measurement>
<Note>
Alarm ON/OFF
Alarm monitoring
<Auto-return system>
Additional feature
<Auto-return system>
Split time:
Page 8

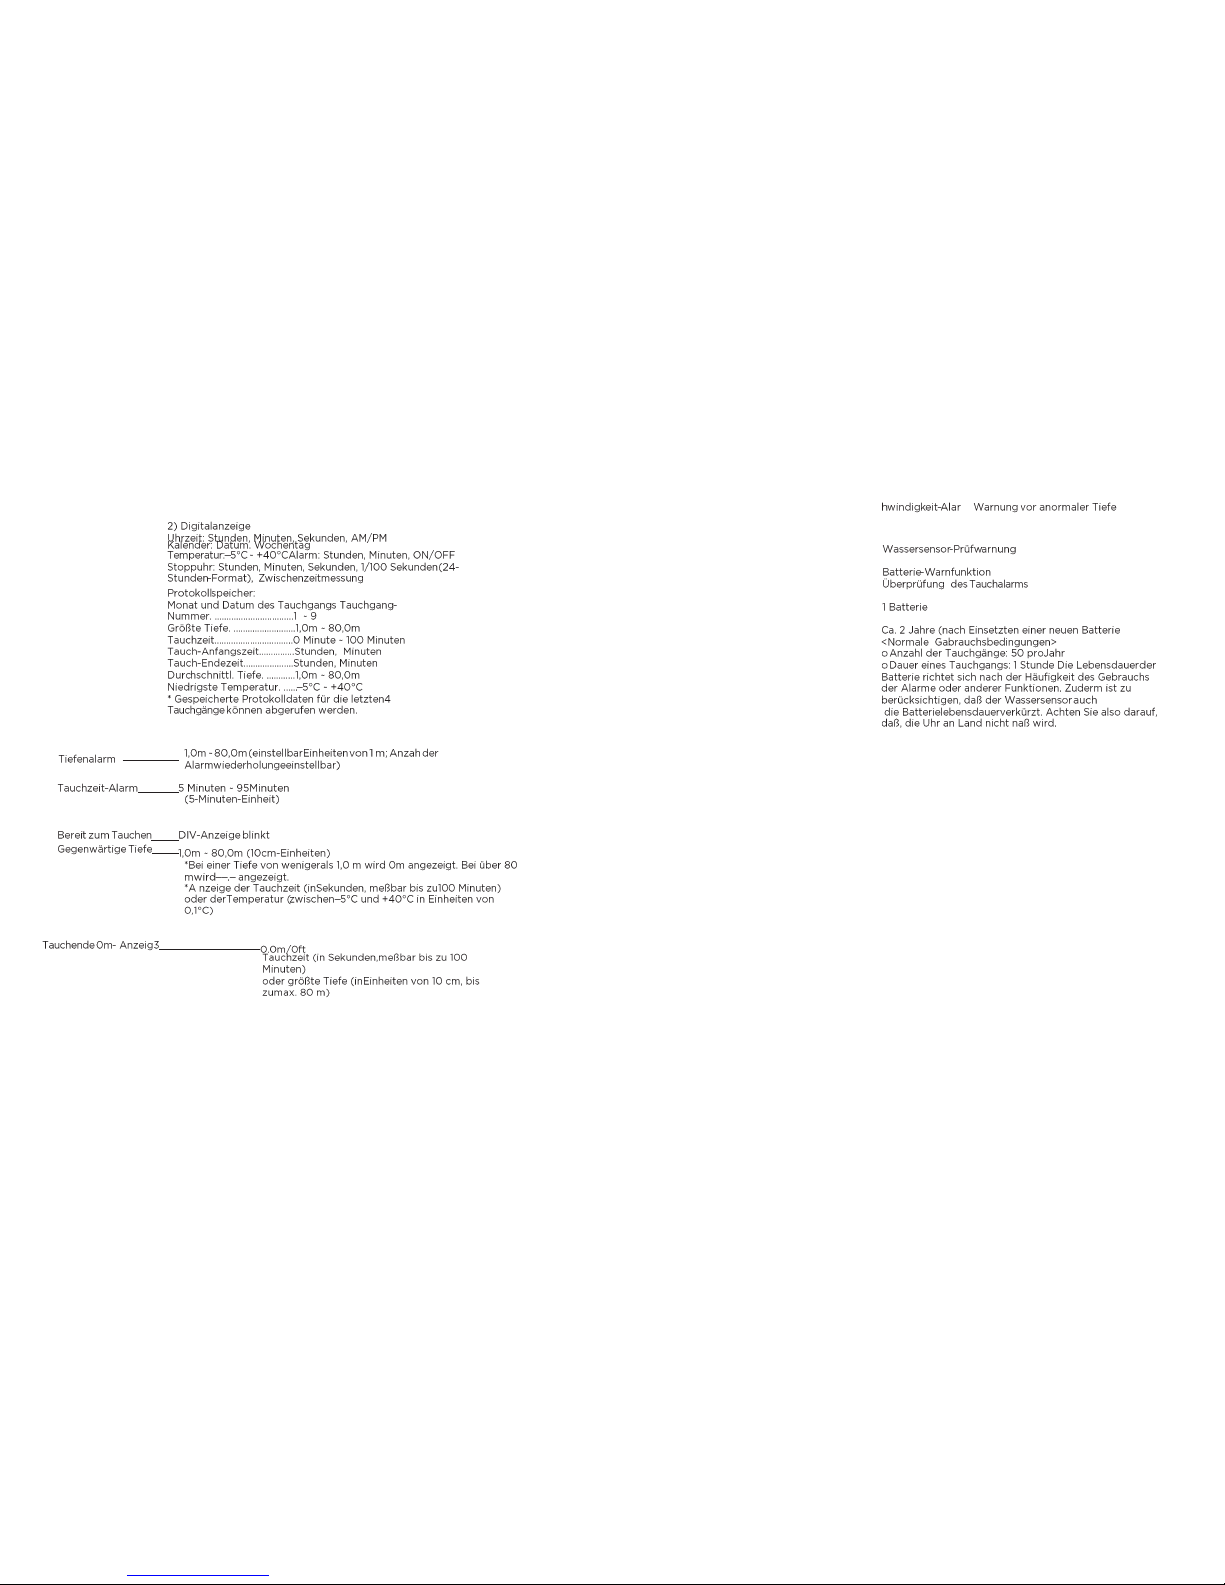
G. Log Mode
The dive log data can be retained in the watch, counting the last 4 dives.
1. Number of dives:
2. Dive month and date:
3. Maximum depth:
4. D ive time:
5. Dive start time:
6. D ive end time:
7. Average depth:
8. Minimum temperature:
Changing the Log Display
To delete all log data;
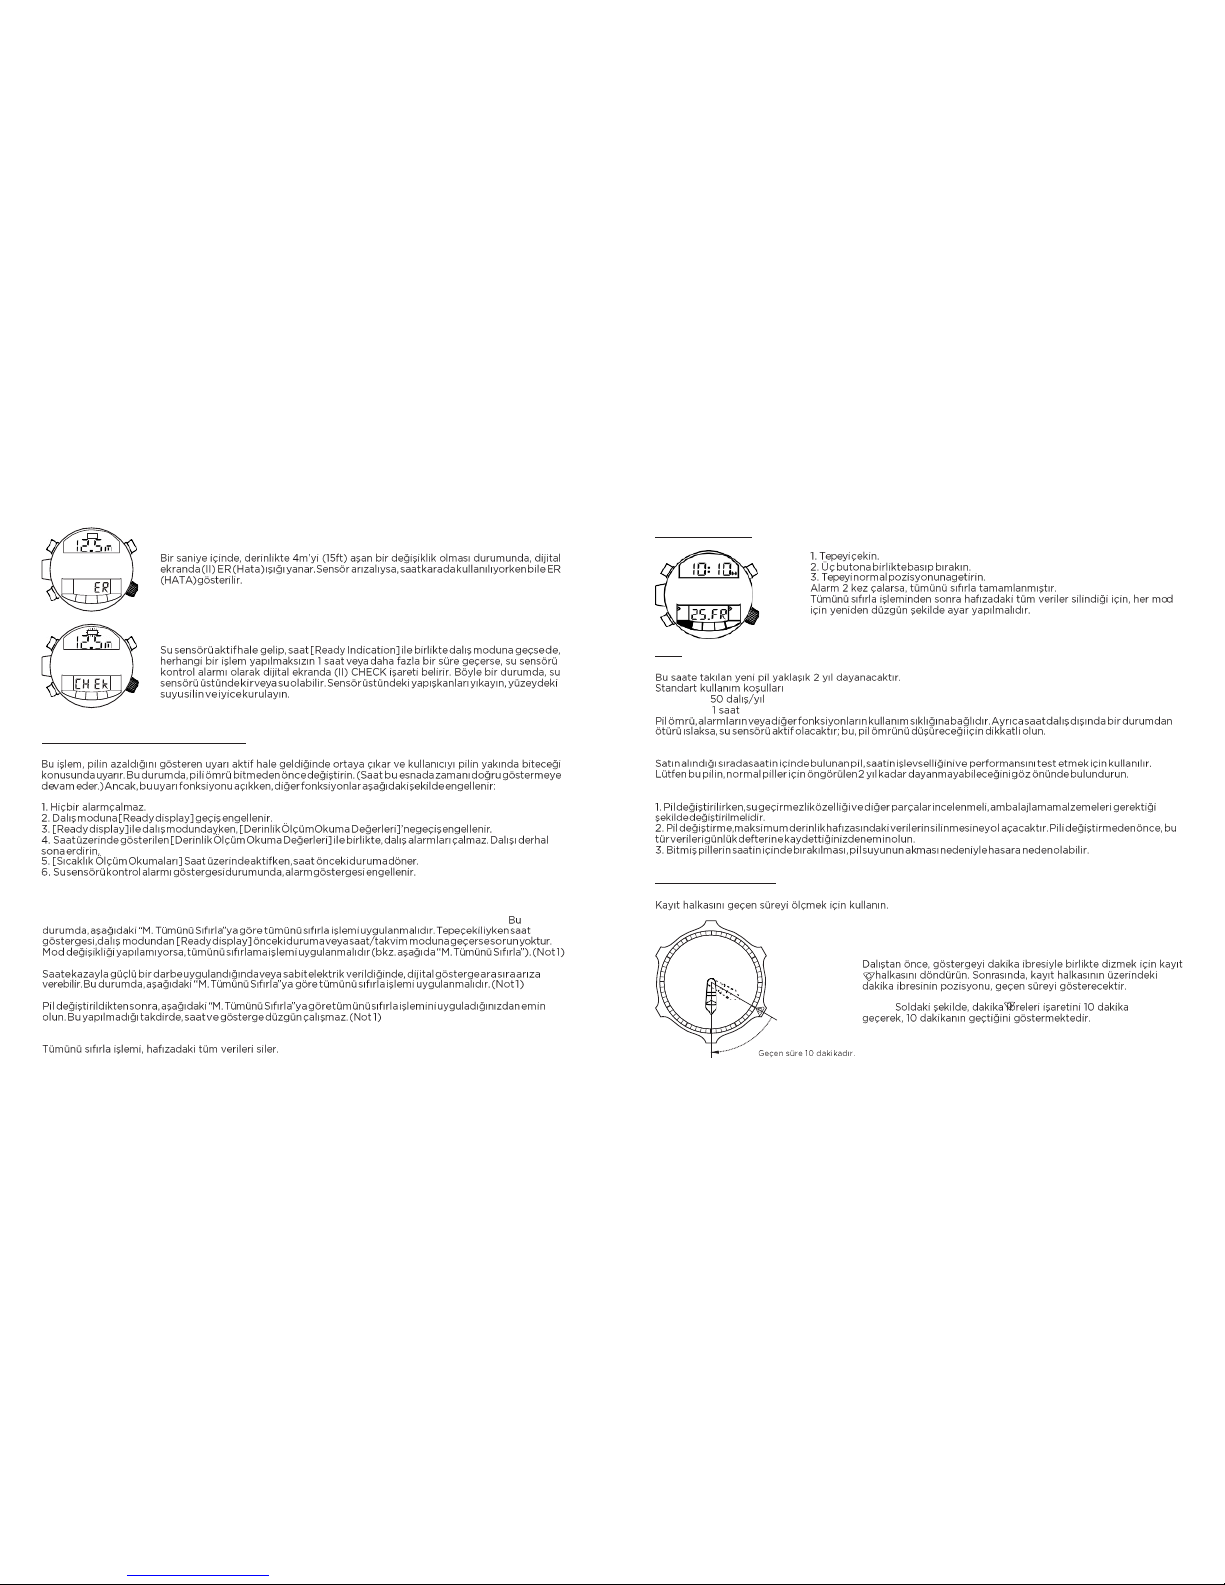
In case the depth indication �lashes:
In case ER (error) is shown:
H. Dive Alarm Modes
Page 9

The following two alarm functions are provided as dive alarms used in this watch.
1. Depth alarm function:
2. Dive time alarm function:
Setting the depth alarm/ dive time alarm
İ. Diving Mode
Dive Alarm Monitor
Additional feature
<Water Sensing Function>
Page 10

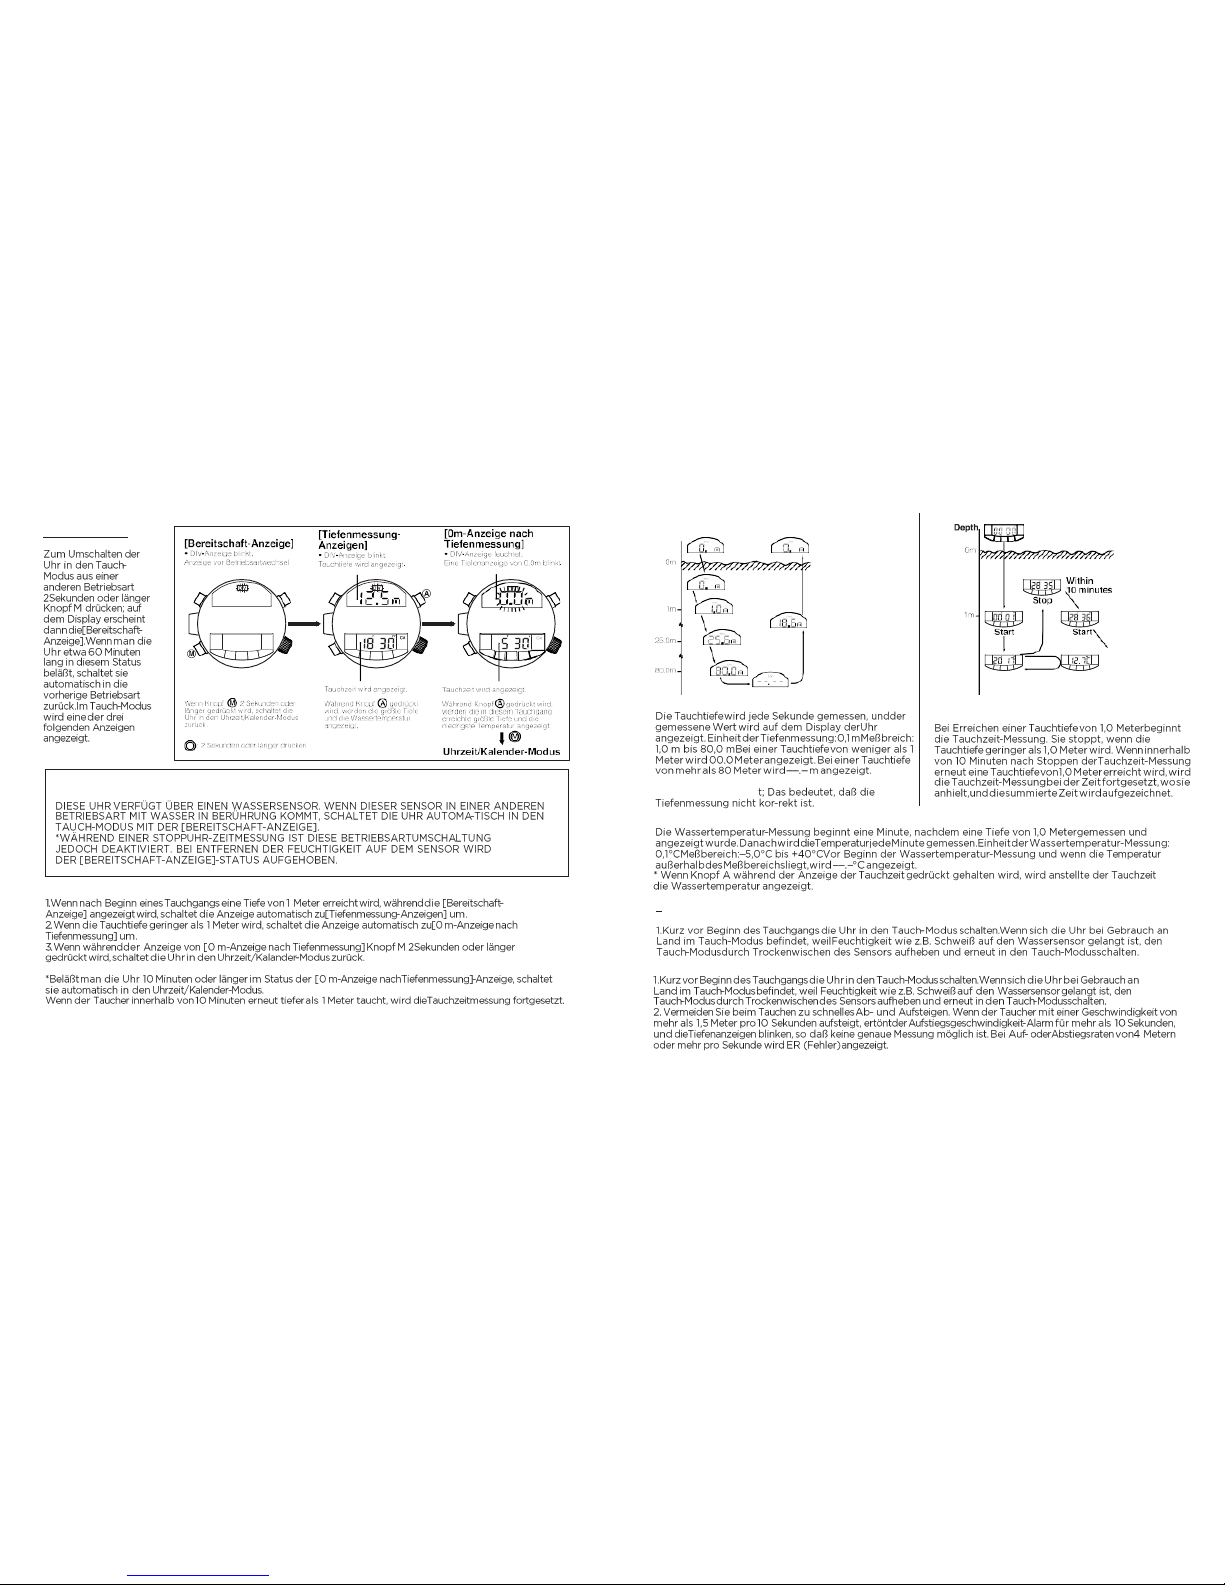
Depth Measurement Readings
Depth Measurement
1. Depth Measurement
3. Water Temperature Measurement
Dive the measurement
2. Dive Time Measurement
High altitude & Freshwater diving
However, an accurate measurement is
not possible at altitudes over 4,000 meters (13,124 ft).
Before diving
During diving
After diving
J. Precautions for Diving Mode Use
Making accurate depth readings
K. Various Alert Functions
1. Ascending Speed Warning
Page 11

2. Abnormal Depth Alert
M. All Reset
3. Water Sensor Check Alert
L. In Case of the Following:
The second hand goes at 2-second intervals.
Changeover cannot be performed from the diving mode [Ready display] or [0m Reading after Depth
Measurement] to the time/calendar mode.
•In case the depth reading is one meter or more, though the watch is used on land
• Digital display malfunction
• After battery replacement
* Note 1
N. The Ba ttery
a. Battery life
Number of dives:
Duration of dives:
b. The original battery
c. Battery replacement
O. Other Functions
Register ring
Example:
DIV
CA
P
SEL
CA
DIV
CA
40
Page 12
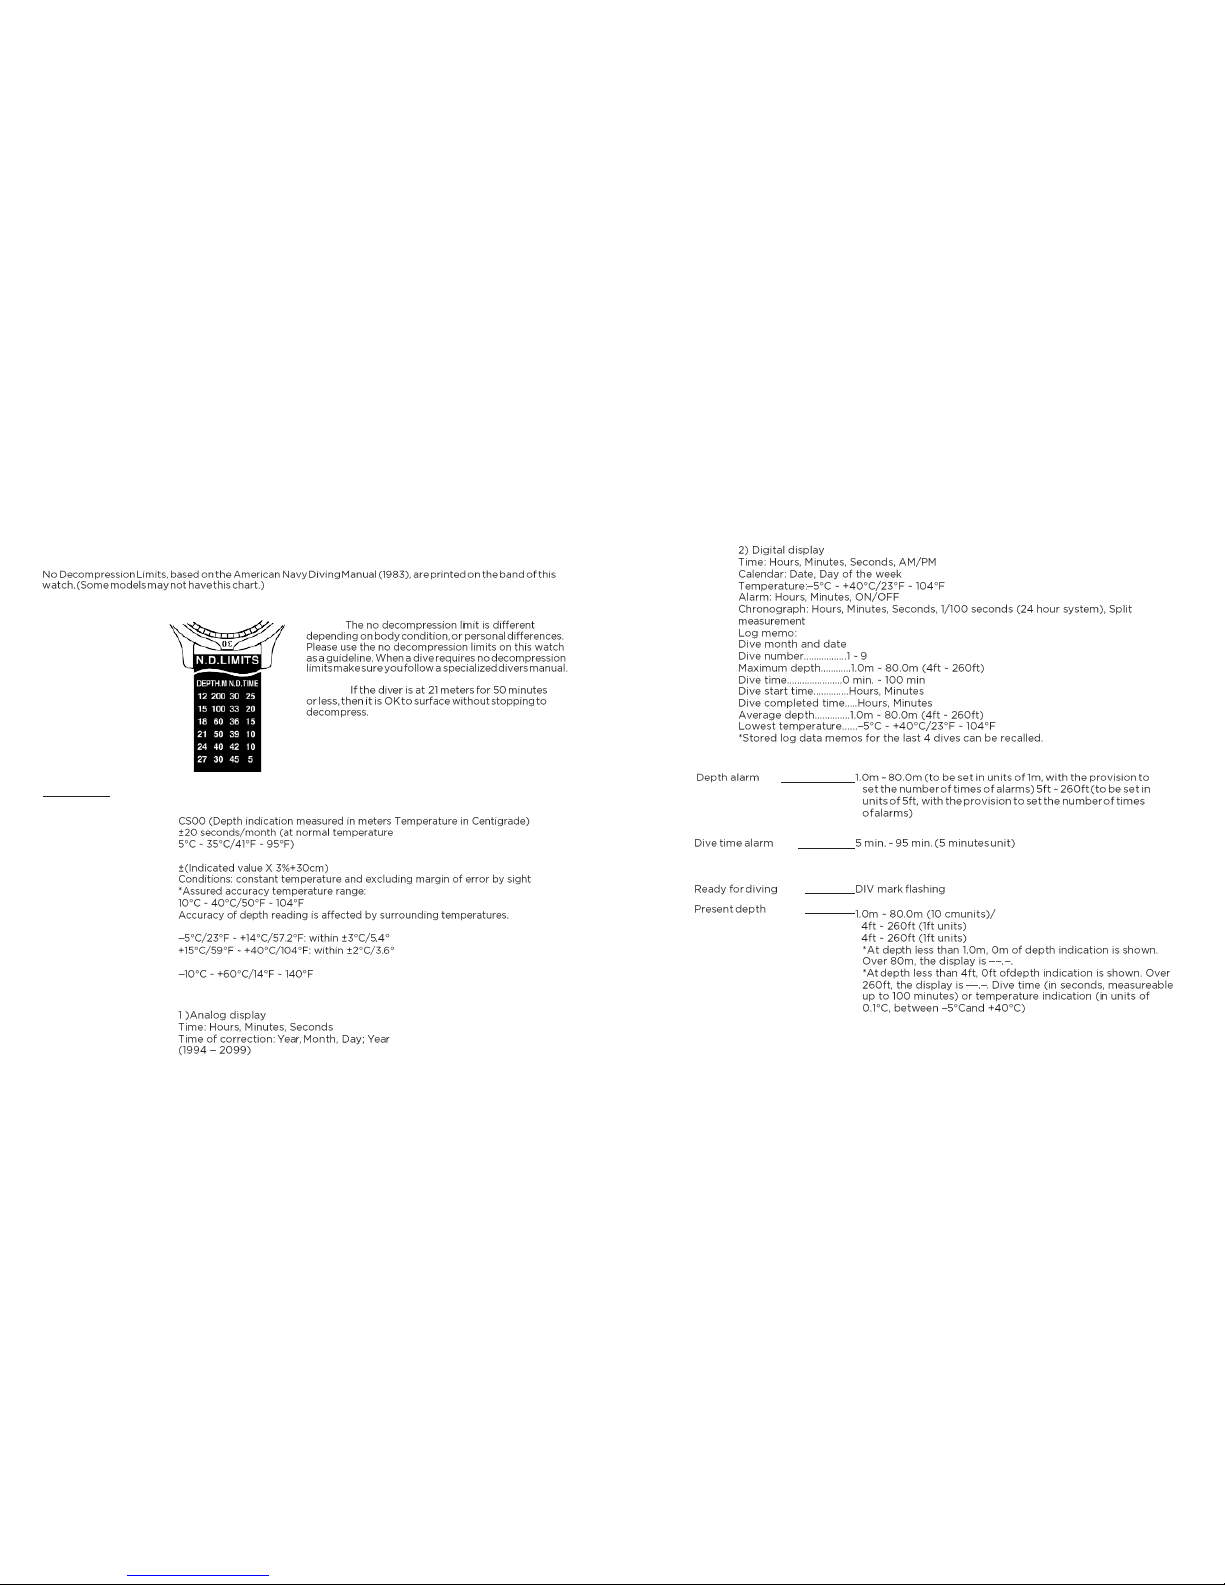
No decompression limits
The range of time when it is unnecessary to stop to decompress while surfacing from a dive is determined by the depth
and time of the dive.These values are referred to as “No Decompression Limits.” Use these as estimates when diving.
<Reading the chart>
DEPTH. m....N.D. Time12
m. .............................. 200
Min.15 m. ................ 100
Min.18 m. ................ 60
Min.21 m. ................ 50
Min.24 m. ................ 40
Min.27 m. ................ 30
Min.30 m. .................25
Min.33 m. ................ 20
Min.36 m. ................ 15
Min.39 m. ................ 10
Min.42 m. ................ 10
Min.45 m............5 Min.
P. Speci�ication
1. Caliber number
2. Accuracy of time
measurement
3. Accuracy of depth
reading
4. A ccuracy of
temperature reading
5. Watch operational
temperature range
6. D isplay function
Caution:
Example:
Dive alarm mode:
Dive:
Page 13
Cal. No CS00
GEBRAUCHSANWEISUNG
7. Alarm functions
8. Additional features
9.Battery to be used
10.Battery lifetime
Page 14

VORSICHT:
Wasserdicht bis zu einer Tiefe von 200 Metern
1. Einsatz der Uhr beim Tauchen
BESONDERE VORSICHT:
Sicheres Tauchen
Keine Benutzung des Tiefenmessers unter den folgenden Umständen...
Notwendigkeit zum Beenden des Betriebs dieses Produkts unter den folgenden Umständen
B.B ezeichnung der Teile
C.Umschalten-Zwischen den
Betriebsarten
A
SEL
SET
CA
SEL
Page 15

D. Uhrzeit/Kalender-Modus
Umschalten zur Digitalanzeige (II)
Handhabung der Krone Über die Schraubarretierung
To remove this notice,visi
b. Analog-Einstellung
Einstellen der Analogzeit
E. Alarm-Modus
Einstellen der Alarmzeit
Einstellen der Uhrzeit und des Kalenders
a.Immer zuerst die Digital-Einstellung und
dann die Analog-Einstellungdurchführen.
a. Digital-Einstellung
Einstellen der Uhrzeit und des Kalenders
Ein-und Ausschalten des Alarms
Überprüfen des Alarms
<Rückschaltautomatik>
Page 16

F. Stoppuh-Modus
G. Protokoll-Modus
Verwendung der Stoppuhr
<Normale Zeitmessung>
Die Tauch-Protokolldaten für die letzten 4 Tauchgänge können in der Uhrgespeichert werden.
<Aufeinanderfolgende Zeitmessungen mit Summierung>
<Messung von Zwischenzeiten>
Wechseln der Protokoll-Anzeige
<Hinweis>
Zusätzliche Funktion
<Rückschaltautomatik>
Zwischenzeit:
Page 17
1. Anzahl Tauchgänge:
2. Monat und Datum:
3. Größte Tiefe:
4. Tauchzeit:
5. Tauch-Anfangszeit:
6. Tauch-Endezeit:
7. Durchschnittliche Tiefe:
8. Niedrigste Temperatur:
Bei dieser Uhr stehen die folgenden beiden Tauchalarm-Funktionen zu Verfüg
r
1. Tiefenalarm:
To remove this
www.foxitsoftware.c
2. Tauchzeit-Alarm:
Löschen aller Protokolldaten;
Wenn die Tiefenanzeige blinkt;
Einstellen des Tiefenalarms/Tauchalarms
Wenn ER (Fehler) angezeigt wird;
H. Tauchalarm-Modus
(Hinweis)
Überprüfen des Tauchalarms
Page 18
İ. Tauch-Modus
Tiefenmessung-Anzeigen
Tiefenmessung
1. Tiefenmessung
Wenn ER (Fehler) angezeigt wird und
dieTiefenanzeige blink
3. Wassertemperatur-Messung
2. Tauchzeit-Messung
J. Vorsichtsmaßnahmen bei Versendung desTauch-Modus
Maßnahmen für präzise Tiefenmessungen
Maßnahmen für präzise Tiefenmessungen
Tiefe
Zusätzliche Funktion
<Wassersensor-Funktion>
Page 19

Tauchen in Gewässern in großer Höhe und in Binnengewässern
2. Warnung vor anomaler Tiefe
Vor dem Tauchen
Während des Tauchens
Nach dem Tauchen
K. Verschiedene Warnfunktionen
1. Aufstiegsgeschwindigkeit-Warnung
3. Wassersensor-Prüfwarnung
L. IAbhilfemaßnahmen in der Folgenden Fällen:
Der Sekundenzeiger bewegt sich in 2-Sekunden-Schritten.
•Es kann nicht vom Tauch-Modus [Bereitschaft-Anzeige] oder [0 m-Anzeigenach Tiefenmessung] in den
Uhrzeit/Kalender-Modus umgeschaltet werden.•Die Tiefenanzeige beträgt ein Meter oder mehr, obgleich d ie
Uhr an Land benutztwird.
•Fehlfunktion der Digitalanzeige
•Nach Batteriewechsel
)
*Hinweis 1
DIV
CA
DIV
CA
Page 20

M. Gesamtrückstellung
Dekompressionsfreie Bereiche
Der Zeitbereich, in dem ein Aufstieg an die Ober�läche ohne Dekompression spausen möglich ist, richtet sich nach der
Tauchtiefe und der Tauchzeit. DiesWertpaare de�inieren jeweils e
Tionernem“Doevkeomthpisrenssoitoicnsef
,
reviiesnit:
Bereich”. Verwende Sie diese Werte als Richtlinien beim Tauchen.
N. Die Batterie
a. Lebensdauer
<Ablesen der Tabelle>
Tiefe-in
Keine Dekom-Meternpression nach
Time12 m. ............ 200
Anzahl der Tauchgänge:
Dauer eines Tauchgangs:
b. Mitgelieferte Batterie
C. Batteriewechsel
O. Sonstige Funktionen
Registrierring
Min.15 m. ............. 100
Min.18 m. ............. 60
Min.21 m. ............. 50
Min.24 m. ............. 40
Min.27 m. ............. 30
Min.30 m. ............. 25
Min.33 m. ............. 20
Min.36 m. ............. 15
Min.39 m. ............. 10
Min.42 m. ............. 10
Min.45 m...........5 Min.
P. Technische Daten
1. Kaliber-Nummer
2. Genauigkeit der
Zeitanzeige
3. Genauigkeit der
Tiefenmessung
4. Genauigkeit der
Temperaturmessung
Beispiel:
5.
Betriebstemperaturbereich
6. Anzeigefunktione
P
SEL
CA
40
Page 21
7. Alarm-Funktionen
8. Zusätzliche Funktionen
9.Batterie
Tauchalarm-Modus:
10.Batterielebensdauer
Tauchen:
Page 22

Cal. No CS00
KULLANMA TALİMATI
200 metreye kadar derinliklerde kullanım için oldukça güvenilir, su geçirmez.
A. Bu Saatle Dalış
UYARI:
Güvenli Dalış
Derinlik ölçeri aşağıdaki koşullarda kullanmayınız!
Page 23

DİKKAT:
Dalış sırasında aşağıdaki durumlarda bu ürünü kullanmayı bırakınız
Parça adları
D. Saat/Takvim Modu
Dijital göstergede değişiklik yapma (II)
Tepeyi hareket ettirirken… Vida kilidi hakkında
Kilitli vida pozisyonu
Kilitsiz vida pozisyonu
C. Mod Değiştirme
Aşağıdaki kutucukta
gösterilen modlardan:
Saat ve Takvim Ayarı
a. Her zaman önce Dijital ayarı, sonra da Analog ayarını yapın.
a. Dijital ayar
Saat Ayarı
Page 24

F. Kronograf Modu
b. Analog ayar
Analog Saat Ayarı
E. Alarm Modu
<Birikmiş geçen süre ölçümü>
Kronograf kullanımı
<Standart ölçüm>
Alarm ayarı
<Split time ölçümü>
Alarm ON/OFF
Alarm izleme
<Otomatik-dönüş sistemi>
<Not>
Ek özellik
<Otomatik-dönüş sistemi>
Split time: Split işlemi yapıldığında, başlangıçtan itibaren geçen süre gösterilir.
Başlangıç
Noktası
Hedef
Page 25

G. Günlük Modu
Son 4 dalışı hesaplayan dalış günlüğü verileri saatte muhafaza edilebilir.
1. Dalış sayısı:
2. Dalış yapılan ay ve tarih:
3. Maksimum derinlik:
4. D alış süresi:
5. Dalış başlangıç zamanı:
6. Dalış bitiş zamanı:
7. Ortalama derinlik:
8. Minimum sıcaklık:
Bu veriler günlük (I), (II), (III) ve (IV) şeklinde ayrı ayrı gösterilir.
Günlük Göstergesini Değiştirme
Tüm günlük verilerini silmek için;
Derinlik göstergesi ışığının yanması durumunda;
ER (Hata) vermesi durumunda;
H. Dalış Alarm Modu
(Not)
Günlük (I) Günlük (II) Günlük (III)
Günlük (IV)
Log data
B
Log data
B
Log data
B
Log data
B
Page 26

Saat/Takvim Modu
Aşağıdaki iki alarm fonksiyonu, bu saatte kullanılan dalış alarmları olarak bulunmaktadır.
1. Derinlik alarmı fonksiyonu:
2. Dalış zamanı alarm fonksiyonu:
Derinlik alarmı/ dalış zamanı alarmı
I. Dalış Modu
Dalış Alarmı izleme
Ek özellik
<Suyu Algılama Fonksiyonu>
Page 27

Derinlik Ölçümü Okuma Değerleri
1. Derinlik Ölçümü
Derinlik ölçümü birimleri:
Ölçüm aralığı:
3. Su Sıcaklığı Ölçümü
Dalış Zaman Ölçümü
2. Dalış Zamanı Ölçümü
Yüksek Rakımda&Tatlı Suda Dalış
Ancak, 4.000 metrenin (13.12ft) üstündeki rakımlarda doğru
ölçüm yapmak mümkün değildir.
Dalıştan Önce
Dalış sırasında
Dalıştan sonra
J. Dalış Modu Kullanımı için Önlemler
Doğru derinlik okuması yapmak
K. Çeşitli Alarm Fonksiyonları
1. Yüzeye Çıkış Hızı Uyarısı
Page 28
2. Anormal Derinlik Alarmı
M. Tümünü Sıfırla
3. Su Sensörü Kontrol Alarmı
L. Aşağıdakilerin Olması Durumunda:
Saniye ibresi 2-saniyelik aralıklarla ilerliyor.
• Dalış [Ready display] veya [0m Derinlik Ölçümünden sonra Okuma] modundan saat/takvim moduna g eçiş işlemi
yapılamaz.
• Saat karada kullanılıyor olsa bile, derinlik okuma değerinin bir metre veya daha fazla olması durumunda
• Dijital gösterge arızası
• Pil değişikliğinden sonra
* Not 1
N. Pil
a. Pil Ömrü
Dalış sayısı:
Dalış süresi:
b. Orijinal Pil
c. Pil Değiştirme
O. Diğer Fonksiyonlar
Kayıt halkası
40
<Kayıt halkasının kullanımı>
Örnek:
DIV
CA
DIV
CA
P
SEL
CA
Page 29

Dekompresyonsuz Limit
Dalış sırasında yüzeye doğru çıkarken dekompresyona gerek yoksa, zaman aralığı, derinlik ve dalış süresi ile
belirlenir.
Bu değerlere “Dekompresyonsuz Limitler” denir. Bunları, dalış sırasında tahmin olarak kullanın.
Zaman:
Takvim: Sıcaklık:
Alarm:
Kronograf:
Günlük hafızası:
<Şemayı okumak>
DEPTH. m....N.D.
Time12 m. ........... 200
Min.15 m. ............. 100
Min.18 m. ............. 60
Min.21 m. ............. 50
Min.24 m. ............. 40
Min.27 m. ............. 30
Min.30 m. ............. 25
Min.33 m. ............. 20
Min.36 m. ............. 15
Min.39 m. ............. 10
Min.42 m. ............. 10
Min.45 m............5 Min.
P. Açıklama
Dikkat:
Örnek:
Dalış alarmı modu:
1. Kalibre numarası
2. Zaman ölçümünün doğruluğu
3. Derinlik okuma değerlerinin
doğruluğu
4. S ıcaklık okuma değerlerinin
dorğuluğu
5. Saatin operasyonel sıcaklık
aralığı
6. Gösterge fonksiyonları
Koşullar:
Zaman:
Zaman düzeltme:
Dalış:
Page 30

7. Alarm fonksiyonları
8. Ek özellikler
9. Kullanılan pil
10. Pil ömrü
Page 31

 Loading...