

Page 1

QNAP Turbo NAS
Software User Manual
(Version: 4.0)
This m anual is applicabl e to the following Turbo NA S models: TS- 110, TS-112, TS -119P II ,
TS- 120, TS-121, TS -210, TS- 212, TS-219P II, T S-220, TS -221, TS -259 Pro+, TS -269L, TS- 410,
TS- 410U , T S-412, TS -412U, TS-419P II, TS- 419U II, TS- 420, TS-420U, TS- 421, TS-421U, TS-459
Pro II, T S- 459 Pro+, TS- 469 Pr o, TS- 469L, T S-509 Pro, TS-569L, TS -669L, TS- 809 Pr o, TS -869L,
SS-439 Pr o and SS -839 Pro.
For user manuals of other Turbo NAS models and firmware versions, please visit
http://docs.qnap.com
© 2013 QNAP System s, Inc. All Ri ghts R eserved.
Page 2

Table of Contents
................................................................................................................5
1. Notice
.............................................................................................................. 6
1.1 Le ga l Notice a nd Disclaimer
1.2 Regulato ry Notice
.............................................................................................................. 8
1.3 Symbols in this Document
.............................................................................................................. 12
1.4 Safet y Information and Prec aut ions
.............................................................................................................. 13
................................................................................................................14
2. Getting Started
.............................................................................................................. 15
2.1 Hardw a re Ins tallation
................................................................................................................................ 162.1.1 Hard Disk Drive Compatibility Lis t
................................................................................................................................ 17
2.1.2 Checking System Status
.............................................................................................................. 212.2 S oftwa re Ins ta llatio n
................................................................................................................................ 222.2.1 Online Installation
................................................................................................................................ 35
2.2.2 Cloud Installation
................................................................................................................................ 44
2.2.3 CD Installation
.............................................................................................................. 452. 3 Gettin g Utilities
2.4 Connec t ing to NAS Shared Folders
.............................................................................................................. 48
................................................................................................................................ 492.4.1 Connecting to NAS shared folders in Windows
................................................................................................................................ 54
2.4.2 Connecting to NAS shared folders in Mac or Linux
.............................................................................................................. 602.5 Connecting t o NAS by We b Browser
2.6 Migrating from Old NAS
.............................................................................................................. 62
................................................................................................................65
3. QTS Basics and Desktop
.............................................................................................................. 66
3.1 Introducing QT S
3.2 Using QTS Deskt o p
.............................................................................................................. 70
................................................................................................................86
4. System Settings
.............................................................................................................. 87
4.1 General Settings
4.2 Storage M a na ger
.............................................................................................................. 95
................................................................................................................................ 964.2.1 Volume Management
................................................................................................................................ 100
4.2.2 RAID Management
................................................................................................................................ 123
4.2.3 Hard Disk S.M.A.R.T
................................................................................................................................ 124
4.2.4 Encrypted File System
................................................................................................................................ 135
4.2.5 iSCSI
4.2.5.1 Por tal Ma nagement
........................................................................................................................ 13 6
4.2.5.2 Targ et Management
........................................................................................................................ 14 4
4.2.5.3 Advanced ACL
........................................................................................................................ 17 0
4.2.5.4 LUN Backup
........................................................................................................................ 17 3
................................................................................................................................ 2004.2.6 Virtual Disk
.............................................................................................................. 2054. 3 Netwo rk
4.4 S e curity
.............................................................................................................. 229
2
Page 3

4.5 Hardw a re
.............................................................................................................. 232
.............................................................................................................. 238
4.6 P o w e r
.............................................................................................................. 243
4.7 Notif ica tion
4.8 Firmware Upd a te
.............................................................................................................. 246
4.9 Backup/ Resto re
.............................................................................................................. 250
.............................................................................................................. 252
4.10 Ext e rna l Device
................................................................................................................................ 2534.10.1 External Storage
................................................................................................................................ 261
4.10.2 USB Printer
4.10.2.1 Setting up Printer Connection in Windows 7
........................................................................................................................ 26 5
4.10.2.2 Setting up Printer Connection in Windows XP
........................................................................................................................ 27 0
4.10.2.3 Se tting up Pr inte r Connection in Mac OS 10.6
........................................................................................................................ 27 2
4.10.2.4 Se tting up Pr inte r Connection in Mac OS 10.5
........................................................................................................................ 27 5
4.10.2.5 Se tting up Pr inte r Connection in Mac OS 10.4
........................................................................................................................ 28 0
4.10.2.6 Setting up Printer Connection in Linux (Ubuntu 10.10)
........................................................................................................................ 28 4
................................................................................................................................ 2894.10.3 UPS
.............................................................................................................. 2954. 11 S y s tem Sta tus
4.12 S y s tem Logs
.............................................................................................................. 302
................................................................................................................308
5. Privile ge Settings
.............................................................................................................. 309
5.1 Use rs
5.2 Use r Groups
.............................................................................................................. 325
.............................................................................................................. 327
5.3 S ha red Folde rs
5.4 Quota
.............................................................................................................. 363
5.5 Domain Se curity
.............................................................................................................. 365
................................................................................................................................ 3675.5.1 Joining NAS to Active Directory (Windows Server 2003/2008)
................................................................................................................................ 378
5.5.2 Connecting NAS to an LDAP Directory
................................................................................................................384
6. Network Serv ic es
.............................................................................................................. 385
6.1 W in/Ma c/NF S
6.2 FTP
.............................................................................................................. 393
6.3 Telnet/ S S H
.............................................................................................................. 396
6.4 S NMP S e tt ings
.............................................................................................................. 397
6.5 S e rvice Disco v e ry
.............................................................................................................. 399
6.6 Network Recy cle Bin
.............................................................................................................. 401
6.7 Qs y nc
.............................................................................................................. 403
................................................................................................................426
7. Applications
.............................................................................................................. 427
7.1 Station M a na ge r
7.2 iTune s S e rver
.............................................................................................................. 435
7.3 DLNA Media S erve r
.............................................................................................................. 437
7.4 Media Library
.............................................................................................................. 439
7.5 W e b S e rv e r
.............................................................................................................. 444
................................................................................................................................ 4657.5.1 Virtual Host
3
Page 4

7.6 LDAP S e rver
.............................................................................................................. 469
.............................................................................................................. 473
7.7 V P N Se rvice
.............................................................................................................. 489
7.8 MySQL S e rv e r
7.9 S y s log Serve r
.............................................................................................................. 491
7.10 A ntiv irus
.............................................................................................................. 498
.............................................................................................................. 509
7.11 RADIUS Serve r
7.12 TFTP Serve r
.............................................................................................................. 513
................................................................................................................515
8. QNAP Applications
.............................................................................................................. 516
8.1 Backup S ta tio n
................................................................................................................................ 5178.1.1 Backup Server
................................................................................................................................ 526
8.1.2 Remote Replication
................................................................................................................................ 550
8.1.3 Cloud Backup
................................................................................................................................ 557
8.1.4 External Backup
.............................................................................................................. 5768. 2 myQNAPcloud Service
8. 3 File S ta tion
.............................................................................................................. 599
8.4 P ho to S ta tion
.............................................................................................................. 623
8.5 Music S ta tion
.............................................................................................................. 638
8. 6 M u ltimedia Statio n
.............................................................................................................. 644
8.7 Downlo a d S ta tion
.............................................................................................................. 672
8.8 HD Sta tion
.............................................................................................................. 691
8. 9 S u rveilla n ce S ta tion Pro
.............................................................................................................. 713
8.10 A pp C e nte r
.............................................................................................................. 723
................................................................................................................731
9. Use the LCD Panel
................................................................................................................737
10. GNU GENERAL PUBLIC LICENSE
4
Page 5

1. Notice
Le g al No tice an d Dis cla imer
Regulatory Notice
8
Symbols in thi s D oc ument
6
12
Safety Information and Prec aut ions
13
5
Page 6

1.1 Legal Notic e and Disclaimer
T ha nk yo u for choos ing QNAP prod uct s ! This us er manual prov ides d e ta iled instruc tions
of using the Turbo NAS (network-attached storage). Please read carefully and start t o
enjoy the powerful func t ions of the Turbo NAS!
Th e Turb o NA S is h ere after referred to as the NA S .
T his manua l prov ides the de s cription o f a ll t he f unct ions o f the Turbo NAS. The
produc t y ou purchas ed may not s upport cert ain funct ions dedica te d to s pe cific
models.
Legal Notices
All the fe ature s, fu nctio nality , a n d othe r p rod uct s p ecifica tion s a re subje ct to chang e
without p rior notice o r obligation. Inf o rmation conta ined herein is sub ject to chang e
without notic e.
QNAP and the QNAP logo are trademarks of QNAP Systems, Inc. All other brands and
produc t names referred to are trademarks of their respec t ive holders.
Further, the ® or ™ symbols are not used in the text.
D is c la im e r
Information in this do cument is provided in connection w ith QNAP® products . No lic e ns e ,
express or implied, by e sto ppe ls or otherwise, to any int e llectual property rights is
grante d by this document. Exc e pt a s provided in QNAP's te rms and condit ions of sa le f or
such products, QNAP Assumes no liability whatsoever, and QNAP disclaims any express or
implied warranty , rela ting to sale an d / or u s e of QNA P p rodu cts inclu d in g liability or
wa rranties rela ting to f itne s s f o r a p a rt icular purpose , mercha ntability , o r infringement o f
any pate nt, copyright or other inte llectual property right.
QNAP product s a re no t inte nd e d for use in medica l, life s a v ing, life s us taining, crit ical
c ontrol or safety syst ems, or in nuclear fac ility applic ations.
In no event shall QNAP Systems, Inc . (QNAP) liability exceed t he price paid for the
produc t f rom direct , indirect, s pe cial, incident a l, or co nse quential damages result ing from
t he us e o f the prod uct , its a cco mpany ing s o f twa re, o r it s d ocumenta tion. QNAP makes
no warrant y or represe ntation, e xpresse d, implied, or sta tutory, w it h respe ct to its
6
Page 7

products or the conte nts o r use of this do cumenta tion a nd a ll acco mpany ing s o f twa re,
an d sp ecif ically d is claims its q uality , p erfo rmance, merchan tab ility , o r fitness for a n y
particular purpose. QNAP rese rves the right to rev ise o r update it s products , s of tw a re, or
documentation without obligation to notify any individual or entity.
Back up t he s y s te m periodica lly t o a v oid any pote ntial dat a loss . QNAP disclaims any
responsibility of all sorts of dat a loss or recovery.
Should y o u return any compone nts o f the NAS pa ckage f o r ref und o r maint enance, make
sure t he y a re carefully packed f or shipping. Any f orm of da mages due to improper
packaging will not be compensate d.
QNAP, QNAP logo, QT S, myQNAPc loud and VioStor are t radema rks or registered
trademarks of QNAP Systems, Inc. or its subsidiaries. Other names and brands may be
c laimed as the property of others.
7
Page 8

1.2 Regulatory Notice
FCC Notice
QNAP NAS comply with different FCC compliance classes. Please refer the Appendix for
details. Once the c lass of the device is determined, refer to the following c orresponding
statement.
=================================================================
FCC Class A Not ice
Th is de vice co mplies with P art 15 o f the FC C Rules. O p eration is su b ject to the fo llowing
two co n d itio ns:
1. Th is d evice may not cau se h armful in te rfere n ce.
2. This device must accept any interference received, including interference that may
ca us e unde s ired o pe ra tion.
Note: This equipment has been tested and found to comply with the limits for a Class A
digit a l dev ice, pursuant to P art 15 of the F CC Rules. Thes e limit s a re des igned to provide
reasonable protect ion against harmful interferenc e when the equipment is operated in a
c ommercial environment. This equipment generates, uses, and can radiate radio
frequency energy, and if not installed and used in ac cordanc e with the instruct ion
manual, may ca us e ha rmful int erfe re nce to radio communica tions . Ope ration o f this
equipment in a residential area is likely to c ause harmful interference, in whic h c ase the
user will be required to correc t t he interferenc e at his own expense.
Modific a tions: A ny modific a tions made to this dev ice that a re not a pprove d by QNAP
Systems, Inc. may void the authority granted to the user by the FCC to operate this
equipment.
FCC Class B Notic e
Th is de vice co mplies with P art 15 o f the FC C Rules. O p eration is su b ject to the fo llowing
two co n d itio ns:
1. Th is d evice may not cau se h armful in te rfere n ce.
2. This device must accept any interference received, including interference that may
ca us e unde s ired o pe ra tion.
8
Page 9

Note: This equipment has been tested and found to comply with the limits for a Class B
digit a l dev ice, pursuant to P art 15 of the F CC Rules. Thes e limit s a re des igned to provide
reasonable protect ion against harmful interferenc e in a residential installation. This
equipment generates, uses, and c an radiate radio frequency energy and, if not installed
an d u se d in acco rd a n ce with the instructions, may ca u se harmful in te rfere n ce to radio
c ommunic at ions. However, there is no guarantee that interference will not oc cur in a
particular installation. If this equipment does cause harmful interference t o radio or
t e levision reception, whic h can be dete rmined by t urning the e quipment o f f a nd on, the
user is encouraged to try to correct t he interference by one or more of the following
measures:
Reo rient o r relo ca te the re ceiving an ten n a.
Inc rease the separation between the equipment and rec eiver.
Connect the equipment into an outlet on a circuit different from that to whic h the
receiver is connected.
Cons ult the de a ler or a n e xperienced radio/ telev ision technic ian for he lp.
Modific a tions: A ny modific a tions made to this dev ice that a re not a pprove d by QNAP
Systems, Inc. may void the authority granted to the user by the FCC to operate this
equipment.
9
Page 10

CE NOTICE
QNAP Turbo NAS models comply with different CE compliance classes. Please refer to the
t able be low for details.
NAS Mode ls FCC CE
TS-EC1679U-RP Class A Class A
TS-EC1279U-RP Class A Class A
TS-EC879U-RP Class A Class A
TS-1679U-RP Class A Class A
TS-1279U-RP Class A Class A
TS-879U-RP Class A Class A
TS-1270U-RP Class A Class A
TS-879U-RP Class A Class A
TS-1269U-RP Class A Class A
TS-869U-RP Class A Class A
TS-469U-RP/SP Class A Class A
T S -419U II Class A Class A
TS-412U Class A Class A
TS-420U Class A Class A
TS-421U Class A Class A
T S -1079 Pro Class A Class A
T S -879 Pro Class A Class A
T S -869 Pro Class B Class B
T S -669 Pro Class B Class B
T S -569 Pro Class B Class B
T S -469 Pro Class B Class B
T S -269 Pro Class B Class B
10
Page 11

TS-869L Class B Class B
TS-669L Class B Class B
TS-569L Class B Class B
TS-469L Class B Class B
TS-269L Class B Class B
T S -419P II Class B Class B
T S -219P II Class B Class B
T S -119P II Class B Class B
TS-412 Class B Class B
TS-212 Class B Class B
TS-112 Class B Class B
TS-120 Class B Class B
TS-220 Class B Class B
TS-420 Class B Class B
TS-121 Class B Class B
TS-221 Class B Class B
TS-421 Class B Class B
11
Page 12
1.3 Symbols in this Document
Th is icon in d icates the in structions must be strictly follo wed .
Warning
Caution
Im portant
Fa ilure to do so could result in injury to human body or dea th.
Th is icon in d icates the action may lea d to d isk cle ara n ce o r
loss O R f ailu re to follo w the in structions co u ld result in d ata
damage, disk damage, or product damage.
Th is icon in d icates the in formation p rovided is importa nt o r
relate d to lega l regulations.
12
Page 13
1.4 Safety Information and Precautions
1. The NAS can o pe rate normally in the tempera ture o f 0ºC–40º C a nd relative
humidity of 0%–95%. Pleas e make sure the en v ironment is w e ll-v e ntilat e d.
2. T he pow e r cord and dev ice s connecte d to the NAS must prov ide co rrect supply
vo ltag e ( 100W , 90–264V ) .
3. Do not p lace the NAS in direct sunlight or ne a r che mica ls. M a ke s ure the
temperature and humidity of t he environment are in optimized level.
4. Unplug t he po w e r cord and all the co nnect e d cables be f ore cleaning. Wipe t he NAS
with a dry towel. Do not use c hemic al or aerosol to clean the NAS.
5. Do not place any object s on the NAS during normal system operations and to avoid
overheat.
6. Use the flat head screws in the produc t pac kage to loc k the hard disk drives in the
NAS when installing the hard drives for proper operation.
7. Do not place the NAS near any liquid.
8. Do not place the NAS on any uneven surface t o avoid falling off and damage.
9. Make sure the voltage is correct in your location when using the NAS. If unsure,
please contact the distributo r or the loca l powe r supply co mpany.
10. Do not place any objec t on the power c ord.
11. Do not attempt to repair the NAS in any occasions. Improper disassembly of the
produc t may expose you to elect ric shoc k or other risks. For any enquiries, please
contact the distributor.
12. Th e chas sis ( als o known as ra ck mount) NAS models s h ould only b e in stalled in the
server ro o m and maintain ed b y the a u tho rized serve r manag er o r IT a d ministra tor.
T he se rve r room is locked by key or keyca rd acc e s s a nd only ce rt ified s ta f f is
allowed to enter the server room.
Warning:
Danger of explosion if battery is incorrec tly replac ed. Replac e only with the
same or equiva lent t y p e recomme nde d b y the manufa ct urer. Dispose o f us e d
ba tteries acco rd in g to the manufacture r’s instruction s .
Do NOT touc h t he fan inside the system to avoid serious injuries.
13
Page 14

2. Getting Started
New NAS users are advised to follow the st eps below one by one to c omplete t heir NAS
installation. For users who already own a QNAP NAS and would like to move the data t o a
62
new QNAP NAS, pleas e ref e r t o M igrat ing from Old NAS
For New NAS Users:
f o r d eta iled in structions.
Ha rdware Install ation
Soft w are Installation
Getting Utilities
Connecting to t he Shared Folders
15
21
45
48
Connecting t o the NAS by W e b Browser
F o r E x is ting NAS Use rs :
Migrating from Old NAS
62
60
14
Page 15
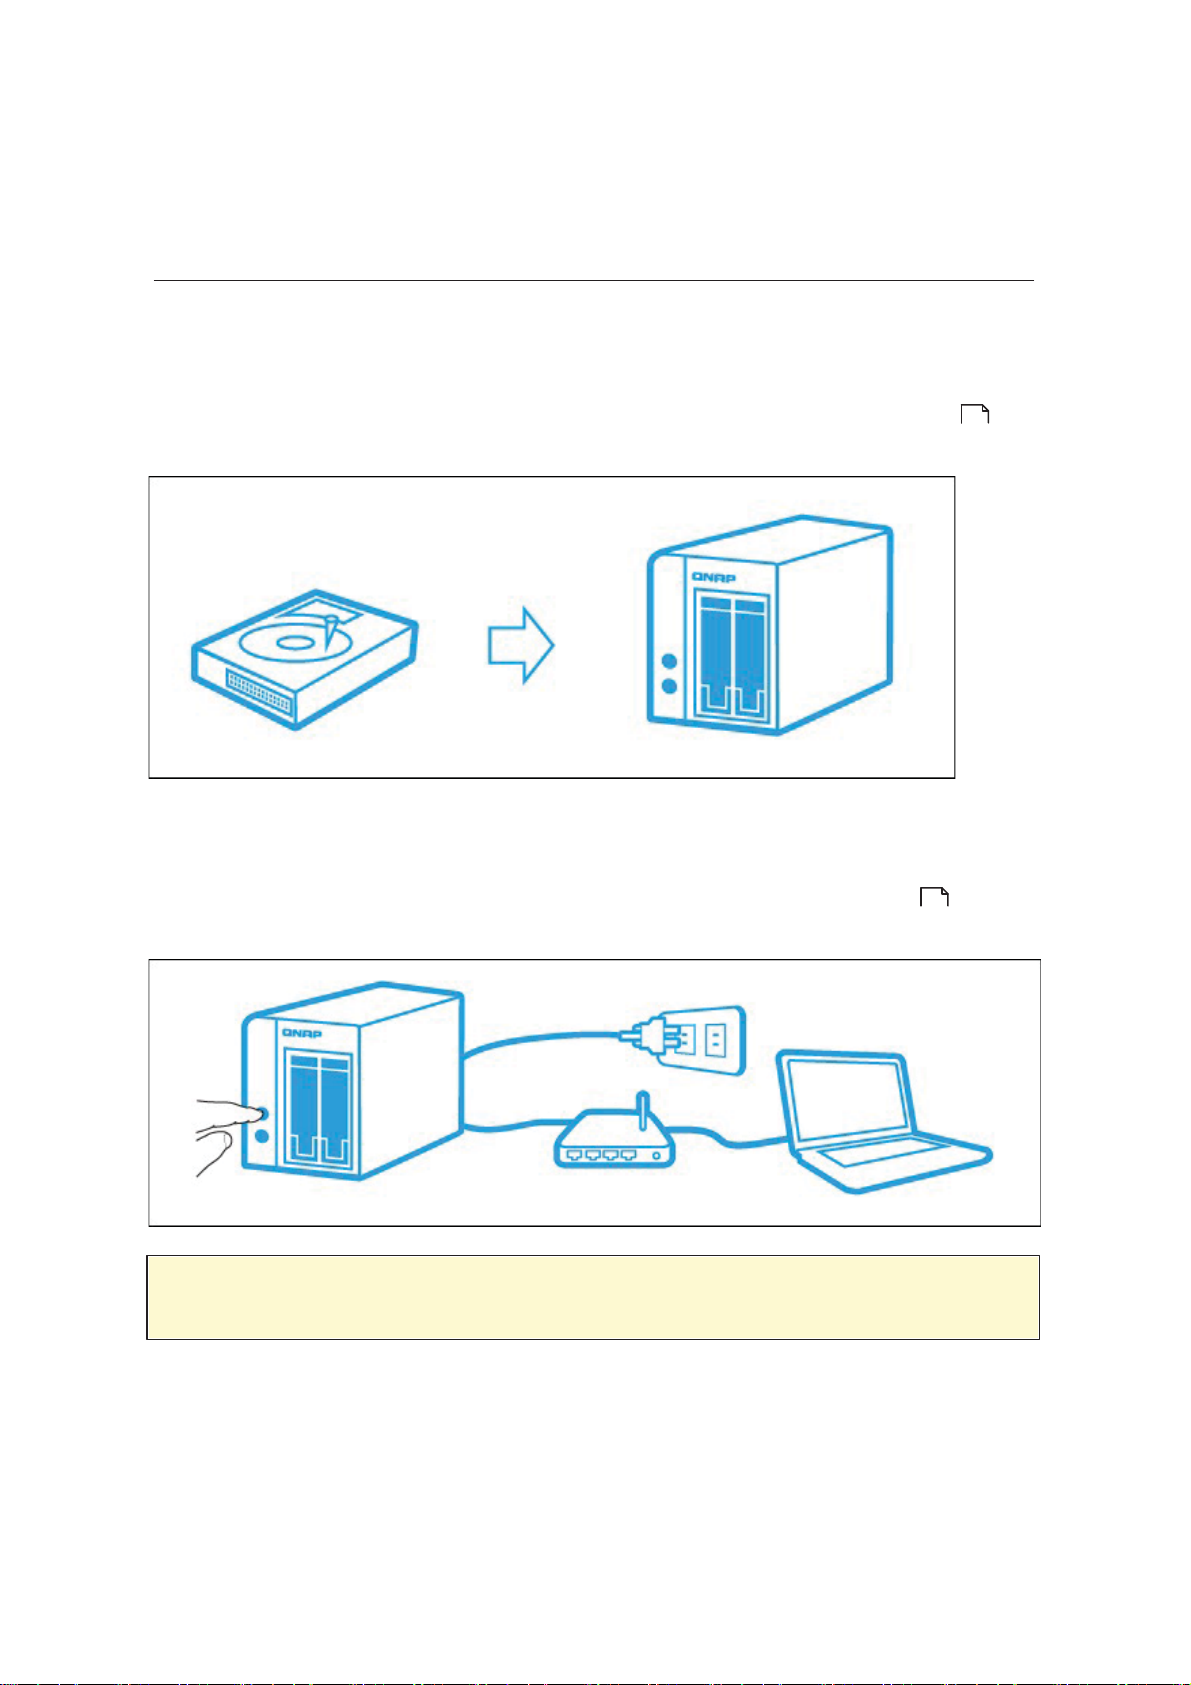
2.1 Hardware Installation
After unpacking the NAS from the package, please first follow the instruc t ions below to
inst a ll yo ur hardw a re:
1. Install the hard drives. Please also make sure that the hard drives (HDDs) that you
use are compatible with the NAS. Go t o t he Hard Disk Drive Compatibility List
16
section fo r more d eta ils .
2. Conne ct the QNAP NAS to the s a me net work as y o ur PC a nd po w e r it o n. During
your insta llat ion proc e s s , pleas e pay a tte ntion t o LEDs and alarm buzzers t o make
sure that the NAS functions properly. Go to the Checking System Stat us
17
sec t ion for details.
Note :
The st eps above are also illustrated in the Quick Installation Guide (QIG) that
can be f ound in t he product pa ckage or QNAP w e bs it e (http:/ /s ta rt . qnap. com).
15
Page 16
2.1.1 Hard Disk Drive Compatibility List
H a rd D isk D r iv e C o m p a tib ility L is t
T his product wo rks wit h 2.5-inch and 3.5-inch SATA hard disk drives and/o r solid- s tate
drive s ( SS D) from major hard drive brands. F o r t he compat ible hard disks, please check
t he compat ibilit y list on QNAP we bs it e (http: // w w w . qnap. com/compatibility ) .
Impo rta nt : QNAP disclaims any respo nsibilit y f or product damage/malfunc tion or
data loss/recovery due to misuse or improper installation of hard disks in any
oc casions for any reasons.
Caution: Note that if you install a hard drive (ne w or us e d) w hich has ne ve r
been inst a lled on t he NAS bef o re, the ha rd drive w ill be formatte d a nd
partitioned automatically and all the disk data w ill be c leared.
16
Page 17

2.1.2 Checking System Status
LED Display & System Status Overview
LED Colour LED Status Desc ription
1)T he hard disk drive on the NAS is being
formatt ed.
2)Th e NA S is b eing in itia lize d .
System
Status
Red/
Green
Flashes green and
red alternately every
0.5 s e c
Red
3) The sy s te m firmware is being updat ed.
4) RAID rebuilding is in proce s s .
5)Online RAID cap a city e xpans ion is in
process.
6)Onlin e RAID le vel migration is in
process.
1)Th e hard d isk drive is invalid .
2)Th e disk vo lu me has reached its full
capacity.
3)Th e disk vo lu me is g oing to b e full.
4)The system fan is out of func tion (TS119 doe s no t s up po rt s mart f a n) .
5)An error occurs when accessing (read/
write) the disk dat a.
6) A ba d s e ctor is dete ct e d o n t he hard
disk drive.
7) The NAS is in degraded read-only mode
(2 member hard drives fail in a RAID 5
or RAID 6 c o nfiguration, the d isk data
can still b e read).
8)(Hardware self- test error).
Flashes red every
0.5 s e c
Flashes green every
0.5 s e c
Green The NAS is ready.
T he NAS is in degraded mode (one
member hard drive fails in RAID 1, RAID 5
or RAID 6 c o nfiguration).
1)The NAS is s ta rting up.
2)The NAS is no t conf igured .
3) The hard disk drive is not f ormat te d.
17
Page 18

LED Colour LED Status Desc ription
LAN Orange
10
Green
GbE*
Red/
HDD
Green
Off
All the hard disk drives on the NAS are in
st a ndby mode.
T he disk dat a is be ing access e d f rom t he
Orange
network and a read/write error occurs
during t he proce s s .
Flashes orange The NAS is connected t o t he network.
T he 10GbE network expans ion card is
Green
installed.
No 10GbE netwo rk expansion card is
Off
installed.
T he NAS is being access ed from the
Flashes red
network.
Red A h a rd drive rea d /write erro r occurs.
Flashes green T he disk dat a is be ing access e d.
USB Blue
Green The hard drive c an be acce ssed.
1)A USB device (connected to front USB
port) is being detect e d.
2)A USB device (connected to front USB
Flas hes b lue e v e ry
0.5 s e c
port) is being removed f rom t he NAS.
3)The USB device (connected to the
front USB port) is being acc e s s e d.
4) The data is be ing c o pied to o r from t he
external USB or eSAT A dev ic e.
A front USB device is detect ed (after the
Blue
dev ice is mounte d ).
1) No USB device is de te cte d.
2)T he NAS has finished copying the data
Off
to or from the USB device connected to
the front USB port of the NAS.
eSATA*
Flashes T he eS ATA dev ice is be ing access e d.
Orange
*
Off No eSATA de v ice can be de te ct e d.
* The 10 GbE net work expans ion funct ion is on ly s up po rte d by the TS -470 Pro, TS-670
18
Page 19

Pro, TS-870 P ro, TS -870U- RP, TS -879 Pro, TS-1079 Pro, TS -879U-RP, TS-1270U-RP,
T S -1279U-RP, TS -EC879U-RP, a nd TS-EC 1279U-RP.
* *TS-210, TS-212, TS -219, TS-439U-SP/ RP, TS-809 Pro, TS-809U-RP do no t s up po rt
eSAT A port.
19
Page 20

Alarm Buzzer
T he alarm buzzer can be disabled in “Cont rol Panel” > “Sys te m Settings” > “Hardware” >
“Buzzer”.
Beep sound No. of Tim es Desc ription
Short beep
(0.5 sec)
Short beep
(0.5 sec)
Short beep
(0.5 sec ), long
beep (1.5 sec)
Long beep
(1.5 sec)
1 1)The NAS is s ta rting up.
2) The NAS is being shut dow n ( so f tw a re shutdow n) .
3)The user presses the reset button to reset the
NAS.
4)T he system firmware has been updated.
3 The NAS data cannot be copied to t he external
storage device from t he front USB port.
3, every 5
min
2 1) The disk volume is going to be full.
T he sy s te m fan is o ut o f funct ion ( TS-119 d oes no t
support smart fan).
2)T he disk volume has reac hed its f ull capac ity.
3)T he hard disk drives on the NAS are in degraded
mode.
4)T he user starts hard drive rebuilding.
1 1)The NAS is turned off by force shutdown (hardware
shutdown).
2)T he NAS has been turned on and is ready.
20
Page 21
2.2 Software Installation
After installing the NAS hardware, proceed to soft w are installation. There are three
ap p roa ch es for so ftw are in stallation :
1. Onlin e In s ta llation
2. Cloud Ins tallation
3. CD Ins ta llation
22
35
44
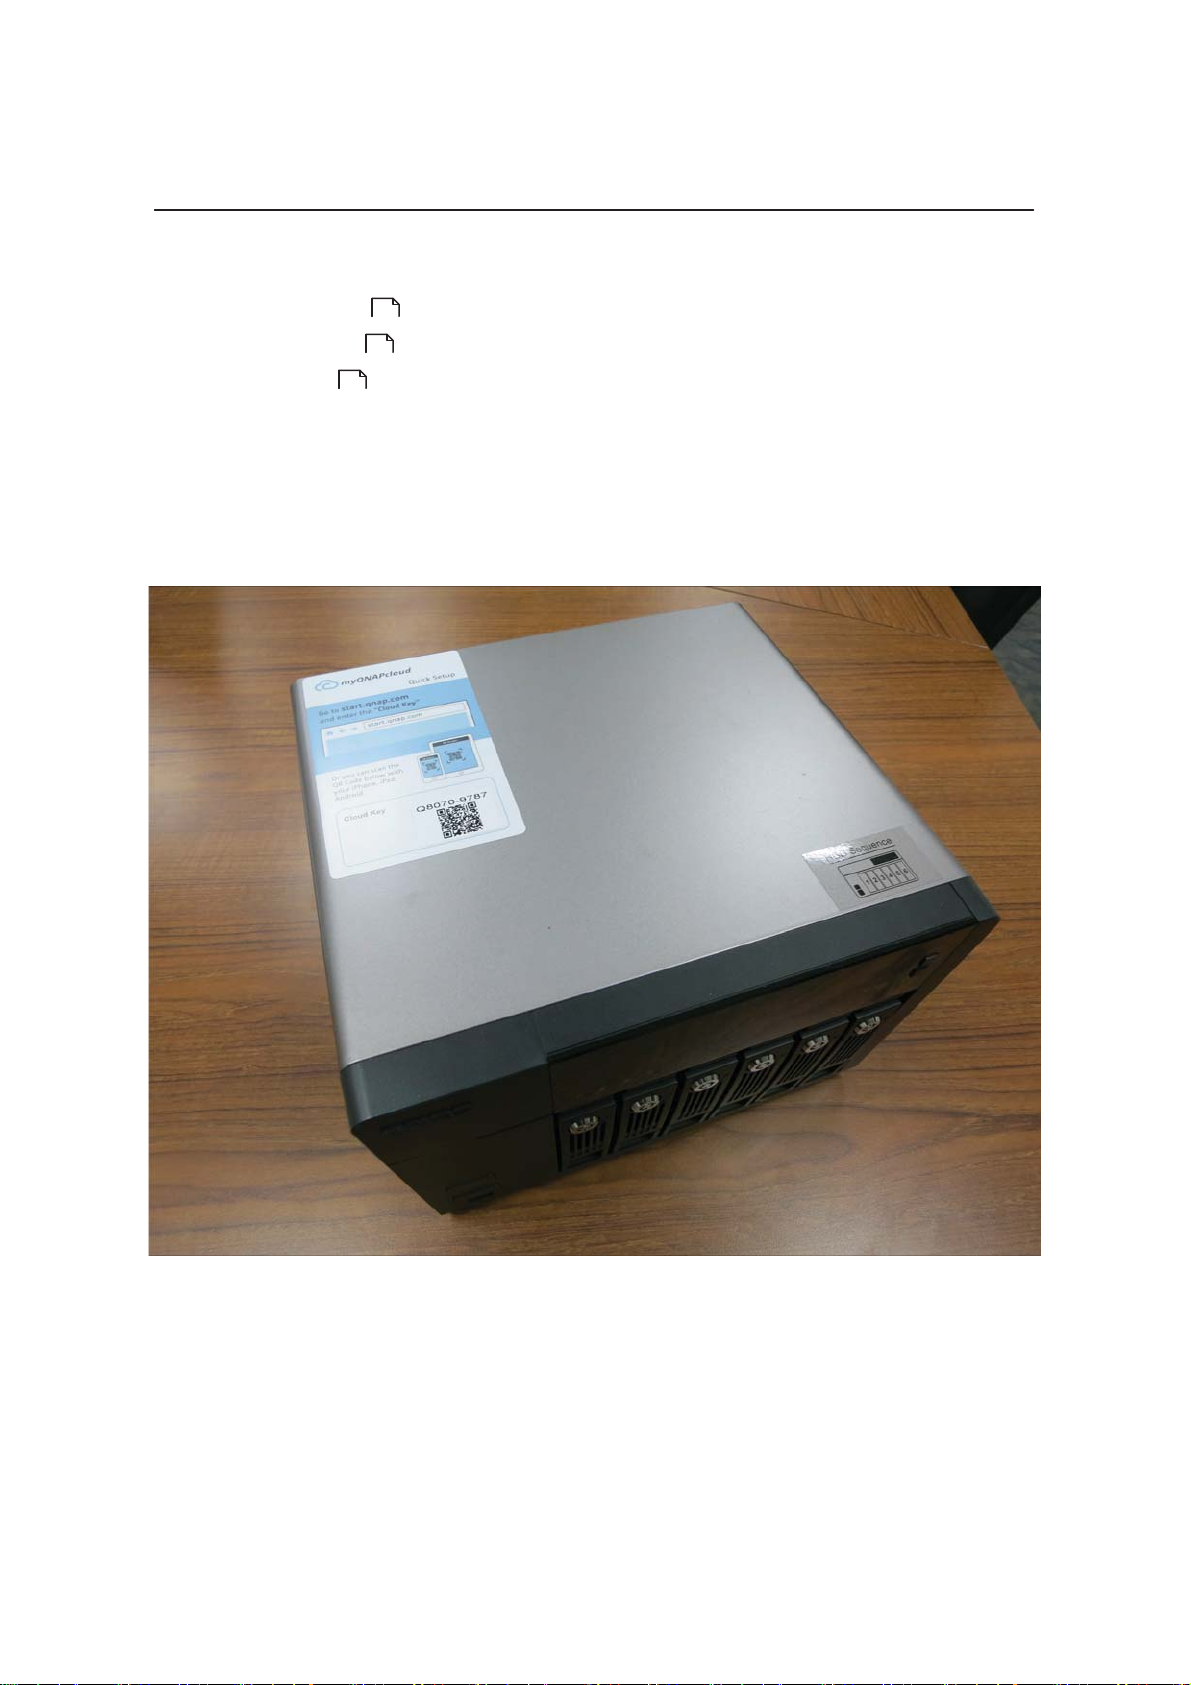
Onlin e insta lla tio n is ava ilab le fo r all h o me and SOHO models , and cloud in stallation is o n ly
for se lecte d home and SOHO models. CD installat ion is designed only f or SMB models. To
verify if yo u r NA S sup p orts cloud in stallation , p lea se check if there is a sticker o n the
NAS, as shown in the figure below:
To confirm if your NAS is a home and SOHO model or SMB model, please check the QNAP
website (go t o ht tp://www .qnap.com/ > Products > Storage.) All home a nd SOHO users
are enc ouraged to use cloud and online installation. For all problems encountered in the
insta llat ion proc e s s , plea s e contact our t e chnica l support de partment ( go to http:/ /
www.qnap.com/ > Support > Customer Service.)
21
Page 22
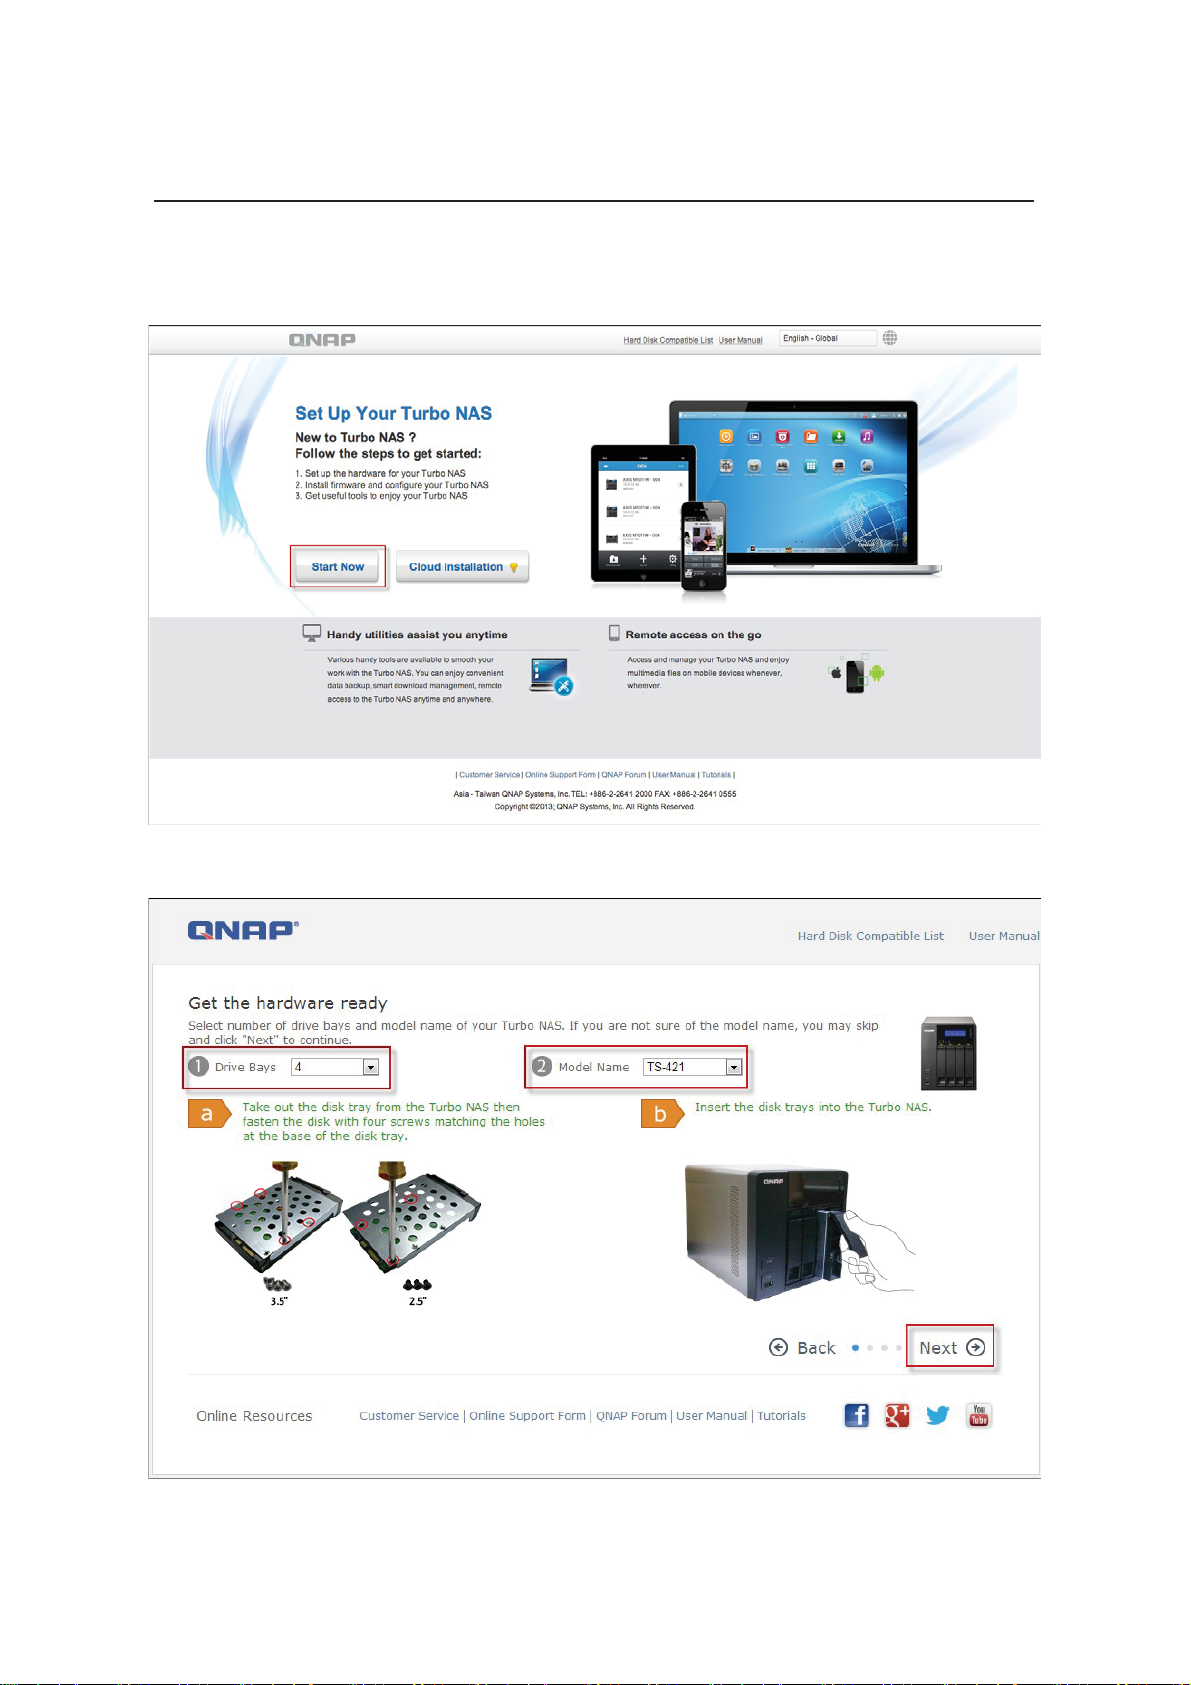
2.2.1 Online Installation
F ollo w the ste p s in this s ection to complete o n lin e insta lla tio n fo r your NAS .
1. Go to htt p://st art.qnap.com and c lick “St art Now”.
2. Choose the number of HDD bays and the model of your NAS and click “Next”.
22
Page 23
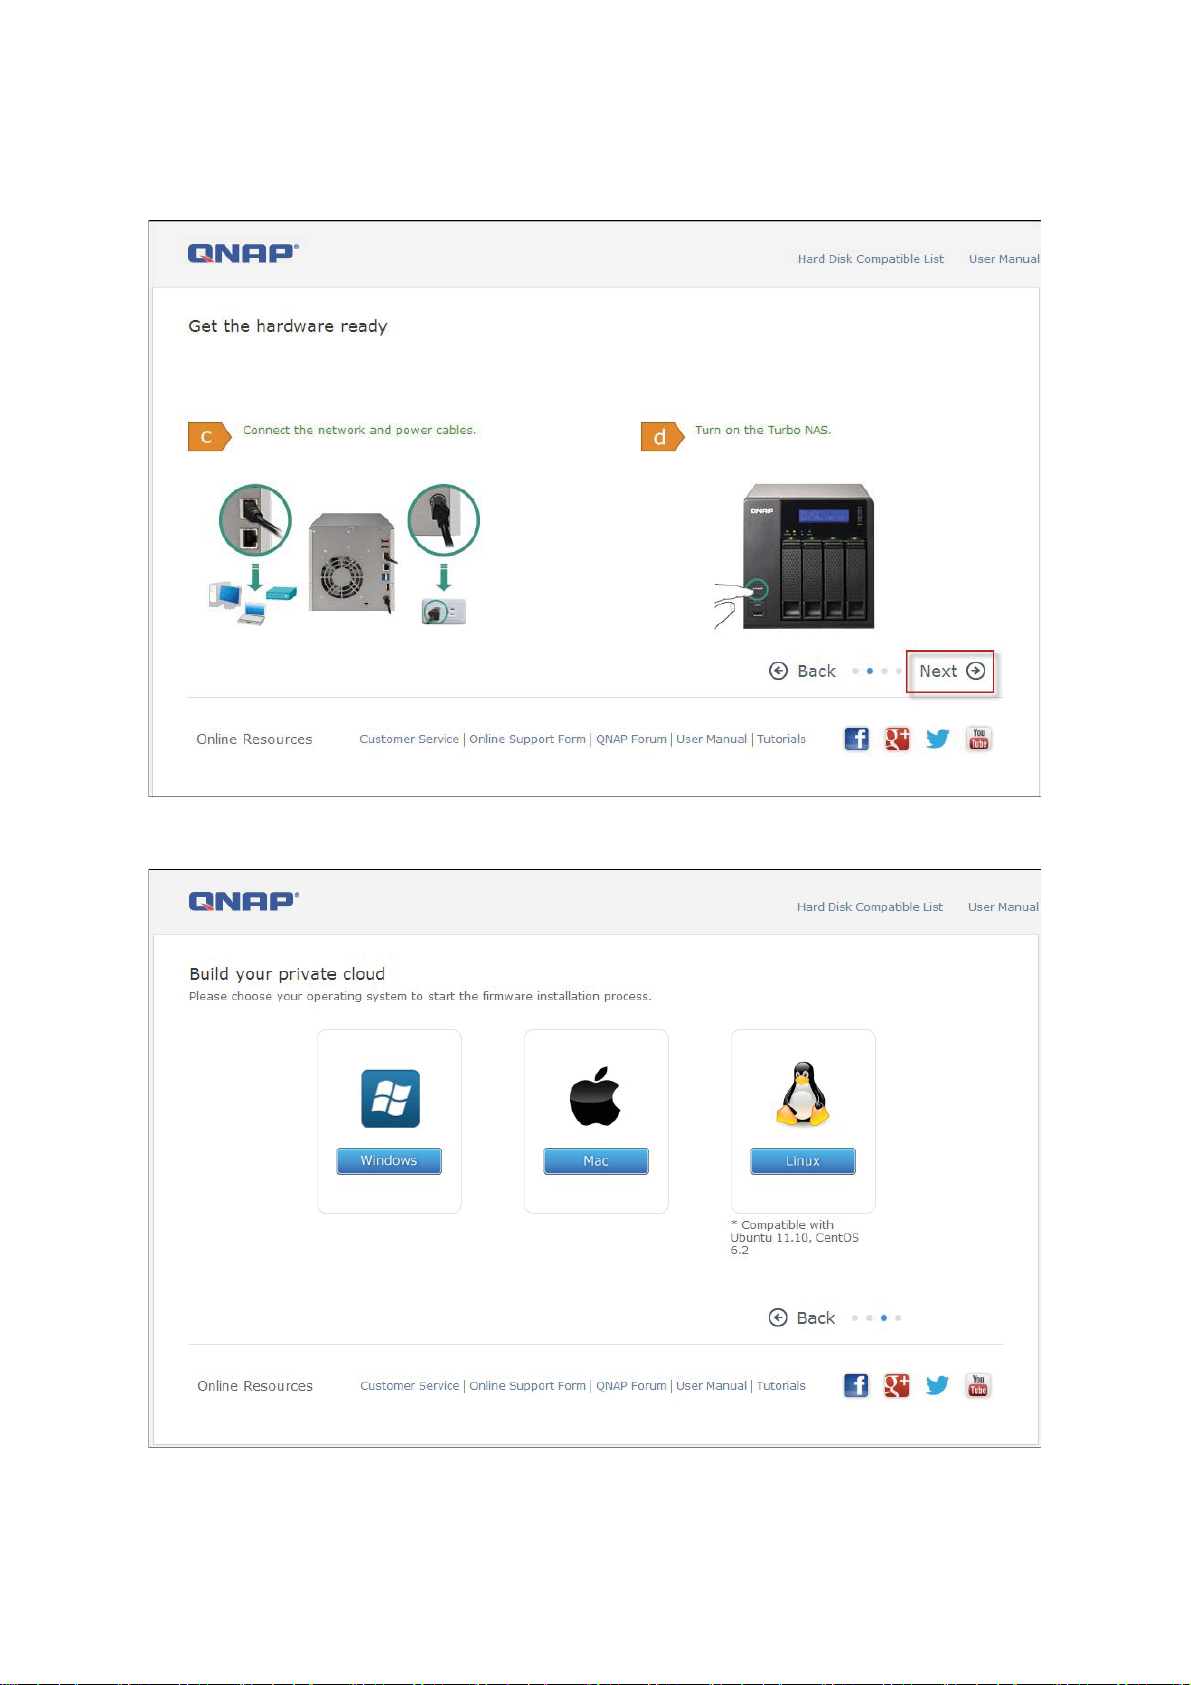
3. Connect the network and power c ables of your NAS, turn on the Turbo NAS and
click “ Next”.
4. Clic k the o pe rating sys tem yo ur co mpute r is running on.
23
Page 24
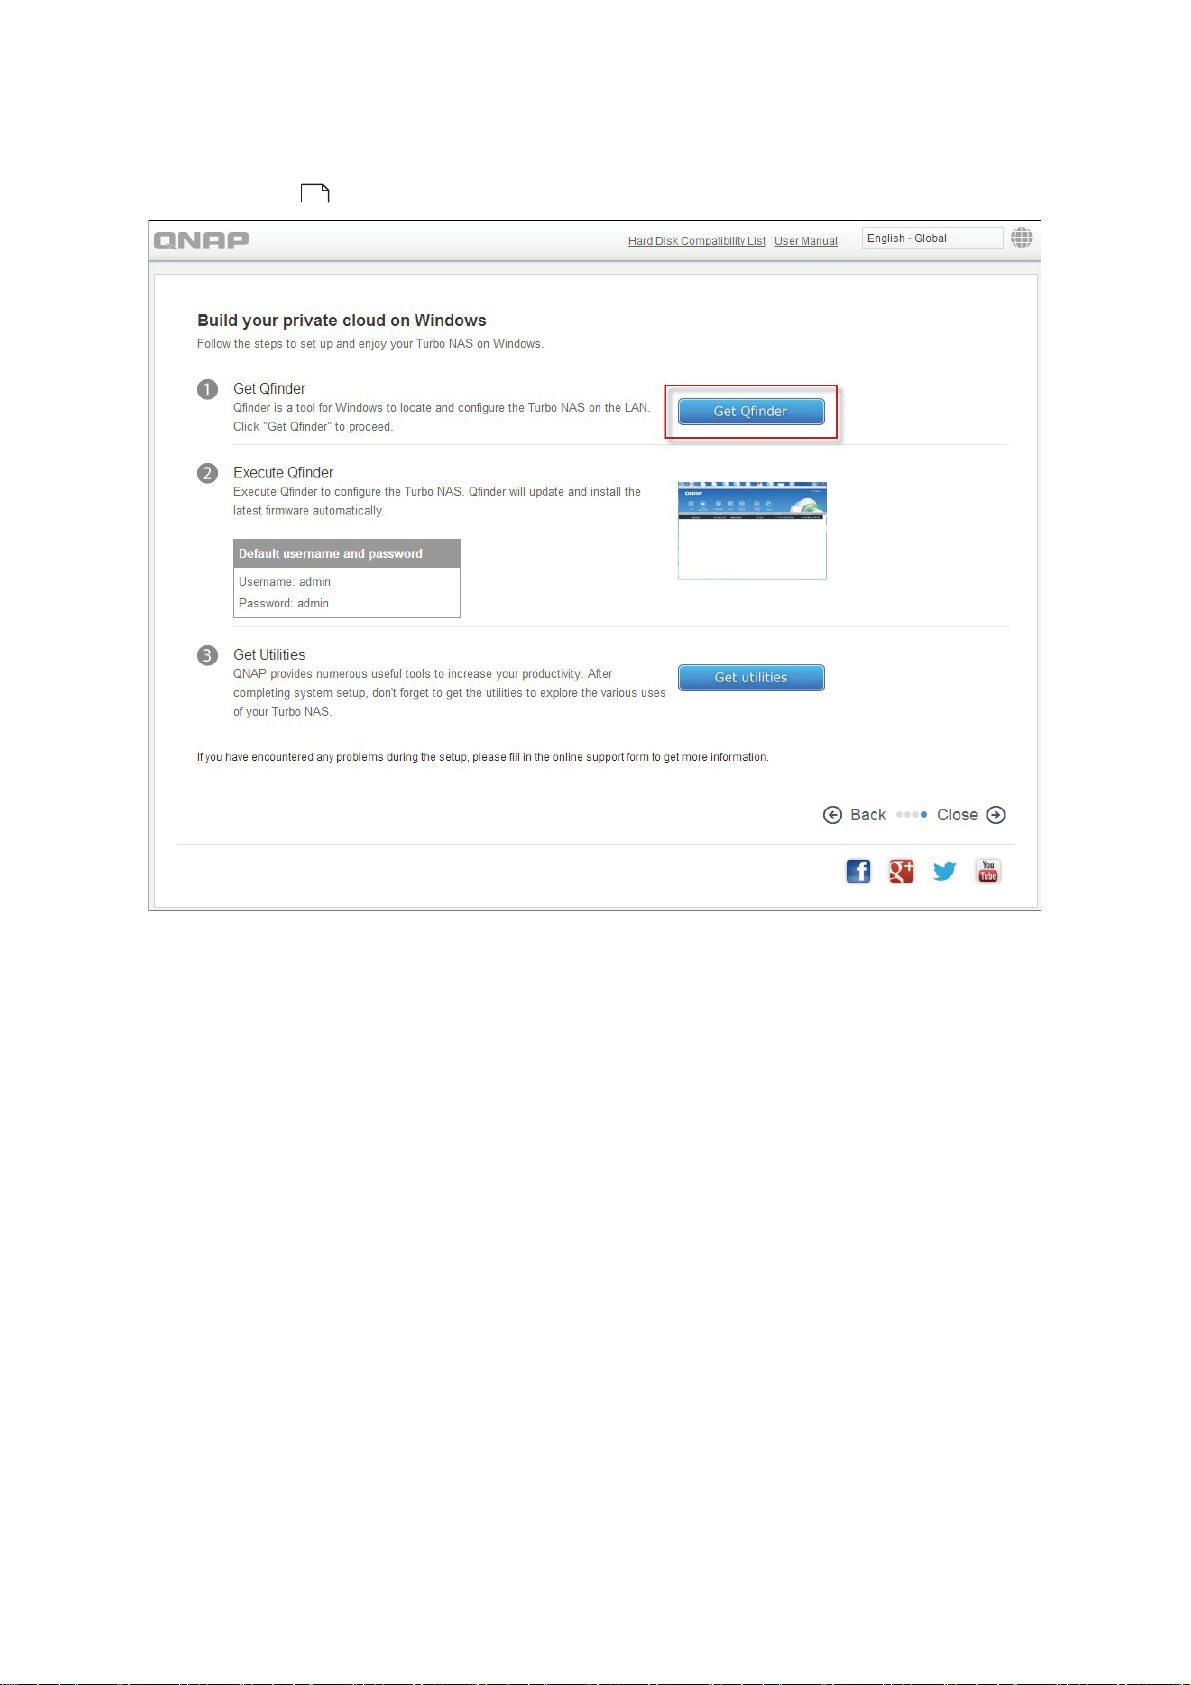
5. Click “Ge t Qfin d er” to d ownloa d the Q NA P Q fin d er u tility ( For M ac users , p lea se skip
to Step 19
31
.)
6. Launch the QNAP Qfinder insta ller fro m yo ur co mpute r and click “Next ” .
24
Page 25
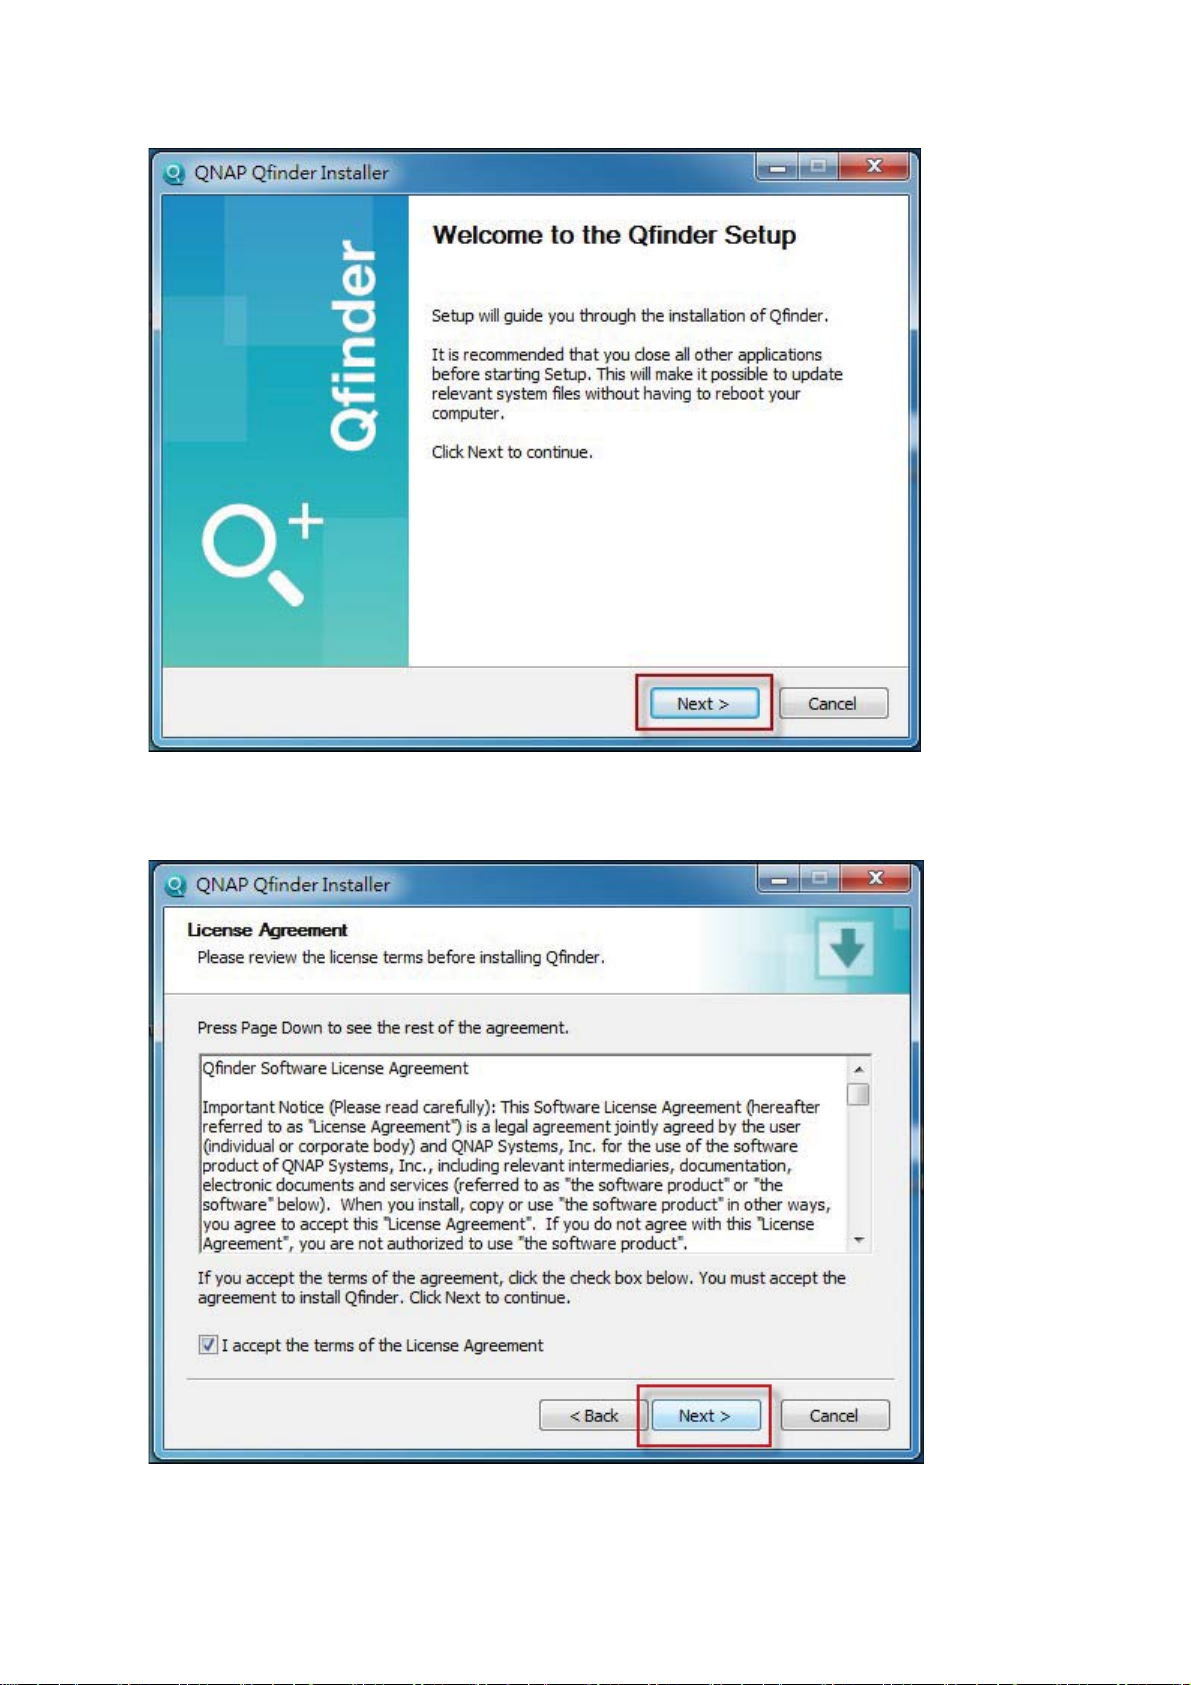
7. Read the lic ense agreement, chec k “I ac cept t he t erms of t he Lic ense Agreement,”
and click “Next”.
25
Page 26
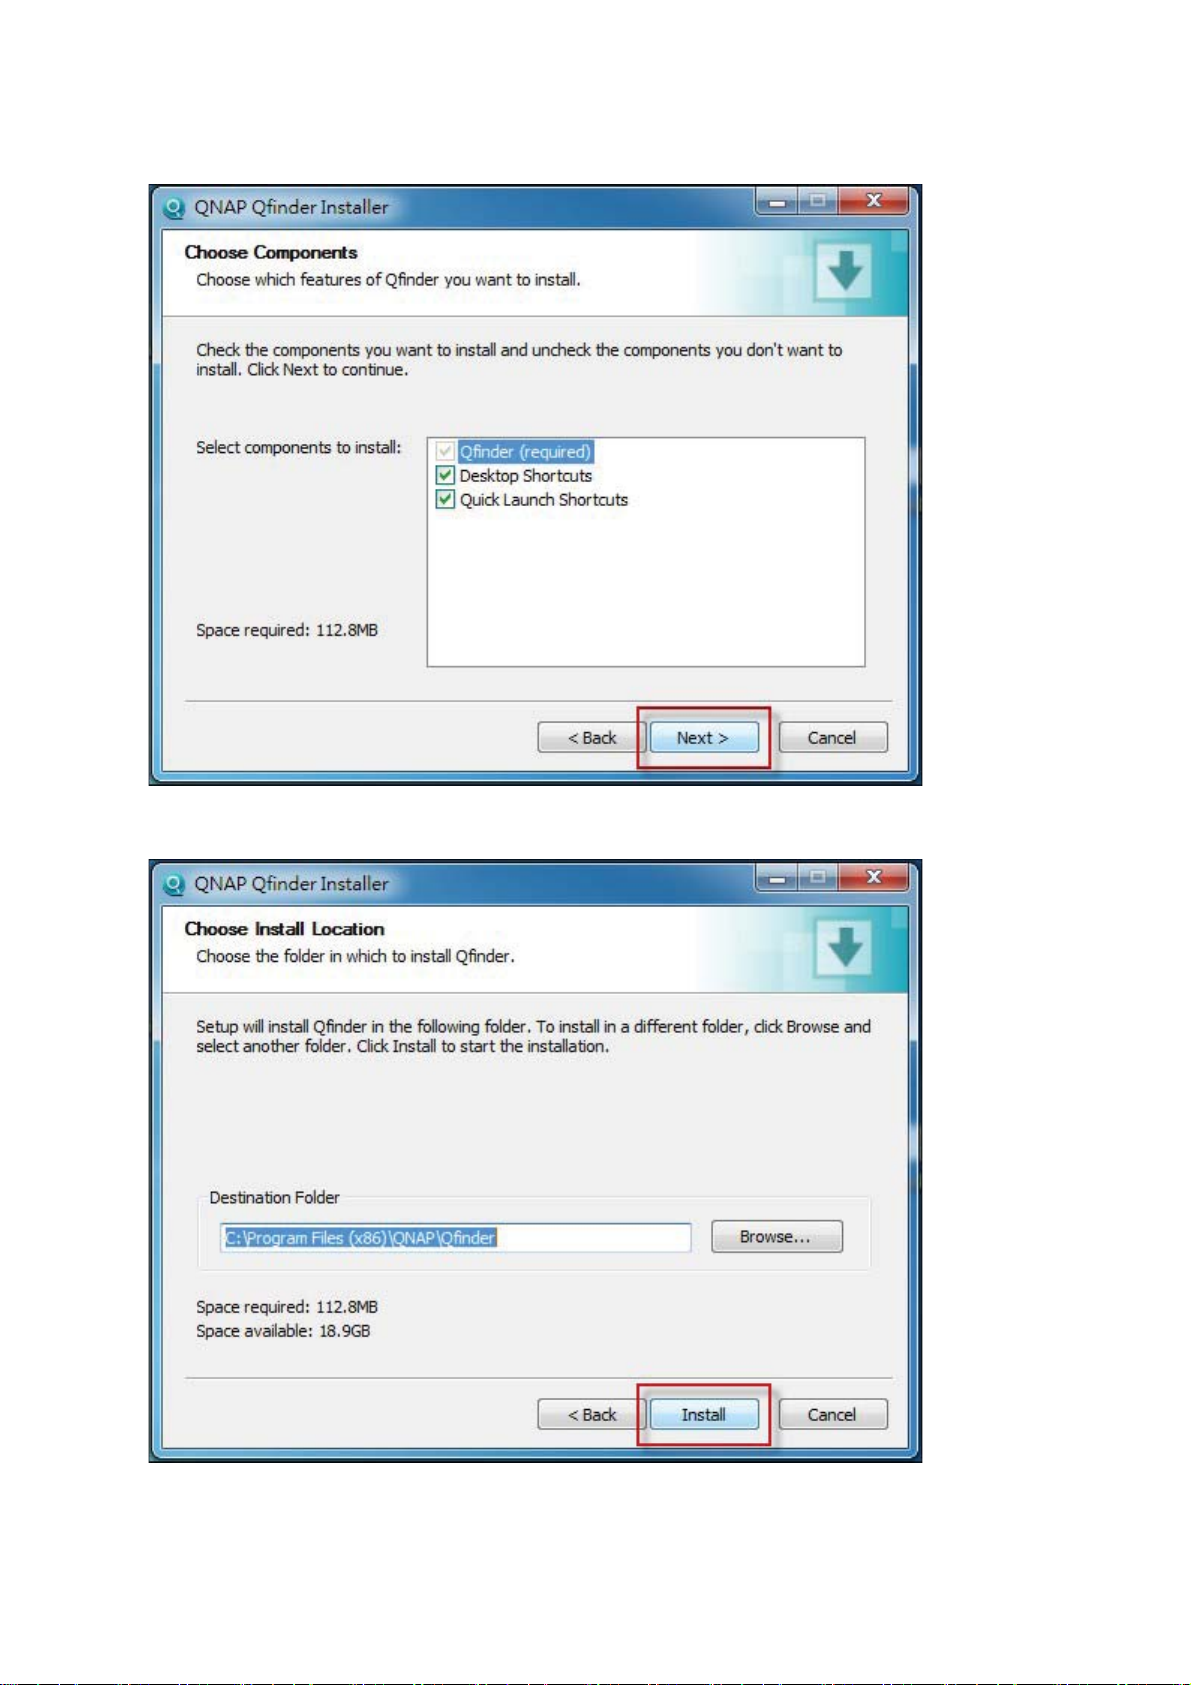
8. Click “Next”.
9. Click “I nsta ll” .
26
Page 27
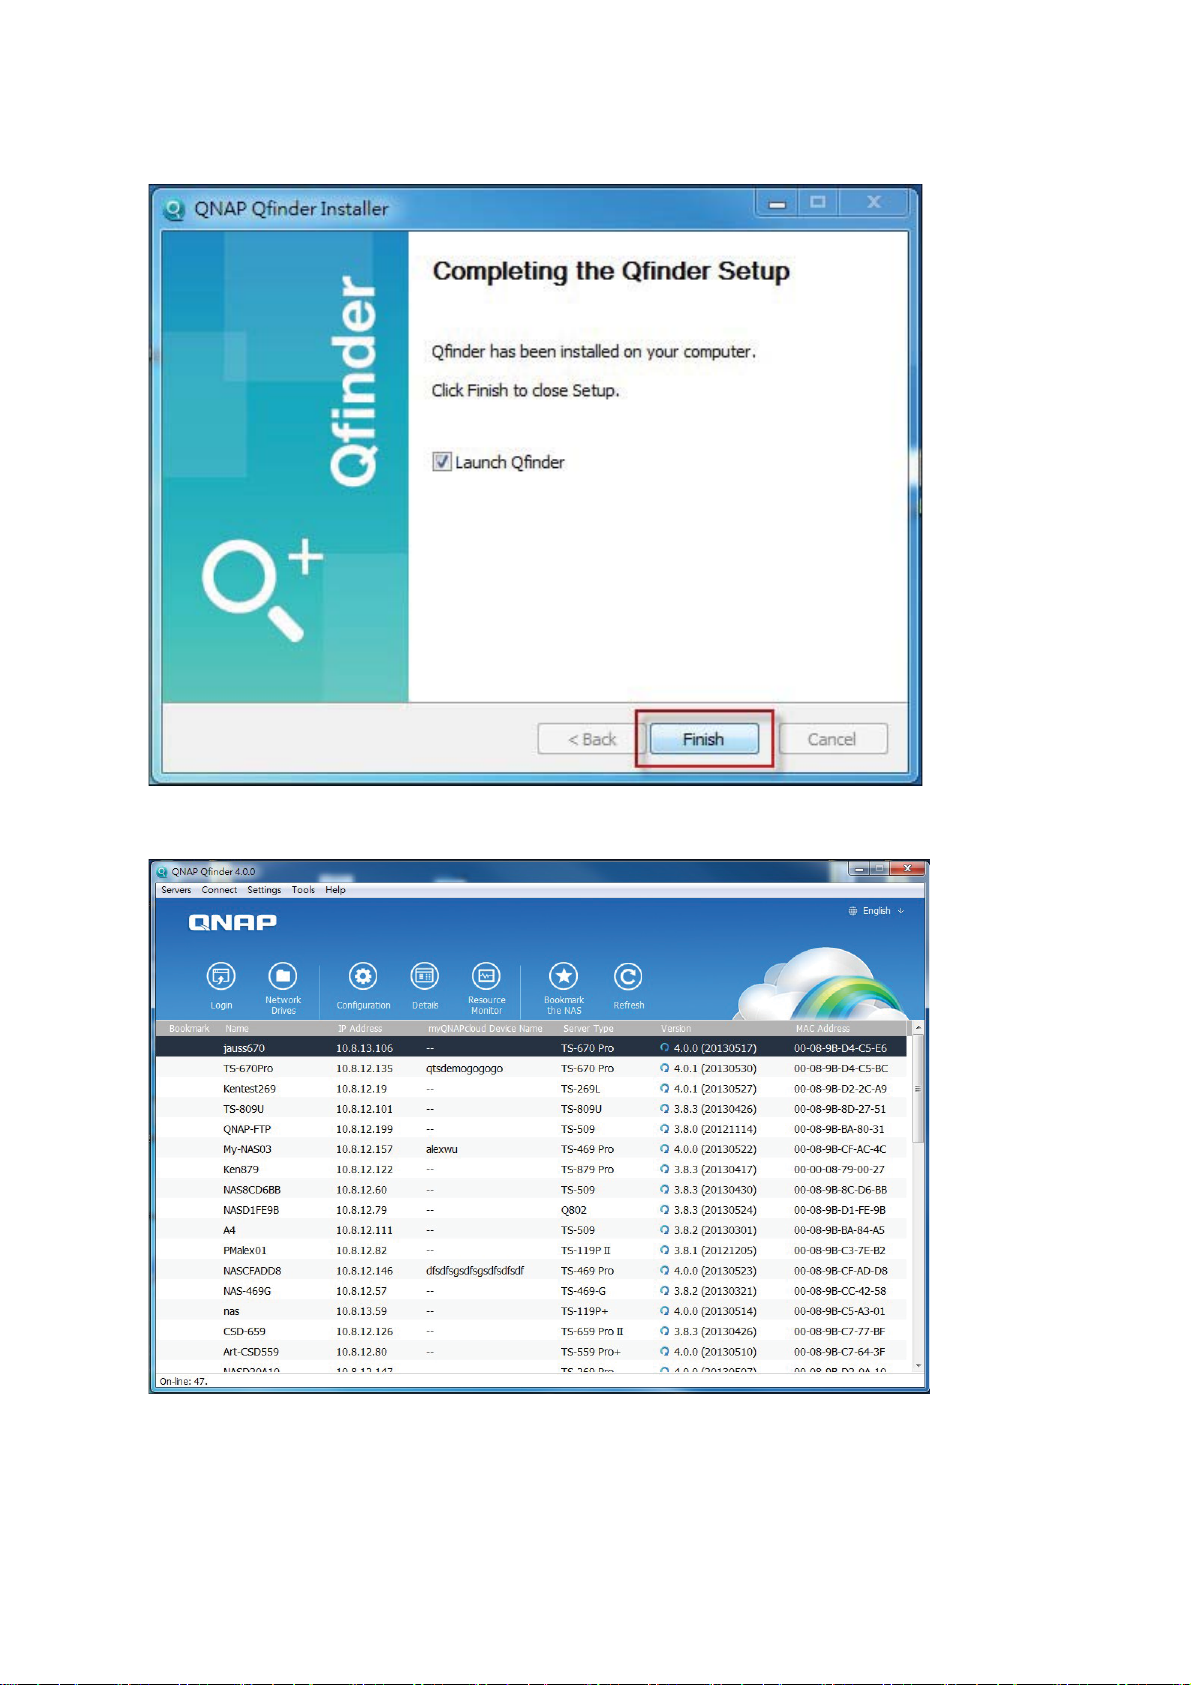
10. Click “Finis h ” .
11. Launch t he QNAP Qf inde r f rom your des kt o p.
27
Page 28
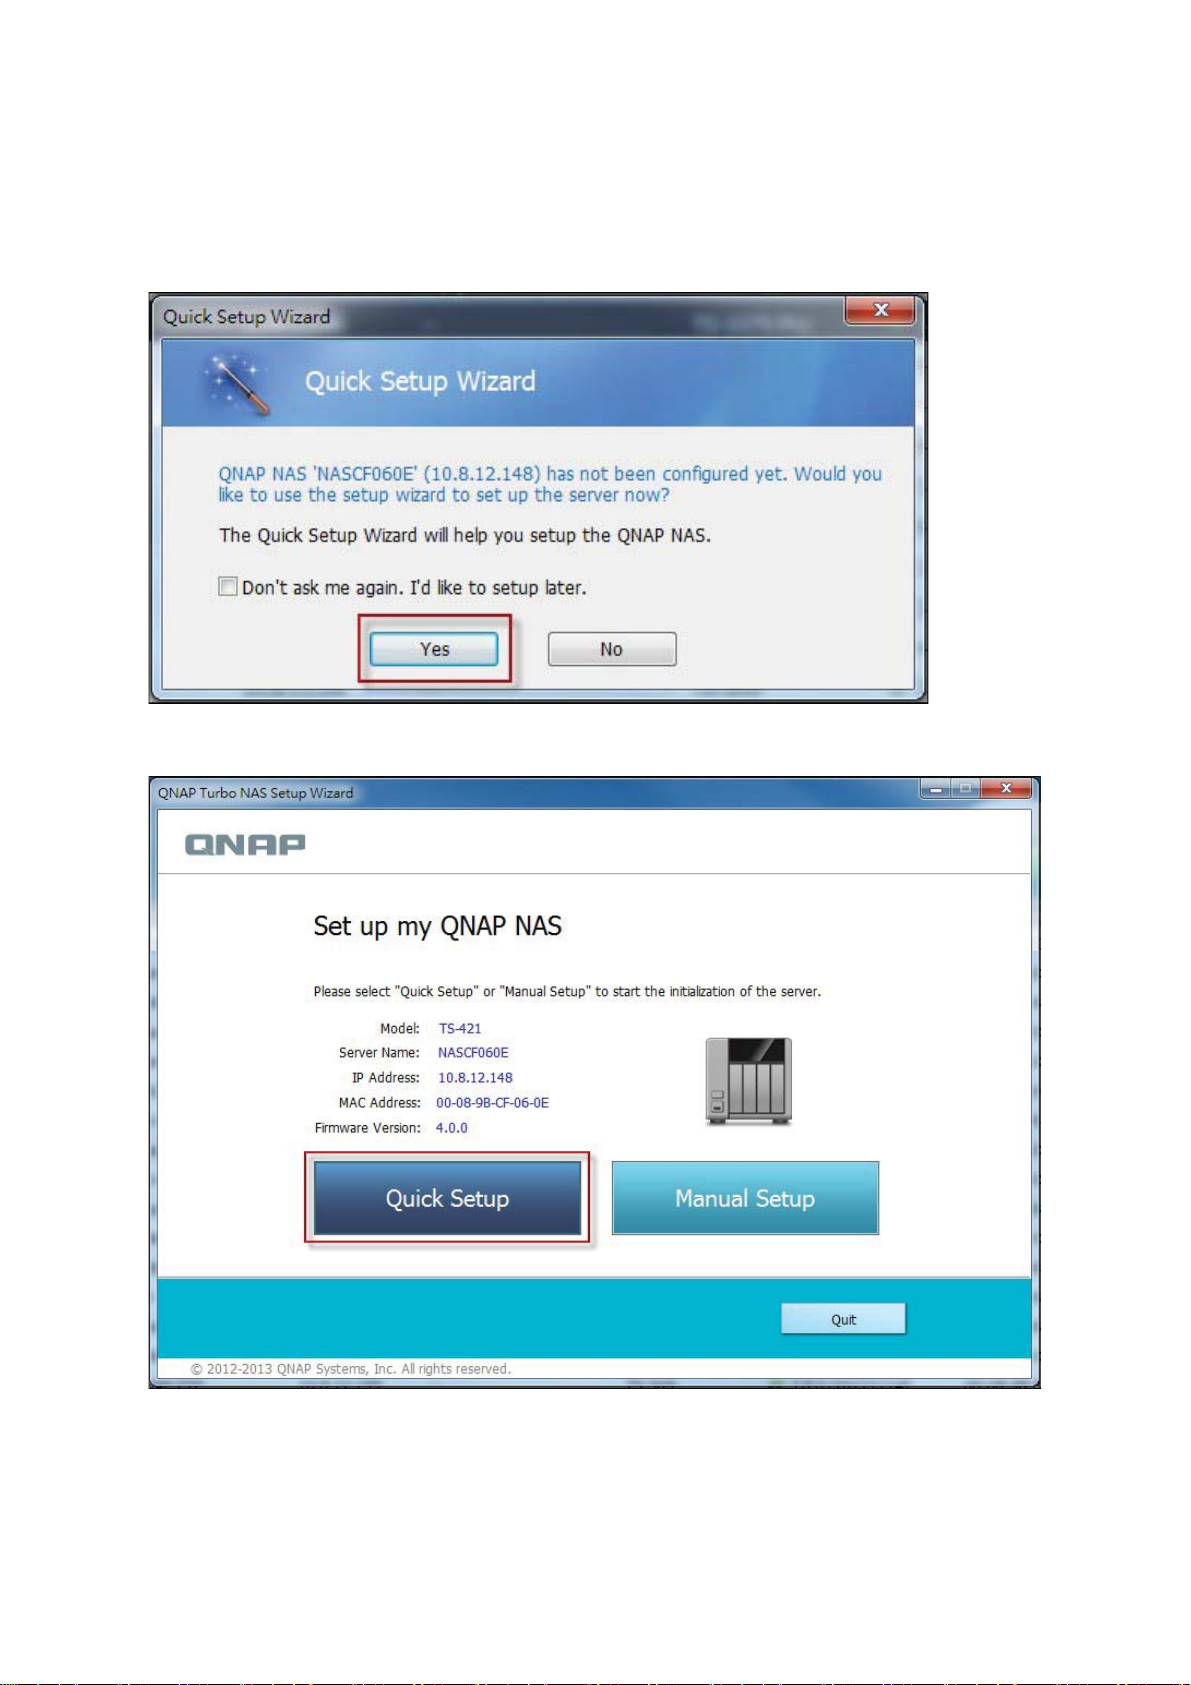
12. Th e Qu ick S etup Wiz ard will b e la u n ched auto matically . Plea se co nfirm t h at the IP
addres s show n up o n the dialog w indow matches the Turbo NAS y o u a re trying t o
c onfigure (please c hec k the MAC address from the QNAP Qfinder and its
corres po nding IP a d dres s . ) C lic k “Yes” to conf igure y o ur Turbo NAS .
13. Clic k “Quick Se tup ”.
14. Install a ha rd drive on your Turbo NAS if y o u ha v e no t a lrea dy done so a nd click
“Detect Again”.
28
Page 29
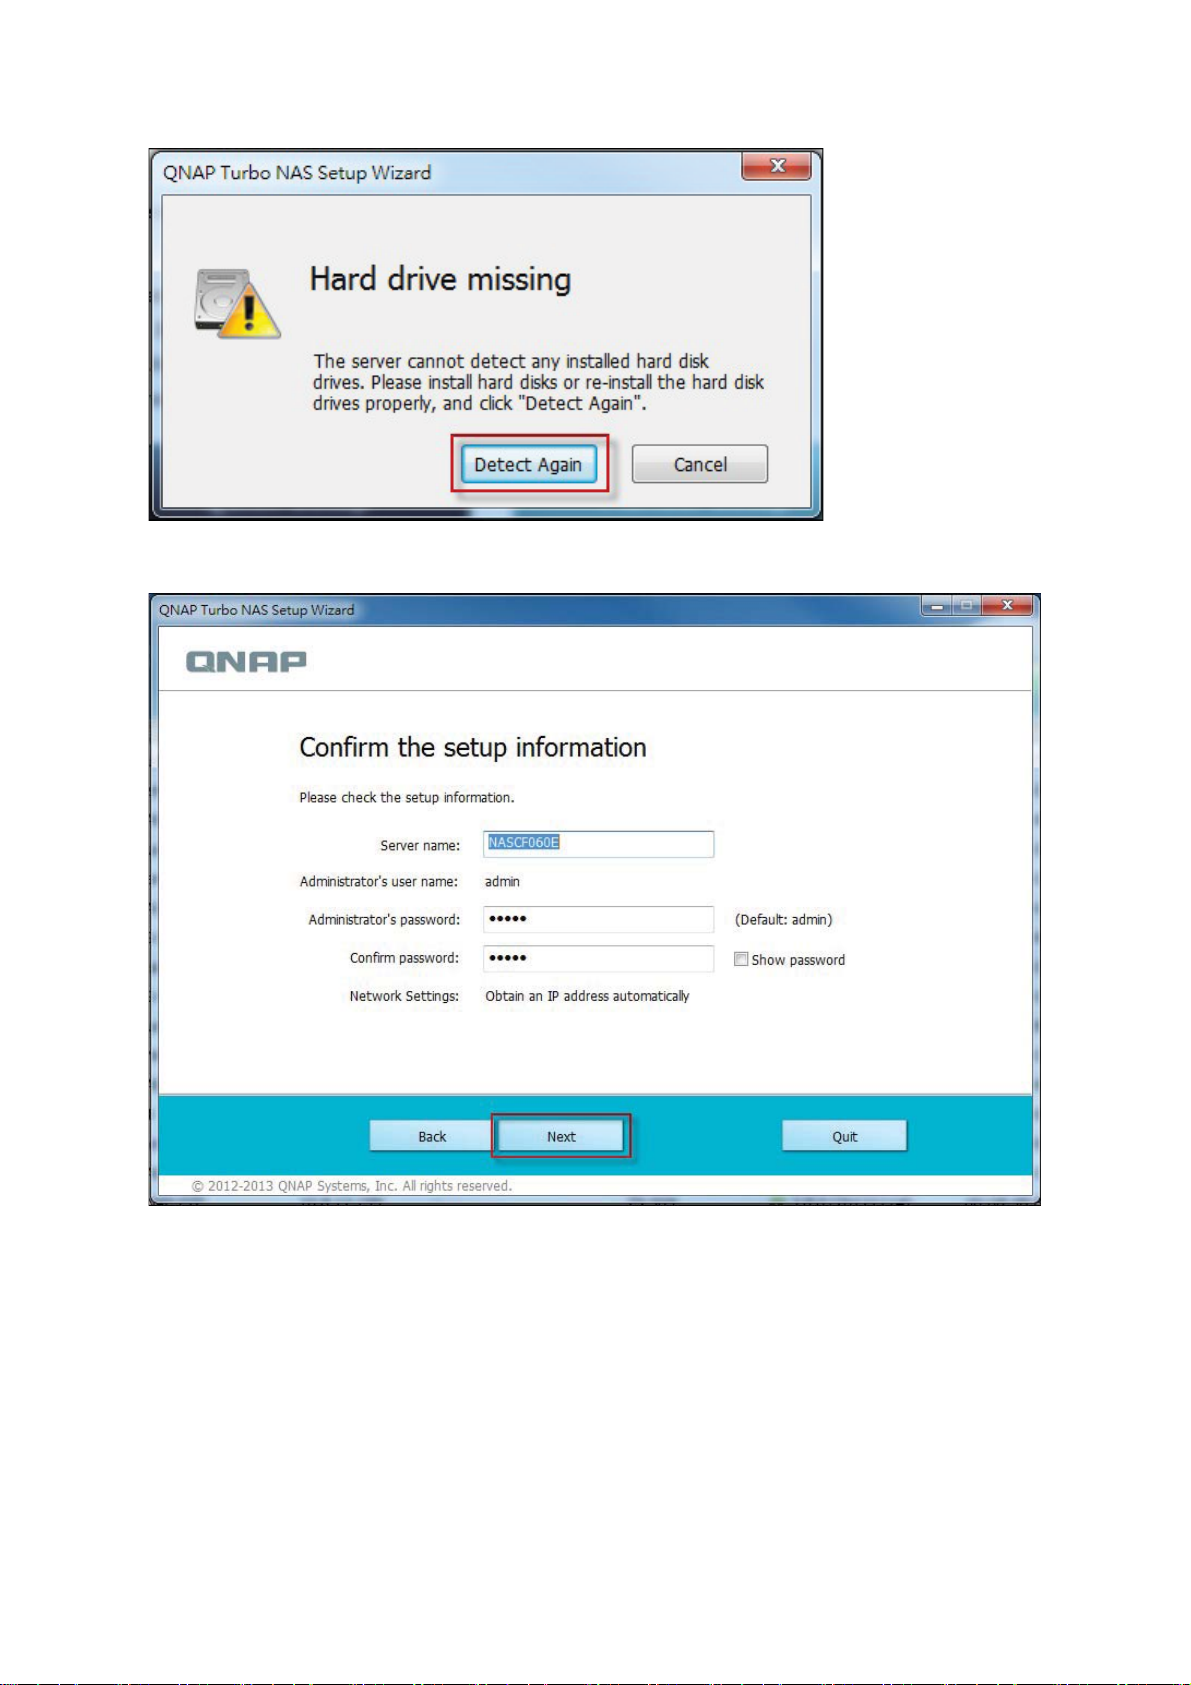
15. Conf irm the se tup de ta ils and click “Next”.
16. The wizard will proc eed t o finish the installation process.
29
Page 30
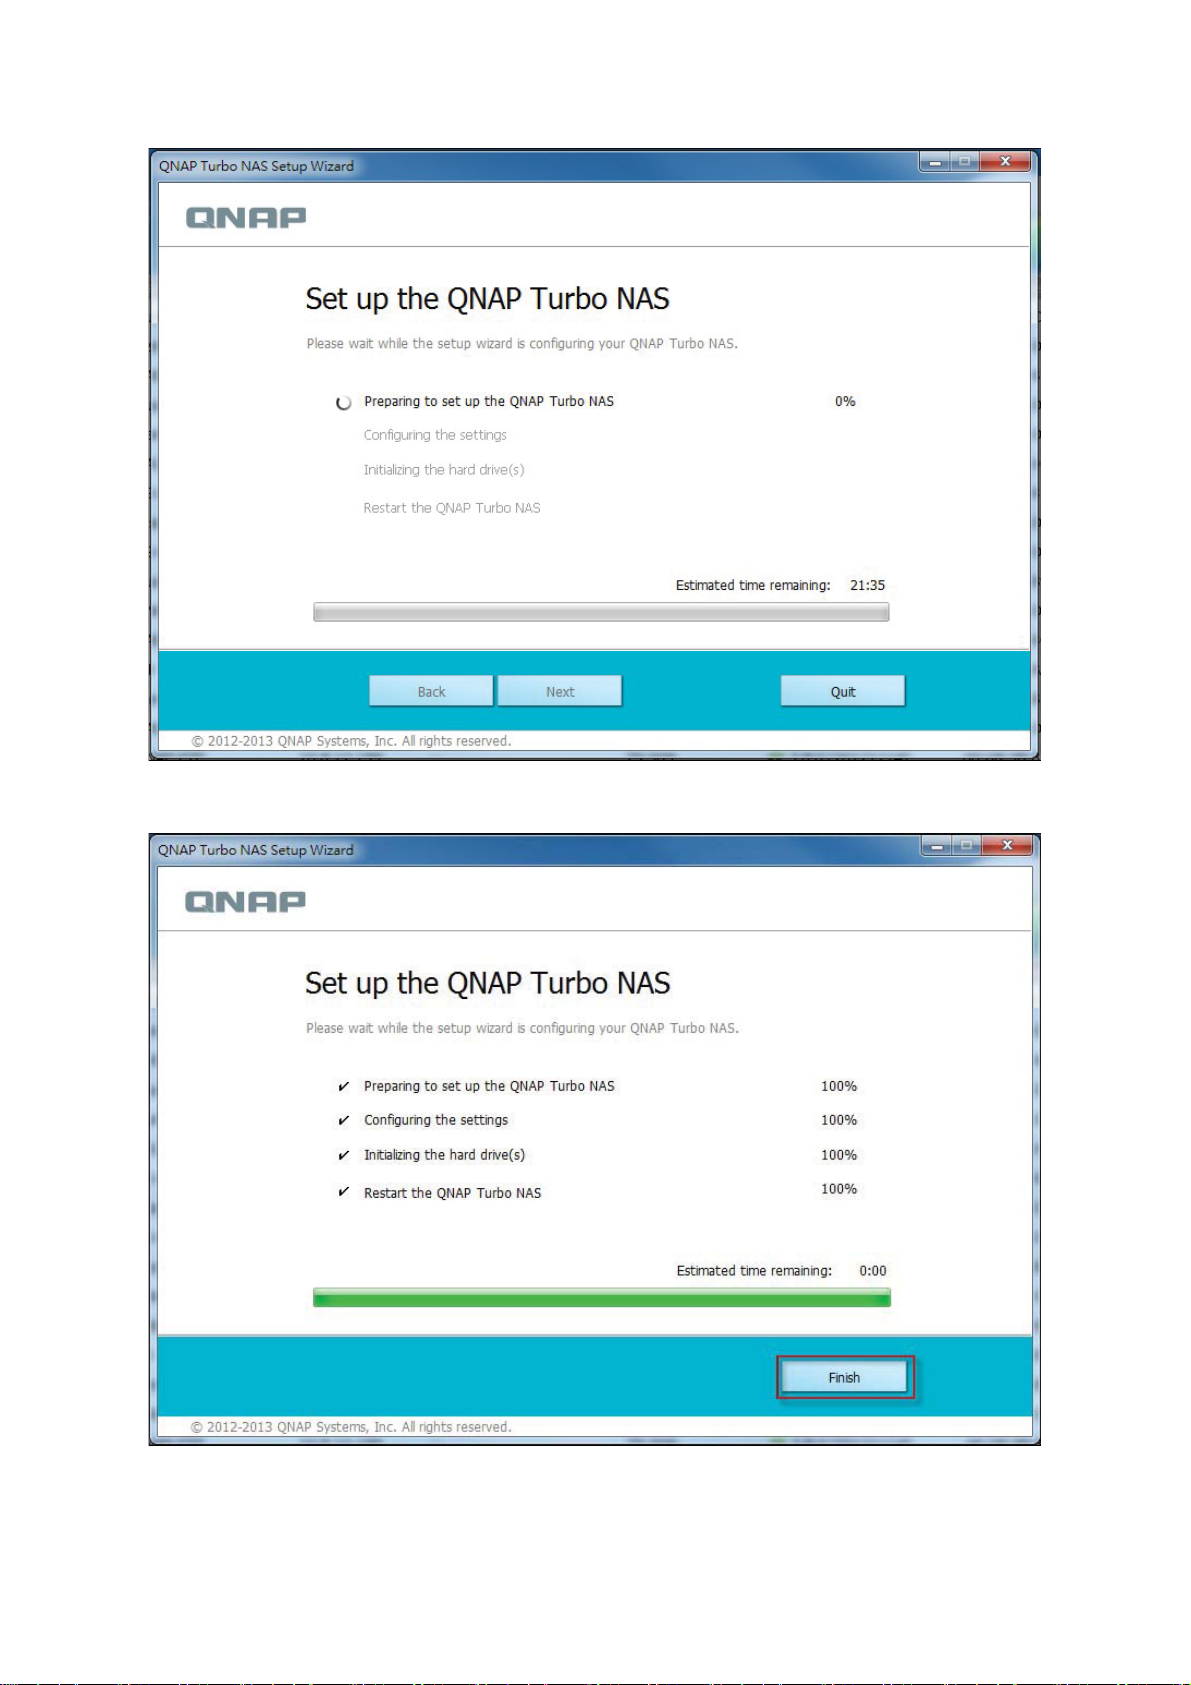
17. Click “Finis h ” to co mplete the insta lla tio n p ro cess an d o p en the NAS login p ag e.
30
Page 31

18. Key in the user ID and password entered in the “Confirm t he setup information”
page.
19. Click “Ge t Qfin d e r” to d ownloa d the QNAP Q fin d er utility (S te p s 19 to 2 3 a re for
Mac users.)
20. Install the QNAP Qfinder.
31
Page 32

21. Execute t he QNAP Qfinder and connect t o the NAS.
32
Page 33

22. Start the Web Installation step.
33
Page 34

23. Key in the user ID and password entered in the “Confirm t he setup information”
page.
34
Page 35

2.2.2 Cloud Installation
F ollo w the ste p s in this s ection to complete clo u d in s ta llation fo r your NAS .
1. Conne ct y o ur NAS to the Inte rne t, a nd o n y o ur PC , go to “ s ta rt. qna p . com” a nd
click “ C loud Insta lla tio n ” .
2. Alternatively, you may sc an the QR code using your mobile phone to start c loud
installation.
35
Page 36

3. Ente r t he cloud key ( cloud key can b e f o und from the s tic ker on to p of y o ur QNAP
NAS) and click “Enter”.
36
Page 37

Note :
If you encounter the “Device not f ound” message on screen, please make sure
1) your NAS has been powered on; 2) the network c able is connect ed t o t he NAS and
t he o range a nd green indica tor lights on it s LAN port (s ) a re blinking; and 3) the cloud
ke y is correct.
4. Fill out all fields t o register yo ur myQNAPc loud acc o unt or sign in your
myQNAPcloud account. check “I agree to myQNAPcloud Terms of Use and QNAP
Privacy Po licy” an d click “Next Step” .
37
Page 38

Note :
Before proc e e ding t o S te p 4, plea s e be s ure to a ct ivate y our myQNAPc loud
account af te r y o ur acco unt reg istration is co nf irmed (a n e mail will be s e nt to the email
address provided to create your myQNAPcloud account, and the account activation
link w ill b e in clud ed in tha t e mail. ) For d etails, p lea se re fer to the ch a p te r on
576
myQNAPcloud Service
in th is manu a l.
If y ou a lrea dy have a myQNAPcloud a cco unt, plea s e s e le ct “ S ign in myQNAPcloud
account” and login w ith y o ur acco unt crede ntials.
5. T y pe in t he na me of y o ur T urbo NAS t o registe r it and click “Register”.
38
Page 39

6. Insta ll a hard drive o n y o ur Turbo NAS if you ha ve no t already d o ne s o .
7. Click “Be g in ” to in s ta ll firmwa re on your Turb o NA S .
39
Page 40

8. Clic k “Start” to start the quick setup.
9. Co n firm all deta ils an d click “Pro cee d” .
40
Page 41

10. F ollo w the onscree n in structio n s.
41
Page 42

11. Clic k “Connect a nd Lo gin QTS ” .
12. Key in the use r ID and pas sw o rd t o login your Turbo NAS.
42
Page 43

43
Page 44

2.2.3 CD Installation
F ollo w the ste p s in this s ection to complete C D ins ta llation fo r your NAS .
1. Install the QNAP Qfinder from the product CD-ROM.
2. Run t he QNAP Qfinder. If the QNAP Qfinder is blocked by y our firewa ll, unblock t he
utility.
3. F ollow the st eps outlined in the Online Installation
24
se ct ion a nd finish the
ins ta lla tio n p ro cess .
Note :
Some new NAS models, s uch as TS-x12, TS-x20 and TS-x21, no longe r ha v e the
ins ta lla tio n C D includ ed .
T he default login ID and passw o rd of the NAS are bo th admin.
44
Page 45

2.3 Getting Utilities
QNAP has pre pa red a number of practica l and us ef ul utilities to e nha nce y o ur NAS
experiences. After setting up your NAS, please choose from the following two methods to
ins ta ll the u tilities.
Download from the QNAP website
A.
T y pe http:// w w w . qnap. com/ in your browser, go to F e a tures > Fo r Home ( “For Business ”
if you are business users). Sc roll down to the bott om of the screen and c lic k “Utilities”.
Choo se to d ownloa d an d in s ta ll u tilities on yo u r PC.
Install from the product C D-RO M
B.
T he p roduct CD- ROM co nta ins s o ftw a re utilit ie s QNAP Qfinder, myQNAPcloud Co nne ct ,
Net Bak Replic at or, and QGet.
45
Page 46

Browse t he CD-ROM and ac cess the following c ontent s:
Quick Insta lla tio n Guid e: View th e h a rd ware insta lla tio n instruction s of the NAS .
Insta ll QNAP Qf inder: T he se tup program of the QNAP Qf inder (for Windows OS. )
Insta ll my QNAPcloud Connect : The setup program of the myQNAPcloud Connect (for
Windows OS.)
Insta ll NetBak Replicato r: The s e tup program of Net Bak Replicato r (Windows utilit y f o r
data backup from Windows OS to the QNAP NAS.)
Install QGet: The set up program of t he QGet download utility (for Windows OS.)
User Ma nua l and A pp lic a tion Not e s : So ftw a re us e r manuals , a nd ha rdw a re manual of
the Turbo NAS.
46
Page 47

47
Page 48

2.4 Connecting to NAS Shared Folders
Conne ct ing to NAS s ha re d f o lde rs in Windows
49
Conne ct ing to NAS s ha re d folde rs in Ma c or Linux
54
48
Page 49

2.4.1 Connecting to NAS shared folders in Windows
For Windows operating systems, there are two methods to connect t o shared folders of
the NAS:
A. QNAP Qfinder
B. My Network Places or Run
Connect to the shared folders of the NAS by using the QNAP
A.
49
52
Qfinder:
1. Launch the QNAP Qfinder. Select the NAS detec ted and then click “Map Network
Drive”.
2. Selec t a shared folder on the NAS to be mapped as a network drive and c lick “Map
Ne tw ork Drive ” .
49
Page 50

3. Ente r t he use rname and pas s w ord to connect to the NAS a nd clic k “OK”.
4. Selec t a drive in the OS to map t he folder chosen in Step 2 and click “Finish”.
50
Page 51

5. T he mapped f o lder will appea r whe n ope ning the F ile Explorer.
51
Page 52

Note :
shared folders. The st eps: 1) Launc h t he QNAP Qfinder; 2) Select St orage Plug &
Conne ct und e r Conne ct; 3) Check Login w ith us e rname and pa s s w o rd” a nd ente r
username and password; 4) Clic k a NAS shared folder; and 5) Click “Map the Network
Drive” on top of the sc reen.
B.
Alt e rnatively, y ou can us e the Storage P lug & Conne ct Wiza rd to conne ct NAS
Connect to the shared folders of the NAS by using My Network
Places or Run
1a. Open My Network Places and find the workgroup of the NAS. If the NAS cannot be
fo und, bro w s e the w hole ne twork t o s e a rch for the NAS. Double click t he na me of
t he NAS f o r co nne ction.
1b. Use the Run funct ion in Windows . Ente r \\ NAS_na me or \\NAS_IP.
2. Ente r t he de f ault a dministrator name and pas s w ord.
Default us e rname: admin
52
Page 53

Def a ult pas s w ord: admin
3. Yo u can uploa d files to the s ha red fo lders .
53
Page 54

2.4.2 Connecting to NAS shared folders in Mac or Linux
Mac Users
There are two methods to c onnect shared folders on a NAS:
54
A. Using QNAP Qfinder
B. Connect to Se rver
56
A. Using QNAP Qfinder
1. Launch the QNAP Qfinder, s e lect the NAS you would like t o connect to , a nd g o to
“Conne ct” > “Open in File Explorer”.
2. Ente r your login ID and passwo rd.
54
Page 55

3. Se lect the folde r y ou wa nt to mount a nd click “OK”.
4. The folder is mounted.
55
Page 56

B. Connect to Server
1. Choose “Go” > “Connect t o Server”.
2. Enter the NAS IP address.
56
Page 57

3. Ente r your login ID and passwo rd.
4. Se lect the folde r y ou wa nt to mount a nd click “OK”.
57
Page 58

5. The folder is mounted.
Linux Users
On Linux, run the f o llow ing co mma nd:
mount -t nfs <NAS IP>:/<Shared Folder Name> <Directory to Mount>
Fo r e xample, if th e IP a d dre s s o f the NAS is 192. 168. 0. 1, to conne ct to the s ha re d folde r
“public ” unde r the / mnt/pub direct o ry, us e the f o llow ing co mma nd:
mount -t nfs 192.168.0.1:/public /mnt/pub
58
Page 59

Note :
You must login as the “root” user to initiate the above command.
Login the NAS with the specified user ID, use the mounted direc t ory to c onnect to t he
shared folders.
59
Page 60

2.5 Connecting to NAS by Web Browser
T o connect to the NAS by a w e b brows e r, f o llow t he steps be low:
1. Ente r http: / /NAS IP: 8080 o r use the QNAP Qfinder to find t he NAS. Double clic k
the NAS name, and t he NAS login page will open.
Note :
T he de fault NAS IP is 169.254. 100. 100: 8080. If th e NAS ha s be e n configured to
use DHCP, you can use the QNAP Qfinder to chec k the IP address of the NAS. Make
sure the NAS and the computer that runs the QNAP Qfinder are connected to t he
same subne t. If the NAS cannot be found, co nne ct the NAS to the compute r directly
and run the QNAP Qfinder again.
2. Ente r the administrator name and password. Turn on the opt ion “Sec ure
login” (Se cure So ckets La ye r login) to a llow s e cure co nne ction to the NAS . If a
user without administration right login the NAS, the user can only change the login
password.
Default us e rname: admin
De faul t pass word: a dmin
Note :
If the NAS is be hind an NAT gate way , to connect to the NAS by s e cure login on
t he Inte rne t, the po rt 443 must be o pe n e d o n the NAT router and forw a rde d to the
LAN IP of the NAS.
60
Page 61

3. The NAS Desktop w ill show up.
61
Page 62

2.6 Migrating from Old NAS
Users can migrat e their QNAP NAS to another Turbo NAS model with all the data a nd
configuration retain ed b y simply in s ta llin g the hard d rives of the orig inal ( source) NA S o n
the new (destination) NAS according to its original hard drive order and restart the NAS.
Due to different hardware design, the NAS will automatically check if a firmware update
is required before system migration. After the migration has finished, all the set t ings and
dat a w ill be kept a nd applied t o the new NAS. Howe v er, the s ys te m settings of the
source NAS canno t be importe d to the de s tination NAS via “ S y s te m Administration” >
“Backup/Restore Settings”. Configure the NAS again if the settings were lost.
T he NAS models which support sy s te m migrat ion are list e d below .
Source NAS De stination NAS Rem a rk
T S -x10, TS -x12, TS-x19,
T S -x20, TS -x21, TS-x39,
T S -509, TS-809, SS -x39,
T S -x10, TS -x12, TS-x19,
T S -x20, TS -x21, TS-x39,
T S -509, TS-809, SS -x39
Firmware update required.
SS-469, TS-x59, TS -x69,
T S -x70, TS -x79
T S -x10, TS -x12, TS-x19,
T S -x20, TS -x21, TS-x39,
T S -x59, TS -x69, TS-x70,
T S -x79, SS -469 Pro
F irmwa re u p d a te n o t
required.
T S -509, TS-809, SS -x39,
T S -x59, TS -x69, TS-x70,
TS-x79
Note :
T he d e s tination NAS sho uld co ntain enoug h drive ba y s to hous e the hard drive s
of t he source NAS.
SS-x39 and SS -469 Pro s e ries s up po rt o nly 2. 5-inch ha rd disk drive s .
A NAS wit h ed disk volume cannot be migrate d to a NAS which doe s not s upport
file s y s tem encryption. File sy ste m enc ry ption is not s up po rte d b y TS-110, TS119, TS -210, TS-219, TS -219P, TS-x20, TS-x21, TS-410, TS-419P , TS -410U,
T S -419U, TS -119P+, T S -219P+, TS-419P +, T S -112, TS-212, TS -412, TS-419U+,
T S -412U, TS -420U and TS -421U.
62
Page 63

The Multimedia Station, Download Stat ion, iTunes Server, and DLNA Media Server
fea tures will be remove d after migrating the non-TS-x79 mo dels to the TS-x70U/
TS -x79 models. The shared fo ld ers M u ltimedia /Qmultimedia, Down lo ad / Q d ownload
and all the do w nloaded files will be kept.
The registered my QNAPc loud name on the source NAS will not be moved to t he
destination NAS after system migration. T o use the same myQNAPc loud name on
t he de s tinat ion NAS, change the myQNAPcloud name on the s o urc e NAS be f ore
system migration and register the same name on the destination NAS after the
proce s s . P le a s e conta ct the QNAP te chnica l supp ort de p a rt ment if y o u ne e d to
keep myQNAPcloud name after system migration.
Destination NAS Disk volume supported for system m igration
1-ba y NAS 1- drive single disk volume
2-ba y NAS 1 t o 2-drive s ingle dis k vo lume, J BOD, RAID 0,
2-drive RAID 1.
4-ba y NAS 1 t o 4-drive s ingle dis k vo lume, J BOD, RAID 0,
2-drive RAID 1,
3 t o 4-drive RAID 5,
4-drive RAID 6,
4-drive RAID 10.
5-ba y NAS 1 t o 5-drive s ingle dis k vo lume, J BOD, RAID 0,
2-drive RAID 1,
3 t o 5-drive RAID 5,
4 t o 5-drive RAID 6,
4-drive RAID 10.
6-ba y NAS 1 t o 6-drive s ingle dis k vo lume, J BOD, RAID 0,
2-drive RAID 1,
3 t o 6-drive RAID 5,
4 t o 6-drive RAID 6,
4-drive o r 6-drive RAID 10.
8-ba y NAS 1 t o 8-drive s ingle dis k vo lume, J BOD, RAID 0,
2-drive RAID 1,
3 t o 8-drive RAID 5,
4 t o 8-drive RAID 6,
4-drive , 6-drive, or 8-drive RAID 10.
63
Page 64

Follow the steps below to perform system migration.
1. Turn of f the s o urce NAS a nd unp lug the ha rd drive s .
2. Remove the hard drives from t he old trays and install them to the hard drive trays
of t he new NAS.
3. Plug the hard drives to the destination NAS (new model). Make sure the hard
drive s are in stalled in the o rig in al o rd er.
4. F ollo w the in structions of the Q u ick Installation Guid e ( Q IG) to co n nect th e po wer
supply and netw ork c a ble(s ) o f the ne w NAS.
5. Turn on the new NAS. Login the web administration interface as an administrator
(def a ult login: admin; passwo rd: admin).
6. If you are informed to update the firmw are of the new NAS, follow the instruct ions
to download and install the firmware.
7. Clic k “Start Migrating”. The NAS will restart after system migration. All the data
and settings will be retained.
Caution:
To avoid system damage or serious injuries, the syst em migration
proc e dure should be pe rformed by a n authorized se rve r manager or IT
administrator.
Some system sett ings will be removed aft er system migration due to a different system
des ign. Co nf igure the f o llowing s e ttings aga in on the new NAS:
Windows AD
Some apps nee d to be res int a lled.
64
Page 65

3. QT S Basics and Desktop
Intro d u cing Q TS
66
Usin g Q TS De sktop
70
65
Page 66

3.1 Introducing QTS
Built on a Linux fo unda tion, QTS 4. 0 Turbo NAS op e rating sys tem is sha p e d from the
optimized kernel to deliver high-performance services satisfying your needs in file
storage, management, backup, multimedia applicat ions, and surveillance, and more.
Th e intuitiv e, multi-w in d ow a n d multi-tas kin g Q TS 4 .0 GUI ma ke it incredibly eas y to
man ag e y ou r Turb o NA S, utiliz e its rich home a p p lication s , en jo y multimedia co llection s
wit h more fun, a nd inst a ll a rich se t of applic a tions in the App Ce nte r on demand t o
expand your Turbo NAS experience.
Moreover, QTS 4.0 adds value to business applic ations with its abundant fe at ures,
includ in g file s h aring , iSC S I an d virtua liza tio n , ba ckup , p rivileg e s ettin g s, an d so on,
effect ively inc reasing business effic iency.
Coupled wit h va rious ut ilit ies and s mart mobile apps, QTS 4.0 is the ult imat e plat form for
building a personal or private cloud, synchronizing dat a and s haring files.
66
Page 67

*Click the figure above to c hec k for more details.
67
Page 68

Turbo NAS for Home - Easily enrich home entertainment and
content sharing
T ons of photos , music , v ideos a nd documents a re of te n scatte red across multiple
compute rs in mode rn homes. QNAP Turbo NAS lineup o f ho me netw o rk st o rag e s e rv e rs
fe a ture plenty o f ha ndy ap plications to let you s martly conne ct a nd manage the s e
asse ts and e n joy a truly d ig ital life in a we ll-se cu red home netw o rk. No b oun d aries for
multimedia sharing at home, and no boundaries for sharing content with family, and
friends . Le a rn more a bo ut the e xciting features tha t QNAP Turbo NAS o ff e rs to yo u:
Intuitive GUI w ith M u lti-Win d o ws, M u lti-Ta sking , Multi-Ap p lication , M u lti-De vice
ac cess support
Cross plat f o rm dat a sto rage, ba ckup and sharing c e nte r
Revolutionary music , photo and home video center
Personal cloud storage
Free and large ca pa city for Dropbox- sty le da ta sy nc
Over 90 Install-on-demand applications via the App Center
Energy- eff icient & eco- friendly
68
Page 69

T urbo NAS for Business - O ptimize business IT infrastructure w ith
ease and efficiency
IT efficiency, coup led with lo w to tal cos t o f o wn ership (TCO ) is an ess en tial factor for
busines s compet it iv e ne s s . QNAP Turbo NAS f e a tures high pe rf o rmance, bus ines s critica l
applic at ions, and affordability; helping businesses ac hieve seamless file sharing, easy
inte g ration into e xist ing ne tworks, f le xible virt ua lized IT e nvironments , a nd many othe r
adv a nced capa b ilities for kee ping bus ines s es running at maximum efficiency. Lea rn more
about t he c ompelling features that QNAP Turbo NAS offers to businesses:
Large data s torage , backup and file sharing ce nter
Supports bo th scale-up and s ca le-o ut so lut ion fo r large st o rage capacity demand
Adv a nced s to rag e management wit h d y na mic thin-prov is ioning, S S D c a ching and
JBOD expans ion f unctions
Trustworthy data security and data encryption
The reliable IP SAN storage (iSCSI) as primary and sec ondary st orage for
virt ua lization e nvironment
Private cloud storage
Free and large ca pa city for Dropbox- sty le da ta sy nc
Over 90 Install-on-demand applications via the App Center
Dev e lopment Ce nter fo r 3rd party pa rt ne rs to build apps on t he Turbo NAS
69
Page 70

3.2 Using QTS Desktop
Afte r you f inish t he ba s ic NAS se tup and login to the NAS, t he f o llowing deskto p w ill
appe a r. Ea ch main des ktop f e a ture is int roduced in the follow ing se ctions .
Toolbar
Main Menu
Click to show the Main Menu. It includes three parts: 1) QNAP applications; 2)
sys te m fe a tures a nd se ttings; a nd 3) third party applic a tions. It e ms under “
APPLICATIONS” are developed by QNAP to enhance your NAS experienc e. Items under “
SYST EMS” are key system fe at ures designed to manage or optimize your NAS. Items at
t he bo ttom sec tion of the menu are applic a tions de signed a nd submitte d by independe nt
deve lopers a nd approve d by QNAP. Those a pplic a tions ca n add functionalities to the NAS
(for their introduction, please refer to t heir description at t he App Center.) Please note
that the default Internet browser, instead of a window on the NAS Desktop, will be
launche d o nce y o u clic k a third party a pplica tion. C lick t he ico n from t he menu t o launch
70
Page 71

the select ed application.
71
Page 72

72
Page 73

Show Desktop
Click t o minimize or restore all open windows and show the desktop.
Background Task
Click t o rev ie w a nd control a ll t a s ks running in the b a ckground (such as HDD SMART
scanning, a ntiv irus scanning, f ile ba ckup or multimedia conv e rsion. )
External Device
Click to list all external devices that are connected to the NAS via its USB or SATA
ports. Click the device listed to open the File Stat ion for that device. Click the “External
Devic e” header to open the External Devic e page for relevant settings and operations
599
(for details on the File Station, please refer to the chapter on File Station
.) C lick
to eject t he external device.
73
Page 74

Notifica tion a nd Alert
Click to ch e ck fo r recent s ys te m erro r and warn ing n otif ica tion s. C lick “C lear A ll” to
c lear all entries from t he list. T o review all historical event notifications, c lic k the “Event
Notifications” header to open the System Logs. For details on System Logs, please refer
302
to the chapter on System Logs
.
74
Page 75

Personal Setting
Ad min Co n trol: C lick t o custo mize your us e r spe cific s ettings , change y o ur user
pas s w o rd, res ta rt/ s hut do wn the NAS o r log out your us e r acco unt.
1) Options:
i. Profile: Specify your user email address and c hange your profile picture.
75
Page 76

ii. Wallp a pe r: C han g e the d efault w allp ap e r or u p lo ad yo u r own wallp a pe r.
iii. Cha n g e P ass word : C h an g e y our lo g in p as swo rd.
76
Page 77

iv. Miscellaneous:
77
Page 78

Warn me when leav ing QT S: Check this option, and use rs w ill be prompt e d f or
c onfirmat ion each time t hey leave the QTS Desktop (such as clic king the bac k ic on (
) in the browser or close the browser ( ). It is advised to check
this option.
Reo p en win d ows wh en log g in g b ack into Q TS: C h eck th is op tion , and all the cu rrent
deskt op s e ttings (s uch a s the “w indow s o pe ned be f o re yo ur logout ”) w ill be kept
af te r y o u login the NAS the next time.
Show the de skt o p sw itching but ton: Che ck this opt ion to hide the next de s kt op
butto n (
) and last de skt o p button ( ) and only display them when you move your
mouse c ursor close to the buttons.
Show the “QNAP Utility” tab: Check this option to show the “QNAP Mobile App”, “
QNAP Utilit y ” a nd “F e e dba ck” tabs a t the bo ttom of t he Deskt op.
Show the Dashboard but ton: If y ou w o uld like t o hide the Dashboard but to n ( ) at
the bottom right side of the NAS Desktop, uncheck this option.
Show the NAS time on the desktop: If you prefer not to show the NAS time at
bottom left side of the desktop, uncheck this option.
Change Pa ss w o rd: Click t his but to n to change yo ur login pass w o rd.
2) Restart: Click this button to restart your NAS.
3) S hutdo wn: Click this button to shut do w n y o ur NAS.
4) Log out: C lick this b u tto n to lo g yourself o u t.
5) About: Click this button to check for the NAS model, firmware version, HDDs
already installed and available (empty) bays.
Search
Click
and enter a feature specific keyword in the searc h box to searc h for the
78
Page 79

desired function and it s co rresponding online help. Click t he result in t he se a rch box t o
launch the funct ion o r ope n its o nline QTS he lp.
Online Re s ourc e
Click to d isp lay a list of onlin e refe ren ce s, in clud in g the Qu ick S ta rt Guide , QTS Help,
Tut orials, QNAP Wiki and QNAP Forum, and cust omer support such as Customer Service
(live support ) a nd F e e dback (fea ture request / bug report ) are a v ailable here.
Language
Click t o choos e your prefe rred langua ge for the UI.
79
Page 80

Desktop Preference
Click t o choose the applic a tion ic o n displaying st y le a nd se lect y o ur preferred
applica tion opening mode on t he de skt o p. Applic a tion ic ons can be s w it ched betw e e n
small thumbna ils (
) and deta iled t humbnails ( ) and applications can be
opened in the tab mode or the window mode.
For the tab mode, the window will be opened to fit the entire NAS Desktop and only one
applica tion window can be displaye d a t once, w hile in the w indow mode, t he applic a tion
window can be resized a nd resha pe d to a de sirable style. P leas e note that if y o u login
t he NAS using a mobile device, only the tab mode is available.
80
Page 81

T a b Mode
Window mode
81
Page 82

Desktop Area
Remove o r arrange all applic a tions on the de s kt op, o r drag one applic a tion ic on o v er the
top of another to put them in the same folder (
Next Desktop and Last Desktop
Click t he ne xt des kt op butto n ( ) (right side of the current de s kt op) or the last de s kt op
button (
of the desktop is indicated by the three dots at bottom of the desktop (
) (left s ide of the current des kt op) to s w it ch betw e en de s kt ops . The pos it ion
).
).
82
Page 83

Dashboard
All important sy s te m and HDD statistics can be review e d in t he QTS Dashboard.
System Health: The status of t he NAS syst em is indic at ed in this sect ion. Clic k the
header to open the “System Stat us” page.
HDD Health: The sta tus of the HDDs currently in stalled in the NAS will b e shown in
he re. X 1 mea n s that on ly o n e HDD is curre n tly in stalled in the NA S. For multiple HDDs
ins ta lled in the NA S , the s ta tus in d icated is o n ly for the HDD with th e wo rst
con d ition . C lick th e “ HDD Hea lth” h ea d er to op en the “ HDD SMART” pag e in Storag e
Manager and review the status of each HDD. For details on the Storage Manager,
please refer to t he c hapter on Storage Manager
95
. Click th e ico n to switch b etw ee n
the “HDD Summary” page and the HDD status indicator. Please note that the color of
t he HDD symbol will c hange bas e d on HDD health.
83
Page 84

Resource M onito r: The CP U, RAM a nd ba ndwidth usa g e s a re d isplay ed he re. C lic k the
“Resource Monitor” header to open the c orresponding page in System Status for
details. Pleas e note tha t if the po rt trunking fea ture is act ivated, the bandw idt h
stat istic is the combined usage of all NICs.
Storage: The shared folder (top five largest folders), volume and storage stat istics
are summarized here. Click the “Storage” header to open the c orresponding page in
Syst em St atus for details.
Hardware: The system and HDD temperatures, fan speeds and hardware usages are
summarized here. Please note that the statistics listed here vary based on the NAS
model purchas e d. Clic k the “Hardware” he ade r t o ope n the corresponding page in
“S yste m Sta tus” for d e ta ils.
Online Users: All users c urrently connec ted to t he NAS are listed here. T o disconnec t
or block a use r or IP, right click t he use r and choo s e the desired act ions. Clic k t he
“Online Users” header to open the corresponding page in “System Logs” for details.
Scheduled Ta sks: Tasks scheduled are liste d here. Clic k the ta sk dropdown list to list
only the c hosen cat egory and the time drop down list t o spec ify the time range for
tasks to be listed.
News : NAS rela te d ne ws f rom QNAP will be listed he re. C lic k the ne w s link to v is it the
corresponding webpa ge on the QNAP w e bsite.
Tip:
All widgets w it hin the Dashboard ca n be dragge d onto the de s kt op f o r monitoring
sp ecific d etails.
The Dashboard will be presented differently on different sc reen resolutions.
T he co lor of the Dashboard but ton w ill change bas e d on the s tatus of sy s te m
he alth fo r q u ick re co g n ition (
).
QNAP Mobile App: Click this tab to check and download the lates t a nd av a ilable QNAP
mob ile ap p lica tio ns.
QNAP Utility: C lick this ta b to ch eck an d d ownloa d th e latest an d ava ilab le NA S
utilities.
Fe e dback: Clic k t his tab to f ile a f e ature reques t and bug report .
Slide- in window: System-related news will be displayed on the window at bott om
right s ide of the de skt o p. Clic k t he update to che ck for relevant de tails.
84
Page 85

Note :
first inst a ll business applic ations f rom t he A pp Ce nter
If y ou would like t o us e y o ur home NAS model as a bus ine s s NAS model, plea s e
723
and drag t he corresponding
ite m from t he M ain M en u an d d rop it to the Q TS De sktop .
85
Page 86

4. System Settings
Gen eral Settings
Storage_Manager
Network
Security
Hardware
Power
Notification
205
229
232
238
243
F irmwa re Up d a te
Backup/Restore
250
External_Device
System_Status
Syst em Logs
295
302
87
95
246
252
86
Page 87

4.1 General Settings
System Administration
Enter the name of the NAS. The NAS name supports maximum 14 c haracters and can be
a c ombinat ion of the alphabets (a-z, A-Z), numbers (0- 9), and dash (-). Space ( ),
period (.), o r pure numbe r are not a llowed.
Ent e r a p o rt number for the s y ste m ma na ge ment . The de f a ult po rt is 8080. The s e rv ice s
which us e this port include: S y s tem Mana g e ment, File Sta tion, Multimedia S ta tion, and
Download S ta tion. If you a re no t sure a bo ut this se tting, us e the de f a ult po rt number.
Enable Secure C onnection (SSL)
To allow the users to connect the NAS by HTTPS, turn on secure connection (SSL) and
enter the port number. If the option “Force secure connection (SSL) only” is turned on,
t he us e rs can only conne ct to the w e b a dministration pa g e by HTTP S conne ct ion.
Disable and hide the hom e/m ultimedia features such as Multimedia Station,
Photo Station, Music Station, Surveillance Station, Download Station, iTunes
server, and DLNA media server
Th e mult imedia featu res, inclu d ing th e M u ltimedia Statio n , P h o to S ta tion , M u sic S ta tion ,
87
Page 88

Surveillance St ation, Download Stat ion, iTunes server, Media Library and DLNA media
serve r, may be hidden or disabled by de f ault o n the f o llowing SMB mode ls: x70U, x79 Pro,
x79U. To enable the multimedia features for those models, please unchec k this option.
88
Page 89

Time
Adjust the date, time, and time zone according to the location of the NAS. If the
settings are incorrect, the following problems may occur:
When using a web browser to c onnect t o t he NAS or save a file, t he display time of
the action will be incorrect.
The time of the event log displayed will be inconsistent with the actual time when an
ac tion occurs.
Set the server time the same as your computer time
To sync hronize the time of the NAS with the computer time, c lic k “Update now” next t o
this option.
Synchronize with an Internet time server automatically
Turn on this option to synchronize the date and time of the NAS automatic ally with an
NT P (Network Time Protocol) server. Enter the IP address or domain name of the NTP
server, for example, time.nist.gov, time.windows.com. Then enter the time interval for
sy nchronization. This option can be use d o nly w hen the NAS is conne cte d to the
Internet.
Note :
T he first time s y nchronization may take seve ral minute s to co mplete.
89
Page 90

Daylight Saving Time
If your region adopts daylight saving time (DST), turn on the option “Adjust system clock
automat ically for daylight saving time”. Click “Apply”. The latest DST schedule of the
time zone specified in the “Time” sect ion will be shown. T he system time will be adjusted
automatically according to the DST.
Note that if your region does not adopt DST, the options on this page will not be
available.
To enter the daylight saving time table manually, selec t the option “Enable customized
daylight s av ing t ime t a ble“. Clic k “Add Daylight Sa v ing T ime Data“ and e nter the da ylight
saving time sc hedule. Then click “Apply“ to save the set t ings.
90
Page 91

91
Page 92

Codepage
Selec t t he language the NAS uses to display the files and direct ories.
Note :
the FT P clients or the PC OS does not support Unicode, selec t the language which is
the same as the OS language in order to view the files and direct ories on the NAS
properly.
All the file s and d irectories o n the NA S will b e cre ated u sing Unico d e encod ing . If
92
Page 93

Passw ord Strength
Specify the password rules. After applying the setting, the NAS will automatic ally check
the validity of the password.
93
Page 94

Login Screen
Set the login screen style. First clic k the desired template and then click “Preview” to
preview the chosen template or “Apply” to apply the c hosen login screen.
94
Page 95

4.2 Storage Manager
Volume Management
RAID Management
Hard Disk S.M.A.R.T
100
123
Encrypted File Sy s te m
135
iSCSI
Virtual Disk
200
96
124
95
Page 96

4.2.1 Volume Management
T his page s how s the model, size, and current sta tus of the hard drives on the NAS. Yo u
can f ormat a nd check t he ha rd drives, a nd scan t he bad blocks on the hard drives. W he n
the hard drives have been formatt e d, the NAS will c reate t he following default share
folders:
Public: The default shared folder for file sharing by everyone.
Qdownload/Download*: The shared folder for Download Station.
Qmult imedia/ Multimedia *: The sh are d fold er fo r Multimedia Statio n .
Qusb/Usb*: T he shared folder for data copy funct ion using the USB ports.
Qweb/Web*: T he shared folder for Web Server.
Qrecordings/Rec ordings*: T he shared folder for Surveillance Stat ion.
*T he default shared folders of the TS-x59 and TS-x69 Turbo NAS series are Public,
Dow n lo ad , M u ltime d ia, Usb , W eb , a n d Re co rd in g s.
Note : The default shared folders of the NAS are c reated on the first disk volume and
t he directory cannot be changed.
96
Page 97

Disk Configuration Applied NAS Models
Single disk volume All models
RAID 1, JBOD (just a b unch of dis ks) 2- drive models or abov e
RA I D 5, RA ID 6 , RA ID 5 +h ot sp are 4-drive models or abov e
RA I D 6+h ot sp ar e 5- drive models or abov e
RA I D 10 4- drive models or abov e
RAID 10+hot s pa re 5- drive models or abov e
Single Disk Volume
Each hard drive is us e d a s a
st a nda lone disk. If a hard drive is
damaged, all the da ta w ill be lost.
97
Page 98

JBOD (Just a bunch of disks)
JBOD is a collect ion of hard drives that
does not of fer any RAID protect ion.
The data are written to the physical
disks sequentially. The tot al storage
capacity is equal to the sum of the
capacity of all member hard drives.
RAID 0 Strip in g Dis k Vo lum e
RAID 0 (striping disk) c ombines 2 or
more hard drives into one larger
volume. The data is written to the
hard drive w it ho ut any parity
information a nd no red unda ncy is
offered.
The t ot al storage capacity of a RAID 0
disk volume is equal to the sum of the
capacity of all member hard drives.
RAID 1 M irro ring Dis k V o lum e
RAID 1 duplicate s the data be tw e e n
t w o ha rd drives t o provide disk
mirroring. To create a RAID 1 array, a
minimum of 2 hard drives are required.
The st orage capac ity of a RAID 1 disk
volu me is eq ual to the siz e o f the
smallest hard drive.
RAID 5 Disk V olum e
T he data a re striped acros s a ll the
ha rd d rives in a RAID 5 arra y. The
parity info rmat ion is distribute d a nd
stored across each hard drive. If a
member hard drive fails, the array
ent e rs de graded mode. Afte r inst a lling
a new hard drive to replace t he failed
one, the da ta can be rebuilt f rom ot he r
member drives that contain the parity
98
Page 99

inform ation.
To c reate a RAID 5 disk volume, a
minimum of 3 hard drives are required.
The st orage capac ity of a RAID 5 array
is equal to (N-1) * (s ize of smallest
hard drive) . N is the number of ha rd
drive s in the arra y.
RAID 6 Disk Volume
T he data a re striped acros s a ll the
ha rd d rives in a RAID 6 arra y. RAID 6
differs from RAID 5 that a second set
of parity information is stored across
the member drives in the array. It
tolerates failure of two hard drives.
To c reate a RAID 6 disk volume, a
minimum of 4 hard drives are required.
The st orage capac ity of a RAID 6 array
is equal to (N-2) * (s ize of smallest
hard drive) . N is the number of ha rd
drive s in the arra y.
RAID 10 Disk V olum e
RAID 10 c ombines four or more di sks in
a way t hat protec ts data against loss
of no n-a d jacent d isks. It prov ide s
securit y by mirroring all dat a o n a
sec ondary set of disks while using
striping across each set of disks to
speed up data transfers.
RAID 10 requires an even number of
hard drives ( minimum 4 ha rd drive s ) .
The st orage capacity of RAID 10 disk
volu me is eq ual to (siz e o f the smalle st
capacity disk in the array) * N/2. N is
t he number of ha rd drives in the
volume.
99
Page 100

4.2.2 RAID Management
* Online RAID cap a city e xpans ion, o nline RAID leve l migrat ion, a nd RAID recov e ry a re no t
suppo rte d by o ne-b a y NAS models, TS -210, a nd TS -212.
Y o u can perfo rm online RAID ca pa cit y e xpa ns ion ( RAID 1, 5, 6, 10) a nd on line RAID leve l
migratio n (single disk, RAID 1, 5, 10) , a dd a ha rd drive member t o a RAID 5, 6, o r 10
configuration, configure a s p a re ha rd drive ( RAID 5, 6, 10) w ith the d a ta retained, en a ble
Bitmap, recove r a RAID c onfiguration, and set a global spare on this page.
T o e xpand the s torage capa cit y o f a RAID 10 volume, y o u can perfo rm online RAID
capa city e xpansion or add an ev e n number of hard disk drives to the v olume.
Expand Capacity (Online RAID Capacity Expansion)
Scenario
Y o u bo ug ht thre e 250GB hard drive s for init ial setup o f a TS-509 Pro NAS a nd configured
RAID 5 disk c onfiguration w ith the three ha rd drive s .
A half year later, the data size of the department has largely increased to 1.5TB. In
othe r wo rds , the s torage capa cit y o f the NAS is running out o f us e . At t he s a me time,
t he pric e o f 1TB hard drives ha s droppe d to a large ext e nt.
Operation procedure
In “Sto rage M ana ge r” > “RAID Manage ment”, s e lect the disk volume for expansion and
click “ E xp an d Cap acity ”.
100
 Loading...