

PURE VR1 Owner's Manual

OWNER’S MANUAL
VR1
2
ASSEMBLY
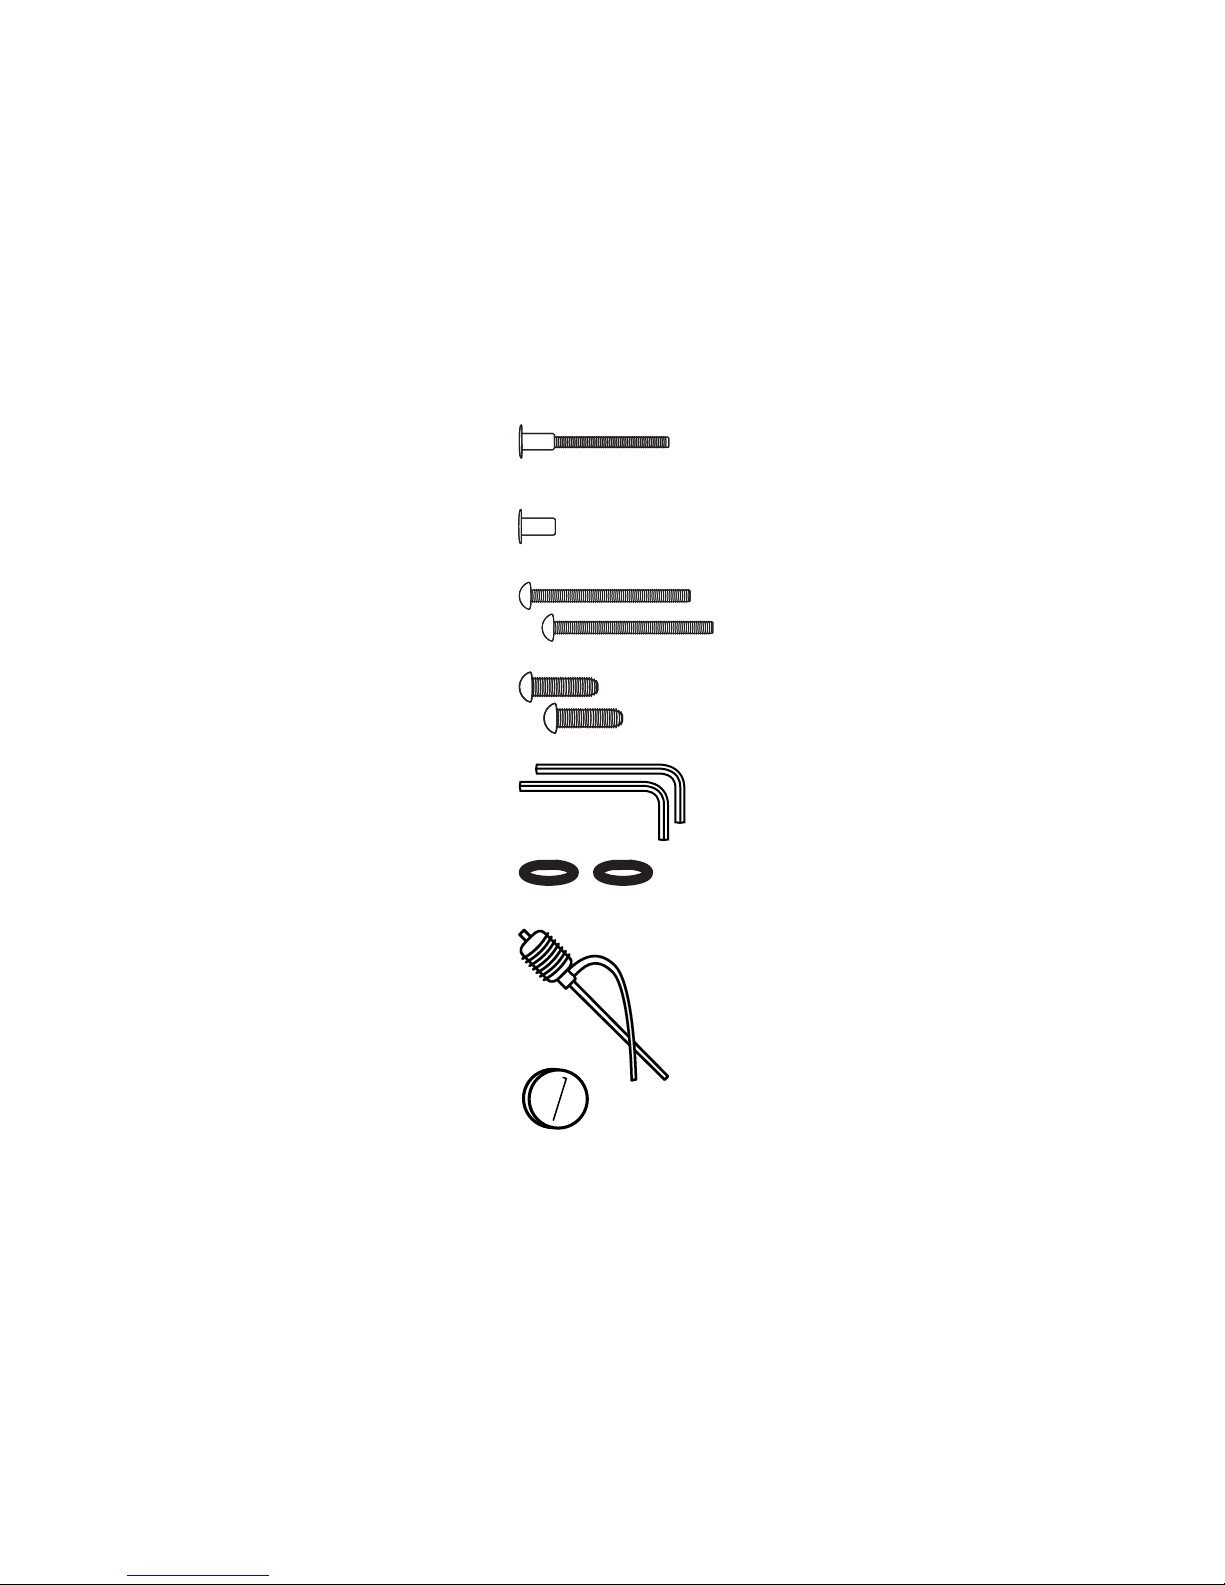
BITS BAG CONTENTS:
A. Rail Cross Bolt
B. Rail Cross Nut
C. Rail Bolt (x2)
D. Rear Leg Bolt (x2)
E. 5mm Allen Key (x2)
F. Black Washer (x2)
G. Syphon Pump
H. Purication Tablets
Congratulations on purchasing the Pure Design Fitness VR1!
Please see the following pages for instructions on assembling your VR1.
3
1. Open box, remove the bits bag, seat, and rear leg from the cardboard insert.
Remove the cardboard insert.
2. Carefully pull the tank out of box.
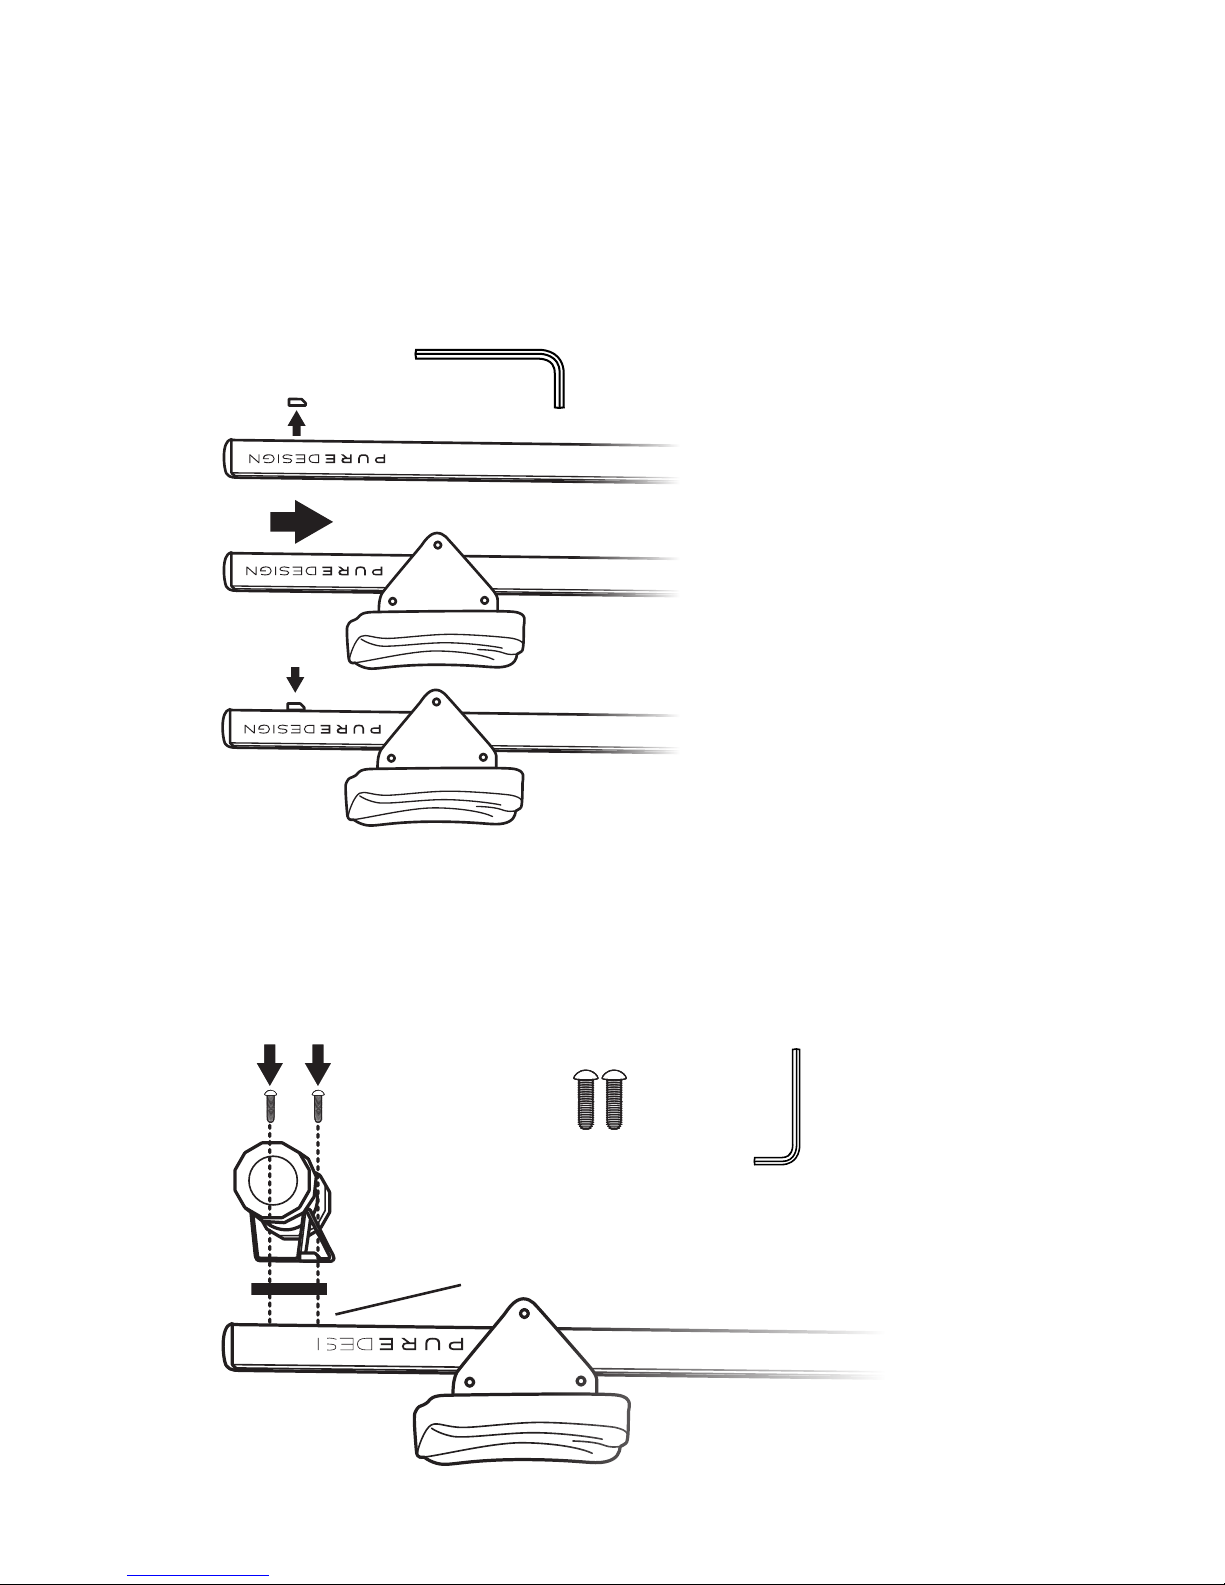
3. Using the Allen key, remove the stops from each side of the rail and slide the seat
onto the rail (front/wider end) rst. With the Allen key, replace the stops back
onto each side of the rail.
(E) 5mm Allen Key
4. Attach the rear leg to the underside of the rail using the Rear Leg Bolts (D).
Firmly tighten the bolts with the 5mm Allen key.
(D) Rear Leg Bolt (x2) (E) Allen Key
The rear leg should be perpendicular to the rail.
4
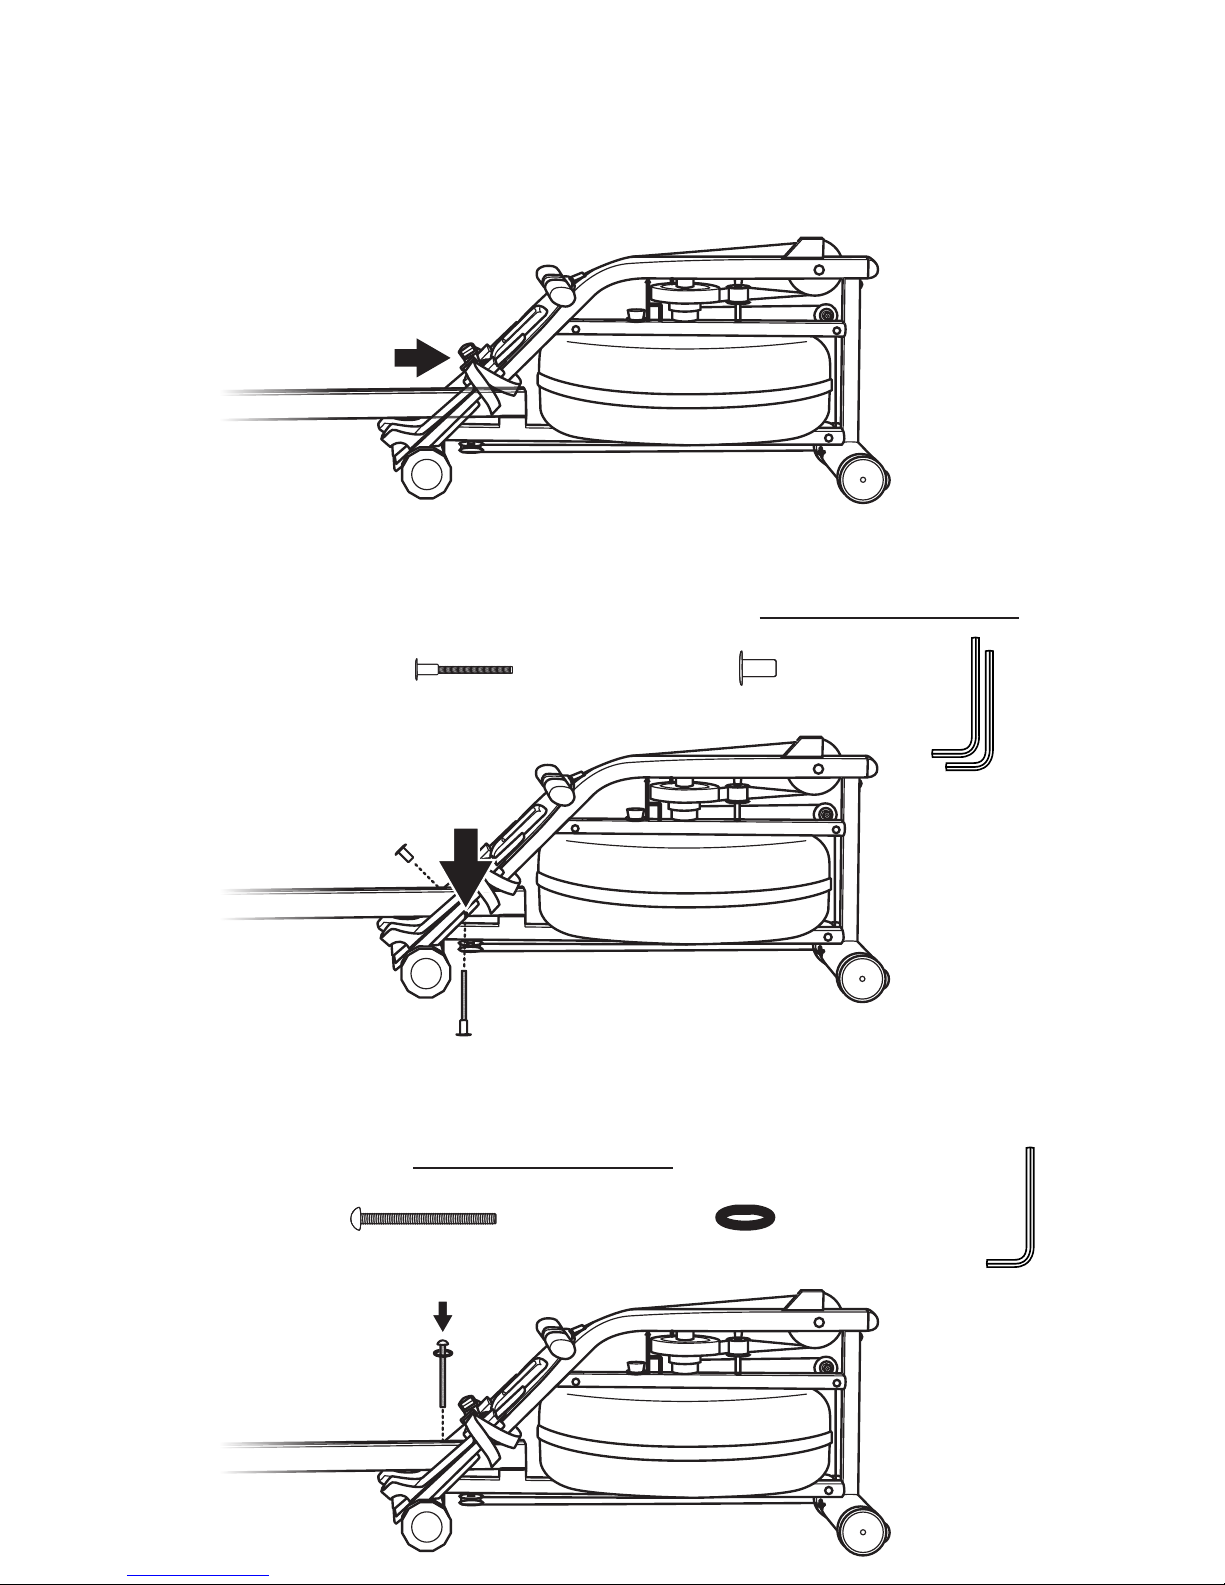
5. Slide the rail into the gap in the footboard between the heel rests. The seat should
be upwards. The rail end should slide in until the holes on the side of the rail line
up with the holes behind the footboard. (You may need to lift tank to slide rail
through.)
6. Install the rail cross bolt (A) through the back of the footboard and rail and into
the rail cross nut (B) (inserted into the opposite side). Do not tighten all the way.
(A) Rail Cross Bolt (B) Rail Cross Nut (E) Allen Keys
7. Install the rail bolt (C) and black washer (F) through the top surface of the rail and
into the footboard. Do not tighten all the way.
(C) Rail Bolt (F) Black Washer (E) Allen Key
5
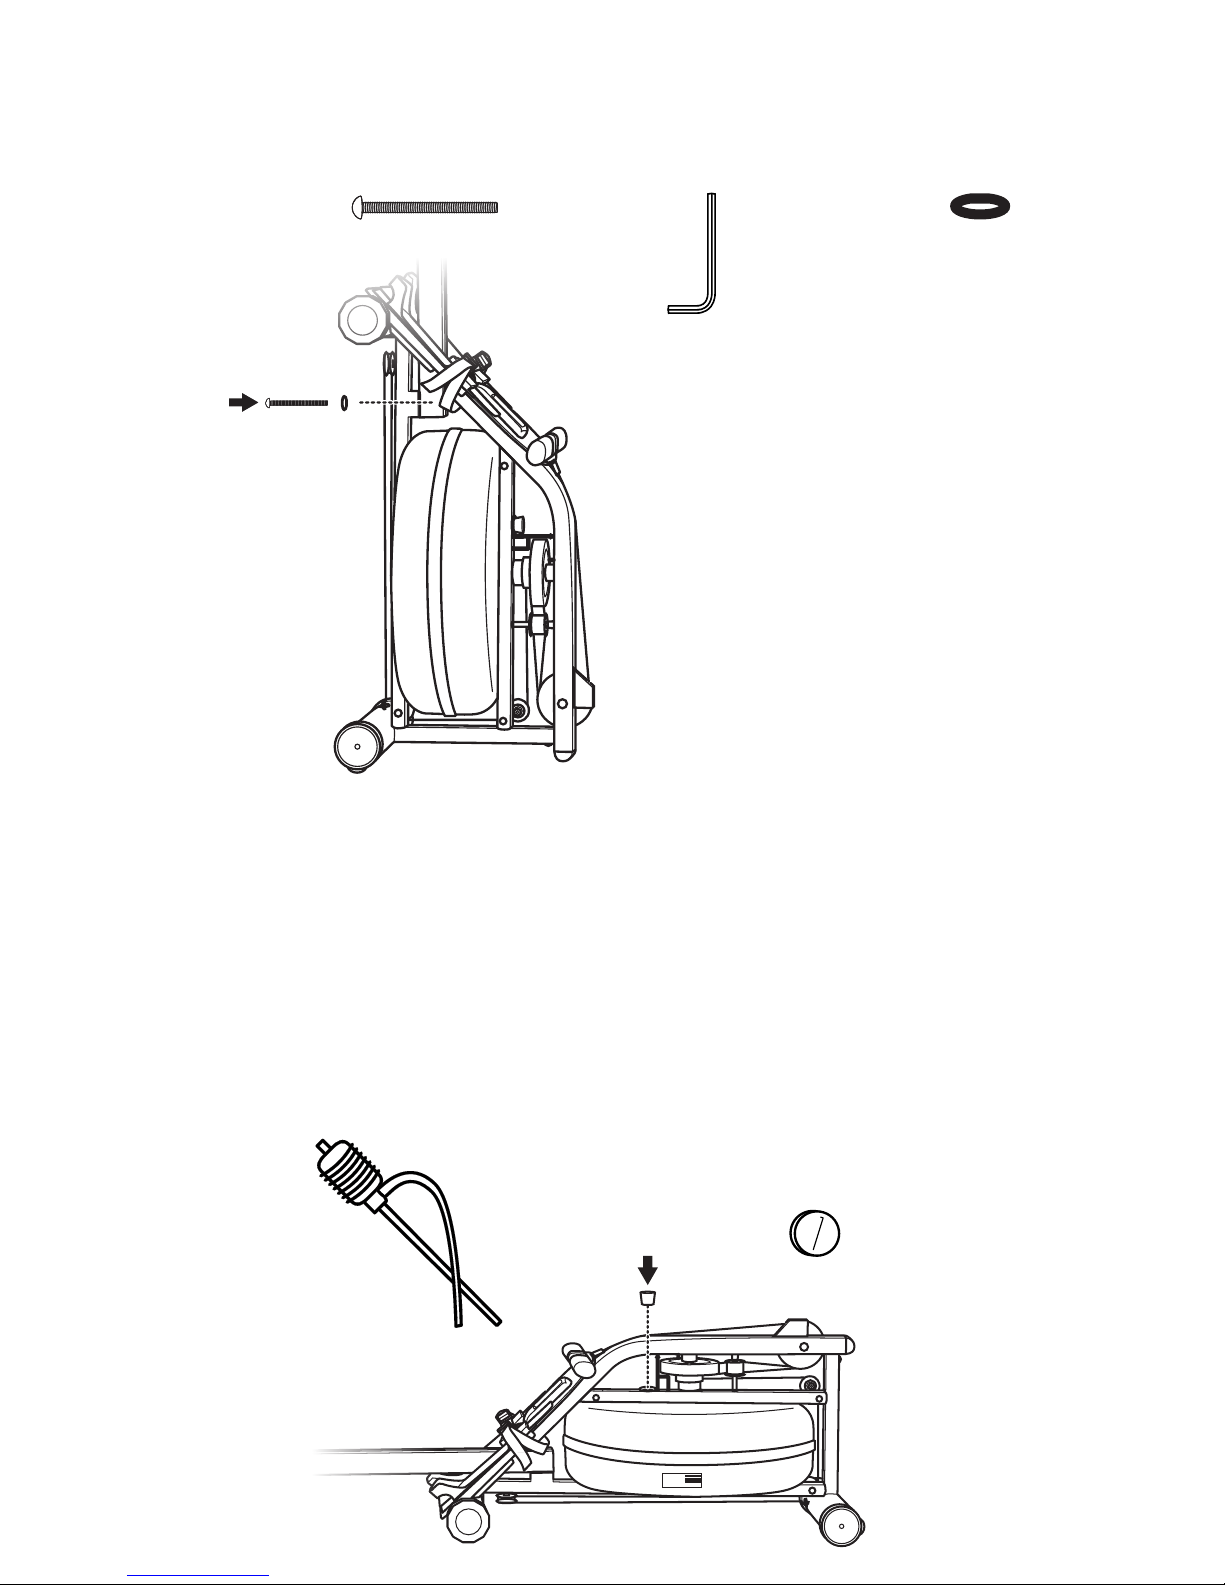
8. Stand the unit up. Use the Allen key (E) to install the rail bolt and washer through
the hole in the bottom of the tank sub frame, and into the rail underside. Use the
Allen key (E) to rmly tighten the bolt.
(D) Rail Bolt (E) Allen Key (F) Black Washer
9. Using the Allen key (E), tighten the bolts from steps 6 and 7.
10. Remove the tank stopper. Using the siphon pump (G), ll the tank with municipal
tap or distilled water to the appropriate level indicated on the gauge sticker
on the side of the tank. Add 1 purication tablet (H) to the tank. Be sure not to
overll the tank. Add a new purication tablet approximately every 6 months.
Purication tablets are available for order on puredesigntness.com. Refer to
Maintenance - Water and Tank section for direction on frequency of adding
purication tablets.
H20
LEVEL GAUGE
19
18
17
16
15
14
13
http://www.myrower.com
info@myrower.com
SN:
E100012
 Loading...