

Page 1
Contents of the Box:
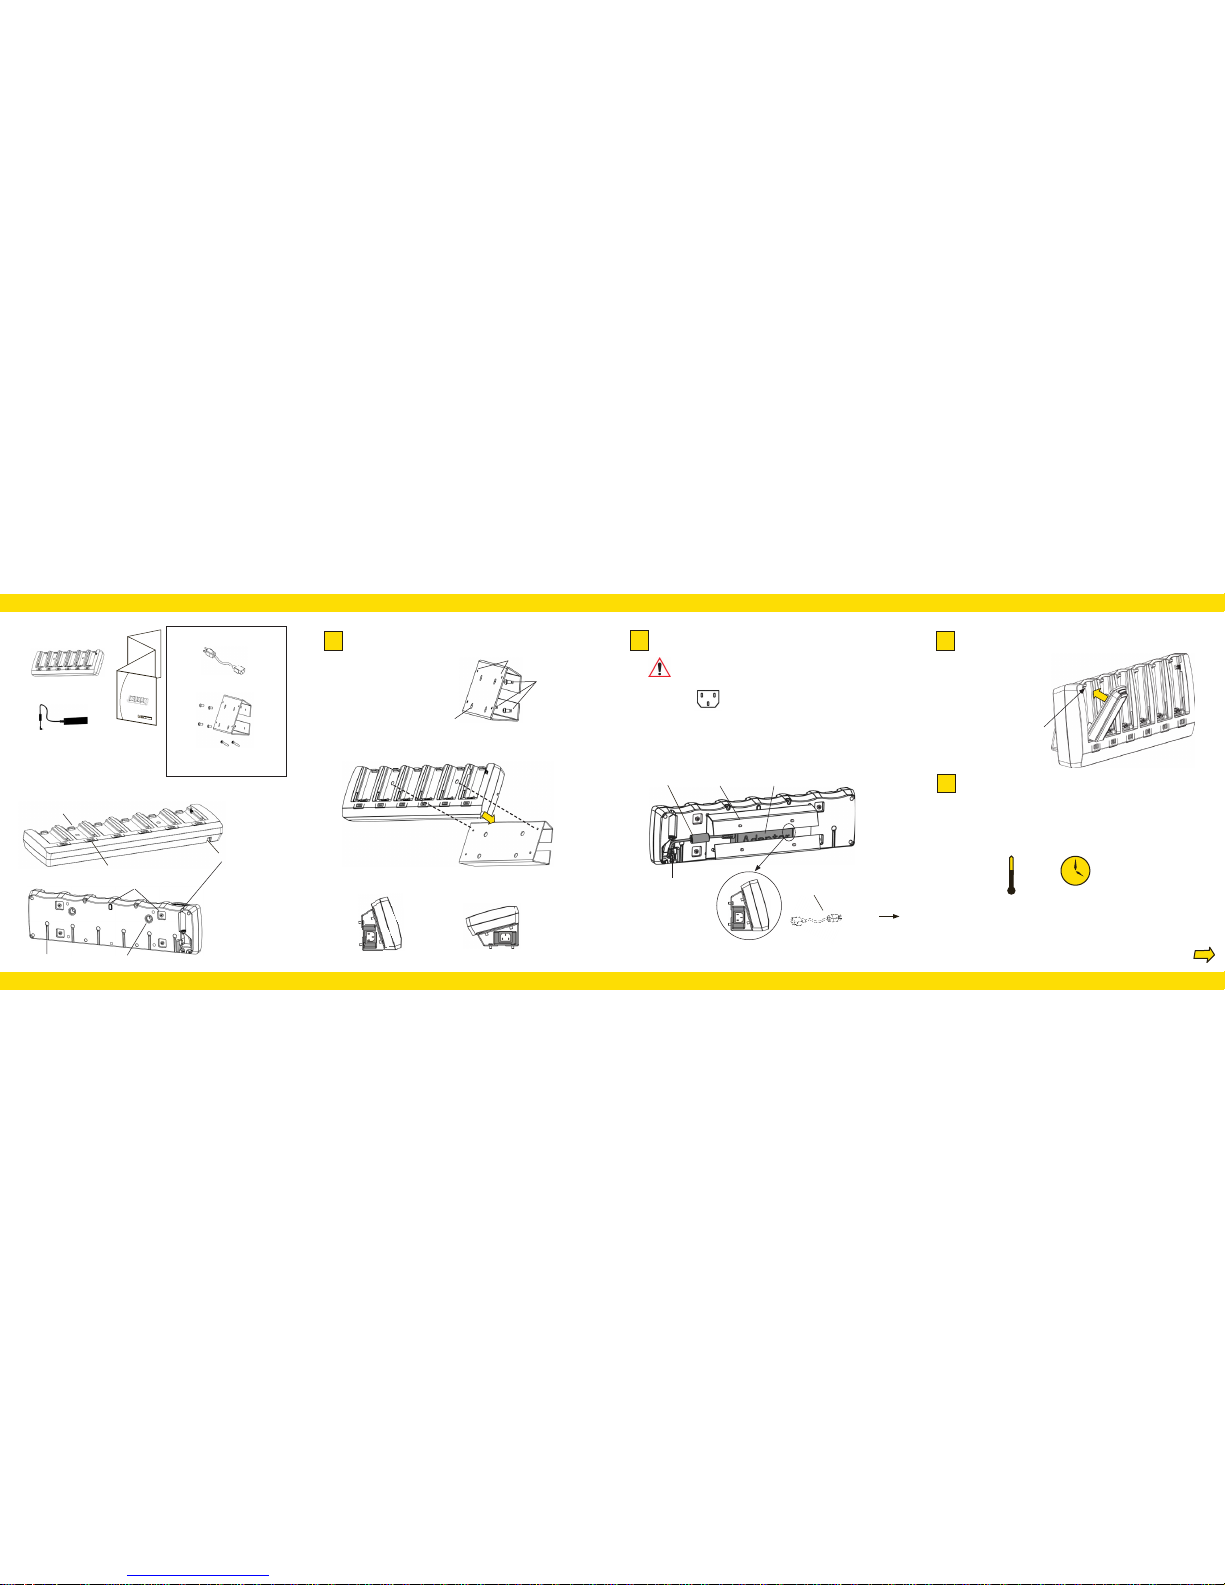
Features: Top and Bottom
ST3006 6-Slot Battery Charger
This Guide
Power Cord
Charge Indicator LEDs (set of 4 per compartment)
Charging Compartments (6)
AC/DC Adaptor
DC In Connector
Mounting Holes (2)
Wall Mounting
holes (4)
Getting Started:
Over
Allow the batteries to charge for four hours.
4
Use only the universal AC/DC power adaptor approved by Psion Teklogix
for use with the Battery Charger.
Note: Full battery performance is only reached after the rst few charge/discharge
cycles. A table of the charge status indicated by the LEDs is shown overleaf.
4 h
0 - 40 °C
32 - 104 °F
1
Connect the Battery Charger to external power.Mount the Battery Charger.
Insert one or more batteries for charging.
3
2
Power cord
(sold separately)
Attach the Mounting Bracket to the
wall using the 4 screws included in
the MT2031 Mounting Bracket Kit.
See the location guide overleaf for
dimensions.
AC/DC adaptor
DC input plug
AC outlet
Insert the two mounting screws from the Kit into the holes through the top of the
Battery Charger and tighten to the Mounting Bracket to secure it.
Notes: The LEDs light when rst connected to power.
Rubber Feet (5)
Bracket Mounting Holes (2)Drain Holes (6)
Dependent on order (sold separately)
MT2031 Mounting Bracket Kit (contains
Wall Mount Bracket, 4 wall screws, 2
screws for Charger)
Final position with AC/DC Adaptor in place.
Insert the battery by placing
the base into the slot in line
with the pins and pivoting
the top of the battery into the
charge compartment.
Then snap the battery tabs
into place.
Wall bracket
Choke
Bottom of
Charger
Wall mount Desk mount (attachment to desk is optional)
Warning: Use IEC-320 C13 power cords approved by Psion Teklogix, with
the ground pin connected to a proper earth-grounded receptacle. Check with
a qualied electrician if you are uncertain of your receptacle grounding.
IEC-320 C13
Charger Mounting holes (2)
Screwdriver access holes (4)
I
S
O
9
0
0
1
C
e
r
t
i
f
ie
d
�
Q
u
a
li
t
y
M
a
n
a
g
e
m
e
n
t
S
y
s
t
e
m
ST3006
Omnii™ 6-Slot Battery Charger
Quick Start Guide
PN: 8000204
Page 2

ISO 9001 Certied
Quality Management System
Rev. A
Psion Teklogix and Omnii are
trademarks of Psion Teklogix Inc.
Other product names mentioned in this
document are trademarks or registered
trademarks of other hardware, software,
or service providers and are used
herein for identication purposes only.
Location Guide For Mounting Screws
The mounting screws on the bracket
are M4 x 6mm panhead screws.
Quick Start Guide
Omnii™ 6-Slot Battery Charger
ST3006
September 1, 2010 PN 8000204.A
Charge Status Indicator LEDs
Battery error or charging timeout (solid RED)
Battery out of charging temperature range (ashing YELLOW)
Battery capacity (25% capacity per bar) (ashing GREEN)
Fully Charged
(all LEDs solid GREEN)
100%
75%
50%
25%
 Loading...