

Page 1
NETBOOK PRO
User Manual
May 27, 2004 P/N 8100012 Rev C
ISO 9001 Certified
Quality Management System
Page 2

© Copyright 2004 by Psion Teklogix Inc., Mississauga, Ontario
This document and the information it contains is the property of Psion Teklogix Inc.,
is issued in strict confidence, and is not to be reproduced or copied, in whole or in
part, except for the sole purpose of promoting the sale of Psion Teklogix manufactured goods and services. Furthermore, this document is not to be used as a basis for
design, manufacture, or sub-contract, or in any manner detrimental to the interests of
Psion Teklogix Inc.
All trademarks are the property of their respective holders.
Page 3

Return-To-Factory Warranty
Psion Teklogix warrants a return-to-factory warranty for a period of one year. Please
contact your local Psion Teklogix office for details. For a list of offices, please refer
to Appendix A: “Support Services And Worldwide Offices”. The warranty on Psion
Teklogix manufactured equipment does not extend to any product that has been
tampered with, altered, or repaired by any person other than an employee of an
authorized Psion Teklogix service organization. See Psion Teklogix terms and
conditions of sale for full details.
Service
When requesting service, please provide information concerning the nature of the
failure and the manner in which the equipment was used when the failure occurred.
Type, model, and serial number should also be provided. Before returning any
products to the factory, call the Customer Services Group for a Return
Authorization number.
Support Services
Psion Teklogix provides a complete range of product support services to its
customers. For detailed information, please refer to Appendix A: “Support Services
And Worldwide Offices”.
Disclaimer
Every effort has been made to make this material complete, accurate, and up-todate. Psion Teklogix Inc. reserves the right to make changes without notice and shall
not be responsible for any damages, including but not limited to consequential
damages, caused by reliance on the material presented, including but not limited to
typographical errors.
Page 4

Page 5

TABLE OF CONTENTS
Approvals and Safety Summary ..........................vii
Chapter 1: Introduction
1.1 About This Manual ............................3
1.2 Text Conventions.............................4
1.3 Unpacking The Box: Item Checklist................... 4
1.4 Main Features...............................5
1.5 Applications Installed On The NETBOOK PRO. . . ..........5
1.5.1 About ActiveSync........................ 6
1.6 Caring For The NETBOOK PRO..................... 6
Chapter 2: Getting Started
2.1 Features Of The NETBOOK PRO ....................11
2.1.1 Identifying Product Features...................11
2.2 Turning On And Off ...........................13
2.3 Passwords.................................14
2.4 Finding And Using The Stylus......................15
2.5 Power Management............................16
2.5.1 Main And Backup Batteries...................16
2.5.1.1 Fitting The Main Battery................16
2.5.1.2 Charging The NETBOOK PRO Battery Pack . ....17
2.5.1.3 Changing Battery Packs................17
2.5.1.4 The Internal Backup Battery..............18
2.5.2 Power Properties.........................19
2.5.2.1 Battery.........................20
2.5.2.2 Battery Calibration...................21
2.5.2.3 Power Saving Schemes ................22
2.5.2.4 The Advanced Tab...................26
Psion Teklogix NETBOOK PRO User Manual i
Page 6

Contents
2.6 Memory Cards.............................. 27
2.6.1 Inserting And Removing An MMC Or SD Card........ 27
2.6.2 Inserting And Removing A Compact Flash Card ....... 28
2.6.3 Inserting And Removing A PCMCIA Card .......... 29
2.7 Connecting USB Accessories . . . ...................30
2.8 The Start Button And Taskbar......................31
2.9 Resetting The NETBOOK PRO. . ................... 32
2.9.1 Performing A Soft Reset....................33
2.9.2 Performing A Hard Reset.................... 34
2.10 First Steps................................34
2.10.1 Navigating Between Files And Folders............. 35
2.10.2 Starting Programs........................ 35
2.10.3 Programs And Files....................... 35
2.10.4 Entering Information......................35
2.10.5 Using Menus..........................36
2.10.6 Using Dialogues ........................ 36
2.10.6.1 Dialogue Buttons ................... 37
2.10.7 Copying Information Between Programs............ 38
Chapter 3: The Keyboard
3.1 Features ................................. 41
3.2 Accessing The Numeric Keypad Functions...............41
3.3 Function Keys.............................. 42
3.3.1 Brightness Control ....................... 42
3.3.2 Capitalized Characters .....................42
3.4 International Keyboards .........................43
3.4.1 Specialized Accent Keys.................... 43
3.4.2 Keyboard Diagrams....................... 44
Chapter 4: Configuring The Unit
4.1 Things To Do First............................ 51
4.1.1 Entering Owner and Password Information ..........51
4.1.2 Setting The Time, Date, And Time Zone............ 52
4.2 Things To Do Next ........................... 52
ii
Psion Teklogix NETBOOK PRO User Manual
Page 7

4.2.1 Setting Up ActiveSync......................52
4.2.1.1 Partnerships ......................52
4.2.1.2 Connecting Via RS-232 Serial . . . ..........53
4.2.1.3 Connecting Via Infrared (IrDA) . . ..........54
4.2.1.4 Connecting Via Ethernet (802.11b) ..........54
4.2.1.5 Connecting Via Bluetooth ...............55
4.2.2 Backing Up To A PC.......................56
4.2.2.1 Backing Up To A Memory Card............56
4.2.2.2 Restoring Files From A Memory-Card Backup....57
4.2.3 Exploring The Control Panel...................57
4.2.4 Securing Your Information....................58
Chapter 5: Files, Folders, and Programs
5.1 Introduction................................61
5.2 Moving Around..............................61
5.3 Opening Files, Folders And Programs..................61
5.4 Closing Programs/Files..........................62
5.5 Creating New Folders...........................62
5.5.1 Creating New Files........................63
5.6 Start Menu - Documents.........................63
5.7 Changing File Attributes.........................63
5.8 Managing Folders.............................64
5.9 The Flash Folder .............................65
5.10 Total Recall . . . .............................66
5.10.1 Using Total Recall........................66
5.10.2 The Profile Information Page ..................67
5.10.2.1AutoRestore Profile Settings..............67
5.10.2.2Profile Location ....................68
5.10.3 The Add Files Page........................68
5.10.4 The View Selections Page....................70
5.10.5 Completing Backup/Restore . . . ................70
5.11 Memory-Card Folders ..........................71
5.12 Checking System Memory Use......................72
Contents
Psion Teklogix NETBOOK PRO User Manual iii
Page 8

Contents
5.12.1 What Happens When System Memory Is Full? ........ 72
5.12.2 Additional Memory And Programs............... 72
5.13 The Storage Manager..........................73
5.13.1 Formatting A Memory Card .................. 73
5.13.2 Creating Partitions .......................74
5.13.3 Partition Management......................75
Chapter 6: Using The PC Connection
6.1 Introduction...............................81
6.2 Using ActiveSync............................ 81
6.3 Getting Help...............................82
6.3.1 Where Can I Find More Help?................. 82
6.3.2 Tips On Using ActiveSync Help................ 82
6.4 Working With Your Files ........................ 83
6.4.1 Looking At Files On Your NETBOOK PRO.......... 83
6.4.2 Copying A File Using Drag And Drop............. 83
6.4.3 Copying A File Using Copy And Paste............. 84
6.4.4 Opening NETBOOK PRO Files From Your PC . . ...... 85
6.5 Backing Up Your NETBOOK PRO With ActiveSync . . . ......85
6.5.1 Performing Your First Backup................. 85
6.5.2 Performing Regular Backups ..................85
6.6 Synchronizing Your NETBOOK PRO .................86
6.6.1 What Is Synchronization?....................86
6.6.2 Synchronizing Your NETBOOK PRO............. 86
6.6.2.1 Creating The Partnership............... 86
6.6.3 Using An Existing Partnership.................88
6.7 On-Schedule Outlook Sync ....................... 89
Chapter 7: Configuring Communications
7.1 Introduction...............................93
7.2 802.11b Radio Configuration . . . ................... 93
7.3 Bluetooth Radio Configuration.....................95
7.3.1 NETBOOK PRO Bluetooth Settings . . ............ 96
7.3.1.1 Devices Menu Page..................97
iv
Psion Teklogix NETBOOK PRO User Manual
Page 9

Contents
7.3.1.2 Servers Menu Page..................100
7.3.1.3 Property Menu Page.................101
7.4 Internet And E-Mail Settings......................103
7.4.1 Overview............................103
7.4.1.1 Using The Internet On The NETBOOK PRO . . . . 103
7.4.1.2 Using E-mail On The NETBOOK PRO .......103
7.4.1.3 Types Of E-mail Account..............104
7.4.1.4 If You Don’t Have An Internet/E-mail Account . . . 105
7.4.1.5 Glossary Of Terms..................105
7.4.2 Setting Up Your NETBOOK PRO...............106
7.4.2.1 How To Use Internet Explorer/Inbox ........106
7.4.2.2 Getting Help.....................107
7.4.2.3 What Information Do I Need?............107
7.4.2.4 IPv6 Support .....................108
7.4.3 Connecting To An ISP Or RAS................110
7.4.3.1 Connecting An External Modem . .........110
7.4.3.2 Connecting The Internal Modem . .........111
7.4.3.3 Setting Up Dialing..................111
7.4.3.4 Configuring The Modem...............112
7.4.3.5 Setting Up The E-mail Program...........114
Chapter 8: Troubleshooting And Tips
8.1 General Tips...............................119
8.1.1 Times Aren’t Correct In The Time Program..........119
8.1.2 If You Forget Your Password..................119
8.1.3 The NETBOOK PRO Doesn’t Turn On/Off . .........120
8.1.4 Resetting The NETBOOK PRO................120
8.1.5 Battery Life Of The NETBOOK PRO.............121
8.1.5.1 Charging Times ...................121
8.2 ActiveSync Connection Problems
Using Windows® 95/98/NT 4.0....................121
8.2.1 Tips When Installing ActiveSync ...............122
8.2.2 Basic Troubleshooting For Your NETBOOK PRO . . . . . . 122
8.2.3 Basic Troubleshooting For Your PC ..............123
Psion Teklogix NETBOOK PRO User Manual v
Page 10

Contents
8.2.4 Device Conflicts ........................124
8.2.5 Fax/Modem On COM 1/2/3/4 .................126
8.3 ActiveSync Synchronization Problems.................128
8.3.1 Basic Troubleshooting For Synchronization Problems.....128
8.3.2 Other Things To Try ......................129
Chapter 9: Specifications
9.1 Hardware Specifications.........................133
9.1.1 Physical.............................133
9.1.2 Environmental Characteristics.................133
9.1.3 Standard Display........................134
9.1.4 Power Requirements......................134
9.1.5 Standard Processor And Memory................134
9.1.6 Miscellaneous..........................134
9.1.7 Accessories . . .........................135
9.2 Standard Operating System.......................135
Appendices
Appendix A: Support Services And Worldwide Offices
A.1 Technical Support . . . .........................A-1
A.2 Product Repairs .............................A-1
A.3 WorldWide Offices............................A-2
A.4 Worldwide Web.............................A-3
Appendix B: Program License Agreements
B.1 Program License Agreement.......................B-3
B.2 Microsoft® End User License Agreement (EULA)...........B-4
Index ........................................... I
vi
Psion Teklogix NETBOOK PRO User Manual
Page 11

APPROVALS AND SAFETY SUMMARY
IMPORTANT SAFETY INSTRUCTIONS
When using this product, basic safety precautions should always be followed to
reduce the risk of fire, electric shock and injury to persons, including the following:
1. Do not use this product near water, for example, near a bath tub, wash
bowl, kitchen sink or laundry tub, in a wet basement or near a swimming pool.
2. Avoid connecting to a telephone network during an electrical storm.
There may be a remote risk of electric shock from lightning.
3. Do not use this product to report a gas leak in the vicinity of the leak.
Important: Save these instructions.
INFRARED DEVICE SAFETY
CLASS 1 LED PRODUCT
This product includes an Infrared device for transmitting and receiving files from
devices supporting the IrDA format. Although this invisible beam is not considered
harmful, and complies with EN60825-1 (IEC825-1), we recommend the following
precautions when the Infrared device is transmitting:
• Do not stare into the Infrared beam.
• Do not view directly with optical instruments.
No parts in the device may be serviced by the user.
CAUTION: TELECOMMUNICATION LINE CORD
Use only 26 AWG or larger telecommunication line cord. Contact your authorized
Psion Teklogix dealer for a suitable cord.
Psion Teklogix NETBOOK PRO User Manual vii
Page 12

Approvals And Safety Summary
FCC INFORMATION FOR THE USA
FCC DECLARATION OF CONFORMITY (DOC)
Applicant’s Name & Address: PSION TEKLOGIX
2100 Meadowvale Blvd.
Mississauga, Ontario, Canada L5N 7J9
Telephone No.: (905) 813-9900
US Representative’s Name & Address: Psion Teklogix Corp.
1810 Airport Exchange Blvd., Suite 500
Erlanger, Kentucky, 41018, USA
Telephone No.: (859) 371-6006
Equipment Type/ Environment Use: Computing Devices for Home and Office Use
Trade Name / Model No.: NETBOOK PRO
Year of Manufacture: 2003
Standard(s) to which Conformity is Declared:
The NETBOOK PRO, supplied by Psion Teklogix, has been tested and found to comply
with FCC PART 15, SUBPART B - UNINTENTIONAL RADIATORS, CLASS B
COMPUTING DEVICES FOR HOME & OFFICE USE.
Applicant: Psion Teklogix Inc.
Legal Representative in US: Psion Teklogix Corp.
CE MARKING
When used in a residential, commercial or light industrial environment, the product and
its approved UK and European peripherals fulfill all requirements for CE marking.
viii
Psion Teklogix NETBOOK PRO User Manual
Mississauga, Ontario, Canada
Erlanger, Kentucky, USA
Page 13

Approvals And Safety Summary
R&TTE DIRECTIVE 1999/5/EC
This equipment complies with the essential requirements of EU Directive
1999/5/EC (Declaration available: www.psionteklogix.com).
Cet équipement est conforme aux principales caractéristiques définies dans la
Directive européenne RTTE 1999/5/CE. (Déclaration disponible sur le site:
www.psionteklogix.com).
Die Geräte erfüllen die grundlegenden Anforderungen der RTTE-Richtlinie
(1999/5/EG). (Den Wortlaut der Richtlinie finden Sie unter:
www.psionteklogix.com).
Questa apparecchiatura è conforme ai requisiti essenziali della Direttiva Europea
R&TTE 1999/5/CE. (Dichiarazione disponibile sul sito: www.psionteklogix.com).
Este equipo cumple los requisitos principales de la Directiva 1995/5/CE de la UE,
“Equipos de Terminales de Radio y Telecomunicaciones”. (Declaración disponible
en: www.psionteklogix.com).
Este equipamento cumpre os requisitos essenciais da Directiva 1999/5/CE do Parlamento Europeu e do Conselho (Directiva RTT). (Declaração disponível no
endereço: www.psionteklogix.com).
Ο εξοπλισµός αυτός πληροί τις βασικές απαιτήσεις της κοινοτικής οδηγίας EU
R&TTE 1999/5/EΚ. (Η δήλωση συµµόρφωσης διατίθεται στη διεύθυνση:
www.psionteklogix.com)
Deze apparatuur voldoet aan de noodzakelijke vereisten van EU-richtlijn betreffende radioapparatuur en telecommunicatie-eindapparatuur 199/5/EG. (verklaring
beschikbaar: www.psionteklogix.com).
Dette udstyr opfylder de Væsentlige krav i EU's direktiv 1999/5/EC om Radio- og
teleterminaludstyr. (Erklæring findes på: www.psionteklogix.com).
Dette utstyret er i overensstemmelse med hovedkravene i R&TTE-direktivet
(1999/5/EC) fra EU. (Erklæring finnes på: www.psionteklogix.com).
Utrustningen uppfyller kraven för EU-direktivet 1999/5/EC om ansluten teleutrustning och ömsesidigt erkännande av utrustningens överensstämmelse (R&TTE).
(Förklaringen finns att läsa på: www.psionteklogix.com).
Tämä laite vastaa EU:n radio- ja telepäätelaitedirektiivin (EU R&TTE Directive
1999/5/EC) vaatimuksia. (Julkilausuma nähtävillä osoitteessa:
www.psionteklogix.com).
Psion Teklogix NETBOOK PRO User Manual ix
Page 14

Approvals And Safety Summary
FCC INFORMATION TO THE USER
RADIO AND TELEVISION INTERFERENCE
This equipment radiates radio frequency energy and if not used properly—that is,
in strict accordance with the instructions in this manual—may cause interference to
radio communications and television reception. It has been tested and found to comply with the limits for a Class B digital device pursuant to part 15 of the FCC Rules.
Operation is subject to the following two conditions:
1. This device may not cause harmful interference, and
2. This device must accept any interference received, including interference that may cause undesired operation.
These limits are designed to provide reasonable protection against harmful interference in a residential installation. However, there is no guarantee that interference
will not occur in a particular installation. If this equipment does cause harmful interference to radio or television reception, which can be determined by turning the
equipment off and on, the user is encouraged to try to correct the interference by one
or more of the following measures:
• Reorient or relocate the receiving antenna.
• Increase the separation distance between the equipment and the receiver.
• If you are using the equipment with a mains adaptor, plug it into an outlet
which is on a different circuit from that to which the receiver is connected.
• Consult an experienced radio/TV technician for help.
For customers in the USA, the following booklet prepared by the Federal Communications Commission may be of help: “How to Identify and Resolve Radio-TV
Interference Problems”. This booklet is available from the US Government Printing
Office, Washington, DC 20402 - Stock No 004-000-00345-4.
CUSTOMER INFORMATION FOR THE USA
This equipment complies with Part 68 of the FCC rules and the requirements
adopted by the Administrative Council for Terminal Attachment (ACTA). On one
outer side of this equipment is a label that contains, among other information, a
x
Psion Teklogix NETBOOK PRO User Manual
Page 15

Approvals And Safety Summary
product identifier in the format US:AAAEQ##TXXXX. If requested, this number
must be provided to the telephone company.
This equipment uses the following USOC jacks: RJ11C
A plug and jack used to connect this equipment to the premises wiring and telephone network must comply with the applicable FCC Part 68 rules and requirements adopted by the ACTA. Please use a compliant telephone cord and modular
plug for connection to the compatible and compliant modular jack in this equipment. See later for details.
REN=0.0B
The REN is used to determine the number of devices that may be connected to a
telephone line. Excessive RENs on a telephone line may result in the devices not
ringing in response to an incoming call. In most but not all areas, the sum of RENs
should not exceed five (5.0). To be certain of the number of devices that may be
connected to a line, as determined by the total RENs, contact the local telephone
company. For products approved after July 23, 2001, the REN for this product is
part of the product identifier that has the format US:AAAEQ##TXXXX. The digits
represented by ## are the REN without a decimal point (e.g., 03 is a REN of 0.3).
For earlier products, the REN is separately shown on the label.
If this terminal equipment, NETBOOK PRO, causes harm to the telephone network,
the Telephone Company will notify you in advance that temporary discontinuance
of service may be required. But if advance notice isn't practical, the telephone company will notify the customer as soon as possible. Also, you will be advised of your
right to file a complaint with the FCC if you believe it is necessary.
The telephone company may make changes in its facilities, equipment, operations
or procedures that could affect the operation of the equipment. If this happens the
Telephone Company will provide advance notice in order for you to make necessary
modifications to maintain uninterrupted service.
If trouble is experienced with this equipment, NETBOOK PRO, for repair or warranty information, please visit our website for further information:
http://www.psionteklogix.com. If the equipment is causing harm to the telephone
network, the Telephone Company may request that you disconnect the equipment
until the problem is resolved.
Psion Teklogix NETBOOK PRO User Manual xi
Page 16

Approvals And Safety Summary
There are no user serviceable parts in this equipment.
Connection to party line service is subject to state tariffs. (Contact the state public
utility commission, public service commission or corporation commission for information.)
If your home has specially wired alarm equipment connected to the telephone line,
ensure the installation of this NETBOOK PRO does not disable your alarm equipment. If you have questions about what will disable alarm equipment, consult your
telephone company or a qualified installer.
The Telephone Consumer Protection Act of 1991 makes it unlawful for any person
to use a computer or other electronic device, including FAX machines/modems, to
send any message unless such message clearly contains in a margin at the top or bottom of each transmitted page or on the first page of the transmission, the date and
time it is sent and an identification of the business or other entity, or other individual
sending the message and the telephone number of the sending machine or such business, other entity, or individual. (The telephone number provided may not be a 900
number or any other number for which charges exceed local or long-distance transmission charges.)
In order to program this information into your FAX modem, you should refer to the
instructions of your fax program on how to put the required information of the sending telephone number and other identification information.
RADIO FREQUENCY EMISSIONS
Do not use in aircraft or hospitals. Some equipment in hospitals and aircraft are not
shielded from radio frequency energy. Do not use the NETBOOK PRO on board
aircraft, or in hospitals, without first obtaining permission.
IMPORTANT SAFETY INSTRUCTIONS
This equipment was tested for FCC compliance under conditions that included the
use of shielded cables and connectors between it and the peripherals. It is important
that you use shielded cable and connectors to reduce the possibility of causing radio
and television interference. Shielded cables, suitable for the NETBOOK PRO, can
be obtained from an authorised Psion Teklogix dealer.
xii
Psion Teklogix NETBOOK PRO User Manual
Page 17

Approvals And Safety Summary
If the user modifies the equipment or its peripherals in any way, and these modifications are not approved by Psion Teklogix, the FCC may withdraw the user’s right to
operate the equipment.
NOTICE TO USERS OF THE CANADIAN TELEPHONE NETWORK
This product meets the applicable Industry Canada technical specifications.
The Ringer Equivalence Number (REN) is an indication of the maximum number of
terminals allowed to be connected to a telephone interface. The terminus of an interface may consist of any combination of devices, subject only to the requirement that
the sum of the Ringer Equivalence Numbers of all the devices does not exceed five.
The modem REN is located on the rear of the equipment on the product labeling.
Telephone companies report that electrical surges, typically lightning transients, are
very destructive to customer terminal equipment connected to AC power sources.
This has been identified as a major nationwide problem. It is recommended that the
customer install an AC surge arrestor in the AC outlet to which this device is connected. This is to avoid damage to the equipment caused by local lightning strikes
and other electrical surges.
This equipment uses CA11A telephone jacks.
EMISSIONS INFORMATION FOR CANADA
This Class B digital apparatus meets all requirements of the Canadian InterferenceCausing Equipment Regulations.
BATTERY SAFETY PRECAUTIONS
CAUTION!
Danger of explosion if a NETBOOK PRO battery is incorrectly handled, charged,
disposed of or replaced. Replace only with the same or equivalent type recommended by the manufacturer. To avoid the risk of fire, do not replace the backup batteries with rechargeable types.
Dispose of used batteries according to the instructions described in “Lithium-Ion
Battery Safety Precautions” on page xiv. Carefully review all battery safety issues
listed in that section.
Psion Teklogix NETBOOK PRO User Manual xiii
Page 18

Approvals And Safety Summary
LITHIUM-ION BATTERY SAFETY PRECAUTIONS
Do not store batteries at temperatures in excess of +60°C; the optimum storage temperature for maximum battery life is +10°C to +35°C.
Important: It is critical that this safety information be reviewed and that all
warnings be strictly followed.
BATTERIES ARE CONSIDERED HAZARDOUS WASTE. Used batteries must
be disposed of in accordance with the manufacturer’s instructions, taken to an
appropriate local battery recycling facility, or returned to one of the following Psion
Teklogix offices for proper disposal.
Teklogix Inc. Teklogix Corp. Teklogix S.A.
2100 Meadowvale Blvd. 1810 Airport Exchange Blvd. Parc Club Du Golf-Bat 1.
Mississauga, Ontario Suite 500 13856 Aix-En-Provence
Canada Erlanger, Kentucky Cedex 3
L5N 7J9 USA 41018 France
War ni ng : TO PREVENT the battery from leaking acid, generating heat or
exploding, adhere to the precautions listed below.
• Use only with the authorized Psion Teklogix power adaptor.
• Do not dispose of in fire.
• Do not incinerate or subject battery cells to temperatures in excess of 100°C
(212°F). Such treatment can vaporize the liquid electrolyte causing cell rupture. Incineration may result in harmful emissions or explosion.
• Do not charge, use or store batteries below -30º C (-22° F). Batteries must
be handled in accordance with all applicable state and federal laws and regulations.
• The battery incorporates built-in safety devices. To ensure their proper function, do not disassemble or alter any parts of the battery.
• Do not short-circuit the battery by directly connecting any of the exposed
terminals with metal objects such as wire. Do not transport or store the
battery together with metal objects such as necklaces, hair pins, etc.
• Do not use or leave the battery near a heat source such as a fire or heater.
• Do not immerse the battery in water.
xiv
Psion Teklogix NETBOOK PRO User Manual
Page 19

Approvals And Safety Summary
• When charging, use the battery charger specifically designed for the battery.
• Do not crush, puncture, open, dismantle, or otherwise mechanically interfere with batteries.
• Do not directly solder the battery.
• Do not connect the battery to an electrical outlet, vehicle cigarette lighter, etc.
• Do not put battery into a microwave oven or pressurized container.
• Do not use the rechargeable battery in combination with non-rechargeable
batteries (such as dry-cell batteries) or batteries of different capacities or
brands.
• Immediately remove the battery from the device or battery charger and stop
use if the battery gives off an odour, generates heat, becomes discoloured or
deformed, or in any way appears abnormal during use.
• Do not continue charging the battery if it does not recharge within the specified charge time.
• The battery may burst or ignite if the battery leaks. Always ensure that it is
away from any exposed flames.
• If a battery should leak, do not allow the contents to come into contact with
your skin or your eyes. If it does, wash immediately with plenty of cold
water and seek medical advice.
• Do not store the battery in extremely high temperatures (e.g., a vehicle,
strong direct sunlight, etc.). This may cause the battery to overheat or ignite,
and it may also reduce the performance and service life of the battery.
• Do not use in areas where static electricity is greater than what the manufacturer guarantees.
• Keep batteries out of reach of children.
Psion Teklogix NETBOOK PRO User Manual xv
Page 20

Page 21

INTRODUCTION 1
1.1 About This Manual ............................3
1.2 Text Conventions. ............................. 4
1.3 Unpacking The Box: Item Checklist.................... 4
1.4 Main Features............................... 5
1.5 Applications Installed On The NETBOOK PRO.............5
1.5.1 About ActiveSync.......................6
1.6 Caring For The NETBOOK PRO .....................6
Psion Teklogix NETBOOK PRO User Manual 1
Page 22

Page 23

Chapter 1: Introduction
About This Manual
1.1 About This Manual
This manual provides information on the operation and features of the Psion
Teklogix NETBOOK PRO. For additional information, refer to the NETBOOK
PRO online help, or the documentation supplied with the application you are using.
The manual references other user documents, where applicable.
Chapter 1: Introduction
provides an overview of this manual, NETBOOK PRO applications, including
the PC connectivity software, ActiveSync, and care of the NETBOOK PRO.
Chapter 2: Getting Started
describes the NETBOOK PRO features and how to get the NETBOOK PRO
ready for use, including installation of a PC Card, Compact Flash card, or MultiMedia / Secure Digital Card. Important battery installation and use information is also detailed.
Chapter 3: The Keyboard
describes the NETBOOK PRO’s keyboard features and international layouts.
Chapter 4: Configuring The Unit
provides instructions on configuring the NETBOOK PRO’s security and
Control Panel features. It also explains how to use ActiveSync to connect the
NETBOOK PRO to a PC serially, or through Infrared or radio communication.
File transfers and file synchronization can be done via ActiveSync.
Chapter 5: Files, Folders, and Programs
describes the NETBOOK PRO’s file manager and how to move around and
manage the information on your NETBOOK PRO.
Chapter 6: Using The PC Connection
explains how to use ActiveSync for file transfers, file synchronization and
sending e-mail.
Chapter 7: Configuring Communications
features the modem, Bluetooth and 802.11b radios, and the programs Internet
Explorer (the Internet browser) and Inbox (the e-mail application).
Chapter 8: Troubleshooting And Tips
assists in the recognition and correction of problems that you may encounter
when operating the NETBOOK PRO and ActiveSync. Includes detailed information on battery use and power consumption.
Psion Teklogix NETBOOK PRO User Manual 3
Page 24

Chapter 1: Introduction
Text Conventions
Chapter 9: Specifications
details the physical, environmental and various operating specifications for
the NETBOOK PRO.
Appendix A: Support Services And Worldwide Offices
presents information for technical support, contacts and the Psion Teklogix
worldwide web address.
Appendix B: Program License Agreements
details the various program license agreements.
1.2 Text Conventions
Note: Notes highlight additional helpful information.
Important: These statements provide particularly important instructions or
Warning: These statements provide important information that may prevent
additional information that is critical to the operation of the
computer and other equipment.
injury, damage to the equipment, or loss of data.
1.3 Unpacking The Box: Item Checklist
Your NETBOOK PRO was shipped with a number of accessories. Please ensure
that you have all of the following items and that they are in good condition. For
missing items or damaged contents please contact your local Psion Teklogix office.
• NETBOOK PRO (a stylus ships in the holder in the computer - see “Finding And Using The Stylus” on page 29).
• Rechargeable 12.6 V 2200 mAH Lithium-Ion battery (main battery).
• Two AAA replaceable alkaline batteries (for backup).
• NETBOOK PRO RS-232/ActiveSync cable.
• ‘Mini to full-size USB host port’ adaptor cable.
• Power Supply.
• NETBOOK PRO AC adaptor.
Psion Teklogix NETBOOK PRO User Manual
4
Page 25

Chapter 1: Introduction
Main Features
Other information:
• NETBOOK PRO Quick Start Guide.
• NETBOOK PRO CD (includes User Manual).
1.4 Main Features
The NETBOOK PRO is a Windows® CE .NET OS-based mobile touchscreen computer with an SVGA touch-sensitive screen. It has the following features:
®
•Intel
• Windows CE .NET.
• 32MB Flash and 128MB SDRAM.
• High quality 800 x 600 SVGA TFT transmissive LCD.
• USB master connectivity.
• RS232 serial connector.
• IrDA interface.
PXA 255 XScale® processor (400Mhz).
•CF Card slot.
•MMC/SDCard/SDIO slot.
• PCMCIA Card slot.
1.5 Applications Installed On The NETBOOK PRO
The NETBOOK PRO is capable of running a wide variety of applications, but those
available on your particular NETBOOK PRO depend on the purpose for which the
unit is provided. A number of standard applications exist and custom programs can
be installed easily.
The following standard programs are available:
• Inbox, for sending and receiving e-mail.
• Internet Explorer, for browsing the World Wide Web.
• Windows Messenger for CE, an instant-messaging program.
• Pocket On-Schedule, a personal-information manager.
Psion Teklogix NETBOOK PRO User Manual 5
Page 26

Chapter 1: Introduction
About ActiveSync
•JEM-CE, Java ‘virtual machine’ software.
•Microsoft
• Windows Explorer, a file browser.
• Windows Media Player, software for viewing multimedia files.
• Wordpad, a word processor for writing letters and other documents.
1.5.1 About ActiveSync
®
File Viewer, software for viewing files.
The Microsoft® PC connectivity software, ActiveSync, can be used to connect
the NETBOOK PRO to PCs running Windows
connecting the NETBOOK PRO to a PC with a cable and running ActiveSync on
the PC, you can:
• View your NETBOOK PRO files from Windows Explorer by using the
Mobile Device icon in the PC’s My Computer window.
• Browse the Internet through the PC.
• Drag and drop files between the NETBOOK PRO and the PC in the same
way that you would between PC drives, and they will be automatically converted to the appropriate file format at the same time.
• Synchronize e-mail and your address book on the NETBOOK PRO with
the PC to keep them in step with each other.
• Back up your NETBOOK PRO files to the PC, then restore them from the
PC to the NETBOOK PRO again, if needed.
For detailed information, please refer to Chapter 6: “Using The PC Connection”.
®
95/98/ME/2000/XP or NT 4.0. By
1.6 Caring For The NETBOOK PRO
Screen
When used with the approved stylus, the NETBOOK PRO screen is very resistant to
wear and impact and should last for a considerable time. Use of any object, other
than the approved stylus, may result in damage to the NETBOOK PRO screen.
To maintain the life of the NETBOOK PRO screen, keep the screen clean.
To clean the screen: switch off the NETBOOK PRO and use a soft, clean, dry cloth
Psion Teklogix NETBOOK PRO User Manual
6
Page 27

Chapter 1: Introduction
Caring For The NETBOOK PRO
to gently wipe the screen. (If the unit is set to turn on automatically when the screen
is tapped, you should turn this preference off before cleaning the screen.)
Warning: Under no circumstances use chemical solvents to clean the screen.
Charging
To avoid damage to the NETBOOK PRO or the NETBOOK PRO battery packs, use
only Psion Teklogix approved chargers.
Backup Battery
The NETBOOK PRO has replaceable backup batteries designed to retain data while
the main battery pack is charging or being changed over.
The backup batteries are a pair of AAA cells. These may be replaced by the user.
Important: If both the main battery pack and the backup battery are allowed
to fully discharge, you will lose all your information on the internal disk. However, some of your data can be protected from loss
using the flash folder. Please refer to page 65 for details.
Drop Rating
The NETBOOK PRO is designed to survive being dropped onto carpet, from a
height of 0.7 m (2.3 ft.).
Dropping the NETBOOK PRO from greater heights or onto harder surfaces may
result in damage to the NETBOOK PRO.
IP Rating
The NETBOOK PRO is rated to IP30.
Operating Temperature
The NETBOOK PRO is designed to operate within the temperature limits of 0°C to
+50°C (32°F and 120°F). Use of the NETBOOK PRO outside of these temperature
limits may reduce its life.
Avoid exposing the NETBOOK PRO to sudden changes in temperature, since such
exposure may result in damage.
Psion Teklogix NETBOOK PRO User Manual 7
Page 28

Chapter 1: Introduction
Caring For The NETBOOK PRO
Important: As a safety precaution, charging the NETBOOK PRO battery
should be limited to the temperature range: 0°C to +50°C
(32°F to 120°F) Outside of these limits, the safety circuits of the
NETBOOK PRO battery pack will not allow the battery to charge.
Storage Temperature
The NETBOOK PRO is designed to be stored within the temperature ranges of
-10°C to +60°C (14°F and 140°F). Storage of the NETBOOK PRO outside of these
temperature limits may reduce its life.
To prolong the life of the NETBOOK PRO battery packs during normal storage,
store the NETBOOK PRO (and the battery pack) between +10°C and +35°C (+50°F
and +95°F).
When storing the NETBOOK PRO for a long period of time, the main battery
should be removed and stored when at a 70% to 90% charge level.
Humidity
The NETBOOK PRO is designed to operate in humidity ranging from 5 to 93%
(non-condensing). Use of the NETBOOK PRO in environments with condensing
humidity or humidity outside these limits may result in damage to the NETBOOK
PRO.
Magnetic Fields And Static Electricity
The magnet of the NETBOOK PRO speaker may corrupt data stored on magnetic
media. Do not keep the NETBOOK PRO next to credit cards or other magnetic
media.
Avoid exposing the NETBOOK PRO to strong magnetic fields or static electricity.
Such exposure may cause loss of data or result in damage to the NETBOOK PRO.
Service
Do not attempt to dismantle the NETBOOK PRO. There are no user-serviceable
parts inside, and any attempt to dismantle the NETBOOK PRO will invalidate the
warranty.
Psion Teklogix NETBOOK PRO User Manual
8
Page 29

GETTING STARTED 2
2.1 Features Of The NETBOOK PRO.....................11
2.2 Turning On And Off............................13
2.3 Passwords.................................14
2.4 Finding And Using The Stylus.......................15
2.5 Power Management............................16
2.5.1 Main And Backup Batteries.................16
2.5.1.1 Fitting The Main Battery ...............16
2.5.1.2 Charging The NETBOOK PRO Battery Pack. . . . . 17
2.5.1.3 Changing Battery Packs................17
2.5.1.4 The Internal Backup Battery..............18
2.5.2 Power Properties.......................19
2.5.2.1 Battery.........................20
2.5.2.2 Battery Calibration ..................21
2.5.2.3 Power Saving Schemes . . . . . . . . . . . . . . . . 22
2.5.2.4 The Advanced Tab...................26
2.6 Memory Cards...............................27
2.6.1 Inserting And Removing An MMC Or SD Card . . . . . . 27
2.6.2 Inserting And Removing A Compact Flash Card . . . . . . 28
2.6.3 Inserting And Removing A PCMCIA Card . . . . . . . . . 29
2.7 Connecting USB Accessories.......................30
2.8 The Start Button And Taskbar.......................31
2.9 Resetting The NETBOOK PRO......................32
2.9.1 Performing A Soft Reset...................33
2.9.2 Performing A Hard Reset..................34
2.10 First Steps.................................34
Psion Teklogix NETBOOK PRO User Manual 9
Page 30

2.10.1 Navigating Between Files And Folders. . . . . . . . . . . 35
2.10.2 Starting Programs......................35
2.10.3 Programs And Files.....................35
2.10.4 Entering Information....................35
2.10.5 Using Menus ........................36
2.10.6 Using Dialogues.......................36
2.10.6.1 Dialogue Buttons...................37
2.10.7 Copying Information Between Programs . . . . . . . . . . 38
10 Psion Teklogix NETBOOK PRO User Manual
Page 31

Chapter 2: Getting Started
Features Of The NETBOOK PRO
2.1 Features Of The NETBOOK PRO
The NETBOOK PRO is a sub-notebook mobile computer using the Windows®
CE .NET operating system, with an SVGA touch-sensitive screen. The NETBOOK
PRO is lightweight and designed for use by field professionals in a wide range of business areas including field service and sales, transportation, health care, hospitality, manufacturing and insurance.
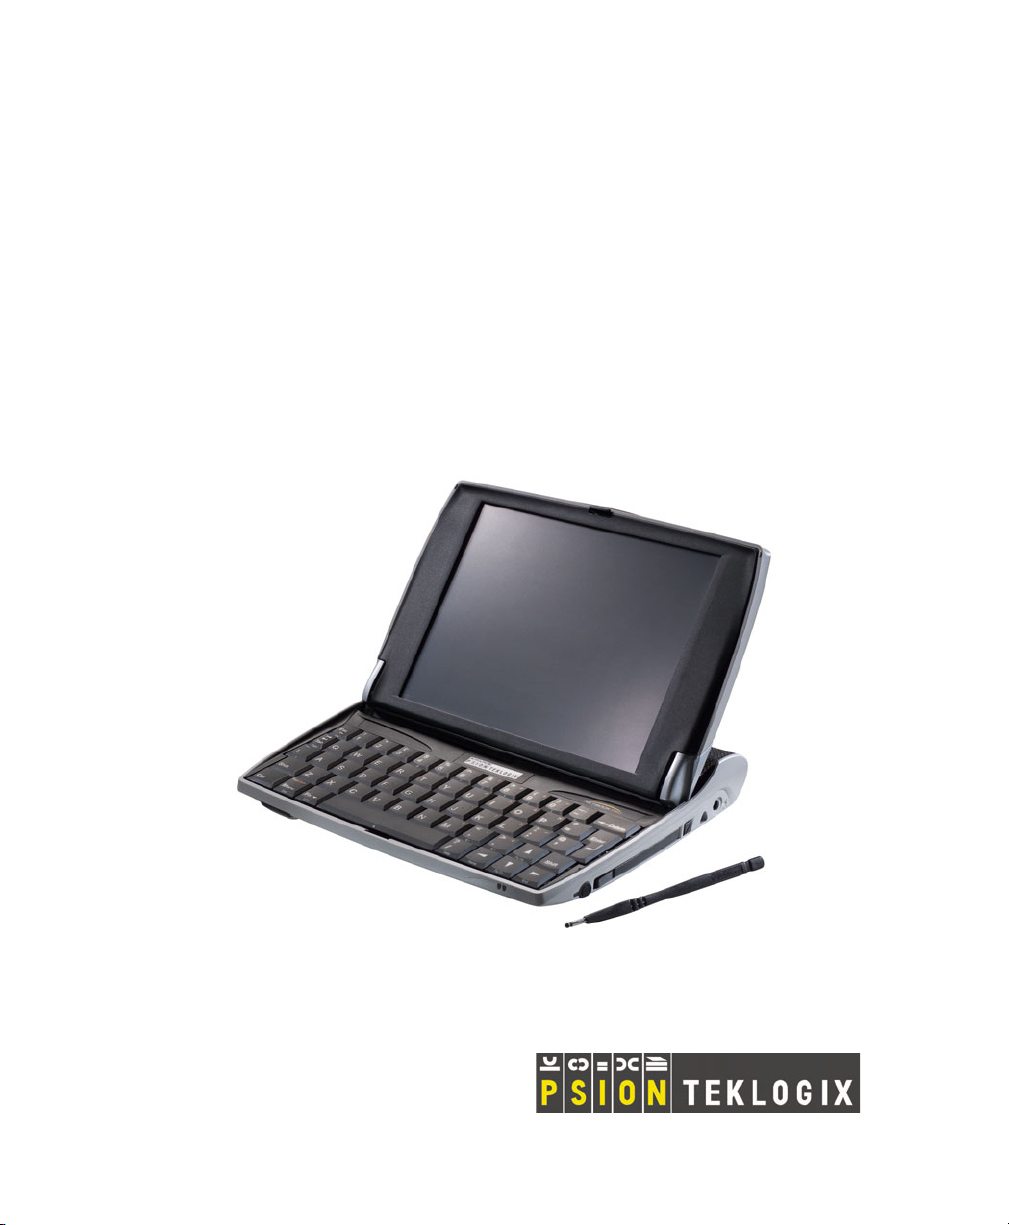
2.1.1 Identifying Product Features
Figure 2.1 The NETBOOK PRO Open
Latch
MMC/SDCard/SDIO Slot
Figure 2.2 Lower Front Of NETBOOK PRO
Psion Teklogix NETBOOK PRO User Manual 11
Power Indicator
Page 32

Chapter 2: Getting Started
Identifying Product Features
Headphone Jack
Power Connector
PCMCIA Slot
PCMCIA Release Button
Figure 2.3 Right Side Of NETBOOK PRO
Infrared Port
Figure 2.4 Back Of NETBOOK PRO
Stylus
Stylus Release Button
Psion Teklogix NETBOOK PRO User Manual
12
Page 33

Chapter 2: Getting Started
Turning On And Off
Main Battery Cover
CF Card Slot
CF Eject Button
USB Connector
45 !
RS-232 Connector
Figure 2.5 Left Side Of NETBOOK PRO
2.2 Turning On And Off
To sw i tch o n:
open the NETBOOK PRO.
Note: In its default configuration, the NETBOOK PRO will wake up when the
case is opened, and sleep when the case is closed. These and other poweron/power-off options can be changed on the Advanced tab of the Power
Properties control panel.
To sw i tch o ff:
press and hold the Fn key, then press the Esc/On key to turn off the NETBOOK
PRO. Or, tap the Suspend icon in the Start menu. You can switch off at any
time, but first save any open files. If you are working with a file on a memory
card, save the file before switching off the NETBOOK PRO and removing the
card.
Note: If you do not use the NETBOOK PRO, it will automatically switch off
after a few minutes to save battery power. To continue using the NETBOOK PRO where you left off, switch the NETBOOK PRO on again
using the Esc/On key. Your information will be saved as long as the unit is
powered (external power, main or backup batteries). See “Power Management” on page 16 for information on checking battery-charge levels
and power settings.
Psion Teklogix NETBOOK PRO User Manual 13
Page 34

Chapter 2: Getting Started
Passwords
2.3 Passwords
The NETBOOK PRO may be configured to require a password when it is turned on.
To do this:
1. Select Start, Settings, Control Panel. The Control Panel appears.
2. Double-click on the Password icon. The Password Properties dialogue
appears:
3. Enter a new password, and enter it again to confirm it. The Enable
Password Protection section of the dialogue becomes active.
4. Select the At Power On checkbox to enable the power-on password.
5. Press the OK button. When the NETBOOK PRO is turned on, it will
request the power-on password before opening the Desktop. Changes
to the Owner and Password settings will also require the password.
To disable the power-on password:
1. Select Start, Settings, Control Panel. The Control Panel appears.
2. Double-click on the Password icon. A dialogue appears, requesting the
existing password.
3. Enter the existing password. The Password Properties dialogue
appears.
4. Deselect the At Power On checkbox.
5. Press the OK button.
The existing password will still be active. Any changes to the Owner or Password
settings will still require this password for access. To completely disable the password to allow unrestricted access to the Owner or Password settings, clear the two
password-entry fields and press the OK button.
Psion Teklogix NETBOOK PRO User Manual
14
Page 35

Chapter 2: Getting Started
Finding And Using The Stylus
2.4 Finding And Using The Stylus
The stylus is located in the NETBOOK PRO, in a holder at the right.
Stylus
Stylus Eject Button
Figure 2.6 Location Of The Stylus
To remove the stylus, push the square button next to it. The stylus pops out. To
replace the stylus, push it back in. You can use your fingers to tap on the screen,
though it is best to use the stylus to avoid fingerprints or smudges on the screen. Do
not tap the screen with any object that has a sharp tip or you may damage the screen.
Don’t use any type of ink pen, as the ink may be impossible to remove. See “Caring
For The NETBOOK PRO” on page 6 for instructions on how to clean the screen.
You can usually tap on (“click on”) an item with the stylus to select or change it,
simulating the standard mouse clicks. For example, you can:
• Single-tap (or single-click) to select an item.
• Double-tap (or double-click) a program icon, to open a program.
• Hold down the Alt key, then tap, to right-click. Right-click on an item to
display its ‘context menu’, which gives access to the object’s properties.
Note: If the screen doesn’t respond to your taps, you may need to recalibrate it.
See recalibration instructions in the Control Panel/Stylus Properties /Calibration menu.
Psion Teklogix NETBOOK PRO User Manual 15
Page 36

Chapter 2: Getting Started
Power Management
2.5 Power Management
The NETBOOK PRO is powered by a Lithium Ion rechargeable battery
pack (for details, see “Battery Life Of The NETBOOK PRO” on page 121).
The NETBOOK PRO can be powered from AC when used with the AC adaptor.
When the NETBOOK PRO is powered from the AC adaptor, it will also charge
the battery pack.
Note: How long your batteries last will depend upon how you use your NET-
BOOK PRO. The NETBOOK PRO will use considerably more battery
power when you have the brightness turned up, are using files stored on a
memory card, or are using infrared or a communications card.
You can take steps to help prolong your battery’s life:
• Turn the screen brightness down.
• Set the delay time to 10 minutes in the Switch to Suspend option of the
Battery Power scheme of the Power Schemes tab in the Power Properties
control panel (see page 25).
• Open and use files from internal storage instead of from a memory card,
as the NETBOOK PRO requires more power to write to memory cards.
• Remove communications cards when not in use.
2.5.1 Main And Backup Batteries
2.5.1.1 Fitting The Main Battery
Before you can use the NETBOOK PRO you must fit the main battery—slide it into
place, then slide the cover across until it latches into place, as shown in Figure 2.7
on page 17.
Important: Always switch off the NETBOOK PRO before removing the main
battery.
Psion Teklogix NETBOOK PRO User Manual
16
Page 37

Chapter 2: Getting Started
Main And Backup Batteries
Figure 2.7 Main Battery Removal
Important: Take care when replacing batteries! The NETBOOK PRO will
warn you when its main battery is getting low. The backup battery
is designed to maintain the memory for several hours.
2.5.1.2 Charging The NETBOOK PRO Battery Pack
To charge the battery, attach the battery pack to the NETBOOK PRO and connect
the supplied AC adaptor. The standard (2200 mAH) NETBOOK PRO battery will
normally be fully charged within 3 to 4 hours.
2.5.1.3 Changing Battery Packs
If you are using your NETBOOK PRO away from the charger and a spare battery
pack is available, you can change batteries when the battery warning is displayed.
To do this:
1. Switch the NETBOOK PRO off.
2. Slide the battery pack latch towards the rear of the NETBOOK PRO.
3. Pull the battery away from the NETBOOK PRO to remove it.
4. Push in the replacement battery pack.
The backup battery preserves the contents of the NETBOOK PRO.
Psion Teklogix NETBOOK PRO User Manual 17
Page 38

Chapter 2: Getting Started
Main And Backup Batteries
If you are going to use more than one battery pack, you should indicate this on the
Battery tab of the Power Properties dialogue by selecting the check-box ‘Using multiple main battery packs’. This option indicates that any time you remove a battery,
you may be replacing it with a different one. When the battery is removed, the
NETBOOK PRO discards the current battery capacity information, and starts from
the ‘Not calibrated’ state for the battery gauge.
Important: Always switch off the NETBOOK PRO before removing the
main battery.
2.5.1.4 The Internal Backup Battery
The NETBOOK PRO has an internal backup battery designed to retain data while
the main battery pack is being changed over and the unit is not connected to external
power. The backup battery is a pair of non-rechargeable alkaline AAA cells that
may be changed by the user.
Important: If both the main battery pack and the backup battery are allowed
to fully discharge, you will lose all your information in internal
memory. However, some of your data can be protected from loss
using the flash folder. Please refer to page 65 for details.
The backup battery is user-replaceable. To replace it:
1. Switch the NETBOOK PRO off.
2. Position the display at a slight angle forward to access the backupbattery cover, which is located on the left above the computer keyboard
(see Figure 2.8 on page 19).
3. Apply downward pressure to the center of the backup-battery cover and
slide it towards the front of the NETBOOK PRO.
4. Remove the AAA cells.
5. Insert replacement alkaline AAA cells, observing the polarity indication.
6. To close the compartment, slide the cover back over the batteries while
again applying downward pressure to the center of the cover.
Psion Teklogix NETBOOK PRO User Manual
18
Page 39

Backup-Battery Cover
Chapter 2: Getting Started
Power Properties
Angle display slightly
forward to access cover
Figure 2.8 Backup Battery Removal
2.5.2 Power Properties
Power Properties for the battery can be accessed either through the Power icon in
the Control Panel (for the Control Panel screen, see Figure 2.20 on page 32), or by
double-clicking the system status power icon in the taskbar (this icon changes
depending on power status, as described in Table 2.9 on page 20).
The power LED on the front lower edge of the computer is on when external power
is present, or the main battery is either fully charged or not present.
Psion Teklogix NETBOOK PRO User Manual 19
Page 40

Chapter 2: Getting Started
Power Properties
System Status Power Icons Description
Low Backup Battery Appears when backup battery charge is less than 25% of
capacity.
External Power Indicator
Low Main Battery Appears when main battery charge drops below 50% of
Critical Main
Battery
Charging Main
Battery
No Charge Icon All charge-related icons disappear if battery levels are not
Appears when the NETBOOK PRO is connected to the AC
adaptor and the main battery is fully charged. Disappears
when the AC adaptor is disconnected.
capacity.
Appears when main battery charge drops below 25% of
capacity.
Appears when the NETBOOK PRO is connected to the AC
adaptor, and the battery is charging.
low or critical, and the NETBOOK PRO is not connected
to an external power source.
Table 2.9 System Status Power Charge States
2.5.2.1 Battery
To check the battery power status, click on the Battery tab:
Psion Teklogix NETBOOK PRO User Manual
20
Figure 2.10 Power Properties: Battery
Page 41

Chapter 2: Getting Started
Power Properties
This tab describes the main and backup batteries, and their state. A warning message
to change or recharge the battery appears when the main or backup battery levels
become critically low.
Note: The main battery can run until the computer shuts off: at this point there
will still be enough power in the battery pack to preserve the system state
without relying on the backup batteries. If allowed to discharge further,
eventually the backup batteries will automatically take over
This tab includes a checkbox, Using multiple main battery packs. When this checkbox is selected, the NETBOOK PRO calibrates each battery pack anew each time
the pack is inserted. When this checkbox is not checked, the NETBOOK PRO
retains the battery calibration information when the battery pack is removed. See
“Battery Calibration” below for details.
This tab also displays an indication of charge or discharge current for the main battery. The user can see how the current varies as the main battery charges and discharges, the backlight is adjusted, or a peripheral card is inserted. (Again, see
“Battery Calibration” below for details.)
Note: The current measurement displayed may be up to ten seconds old.
2.5.2.2 Battery Calibration
The NETBOOK PRO uses ‘battery calibration’ to increase the accuracy of the
remaining charge indication for its rechargeable battery.
When a battery pack is first connected, the NETBOOK PRO tracks its discharge and
charge current and voltage over a full discharge/charge cycle. This enables it to form
a picture of how the battery behaves, and thus give accurate estimates of how long
the charge will last during day-to-day use. An indicator beside the estimate of
remaining charge in the main battery displays either ‘Not calibrated’, ‘Calibrating’,
or nothing:
• When the Battery tab of the Power Properties dialogue displays the ‘Not
calibrated’ message, the NETBOOK PRO has not yet calibrated the battery.
• When it displays the ‘Calibrating’ message, the NETBOOK PRO is setting
up its battery calibration. To do this, it tracks the performance of the battery
through a complete discharge and charge cycle.
Psion Teklogix NETBOOK PRO User Manual 21
Page 42

Chapter 2: Getting Started
Power Properties
The percentage capacity estimate of the battery is not very accurate in the 'Not calibrated' state, somewhat more accurate in the 'Calibrating' state, and should be very
accurate once the battery has been calibrated.
Note: Psion Teklogix recommends that the battery be fully charged when first
used, then fully discharged before being charged again.
When the battery is calibrated, the ‘Calibrating’ indication vanishes. Once the
battery is calibrated, the NETBOOK PRO continues to refine its estimate every time
it sees a full charge or discharge cycle. The battery-charge indication is thus adjusted
for ageing battery packs.
A calibration cycle will abort if the AC power state is changed (if the power cable is
plugged in or removed). Calibration during charging can also abort if the unit gets
too hot.
The ‘Not calibrated’ indicator will reappear, and calibration of the gauge is lost,
if any of these four conditions occur:
• The unit automatically shuts off due to low battery, when the capacity
estimate is greater than 6%.
• Battery charging ceases (charge current less than 100mA) and the capacity
estimate is less than 94%.
• Capacity estimate reaches 0% and unit continues to run for more than
15 minutes.
• Capacity estimate reaches 100% and unit continues to charge with charge
current greater than 100mA for more than 15 minutes.
2.5.2.3 Power Saving Schemes
The Power Schemes tab specifies the settings for the two ‘power schemes’ named
On AC Power, and On Battery Power. These power schemes group settings are
used when the NETBOOK PRO is running on battery power or when it is connected
to external power.
Psion Teklogix NETBOOK PRO User Manual
22
Page 43

Chapter 2: Getting Started
Power Properties
Figure 2.11 Power Properties: Schemes
Note: The Power Properties Schemes settings are cumulative—that is, to deter-
mine when the NETBOOK PRO enters ‘Suspend’ state, the unit waits for
the ‘Switch to Dim’ time to elapse, followed by the ‘Switch to Stand-By’
time, and then, once the ‘Switch to Suspend’ time has elapsed, ‘Suspend’
state is activated.
When setting the Switch to Dim, Switch to Stand-By, and Switch to Suspend states,
keep the following in mind. Because the NETBOOK PRO ‘wakes up’ from the Dim
and Stand-By states almost instantaneously following any user input (button press,
screen tap), the timeouts you set will not slow user activity. The sum of the Switch to
Dim, Switch to Stand-By, and Switch to Suspend timeouts should be selected care-
fully since the NETBOOK PRO will go to sleep (appear off) when this time has
elapsed, saving battery power.
Psion Teklogix recommends starting with a total of 10 minutes for this overall timeout. Setting any of these time-outs to Never does not affect the other time-out
options, but will adversely affect the battery run time. If all three time-outs are set to
Never, the NETBOOK PRO will remain on. To further reduce power consumption,
carefully consider the duration of time that the display backlight is ON or turned up
(go to Start/Settings/Control Panel/Display Properties to adjust settings).
Psion Teklogix NETBOOK PRO User Manual 23
Page 44

Chapter 2: Getting Started
Power Properties
The following are the default values for the power schemes options:
Option AC Power Battery Power
Switch to Dim After 1 minute After 30 seconds
Switch
to Stand-By Never Never
Switch to Suspend Never After 10 minutes
Power Scheme
This dropdown menu allows you to access the two power schemes (AC Power or
Battery Power) to configure their settings.
Switch To Dim
During the Dim state the backlight brightness is turned down after the specified
time has elapsed, if the NETBOOK PRO does not receive any user input, including
activities such as a screen tap—any user-initiated activity. When the NETBOOK
PRO enters the Dim state, it begins to monitor the time specified in the Switch to
Stand-By menu.
Table 2.12 Power Schemes Default Values
Figure 2.13 Power Schemes: Switch To Dim Menu
Press any key or tap the screen to bring the unit out of Dim state.
Psion Teklogix NETBOOK PRO User Manual
24
Page 45

Chapter 2: Getting Started
Power Properties
Switch to Stand-By
In Stand-By state, the NETBOOK PRO turns off the display, but the programs
and NETBOOK PRO hardware remain active. Stand-By is activated when the time
specified in the Switch to Dim and the Switch to Stand-By options have elapsed
without any activity. The NETBOOK PRO then begins to monitor the Suspend time.
Figure 2.14 Power Schemes: Switch To Stand-By Menu
Press any key or tap the screen to bring the unit out of Stand-By state.
Switch to Suspend
Once the time specified in the Switch to Dim and the Switch to Stand-By states have
elapsed, the NETBOOK PRO begins to count down the time specified in the Switch
to Suspend option. When the time in the Suspend option elapses, the unit enters
Suspend state.
In Suspend state, the NETBOOK PRO CPU suspends all activity, turns off the
display, and goes into a low power state. The state of the device (RAM contents)
is preserved.
Select Suspend from the Start Menu or press the Fn and Esc keys together to put
the NETBOOK PRO into Suspend state. The NETBOOK PRO may be configured
to allow entry into Suspend state if external communications connections are active;
these options can be set in the Advanced tab of the Power Properties dialogue.
Press the Esc/On key to wake up the unit. You can also enable the unit to wake from
Suspend when a number of external events occur, by checking the appropriate
option box in the Advanced tab of the Power Properties dialogue.
Note: When the NETBOOK PRO is in suspend state, any network connection is
broken. To resume, you must re-establish the network connection.
Psion Teklogix NETBOOK PRO User Manual 25
Page 46

Chapter 2: Getting Started
Power Properties
2.5.2.4 The Advanced Tab
The Advanced tab of the Power Properties dialogue contains settings that govern
when the NETBOOK PRO will switch on and off:
Figure 2.15 Power Schemes: Switch To Suspend Menu
The NETBOOK PRO can be configured to switch off when its case is closed, and
switch on when its case is opened (these are the default settings).It can also be configured to switch on when a serial cable is connected, or when the screen is tapped.
The NETBOOK PRO can be configured to enter the Suspend state when it has an
active network or device connection. By default, it will not enter Suspend state
when one of these connections is active.
Psion Teklogix NETBOOK PRO User Manual
26
Figure 2.16 Power Properties: Advanced
Page 47

Chapter 2: Getting Started
Memory Cards
2.6 Memory Cards
The NETBOOK PRO accepts non-volatile memory cards, which fit into dedicated
slots in the unit and can be used to store application software and/or data. The
NETBOOK PRO accepts the following types of memory cards:
• Compact Flash (CF) cards.
• MultiMedia Cards (MMCs).
• Secure Digital (SD) cards.
• PCMCIA cards.
Each memory card appears as a separate folder in the file browser. See section 5.11
on page 71.
2.6.1 Inserting And Removing An MMC Or SD Card
The MMC/SDCard/SDIO slot is located on the lower front of the NETBOOK PRO
(see Figure 2.17).
Contacts On
Other Side
MMC/SDCard/SDIO Slot
Figure 2.17 MMC/SDCard/SDIO Slot Location
MMC cards are keyed so that they may not be inserted incorrectly (SD cards cannot
be inserted incorrectly). When a memory card is inserted, a folder for it appears in
the Windows Explorer file browser.
Psion Teklogix NETBOOK PRO User Manual 27
Page 48

Chapter 2: Getting Started
Inserting And Removing A Compact Flash Card
To insert a card:
• Push the MMC or SD into the slot until it clicks. It will then bounce
outward slightly.
Note: Always insert the MMC or SD card with the contacts first and the notch to
the right.
To remove a card:
• Push the edge of the card inwards. It will click, and then bounce out. The
end may then be grasped. Pull the card outward to remove it.
Store your MMC or SD card safely.
2.6.2 Inserting And Removing A Compact Flash Card
The CF slot is located on the left-hand side of the NETBOOK PRO (see Figure 2.18).
CF cards are keyed so that they may not be inserted incorrectly. When a memory
card is inserted, a folder for it appears in the Windows Explorer file browser.
To insert a CF card:
• Push the Compact Flash card into the card slot on the left-hand side of the
NETBOOK PRO.
Psion Teklogix NETBOOK PRO User Manual
28
Eject Button
Compact Flash Card Slot
Figure 2.18 Compact Flash Slot Location
Page 49

Chapter 2: Getting Started
Inserting And Removing A PCMCIA Card
To remove a CF card:
• Press the eject button next to the slot. The eject button will pop out, then
press the button again to eject the card.
Store your Compact Flash card safely.
2.6.3 Inserting And Removing A PCMCIA Card
The PCMCIA card slot is located on the right-hand side of the NETBOOK PRO
(see Figure 2.19).
Eject Button
PCMCIA Card Slot
Figure 2.19 PCMCIA Slot Location
PCMCIA cards are keyed so that they may not be inserted incorrectly. When a
memory card is inserted, a folder for it appears in the Windows Explorer file
browser.
To insert a PCMCIA card:
• Push the card into the card slot. The eject button next to the card slot will
pop out.
Note: The Eject button may be folded back against the side of the NETBOOK
PRO when a PCMCIA card is inserted.
Psion Teklogix NETBOOK PRO User Manual 29
Page 50

Chapter 2: Getting Started
Connecting USB Accessories
To remove a card:
• Press the eject button next to the slot (unfold first if it’s tucked away). The
card will pop loose, and can then be pulled outwards.
Store your PCMCIA card safely.
2.7 Connecting USB Accessories
The NETBOOK PRO can accept USB accessories, such as a mouse, keyboard, or
printer. The NETBOOK PRO’s USB connector is located at the lower left side of
the computer:
USB Mini Type-A Connector
To connect:
plug the accessory into the USB port. The NETBOOK PRO will search the
USB interface for the device.
Note: If the connected accessory requires drivers, they must be loaded through
ActiveSync or from a memory card before the accessory is connected.
Psion Teklogix NETBOOK PRO User Manual
30
To USB Peripheral
Page 51

Chapter 2: Getting Started
The Start Button And Taskbar
2.8 The Start Button And Taskbar
By default, the NETBOOK PRO screen has a ‘taskbar’ across the lower edge of the
display. At the left of the taskbar is a ‘Start button’, which gives easy access to the
programs in the device.
Start Menu:
The Start menu provides convenient access to the NETBOOK PRO’s programs
and settings. Display it by clicking on the Start button:
Psion Teklogix NETBOOK PRO User Manual 31
Page 52

Chapter 2: Getting Started
Resetting The NETBOOK PRO
The Control Panel:
The Control Panel contains settings for various system features of the
NETBOOK PRO. It is accessible by selecting Start, Settings, Control Panel:
2.9 Resetting The NETBOOK PRO
If you find that you can’t exit a program normally, you can end the program from
the Task Manager.
Figure 2.20 Control Panel
To open the Task Manager, perform one of the following:
•Press the Alt and Ta b keys simultaneously.
•Press the Ctrl, Alt, and Delete keys simultaneously for less than
three seconds:
The Task Manager appears. Select the task that appears to be unresponsive and click
on the End Task button.
If this does not work, or your NETBOOK PRO appears to have ‘locked up’, you can
perform a ‘soft reset’. This should restart your NETBOOK PRO while preserving
most of your information. After a soft reset, any changes to open files will be lost.
Files in internal flash storage are preserved.
It is worth trying a soft reset if the keys on the NETBOOK PRO do not appear to
respond, or if the NETBOOK PRO appears to switch on and you are sure that the
batteries are good, but the screen is otherwise blank.
Psion Teklogix NETBOOK PRO User Manual
32
Page 53

Chapter 2: Getting Started
Performing A Soft Reset
It is possible, though unlikely, that performing a soft reset after a program failure
would cause the NETBOOK PRO to lose the information in its internal flash storage; it could even prevent the reset from working at all. If this happens, you will
have to perform a ‘hard reset’. This will erase all data in internal storage.
Important: A hard reset resets the NETBOOK PRO completely. All running
programs, unsaved information, or programs installed to the
RAM disk will be lost.
Anything saved to non-volatile (flash disk) storage will be preserved. Any registry settings that have been written to non-volatile
storage will be preserved.
2.9.1 Performing A Soft Reset
To perform a soft reset, do one of the following:
•Go to the Start/Run.... menu, and type in “warmboot”. Then press OK.
• Hold down the Ctrl, Alt, and Delete keys for three seconds.
• Gently press a thin object, such as an unfolded paper clip, onto the Reset
button. This is located in a hole to the right of the right-hand Shift key
(see Figure 2.21 on page 33). Hold the reset switch down for a second.
If the NETBOOK PRO turns off, press the Esc/On button to turn it back on.
Note: Pressing the Esc/On button is only necessary if the unit has been reset
through use of the reset switch.
After a soft reset, any changes to open files will be lost. Your other files in internal
storage will almost always be safe. When you use the warmboot.exe program,
changes made to the registry will be saved.
Reset Button (In Hole)
Figure 2.21 Reset Button Location
Psion Teklogix NETBOOK PRO User Manual 33
Page 54

Chapter 2: Getting Started
Performing A Hard Reset
2.9.2 Performing A Hard Reset
To perform a hard reset:
• Remove all batteries and AC power.
• Once the main battery or AC power is applied, the NETBOOK PRO
will reboot.
Notes:
1. When performing a hard reset, ensure that the backup batteries are
removed before the main battery, and replaced last, to avoid unnecessarily draining them.
2. Hard resetting the NETBOOK PRO may delete the ActiveSync
partnership on the NETBOOK PRO. If that occurs, you may delete
and re-create the partnership on the PC, or create another partnership with a new name. Refer to ActiveSync’s online help for more
detail on this operation.
2.10 First Steps
When you first switch on the NETBOOK PRO, you will see the Windows CE .NET
desktop. At this time it is a good idea to set the date and time. To do this:
1. Press the Start button. Select Settings, Control Panel. The Windows
Control Panel opens.
2. Double-tap on Date/Time Properties. The Date/Time Properties
dialogue appears.
3. Set the desired date and time values.
4. Click the OK button in the Date/Time Properties dialogue to close and
save your changes.
Note: You can also double tap the time indication in the taskbar to open the
Date/Time Properties dialogue.
Psion Teklogix NETBOOK PRO User Manual
34
Page 55

Chapter 2: Getting Started
Navigating Between Files And Folders
2.10.1 Navigating Between Files And Folders
• Double-click on a folder icon to open that folder. To close the folder, click
on the X icon at the far right of the menu bar. Click on the Up Folder icon
to move back up one level.
• Click on a file to select it. Double-click to open it.
‘Up Folder’ Icon ‘Close’ Icon
2.10.2 Starting Programs
When you open a file, the correct program for this file is started automatically. You
can also start programs by clicking on them from the Start Menu. You don’t have to
close one program before opening another. The taskbar displays all open applications.
2.10.3 Programs And Files
To create a new file:
open the program and enter your information. Select the Save command on the
File menu and type in the name for the new file. The file will now be created. It
is a good idea to keep related files together in a folder, to make the files easier to
find later.
2.10.4 Entering Information
You can enter information and complete tasks by using the stylus (see
“Finding And Using The Stylus” on page 15), or by using the keyboard (see
Chapter 3: “The Keyboard”).
Psion Teklogix NETBOOK PRO User Manual 35
Page 56

Chapter 2: Getting Started
Using Menus
2.10.5 Using Menus
You can usually select a menu command to perform tasks.
• Click on the menu you want to access from the menu bar.
• Click on the menu names and commands, or use the arrow keys to move
around the menus. Click on commands marked with a or press the right
arrow key to see further commands.
A menu command with three dots at the end means that selecting the command will
display a “dialogue” where you enter more information (see “Using Dialogues”,
below).
If a menu command is grey, it means that it’s not currently available; for example,
you cannot Copy unless you have first selected something to copy.
2.10.6 Using Dialogues
A “dialogue” appears when you need to make selections and enter further information. You can move between dialogue items by clicking on them, or by pressing the
Ta b or Shift + Tab keys. The selected item is highlighted.
Dialogues contain one or more of the following elements:
Textbox:
where you just type in your information.
Dropdown:
where you select from a number of options. The current selection in the list is
highlighted. You can change the selection by tapping on the arrow next to the
list; the list drops down so that you may choose one of the options. You may
also select options by pressing the arrow keys or by typing the first letter of the
option you want.
Checkbox:
where you make a choice between selecting an option or not selecting it. Tap on the
checkbox, or press the Space key, to add or remove a checkmark.
Radio buttons:
where you make one choice from a number of options. Just tap on an option, or
use the Left arrow and Right Arrow keys to make a selection. Press the Tab
key to leave the set of radio buttons and go on to the next item.
Psion Teklogix NETBOOK PRO User Manual
36
Page 57

Chapter 2: Getting Started
Using Dialogues
If an item is grey, it is currently not available. For example, if you are not connecting
to the Internet through a proxy server, the Bypass proxy server for local addresses
checkbox in Internet Settings, Connection tab, will be greyed out. Some dialogues
comprise a number of “pages”; each page has a “tab” at the top (see Figure 2.22).
Tap on the tab, or move the highlight to the tab name, to go to that page. You can
also move a dialogue around the screen by holding the stylus on the dialogue title
bar and dragging it across the screen.
Tabs in dialogue page
Checkbox
Dropdown box
Figure 2.22 Dialogue Pages
2.10.6.1 Dialogue Buttons
Dialogues usually include standard buttons such as Ok and X. Some buttons have a
standard keypress equivalent:
• Usually, you can click on the OK button or press the Enter key if you want
to save information and remove the dialogue.
•Click on the Cancel button, the X button, or press the Esc key if you want
to close the dialogue without saving the information.
• For dialogues that ask a question, you can click on the Ye s button or press
the Y key for ‘yes’. Click on the No button, press the N key, or press the Esc
key for ‘no’.
Psion Teklogix NETBOOK PRO User Manual 37
Page 58

Chapter 2: Getting Started
Copying Information Between Programs
2.10.7 Copying Information Between Programs
You can insert information created in one program into a different program.
For example, you may want to compose text in Wordpad before copying it into
an e-mail message in the Inbox. If you try to insert an object into a program that is
not designed to handle that type of object, you will be unable to Paste. Trying to
copy a file from Windows Explorer into a Wordpad document will not work because
Wordpad will keep the Paste option greyed out until it detects that text is ready to
be pasted.
Psion Teklogix NETBOOK PRO User Manual
38
Page 59

THE KEYBOARD 3
3.1 Features ..................................41
3.2 Accessing The Numeric Keypad Functions................41
3.3 Function Keys...............................42
3.3.1 Brightness Control......................42
3.3.2 Capitalized Characters....................42
3.4 International Keyboards . . . .......................43
3.4.1 Specialized Accent Keys...................43
3.4.2 Keyboard Diagrams . . . . . . . . . . . . . . . . . . . . . 44
Psion Teklogix NETBOOK PRO User Manual 39
Page 60

Page 61

Chapter 3: The Keyboard
Features
3.1 Features
The NETBOOK PRO has a compact layout keyboard with 58 full-size keys, and 78key functionality. It is available in a number of languages (see “International Keyboards” on page 43). Specialized keys include the <Esc/On/Off> key, a 15-key
numeric keypad, and a function lock key <Fn>.
The keyboard character repeat function can be adjusted by going to the Keyboard
Properties menu in Start/Settings/Control Panel/Keyboard. Set the required options
under the Repeat tab, and press OK.
Note: To clean the keyboard, spray a mild all-purpose cleaner onto a cloth and
gently wipe the surface.
3.2 Accessing The Numeric Keypad Functions
The embedded numeric keypad consists of 15 keys. The numeric keypad and related
functions are accessed by pressing the <Shift>+<Alt> keys. This key combination
simulates the “Num Lock” key, and acts as a toggle switch for turning the numeric
keypad on and off.
Note: By first activating the Num Lock capability, you can also generate char-
acters using their ASCII values by pressing the <Alt> key plus the decimal
value of the ASCII code.
Psion Teklogix NETBOOK PRO User Manual 41
Page 62

Chapter 3: The Keyboard
Function Keys
3.3 Function Keys
There are various “soft keys” that are key combinations that enable specific features
or additional keyboard characters. The soft keys are accessed by pressing and
holding the function lock <Fn> key, then pressing the function key you need (these
are affected by Caps Lock or <Shift> where appropriate). These functions or special
characters are identified on the lower lip of the keys, as shown in each language-specific keyboard diagram on pages 44 to 48.
There are also language-specific “dead keys” that produce accented characters when
the appropriate key combination is used (see “Specialized Accent Keys” on
page 43).
3.3.1 Brightness Control
The keyboard has two convenient function keys for changing the brightness of the
display. You can increase or decrease the brightness by holding down the <Fn> key
while pressing the appropriate brightness key once for each level of brightness
required. These keys are located as shown in the keyboard diagrams in this chapter.
3.3.2 Capitalized Characters
Capitalized versions of characters (including various accented letters) are accessible
with the following key combinations:
Capitals: <Shift> + alpha key, or <Fn> + <Ta b> keys + alpha key.
Caps Lock Set: <Fn> + <Ta b> keys (<Fn> +
Caps Lock UnSet: Same key strokes as “Caps Lock Set” (<Shift> + <Tab>
When the Caps Lock Set is activated, an “A” icon will appear in the right side of the
Start Menu taskbar.
Psion Teklogix NETBOOK PRO User Manual
42
< key on German keyboard).
keys on French keyboard; <Shift> +
keyboard).
< keys on German
Page 63

Chapter 3: The Keyboard
International Keyboards
3.4 International Keyboards
The NETBOOK PRO keyboard is available in a number of language layouts, as
shown on pages 44 to 48. The language in use must be properly configured by going
to Start/Settings/Control Panel/Keyboard. Select the appropriate language from the
dropdown list under the Language tab, and press OK.
You should also configure the properties in Start/Settings/Control Panel/Regional
Settings for your language and region.
3.4.1 Specialized Accent Keys
Accent keys (also known as “dead keys”) can be accessed by using the appropriate
<Fn> + alpha key combination.
For example, on the French and German keyboards, to produce the lowercase letter
“a” with a tilde “~” accent, the following keystroke combination is used:
Press <Fn> + <v> and release (enables the tilde dead key), then press <a>.
For an uppercase letter “A” with a tilde “~” accent:
First set the Caps Lock. Press <Fn> + <v> and release, then press <a>.
Pressing the space bar after a dead key causes the accent character alone to be
printed. Pressing a key that cannot receive the accent after the dead key prints the
accent followed by the key character (e.g. “~S”).
Psion Teklogix NETBOOK PRO User Manual 43
Page 64

Chapter 3: The Keyboard
Keyboard Diagrams
3.4.2 Keyboard Diagrams
Standard Inverted “T” Cursor Pad
Embedded Numeric Keypad
Brightness Control Keys
Psion Teklogix NETBOOK PRO User Manual
44
Function Key
Alt (and Program Menu) Key
Figure 3.1 English Keyboard
Page 65

Chapter 3: The Keyboard
Keyboard Diagrams
Eff
Entrée
FinAide
Début
Standard Inverted “T” Cursor Pad
µ
8 9
Embedded Numeric Keypad
4 5 6
7
1 2 3
0
Brightness Control Keys
Caps
Figure 3.2 French Keyboard
Psion Teklogix NETBOOK PRO User Manual 45
Ctrl
Function Key
Comp
Alt (and Program Menu) Key
Page 66

Chapter 3: The Keyboard
Keyboard Diagrams
Standard Inverted “T” Cursor Pad
8 9
Embedded Numeric Keypad
4 5 6
7
1 2 3
0
Brightness Control Keys
Function Key
Alt (and Program Menu) Key
Psion Teklogix NETBOOK PRO User Manual
46
Figure 3.3 German Keyboard
Page 67

Chapter 3: The Keyboard
Keyboard Diagrams
Standard Inverted “T” Cursor Pad
Embedded Numeric Keypad
Brightness Control Keys
Figure 3.4 Italian Keyboard
Psion Teklogix NETBOOK PRO User Manual 47
Function Key
Alt (and Program Menu) Key
Page 68

Chapter 3: The Keyboard
Keyboard Diagrams
Embedded Numeric Keypad
Standard Inverted “T” Cursor Pad
Brightness Control Keys
Psion Teklogix NETBOOK PRO User Manual
48
Function Key
Alt (and Program Menu) Key
Figure 3.5 Spanish Keyboard
Page 69

CONFIGURING THE UNIT 4
4.1 Things To Do First.............................51
4.1.1 Entering Owner and Password Information . . . . . . . . . 51
4.1.2 Setting The Time, Date, And Time Zone . . . . . . . . . . 52
4.2 Things To Do Next.............................52
4.2.1 Setting Up ActiveSync....................52
4.2.1.1 Partnerships......................52
4.2.1.2 Connecting Via RS-232 Serial. . . . . . . . . . . . . 53
4.2.1.3 Connecting Via Infrared (IrDA) . . . . . . . . . . . . 54
4.2.1.4 Connecting Via Ethernet (802.11b) . . . . . . . . . . 54
4.2.1.5 Connecting Via Bluetooth . . . . . . . . . . . . . . . 55
4.2.2 Backing Up To A PC.....................56
4.2.2.1 Backing Up To A Memory Card . . . . . . . . . . . 56
4.2.2.2 Restoring Files From A Memory-Card Backup . . . . 57
4.2.3 Exploring The Control Panel . . . . . . . . . . . . . . . . 57
4.2.4 Securing Your Information..................58
Psion Teklogix NETBOOK PRO User Manual 49
Page 70

Page 71

Chapter 4: Configuring The Unit
Things To Do First
4.1 Things To Do First
This section describes what you may need to do to set up your NETBOOK PRO:
• Enter owner information in the Owner control panel, so that your
NETBOOK PRO can be returned if you lose it.
• Set a password for your machine, so that other people cannot access
your information.
• Set the current time and date.
4.1.1 Entering Owner and Password Information
It is a good idea to enter “owner information”, so that if the NETBOOK PRO is lost,
it can be returned when found:
1. Select the Owner icon from the Control Panel. Fill in the fields on the
Identification tab. Click OK to save your information.
2. Select the Password icon from the Control Panel. Enter a password in
the first textbox and confirm it by typing it again in the second textbox.
The text will be displayed as an asterisk (*) for security.
3. Click At Power On if you want to display the password request screen
when switching the machine on after a suspend.
4. Click OK to save your changes.
Note: The system password does not protect files stored on memory cards or
files copied to other machines. However, when connecting via ActiveSync
to a unit that is password protected, you will be asked to enter the unit’s
password on the PC.
Important: Don’t forget your password! If you have forgotten the system
password then you will have to reload the operating system (see
“If You Forget Your Password” on page 119).
Psion Teklogix NETBOOK PRO User Manual 51
Page 72

Chapter 4: Configuring The Unit
Setting The Time, Date, And Time Zone
4.1.2 Setting The Time, Date, And Time Zone
1. In the Control Panel, open the Date/Time icon. The Date/Time Properties dialogue is also accessible by double-clicking on the system time in
the system tray.
2. You will see a dialogue in which you can set the time, date, and time
zone. Set the Time Zone and click on Apply before changing any other
settings. Move the highlight in the date box by tapping on the correct
date. Use the arrow buttons to change month and year. In the Current
Time box, type in the time or use the up and down arrows to set the time.
3. Click on the OK button, and the time and date are saved.
4.2 Things To Do Next
This section gives a brief overview of what else you may want to do when you first
use your NETBOOK PRO.
4.2.1 Setting Up ActiveSync
ActiveSync allows you to connect the NETBOOK PRO to a PC serially, or through
infrared or radio communication. File transfers, file synchronization and sending email can all be done via ActiveSync.
ActiveSync must be connected through serial or infrared at least once before other
connection types are possible.
Note: ActiveSync can be set up through Bluetooth first, if using the virtual serial
port connection.
Install the most recent version of ActiveSync on your PC (check the Microsoft
website for the latest software).
4.2.1.1 Partnerships
There are two types of connection provided for by ActiveSync:
• Guest - A guest connection allows file transfers. No synchronization is performed. If the NETBOOK PRO is password protected, the password
prompt will appear when connecting as guest.
Psion Teklogix NETBOOK PRO User Manual
52
Page 73

Chapter 4: Configuring The Unit
Setting Up ActiveSync
• Partnership - A partnership connection allows for synchronization of files,
e-mail and other data. If the NETBOOK PRO is password protected, a password prompt will appear before allowing synchronization. It is necessary to
establish a partnership before trying to connect to ActiveSync via Ethernet,
Bluetooth, or 802.11.
You can disconnect any ActiveSync connection by double-clicking on the blue icon
in the NETBOOK PRO’s system tray and selecting the Disconnect button from
the dialogue.
4.2.1.2 Connecting Via RS-232 Serial
Once the first time ActiveSync serial connection has been established, inserting the
serial cable will create an autoconnection to the PC. To establish the connection
using ActiveSync via RS-232 serial:
1. Connect the NETBOOK PRO ActiveSync serial cable to the serial
communications port on your computer (usually COM1 or COM2).
2. Connect the other end of the serial cable to the NETBOOK PRO serial
port. The port is behind the rubber cover on the left hand side of the unit
(labelled with the symbol).
RS232
On the NETBOOK PRO...
3. Open the NETBOOK PRO’s Control Panel and double-click on the PC
Connection icon. The PC Connection dialogue opens.
4. Verify that the Use Connection checkbox is checked and that the unit
will connect using ‘Serial Cable on Com 1’.
On the PC...
5. Double-click on the ActiveSync icon in the system tray. The ActiveSync menu appears.
6. Go to File/Connection Settings in the ActiveSync window. The Connection Settings dialogue appears.
7. Place a checkmark in the checkbox labeled ‘Allow serial cable or infrared connection to this COM port:’, and select the COM port to which
you connected the cable in Step 1. Press OK.
Psion Teklogix NETBOOK PRO User Manual 53
Page 74

Chapter 4: Configuring The Unit
Setting Up ActiveSync
On the NETBOOK PRO...
8. Go to Start/Programs/ActiveSync, and select direct from the ActiveSync menu. A dialogue appears, indicating that the NETBOOK PRO is
attempting to connect.
9. A successful connection is indicated by a blue icon in the
NETBOOK PRO’s system tray. The NETBOOK PRO and the PC will
also play sounds to indicate that they are connected, if sound is enabled
on the devices.
4.2.1.3 Connecting Via Infrared (IrDA)
To connect using ActiveSync via infrared, a partnership must already be established
between the PC and the NETBOOK PRO (see “Creating The Partnership” on
page 86).
1. On the PC, open ActiveSync and go to the Connection Settings
screen. The first checkbox concerns both serial and IrDA connections.
Set the dropdown to use the Infrared connection. The NETBOOK PRO
supports Fast IrDA.
2. On the NETBOOK PRO, go into Control Panel and open PC Connec-
tion. Make sure the checkbox is checked. Make sure it will connect
using the Infrared Port. If this is not the case, click on the Change
button and set the dropdown to the correct connection type.
3. Align the IrDA port on the NETBOOK PRO with the IrDA port on the
PC. Infrared requires a clear path between ports. Make sure nothing is
blocking the Infrared ports.
4. On the NETBOOK PRO, go to Start /Programs/ActiveSync, and
select direct from the ActiveSync menu.
4.2.1.4 Connecting Via Ethernet (802.11b)
To connect using ActiveSync via Ethernet, a partnership must already be established
between the PC and the NETBOOK PRO.
1. On the PC, open ActiveSync and look at the Connection Settings
screen. Uncheck all checkboxes except Ethernet.
Psion Teklogix NETBOOK PRO User Manual
54
Page 75

Chapter 4: Configuring The Unit
Setting Up ActiveSync
2. On the NETBOOK PRO, go into Control Panel. Open Network and
Dial-up Connections. Open the Properties for the network connection
by double-clicking on the icon.
3. Click on the Name Servers tab and fill in the WINS information. If
your network does not have a WINS server, you must set this information to use the IP of your PC. If you do not know this information,
please contact your system administrator.
4. Click on OK to save the network settings.
5. On the NETBOOK PRO, click on the Start button, then Programs,
then ActiveSync, and select wireless from the ActiveSync menu.
Important: You must have a correctly configured access point to use 802.11b
Ethernet to access your PC via ActiveSync. The PC and the
NETBOOK PRO must be on the same network, or networks that
have access to each other, for this to function correctly.
4.2.1.5 Connecting Via Bluetooth
To create an ‘ASync’ profile (ActiveSync profile) via Bluetooth, a partnership must
be established between the PC and the NETBOOK PRO. For details on Bluetooth
profiles, see “Services” on page 98.
On the PC...
1. First, you must setup ActiveSync on your PC so that it listens on the
Bluetooth port for the incoming serial connection. The port name is
system-dependent, so consult the Bluetooth manager of your PC to find
out which one it is. Once you have identified the Bluetooth port name,
open ActiveSync on the PC and look at the Connection Settings
screen. Place a checkmark in the checkbox labeled ‘Allow serial cable
or infrared connection to this COM port:’. Select the appropriate COM
port, and press OK.
Note: Ensure that the Authentication and Encryption settings are correct on
both local and remote devices—the speed or baudrate of the port is not
important.
Psion Teklogix NETBOOK PRO User Manual 55
Page 76

Chapter 4: Configuring The Unit
Backing Up To A PC
On the NETBOOK PRO...
2. In the Bluetooth manager, scan for remote devices and activate the
ASync profile (for details, see “Devices Menu Page” on page 97). Activating this profile will create a connection named ‘‘Bluetooth’ in the
PC Connection program in the NETBOOK PRO’s Control Panel.
3. Once the ASync profile is activated, close the Bluetooth manager and
go to the Control Panel. Double-click on the PC Connection icon. The
PC Connection dialogue opens.
4. Verify that the ‘Allow Connection with desktop computer when device
is attached’ checkbox is checked, and that the unit will connect using
‘Serial Cable on Com 1’.
5. Press the Change button and select ‘Bluetooth from the droplist. Press
OK twice and close the Control Panel.
6. To initiate the connection from ActiveSync, go to Start/
Programs/ActiveSync, and select direct from the ActiveSync menu
(not ‘wireless’ or ‘network’). A dialogue appears, indicating that the
NETBOOK PRO is attempting to connect.
7. A successful connection is indicated by a blue icon in the
NETBOOK PRO’s system tray. The NETBOOK PRO and the PC will
also play sounds to indicate that they are connected, if sound is enabled
on the devices.
4.2.2 Backing Up To A PC
You can use ActiveSync to back up individual files, folders, or the NETBOOK
PRO’s entire internal storage to the PC. It is possible to configure ActiveSync to
automatically back up the NETBOOK PRO every time it synchronizes (for details,
see “Backing Up Your NETBOOK PRO With ActiveSync” on page 85).
4.2.2.1 Backing Up To A Memory Card
You can back up individual files, individual folders or groups of files and folders to
a MultiMedia, Secure Digital, Compact Flash, or PCMCIA card fitted in the appropriate slot. To back up the files and folders, copy them from the internal disk to the
card using the Copy and Paste commands in the System screen.
Psion Teklogix NETBOOK PRO User Manual
56
Page 77

Chapter 4: Configuring The Unit
Exploring The Control Panel
1. Select the files and folders you want to back up.
2. Choose the Copy command from the Edit menu.
3. Select the folder of the memory card.
4. Choose the Paste command from the Edit menu.
4.2.2.2 Restoring Files From A Memory-Card Backup
To restore the files and folders on a memory card to your NETBOOK PRO, they
may be copied them from the memory card to internal storage in the same way as
when they were backed up. To do this:
1. Select the folder of the memory card.
2. Choose the Copy command from the Edit menu.
3. Select a folder on the NETBOOK PRO as a destination.
4. Choose the Paste command from the Edit menu.
4.2.3 Exploring The Control Panel
To display the Control panel:
select the Start, Settings, Control Panel menu. The Control Panel opens.
Initially, Date/Time should already be set, and possibly Password and
PC Connections as well. You may wish to change other settings later.
Some of the other options include:
• Regional Settings, to change settings that may vary from country to country, such as the currency and date formats.
Psion Teklogix NETBOOK PRO User Manual 57
Page 78

Chapter 4: Configuring The Unit
Securing Your Information
• Power, to control how and when the NETBOOK PRO switches on and off.
For example, you might like it to switch on when you tap the screen, and off
when you haven’t used it for three minutes.
• Display Properties, to set the appearance of the desktop and the windows
on it, and the brightness of the backlight.
• Volume & Sound, to control the sounds that the NETBOOK PRO makes
when you press navigation keys, tap the screen and perform other actions.
• Stylus, to set the accuracy needed for two taps of the touchscreen to register
as a ‘double-tap’, and also to calibrate the touchscreen.
4.2.4 Securing Your Information
There are no known problems with passing the NETBOOK PRO through airport
security machines and other X-rays.
There are several things that you can do to secure your files against other hazards.
• To prevent accidental alterations to the contents of a file, the file can be
made “read-only”. For more information see Chapter 5: “Files, Folders,
and Programs”.
• To prevent accidental loss of data, files should be backed up regularly (see
“Backing Up To A Memory Card” on page 56), in case they become corrupted or are deleted accidentally.
• To prevent unauthorized access to sensitive information, a password can be
set to restrict access to data files.
• Enter owner information so that the NETBOOK PRO can be returned if it is
lost. See “Entering Owner and Password Information” on page 51.
Note: It is not possible for anyone to copy information from or to your machine
using Infrared, unless they are able to access the Infrared ‘Send’ and
‘Receive’ commands on the NETBOOK PRO.
Psion Teklogix NETBOOK PRO User Manual
58
Page 79

FILES, FOLDERS, AND PROGRAMS 5
5.1 Introduction . . . .............................61
5.2 Moving Around..............................61
5.3 Opening Files, Folders And Programs...................61
5.4 Closing Programs/Files ..........................62
5.5 Creating New Folders...........................62
5.5.1 Creating New Files......................63
5.6 Start Menu - Documents..........................63
5.7 Changing File Attributes..........................63
5.8 Managing Folders.............................64
5.9 The Flash Folder..............................65
5.10 Total Recall................................66
5.10.1 Using Total Recall.....................66
5.10.2 The Profile Information Page................67
5.10.2.1 AutoRestore Profile Settings . . . . . . . . . . . . . 67
5.10.2.2 Profile Location ...................68
5.10.3 The Add Files Page.....................68
5.10.4 The View Selections Page.................70
5.10.5 Completing Backup/Restore................70
5.11 Memory-Card Folders ..........................71
5.12 Checking System Memory Use .....................72
5.12.1 What Happens When System Memory Is Full? . . . . . . 72
5.12.2 Additional Memory And Programs. . . . . . . . . . . . . 72
5.13 The Storage Manager...........................73
5.13.1 Formatting A Memory Card................73
5.13.2 Creating Partitions.....................74
5.13.3 Partition Management ...................75
Psion Teklogix NETBOOK PRO User Manual 59
Page 80

Page 81

Chapter 5: Files, Folders, and Programs
Introduction
5.1 Introduction
Windows® Explorer is the NETBOOK PRO’s file manager. It is accessible by
double-clicking on the My Computer icon.
Note: When you turn the NETBOOK PRO on from a suspend, the programs that
were previously open will still be open and will be displayed on the
screen. When you turn on the NETBOOK PRO from a cold or warm boot,
you will see the Desktop.
5.2 Moving Around
To move the highlight between the files and folders on the screen:
click on the names, or use the arrow keys. If there are more files in the folder
than can be displayed on screen, scroll the screen using the scroll bar.
To view the files on a memory card:
change the current folder by opening the My Computer folder and selecting the
appropriate memory card icon.
5.3 Opening Files, Folders And Programs
To open a file or folder in Windows Explorer:
double-click, or highlight it and press Enter. In most cases, if a program is
already running, opening a file associated with that program will open another
instance of that program.
To run a program:
Open the Start Menu by clicking on the Start button in the bottom left corner of
the screen. Click on Programs to display all the programs available. Click on
the name of the program you wish to run.
Psion Teklogix NETBOOK PRO User Manual 61
Page 82

Chapter 5: Files, Folders, and Programs
Closing Programs/Files
How can I see which programs are open?
The taskbar across the bottom of the screen displays buttons for programs that are
open. To switch between programs, click on the button in the taskbar.
The Task Manager displays a list of programs that are open. To open the Task Manager, press Ctrl Alt Del or Alt Tab .
5.4 Closing Programs/Files
To close the current folder:
click on the X icon at the top right corner of the screen. When you close all open
folders, you will see the Desktop.
To close a file:
use the Close command on the File menu, in the program in which the file is
open.You will be prompted to save your changes.
You can also close files or programs by selecting the list of open files and programs
by using the X button in the upper right corner of any window.
5.5 Creating New Folders
New folders (or directories) can be created anywhere in the NETBOOK PRO’s
system.
A convenient place to keep the user documents is the My Documents folder under
My Computer. It is possible to create folders inside My Documents, in which to
store all your files to prevent the My Documents screen from becoming too full.
Folders can also be created in the flash disk folder or on memory cards. The contents of these folders will not be lost during a hard reset.
To create a new folder:
1. Move to the folder in which you wish to create the new folder.
2. Select the New folder command from the File menu, and type in the
folder name. You can also right-click on the blank space in a folder and
select New folder from the context menu.
You cannot use the following characters in a folder name: < > : / \ * ?
Psion Teklogix NETBOOK PRO User Manual
62
Page 83

Chapter 5: Files, Folders, and Programs
Creating New Files
If you use NETBOOK PRO files with a PC, you may wish to create folders that
match equivalent folders on your PC. This will make transferring files between the
NETBOOK PRO and PC easier.
5.5.1 Creating New Files
You can create files from within programs. As a general rule, open the program in which
you want to create the file, and select New from the File menu. A file name is suggested.
If you do not wish to use this, type a name of your own before pressing the OK button.
What names can I use for my files & folders?
You can use most characters in file and folder names including spaces, for example,
“2002 Purchase Orders and Invoices”. The only characters which cannot be used in
a file or folder name are: / < > : \ * ?
You may encounter difficulties if you use very long file names for files stored in
folders with long names, which are nested within other folders with long names, and
so on. If you do exceed the maximum allowed length, rename a folder or file to a
shorter name.
5.6 Start Menu - Documents
A quick way to find a file that has been recently used is to look in the Documents
menu on the Start menu. The Documents menu will list up to ten of the most recent
files opened.
5.7 Changing File Attributes
You can prevent a file from being accidentally changed by making it a “read-only”
file. To do this, right-click on the file and select Properties from the context menu.
Then check the Read-only box.
Psion Teklogix NETBOOK PRO User Manual 63
Page 84

Chapter 5: Files, Folders, and Programs
Managing Folders
Files that have been created on a PC and then transferred to the NETBOOK PRO
will also be “read-only” files.
Note: If you transfer a “read-only” file to another machine, it can be viewed,
and the “read-only” attribute can be removed.
5.8 Managing Folders
To move one or more folders or files from one location to another:
1. First highlight the file(s) or folder(s) to select them. Drag with the
stylus to select more than one file.
To select all the files/folders in the current folder, use the Select all
command on the Edit menu. To deselect items, press the Esc key.
2. Select the Cut command from the Edit menu. A dotted line appears
around the file/folder icon(s).
3. Go to the folder into which the highlighted items are to be moved.
4. Select the Paste command from the Edit menu.
Note: Moving a folder also moves all the files within that folder.
To copy a file or folder, or multiple files/folders to a different folder:
follow the earlier instructions, but select the Copy as opposed to the Cut
command from the Edit menu.
To make a copy of a file or folder within the same folder:
highlight it and select the Copy command followed by the Paste command. A
new file is automatically created for you using the following naming convention
(with Wordpad as the example): Copy of Doc1, etc. You can rename the file or
folder later if you wish.
To rename a single file or folder:
right-click, select Rename from the context menu, and then type in a new name.
To remove one or more files or folders:
first highlight them and then either press the Delete key, or select the Delete
command from the File menu. You can also right-click and select Delete.
Psion Teklogix NETBOOK PRO User Manual
64
Page 85

Chapter 5: Files, Folders, and Programs
The Flash Folder
Important: If you are deleting folders, remember that the entire contents of
the folders (including all the other folders contained within them
and all their files) will also be deleted.
5.9 The Flash Folder
The Flash folder, accessed from the My Computer icon on the desktop, can be used
to store data securely in case of power loss. It can also be used as the backup location for the Total Recall application (see “Profile Location” on page 68).
Folder for Internal Flash Storage
Data stored in this directory will still exist even if the main battery and backup
battery are discharged. Data will also remain in this directory after a “soft” or “hard”
reset. The size of storage is limited—to see the amount of space available in this
folder, right-click on the Flash icon in My Computer, and select Properties in the
dropdown menu.
If there are some files you don’t want installed automatically with a cold boot but
want to keep secure, either back those up to your PC or place in another folder
within the Flash folder.
The Flash folder has device name ‘DSK1:’ in the Storage Manager (see page 73).
Psion Teklogix NETBOOK PRO User Manual 65
Page 86

Chapter 5: Files, Folders, and Programs
Total Recall
5.10 Total Recall
If you need to perform a cold boot on the NETBOOK PRO, any file or database
entry that is installed (that is, not a part of the boot image file) will be lost. To avoid
this, you can use the Total Recall application, which provides backup and restore
capabilities. Total Recall is accessed from the Control Panel.
5.10.1 Using Total Recall
Each page of the Total Recall application shows menu-specific instructions in the
left side box of the dialogue. When each page is first opened, the descriptions and
instructions for each option are automatically scrolled for you. To review the text,
tap in the box until you have scrolled to the instruction you need.
The first page presented when opening Total Recall shows the following options:
Create Backup Profile (to backup your files, databases, and registry), Restore
Selected Profile, View Selected Profile Data, and Delete Selected Profile. If you
select Restore, View, or Delete a profile, a combo box with profile names will
appear. If you have not yet created any profiles, you will be alerted that no profiles
were found.
Psion Teklogix NETBOOK PRO User Manual
66
Page 87

Chapter 5: Files, Folders, and Programs
The Profile Information Page
5.10.2 The Profile Information Page
If you chose to create a profile (see Section 5.10.1), first enter a new Profile Name.
The Profile Settings in bold text show the following information about this profile’s
platform and cannot be modified:
Image:
indicates under which Psion Teklogix product this profile is being generated.
OS Version:
shows the version of the Windows CE .NET operating system.
Registry Type:
indicates what type of registry the platform supports.
The Profile Settings contain two parent controls: AutoRestore Profile Settings, and
Profile Location.
5.10.2.1 AutoRestore Profile Settings
An AutoRestore profile is automatically restored on cold boots. The AutoRestore
Profile Settings control allows you to choose the type of AutoRestore profile that
you need: Not an AutoRestore Profile (default setting), AutoRestore Profile for
this device only, and Clone Profile for other devices. Only one choice can be
selected at a time.
Not an AutoRestore Profile prevents the profile from automatically loading on
cold boots.
AutoRestore Profile for this device only creates a profile that automatically loads
on cold boots for this device only.
Psion Teklogix NETBOOK PRO User Manual 67
Page 88

Chapter 5: Files, Folders, and Programs
The Add Files Page
Clone Profile for other devices creates a profile that automatically loads on cold
boot for any device that matches the profile’s platform.
5.10.2.2 Profile Location
This control lists the possible storage destinations to place the profile file. If more
than one location are available, none are selected by default and one location must
be chosen to continue.
Once all the settings in the Profile Information page are selected, press Next> to
continue to the Add Files page.
5.10.3 The Add Files Page
The All Files option is selected by default (shown by the green check), meaning that
every possible file on the device will be backed up. When this option is selected, the
Databases and Registry options have a grey check next to them, indicating that they
are automatically selected as well since some files are dependent on this information.
Psion Teklogix NETBOOK PRO User Manual
68
Page 89

Chapter 5: Files, Folders, and Programs
The Add Files Page
If you do not select All Files, then you can choose the By File setting and/or the
Databases and Registry options, as required. The By File settings allow you to
choose files individually or by type. Expanding the setting provides the By Individual File: (Files: 0) and By File Type options.
By Individual File allows you to Add Files from the NETBOOK PRO’s folders to
create a file list for this profile, or Remove Files from the file list you’ve already
created. After selecting the file(s) to add, press the OK button, and you’ll see in the
main window that the number of files has increased by the number you’ve selected
(e.g. By Individual File: (Files: 5). To remove files, choose By Individual File again,
this time selecting Remove Files, and a popup window will appear from which you
can select the file(s) to remove.
Expanding the By File Type option shows a list of file types (such as *.lnk) that you
can choose. You can choose any number of file types that you require.
When your selections are complete, press the Next> button to continue, and the
Total Recall program will process all the selections to create a list of the files that
have been selected for backup for this profile.
Psion Teklogix NETBOOK PRO User Manual 69
Page 90

Chapter 5: Files, Folders, and Programs
The View Selections Page
5.10.4 The View Selections Page
The View Selections page shows a list of all the files that you selected in the previ-
ous options. In the Vie w dropdown list only the file options that were selected will
appear (Files, Databases, and Registry) and the names of the files will be shown in
the scrollable window.
5.10.5 Completing Backup/Restore
Important: Once the operation starts, do not attempt to stop it or start
another process.
To complete the Backup/Restore process, press the Backup To \Flash Disk button.
A progress bar will show the processing of the files, databases, and/or registry. Once
the operation is complete, the Finish button will become available, allowing you to
exit Total Recall. If an error occurred during processing, a file named
PROFILENAME_err.txt will be created that will contain information about the error.
If you are performing a Restore, you will be alerted that once the operation has been
performed the unit will reboot automatically.
Psion Teklogix NETBOOK PRO User Manual
70
Page 91

Chapter 5: Files, Folders, and Programs
Memory-Card Folders
5.11 Memory-Card Folders
Each memory card appears as a separate folder in My Computer.
Folder for MMC/SD Card
Folder for first CF/PCMCIA Card
Folder for second CF/PCMCIA Card
The MMC/SD card has folder name 'MMC Card'. In the Storage Manager, it has
device name 'SMC1:' (see section 5.13 on page 73 for details about the Storage
Manager).
CompactFlash and PCMCIA cards are treated identically by the system. Whichever
of them is inserted first is assigned folder name 'Storage Card' and device name
'DSK2:'. Whichever is inserted second is assigned folder name 'Storage Card2' and
device name 'DSK3:'. These folder and device names remain constant while the
cards are connected (if one is removed, the names for the other do not change), but if
both the CF and PCMCIA cards are removed and replaced in reverse order, the designations will be swapped.
Note: This assumes that there is only one partition on each card (see page 74).
Psion Teklogix NETBOOK PRO User Manual 71
Page 92

Chapter 5: Files, Folders, and Programs
Checking System Memory Use
5.12 Checking System Memory Use
To display the amount of system memory (RAM) remaining:
double-click the System icon in the Control Panel and select the Memory tab.
You can see the amount of free memory in the slider bar.
5.12.1 What Happens When System Memory Is Full?
When the system memory is nearly full, you will see warning dialogues when
running programs to indicate that the NETBOOK PRO’s memory is almost full, and
there is not enough memory to perform some tasks. Many actions need just a little
free memory in order to work—displaying dialogues, menus, etc. These can fail
with a message like ‘Memory full’. The NETBOOK PRO will not allow you to use
all of the available memory; it will always set aside enough memory for you to close
a program or save an open file to a multimedia card.
Files saved on the internal flash memory, files saved on memory cards, and ‘open’
programs do not use system memory.
Applications running from RAM, or files stored outside the Flash folder or memory
cards, do use system memory. To free memory, close these files, delete any
unwanted files, or move files to a multimedia card or your PC.
5.12.2 Additional Memory And Programs
You can insert memory cards into the slots of the NETBOOK PRO. You might use
them as additional memory for storing files, or to add more programs to the
NETBOOK PRO. For details, please refer to “Memory Cards” on page 27.
If a memory card contains additional programs:
their icons will be available in the card’s folder.
Psion Teklogix NETBOOK PRO User Manual
72
Page 93

Chapter 5: Files, Folders, and Programs
The Storage Manager
5.13 The Storage Manager
Double-click on the Storage Manager icon to open the Storage Properties dialogue:
The Storage Manager allows the user to view information about the storage
devices that are present in the NETBOOK PRO. Storage devices include MMC/SD
flash cards, PCMCIA flash cards and microdrives, and CompactFlash cards and
microdrives.
5.13.1 Formatting A Memory Card
Formatting a memory card bulk-erases it. Once a card is erased, partitions may be
created in it, similarly to those on a hard drive.
Memory-card devices are normally ‘mounted’ (made available to the system)
automatically when they are inserted. They must be dismounted before they can
be formatted.
To format an entire memory card:
1. Select Start, Settings, Control Panel.
2. Double-click on the Storage Manager icon. The Storage Manager
menu opens:
Psion Teklogix NETBOOK PRO User Manual 73
Page 94

Chapter 5: Files, Folders, and Programs
Creating Partitions
3. Select the memory card from the drop-down list.
4. Press the Dismount button to dismount the memory card. All partitions
on the card will be dismounted.
5. Press the Format button to format the memory card.
Warning: All partitions and information on the card will be erased during the
formatting process.
5.13.2 Creating Partitions
Once the card is formatted, new partitions can be created in it. The default is to
create one partition that occupies the whole card, but a card can be divided into
more than one partition if desired. Each partition appears as a separate folder in
Windows Explorer.
To create new partitions:
1. Press the New button next to the Partitions listbox. The New Partition
dialogue appears:
2. Enter a name for the partition.
3. If more than one partition is desired, uncheck the Use All Available
Diskspace checkbox, then specify the desired number of sectors to be
used by the partition:
Psion Teklogix NETBOOK PRO User Manual
74
Page 95

Chapter 5: Files, Folders, and Programs
Partition Management
Note: The sector size of the card is given on the left-hand side of the Storage
Properties dialogue.
4. Press OK. The new partition appears in the Partitions list:
The new partition is automatically mounted. This is indicated by an asterisk (*) next
to its name in the partition list. Any unallocated space on the card is indicated at the
left, and additional partitions can be created in it.
5.13.3 Partition Management
Partitions can be individually dismounted, mounted, deleted, or formatted as well.
These and additional tasks are available from the Partition Properties dialogue:
To dismount a partition:
1. Select the desired partition.
Psion Teklogix NETBOOK PRO User Manual 75
Page 96

Chapter 5: Files, Folders, and Programs
Partition Management
2. Press the Properties button. The Partition Properties dialogue appears.
3. Press the Dismount button. The partition is dismounted. The asterisk
disappears next to its name in the partitions list.
To delete a partition:
1. Select the desired partition.
2. Press the Delete button. A warning dialogue appears.
3. Press the OK button. The partition is deleted.
To format a partition:
1. Select the desired partition.
2. Press the Properties button. The Partition Properties dialogue appears.
3. Press the Dismount button. The partition is dismounted. The asterisk
disappears next to its name in the partitions list.
4. Press the Format button. The Format dialogue appears:
5. Choose your format options. These options include:
• Version of file system (FAT-12, for devices holding up to 16 MB;
FAT-16, for devices holding up to 4 GB; or FAT-32, for devices containing up to 32 GB).
• Number of file-allocation tables.
• Number of entries allowed in the root directory.
• Cluster size (512 B to 64 KB).
Psion Teklogix NETBOOK PRO User Manual
76
Page 97

Chapter 5: Files, Folders, and Programs
Partition Management
There are also two checkboxes, which govern:
• Whether to use the transaction-safe FAT file system (TFAT). This file
system keeps multiple copies of the file-allocation table, changing one
while maintaining another as a backup.
• Whether to perform a quick format. Quick formatting removes all reference to data in the partition without erasing the actual partition. The
partition will be treated as empty, and new data will overwrite it.
6. Press Start. The partition is formatted.
To mount a partition:
1. Select the desired partition.
2. Press the Properties button. The Partition Properties dialogue appears.
3. Press the Mount button. The partition is mounted. The asterisk appears
next to its name in the partitions list.
The Partition Properties dialogue has buttons for additional functions. Partitions can
be defragmented, and their file structure can be scanned.
Psion Teklogix NETBOOK PRO User Manual 77
Page 98

Page 99

USING THE PC CONNECTION 6
6.1 Introduction .................................81
6.2 Using ActiveSync..............................81
6.3 Getting Help.................................82
6.3.1 Where Can I Find More Help?................82
6.3.2 Tips On Using ActiveSync Help. . . . . . . . . . . . . . . 82
6.4 Working With Your Files..........................83
6.4.1 Looking At Files On Your NETBOOK PRO . . . . . . . . 83
6.4.2 Copying A File Using Drag And Drop . . . . . . . . . . . 83
6.4.3 Copying A File Using Copy And Paste . . . . . . . . . . . 84
6.4.4 Opening NETBOOK PRO Files From Your PC. . . . . . . 85
6.5 Backing Up Your NETBOOK PRO With ActiveSync...........85
6.5.1 Performing Your First Backup . . . . . . . . . . . . . . . . 85
6.5.2 Performing Regular Backups . . . . . . . . . . . . . . . . 85
6.6 Synchronizing Your NETBOOK PRO...................86
6.6.1 What Is Synchronization?..................86
6.6.2 Synchronizing Your NETBOOK PRO. . . . . . . . . . . . 86
6.6.2.1 Creating The Partnership . . . . . . . . . . . . . . . 86
6.6.3 Using An Existing Partnership................88
6.7 On-Schedule Outlook Sync . .......................89
Psion Teklogix NETBOOK PRO User Manual 79
Page 100

 Loading...