


Compound Bow Set-up Procedures
Compound Bow Set-Up & Tuning Procedure
1. Remove bow from shipping box. Remove bow from plastic bag and remove the owner’s guide and other
promotional material from the bow.
2. Read the Owner’s Guide before using the product.
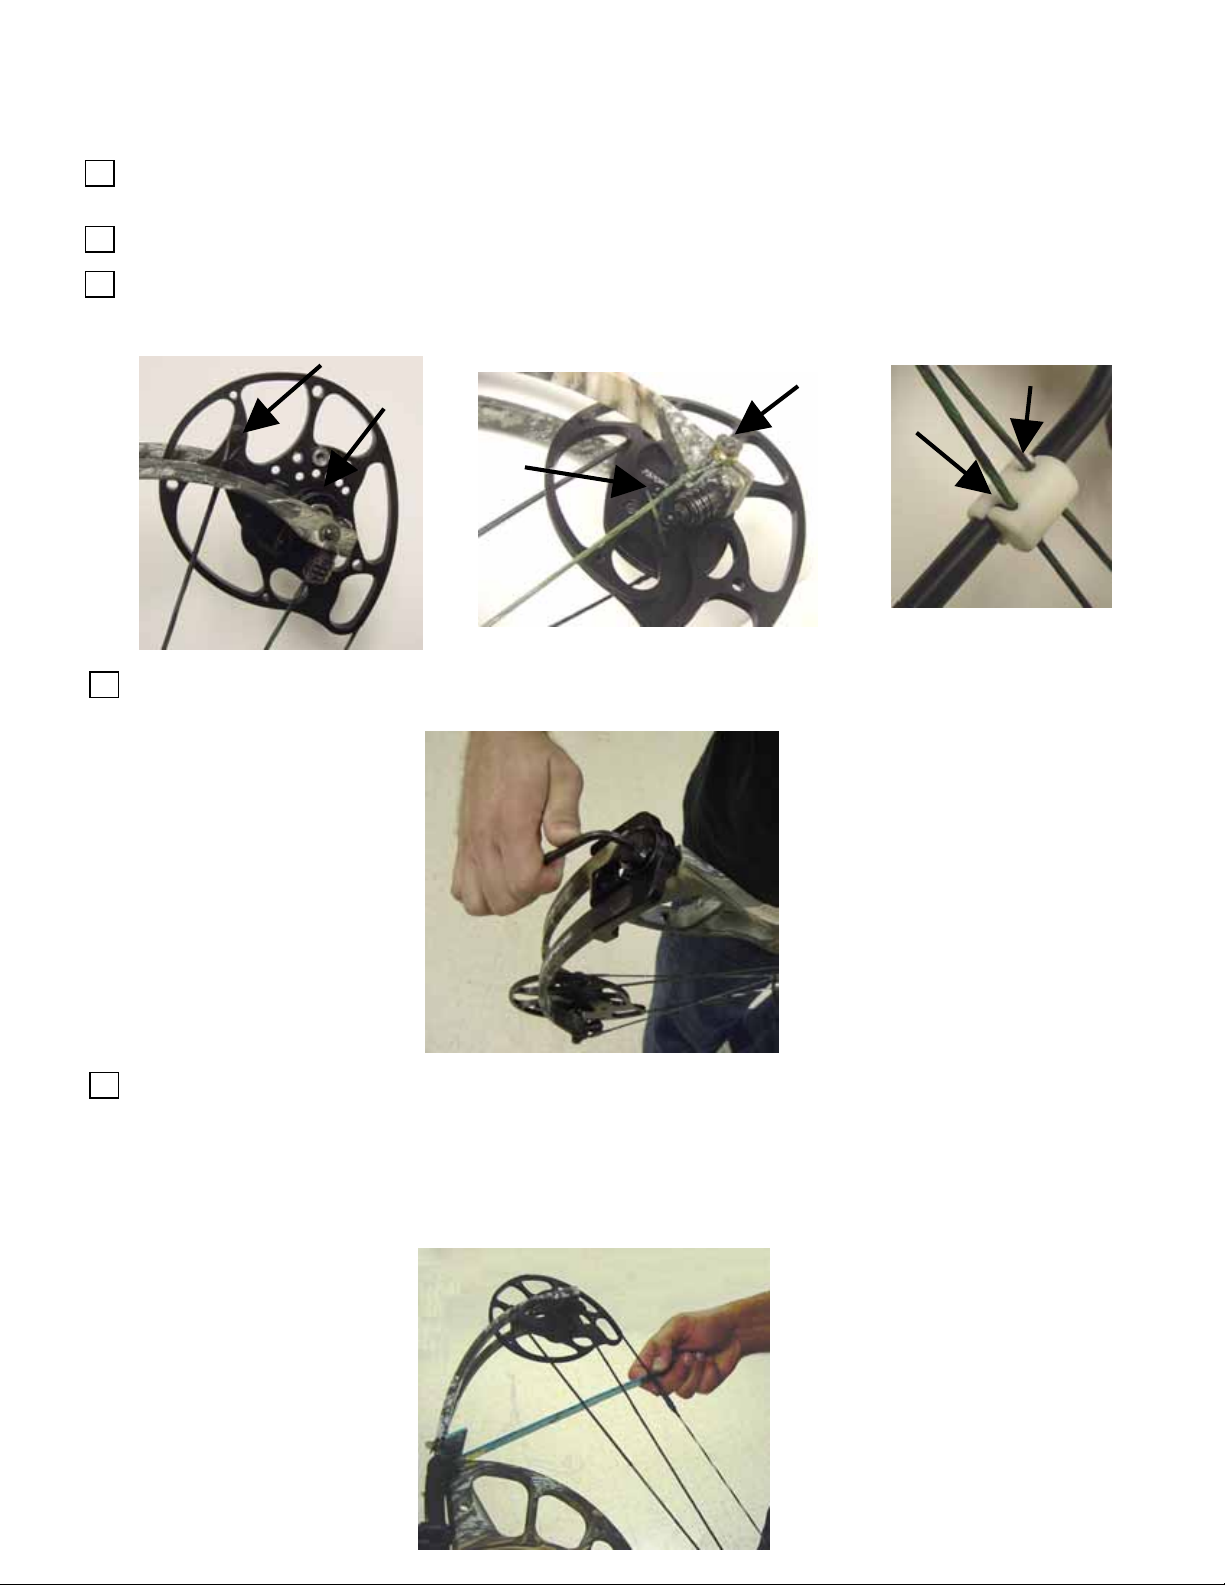
3. Inspect the bow to insure that the cables and string are in their tracks on the cam and attached to the posts
properly. Check all screws and bolts to insure they are not loose, including rubber dampers and cam
modules and/or inner cams.
4. Set Draw weight: Adjust draw weight to the desired level by turning the limb bolts clockwise to increase
weight and counter-clockwise to decrease weight. Turn both limb bolts equal amounts for the initial setting.
Rev 02/12/08
5. Set tiller: Check tiller before making any other adjustments. The distance from the riser to the string, as
shown in the photo below, should be the same for both the top and bottom limbs. If the distance is the
same, no adjustment is required. If the distance varies more than 1/8”, adjust the limb bolts the same
amount in OPPOSITE directions until the tiller is correct. For example, if the top limb bolt is turned
clockwise a half a turn, the bottom limb bolt must be turned counter clockwise a half a turn. For One-Cam
bows, the tiller must be measured by tying a thin piece of string from one axle to the other and using that
string to measure tiller.
6. Checking static cam orientation: With the bow at rest, generally the cam orientation marks on the cam
should be within a string width of being on the marks when the string is in the center post or the post with
the dot. Orientation marks will not line up if the string is on the “+” post or the “-“ post of the cam. Timing
mark location varies with bow model and draw length. It is important that the timing marks be symmetrical
from top to bottom. Example: if the string is to the rear of the timing mark at the top cam it should be
approximately the same distance to the rear on the bottom cam.
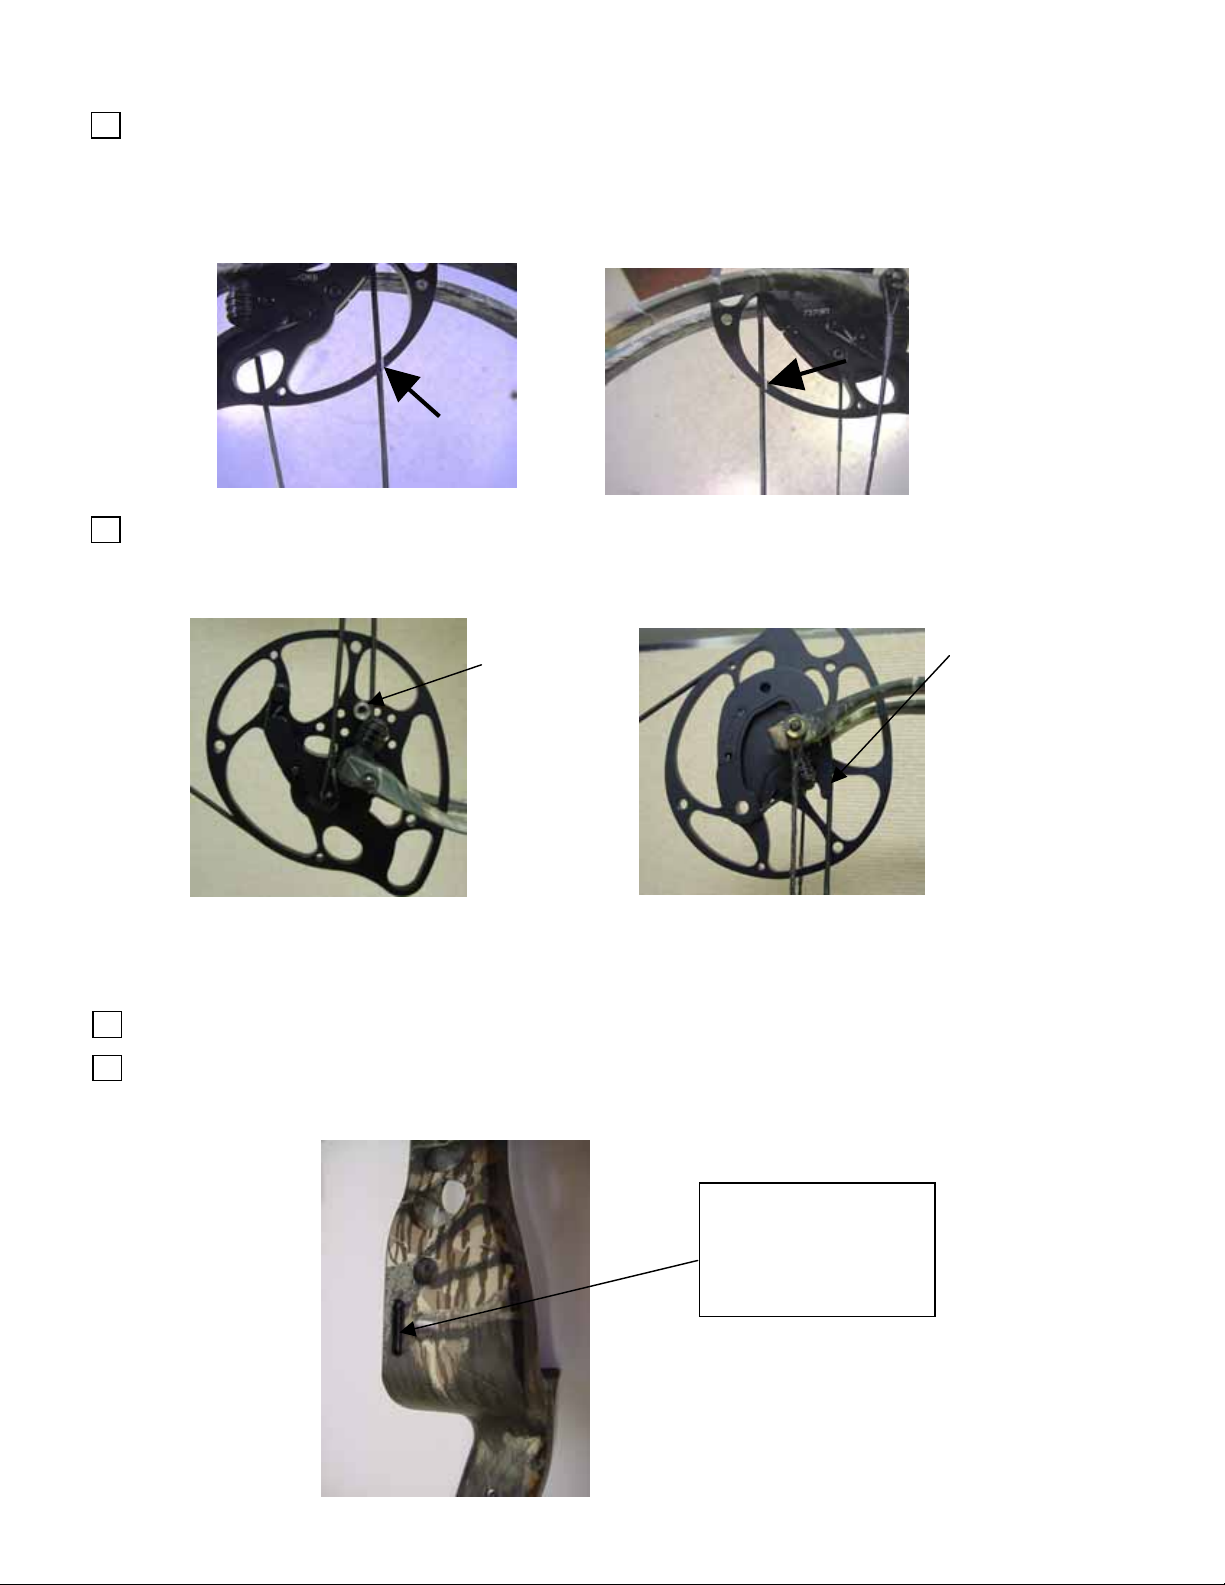
7. Checking draw stops for bows equipped with a Hybrid Cam System: With the bow at full draw, and the split
harness cable making contact with the draw stop on the bottom cam, the control cable should also be
making contact with flat portion of the module on the upper cam. Twist or untwist the control cable to adjust
the upper cam so that the string contacts the flat correctly.
Draw Stop on
bottom cam
Cable makes
contact with the
flat on the
module on the
upper cam.
Checking timing for bows equipped with a twin cam system: While drawing the bow, both cams must roll
over at precisely the same time. Timing is adjusted by either twisting or untwisting one or both of the cables
until cams are synchronized.
8. Recheck steps 5, 6 and 7 in sequence until everything is correct.
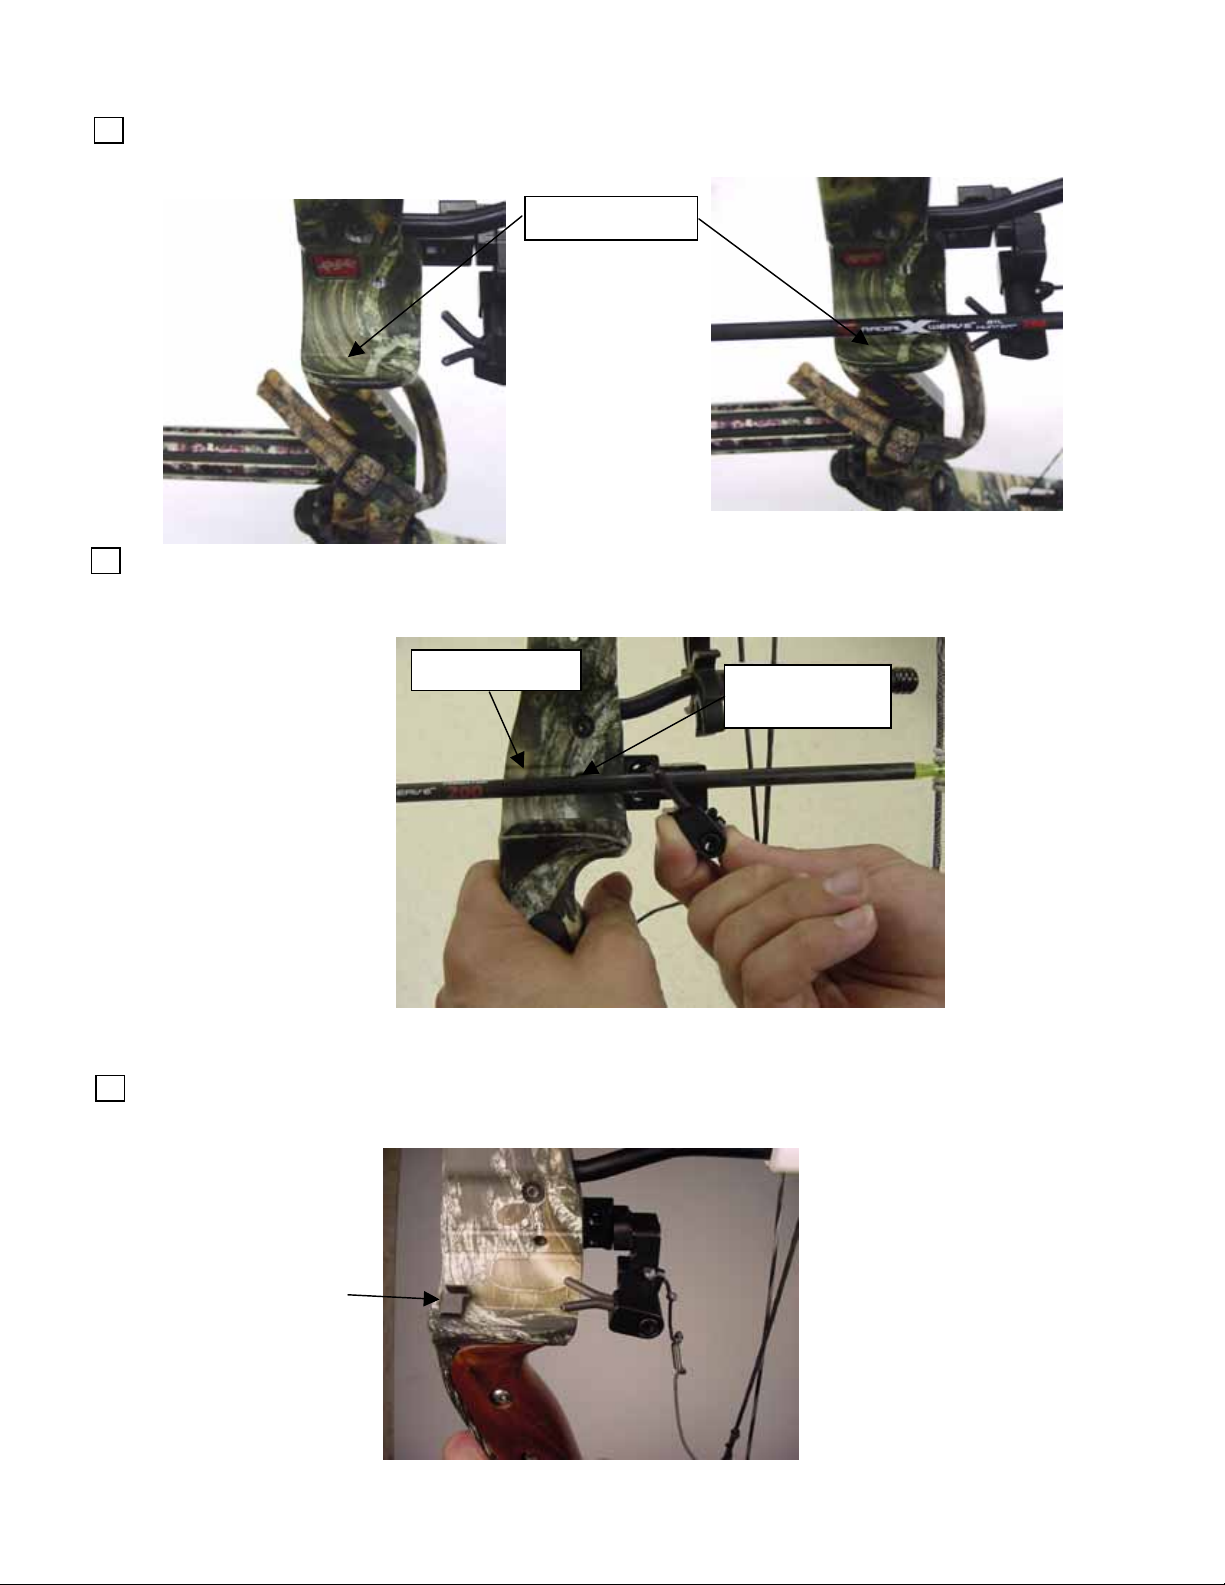
9. Install the arrow rest carefully following the instructions for the rest. Mount arrow rest to the bow utilizing the
Posi-Lock feature if available.
Bows equipped with this slot
can utilize the rest’s PosiLock feature to locate the
arrow rest securely into
position.
10. For all styles of arrow rests set the center shot adjustment on the rest so that the arrow is parallel to the
alignment mark.
Alignment Mark
11. Using the nocking loop and the rest adjustment, set the arrow horizontal so that it is parallel to the
alignment mark on the window of the bow and passes in front of the arrow rest mounting hole.
Alignment mark
Arrow rest
mounting hole
12. If using a fall-away arrow rest with an arrow holder, clean the mounting area on the riser with alcohol. Then
attach the arrow holder to the riser using cyanoacrylate glue, such as Carbon Force Advance Instant
Adhesive, so that the arrow rests in the holder when the bow is at rest.
Arrow Holder
 Loading...