

WARNINGS
Brand: PROPOINT
Model: PP D2
FCC ID: N26-PPVPPD2
The changes or modifications not expressly approved by the party responsible for
compliance could void the user’s authority to operate the equipment.
To comply with the FCC RF exposure compliance requirements, this device and its antenna
must not be co-located or operating to conjunction with any other antenna or transmitter.
This device complies with Part 15 of the FCC Rules. Operation is subject to the following
two conditions:
(1) this device may not cause harmful interference.
(2) this device must accept any interference received, including interference that may
cause undesired operation.
PP D2
Bluetooth headsets
R
C
E
O
T
M
N
I
5
0
0
S
R
M
E
E
T
COMPLIANT
User Manual

Contents
Package Contents
Package Contents 2
Product Description 2
Installation 4
PP D2 Allen Key
Clip Clip with 3M sticker
Main Features 5
Operation 7
PP D2 - Mobile Phone Pairing Operation 7
PP D2 – Intercom Pairing Operation 9
Headset
Audio CableAdaptorUSB Cable
Music Operation 10
GPS Navigator Operation 11
FM Radio Operation 12
Operation for Audio USB Cable Connector 13
Headset Embedded Battery Charging 14
LED Light Indicator 14
Trouble Shooting 15
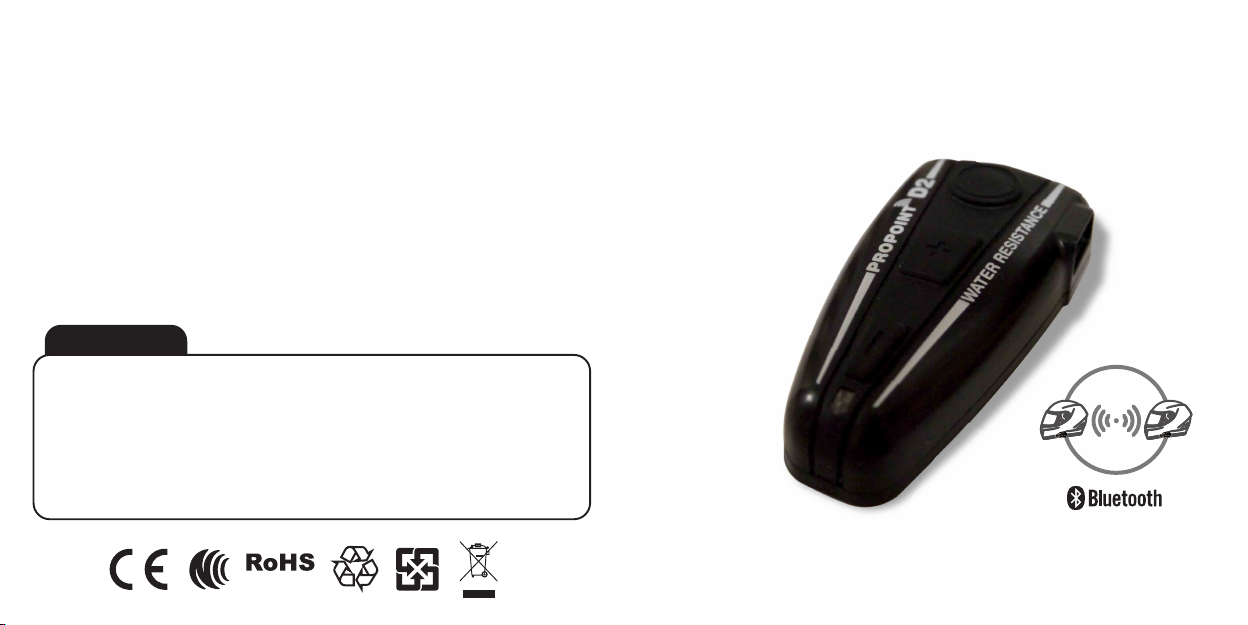
Product Description
Thank you for having chosen the PP D2, the Bluetooth® Headset for
Motorcycle Riders. This Manual will help you to operate the headset, but you
should first familiarize yourself with the Bluetooth® functionality of your
cellular phone or GPS device before using.
PP D2 stereo is a Bluetooth® system for helmets, enabling you to talk with
passenger or other riders, and entertainment while riding your motorcycle.
PP D2 stereo works and communicates with cellular phones, GPS navigators, musical readers, intercom system, FM/Radio equipped with Bluetooth®
Technical Specs 16
1 2
technology.

21
7
8
9
Detachable
1
1. LED Light Indicator
2
Volume – (Volume down/FM Radio track back )
3
2. Volume + (Volume up/FM Radio track forward )
4
3. MFB (Multi-functional Button )
5
4. Control Button ( Power/Pairing/Intercom )
6
Headset & Charging Jack
7
Microphone
8
Audio USB Connector
9
Audio Connector
10
Speakers
1010
Installation
1. Mouthing the Clip
3
4
5
6
The headset clip must be mounted onto the helmet. Once mounted, the
headset unit can be attached or detached from the headset clip at any
time. Even remove it for charging and storage.
Note: We recommend that you remove the headset from the helmet when not in use.
2. Mounting the Microphone and Speakers
2.1 The Microphone must be positioned in front of the center of the mouth.
2.2 Attach the speakers to the Velcro inside your helmet opposite your ears
(short speaker cord for left ear & long speaker cord for right ear), or use
the supplied Velcro pads.
2.3 For some countries’ traffic regulations, only one speaker is permitted to
install in the helmet. In this case, the right side speaker can be detached
and then leave only one speaker for better keep your mind on the road
condition.
Note: Always prioritize your riding, not Mobile phone calls, or whilst using the interphone, deceleration
and concentrate on your riding. In bad weather and/or heavy traffic, we recommend pulling over and
stopping, before answering.
Microphone
Speacker
43
 Loading...