

Page 1
EN
FR
NL
ES
PORTABLE RADIO/CD PLAYER
LECTEUR CD/RADIO PORTABLE
DRAAGBARE RADIO/CD-SPELER
RADIO/REPRODUCTOR DE CD PORTÁTIL
NC132
INSTRUCTION MANUAL
NOTICE D’UTILISATION
GEBRUIKERSHANDLEIDING
MANUAL DE INSTRUCCIONES
Page 2

Page 3

Table of Contents
WARNINGS ............................................................................................................................... 2
IMPORTANT SAFETY INSTRUCTIONS .................................................................................... 2
CONTROLS ............................................................................................................................... 3
BATTERY OPERATION (NOT SUPPLIED) ............................................................................... 4
MAINS OPERATION .................................................................................................................. 5
RADIO OPERATION .................................................................................................................. 5
PRESETTING YOUR FAVOURITE RADIO STATIONS ............................................................. 5
DISCS OPERATION .................................................................................................................. 5
AUX IN ....................................................................................................................................... 7
STEREO PHONE JACK ............................................................................................................ 7
TROUBLESHOOTING ............................................................................................................... 8
SPECIFICATIONS ..................................................................................................................... 8
EN-1
Page 4
WARNINGS
This appliance is intended for domestic household use only and should not be used for any
other purpose or in any other application, such as for non domestic use or in a commercial
environment.
Ventilation
Allow at least a 10 cm gap all around the product.
The ventilation should not be impeded by covering the ventilation openings with items, such as
newspapers, table-cloths, curtains, etc.
No naked flame sources, such as lighted candles, should be placed on the apparatus.
Attention should be drawn to the environmental aspects of battery disposal.
This apparatus is not suitable for use in a tropical climate.
The apparatus shall not be exposed to dripping or splashing and that no objects filled with
liquids, such as vases, shall be placed on the apparatus.
Batteries (battery pack or batteries installed) shall not be exposed to excessive heat such as
sunshine, fire or the like.
Where the MAINS plug or an appliance coupler is used as the disconnect device, the
disconnect device shall remain readily operable.
The marking plate is located at the bottom of the apparatus.
IMPORTANT SAFETY INSTRUCTIONS
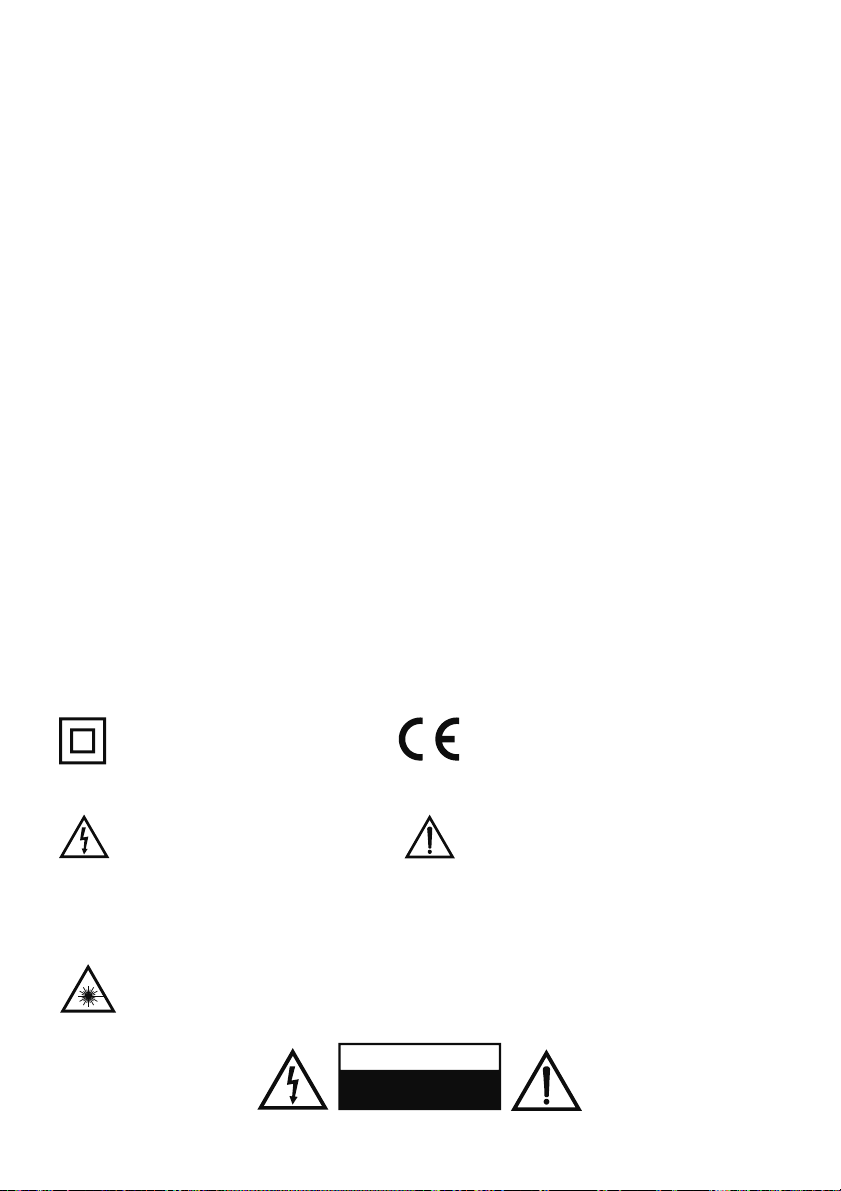
Symbols
This equipment is double
insulated and an earth
connection is not required.
Dangerous voltage
constituting a risk of electric
shock is present inside this
Class 1 laser product
equipment.
This apparatus contains a low power laser device. Invisible laser radiation when the
enclosure is opened and interlocks are defeated.
Avoid exposure to beam.
This mark is applied to show the equipment
conforms to European safety and
electromagnetic compatibility standards.
There are important operating and
maintenance instructions in the literature
accompanying this equipment.
CAUTION
RISK OF ELECTRIC SHOCK
DO NOT OPEN
EN-2
Page 5

This digital disc player employs a laser system. Use of controls, adjustments, or the
performance of procedures other than those specified herein may result in hazardous radiation
exposure.
To prevent direct exposure to laser beam, do not open the enclosure.
Never stare directly into the laser beam.
Do not install this apparatus in a confined space such as a book case or similar unit.
BATTERY WARNING: Only adults should handle the batteries. Do not allow a child to use this
product unless the Battery Cover is securely attached to the Battery Compartment.
The battery type used in this product is six C size batteries. These batteries are located
internally and are readily accessible.
Remove the battery cover on the bottom of the product to remove the batteries.
These batteries must be disposed of at your local recycling point.
WARNING: To protect your hearing
It is important that any headphones or earphones used in conjunction with this product are
compliant with French Decree of 8 November 2005 implementing Article L.5232-1 This ensures
that the sound level does not exceed 100 dB SPL. The prolonged listening at high volume for
more than five hours a week can damage your hearing.
At full power, prolonged listening to the player can damage the ear of the user.
To prevent possible hearing damage, do not listen at high volume levels for
long periods.
CONTROLS
Top
1234
1. Handle
2. Telescopic aerial
3. CD door
4. CD door open area
EN-3
Page 6
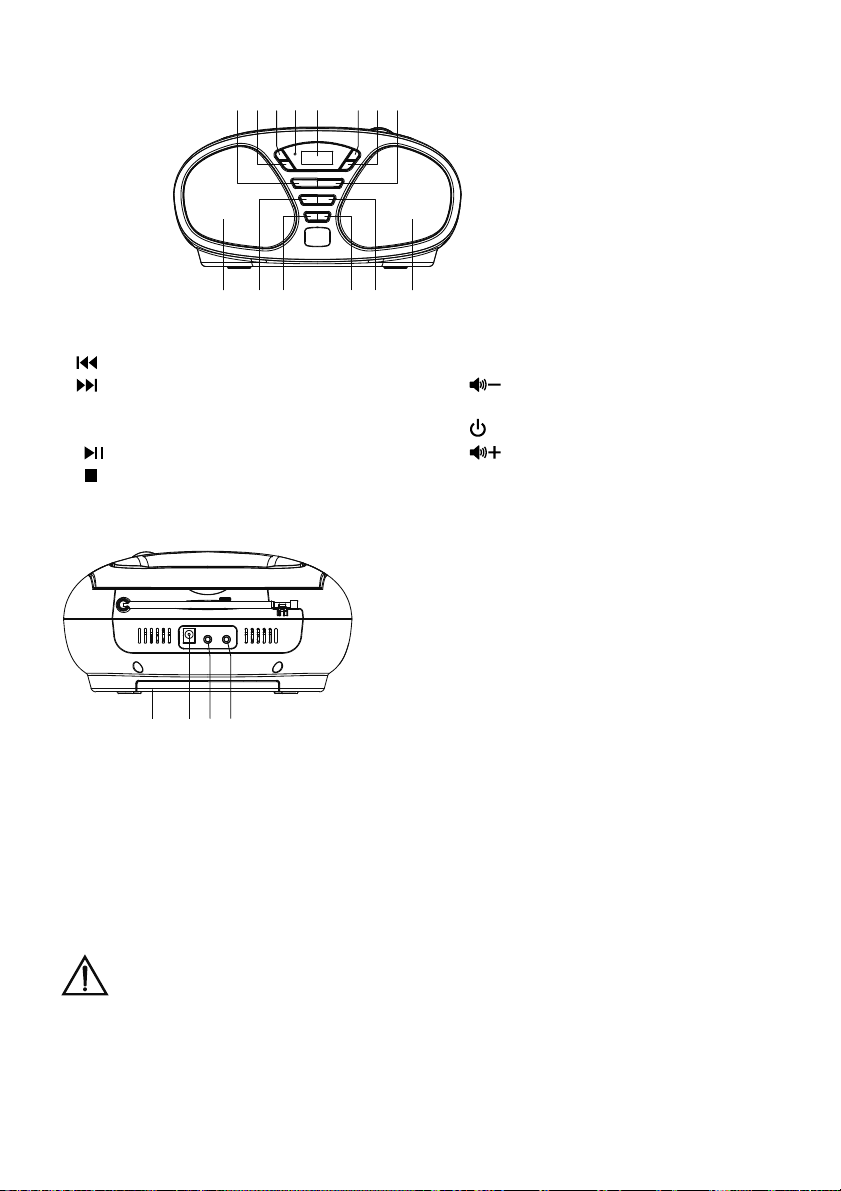
Front
13 14 15 16 17 13
5. MEM/PROG button
6.
7.
8. POWER indicator light
9. Display
/CH+ button
10.
11. /CH- button
Rear
5678 9 101112
12. REP button
13. SPEAKERS
14.
15. S/MODE button
16.
17.
18. Battery cover
19. DC IN 9V jack
20. PHONE jack
21. AUX IN jack
18 19 20 21
BATTERY OPERATION (NOT SUPPLIED)
1. Remove the battery cover.
2. Insert six C size batteries into the battery compartment.
• Make sure all batteries are inserted with the correct polarity as shown on the inside of the
battery compartment.
3. Replace the battery cover.
If the unit is not to be used for a prolonged period of time, remove the batteries to avoid
damage by battery leakage.
EN-4
Page 7
MAINS OPERATION
1. Place the player on a flat stable surface.
2. Plug the mains lead into the DC IN 9V jack located on the rear of the player ensuring that the
plug is pushed fully into the jack.
3. Plug the other end of the mains lead into the mains socket.
The mains socket used for the player must remain accessible during normal use. In
order to disconnect the player from the mains, the mains plug should be removed from the
mains power socket completely.
RADIO OPERATION
1. Extend the telescopic aerial.
• Note: Fully extend and reposition the aerial for optimum reception.
2. Press
3. Repeatedly press S/MODE to switch the unit to the FM radio mode.
4. Adjust the volume by repeatedly pressing
5. Repeatedly press
to turn the unit on.
• The POWER indicator light will illuminate.
/ to tune in to the desired station.
• Press and hold
/ for auto forward or backward radio station searching.
/ .
PRESETTING YOUR FAVOURITE RADIO STATIONS
Up to 20 FM radio stations can be preset.
1. Follow steps in "RADIO OPERATION" and tune in to the station that you wish to preset.
2. Press MEM/PROG.
• “MEM” and the memory slot number will flash on the display.
3. Repeatedly press
4. Press MEM/PROG again to store the station.
5. Repeat steps 1 to 4 to store desired stations.
To listen to preset radio stations, repeatedly press
station.
/CH+ or /CH- to select the desired memory slot.
/CH+ or /CH- to select the desired radio
DISCS OPERATION
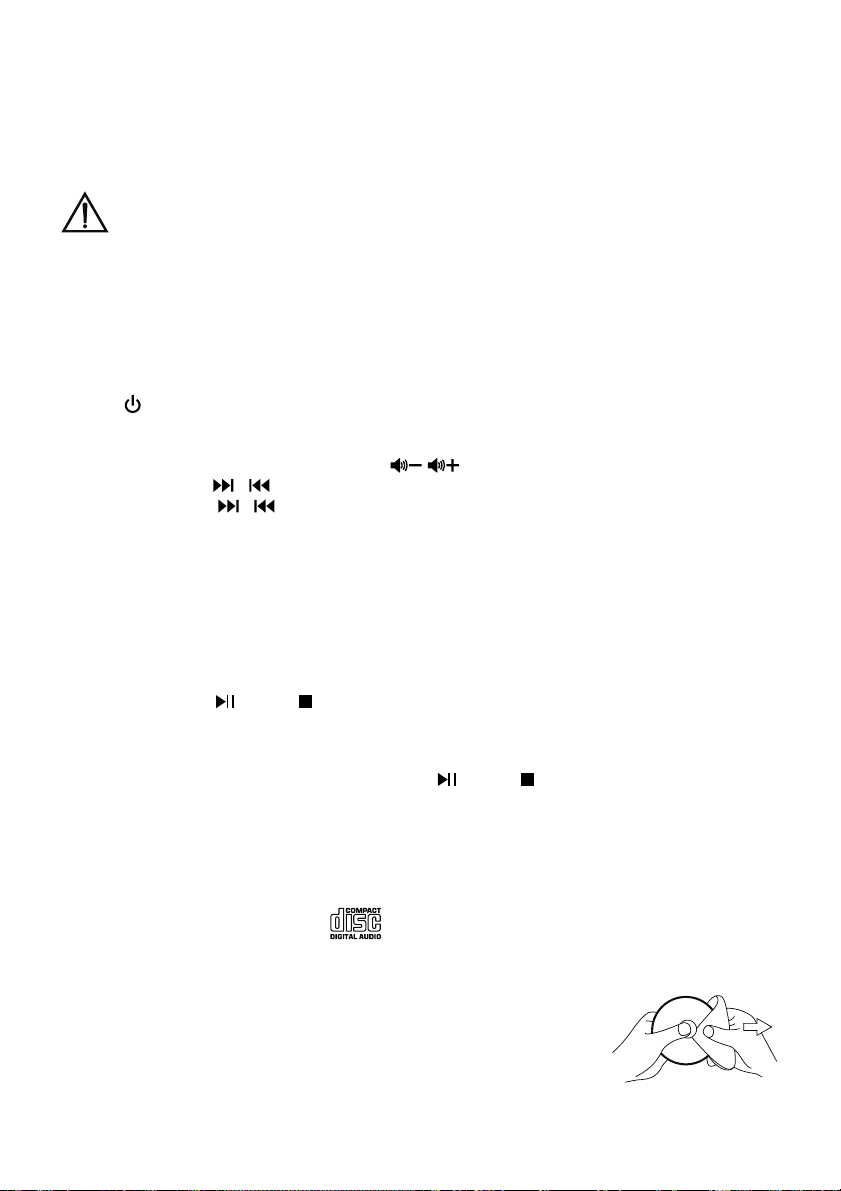
Compact discs
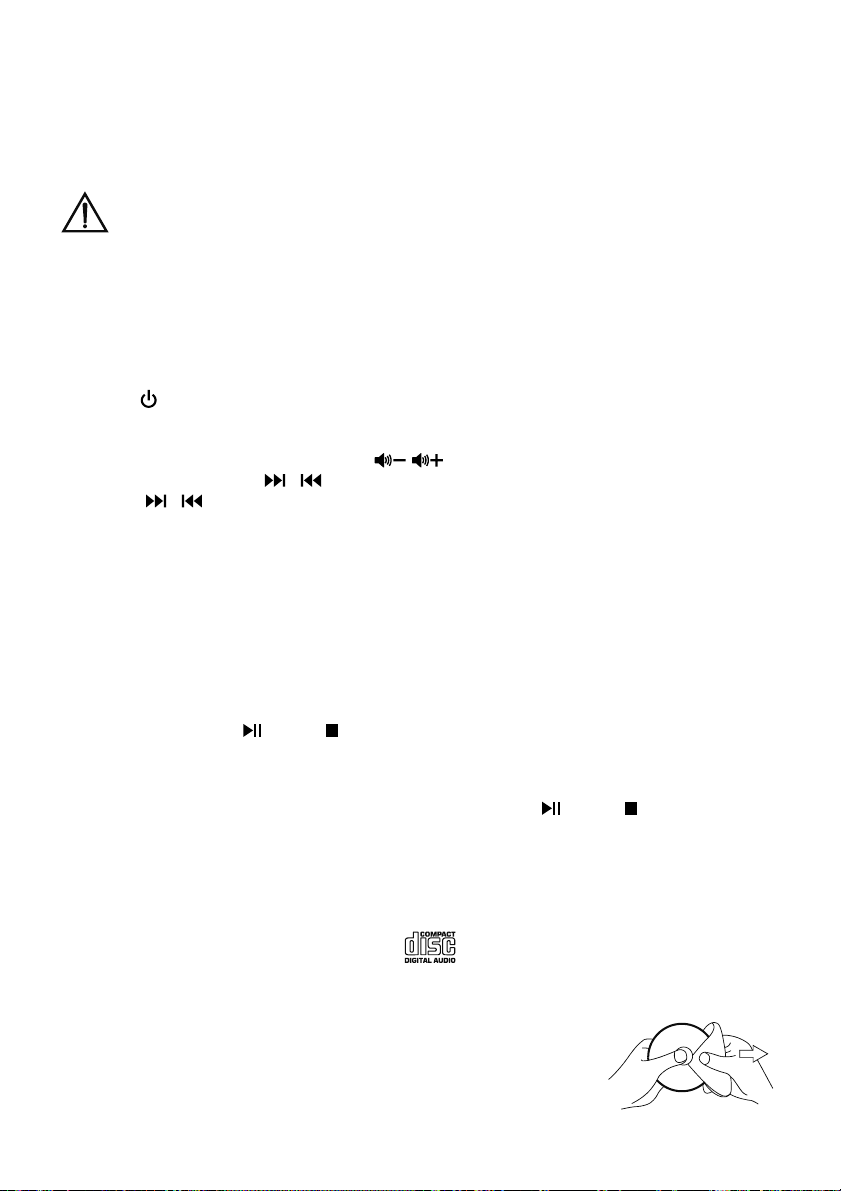
Use only Digital Audio CDs with the
Never write on a CD or attach any sticker to the CD. Always hold the CD at the edge and store it
in its box after use with the label facing up.
To remove dust and dirt, breathe on the CD and wipe it with a soft, lint
free cloth in a straight line from the centre towards the edge.
Cleaning agents may damage the CD.
Do not expose the CD to rain, moisture, sand or to excessive heat.
symbol.
EN-5
Page 8
CD-R/CD-RW discs
The player can playback CD-R/CD-RW discs that have been finalised upon completion of
recording.
The player may fail to playback some CD-R/CD-RW discs due to poor recording and wide
variation in quality of the CD-R/CD-RW discs.
Inserting a CD
1. Open the CD door by the CD door open area.
2. Insert a disc on the disc tray with the label side facing up.
3. Close the CD door.
Playing a CD
1. Press
2. Repeatedly press S/MODE to switch the unit to the CD mode.
3. The player will automatically start playback from the first track.
4. Adjust the volume by repeatedly pressing
5. To pause playback press
6. To resume playback, press
7. To stop playback, press
Note:
• The CD door should only be opened when the CD is in stop mode.
• If the unit is in the CD stop mode position for approximately one hour, it will automatically
switch to the standby mode.
Selecting a track
While the CD is playing, press
Note:
• Press
• You can also skip to a desired track when the player is in stop mode. Press
the selected track.
Search function
While the CD is playing, press and hold
the track is reached.
to turn the unit on.
• The POWER indicator light will illuminate.
• The player will scan the contents of the CD. The total number of tracks will then be
displayed.
/ .
/CH+.
• The current playing time will flash on the display.
/CH+ again.
/CH-.
/ to select the desired track.
once to go to the beginning of current track. Press twice to go to previous track.
/CH+ to play
/ . Release the button when the desired part of
EN-6
Page 9
CD repeat mode
While the CD is playing, repeatedly press REP to select the desired repeat mode.
Repeat icon on the display Description
“REP” flashes
“REP” stops flashing
“INTRO”
“RAN”
No repeat icon
Programmed play
By programming the player you can play up to 20 tracks in any desired order.
1. While the CD is in stop mode, press MEM/PROG.
• “PROG” and “P-01” will flash on the display.
2. Repeatedly press
3. Press MEM/PROG again to store the track.
4. Repeat the above steps until you have completed your programme.
5. Press /CH+ to commence play of selected tracks.
Erasing a programme
Press
/CH- until “PROG” disappears on the display.
/
To repeat a single track
To repeat all tracks
To play the first 10 seconds of each track
Random playback
Normal playback
to select the desired track number.
AUX IN
Connect an audio cable (not supplied) to the AUX IN jack on the rear of the unit. Connect the
other end to a suitable output socket on your auxiliary device.
In power on state, repeatedly press S/MODE to switch the unit to the AUX mode.
You can play music from an auxiliary device through the speakers of the player.
STEREO PHONE JACK
A stereo phone jack is provided on the rear of the player so that you can listen without
disturbing others. To use this jack, plug in the headphones/earphones (not supplied) and adjust
the volume to a preferred level.
Note: When headphones/earphones are connected, the speakers of the player will be muted.
EN-7
Page 10
TROUBLESHOOTING
Problem Possible Cause Possible Solution
The player will not
play.
CD skips while playing. Disc is dirty or scratched. Wipe the disc with a cloth or use
Radio sound distorted. 1. The station is not tuned in.
No radio sound. 1. The unit is not in radio mode.
1. Unit not in CD mode.
2. CD is not installed or installed
incorrectly.
2. There is interference.
2. The volume is on the
minimum setting.
1. Select CD mode.
2. Load a CD with label side up.
another disc.
1. Fine tune the station.
2. Reposition the unit.
1. Select radio mode.
2. Adjust the volume level.
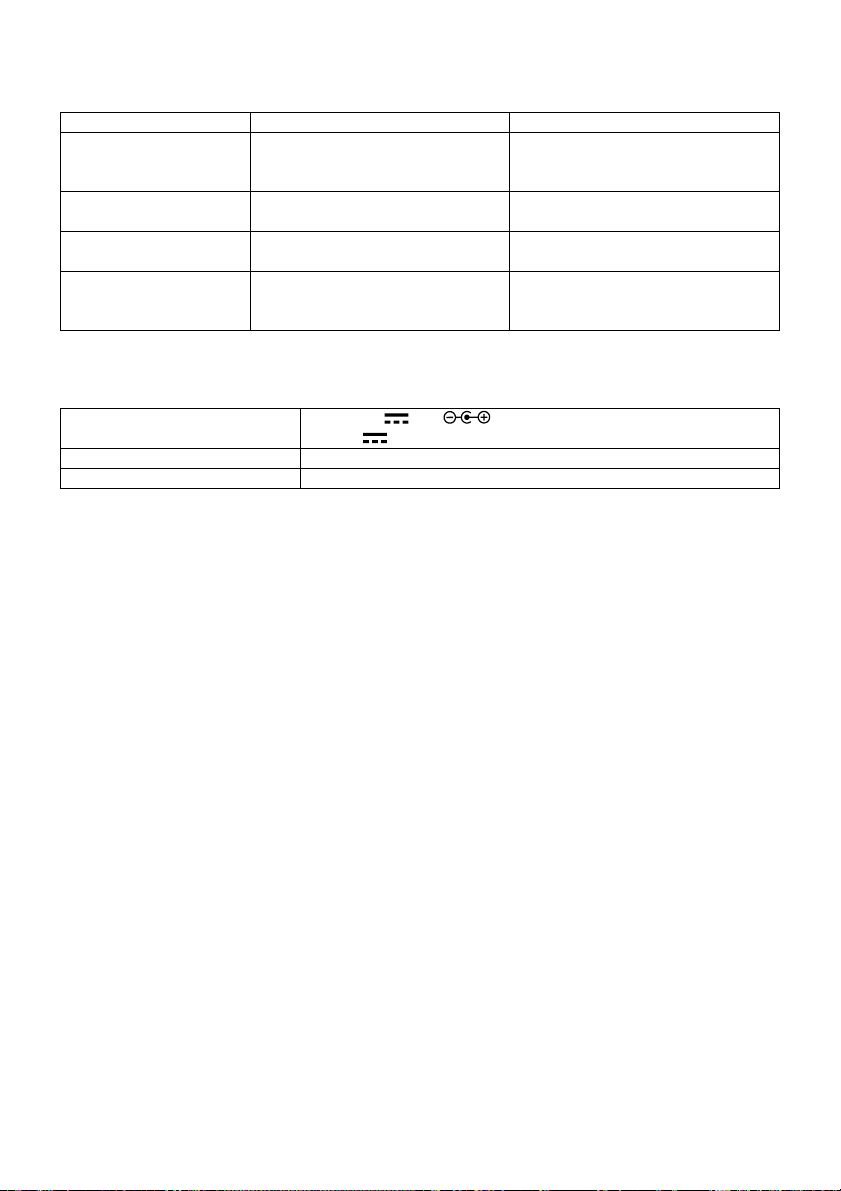
SPECIFICATIONS
Power Supply:
Power Consumption:
Radio Frequency Range:
DC IN 9V
DC 9V
9 W
FM 87.5 – 108 MHz
1 A (AC adapter)
(UM-2 1.5Vx6 batteries)
We apologise for any inconvenience caused by minor inconsistencies in these instructions,
which may occur as a result of product improvement and development.
Kesa Electricals © UK: EC1N 6TE 24 / 10 / 2013
EN-8
Page 11

Table des matières
AVERTISSEMENTS ................................................................................................................... 2
CONSIGNES DE SÉCURITÉ IMPORTANTES .......................................................................... 2
DESCRIPTION .......................................................................................................................... 3
INSTALLATION DES PILES (NON FOURNIES) ........................................................................ 4
INSTALLER L’APPAREIL ........................................................................................................... 5
UTILISER LA RADIO ................................................................................................................. 5
PRÉRÉGLER VOS STATIONS DE RADIO PRÉFÉRÉES ......................................................... 5
UTILISER LE LECTEUR CD ...................................................................................................... 5
ENTRÉE AUX (AUX IN) ............................................................................................................. 7
PRISE CASQUE STÉRÉO ........................................................................................................ 7
DÉPANNAGE ............................................................................................................................ 8
SPÉCIFICATIONS ..................................................................................................................... 8
FR-1
Page 12
AVERTISSEMENTS
Cet appareil est destiné à un usage domestique uniquement. Toute utilisation autre que celle
prévue pour cet appareil, ou pour une autre application que celle prévue, par exemple une
application commerciale, est interdite.
Aération
Prévoyez un espace libre d'au moins 10 cm tout autour du produit.
Il convient que l’aération ne soit pas gênee par l’obstruction des ouvertures d’aération par des
objets tels que journaux, nappes, rideaux, etc.
Il convient de ne pas placer sur l’appareil de sources de flammes nues, telles que des bougies
allumées.
Il convient d’attirer l’attention sur les problèmes d’environnement à la mise au déchet des piles.
Cet appareil n'est pas destiné à être utilisé sous un climat tropical.
L’appareil ne doit pas être exposé á des égouttements d'eau ou des éclaboussures et de plus
qu'aucun objet rempli de liquide tel que des vases ne doit être placé sur l’ appareil.
Les piles (piles installées) ne doivent pas être exposées à une chaleur excessive telle que celle
du soleil, d'un feu ou d'origine similaire.
Lorsque la prise du réseau d'alimentation ou une prise placée sur
l’appareil est utilise comme dispositif de déconnexion, ce dispositif doit demeure aisément
accessible.
La plaque signalétique se trouve en dessous de l'appareil.
CONSIGNES DE SÉCURITÉ IMPORTANTES
Symboles
Appareil laser de classe 1
Cet appareil est équipé d’une
double isolation, il n’est donc pas
nécessaire de le connecter à la
terre.
Ce symbole indique que l’appareil est
conforme aux normes européennes de
sécurité et de compatibilité
électromagnétique.
Une tension électrique
dangereuse présentant un risque
de choc électrique est présente à
l'intérieur de cet appareil.
La documentation fournie avec cet
appareil contient d'importantes
instructions d'utilisation et d'entretien.
Cet appareil est équipé d'un laser à basse puissance. Faisceau laser invisible quand
le boîtier est ouvert ou quand le mécanisme de fermeture est faussé.
Évitez toute exposition au faisceau laser.
ATTENTION
RISQUE DE CHOC ÉLECTRIQUE
NE PAS OUVRIR
FR-2
Page 13

Ce lecteur CD intègre un dispositif laser. L’utilisation de commandes de contrôle et de
dispositifs de réglages, ou l’exécution de procédures autres que ceux spécifiés dans les
présentes peut provoquer l’exposition à un rayonnement dangereux.
Pour éviter l’exposition directe au faisceau laser, n'ouvrez pas le boîtier.
Ne regardez jamais directement dans le faisceau laser.
N'installez pas cet appareil dans un espace confiné, par exemple dans une bibliothèque ou un
autre meuble.
MISES EN GARDE CONCERNANT LES PILES : Les piles ne doivent être manipulées que par
les adultes. Ne laissez pas un enfant utiliser cet appareil si le couvercle du logement des piles
n'est pas correctement refermé.
Cet appareil fonctionne avec 6 piles de type C. Ces piles se trouvent à l'intérieur de l’appareil et
sont directement accessibles.
Ouvrez le couvercle du logement des piles sous l’appareil pour sortir les piles.
Lors de la mise au rebut des piles, déposez-les dans un centre de recyclage local.
AVERTISSEMENT : pour protéger votre ouïe
Il est important que n'importe quel casque ou écouteurs utilisés en conjonction avec ce produit
soient conformes à la norme Français Arrêté du 8 novembre 2005 portant application de l'article
L. 5232-1 Ceci garantit que le niveau sonore ne dépasse pas 100 dB SPL. L'écoute prolongée à
volume élevé pendant plus de cinq heures par semaine peut endommager votre audition.
A pleine puissance, l’écoute prolongée du baladeur peut endommager l’oreille
de l’utilisateur.
Afin d’éviter des dommages auditifs éventuels, ne pas écouter à un niveau
sonore élevé pendant une longue durée.
DESCRIPTION
Dessus
1234
1. Poignée
2. Antenne télescopique
3. Couvercle du plateau de lecture CD
4. Bouton d’ouverture du plateau de lecture CD
FR-3
Page 14

Devant
5. Touche MEM/PROG
6.
7.
8. Voyant d’alimentation
9. Affichage
10. Touche
/CH+
11. Touche /CH-
Dos
5678 9 101112
13 14 15 16 17 13
12. Touche REP
13. Haut-parleurs
14.
15. Touche S/MODE
16.
17.
18. Couvercle du logement des piles
19. Prise d’alimentation (DC IN) 9 V
20. Prise casque
21. Entrée AUX (AUX IN)
18 19 20 21
INSTALLATION DES PILES (NON FOURNIES)
1. Ouvrez le couvercle du logement des piles.
2. Insérez 6 piles de type C dans le logement.
• Insérez correctement toutes les piles en respectant la polarité indiquée dans le logement
des piles.
3. Refermez le couvercle du logement des piles.
Avant toute période d’inutilisation prolongée, retirez les piles pour éviter que l’appareil
ne soit détérioré si elles se mettent à fuir.
FR-4
Page 15

INSTALLER L’APPAREIL
1. Posez le lecteur sur une surface plane et stable.
2. Branchez la fiche du cordon d’alimentation dans la prise d'alimentation (DC IN) 9 V au dos du
lecteur en veillant à l'enfoncer complètement dans la prise.
3. Branchez l’autre fiche du cordon d'alimentation dans une prise secteur.
La prise secteur dans laquelle le lecteur est branché doit rester accessible pendant
l’utilisation normale. Pour débrancher complètement le lecteur du secteur, sortez complètement
la fiche de son cordon d’alimentation de la prise secteur.
UTILISER LA RADIO
1. Déployez l’antenne télescopique.
• Remarque : Déployez-la entièrement et modifiez sa position pour optimiser la réception.
2. Appuyez sur
• Le voyant d’alimentation s’allume.
3. Appuyez plusieurs fois sur la touche S/MODE pour sélectionner le mode radio FM.
4. Réglez le volume en appuyant plusieurs fois sur les touches / .
5. Appuyez plusieurs fois sur les touches
que vous voulez écouter.
• Maintenez l’une des touches
automatiquement la station suivante ou précédente.
pour allumer l’appareil.
/ pour régler la fréquence de la station de radio
/ appuyée pour que l’appareil recherche
PRÉRÉGLER VOS STATIONS DE RADIO PRÉFÉRÉES
Vous pouvez prérégler jusqu'à 20 stations FM.
1. Réglez la fréquence d’une station de radio en procédant comme indiqué au chapitre
« RADIO ».
2. Appuyez sur la touche MEM/PROG.
• « MEM » et un numéro de mémoire clignotent à l’écran.
3. Sélectionnez un numéro de mémoire en appuyant plusieurs fois sur la touche
/CH-.
4. Appuyez à nouveau sur la touche MEM/PROG pour mémoriser la station.
5. Répétez les étapes 1 à 4 pour prérégler d’autres stations.
Pour écouter l’une des stations de radio préréglées, appuyez plusieurs fois sur la touche
/CH+ ou /CH- pour la sélectionner.
/CH+ ou
UTILISER LE LECTEUR CD
Disques compacts
Utilisez exclusivement des CD audio numériques portant le symbole
N’écrivez jamais sur un CD et ne collez jamais d'autocollant dessus. Saisissez toujours les CD
par leur bord et rangez-les dans leur boîtier après utilisation en positionnant leur face imprimée
vers le haut.
FR-5
.
Page 16

Pour enlever les poussières et saletés d’un CD, soufflez dessus et
essuyez-le avec une lingette douce et ne peluchant pas en procédant
par lignes droites du centre vers le bord extérieur.
L’utilisation de produit de nettoyage peut détériorer les CD.
N’exposez pas les CD à la pluie, à l’humidité, au sable ou à une chaleur excessive.
CD-R/CD-RW
Le lecteur peut lire les disques CD-R/CD-RW finalisés après gravage.
Le lecteur peut ne pas pouvoir lire certains CD-R/CD-RW mal gravés ou dont la qualité ne
convient pas.
Insérer un CD
1. Ouvrez le couvercle du plateau de lecture CD en appuyant sur le bouton d’ouverture.
2. Insérez un disque sur le plateau de lecture avec sa face imprimée vers le haut.
3. Refermez le couvercle du plateau de lecture.
Lire un CD
1. Appuyez sur
pour allumer l’appareil.
• Le voyant d’alimentation s’allume.
2. Appuyez plusieurs fois sur la touche S/MODE pour sélectionner le mode CD.
• Le lecteur détecte le contenu du CD. Le nombre total de pistes s’affiche.
3. Le lecteur démarre automatiquement la lecture à partir de la première piste.
4. Réglez le volume en appuyant plusieurs fois sur les touches
5. Pour mettre la lecture en pause, appuyez sur la touche
• Le temps de lecture actuel se met à clignoter à l’écran.
6. Pour reprendre la lecture, appuyez à nouveau sur la touche
7. Pour arrêter la lecture, appuyez sur la touche
Remarque :
• Le couvercle du plateau de lecture CD ne doit être ouvert que lorsque la lecture CD est à
l’arrêt (mode stop et non pause).
• Après une heure environ d’arrêt de la lecture, l’appareil se met automatiquement en veille.
Sélectionner une piste
Pendant la lecture d’un CD, sélectionnez une piste avec les touches
Remarque :
• Appuyez une fois sur la touche pour retourner au début de la piste en court de lecture.
Appuyez deux fois sur la touche
pour sauter à la piste précédente.
• Vous pouvez également sélectionner une piste quand la lecture est arrêtée. Appuyez sur
/CH+ pour lire la piste sélectionnée.
/ .
/CH+.
/CH+.
/CH-.
/ .
FR-6
Page 17

Rechercher un passage
Pendant la lecture d’un CD, maintenez la touche
ou appuyée. Relâchez la touche quand
vous avez trouvé le passage recherché de la piste.
Répéter la lecture
Pendant la lecture d’un CD, appuyez plusieurs fois sur la touche REP pour sélectionner le mode
de répétition souhaité.
Icône répétition affichée Description
« REP » clignote
« REP » s’arrête de clignoter
« INTRO »
« RAN »
Pas d’icône répétition affichée
Répéter la lecture d’une seule piste
Répéter la lecture de toutes les pistes
Lire les 10 premières secondes de chaque piste
Lecture aléatoire
Lecture normale
Programme de lecture
Vous pouvez programmer la lecture de 20 pistes au maximum dans n'importe quel ordre.
1. Quand la lecture d'un CD est à l’arrêt (et non en pause), appuyez sur MEM/PROG.
• « PROG » et « P-01 » clignotent à l’écran.
2. Appuyez plusieurs fois sur
/
pour sélectionner le numéro de piste désiré.
3. Appuyez à nouveau sur la touche MEM/PROG pour mémoriser la piste.
4. Répétez cette procédure jusqu'à ce que votre programme soit terminé.
5. Appuyez sur la touche /CH+ pour démarrer la lecture des pistes programmées.
Effacer un programme
Appuyez sur la touche
/CH- jusqu’à ce que l’écran n’affiche plus « PROG ».
ENTRÉE AUX (AUX IN)
Branchez un câble audio (non fourni) dans la prise AUX IN au dos de l'appareil. Branchez
l’autre fiche du câble dans la sortie audio appropriée d’une source audio externe.
Quand l’appareil est allumé, appuyez plusieurs fois sur la touche S/MODE pour sélectionner le
mode AUX.
Vous pouvez écouter la musique de la source audio externe via les haut-parleurs du lecteur.
PRISE CASQUE STÉRÉO
La prise casque stéréo au dos du lecteur vous permet d’utiliser le lecteur sans déranger les
autres. Pour utiliser cette prise, branchez des écouteurs ou un casque (non fourni) et réglez le
volume au niveau désiré.
Remarque : Quand des écouteurs ou un casque sont branchés, les haut-parleurs du lecteur ne
diffusent plus de sons.
FR-7
Page 18

DÉPANNAGE
Problème
Le lecteur ne lit pas le
CD.
Cause possible
1. Le mode CD n’a pas été
sélectionné.
2. Il n'y a pas de CD dans le plateau
Solution possible
1. Sélectionnez le mode CD.
2. Insérez un CD, face
imprimée vers le haut.
de lecture ou le CD inséré n'est
Essuyez le disque avec une
lingette ou changez de disque.
1. Effectuez le réglage fin de la
fréquence.
2. Repositionnez l’appareil.
1. Sélectionnez le mode radio.
2. Régler le volume.
La lecture du CD
saute.
Le son de la radio est
déformé.
L’appareil ne diffuse
pas la radio.
pas correctement positionné.
Le disque est rayé ou encrassé.
1. La fréquence n'a pas été
correctement réglée.
2. Il y a des interférences.
1. Le mode radio n'a pas été
sélectionné.
2. Le volume est réglé au minimum.
SPÉCIFICATIONS
Alimentation :
Consommation électrique :
Bande de fréquences radio :
DC IN 9 V 1 A (Adaptateur secteur)
DC 9 V
9 W
FM 87.5 – 108 MHz
(6 piles UM-2 1,5 V)
En raison des modifications et améliorations apportées à nos produits, de petites incohérences
peuvent apparaître dans cette notice d’utilisation. Veuillez nous excuser pour la gêne
occasionnée.
Kesa Electricals © UK : EC1N 6TE 24 / 10 / 2013
FR-8
Page 19

Inhoudsopgave
WAARSCHUWINGEN ............................................................................................................... 2
BELANGRIJKE VEILIGHEIDSVOORSCHRIFTEN .................................................................... 2
BESCHRIJVING VAN DE ONDERDELEN ................................................................................. 3
BATTERIJ PLAATSEN (NIET BIJ DE LEVERING INBEGREPEN) ............................................ 4
GEBRUIK MET AANSLUITING OP HET LICHTNET ................................................................. 5
RADIO BEDIENEN .................................................................................................................... 5
UW FAVORIETE RADIOSTATIONS IN HET GEHEUGEN OPSLAAN ....................................... 5
DISKS AFSPELEN ..................................................................................................................... 5
AUX IN ....................................................................................................................................... 7
STEREO KOPTELEFOONAANSLUITING ................................................................................. 7
PROBLEEMOPLOSSING .......................................................................................................... 8
TECHNISCHE GEGEVENS ....................................................................................................... 8
NL-1
Page 20

WAARSCHUWINGEN
Dit apparaat is alleen bedoeld voor huishoudelijk gebruik en mag niet voor andere doeleinden of
toepassingen worden gebruikt, zoals niet-huishoudelijk gebruik of in een commerciële omgeving.
Ventilatie
Laat minstens een vrije ruimte van 10cm rond het product.
Belemmer de ventilatie niet door het afdekken van de ventilatie-openingen met voorwerpen
zoals een krant, tafelkleed, gordijn, enz.
Plaats geen bronnen van open vuur, zoals kaarsen, op het apparaat.
Houd rekening met het milieu bij het weggooien van batterijen.
Dit apparaat is niet geschikt voor gebruik in een tropisch klimaat.
Stel het apparaat niet bloot aan druppelend of spattend water en plaats geen, met vloeistof
gevulde, voorwerpen zoals vazen op het apparaat.
Stel batterijen (accupack of geïnstalleerde batterijen) nooit bloot aan overmatige warmte zoals
zonlicht, vuur, enz.
Daar waar de NETstekker of een aansluiting op een apparaat als uitschakelapparaat wordt
gebruikt, dient een dergelijke voorziening gemakkelijk bereikbaar zijn voor de bediening.
Het nominale specificatieplaatje is te vinden op de onderzijde van het apparaat.
BELANGRIJKE VEILIGHEIDSVOORSCHRIFTEN
Symbolen
Dit apparaat is dubbel
geïsoleerd en heeft geen
aardaansluiting nodig.
Deze markering is aangebracht om aan
te geven dat het apparaat voldoet aan
de Europese richtlijnen inzake veiligheid
en elektromagnetische compatibiliteit.
In het inwendige van het
apparaat bestaat een
gevaarlijke spanning die een
risico op elektrische schokken
Er staan belangrijke gebruiks- en
onderhoudsinstructies in de
documenten die bij dit apparaat zijn
geleverd.
oplevert.
Klasse 1 laser product
Dit product bevat een laser met een laag vermogen. Onzichtbare laserstraling
wanneer de behuizing wordt geopend en de vergrendelingen worden genegeerd.
Vermijd blootstelling aan de straal.
VOORZICHTIG
RISICO OP ELEKTRISCHE SCHOKKEN
NIET OPENEN
NL-2
Page 21

Deze digitale diskspeler maakt gebruik van een lasersysteem. Het gebruik van gelijk welke
bediening, aanpassing of procedure hier niet vermeld kan een gevaarlijke blootstelling aan
laserstraling veroorzaken.
Open de behuizing niet om te vermijden dat u rechtstreeks wordt blootgesteld aan een
laserstraal.
Kijk nooit rechtstreeks in de laserstraal.
Installeer dit product niet in een nauwe ruimte zoals een boekenkast of gelijksoortig meubilair.
BATTERIJWAARSCHUWINGEN: Alleen volwassenen mogen batterijen installeren. Een kind
mag dit apparaat alleen gebruiken als het batterijdeksel op een juiste manier op het batterijvak
is vastgemaakt.
Dit product werkt op zes batterijen, formaat C. Deze batterijen bevinden zich in het apparaat en
zijn gemakkelijk toegankelijk.
Haal het batterijdeksel aan de onderkant van het apparaat eraf om de batterijen te verwijderen.
Lever uw lege batterijen in bij uw lokaal inzamelpunt.
WAARSCHUWING: om uw gehoor te beschermen
Het is belangrijk om met dit product een kop- of oortelefoon te gebruiken conform het besluit
van de Franse regering van 8 november 2005 houdende toepassing van artikel L.5232-1. Dit
besluit waarborgt dat het geluidsniveau 100 dB SPL niet overschrijdt. Een langdurige
blootstelling aan een hoog volume gedurende langer dan vijf uur per week kan uw gehoor
beschadigen.
Een langdurige blootstelling aan een hoog volume met gebruik van een kop- of
oortelefoon kan het gehoor van de gebruiker beschadigen.
Om gehoorbeschadiging te vermijden, luister niet gedurende een lange periode
aan een hoog volumeniveau.
BESCHRIJVING VAN DE ONDERDELEN
Bovenkant
1234
1. Handgreep
2. Telescopische antenne
3. CD-klep
4. Uitsparing voor het openen van de CD-klep
NL-3
Page 22

Voorkant
5678 9 101112
13 14 15 16 17 13
5. MEM/PROG knop
6.
7.
8. POWER controlelampje
9. Display
/CH+ knop
10.
11. /CH- knop
Achterkant
12. Rep knop
13. LUIDSPREKERS
14.
15. S/MODE knop
16.
17.
18. Batterijdeksel
19. DC IN 9V-aansluiting
20. KOPTELEFOONaansluiting
21. AUX IN aansluiting
18 19 20 21
BATTERIJ PLAATSEN (NIET BIJ DE LEVERING INBEGREPEN)
1. Verwijder het batterijdeksel.
2. Plaats zes batterijen formaat C in het batterijvak.
• Controleer of alle batterijen met de polen in de juiste richting liggen zoals aan de
binnenkant van het batterijvak is weergegeven.
3. Plaats het batterijdeksel terug.
Haal de batterijen uit het apparaat als u het gedurende een lange periode niet gebruikt,
om schade veroorzaakt doordat batterijen gaan lekken te vermijden.
NL-4
Page 23
GEBRUIK MET AANSLUITING OP HET LICHTNET
1. Plaats de speler op een stabiel en vlak oppervlak.
2. Sluit het lichtnetsnoer met de stekker aan op de DC IN 9V aansluiting aan de achterkant van
de speler. Zorg dat u de stekker volledig in de aansluiting steekt.
3. Doe de andere stekker in het stopcontact van het lichtnet.
Het voor de radio gebruikte stopcontact van het lichtnet moet tijdens normaal gebruik
van de radio steeds bereikbaar zijn. Om de aansluiting van de radio op het lichtnet te verbreken
moet de stekker uit het stopcontact worden gehaald.
RADIO BEDIENEN
1. Trek de telescoopantenne uit.
• Opmerking: Trek voor een optimale ontvangst de antenne helemaal uit.
2. Druk op
• Het POWER controlelampje brandt.
3. Druk meerdere keren op S/MODE om het toestel op de FM radiomodus te zetten.
4. Regel het volume door herhaaldelijk op
5. Druk meerdere keren op
• Houd
zoeken.
om het toestel in te schakelen.
/ te drukken.
/ om op het gewenste station af te stemmen.
/ ingedrukt om automatisch vooruit of achteruit naar een radio station te
UW FAVORIETE RADIOSTATIONS IN HET GEHEUGEN OPSLAAN
U kunt tot 20 FM radiostations in het geheugen vastleggen.
1. Volg de stappen onder "DE RADIO BEDIENEN" en stem af op het radiostation dat u in het
geheugen wilt opslaan.
2. Druk op MEM/PROG.
• “MEM” en het nummer van de geheugenplaats begint op het display te knipperen.
3. Druk herhaaldelijk op
4. Druk nog een keer op MEM/PROG om het station op te slaan.
5. Herhaal stappen 1 tot 4 om meer radiostations op te slaan.
Om naar al ingestelde radiostations te luisteren herhaaldelijk op
het gewenste station te selecteren.
/CH+ of /CH- om de gewenste geheugenplaats te selecteren.
/CH+ of /CH- drukken, om
DISKS AFSPELEN
Compact discs
Gebruik uitsluitend digitale audio cd's met het
Schrijf in geen geval op een cd en plak er ook geen stickers op. Houd de cd altijd aan de rand
vast en doe hem na gebruik terug in het doosje met de titel naar boven.
Verwijder stof en vuil door op de cd te ademen en hem met een zachte,
niet pluizende doek in één haal, vanaf het midden naar de rand, af te
vegen.
symbool.
NL-5
Page 24
Schoonmaakmiddelen kunnen de cd beschadigen.
Stel de cd niet bloot aan regen, vocht, zand of extreme hitte.
CD-R/CD-RW discs
De speler kan CD-R/CD-RW-discs afspelen die nadat het opnemen was afgelopen, zijn voltooid
of gefinaliseerd.
Mogelijk kan de speler sommige CD-R/CD-RW-discs niet afspelen door hun slechte
opnamekwaliteit of door de grote verscheidenheid in kwaliteit van CD-R/CD-RW-discs.
Een CD inleggen
1. Open de CD-klep bij de uitsparing voor het openen.
2. Plaats een disk met de bedrukte zijde naar boven gericht.
3. Sluit de CD-klep.
Een cd afspelen
1. Druk op
• Het POWER controlelampje brandt.
2. Druk meerdere keren op S/MODE om het toestel op de CD-modus te zetten.
• De speler scant nu de inhoud van de cd. Het totale aantal nummers wordt weergegeven.
3. De cd wordt automatisch vanaf het eerste nummer afgespeeld.
4. Regel het volume door herhaaldelijk op
5. Druk, om het afspelen te pauzeren, op
• De huidige speelduur knippert op het display.
6. Druk, om het afspelen te hervatten, nog een keer op
7. Druk, om het afspelen te stoppen, op
Opmerking:
• Open het cd-deksel alleen wanneer de cd in de stopmodus is.
• Staat het apparaat gedurende 120 minuten in de cd stopmodus dan schakelt het automatisch
over op de stand-by-modus.
Een nummer kiezen
Druk, terwijl de cd wordt afgespeeld op
Opmerking:
• Druk één keer op
keer op
• U kunt ook naar het gewenste nummer springen als de speler in de stopmodus staat. Druk op
/CH+ om het gekozen nummer af te spelen.
Zoekfunctie
Houd, terwijl de cd wordt afgespeeld
deel van het nummer is bereikt.
om het toestel in te schakelen.
/ te drukken.
/CH+.
/CH+ .
/CH-.
/ om het gewenste nummer te kiezen.
om naar het begin van het huidige nummer terug te keren. Druk twee
om naar het vorige nummer te gaan.
/ ingedrukt. Laat de knop los zodra het gewenste
NL-6
Page 25

Herhalingsmodus cd
Druk terwijl de cd wordt afgespeeld, herhaaldelijk op REP om de gewenste herhalingsmodus te
selecteren.
Herhalingssymbool op het display. Beschrijving
“REP” knippert
“REP” knippert niet meer
“INTRO”
“RAN”
Geen herhalingssymbool
Geprogrammeerd afspelen
Door de speler te programmeren, kunt u tot 20 nummers in elke gewenste volgorde afspelen.
1. Druk, met de cd in de stopmodus, op MEM/PROG.
• “PROG” en “P-01” gaan knipperen op het display.
2. Druk herhaaldelijk op
3. Druk nog een keer op MEM/PROG om het nummer op te slaan.
4. Herhaal bovenstaande stappen tot uw programma compleet is.
5. Druk op /CH+ om de gekozen nummers af te spelen.
Een programma wissen
Druk op
/CH- to “PROG” van het display verdwijnt.
/
Voor herhaling van één nummer
Voor herhaling van alle nummers
Om de eerste 10 seconden van elke track af te spelen
Willekeurig afspelen
Normaal afspelen
om het volgnummer van het gewenste nummer te selecteren.
AUX IN
Sluit een audiokabel (niet meegeleverd) aan op de AUX IN aansluiting aan de achterkant van
het apparaat. Sluit het andere uiteinde aan op een geschikte outputbus op uw andere apparaat.
Druk, terwijl het toestel aan staat, herhaaldelijk op S/MODE om het toestel in de
zetten.
U kunt muziek van uw andere apparaat via de luidsprekers van de speler beluisteren.
AUX
modus te
STEREO KOPTELEFOONAANSLUITING
Aan de achterkant van de speler zit een stereo koptelefoonaansluiting zodat u kunt luisteren
zonder anderen te storen.
Bij gebruik van deze aansluiting de koptelefoon/oortelefoons (niet bij de levering inbegrepen)
aansluiten en het volume op de gewenste sterkte zetten.
Opmerking: Wanneer de koptelefoon/ oortelefoons zijn aangesloten staan de luidsprekers op
mute.
NL-7
Page 26

PROBLEEMOPLOSSING
Probleem Mogelijke oorzaak Mogelijke oplossing
De speler speelt niets
af.
De cd slaat tijdens
het afspelen over.
Het geluid van de
radio is gestoord.
Geen radiogeluid. 1. Het apparaat staat niet in de
1. Het apparaat staat niet in de
cd-modus.
2. De cd is niet geplaatst of niet
goed geplaatst.
De disc is vuil of beschadigd Veeg de disc met een doek af of
1. Geen goede afstemming op de
zender.
2. Er is interferentie.
radio-modus.
2. Het volume staat te laag.
1. Selecteer de cd-modus.
2. Plaats de cd met het label naar
boven.
neem een andere disc.
1. Stem goed af op het station.
2. Plaats het apparaat anders.
1. Selecteer de radio-modus.
2. Pas het volume aan.
TECHNISCHE GEGEVENS
Voeding:
Stroomverbruik:
Radiofrequentiebereik:
DC IN 9V
DC 9V
9 W
FM 87,5 – 108 MHz
1 A (AC adapter)
(UM-2 1,5Vx6 batterijen)
We verontschuldigen ons voor enig ongemak veroorzaakt door kleine inconsistenties in deze
gebruikershandleiding, die kunnen voorkomen door productverbetering of –ontwikkeling.
Kesa Electricals © UK: EC1N 6TE 24 / 10 / 2013
NL-8
Page 27

Índice
ADVERTENCIAS ....................................................................................................................... 2
PRECAUCIONES DE SEGURIDAD IMPORTANTES ................................................................ 2
CONTROLES ............................................................................................................................. 3
FUNCIONAMIENTO CON PILAS (NO SUMINISTRADAS) ....................................................... 4
MODO DE EMPLEO .................................................................................................................. 5
UTILIZACIÓN DE LA RADIO ..................................................................................................... 5
PRESINTONIZACIÓN DE SUS EMISORAS FAVORITAS ......................................................... 5
UTILIZACIÓN DE DISCOS ........................................................................................................ 5
AUX IN ....................................................................................................................................... 7
CONECTOR DE AURICULARES ESTÉREO ............................................................................ 7
SOLUCIÓN DE PROBLEMAS ................................................................................................... 8
ESPECIFICACIONES ................................................................................................................ 8
ES-1
Page 28

ADVERTENCIAS
Este aparato ha sido diseñado únicamente para uso doméstico y, por lo tanto, no deberá
utilizarse para ningún otro fin ni en ninguna otra aplicación como, por ejemplo, en entornos no
domésticos o comerciales.
Ventilación
Deberá dejarse como mínimo un espacio libre de 10 cm alrededor del aparato.
No deberá dificultarse la ventilación del aparato mediante la obstrucción de las rejillas de
ventilación con objetos como periódicos, manteles, cortinas, etc.
No coloque objetos con llamas abiertas, tales como velas encendidas, sobre la unidad.
Sea considerado con el medio ambiente a la hora de desechar las pilas.
Este aparato no es adecuado para ser utilizado en climas tropicales.
El aparato no deberá exponerse a goteos o salpicaduras, ni se deberán colocar objetos llenos
de líquidos, como pueden ser jarrones, sobre el mismo.
Las pilas (batería o pilas instaladas) no deberán exponerse al calor excesivo de la luz directa
del sol, el fuego o fuentes similares.
Cuando se utilice el enchufe o el conector del aparato como dispositivo de desconexión, éste
deberá ser fácilmente accesible en todo momento.
La placa de marca está situada en la parte inferior del aparato.
PRECAUCIONES DE SEGURIDAD IMPORTANTES
Símbolos:
Este equipo está doblemente
aislado, por lo que no es
necesaria una conexión a tierra.
Dentro de este equipo existen
tensiones peligrosas que
constituyen un riesgo de
Producto láser de Clase 1
descarga eléctrica.
Esta unidad incorpora un dispositivo láser de baja potencia. Si se abre la carcasa y se
quitan los interbloqueos, la unidad dejará escapar una radiación láser invisible.
Evite la exposición al haz de láser.
Este símbolo aparece en los equipos
que cumplen con las normativas
europeas de seguridad y compatibilidad
electromagnética.
Este equipo viene acompañado de
documentación con importantes
instrucciones de uso y mantenimiento.
ATENCIÓN
RIESGO DE DESCARGA ELÉCTRICA
NO ABRIR
ES-2
Page 29

El reproductor de discos digitales utiliza un sistema láser. El uso de controles, ajustes o
procedimientos de uso diferentes a los especificados en este manual podría tener como
resultado una exposición a radiación peligrosa.
No abra la carcasa para evitar la exposición directa al haz de láser.
No mire nunca directamente al haz de láser.
No instale esta unidad en espacios cerrados, tales como estanterías u otros muebles de este
tipo.
ADVERTENCIAS SOBRE LAS PILAS: Las pilas únicamente deberán ser manipuladas por
personas adultas. No permita que ningún niño utilice este producto sin que la tapa del
compartimento de las pilas esté cerrada de modo seguro.
Este producto utiliza seis pilas tipo C. Estas pilas están ubicadas en el interior de la unidad y
son fácilmente accesibles.
Abra la tapa del compartimento de las pilas situado en la parte inferior de la unidad para retirar
las pilas.
Estas pilas deberán desecharse en el punto de recogida local para productos reciclables.
A pleno volumen, la escucha prolongada del reproductor portátil puede dañar la
capacidad auditiva del usuario.
ADVERTENCIA!
Para proteger su capacidad auditiva tenga en cuenta lo siguiente:
Es de suma importancia que cualquier tipo de auriculares o audífonos utilizado con este
producto cumplan los requisitos contemplados por la normativa francesa relacionada con la
aplicación del Artículo L. 5232-1 de la Ley aprobada el 8 de noviembre de 2005, donde se
estipula que el nivel de presión acústica (SPL) no debe superar los 100 dB. La escucha
prolongada a un volumen elevado durante más de cinco horas a la semana podría dañar su
capacidad auditiva.
A fin de prevenir posibles lesiones auditivas, no escuche a niveles de volumen
elevados por largos periodos de tiempo.
CONTROLES
Parte superior
1234
1. Asa
2. Antena telescópica
3. Tapa de CD
4. Área de apertura de la tapa de CD
ES-3
Page 30

Parte frontal
5678 9 101112
13 14 15 16 17 13
5. Botón MEM/PROG
6.
7.
8. Indicador luminoso de ALIMENTACIÓN
9. Pantalla
10. Botón
/CH+
11. Botón /CH-
Parte trasera
12. Botón REP
13. ALTAVOCES
14.
15. Botón S/MODE
16.
17.
18. Tapa del compartimento de las pilas
19.Conector DC IN 9V (Entrada de
CC de 9 V)
20. Conector PHONE (Auriculares)
21. Conector AUX IN (Entrada auxiliar)
18 19 20 21
FUNCIONAMIENTO CON PILAS (NO SUMINISTRADAS)
1. Retire la tapa del compartimento de las pilas.
2. Inserte seis pilas de tamaño C en el compartimento de las pilas.
• Asegúrese de instalar todas las pilas con la polaridad correcta según se muestra en el
interior del compartimento.
3. Vuelva a colocar en su sitio la tapa del compartimento de las pilas.
Si no va a utilizar la unidad durante un período de tiempo prolongado, retire las pilas
para prevenir daños de posibles fugas.
ES-4
Page 31

MODO DE EMPLEO
1. Coloque el reproductor sobre una superficie plana y estable.
2. Conecte el cable de alimentación a la toma de entrada de CC de 9 V ubicada en la parte
trasera del reproductor y asegúrese de que la clavija quede perfectamente introducida en el
conector.
3. Enchufe el otro extremo del cable a una toma de corriente.
La toma de corriente utilizada para el reproductor deberá permanecer accesible durante
su uso habitual. Para desconectar el reproductor de la toma de corriente, el enchufe deberá
retirarse por completo de la toma de corriente.
UTILIZACIÓN DE LA RADIO
1. Extienda la antena telescópica.
• Nota: Extienda por completo la antena y posiciónela para obtener una recepción óptima.
2. Presione
• El indicador de ALIMENTACIÓN se iluminará.
3. Pulse repetidamente S/MODE para cambiar la unidad al modo de radio FM.
4. Ajuste el volumen pulsando repetidamente
5. Pulse repetidamente
• Pulse y mantenga presionado
para encender la unidad.
/ .
/ para sintonizar la emisora deseada.
/ para la búsqueda automática de emisoras de radio
hacia adelante o hacia atrás.
PRESINTONIZACIÓN DE SUS EMISORAS FAVORITAS
Se pueden presintonizar hasta 20 emisoras de FM.
1. Siga los pasos de la sección "UTILIZACIÓN DE LA RADIO" para sintonizar las emisoras que
desee presintonizar.
2. Pulse MEM/PROG.
• “MEM” y el número de memoria parpadearán en la pantalla.
3. Pulse repetidamente
4. Pulse MEM/PROG de nuevo para guardar la emisora.
5. Repita los pasos 1 a 4 para memorizar las emisoras que desee.
Para oír emisoras de radio presintonizadas, pulse repetidamente
seleccionar la emisora de radio deseada.
/CH+ o /CH- para seleccionar la memoria deseada.
/CH+ o /CH- para
UTILIZACIÓN DE DISCOS
Discos compactos
Utilice únicamente discos de audio digitales con el símbolo
Nunca escriba ni pegue etiquetas en el CD. Sujete el CD por los bordes y guárdelo en su caja
con la etiqueta mirando hacia arriba después de usarlo.
ES-5
.
Page 32

Para quitar el polvo y la suciedad, eche un poco de aliento sobre el
CD y límpielo con un paño suave y que no deje pelusas, desde el
centro hacia el borde.
Los limpiadores podrían dañar el CD.
No exponga el CD a la lluvia, la humedad, la arena o el calor excesivo.
Discos CD-R/CD-RW
El reproductor puede reproducir discos CD-R/CD-RW que hayan sido finalizados tras la
grabación.
Es posible que el reproductor no reproduzca algunos discos CD-R/CD-RW debido a una mala
grabación o a la baja calidad de los mismos.
Introducción de un CD
1. Abra la tapa de CD mediante el área de apertura de la misma.
2. Introduzca un disco en la bandeja con la etiqueta hacia arriba.
3. Cierre la puerta del CD.
Reproducción de un CD
1. Pulse
2. Pulse repetidamente S/MODE para cambiar la unidad al modo de CD.
3. El lector comenzará la reproducción automáticamente desde la primera pista.
4. Ajuste el volumen pulsando repetidamente
5. Para pausar la reproducción, pulse
6. Para reanudar la reproducción, pulse
7. Para detener la reproducción, pulse
Nota:
• La tapa del lector de CD únicamente deberá abrirse cuando el CD esté detenido.
• Si la unidad está en el modo de parada del CD durante aproximadamente una hora, ésta
pasará automáticamente al modo en espera.
Selección de una pista
Durante la reproducción de un CD, pulse
Nota:
• Pulse
anterior.
• También podrá saltar a la pista deseada cuando el reproductor esté en modo de parada.
Pulse
para encender la unidad.
• El indicador de ALIMENTACIÓN se iluminará.
• El lector explorará el contenido del CD. A continuación, se mostrará el número
total de pistas.
/ .
/CH+.
• El tiempo de reproducción en curso parpadeará en la pantalla.
/CH+ de nuevo.
/CH-.
/ para seleccionar la pista deseada.
una vez para ir al principio de la pista en curso. Pulse dos veces para ir a la pista
/CH+ para reproducir la pista seleccionada.
ES-6
Page 33

Función de búsqueda
Durante la reproducción del CD, mantenga pulsado
sección deseada de la pista.
Modo de repetición de CD
Durante la reproducción de un disco, pulse REP reiteradamente para seleccionar el modo de
repetición deseado.
Icono de repetición en la pantalla Descripción
“REP” parpadea
“REP” deja de parpadear
“INTRO”
“RAN”
Ningún icono de repetición
Reproducción programada
Mediante la programación del reproductor, podrá reproducir hasta 20 pistas en cualquier orden.
1. Con el CD en modo de parada, pulse MEM/PROG.
• “PROG” y “P-01” parpadearán en la pantalla.
2. Pulse repetidamente
3. Pulse MEM/PROG de nuevo para guardar la pista.
4. Repita los pasos anteriores hasta que haya completado el programa.
5. Pulse /CH+ para iniciar la reproducción de las pistas seleccionadas.
Borrado de un programa
Pulse
/CH- hasta que “PROG” desaparezca de la pantalla.
/
Para repetir una pista sencilla
Para repetir todas las pistas
Para reproducir los 10 primeros segundos de cada pista
Reproducción aleatoria
Reproducción normal
para seleccionar el número de pista deseado.
/ . Suelte el botón cuando alcance la
AUX IN
Conecte un cable de audio (no suministrado) al conector AUX IN de la parte trasera de la
unidad. Conecte el otro extremo a la salida de audio del dispositivo auxiliar.
En el estado de encendido, pulse repetidamente S/MODE para cambiar la unidad al modo AUX.
Podrá reproducir música desde un dispositivo auxiliar a través de los altavoces del reproductor.
CONECTOR DE AURICULARES ESTÉREO
En la parte trasera del reproductor se proporciona un conector para auriculares estéreo para
que pueda escuchar sin molestar a los demás. Para utilizar este conector, conecte los
cascos/auriculares (no suministrados) y ajuste el volumen al nivel deseado.
Nota: Cuando se conecten unos cascos/auriculares, los altavoces del reproductor quedarán
silenciados.
ES-7
Page 34

SOLUCIÓN DE PROBLEMAS
Problema Causa probable Posible solución
El lector no reproduce el
disco.
Se producen saltos
durante la reproducción
del CD.
La radio se escucha
distorsionada.
No se escucha ningún
sonido de la radio.
1. La unidad no está en el modo
CD.
2. El CD no está instalado o está
mal instalado.
El disco está sucio o arañado. Limpie el disco con un paño o
1. La emisora no está bien
sintonizada.
2. Hay alguna interferencia.
1. La unidad no está en el modo
radio.
2. El volumen está ajustado al
mínimo.
ESPECIFICACIONES
1. Seleccione el modo CD.
2. Cargue el CD con la etiqueta
hacia arriba.
utilice otro disco.
1. Sintonice bien la emisora.
2. Reubique la unidad.
1. Seleccione el modo de radio.
2. Ajuste el nivel del volumen.
Alimentación eléctrica:
Consumo:
Gama de frecuencias de radio:
Entrada de CC de 9 V
CC 9V
9 W
FM 87,5 – 108 MHz
(pilas UM-2 1,5 V x 6)
1 A (adaptador de CA)
Pedimos disculpas de antemano por cualquier inconveniente debido a inconsistencias menores
en las instrucciones, que pueden ocurrir como resultado de la mejora y desarrollo continuos de
los productos.
Kesa Electricals © UK: EC1N 6TE 24 / 10 / 2013
ES-8
Page 35

Page 36

 Loading...