

Page 1
TECHNICAL SPECIFICATIONS
NOMENCLATURE
Measuring range:
PREPARATIONS:
Slider can be removed only after the locking screw(No.3 item of
the Nomenclature) is loosened.
Wipe clean all the measuring faces and caliper bar.No organic solutions are allowed.
Check to see if all the buttons,switches,and LCD dispaly respond
well.
Loosen the locking screw.
Switch the unit on by pressing “on/o” button, or move caliper
slider for auto power on, then select the unit by pressing
Inch / Metric button. (Each time the button is pressed, inch and
metric digits will be displayed alternatively)
Apply normal measuring pressure on slider to close the esternal
Press Date hold button to keep measureing data in record
Press “on/o” button for power o or the power will auto o
when not in use for 5 minutes
1.
Basic measuring methods:
2.
(1)
(1)
(2)
(2)
(3)
(3)
(4)
(5)
0–150mm / 0–6",0–200mm / 0–8"
0–300mm / 0–12".
0.01mm / 0.0005"
0.01mm / 0.0005"
1.5m / sec,60" / sec.
Linear capacitive measuring system.
LCD display.
One silver oxide battery SR44, 1.55v
capacity:165mAh
5˚C-40˚C / 41 to 104 degress F.
Not important under 80% of
relative humidity.
1.Internal measuring jaws
3.Locking screw
5.External measuring jaws
7.Zero setting
9.Depth measuring blade
2. METRIC / INCH change over A. Measurements of
internal dimensions
B.
Measurements of
external dimensions
D. Measurement of steps
4. LCD display
6. Power on /off button
8. Battery cover
10. Step-measuring faces
11. Data hold button
± 0.02mm / 0.001" (< 100mm)
± 0.03mm / 0.001" (> 100–200mm)
± 0.04mm / 0.0015" (> 200–300mm)
Resolution:
Accuracy:
Repeatability:
Max.measuring speed:
Measuring system:
Display:
Power:
Working temperatuer:
Inuenceof humidity:
measuring jaws.Then press “zero” button to reset the display to
zero.
inch/mm
mm
inch/mm
mm
inch/mm
mm
inch/mm
mm
C. Measurements of depth
inch/mm
mm
18.88
5
10
1
2
3
4
9
18.88
6 7
11
8
18 .88
OFF
ON
ZERO HOLD
HOLD
OFF
ON
ZERO HOLD
HOLD
OFF
ON
ZERO HOLD
HOLD
OFF
ON
ZERO HOLD
HOLD
OFF
ON
ZERO HOLD
HOLD
E. Dierential method of measurement
MAINTENANCE INSTRUCTIONS
(Application of zero setting)
1.
2.
3.
4.
5.
6.
7.
Clean caliper bar with dry cotton fabrics before using in order to
avoid mad display of caliper caused by humidity
Keep the caliper clean and dry(Liquid can damage the slider).
Faces should be cleaned gently with cotton fabrics. Never use
petrol,acetone and other organic solutions.
In order to save power,tum o the unit when caliper is going to stay
idle for some time
Never apply any electric pressure on any part of the caliper and never
use an electric pen for the fear of damaging its chip
For other notes please refer to the conventional calipers
Accidental wrong display may happen while replacing the battery
Just take out the battery and then put it in again after more
than 30 seconds until the display returns to normal
TROUBLE SHOOTING
BATTERY REPLACEM ENT
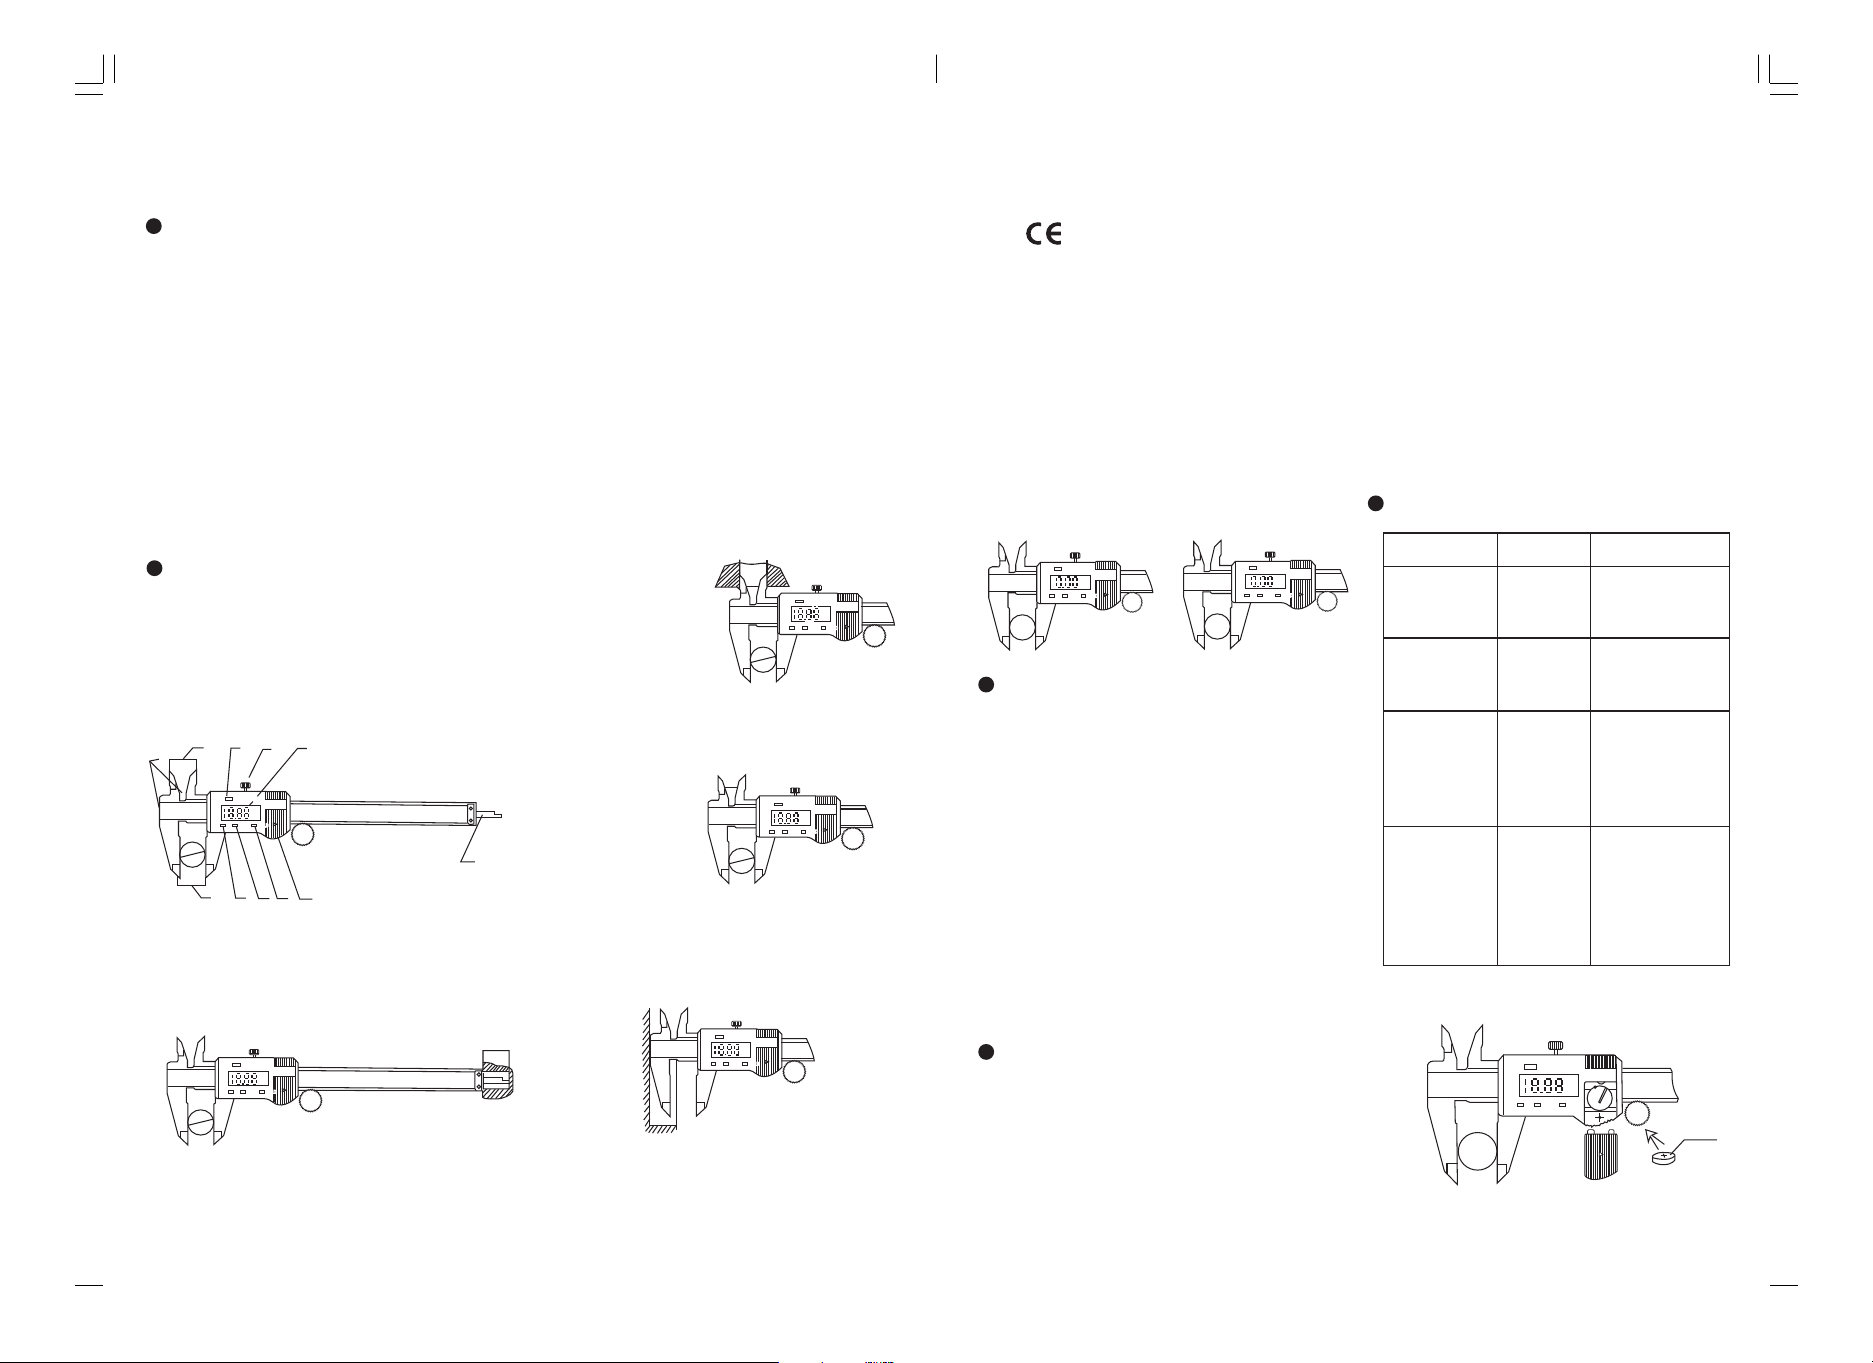
Flashing of digits shows a at battery.Take o the battery cover in the
direction shown by the arrow and replace the battery(positive side fac
ing out).
Failure
Five digits flash
simutaneously,a-
bout once per sec.
Display doesn't
change when the
slider is moved
Accidental
trouble in
circuit
Take out battery and
reset it after 30
sec.
Remove slider cover
and its assembly,clean
face of sensor with
clean compressed air
(5kg/cm
2
).
Dirt in the
sensor
Less accurate than
specied but with
–in ± 0.1mm.
No display on LCD 1 Battery in
poor contact.
2.Battery
voltage under
1.4V.
1 Remove battery cover
and adjust the battery
seat,keep good connec-
tion.
2.Replace battery.
Battery volta-
ge lower than
1.45V.
Replace the battery.
Cause Measure
inch/mm
OFF
ON
ZERO HOLD
HOLD
mm
mm
inch/mm
inch/mm
mm
battery
ELECTRONIC DIGITAL CALIPER
OPERATING INSTRUCTIONS
OFF
ON
ZERO HOLD
HOLD
OFF
ON
ZERO HOLD
HOLD
 Loading...