

Page 1
Operation
Manual
Product Identification
LIMITED WARRANTY
This product is warranted to be free from defects in material and/or
workmanship for a period of two years from date of original
installation, not to exceed 30 months from date of shipment from
our factory.
Any component which proves to be faulty in material and/or
workmanship will be replaced or repaired (at the option of Prince
Castle, Inc.) without cost to the customer for parts or labor.
This warranty is subject to the following exceptions/conditions:
• This equipment is portable; charges for on location service
(e.g., trip charges and mileage) are not included in the
provisions of this warranty.
• Use of any non-genuine Prince Castle parts voids this warranty.
All genuine Prince Castle replacement spare parts are warranted
for ninety (90) days from date of purchase.
• All labor must be performed by an authorized Prince Castle
Service Agency. Failure to do so will void this warranty.
• Damage caused by carelessness, neglect, and/or abuse (e.g.,
dropping, tampering or altering parts), equipment damaged in
shipment, by fire, flood or an act of God is not covered under
this warranty.
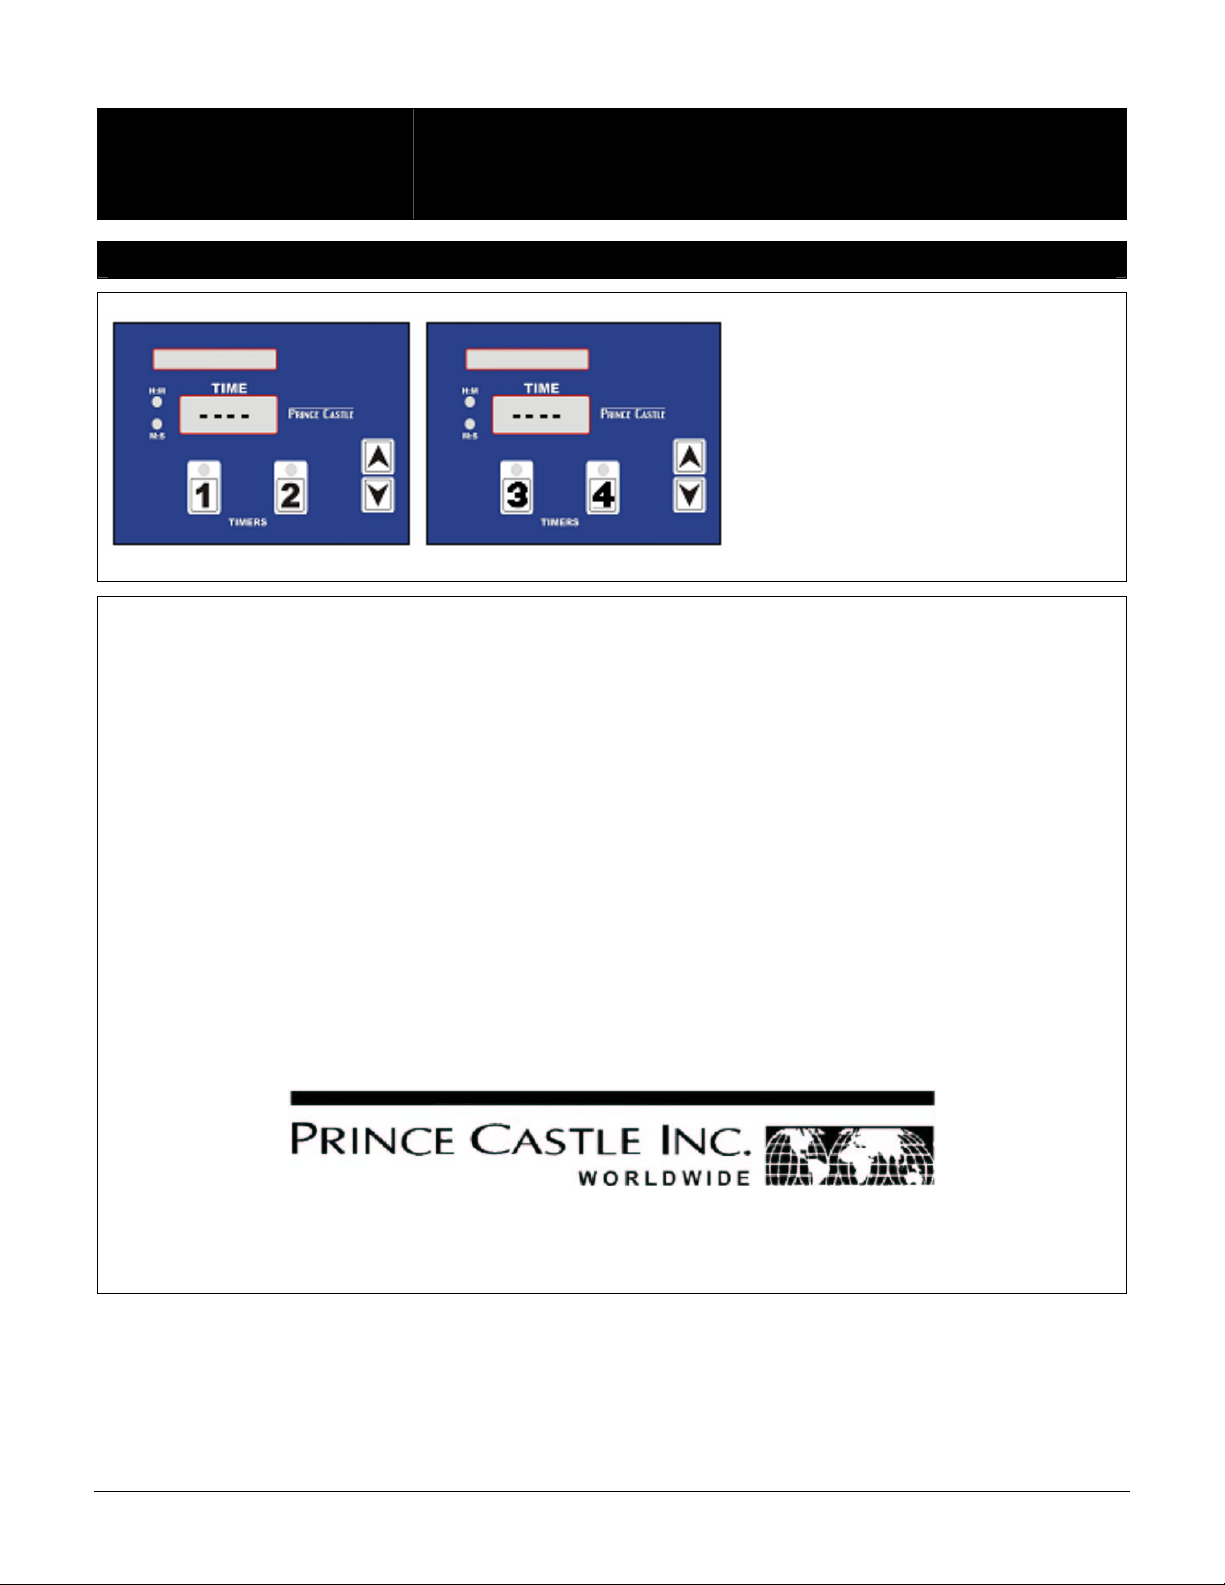
Pro-Timer
841 Series
The 841 series Pro-Timer features
multiple channels that can be
programmed in pairs to perform up
to five functions.
TABLE OF CONTENTS
Product Identification ........................................... 1
Safety Information ............................................... 2
Important!........................................................... 2
Installation ......................................................... 2
Equipment Setup ................................................. 2
Cleaning the Equipment........................................ 2
Preparing Product Using the Timer......................... 3
Programming Mode .............................................. 4
Parts Identification / Function ............................... 5
Troubleshooting Guide ......................................... 6
Notes ................................................................. 7
355 East Kehoe Blvd. • Carol Stream, IL 60188
Phone: 630-462-8800 • Toll Free: 1-800-PCASTLE
Fax: 630-462-1460 • www.princecastle.com
841-502 Printed in USA 1004 © 2004
Page 2

Pro-Timer
841 Series
Safety Information Important!
WARNING!
Indicates information important to the proper operation of
the unit. Failure to observe may result in damage to the
equipment and/or severe bodily injury or death.
CAUTION!
Indicates information important to the operation of the
unit. Failure to observe may result in damage to the
equipment.
Installation
Remove the unit from the carton and inspect for signs of
damage. If there is damage to the unit:
• Notify the carrier within 24 hours of delivery,
• Save carton and packaging materials for inspection purposes,
• Contact your local dealer, or if purchased directly, the Prince
Castle Sales Department at 1-800-722-7853 or 630-462-8800 to
arrange for a replacement unit.
Equipment Setup Cleaning the Equipment
This timer operates on input voltages between 100-240 volts AC,
47-63 Hz.
When plugged in, HIGH SPKR VOLUME should appear in both
text display windows. (See Adjust Speaker Volume section.)
Set the timer for the desired menu items that will be used. (Refer
to the Selecting Active Products procedure in the Programming
Mode section.)
Prince Castle reserves the right to change specifications
and product design without notice. Such revisions do
not entitle the buyer to corresponding changes,
improvements, additions or replacements for previously
purchased equipment.
NOTE: When installing this unit, the ambient temperature at the
mounting site should not exceed 37.8°C (100°F).
CAUTION
All electrical connections must be in accordance with local
electrical codes and any other applicable codes.
Plug the unit into an applicable electrical receptacle.
Do not allow grease to build up on the timer. Wipe it down daily,
using a clean damp cloth.
IMPORTANT!
Do not use abrasive or chemical cleaners on your timer.
Doing so may damage the front overlay.
Printed in USA 1004 © 2004 2 841-502
Page 3
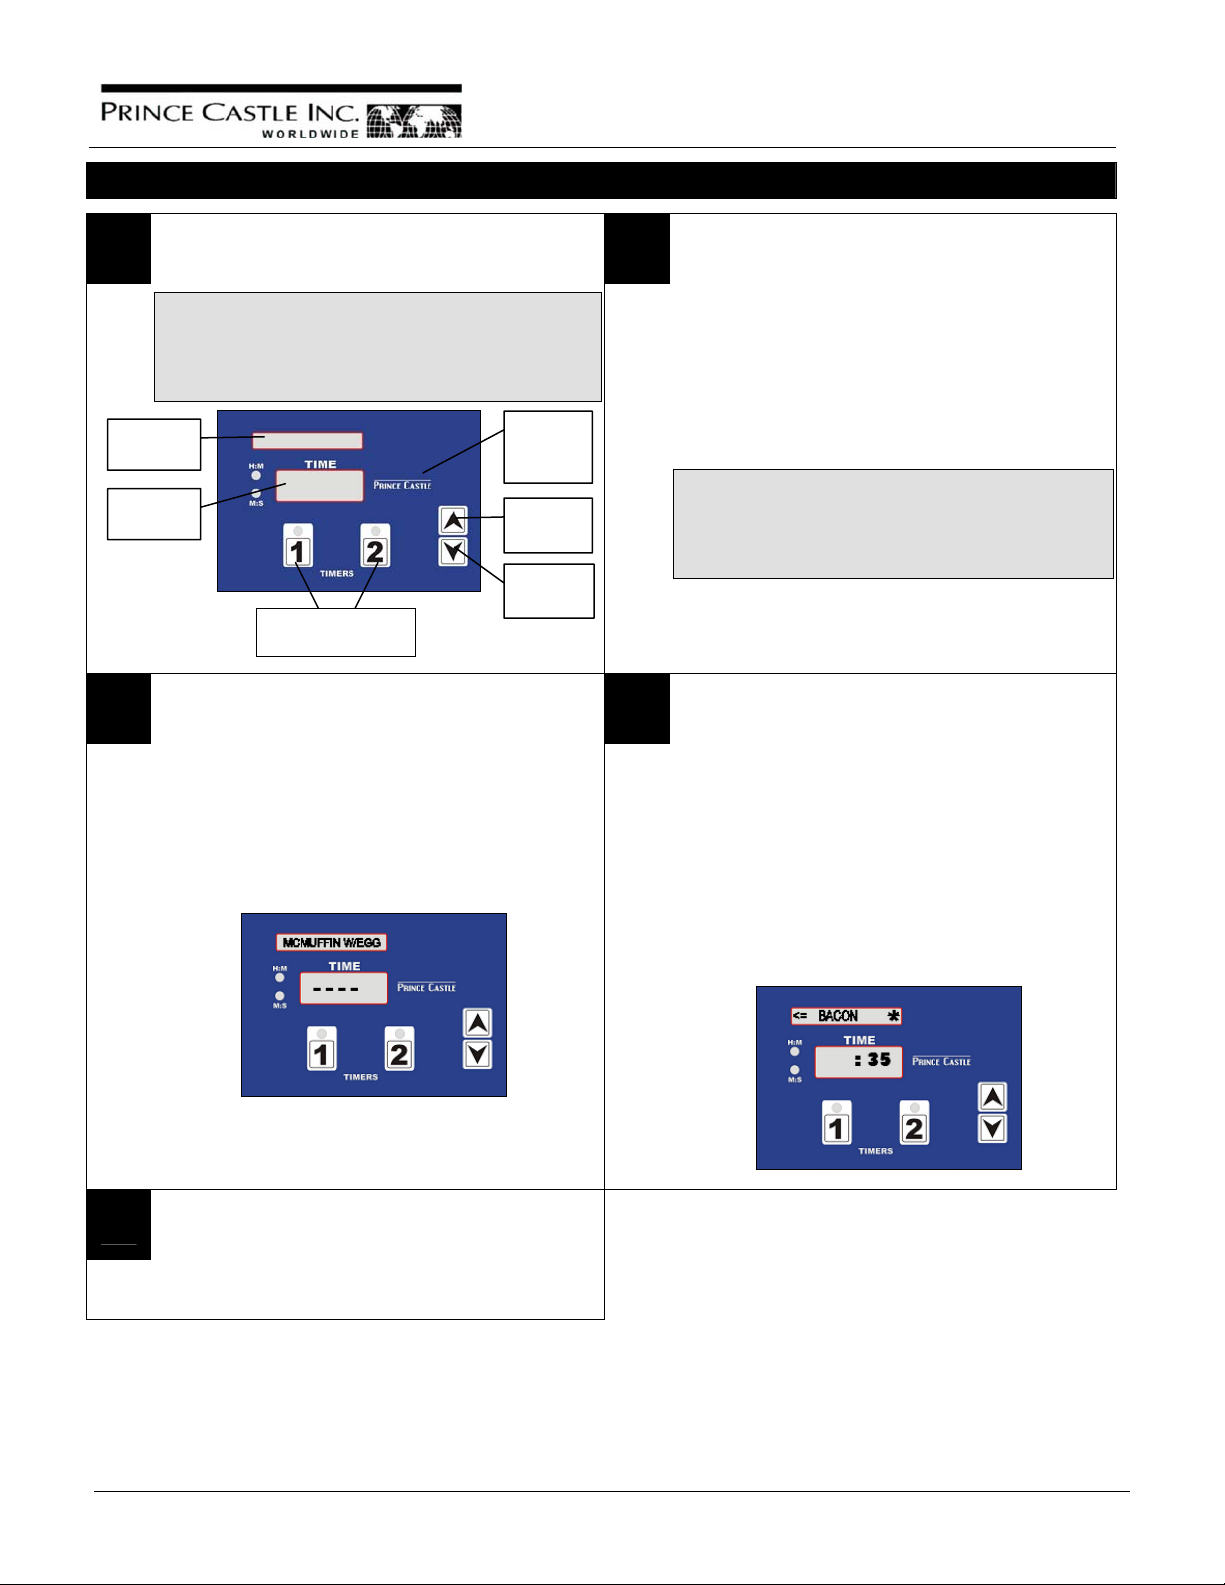
Preparing Product Using the Timer
Using the UP and DOWN buttons, scroll through the
1 2
active products list and select the menu item you wish
to prepare.
#
#
#
The left-side UP/DOWN buttons advance the menu
items in the left text display window and the rightside UP/DOWN buttons advance the menu items in
the right text display window.
Text
Window
Time
Window
Timer Operate
Prince
Castle
Logo
Up
Button
Down
Button
Pro-Timer
841 Series
Beneath each of the time display windows are the
numbered Timer Operate buttons (1-4). Press the
appropriate Timer Operate button to start the product
timing cycle for a cook sequence.
The next operational procedure to be performed at the
end of the current cycle appears in the text display
window and the remaining time of the current cycle in
the time window.
When the current cycle is complete (Time = 00), an
audible signal sounds and the time display flashes.
The displayed procedure must be performed at this
time.
#
#
#
During this alarm period, the next cycle has
started and the time display shows the remaining
time of this next cycle of the product sequence
when the alarm is cancelled.
The next operational cooking procedure to be performed
3 4
appears in the display window when the audible signal
is cancelled.
The audible signal can be programmed for manual turnoff or automatic turn-off. (Refer to the Programming
Mode section).
After all the timing cycles of the selected product
sequence are completed and the final alarm cancelled,
the timer returns to an idle state with the text display
showing the menu item just prepared and the time
display showing four dashes.
To show the remaining time and upcoming operational
5
procedure for another channel, press and hold the button
of the desired timer channel.
Release the button to return the displays to the channel
closest to completing a cook cycle.
Two cook sequences of the same product can be
performed simultaneously. Each numbered Timer
Operate button initiates an independent cook sequence.
When both Timer Operate buttons are used, an arrow
and an asterisk is shown in the text display window, in
addition to the upcoming operational procedure to be
performed.
The arrow points either left or right, indicating which
channel is closest to completing the current cook cycle
(Time = 00). This is also the channel that must perform
the displayed operational procedure. The time display
window shows the countdown time for the channel to
which the arrow points.
The asterisk means that another product sequence is
also being timed.
841-502 3 Printed in USA 1002 © 2004
Page 4

Pro-Timer
841 Series
Programming Mode
To enter Programming Mode, press and hold the button under the left Prince Castle logo for 6 secs.
The text displays show the Program Number and Revision.
Selecting Active Products
Use the left-side UP/DOWN arrows to sequence through all the
available menu items.
As the buttons are pressed the names of the available menu
items appear in the left-side text display window.
When the desired item is displayed, YES or NO is displayed in
the right-side text display window, indicating if this menu item
appears in the active products list.
YES means that, in operating mode, this item appears in the
active selection list and can be chosen to prepare the product.
NO means, that in operating mode, this item does not show up
in the active selection list, indicating that this product is not
offered.
Press any of the timer operate buttons to toggle between YES
and NO.
Adjusting Operational Procedure Settings
When a menu item is displayed in the left-side text
1 2
display window, use the right-side UP/DOWN arrows to
sequence through the associated operational
procedures for this item.
The action for each operational procedure is displayed
in the left-side text window, while the time (in secs.) until
the procedure is to be performed is displayed in the
right-side text display window.
The displayed time is changed as follows:
A. Use the #1 timer operate button to adjust the 100’s
place digit of the displayed time value.
B. Use the #2 timer operate button to adjust the 10’s
place digit of the displayed time value.
C. Use the #3 timer operate button to adjust the 1’s
place digit of the displayed time value
#
#
#
Setting the operational procedure time to 000 will
bypass (delete) the procedure that is being
programmed.
Speaker Volume Adjust
While in normal Operating Mode, use either of the UP/DWN
arrows to scroll through the active products until either LOW
SPKR VOLUME or HIGH SPKR VOLUME is displayed in the
appropriate text display window.
The audible alarm can be set to turn off automatically
after a specific amount of time or manually by an
employee. Pressing the #4 operate button sets the
To change the currently displayed setting, press either of the
operate buttons below the text display window showing the
volume message.
alarm operation as follows:
A. If an A is displayed along with an operational
procedure time value in the right-side text display
window, the alarm at the end of this timing period
turns OFF automatically after five seconds.
B. If an M is displayed along with an operational
procedure time value in the right-side text display
window, an employee must turn OFF the alarm
manually at the end of this timing period.
When all settings adjustments are complete (or if at any
time you just wish to exit programming mode), press
the button under the right-side Prince Castle logo.
A message, “Going Back to Run Mode,” is
momentarily displayed in the text windows, after which
time the unit is back in normal Operating Mode.
Printed in USA 1004 © 2004 4 841-502
Page 5

Pro-Timer
841 Series
Parts Identification / Function
Wiring Diagram
Nate Power Y
Connection
Power
Supply
Power Inlet
Connector
Parts List
Item Part No. Qty Description
1. 88-653-2-4SA 1 Speaker
2. 69-079S 1 Plastic Push Pin Rivet, Pkg. of 2
3. 840-108S 1 Main PCB
4. 840-109S 1 Auxiliary PCB
5. 71-142-02S 2 Display Board
6. 840-097S 2 Switch Panel Assembly
Not Shown:
7. 85-101-045 1 Power Supply
8. 72-200-75 1 Power Cord
841-502 5 Printed in USA 1002 © 2004
Page 6

Pro-Timer
841 Series
Exploded View
Troubleshooting Guide
Problem Probable Cause Remedy
No displays or indicators lit Unit unplugged.
Store’s circuit breaker blown.
Defective Power Supply.
Circuit inoperable.
Absence of Audio Alarm Speaker inoperable.
Circuit inoperable.
Unit will not enter Program Mode Logo Switch inoperable. Replace Switch Panel.
Unit enters Program Mode, but cannot
change times.
Unable to start, stop or store timer
presets in Program Mode. Missing or
abnormal characters in displays.
Arrow Switch inoperable.
Circuit inoperable.
Circuit inoperable. Replace Switch Panel. If problem persists, replace
Plug in unit.
Reset Circuit Breaker.
Replace Power Supply.
Replace Main Circuit Board.
Replace Speaker.
Replace Main Circuit Board.
Replace Switch Panel.
Replace Main Circuit Board.
Main Circuit Board.
Printed in USA 1004 © 2004 6 841-502
Page 7

Pro-Timer
841 Series
Notes
841-502 7 Printed in USA 1002 © 2004
 Loading...