

Page 1
Eris HD10BT
Studiokopfhörer mit aktiver
Rauschunterdrückung (ANC) und Bluetooth
Bedienungsanleitung
®
®
www.presonus.com
Deutsch
Page 2

Table of Contents
1 Übersicht — 1
1.1 Einleitung — 1
1.2 Im Lieferumfang enthalten — 1
1.3 Weitere Produkte von PreSonus — 2
2. Verkabelung — 3
2.1 Anschlüsse und Steuerung an der rechten
Kopfhörermuschel — 3
2.1.1. Einschalten und Koppeln — 3
2.1.2. Titel- und Lautstärkensteuerung über
Bluetooth — 4
2.1.3. Anrufsteuerung — 4
2.1.4. Kabelbetrieb — 5
2.2 Anschlüsse und Steuerung an der linken
Kopfhörermuschel — 5
2.2.1. Aktive Rauschunterdrückung (ANC) — 5
2.2.2. Laden — 5
Page 3
1 Übersicht
1.1 Einleitung
1 Übersicht
1.1 Einleitung
Eris HD10BT
Bedienungsanleitung
Vielen Dank, dass Sie sich für den PreSonus® Eris™ HD10BT Studiokopfhörer
mit aktiver Rauschunterdrückung (ANC) und Bluetooth® Funktechnologie
entschieden haben. Der PreSonus® Eris HD10BT Kopfhörer vereint einen
hochwertigen Klang in Studioqualität mit der Mobilität und Bewegungsfreiheit
der Bluetooth Verbindungstechnologie. Die aktive Rauschunterdrückung
ANC (Active Noise Canceling) dämpft Umgebungsgeräusche um bis zu
18 dB. So können Sie Ihre Lieblings-Musik, -Podcasts oder -Fernsehserien
überall in hochwertigem, lebendigen Sound genießen – egal, ob Sie an einer
vielbefahrenen Hauptstraße oder in der Mittelreihe im Flugzeug sitzen.
Wir bei PreSonus Audio Electronics bemühen uns um eine stetige Weiterentwicklung
unserer Produkte und schätzen unsere Kunden und Ihre kreativen Projekte
sehr. Wir freuen uns über Ihr Vertrauen in unsere Produkte und sind sicher,
dass Ihnen Ihr Eris HD10BT Kopfhörer viele Jahre lang Freude bereiten wird!
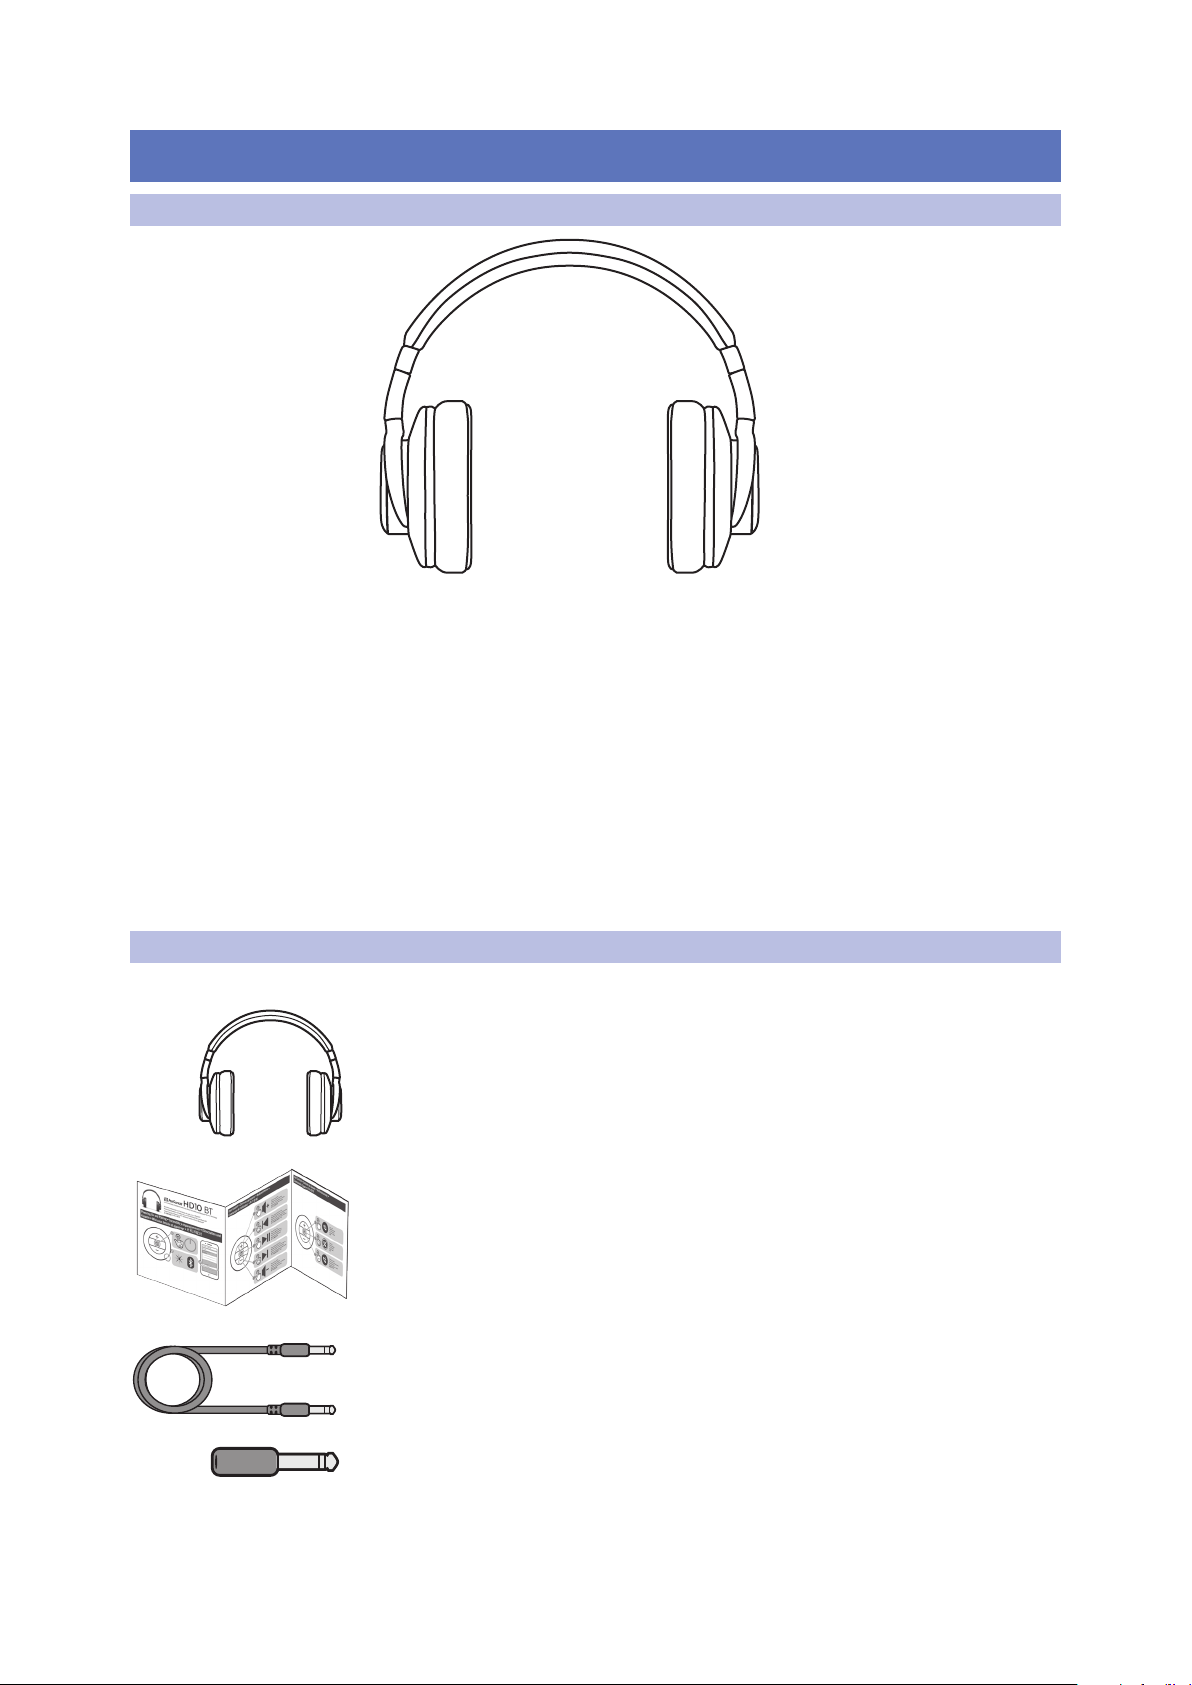
1.2 Im Lieferumfang enthalten
Ihr Eris HD 10BT wird wie folgt ausgeliefert:
PreSonus Eris HD10BT Studiokopfhörer
Kurzanleitung
1 m 3,5 mm TRS-Klinkenkabel
TRS-Klinkenadapter 3,5 mm auf 6,35 mm
1
Page 4

1 Übersicht
PreSonus Safety Warnings and Instructions
Electrical information and warning symbols for PreSonus products are located on the rear electrical panel of the unit
adjacent to the electrical plug or on the bottom of the unit along with other product compliance information.
This lightning flash with arrowhead symbol within an equilateral triangle is intended to alert the user to the presence of noninsulated “dangerous voltage” within the product’s enclosure that may be of sufficient magnitude to constitute a risk of electric shock.
WARNING: TO REDUCE THE RISK OF ELECTRIC SHOCK, DO NOT REMOVE COVER (OR BACK) AS THERE
ARE NO USER-SERVICEABLE PARTS INSIDE. REFER SERVICING TO QUALIFIED PERSONNEL.
The exclamation point within an equilateral triangle is intended to alert the user to the presence of
important operating and maintenance instructions in the literature accompanying the appliance.
CAUTION: To reduce the risk of electric shock, do not expose this appliance to rain and moisture. Do not expose this device
to dripping or splashing liquids and no object filled with liquids, such as vases, should be placed on the device.
CAUTION: These service instructions are for use by qualified service personnel only. To reduce the risk of electric shock,
do not perform any servicing other than that contained in the operation instructions. Qualified service personnel must
perform repairs.
1. Read these instructions.
2. Keep these instructions.
3. Heed all warnings.
4. Follow all instructions.
5. Do not use this device near water.
6. Clean only with a dry cloth.
7. Do not install near any heat sources, such as radiators, heat registers, stoves,
or other device (including amplifiers) that produce heat.
8. Protect the power cord from being walked on or pinched, particularly at plugs,
convenience receptacles, and the point where they exit from the device.
9. Use only attachments/accessories specified by PreSonus.
10. Unplug this device during lightning storms or when unused for long periods.
11. Servicing is required when the device has been damaged in any way, such as if a power-supply cord or plug is
damaged; or liquid is spilled, or objects have fallen into the device; or if the device has been exposed to rain
or moisture, does not operate normally, or has been dropped. All PreSonus products in the USA should be
serviced at the PreSonus factory in Baton Rouge, Louisiana. If your PreSonus product requires a repair, contact
support@presonus.com to arrange for a return authorization number. Customers outside the USA should
contact their local distributor. Your distributor’s contact information is available at www.presonus.com.
12. Protective grounding(earthing) terminal. The apparatus should be connected to a
mains socket outlet with a protective grounding(earthing) connection.
13. Where the Mains plug or an appliance coupler is used as the disconnect device,
the disconnect device shall remain readily operable.
14. The use of apparatus is in moderate climates.
15. Please allow 5cm around the apparatus for sufficient ventilation; the ventilation should not be impeded
by covering the ventilation openings with items, such as newspapers, table-cloths, curtains, etc.
SPL Warning:
Exposure to extremely high noise levels may cause permanent hearing loss. Individuals vary considerably in susceptibility to
noise-induced hearing loss but nearly everyone will lose some hearing if exposed to sufficiently intense noise for a period of
time. The U.S. Government’s Occupational Safety and Health Administration (OSHA) has specified the permissible noise level
exposures shown in the following chart:
Duration (hours) per day SPL (dBA) Typical Example
8 90 Duo in a small club
6 92
4 95 Subway
3 97
2 100 Very loud classical music
1.5 102
1 105
0.5 110
0.25 or less 115 Rock concert
WARNING:
Cancer and reproductive harm - www.p65warnings.ca.gov
PreSonus Compliance Information
European Union (EU)
The CE mark on this product indicates that the device is compliant with the
EU Council Directives
2014/35/EU Low Voltage Directive
2014/30/EU EMC Directive
For a copy of a specific product DoC, contact PreSonus at support@presonus.com.
WEEE This symbol on this product or its packaging indicates that this product must not be disposed of with other
waste. Instead, it is your responsibility to dispose of your waste equipment by handing it over to a designated
collection point for the recycling of waste electrical and electronic equipment. The separate collection and recycling
of your waste equipment at the time of disposal will help conserve natural resources and ensure that it is recycled
in a manner that protects human health and the environment. For more information about where you can drop
off your waste equipment for recycling, please contact your local city recycling office or the dealer from whom you
purchased the product.
Radio and Television Interference
If these symbols are marked on the product, the device complies as follows:
Any Changes or modifications not expressly approved by the party responsible for compliance could void the user’s authority to operate
the equipment.
USA: This equipment has been tested and found to comply with the limits for a Class B digital device, pursuant to
Part 15 of the FCC Rules. Operation is subject to the following two conditions: (1) This device may not cause harmful
interference, and (2) this device must accept any interference received, including interference that may cause
undesired operation. These limits are designed to provide reasonable protection against harmful interference in a
residential installation. This equipment generates, uses, and can radiate radio frequency energy, and, if not installed
in accordance with the instructions, may cause harmful interference to radio communications. However, there is no guarantee that
interference will not occur in a particular installation. If this equipment does cause harmful interference to radio or television reception,
which can be determined by turning the equipment off and on, the user is encouraged to try to correct the interference by one or more of
the following measures:
• Reorient or relocate the receiving antenna.
• Increase the separation between the equipment and the receiver.
• Connect the equipment into an outlet on a circuit different from that to which the receiver is connected.
• Consult the dealer or an experienced radio/TV technician for help.
FCC Radiation Exposure Statement:
This equipment complies with FCC radiation exposure limits set forth for an uncontrolled environment. This equipment should be installed
and operated with minimum distance 20cm between the radiator& your body.
This transmitter must not be co-located or operating in conjunction with any other antenna or transmitter.
CAUTION: Changes or modifications to this device not expressly approved by PreSonus Audio Electronics could void the user’s authority to
operate the equipment under FCC rules.
Australian Compliance: This equipment complies with Radio communication Devices Notice 2003; or Radio communication
Labeling (Electromagnetic Compatibility) Notice 2008; or Radio communication (Compliance Labeling Electromagnetic
Radiation) Labeling Notice 2003.
IC WARNING
IC RSS warning: This device complies with Industry Canada licence-exempt RSS standard (s). Operation is subject to the following two
conditions: (1) this device may not cause interference, and (2) this device must accept any interference,including interference that may
cause undesired operation of the device. Under Industry Canada regulations, this radio transmitter may only operate using an antenna of a
type and maximum (or lesser) gain approved for the transmitter by Industry Canada. To reduce potential radio interference to other users,
the antenna type and its gain should be so chosen that, the equivalent isotropically radiated power (e.i.r.p.) is not more than that necessary
for successful communication.
This radio transmitter (identify the device by certifcation number, or model number if Category II) has been approved by Industry Canada
to operate with the antenna types listed below with the maximum permissible gain and required antenna impedance for each antenna
type indicated. Antenna types not included in this list, having a gain greater than the maximum gain indicated for that type, are strictly
prohibited for use with this device.
IC Radiation Exposure Statement:
This equipment complies with IC RF radiation exposure limits set forth for an uncontrolled environment. This transmitter must not be
co-located or operating in conjunction with any other antenna or transmitter.
ICES003: This CAN ICES3 (B)/NMB3(B) digital apparatus complies with Canadian ICES003.
PreSonus Health, Safety, and Compliance Guide
Headphones
PreSonus Health, Safety, and Compliance Guide
Headphones
®
PreSonus Health, Safety, and Compliance Guide. Part# 70-50000015-A
© 2019 PreSonus Audio Electronics, Inc. All Rights Reserved.
18011 Grand Bay Ct. • Baton Rouge, Louisiana 70809 USA • 1-225-216-7887
www.presonus.com
1.3 Weitere Produkte von PreSonus
1 m USB-Ladekabel
Stabiler Tragekoffer
Hinweise zur Gesundheit, Sicherheit und Konformität von Kopfhörern von PreSonus
Eris HD10BT
Bedienungsanleitung
1.3 Weitere Produkte von PreSonus
Vielen Dank, dass Sie sich für PreSonus entschieden haben! Wir verstehen
uns als Anbieter von integrierten Lösungen und möchten unseren Kunden
(ja, Sie sind gemeint) daher eine optimale Benutzererfahrung bieten – vom
ersten Ton bis zum fertigen Projekt. Um dieses Ziel zu erreichen, stand die
nahtlose Integration von Anfang an und in allen Phasen der Entwicklung an
erster Stelle. Das Ergebnis sind Systeme, die ohne Konfigurationsaufwand
direkt nach dem Auspacken optimal miteinander kommunizieren.
Wir sind für Sie da. Weitere Informationen finden Sie unter www.presonus.com.
2
Page 5

2. Verkabelung
3 Sek . halten
Bluetooth< Settings
Bluetooth
PreSonus HD10BT
My Devices
Other Devices
Now discoverable as “My Phone”
5 Sek . halten
2.1 Anschlüsse und Steuerung an der rechten Kopfhörermuschel
2. Verkabelung
2.1 Anschlüsse und Steuerung an der rechten Kopfhörermuschel
2.1.1. Einschalten und Koppeln
Um Ihren Eris HD10BT Kopfhörer einzuschalten, halten Sie die mittlere Taste drei
Sekunden lang gedrückt: Sofern er noch nicht über Bluetooth gekoppelt wurde oder
das bereits gekoppelte Gerät nicht verfügbar ist, wechselt Ihr Eris HD10BT Kopfhörer
in den Pairing-Modus.
Während der Pairing-Modus aktiv ist, leuchtet die LED rechts unten an der
Kopfhörermuschel abwechselnd blau und rot.
Wählen sie an Ihrem Gerät den Bluetooth-Eintrag „PreSonus HD10BT“.
Eris HD10BT
Bedienungsanleitung
Um Ihren Eris HD10BT Kopfhörer auszuschalten, halten Sie die mittlere Taste fünf
Sekunden lang gedrückt.
3
Page 6

2. Verkabelung
1 Sek . halten
2x drücken
2.1 Anschlüsse und Steuerung an der rechten Kopfhörermuschel
2.1.2. Titel- und Lautstärkensteuerung über Bluetooth
Während der Audiowiedergabe von Ihrem Bluetooth-Gerät
stehen die folgenden Bedienoptionen zur Verfügung:
1
2
3
1. Lautstärke anheben / Nächster Titel. Drücken Sie die Taste
einmal, um die Bluetooth-Lautstärke anzuheben. Halten Sie die
Taste gedrückt, um zum vorherigen Titel zu navigieren.
2. Wiedergabe/Pause. Drücken Sie diese Taste, um die Wiedergabe auf
Ihrem Bluetooth-Gerät aus der Ferne zu starten und anzuhalten.
3. Lautstärke absenken / Nächster Titel. Drücken Sie die Taste
einmal, um die Bluetooth-Lautstärke abzusenken. Halten Sie die
Taste gedrückt, um zum nächsten Titel zu navigieren.
Eris HD10BT
Bedienungsanleitung
2.1.3. Anrufsteuerung
Wenn Sie Ihr Telefon über Bluetooth mit Ihrem Eris HD10BT Kopfhörer gekoppelt
haben, können Sie über die mittlere Taste Anrufe annehmen oder ablehnen.
Drücken Sie die Taste einmal, um einen Anruf anzunehmen.
Halten Sie die Taste eine Sekunde lang gedrückt, um einen Anruf abzulehnen.
Drücken Sie die Taste zweimal, um die letzte Nummer erneut zu wählen.
4
Page 7

2. Verkabelung
2.2 Anschlüsse und Steuerung an der linken Kopfhörermuschel
2.1.4. Kabelbetrieb
Sie können Ihren Eris HD10BT Kopfhörer auch über Kabel anschließen, wenn
beispielsweise der Akku schwach ist oder Sie ein Gerät ohne BluetoothFunktionalität abhören möchten. Die 3,5 mm TRS-Klinkenbuchse befindet
sich unten an der rechten Kopfhörermuschel. Nutzen Sie zum Anschluss
das beiliegende Kabel oder ein anderes 3,5 mm TRS-Klinkenkabel.
Eris HD10BT
Bedienungsanleitung
2.2 Anschlüsse und Steuerung an der linken Kopfhörermuschel
2.2.1. Aktive Rauschunterdrückung (ANC)
An der Unterseite der linken Kopfhörermuschel befindet sich der Schalter für die
aktive Rauschunterdrückung (ANC). Die ANC-Funktion kann auch ohne BluetoothVerbindung genutzt werden. Allerdings muss Ihr Eris HD10BT Kopfhörer
eingeschaltet sein, damit ANC funktioniert.
Hinweis: Bei aktiver ANC-Funktion entlädt sich der Akku schneller als im reinen
Bluetooth-Betrieb.
Sofern ANC aktiv ist, leuchtet die zugehörige LED grün.
2.2.2. Laden
Verbinden Sie das mitgelieferte USB-Kabel mit dem Ladeanschluss, um Ihren Eris
HD10BT Kopfhörer über ein herkömmliches USB-Netzteil oder einen Computer
aufzuladen. Die ANC-LED leuchtet während des Ladevorgangs rot. Sobald der Akku
aufgeladen ist, erlischt die LED. Voll aufgeladen bietet der Eris HD10BT Kopfhörer
eine Bluetooth-Wiedergabedauer von 8 (mit ANC) bzw. 16 Stunden (ohne ANC).
Benutzen Sie Bluetooth nicht während des Ladevorgangs.
5
Page 8

Das streng geheime PreSonus-Rezept für…
Hühner- und Andouille-Gumbo
Zutaten:
• 1 Tasse Haushaltsmehl
• ¾ Tasse Pflanzenöl
• 1 große Zwiebel (gewürfelt)
• 1 kleine Zwiebel (geviertelt)
• 6 gewürfelte Selleriestangen
• 1 große grüne Paprikaschote (gewürfelt)
• 3 Knoblauchzehen (2 kleingehackt, 1 ganze)
• 500 g Andouille (Räucherwurst)
• 4 Hühnerkeulen
• 4 l Wasser
• 4 Lorbeerblätter
• 1 Teelöffel Thymian
• 1 Teelöffel „Old Bay“-Gewürz
• 1-2 Tassen tiefgefrorene Okra, in Scheiben
• ¼ Tasse frische kleingehackte Petersilie
• 6-8 Eier (optional)
Guten Appetit!
Zubereitung:
1. Geben Sie die Hühnerkeulen, das Wasser, die geviertelte Zwiebel, das „Old Bay“-Gewürz, die 2 Lorbeerblätter und die ganze
Knoblauchzehe in den Topf. Legen Sie den Deckel auf den Topf und bringen Sie das Ganze zum Sieden. Lassen Sie das
Ganze dann so lange köcheln, bis sich das Hühnerfleisch von den Knochen löst. Lösen Sie das Fleisch von den Knochen und
legen Sie es beiseite. Holen Sie die Zwiebel, den Lorbeer und den Knoblauch aus dem Sud.
2. Geben Sie 1 Teelöffel Öl in eine schwere Bratpfanne und bräunen Sie die Andouille-Räucherwurst darin: Sie muss richtig
durchgebraten sein. Legen Sie die Wurst beiseite.
3. Geben Sie das verbleibende Öl in dieselbe Bratpfanne. Geben Sie das Mehl unter ständigem Rühren teelöffelweise in das
Öl. Lassen Sie die Mehlschwitze dunkelbraun werden (sie muss aussehen wie geschmolzene schwarze Schokolade). Das Öl
darf auf keinen Fall zu heiß werden, sonst brennt das Mehl an und Sie müssen noch einmal von vorn anfangen.
4. Wenn die Mehlschwitze dunkelbraun ist, geben Sie die gewürfelten Zwiebeln, den Sellerie, den Paprika und den feingehackten Knoblauch hinzu. Lassen Sie diese Mischung so lange köcheln, bis das Gemüse gar ist. Legen Sie keinen Deckel auf
den Topf/die Pfanne.
5. Geben Sie allmählich 1 Liter Hühnerbrühe hinzu und lassen Sie die Mischung unter ständigem Rühren aufkochen.
6. Geben Sie die Mehlschwitze-Mischung in einen Suppentopf und bringen Sie sie zum Sieden. Lassen Sie den Deckel weg, weil
sich die Mehlschwitze sonst auf dem Boden des Topfes ablagert und anbrennt.
7. Geben Sie die verbleibende Hühnerbrühe, den Lorbeer und den Thymian hinzu. Lassen Sie das Ganze 30 Minuten köcheln.
8. Schneiden Sie das Hühnerfleisch und die Andouille-Wurst in kleine Stücke.
9. Geben Sie das Hühnerfleisch und die Andouille-Wurst in den „Gumbo“. Lassen Sie das Ganze 30 – 45 Minuten köcheln.
10. Rühren Sie die tiefgekühlte Okra und Petersilie unter und lassen Sie den Gumbo kurz aufkochen.
11. Optional: Geben Sie ein Ei in eine Teetasse und rühren Sie es zügig unter den siedenden Gumbo. Wiederholen Sie das
mit den übrigen Eiern. Achten Sie jedoch darauf, dass sich keine Klumpen bilden. Wenn die Eier wieder an der Oberfläche
schwimmen, müssen Sie die Hitze reduzieren und den Gumbo köcheln lassen.
12. Schmecken Sie ihn mit Salz und Pfeffer (rot, weiß und/oder schwarz) ab.
13. An Reis und Kartoffelsalat servieren.
Ergibt 12 Portionen
© 2019 PreSonus Audio Electronics, Inc. Alle Rechte vorbehalten. Audiobox, Eris und PreSonus sind Warenzeichen bzw. eingetragene Warenzeichen von PreSonus Audio Electronics,
Inc. Bluetooth ist ein eingetragenes Warenzeichen von Bluetooth SIG. Alle weiteren Produktnamen in dieser Anleitung sind Warenzeichen ihrer jeweiligen Hersteller. Änderungen der
technischen Daten ohne vorherige Ankündigung vorbehalten. Nur am Rezept möchten wir rein gar nichts ändern.
Page 9

Eris HD10BT
Studiokopfhörer mit aktiver
Rauschunterdrückung (ANC) und Bluetooth
Bedienungsanleitung
®
18011 Grand Bay Ct. • Baton Rouge,
®
Louisiana 70809 USA• 1-225-216-7887
www.presonus.com
Part# 70-52000141-A
 Loading...