

Page 1
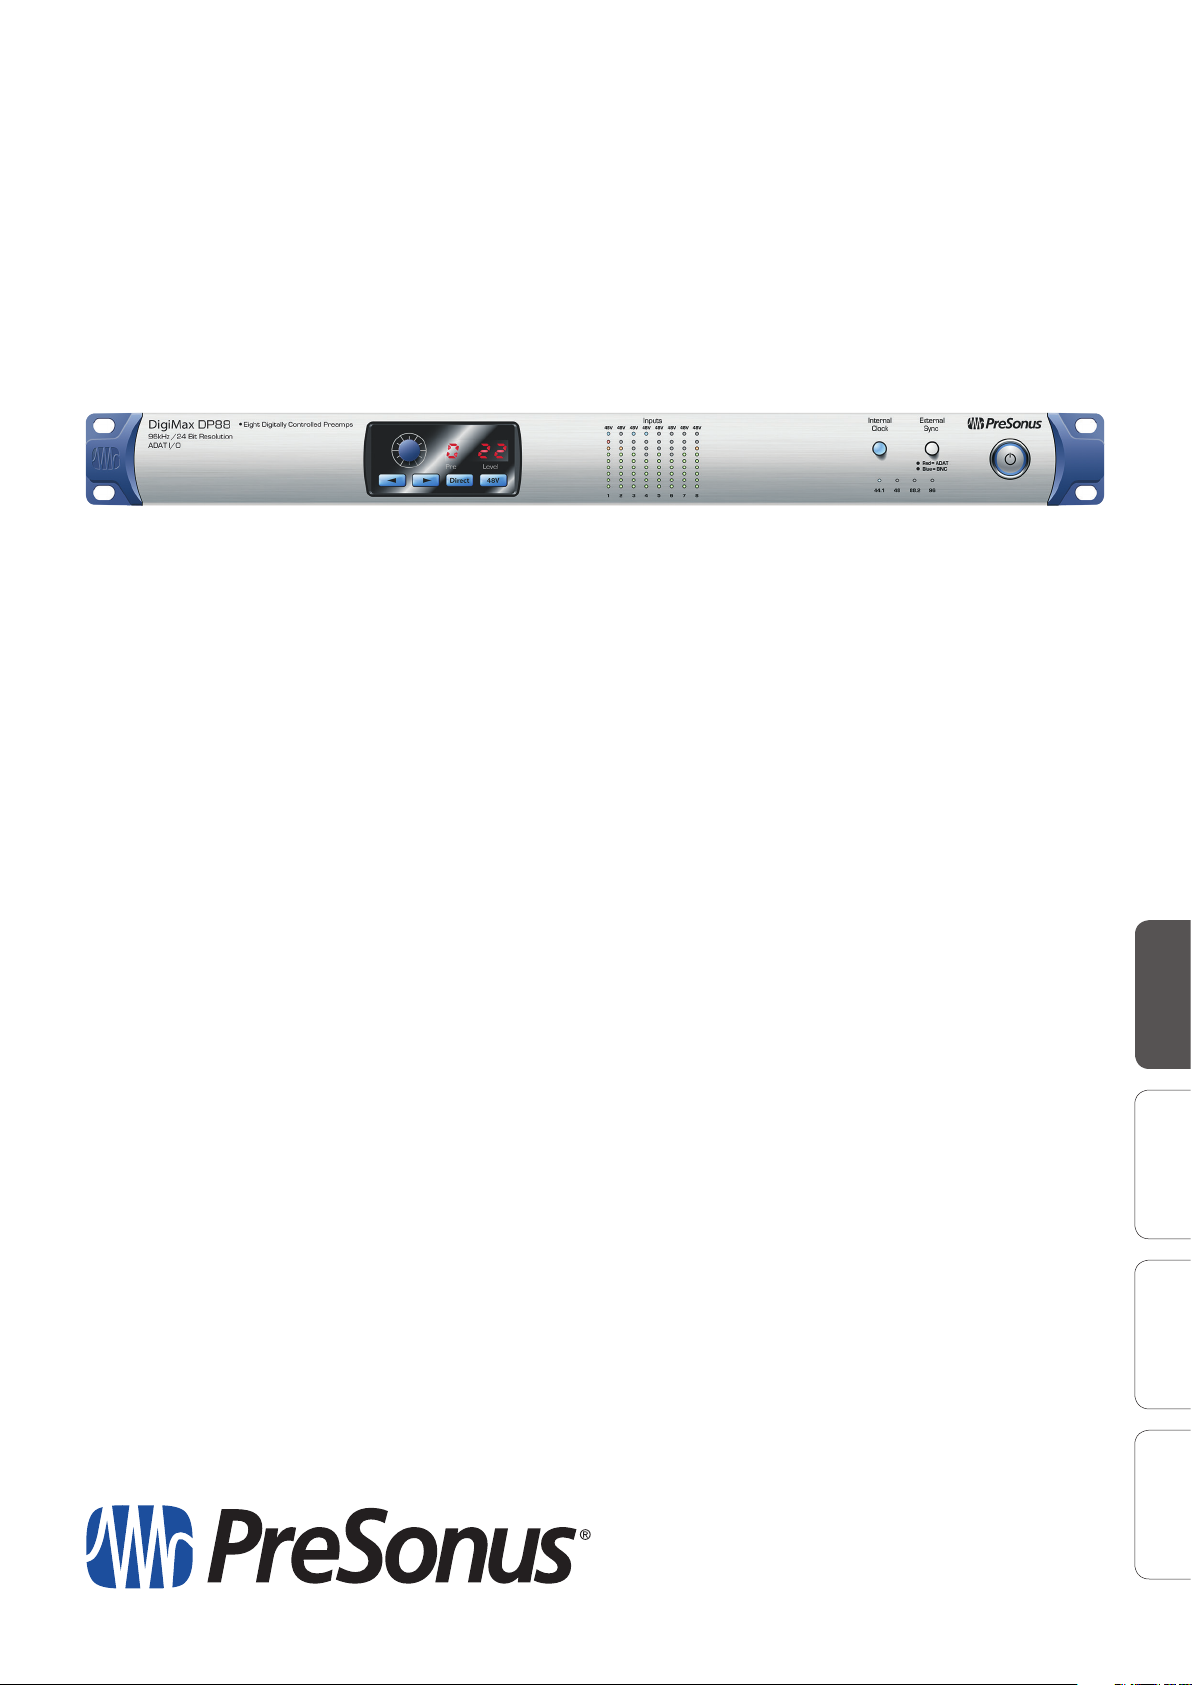
DigiMax™ DP88
8x8 96kHz preamp, converter with ADAT IO,
direct analog inputs, remote mic preamps,
DAC outputs, and Word Clock IO
Owner’s Manual
www.presonus.com
English
Deutsch EspañolFrançais
Page 2

Table of Contents
1 Overview — 1
1.1 Introduction — 1
1.2 Summary of DigiMax DP88 Hardware Features — 1
1.3 What is in the Box — 2
2 Hookup — 3
2.1 Front Panel Controls — 3
2.2 Back Panel Connections — 4
2.3 Connection Diagrams — 6
2.3.1 DigiMax DP88 with Studio 192 — 6
2.3.2 Project Studio — 7
2.3.3 Using the DigiMax DP88 as a Mic Split — 8
3 Technical Information — 9
3.1 Audio Specification — 9
3.2 Block Diagram — 10
4 Warranty Information — 11
4.1 How Consumer Law Relates To This Warranty — 11
4.2 PreSonus Products And EU Statutory Warranty — 11
4.3 What This Warranty Covers — 11
4.4 Exclusions and Limitations — 11
4.5 Who This Warranty Protects — 11
4.6 How Long This Warranty Lasts — 11
4.7 What PreSonus Will Do — 11
4.8 How to Get Warranty Service (USA) — 12
4.9 How to Get Warranty Service (outside of USA) — 12
Page 3
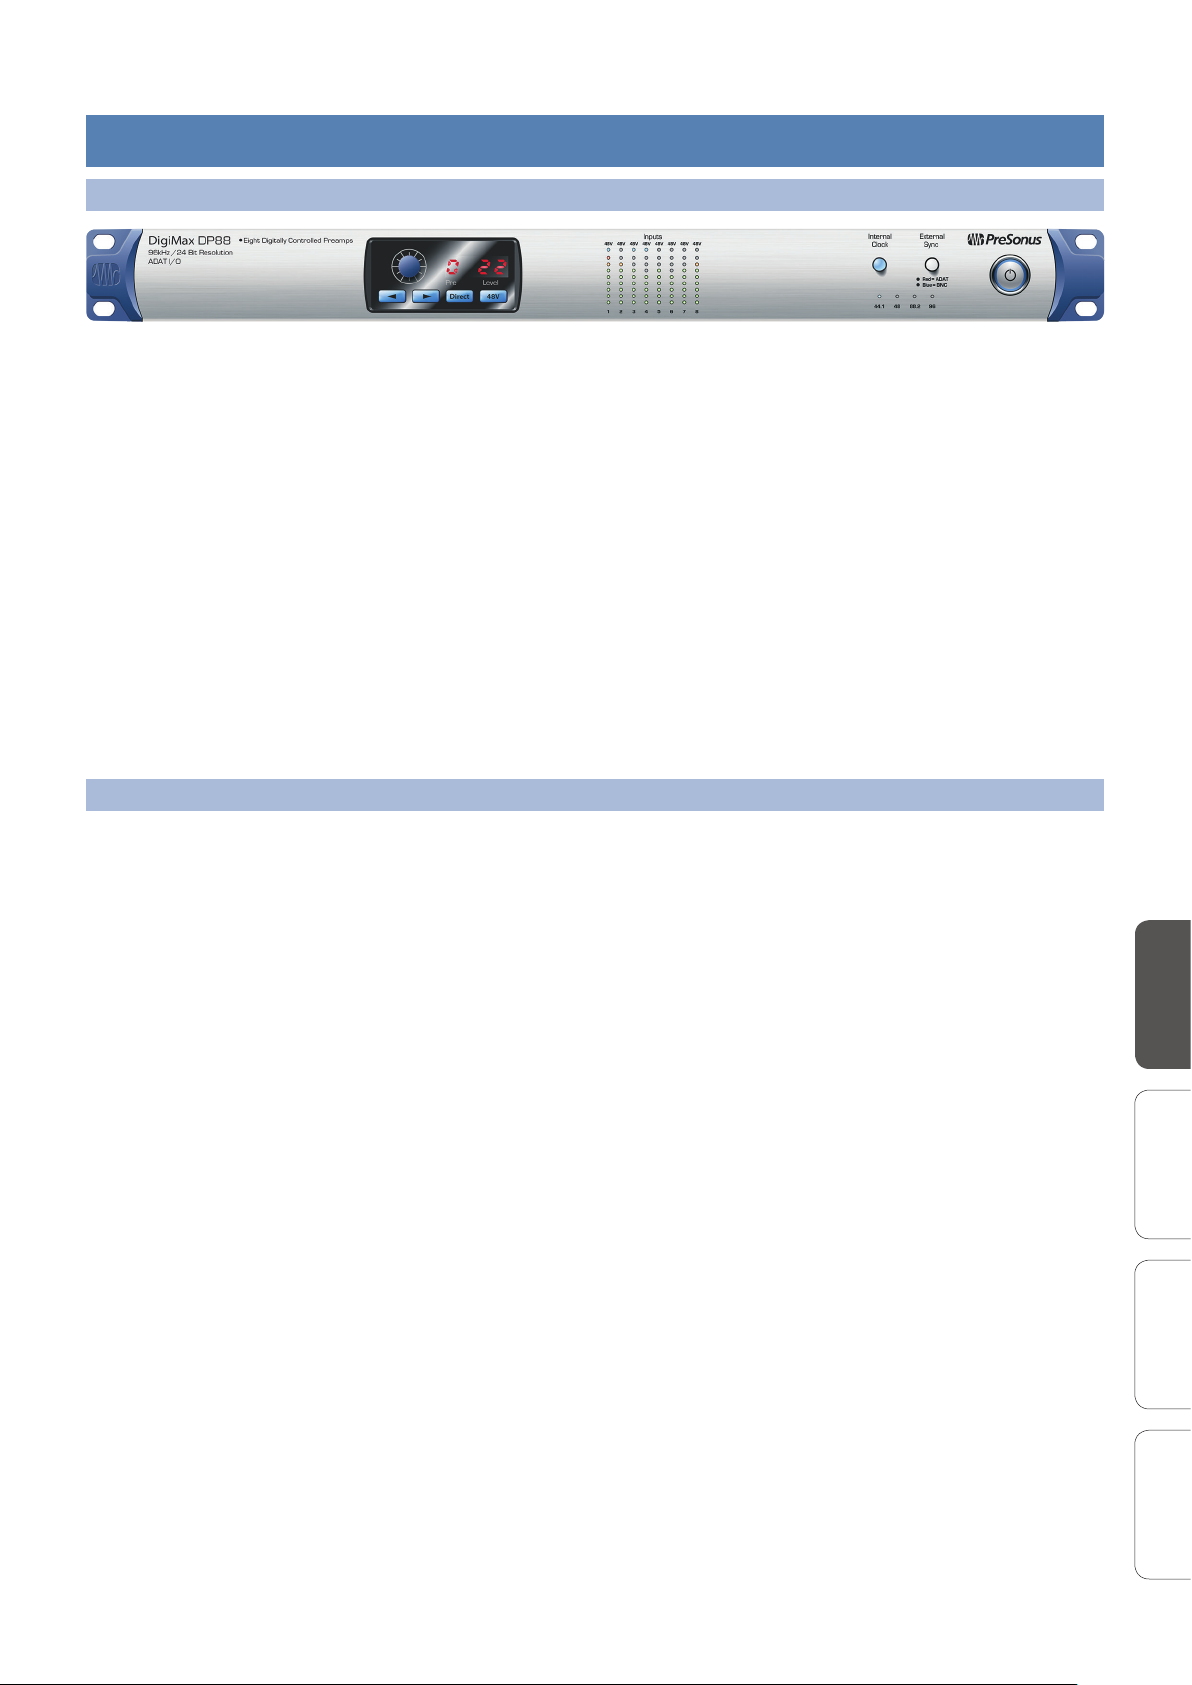
1 Overview
1.1 Introduction
Thank you for purchasing the PreSonus DigiMax™ DP88 8x8 96kHz preamp/converter. PreSonus Audio
Electronics has designed the DigiMax DP88 utilizing high-grade components to ensure optimum performance
that will last a lifetime. Loaded with 8 high-headroom, Class A, digitally controlled XMAX™ microphone
preampliers; 24-bit/96kHz ADAT/dual SMUX I/O; direct-to-converter line inputs; direct preamp outputs; DAC
outputs; and Wordclock I/O, the DigiMax DP88 provides unique interoperability with the PreSonus Studio 192
USB 3.0 Audio Interface and Studio Command Center, but is the perfect hardware expansion for any digital
recording system with optical lightpipe expansion capability.
We encourage you to contact us at 225-216-7887 (9 a.m. to 5 p.m. M-F Central Standard Time)
with questions or comments regarding your PreSonus DigiMax DP88. PreSonus Audio Electronics
is committed to constant product improvement, and we highly value your suggestions. We
believe the best way to achieve our goal of constant product improvement is by listening to
the real experts: our valued customers. We appreciate the support you have shown us through
the purchase of this product and are condent that you will enjoy your DigiMax DP88!
About this manual: We suggest that you use this manual to familiarize yourself with the features, applications, and
correct connection procedures for your DigiMax DP88 before trying to connect it to your other studio equipment.
Throughout this manual you will nd Power User Tips that will help you to get the most from your
DigiMax DP88 expert. Please pay close attention when connecting your DigiMax DP88 to your
system. Bad cables and improper grounding are the most common causes of problems encountered
in recording and sound reinforcement environments. We recommend checking your cables,
connections, and grounding if you experience any noise or sonic performance problems.
DigiMax™ DP88 User Manual
1.2 Summary of DigiMax DP88 Hardware Features
• Flawless analog signal path with top-quality 118dB Burr-Brown digital conversion, and 24-bit resolution
• 8 digitally remote-controlled XMAX™ microphone preamps
• Controlled from front panel or standard MIDI using simple CC
messages to remote control and recall preamp settings
• Controlled from UC Surface and Studio One 3.0 when connected to Studio 192
• Expands both the inputs and outputs of any interface with ADAT I/O
• 8 channels of ADAT optical I/O at up to 96 kHz (via dual SMUX)
• Individual 48V phantom power with LED indicators
• 8 x 8-LED input metering
• 8 Balanced Direct A/D Line Level inputs (DB25)
• 8 Balanced DAC Outputs (DB25) to expand your interface outputs
• 8 Balanced Direct Outputs (DB25)
• 8 XLR Bypass Mic Inputs (DB25)
• BNC Wordclock I/O
• MIDI I/O
• Solid metal chassis
English
Deutsch EspañolFrançais
1
Page 4
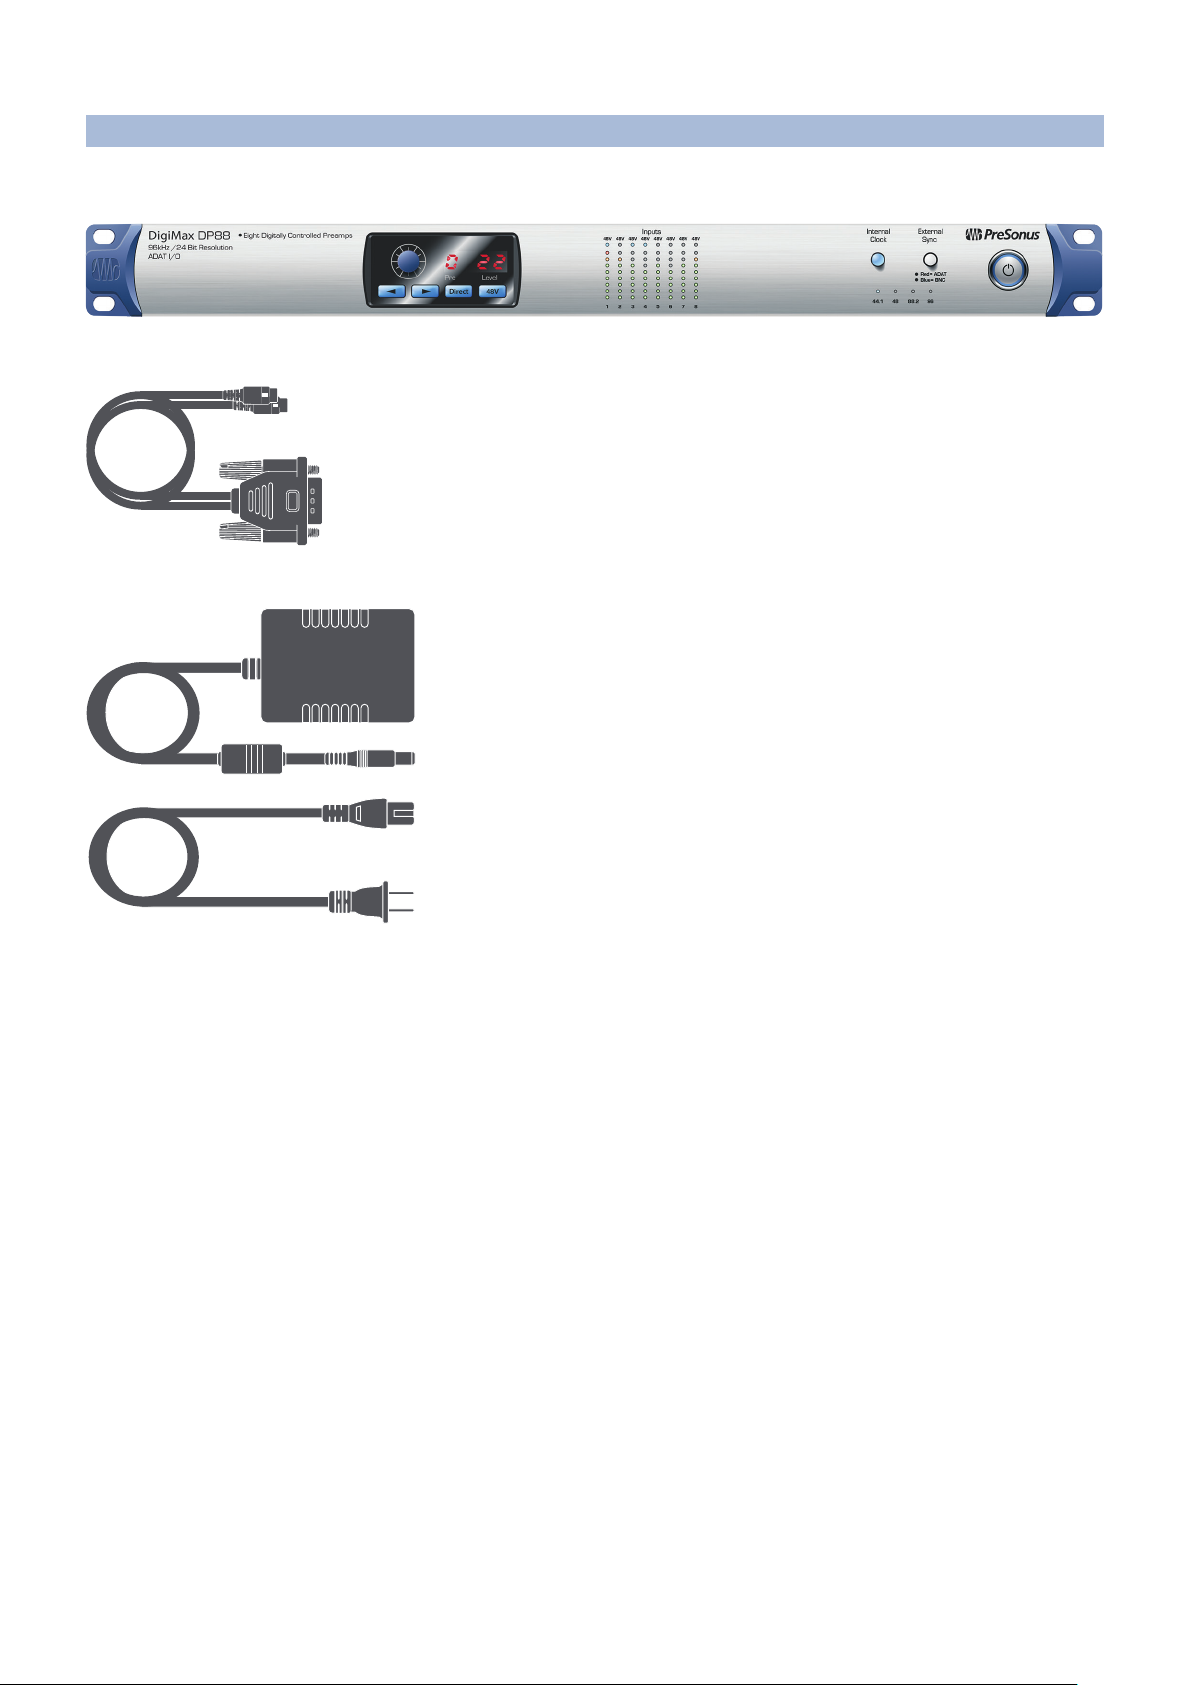
1.3 What is in the Box
1.3 What is in the Box
In addition to this User Manual, your DigiMax DP88 package contains the following:
• PreSonus DigiMax DP88 24-bit/96kHz preamp/converter
• MIDI I/O Break-out cable
• External power supply
2
Page 5
2 Hookup
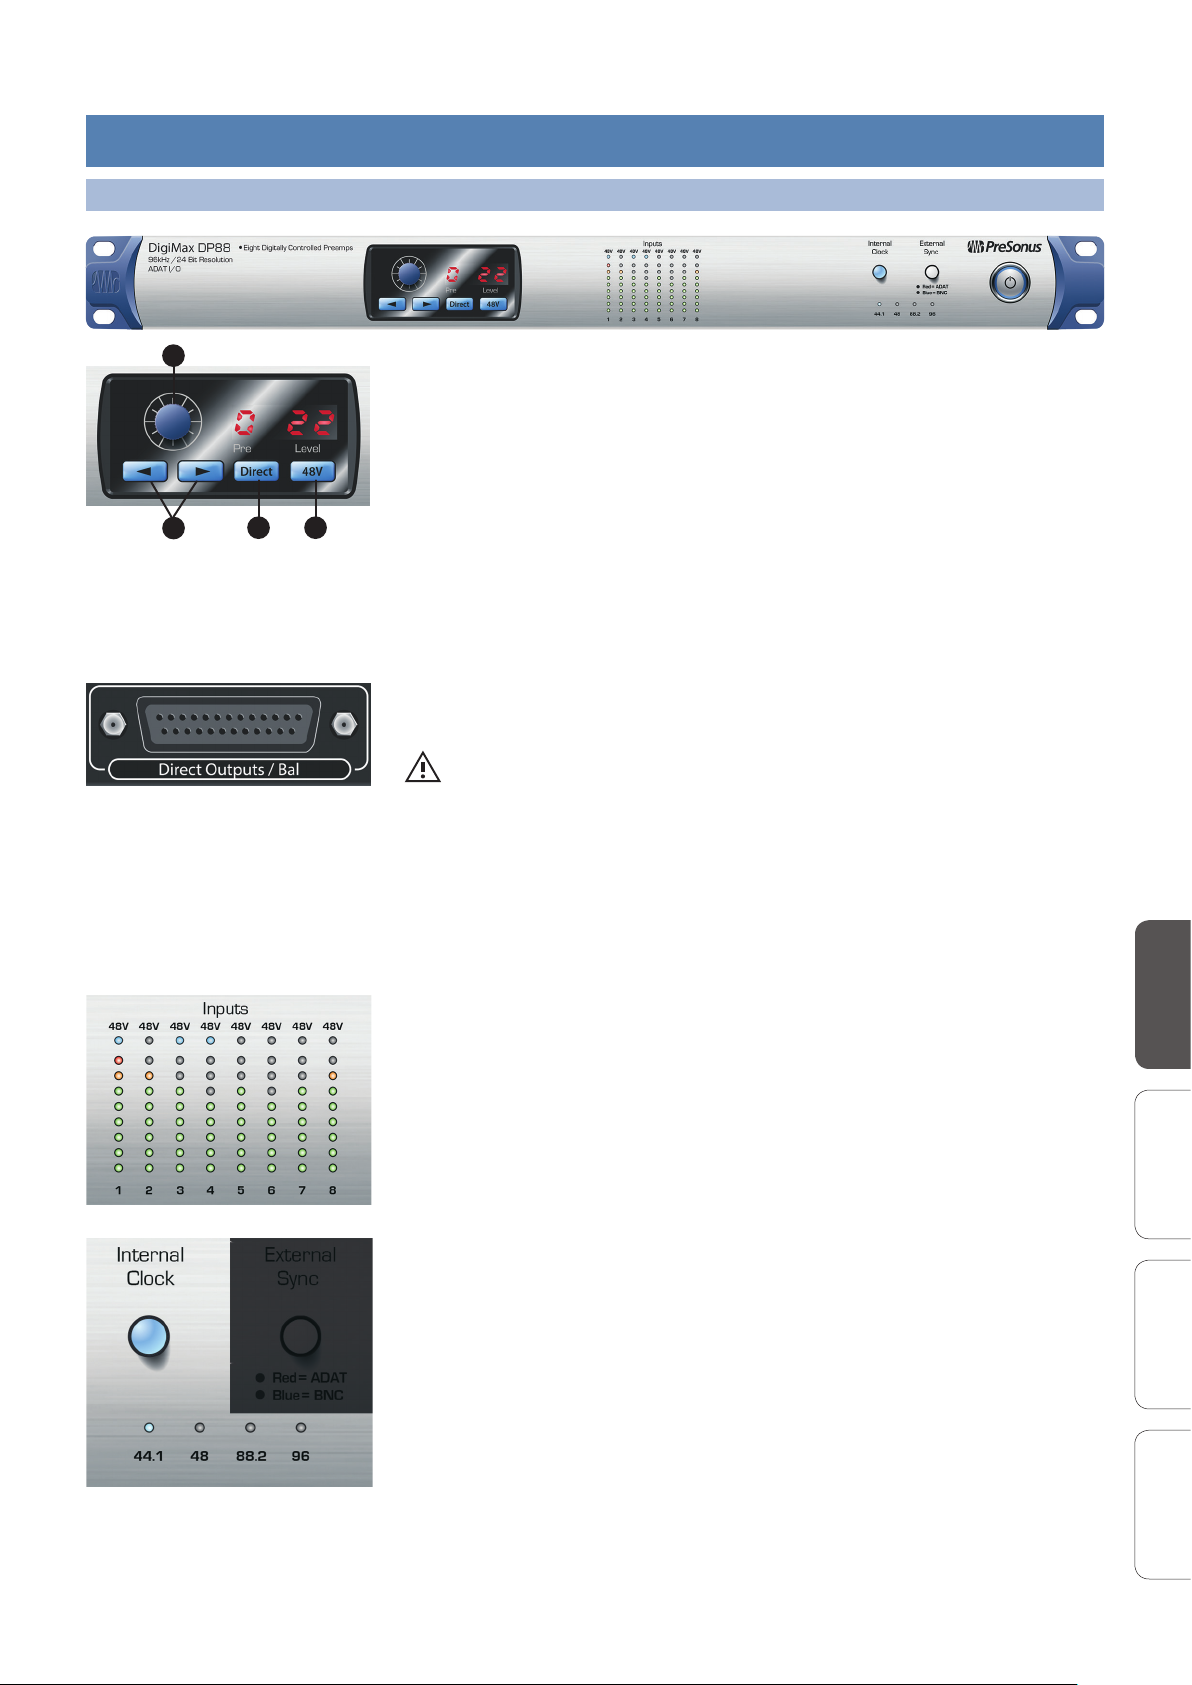
2.1 Front Panel Controls
DigiMax™ DP88 User Manual
1
2
3 4
Preamp Controls. These controls allow you to adjust the gain and enable phantom power for
every onboard microphone preamp.
1. Preamp Gain: Use this control to adjust the level of microphone preamps
1-8. The display to the far right will show the current trim level.
2. Next / Prev: Use these buttons to select the microphone preamp you wish to control. The
display to the right of the trim control will show which preamp is currently being controlled.
3. Direct: The DigiMax DP88 provides direct-to-converter line inputs for
every channel via a DB25 connector on the rear panel. Press this button
to enable the Direct input for the currently selected channel.
4. 48V: The DigiMax DP88 provides 48V phantom power for each microphone preamp.
This feature can be individually enabled for each channel, using this button. When
48V is active, the blue LED at the top of that channel’s meters will illuminate.
Power User Tip: Use the Direct-to-Converter input to connect line level devices or your favorite
boutique analog mic preamps. When active, this input completely bypasses the mic preamp circuit
and its gain stage to directly access the analog-to-digital converter.
Warning: Phantom power is only required for condenser microphones and can severely
damage dynamic mics, especially ribbon mics. Therefore, switch phantom power o for all
channels where it is not required.
XLR connector wiring for phantom power:
Pin 1 = GND
Pin 2 = +48V
Pin 3 = +48V
Input Meters. These 8-LED meters show the input level of the eight analog inputs on your
DigiMax DP88. The green LEDs will illuminate when the input signal ranges from -50 dBFS to -6
dBFS. The yellow LEDs will illuminate when the input signal ranges from -4 dBFS to -2 dBFS. The
red Clip LED will illuminate when your input signal reaches -0.5 dBFS. At this level, the signal will
begin to overload the analog-to-digital converters and exhibit signs of clipping. Use the gain
controls to keep the signal below this level.
Internal Clock / Sample Rate Selector. Use this button to select the internal sample rate for
your DigiMax DP88 (44.1, 48, 88.2, or 96 kHz) when it is clocking internally. Pressing this button
will cycle through the available sample rates. As each sample rate is selected, its indicator LED
will illuminate.
English
Deutsch EspañolFrançais
3
Page 6

2.2 Back Panel Connections
External Clock. The External Clock button allows you to select an external source as
the word clock master. Pressing the button once will select the BNC input as the word
clock source and the button will illuminate blue. Press it again to select the ADAT 1 input.
The button will illuminate red to indicate ADAT as the word clock source.
Power User Tip: When in either mode, the DigiMax DP88 will recognize to which sample
rate the external clock master is set and automatically switch to accommodate it.
Power Button and Sync light. The lighted ring around the power button of your DigiMax DP88 is
a clock source / sync indicator. It lets you know if you unit is receiving word clock correctly.
• Blue. When this light is blue, your DigiMax DP88 is correctly
synced via Word clock, ADAT, or its internal clock.
• Flashing Red and Blue. When this light ashes between blue and red, your DigiMax DP88
is not syncing properly to its chosen word clock. Check your cables and connections.
Power User Tip: Word clock is the timing signal with which digital devices sync frame
rates. Proper word clock sync prevents digital devices from having pops, clicks, and
distortion in the audio signal due to mismatched digital audio transmission.
2.2 Back Panel Connections
Microphone Inputs. Your DigiMax DP88 is equipped with 8 digitally
controlled PreSonus XMAX
microphones. The XMAX design provides a Class A input buer, followed by a
dual-servo gain stage. This arrangement results in ultra-low noise and wide
gain control, allowing you to boost signals without increasing background
noise.
Both DB25 and individual XLR connections are provided for these inputs. Engaging the DB25
input will bypass the corresponding XLR input. In this way, you can hardwire your DigiMax
DP88 into your patch bay using the DB25 connection and then bypass the XLR connection as
needed.
Direct-to-Converter Line Inputs. This DB25 connector is for use with line-level devices. These
inputs are scaled to accept line-level signals up to +18 dBFS.
Power User Tip: When these inputs are engaged, the microphone preamp circuit is
bypassed completely and no trim control is available. Typical examples of line-level
connections are synthesizer outputs, signal processors, and stand-alone mic preamps and
channel strips. Use the output level control on your line level device to adjust its level.
Direct Analog Outputs. These are the balanced, direct analog outputs for the eight
microphone preamps on your DigiMax DP88. These outputs are post-gain, and pre-A/D
converter.
DAC Outputs. These balanced outputs carry the digital-to-analog converter signal from the
ADAT input(s) and converts the ADAT optical input signal to an analog signal.
™
microphone preampliers for use with all types of
Power User Tip: Use these outputs in conjunction with ADAT input(s) to expand the analog outputs of your audio
interface for monitor mixing or speaker switching. By wiring the ADAT output to the ADAT input, you can also use
the DAC and Direct Analog Outputs to create an analog split of your eight input channels. See Section 2.3.3.
4
Page 7

A Quick Note About DB25
DigiMax™ DP88 User Manual
1 2 3 4 5 6 7 8
C G H C G H C G H C G HG CHGCHGCHGCH
13 12 11 10 9 8 7 6 5 4 3 2 1
25 1415161718192021222324
ADAT – S/MUX Input and Output. These are the ADAT – Dual S/MUX connections to connect
your DigiMax DP88 to your audio interface. When the sample rate is set to 44.1 or 48 kHz, only
the ADAT 1 input and output will function. When set to 88.2 or 96 kHz, each connection will
provide four of the available eight channels:
44.1 / 48 kHz Channels 1-8 n/a Channels 1-8 n/a
88.2 / 96 kHz Channels 1-4 Channels 5-8 Channels 1-4 Channels 5-8
Power User Tip: When connecting your DigiMax DP88 to a Studio 192, the ADAT
connections will also send and receive preamp control information for the DigiMax
DP88 so that it can be controlled directly from UC Surface or Studio One.
BNC Input and Output. These allow the DigiMax DP88 to receive and transmit word clock to and from other
digital audio devices.
DB25 connectors provide eight balanced channels on a single analog
connector. Balanced DB25 fan-out snakes can be obtained in various
congurations at most recording and live-sound retailers. Common
congurations are DB25 to (8) XLRM, DB25 to (8) XLRF, and DB25 to (8) TRS.
ADAT 1 Input ADAT 2 Input ADAT 1 Output ADAT 2 Output
MIDI I/O. This is the connection for the included MIDI I/O break-out cable. You can use the MIDI connections
to send and receive control data for your microphone preamps in your DAW application. Once you
congure your DigiMax DP88 as a MIDI device inside your DAW application, you can control trim and
phantom power from within your DAW environment and store those settings with your session.
Below is a chart explaining the MIDI controls for your DigiMax DP88 preamps:
Preamp MIDI Channel Trim Level Phantom Power ON /OFF Direct Line In On/O
Preamp 1 Channel 1 CC #7 CC #14 (0 to 63 = On, 64 to 127 = O) CC #15 (0 to 63 = On, 64 to 127 = O)
Preamp 2 Channel 2 CC #7 CC #14 (0 to 63 = On, 64 to 127 = O) CC #15 (0 to 63 = On, 64 to 127 = O)
Preamp 3 Channel 3 CC #7 CC #14 (0 to 63 = On, 64 to 127 = O) CC #15 (0 to 63 = On, 64 to 127 = O)
Preamp 4 Channel 4 CC #7 CC #14 (0 to 63 = On, 64 to 127 = O) CC #15 (0 to 63 = On, 64 to 127 = O)
Preamp 5 Channel 5 CC #7 CC #14 (0 to 63 = On, 64 to 127 = O) CC #15 (0 to 63 = On, 64 to 127 = O)
Preamp 6 Channel 6 CC #7 CC #14 (0 to 63 = On, 64 to 127 = O) CC #15 (0 to 63 = On, 64 to 127 = O)
Preamp 7 Channel 7 CC #7 CC #14 (0 to 63 = On, 64 to 127 = O) CC #15 (0 to 63 = On, 64 to 127 = O)
Preamp 8 Channel 8 CC #7 CC #14 (0 to 63 = On, 64 to 127 = O) CC #15 (0 to 63 = On, 64 to 127 = O)
Power User Tip: Studio One version 3+ provides a device template for the DigiMax DP88 if you are not
using it with the Studio 192. Simply select it from device list in the External Device set-up window.
Power Input. This is where you connect the power supply for your DigiMax DP88.
English
Deutsch EspañolFrançais
5
Page 8

2.3 Connection Diagrams
2.3 Connection Diagrams
2.3.1 DigiMax DP88 with Studio 192
DigiMax DP88
110-220
VAC
Studio 192
6
Page 9

2.3.2 Project Studio
110-220
VAC
MIDI Interface
DigiMax™ DP88 User Manual
Brand X Interface
Channel Strips
English
Deutsch EspañolFrançais
7
Page 10

2.3 Connection Diagrams
2.3.3 Using the DigiMax DP88 as a Mic Split
110-220
VAC
Mixer
Line
Inputs
To
Remote
Broadcast
8
Page 11

3 Technical Information
3.1 Audio Specication
DigiMax™ DP88 User Manual
Microphone Preamp (XLR Balanced)
Type XLR Female & DB25 Female, Balanced Remote
Maximum Input level (min. gain, 1 kHz@0.5% THD+N) +12 dB u, +/-0.5 dB
Gain Control Range 85 dB, +/-1 dB
Frequency Response (A-D) 10 Hz to 40 kHz, +/-0.2 dB
Dynamic Range (min. gain, a-wtd) > 110 dB
Dynamic Range (mid. Gain, unwtd) > 105 dB
THD+N (min. gain, a-wtd) < 0.005%
Input Impedance 1600 Ω
EIN (+55 dB gain, 150Ω input, 20 Hz-22 kHz, a-wtd) < -128 dBu
Common Mode Rejection Ratio (1 kHz, +55dB gain) > 55 dB
Phantom Power +48 V, +/- 3 V, > 8mA per channel
Line Inputs
Type DB25 Female, Balanced
Maximum Input Level
(min. gain, 1 kHz@0.5% THD+N)
Gain Control Range +/-20dB, +/-1 dB
Frequency Response (A-D) 20 Hz to 20 kHz, +/-0.2 dB
Dynamic Range (min. gain, A-weighted) > 114 dB
Dynamic Range (mid. gain, un-weighted) > 105 dB
THD+N (1 kHz, -1 dBFS, A-weighted) < 0.005%
Input Impedance 10 kΩ
Crosstalk (1 kHz, channel-to-channel) < -80 dB
+22 dBu, +/-0.5 dB
ADC Direct Line Inputs
Type DB25 Female, Balanced
Maximum Input Level
(min. gain, 1 kHz@0.5% THD+N)
Frequency Response (A-D) 20 Hz to 20 kHz, +/-0.2 dB
Dynamic Range (min. gain, A-weighted) > 118 dB
Dynamic Range (mid. gain, un-weighted) > 105 dB
THD+N (1 kHz, -1 dBFS, A-weighted) < 0.005%
Input Impedance 10 kΩ
Crosstalk (1 kHz, channel-to-channel) < -80 dB
+22 dBu, +/-0.5 dB
DAC Outputs
Type DB25 Female, Balanced
Maximum Output Level +24 dBu, +/-0.5 dB
Frequency Response 20 Hz to 20 kHz, +/-0.2 dB
Dynamic Range (A-weighted) > 120 dB
THD+N (1 kHz, -1 dBFS, un-weighted) < 0.005%
Output Impedance 51 Ω
Crosstalk (1 kHz, channel-to-channel) < -80 dB
Digital Audio
Connection Type ADAT / Dual SMUX
ADC Dynamic Range (A-wtd, 48 kHz) 118 dB
DAC Dynamic Range (A-wtd, 48 kHz) 118 dB
Bit Depth 24 bits
Internally Supported Sample Rates 44.1, 48, 88.2, 96 kHz
Clock
Jitter <20 ps RMS (20 Hz – 20 kHz)
Jitter Attenuation >60 dB (1 ns in => 1 ps out)
Signal Level LEDs
Signal 1 -50 dBFS
Signal 2 -30 dBFS
Signal 3 -20 dBFS
Signal 4 -10 dBFS
Signal 5 -6 dBFS
Signal 6 -4 dBFS
Signal 7 -2 dBFS
Clip -0.5 dBFS
English
Deutsch EspañolFrançais
9
Page 12

3.1 Audio Specification
3.2 Block Diagram
DIGITALLY CONTROLLED
TRIM
DB25 Mic Input
XLR Mic Input
CH1
DB25 Line Input
DB25 Mic Input
XLR Mic Input
CH2
DB25 Line Input
DB25 Mic Input
XLR Mic Input
CH3
DB25 Line Input
DB25 Mic Input
XLR Mic Input
CH4
DB25 Line Input
DB25 Mic Input
XLR Mic Input
CH5
DB25 Line Input
DB25 Mic Input
XLR Mic Input
CH6
DB25 Line Input
DB25 Mic Input
XLR Mic Input
CH7
DB25 Line Input
DB25 Mic Input
XLR Mic Input
CH8
DB25 Line Input
48V Direct
MIC PRE
DIGITALLY CONTROLLED
TRIM
48V Direct
MIC PRE
DIGITALLY CONTROLLED
TRIM
48V Direct
MIC PRE
DIGITALLY CONTROLLED
TRIM
48V Direct
MIC PRE
DIGITALLY CONTROLLED
TRIM
48V Direct
MIC PRE
DIGITALLY CONTROLLED
TRIM
48V Direct
MIC PRE
DIGITALLY CONTROLLED
TRIM
48V Direct
MIC PRE
DIGITALLY CONTROLLED
TRIM
48V Direct
MIC PRE
METER 1
A/D BUFFER
88.2 / 96 kHz
Select
ADAT 1 Out
METER 2
A/D BUFFER
ADAT 2 Out
METER 3
A/D BUFFER
METER 4
A/D BUFFER
ADC
METER 5
A/D BUFFER
METER 6
A/D BUFFER
METER 7
A/D BUFFER
METER 8
A/D BUFFER
DB25 Direct Output
10
ADAT 1 In
ADAT 2 In
44.1 / 48 kHz
88.2 / 96 kHz
DAC
DB25 DAC Output
Page 13

4 Warranty Information
PreSonus’ warranty obligations for this hardware product are limited to the terms set forth below:
4.1 How Consumer Law Relates To This Warranty
THIS WARRANTY GIVES YOU SPECIFIC LEGAL RIGHTS, AND YOU MAY HAVE OTHER RIGHTS THAT
VARY FROM STATE TO STATE (OR BY COUNTRY OR PROVINCE). OTHER THAN AS PERMITTED BY LAW,
PRESONUS DOES NOT EXCLUDE, LIMIT OR SUSPEND OTHER RIGHTS YOU MAY HAVE, INCLUDING THOSE
THAT MAY ARISE FROM THE NONCONFORMITY OF A SALES CONTRACT. FOR A FULL UNDERSTANDING
OF YOUR RIGHTS YOU SHOULD CONSULT THE LAWS OF YOUR COUNTRY PROVINCE OR STATE.
4.2 PreSonus Products And EU Statutory Warranty
When you purchase PreSonus products, European Union consumer law provides statutory
warranty rights in addition to the coverage you receive from the PreSonus limited warranty. A
summary of the EU Statutory Warranty and the PreSonus Limited Warranty is below:
EU Consumer Law PreSonus Limited Warranty
Repair or Replacement
Coverage For
Warranty Period
Cost of Coverage Provided at no additional cost Included at no additional cost
Who to contact to make
a claim
Defects present when customer
takes delivery
2 years (minimum) from
original date of purchase (unless
superseded by PreSonus)
The seller PreSonus technical support for your region
Defects arising after customer takes delivery
1 year from original date of purchase (unless superseded by PreSonus)
DigiMax™ DP88 User Manual
4.3 What This Warranty Covers
PreSonus Audio Electronics, Inc., (“PreSonus”) warrants defects in material and workmanship in PreSonusbranded products under normal use. This Limited Warranty applies only to hardware products manufactured
by or for PreSonus that can be identied by the PreSonus trademark, trade name, or logo axed to them.
4.4 Exclusions and Limitations
This warranty does not cover the following:
1. Damage caused by accident, abuse, improper installation, failure to
follow instructions in the applicable owner’s manual or improper
operation, rental, product modication, alteration, or neglect.
2. Damage from improper grounding, faulty wiring (AC and signal), faulty equipment, or connection
to a voltage range outside published specications (see applicable owner’s manual).
3. Damage to drivers or diaphragm assemblies found to have burnt voice coils
from over/under driving or signal surge from another device.
4. Damage occurring during shipment or improper handling.
5. Damage caused by repair or service performed by persons not authorized by PreSonus.
6. Products on which the serial number has been altered, defaced, or removed.
7. Products purchased from an unauthorized PreSonus dealer (products that
have transferable warranties are excluded from this provision provided
the customer and the product are registered with PreSonus).
4.5 Who This Warranty Protects
This Warranty protects only the original retail purchaser of the product (products
that have transferable warranties are excluded from this provision provided
the customer and the product are registered with PreSonus)
English
Deutsch EspañolFrançais
4.6 How Long This Warranty Lasts
A 1-Year Limited Warranty begins on the original date of purchase from the retail purchaser.
11
Page 14

4.7 What PreSonus Will Do
4.7 What PreSonus Will Do
PreSonus will repair or replace, at our sole and absolute option, products covered by this warranty at
no charge for labor or materials. If the product must be shipped to PreSonus for warranty service, the
customer must pay the initial shipping charges. PreSonus will pay the return shipping charges.
4.8 How to Get Warranty Service (USA)
1. You must have an active user account with PreSonus and your hardware
must be on le with your account. If you do not have an account, please go
to https://my.presonus.com and complete the registration process.
2. Contact our Technical Support Department at (225) 216-7887 or log a support
ticket at: http://support.presonus.com. TO AVOID THE POSSIBILITY OF SENDING
IN A PRODUCT THAT DOES NOT HAVE A PROBLEM, ALL SERVICE REQUESTS
SHALL BE CONFIRMED BY OUR TECH SUPPORT DEPARTMENT.
3. The return authorization number, as well as shipping instructions, shall be
provided after your service request is reviewed and conrmed.
4. The product should be returned for service in the original product packaging. Products
may be shipped in a manufactured “ight” or “road” style cases but PreSonus will NOT cover
any shipping damage to these cases. Products that are not shipped in the original product
package or a manufactured case may not receive a warranty repair, at PreSonus’ sole discretion.
Depending on the product model and the condition of your original packaging, your product
may not be returned to you in the original packaging. The return shipping box may be a
generic box that has been tted for that model tested if the original gift box is not available.
4.9 How to Get Warranty Service (outside of USA)
1. You must have an active user account with PreSonus and your hardware must
be on le with your account. If you do not have an account, please go to:
https://my.presonus.com and complete the registration process.
2. Contact the Technical Support/Service Department for your region at www.presonus.com/
buy/international_distributors and follow procedures provided by your PreSonus contact.
12
Page 15

DigiMax™ DP88 User Manual
Added bonus: Presonus’ previously Top Secret recipe for...
Chicken and Andouille Gumbo
Ingredients:
• 1 cup all-purpose flour
• 3/4 cup vegetable oil
• 1 large onion (diced)
• 1 small onion (quartered)
• 6 celery stalks (diced)
• 3 cloves garlic (2 minced, 1 whole)
• 1 lb link andouille sausage
• 4 chicken leg quarters
• 4 qt water
• 4 bay leaves
• 1 tsp thyme
• 1 tsp Old Bay seasoning
• 1-2 cup frozen okra, sliced
• 1/4 cup fresh parsley, minced
• 6-8 eggs (optional)
Cooking Instructions:
1. In a large pot, combine whole chicken leg quarters, water, quartered onion, Old Bay, 2 bay leaves, and 1 whole garlic clove. Cover and
bring to a low boil. Simmer stock until chicken is falling o the bone. Remove the chicken and set aside. Discard the onion, bay leaves,
and garlic, reserving the liquid.
2. In a heavy saucepan, heat 1 Tbspn of the oil on medium high heat and brown the andouille until it is cooked through. Set aside sausage
for later.
3. In the same saucepan, add and heat the remaining oil. Slowly add our 1-2 Tbspn at a time, stirring continuously. Continue cooking and
strirring the roux until it is a dark brown (it should look like melted dark chocolate). Be careful not to get the oil too hot or the our will
burn and you’ll have to start over.
4. Once roux has reached the correct color, add diced onion, celery, green pepper, and minced garlic. Cook until vegetables are very
tender. Do not cover.
5. Slowly add 1 qt of chicken broth and bring to a low boil, stirring constantly.
6. Transfer roux mixture to a soup pot and bring to low boil. Do not cover, the roux will settle on the bottom of the pot and burn.
7. Add remaining chicken broth, bay leaves, and thyme. Simmer for 30 minutes.
8. While gumboi is simmering, debone and shred chicken and slice the andouille.
9. Add chicken and andouille to gumbo and return to a simmer. Simmer for 30-45 minutes.
10. Stir in frozen okra and parsley and bring to a rolling boil.
11. Optional: Crack one egg into a teacup and quickly pour into the boiling gumbo. Repeat with the other eggs being careful not to cluster
them too closely. After all the eggs have risen back to the surface, reduce heat and simmer.
12. Correct seasoning with salt and pepper (red, white, and/or black) if necessary.
13. Serve over rice with potato salad.
Serves 12
English
© 2015 PreSonus Audio Electronics, Inc. All Rights Reserved. AudioBox, DigiMax, FireStudio, Nimbit, PreSonus, QMix, StudioLive, and XMAX are trademarks or registered trademarks
of PreSonus Audio Electronics, Inc. Capture, Impact, Mixverb Presence, RedLightDist, SampleOne, Studio One, and Tricomp are trademarks or registered trademarks of PreSonus
Software Ltd. Mac, Mac OS, and Macintosh are registered trademarks of Apple, Inc., in the U.S. and other countries. Windows is a registered trademark of Microsoft, Inc., in the U.S.
and other countries. Other product names mentioned herein may be trademarks of their respective companies. All specications subject to change without notice...
except the recipe, which is a classic.
Deutsch EspañolFrançais
13
Page 16

DigiMax™ DP88
8x8 96kHz preamp, converter with ADAT IO,
direct analog inputs, remote mic preamps,
DAC outputs, and Word Clock IO
Owner’s Manual
18011 Grand Bay Court
Baton Rouge, LA 70809 USA
1-225-216-7887
www.presonus.com
Part# 70-12000021-A
 Loading...