

Page 1
Elevator Potentiometer Replacement
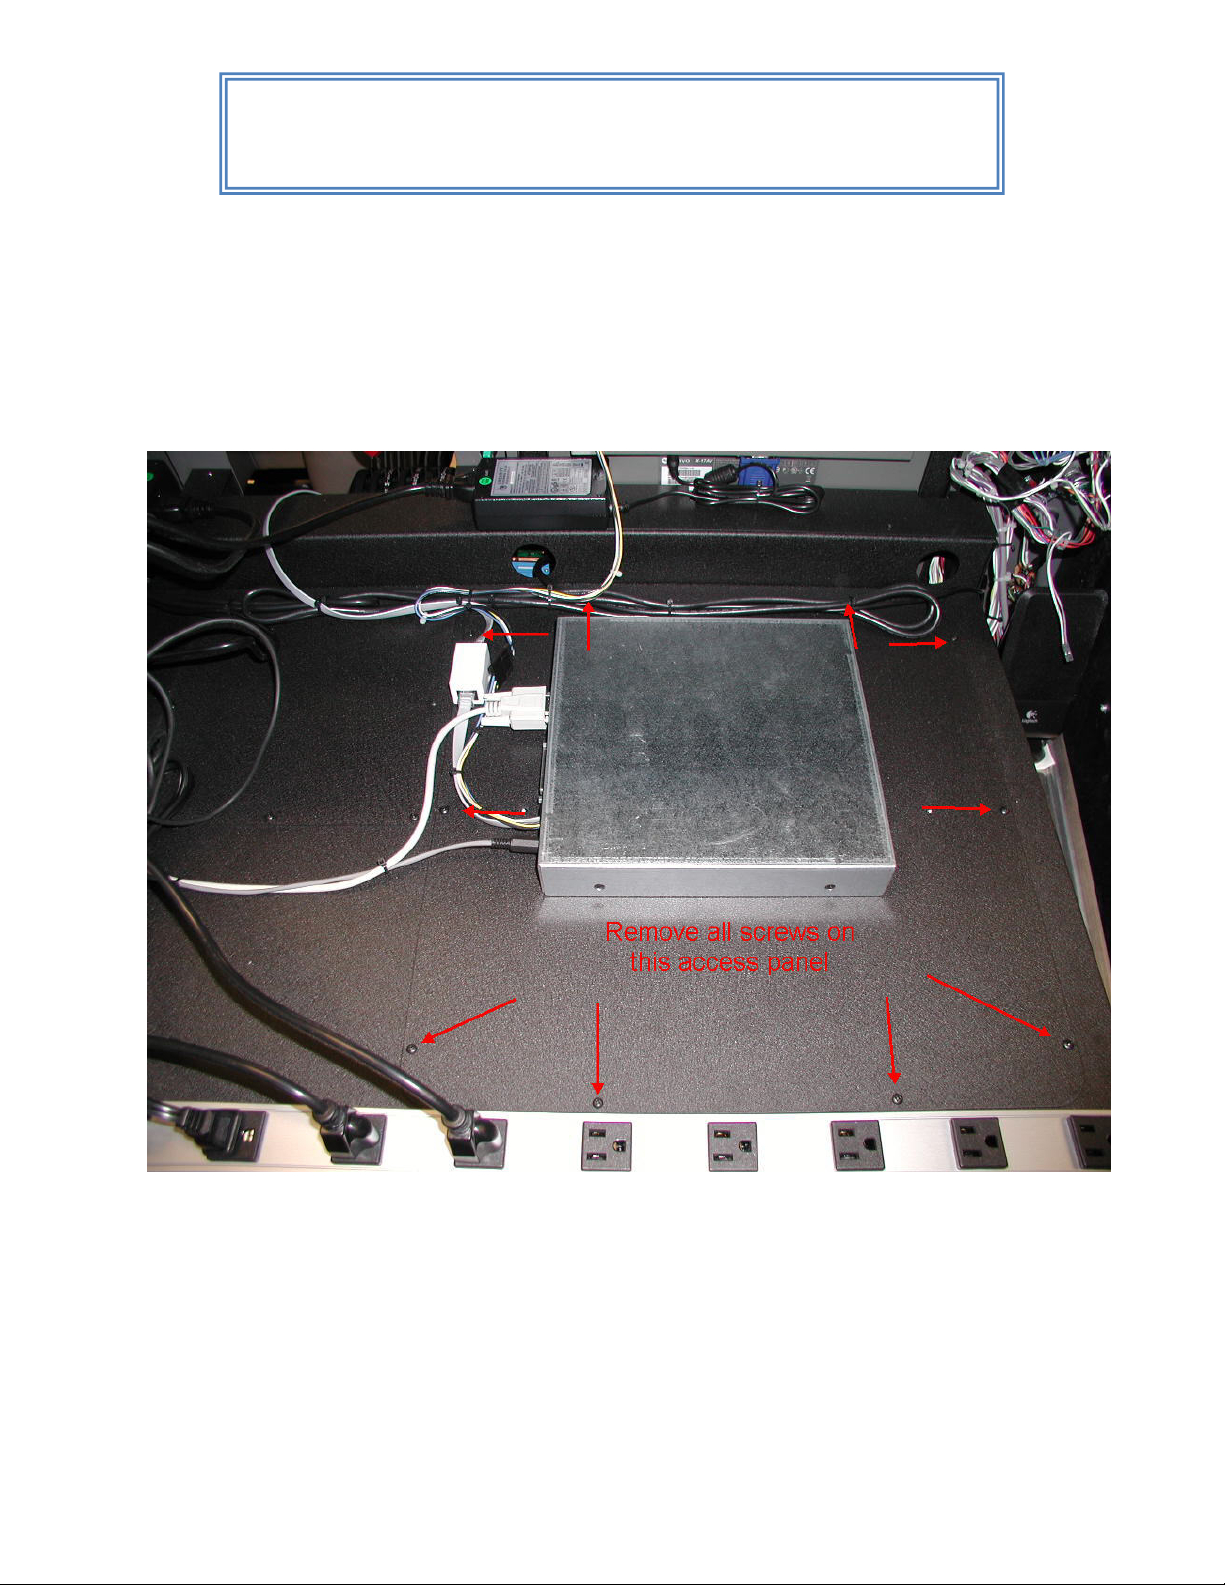
1. Make sure that the Elevator trim wheel is in the T/O position.
2. Disconnect power to the cockpit.
3. Remove cowling cover.
4. Disconnect power connection to exhaust fans (if applicable.)
5. Remove screws on the black cover (10 total). There are screws on both left and right sides, all of them
will need to be removed.
Guide
Page 2
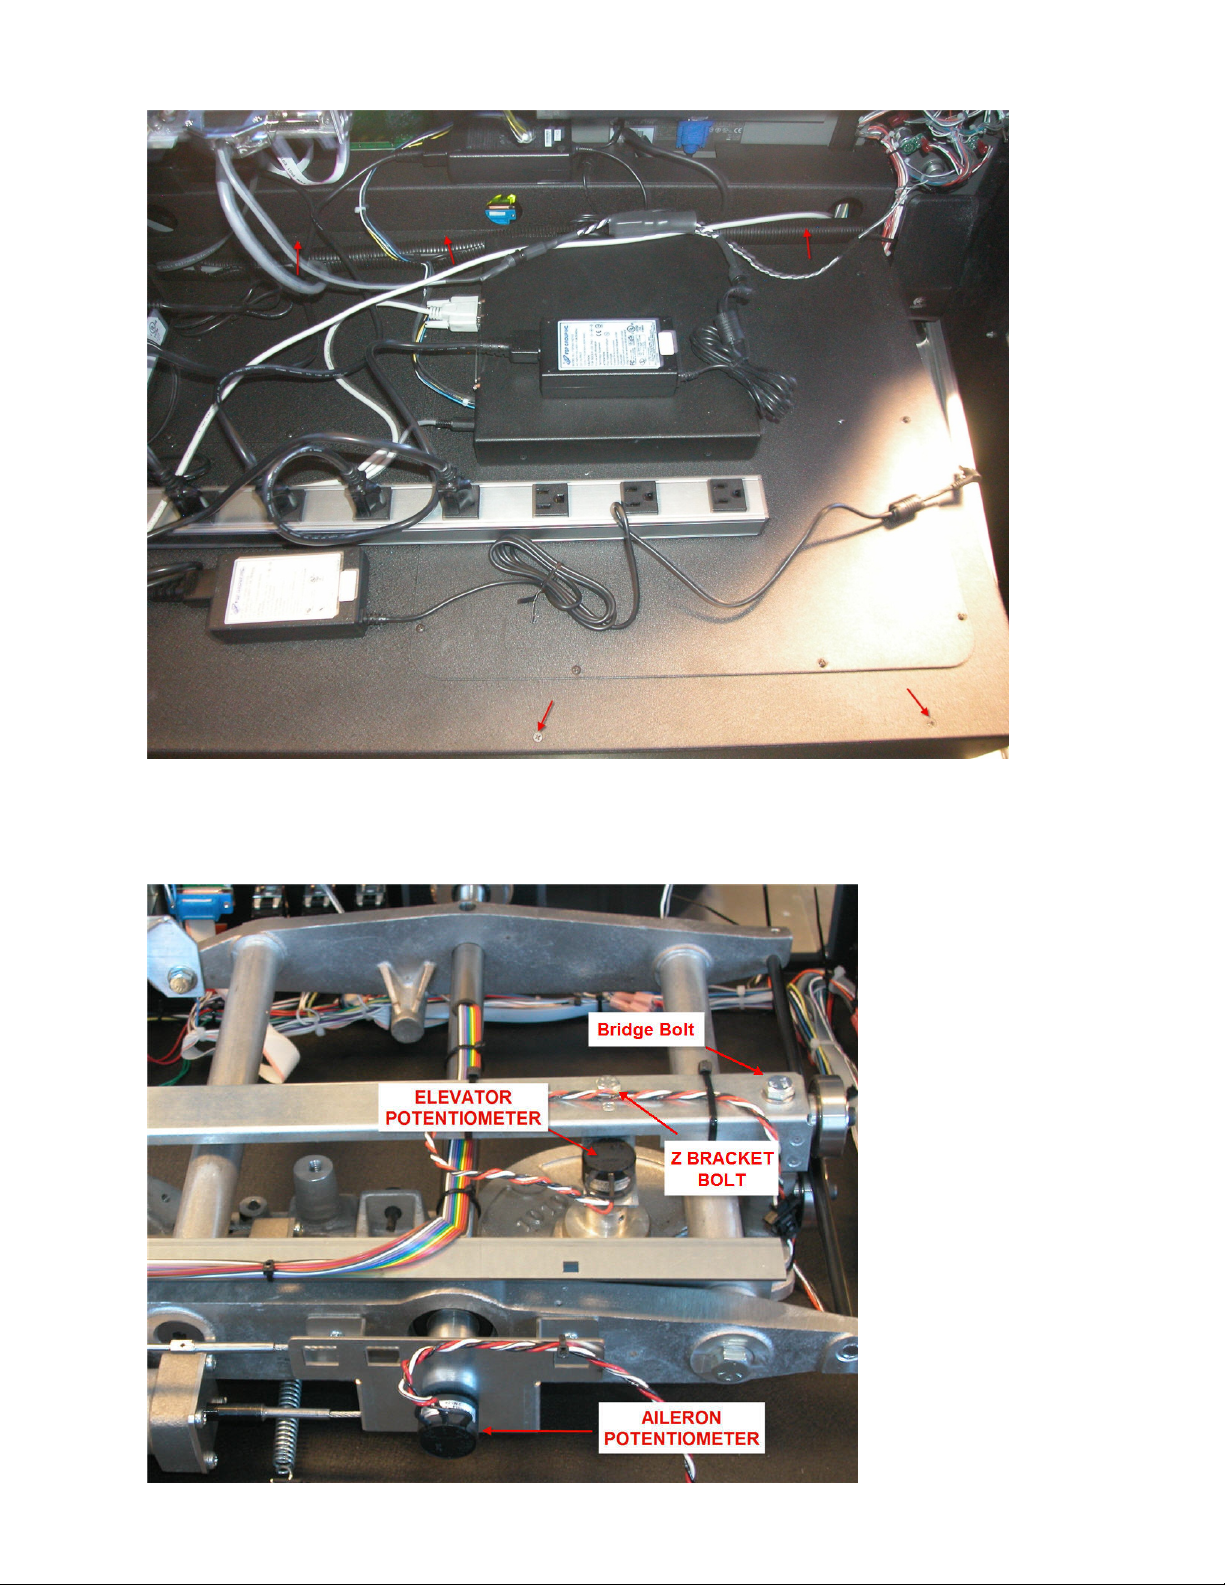
If you do not have the access panel, you will need to remove the 12 screws holding full back cover.
6. Once cover is removed, you will have access to the control carriage. Use picture below for reference for
location of elevator and aileron potentiometer.
Page 3
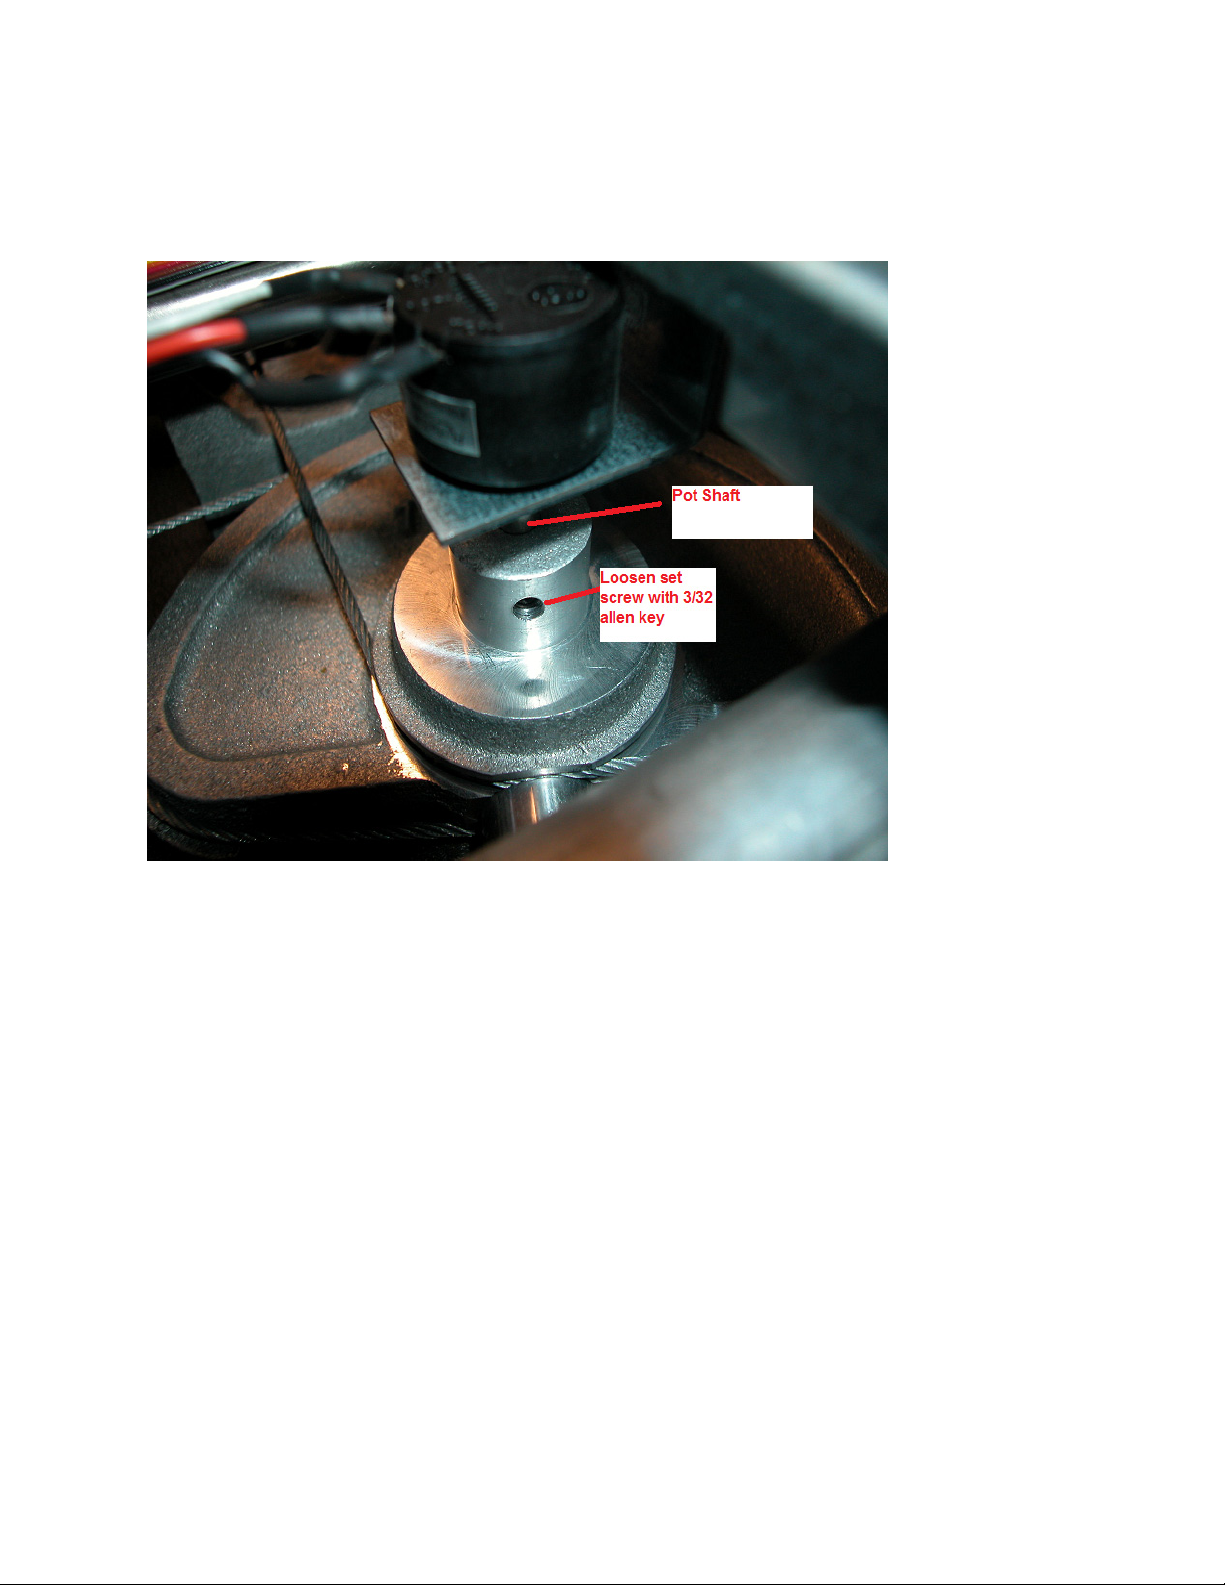
7. Using a ½ inch wrench, remove the bridge bolt. (see picture above)
8. Using a 7/16 wrench, remove the Z bracket bolt. (see above)
9. Cut the wires to the pitch potentiometer. Cut the wires as close to the potentiometer as you can.
10. Remove the setscrew and pull the Z bracket and potentiometer out. Make sure not to bend the Z-
bracket.
11. Remove the old potentiometer and install the new one on the Z bracket. Do not tighten completely yet.
12. Slide the potentiometer in the pulley, pins should point away from the yoke. Do not install allen screw
yet.
Page 4
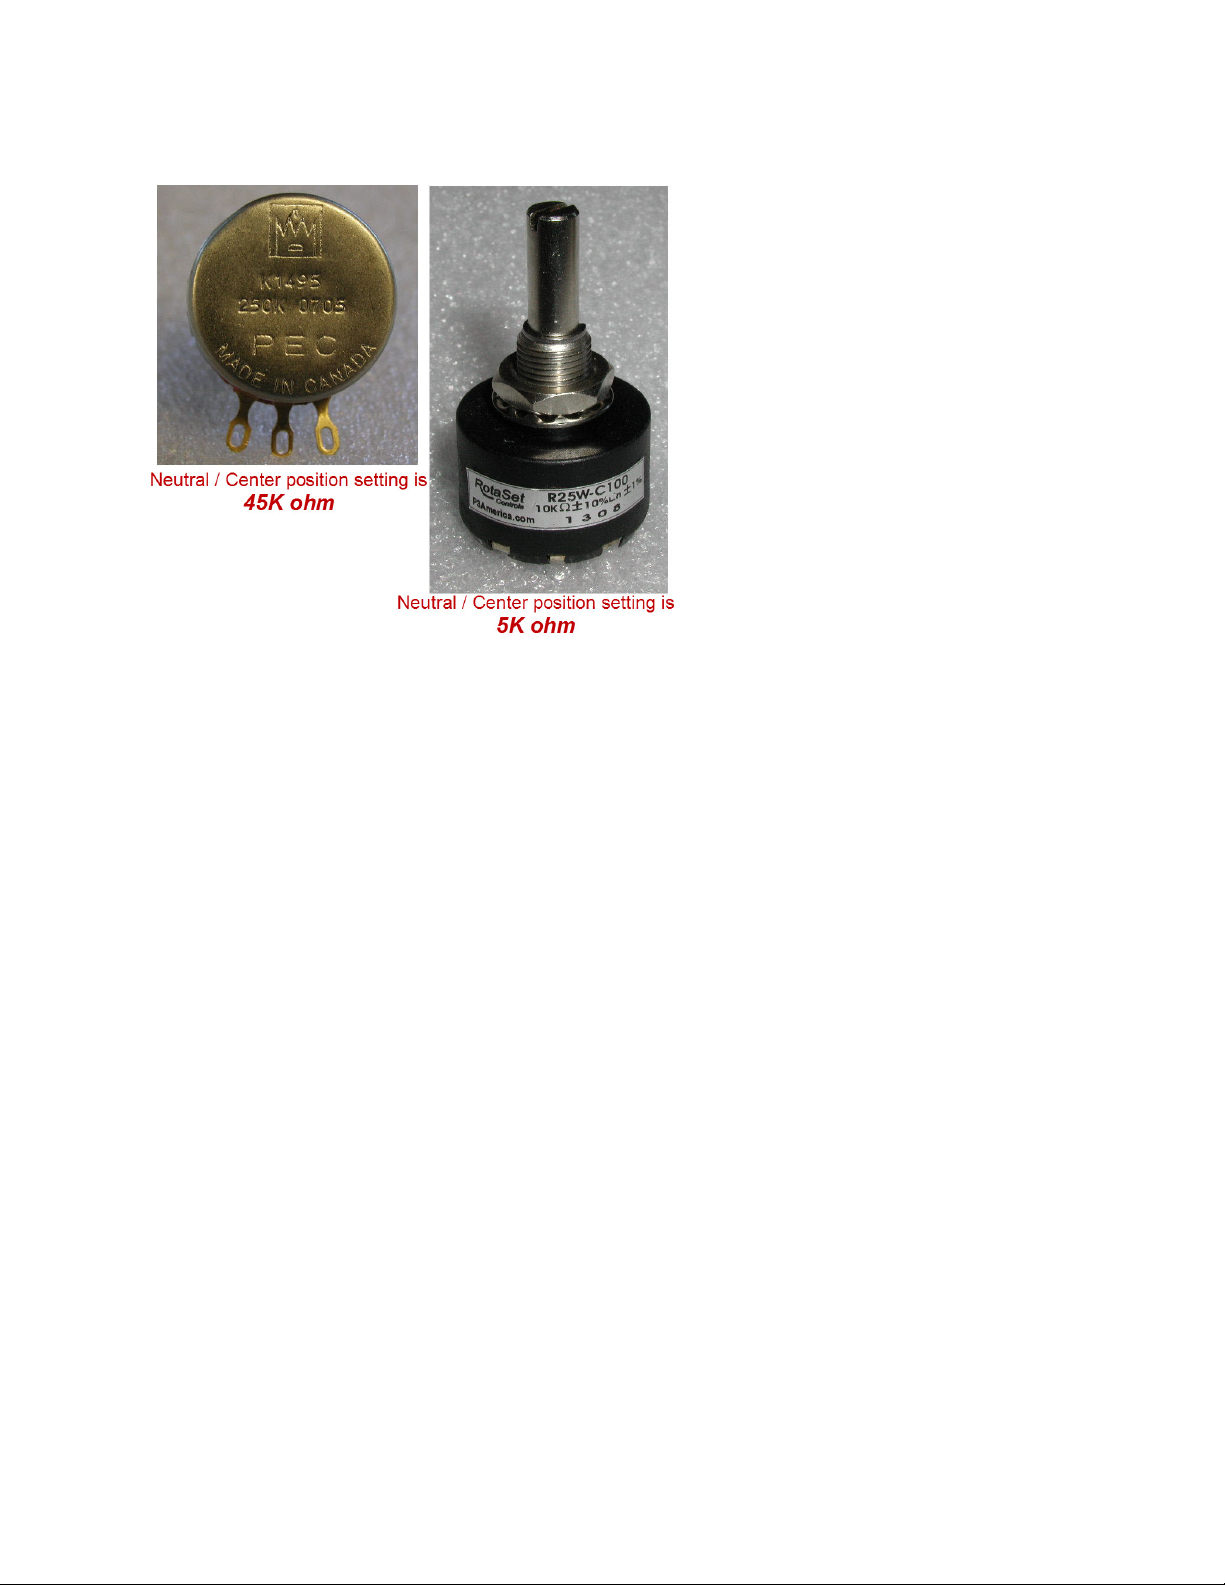
Determining the potentiometer you have:
13. Using the reference picture below you will either have the 250K potentiometer (left) or 10K
potentiometer (right). Also note the center position value setting.
For the 250K ohm potentiometer:
14. Using the probe of a multi-meter take a reading from the same 2 pins used in the old potentiometer.
15. Turn the potentiometer shaft until you get 45K Ohm on your meter.
For the 10K ohm potentiometer:
16. Using the probe of a multi-meter take a reading from the center pin and one of the outside pins
17. Turn the potentiometer shaft until you get 5K Ohm on your meter.
Reinstallation:
18. Reinstall bridge. Do not over tighten bridge bolt, bearing should turn freely but should also keep
carriage from coming up.
19. Secure the Z-Bracket onto the bridge. Make sure not to pinch the wires.
20. Tighten the potentiometer nut on the Z bracket. Pins should point away from the yoke.
21. Reinstall set screw.
22. Using a multi-meter, recheck the potentiometer shaft is still set to 45K Ohm if using the 250K ohm or 5k
ohm if using the 10K ohm potentiometer . If you need to make a small adjustment you can loosen the
potentiometer nut and turn the potentiometer body until you get the proper reading.
23. Retighten nut.
24. Reconnect wires.
 Loading...