

Page 1
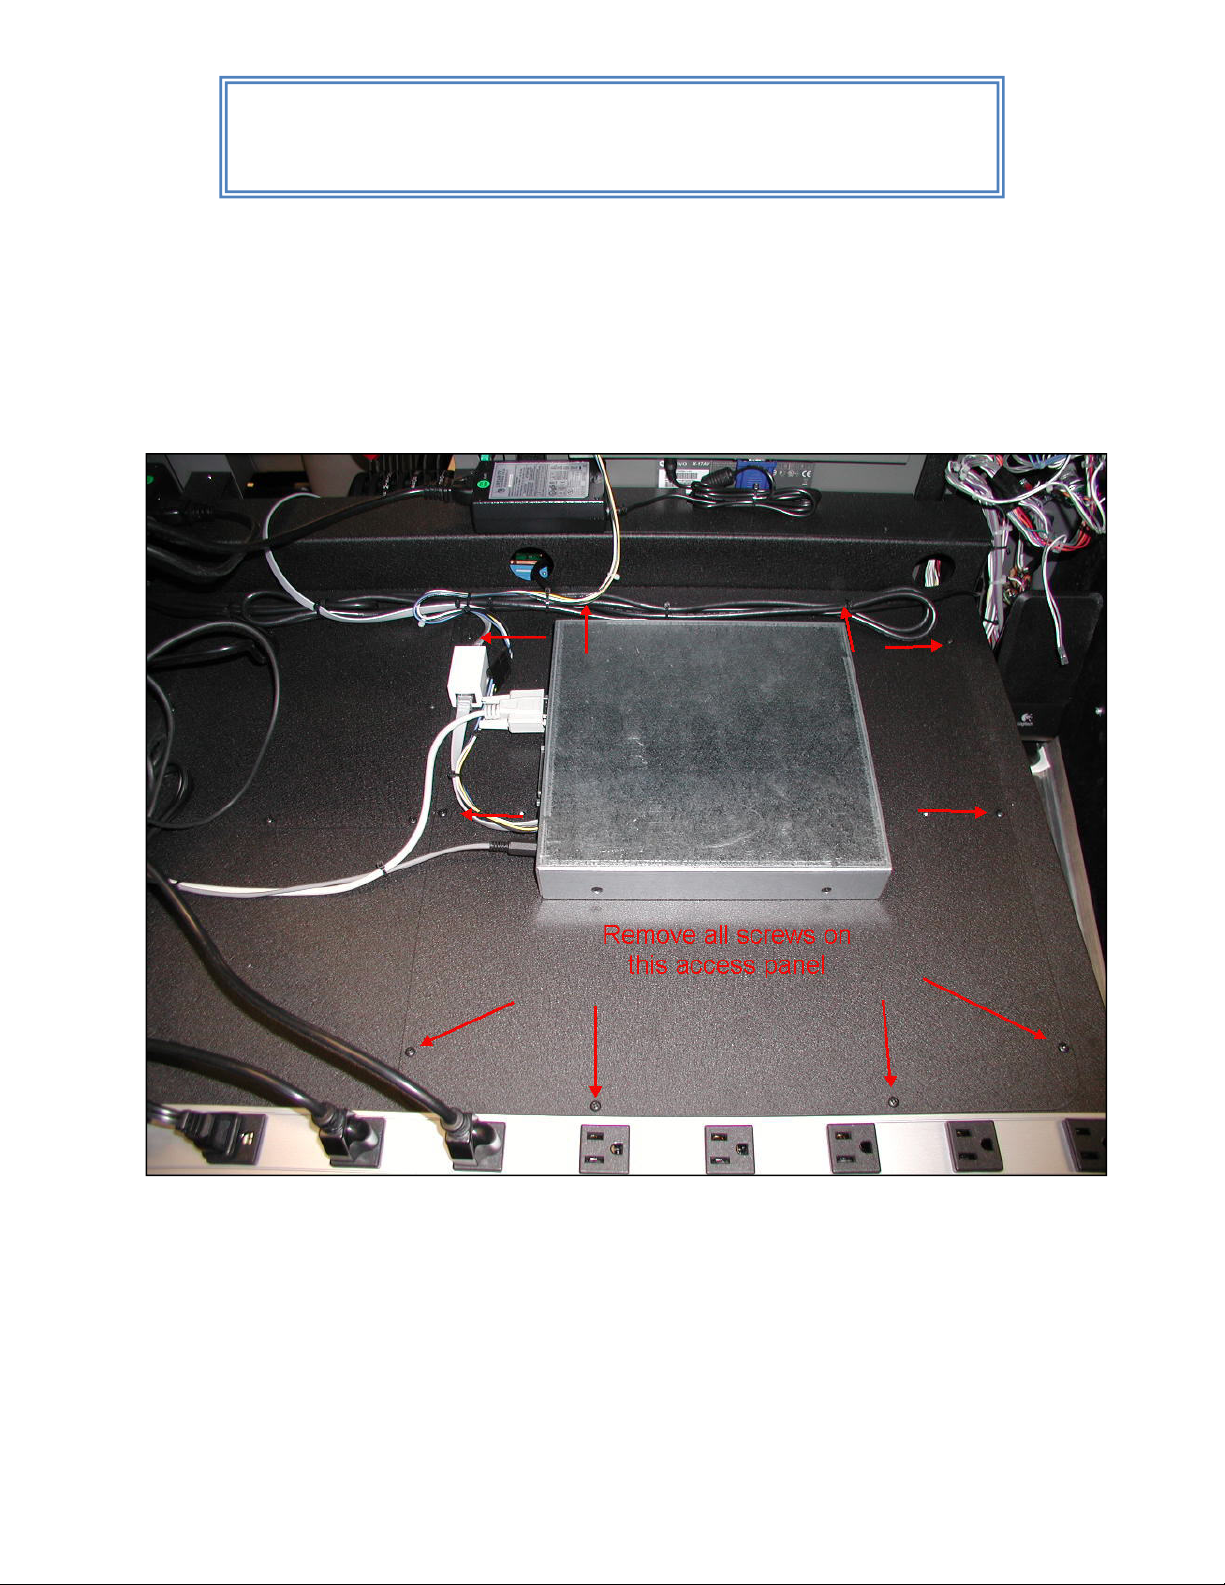
1. Make sure that the Elevator trim wheel is in the T/O position.
2. Disconnect power to the cockpit.
3. Remove cowling cover.
4. Disconnect power connection to exhaust fans (if applicable.)
5. Remove screws on the access panel black cover (10 total). There are screws on both left and right
sides, all of them will need to be removed
Aileron Potentiometer Replacement
Guide
Page 2
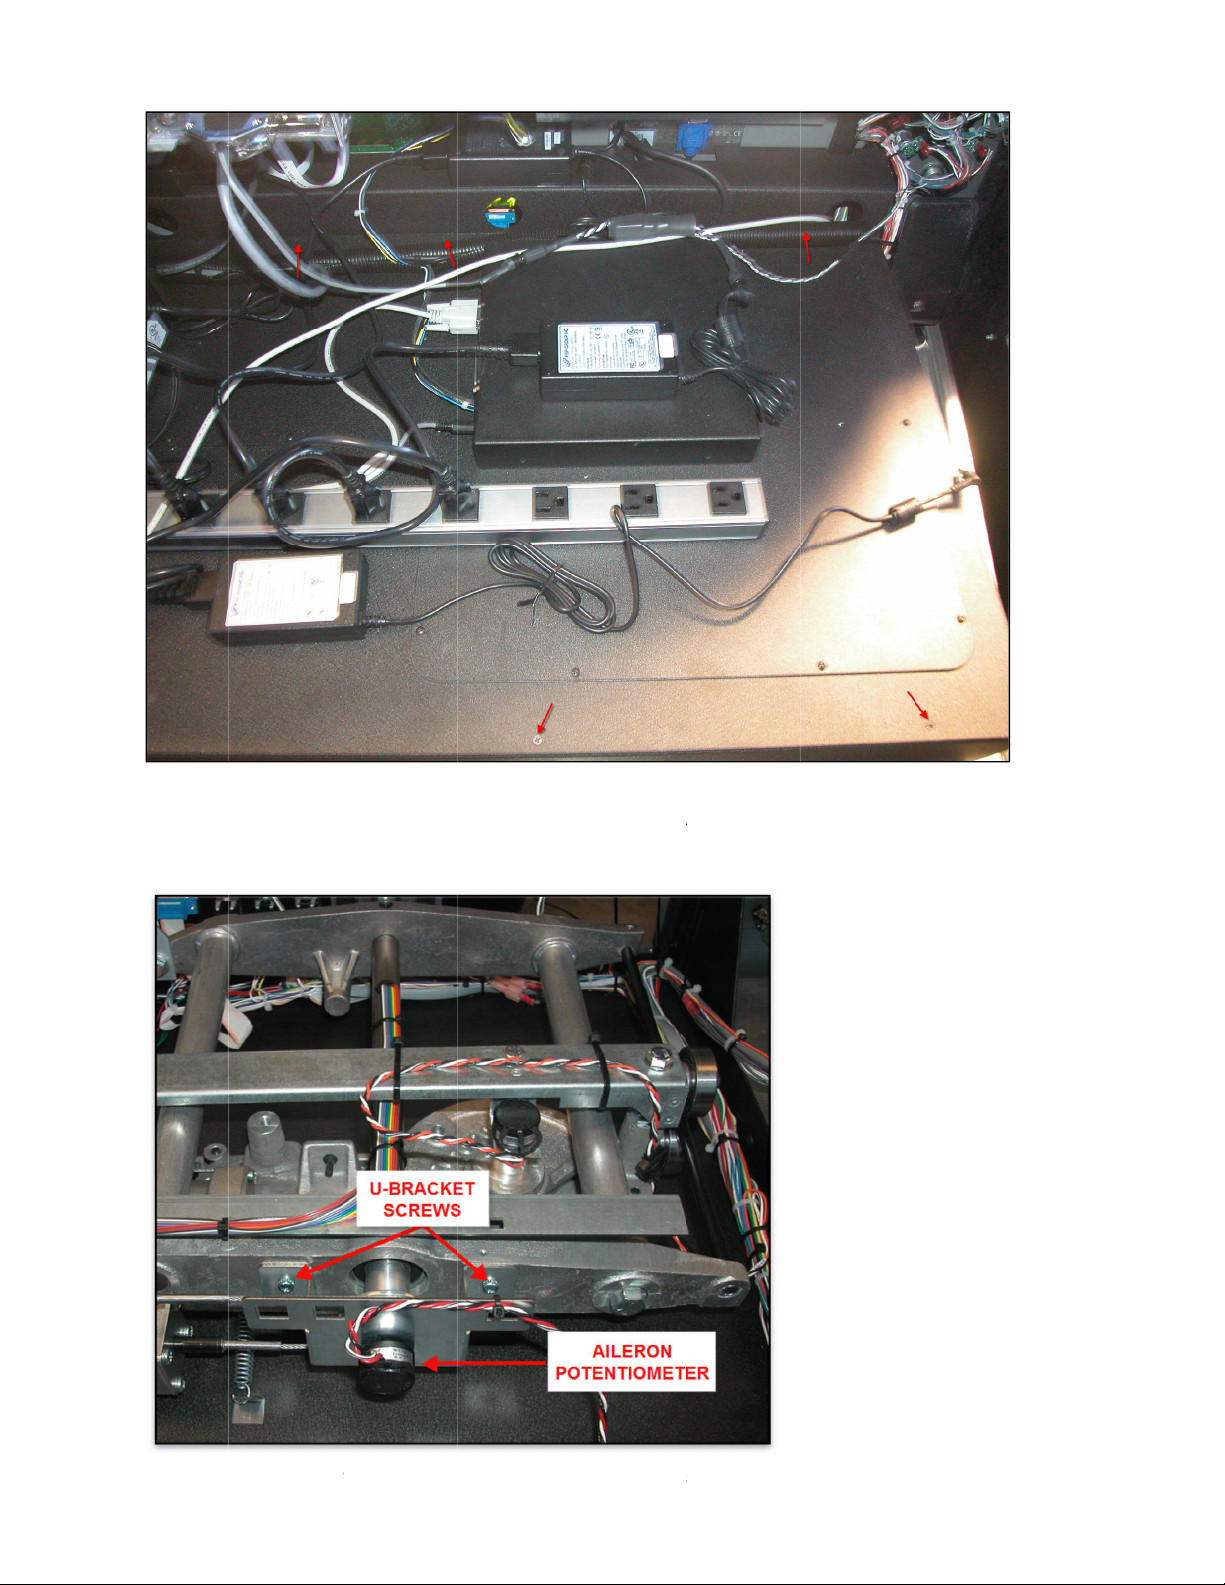
6
7
If you do
v
o
2
v
a
r
a
p
e
l
e
U
m
t
c
t
e
d
e
r
not have th
e access p
nel, you wil
need to re
ove the 12
screws hol
ing full bac
k cover.
. Once co
location
er is remo
f elevator
ed, you will
nd aileron
have acces
otentiomet
s to the con
r.
rol carriag
. Use pictur
below for
eference for
. With a #
Philips sc
ew driver, r
move the
-Bracket s
rews.
Page 3
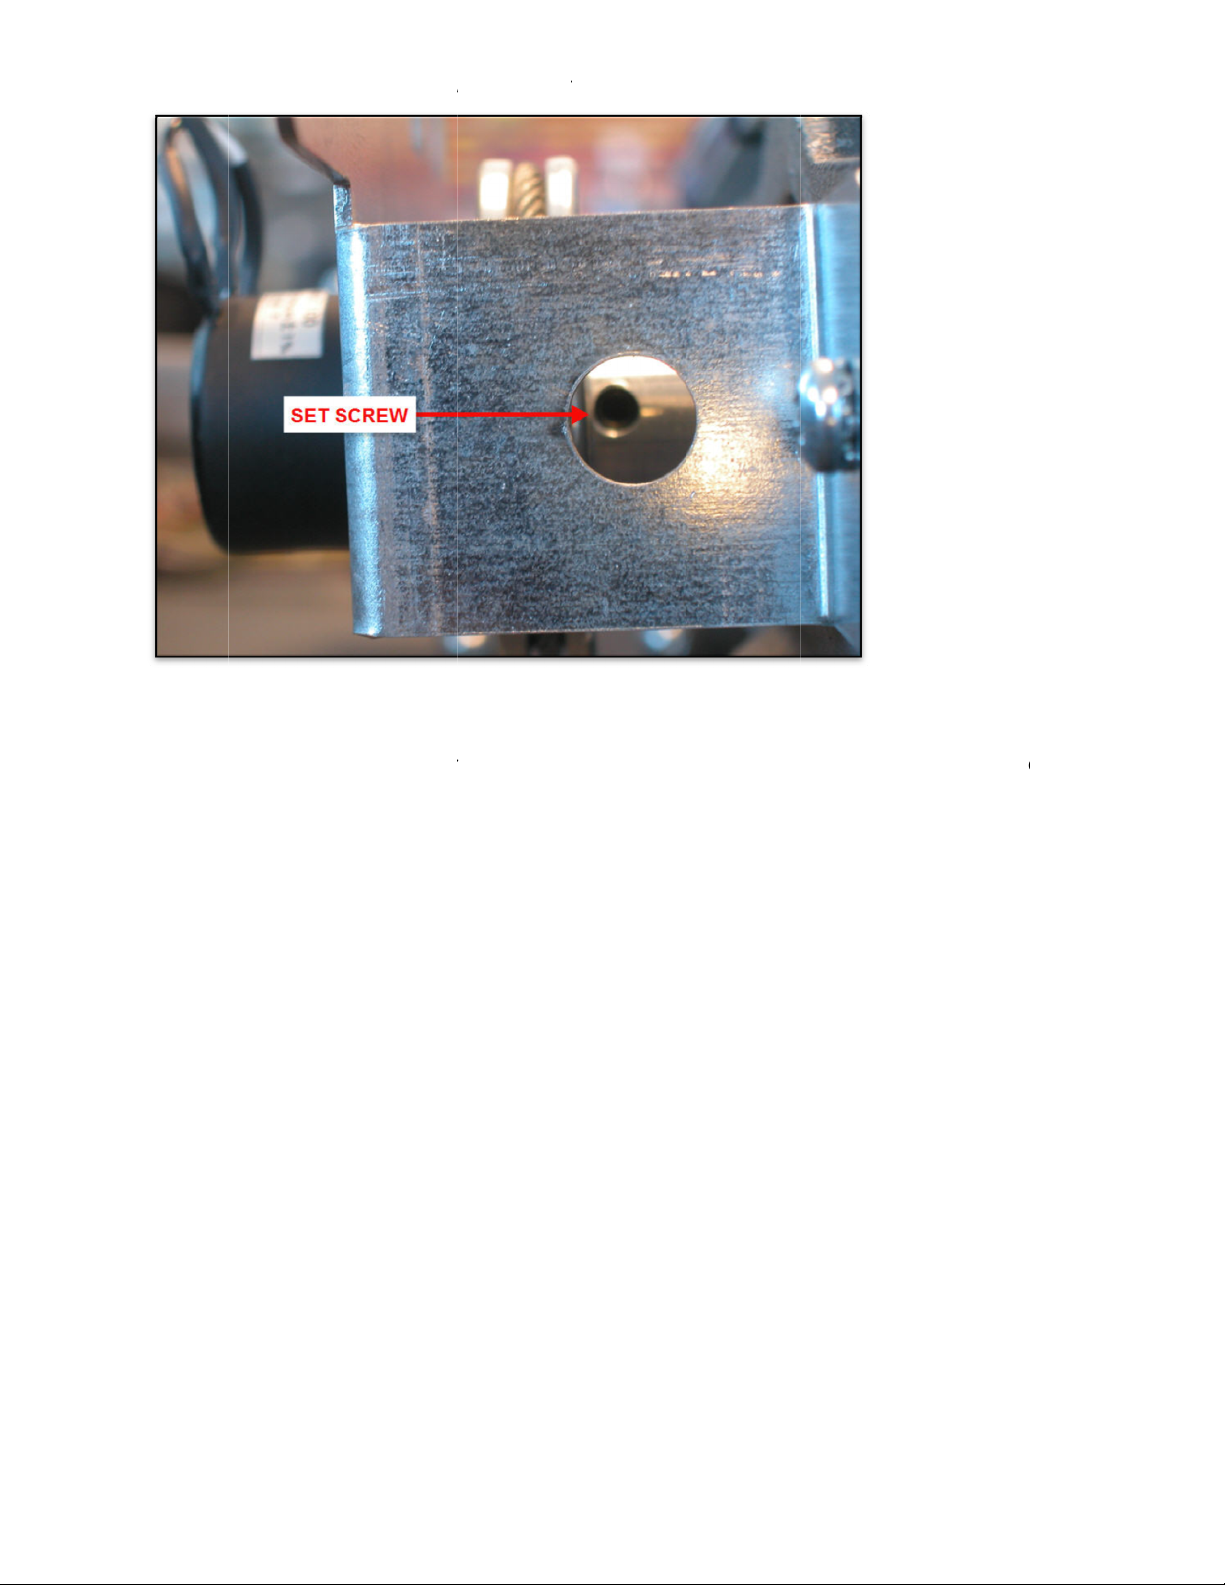
8
911
1
. Remove
w
U
e
e
e
r
n
e
n
/
m
m
r
/
r
h
e
r
k
t
e
s
e
o
s
t
o
n
a
e
o
e
n
the set scr
w using a 3
32 Allen w
ench.
. Cut the
0. Pull the
1. Remove
later.
2. Install th
complet
ires to the
-Bracket a
the old pot
new pote
ly yet.
oll potentio
d potentio
ntiometer f
tiometer on
eter. Cut t
eter out. B
om the U-b
the U-brac
e wires as
careful no
acket. Sav
et, making
close to the
to bend th
the potenti
ure the pin
potentiome
U-Bracket.
meter as y
are pointi
er as you c
ur pin guid
g up the. D
n.
for wiring
not tighte
Page 4
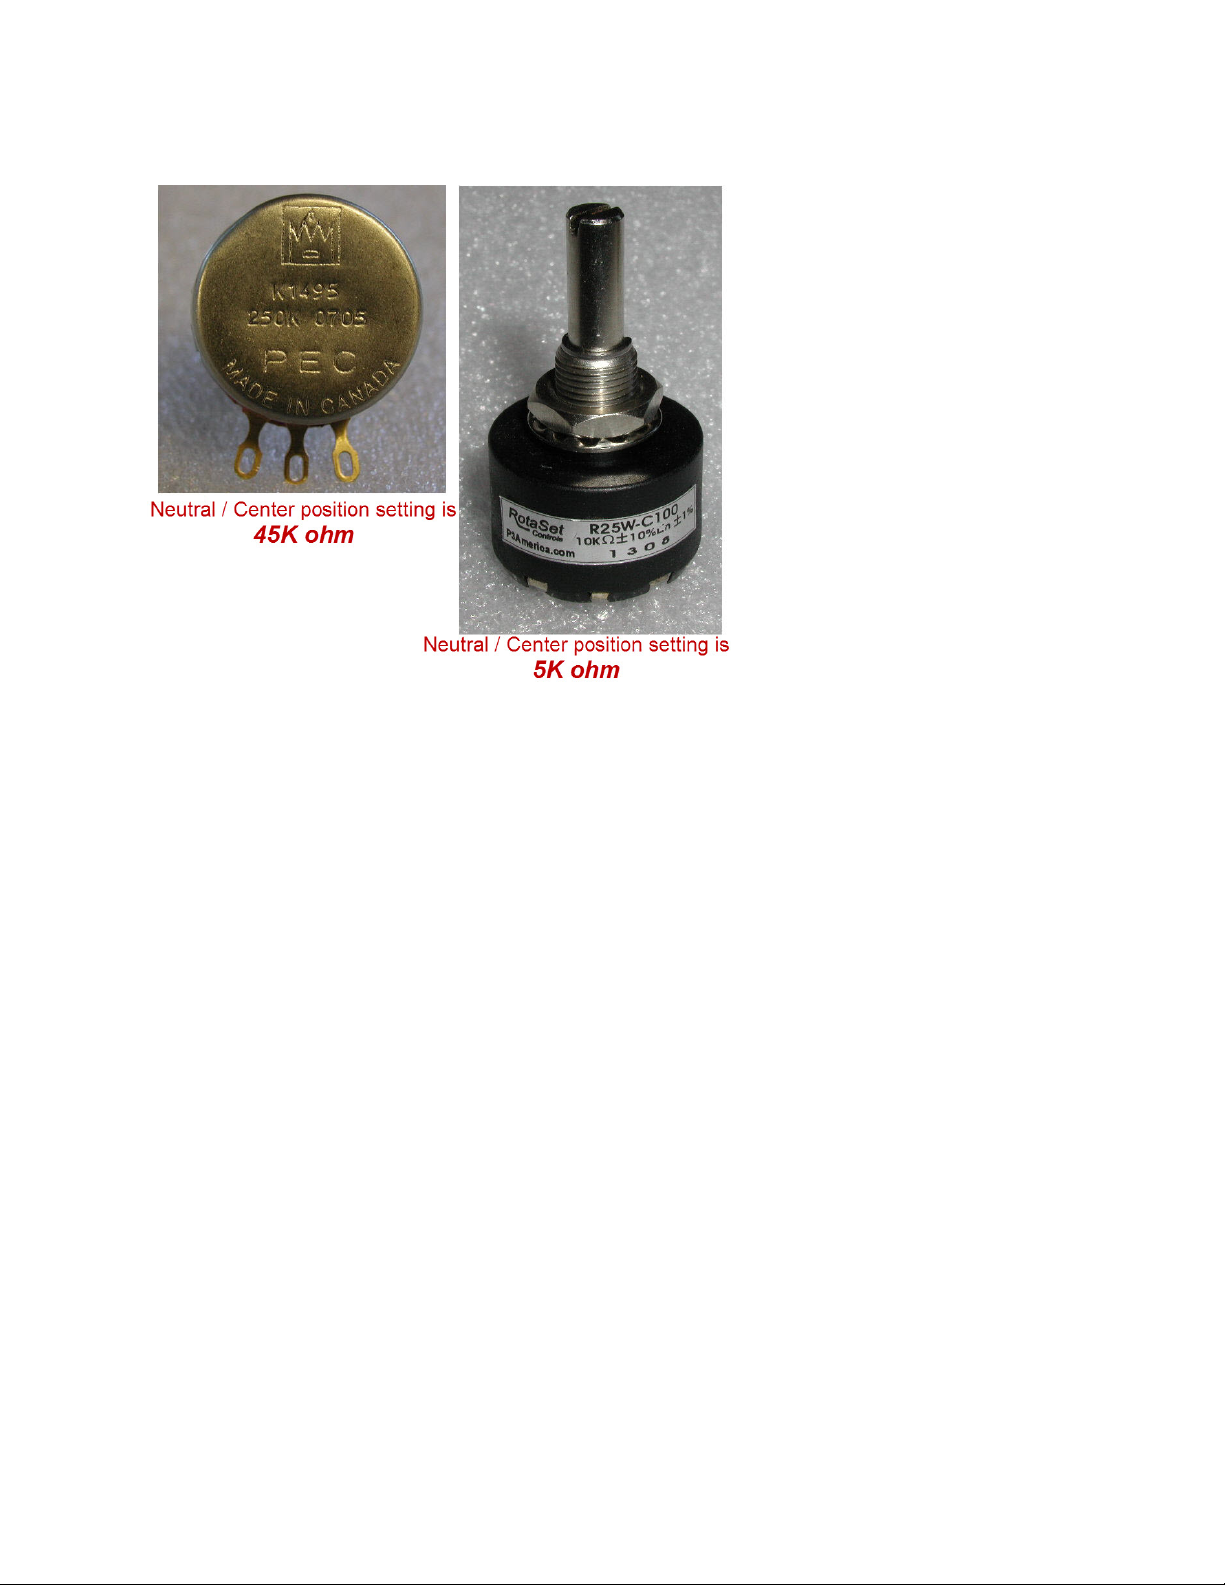
Determining the potentiometer you have:
13. Using the reference picture below you will either have the 250K potentiometer (left) or 10K
potentiometer (right). Also note the center position value setting.
For the 250K ohm potentiometer:
14. Using the probe of a multi-meter take a reading from the same 2 pins used in the old potentiometer.
15. Turn the potentiometer shaft until you get 45K Ohm on your meter.
For the 10K ohm potentiometer:
16. Using the probe of a multi-meter take a reading from the center pin and one of the outside pins
17. Turn the potentiometer shaft until you get 5K Ohm on your meter.
Reinstallation:
18. Install the potentiometer on the U-Bracket
19. Install the assembly in the pulley and secure with the U-Bracket screws. Do not install set screw yet.
20. Tighten the potentiometer nut on the U-bracket. Pins should point up.
21. Install and tighten the set screw.
22. Using a multi-meter, recheck the potentiometer shaft is still set to 45K Ohm if using the 250K ohm or 5k
ohm if using the 10K ohm potentiometer . If you need to make a small adjustment you can loosen the
potentiometer nut and turn the potentiometer body until you get the proper reading.
23. Retighten the nut.
24. Reconnect wires to the potentiometer.
 Loading...