

powersoft Ottocanali 4K4User Guide v 1.6March 2013Ottocanali 12K4, Ottocanali 4K4, Ottocanali 12K4 User Manual
Page 1
powersoft _ottocanali_4k4_8k4_12k4_uguide_en_v1.6
© 2013 Powersof t
Powersoft • Via Enrico Conti, 5 • 50018 Scandicci (FI) • Italy
+39 055 735 0230 • sales@powersoft.it • www.powersoft-audio.com
DO000140
Ottocanali 4K4
User Guide v 1.6
March 2013
Ottocanali
12K4
Ottocanali 8K4
Ottocanali 12K4
Page 2

▶
2
This page intentionally left blank
Page 3

powersoft _ottocanali_4k4_ 8k4_12k4_uguide_en_v1.6
© 2013 Powersof t
Powersoft • Via Enrico Conti, 5 • 50018 Scandicci (FI) • Italy
+39 055 735 0230 • sales@powersoft.it • www.powersoft-audio.com
Ottocanali 4K4/8K4/12K4
User Guide
1 Warnings. ........................................5
1.1 Impor tant Safety Instructions . ......................5
1.2 Warning Notices . .................................5
1.2 .1 Locati on. ....................................5
1.2.2 Precautions Regarding Installation...............5
1.3 Safety Rules . .....................................6
1.4 Speaker Damage . .................................6
1.5 Speaker Output Shock Hazard . ....................6
2 Front and Rear Panel Reference Figures. ...............7
3 Welcome. ........................................9
3.1 Introduction . .....................................9
3.2 The Ot tocanali Series . ............................9
3.3 More Sound and Less Weight . .....................9
4 Installation........................................9
4.1 Unpacking ........................................9
4.2 Mounting . ......................................10
4.3 Cooling . ........................................10
4.4 Operating Precautions ............................10
4.5 Grounding . .....................................10
4.6 AC Mains Connection . ...........................10
5 Connections and Operation. .......................11
5.1 Introduction .....................................11
5.2 Front Panel Controls Access .......................11
5.3 Front Panel Adjustments . .........................11
5.3.1 Output Level Adjustments. ...................11
5.3.2 Energy Save. ................................12
5.4 Front Panel Monitoring . ..........................12
5.5 Connecting Audio Inputs . ........................13
5.6 Connecting Audio Outputs . ......................13
5.7 Hi-Z 70V/100V Operations . ......................14
5.7.1 Rear panel DIP switches. .....................14
5.8 Bridge Mode Connection . ........................14
5.9 GPIO Operations . ...............................14
5.9.1 A larms ......................................14
5.9.2 Remote ON/OFF. . . . . . . . . . . . . . . . . . . . . . . . . . . .16
6 Protection.......................................16
6.1 Turn On/Turn Off Muting . ........................16
6.2 Shor t Circuit Protection . .........................16
6.3 Thermal Protection . .............................16
6.3.1 Thermal Warning. ...........................16
6.3.2 Thermal Shutdown. .........................16
6.4 DC Fault Protection . .............................16
6.5 Input/Output Protection . .........................16
7 User Maintenance.................................16
7.1 Cleaning . .......................................16
7.2 Service . ........................................17
7.3 Dust Removal . ..................................17
8 Warranty........................................17
9 Assistance. ......................................17
10 Technical specication. ............................18
10.1 Ottocanali 4K4 . .................................18
10.2 Ottocanali 8K4 . .................................19
10.3 Ottocanali 8K4 DSP+AVB. ........................20
10.4 Ottocanali 12K4 . ................................21
Page 4

▶
4
This page intentionally left blank
Page 5
powersoft _ottocanali_4k4_ 8k4_12k4_uguide_en_v1.6
© 2013 Powersof t
Powersoft • Via Enrico Conti, 5 • 50018 Scandicci (FI) • Italy
+39 055 735 0230 • sales@powersoft.it • www.powersoft-audio.com
Ottocanali 4K4/8K4/12K4
User Guide
1 Warnings
1.1 Important Safety Instructions
CAUTION
RISK OF ELECTRIC SHOCK
DO NOT OPEN
!
CAUTION: TO REDUCE THE RISK OF ELECTRIC SHOCK, DO
NOT ATTEMPT TO OPEN ANY PART OF THE UNIT . NO
USER-SERVICEABLE PARTS INSIDE. REFER SERVICING TO
QUALIFIED SERVICE PERSONNEL.
“WARNING: TO REDUCE THE RISK OF FIRE OR ELECTRIC
SHOCK , DO NOT EXPOSE THIS APPARATUS TO RAIN
OR MOISTURE. OBJECTS FILLED WITH LIQUIDS, SUCH AS
VASES, SHOULD NOT BE PLACED ON THIS APPARATUS”
“TO COMPLETELY DISCONNECT THIS APPARATUS FROM
THE AC MAINS, DISCONNECT THE POWER SUPPLY CORD
PLUG FROM THE AC RECEPTACLE”
“THE MAINS PLUG OF THE POWER SUPPLY CORD MUST
REMAIN READILY ACCESSIBLE”
SAFEGUARDS: Electrical energy can perform many useful
functions. This unit has been engineered and manufactured to
assure your personal safety. Improper use can result in potential
electrical shock or re hazards. In order not to defeat the
safeguards, obser ve the following instructions for its installation,
use and servicing.
▶
Read these instructions.
▶
Keep these instructions.
▶
Heed all warnings.
▶
Follow all instructions.
▶
Do not use this amplier near water.
▶
Clean only with a dry cloth.
▶
Do not block any ventilation openings.
▶
Install in accordance with the manufacturer’s instructions.
▶
Do not install near any heat sources such as radiators, heat
registers, stoves, or other apparatus (including ampliers)
that produce heat.
▶
Do not defeat the safety purpose of the polarized or
grounding-type plug. A polarized plug has two blades with
one wider than the other. A grounding type plug has two
blades and a third grounding prong. The wide blade or the
third prong are provided for your safety. If the provided
plug does not t into your outlet, consult an electrician for
replacement of the obsolete outlet.
▶
Protect the power cord from being walked on or pinched
particularly at plugs, convenience receptacles, and the point
where they exit from the apparatus.
▶
Only use attachments/accessories specied by the
manufacturer.
▶
Unplug this amplier during lightning storms or when unused
for long periods of time. Refer all servicing to qualied ser vice
personnel. Servicing is required when the amplier has been
damaged in any way. For example if the power-supply cord
or plug have been damaged, if liquid has been spilled or
objects have fallen into the amplier, if the amplier has been
exposed to rain or moisture, if it has been dropped or if it
does not operate normally.
EXPLANATIONS OF GRAPHICAL SYMBOLS:
“The Lightning Flash with arrowhead symbol within an equilateral
triangle is intended to aler t the user to the presence of uninsulated
“dangerous voltage” within the product enclosure that may be of
sufcient magnitude to constitute a risk of shock to persons”.
!
“The exclamation point within an equilateral triangle is intended
to aler t the user to the presence of important operating and
maintenance (servicing) instructions in the literature accompanying
the product”.
1.2 Warning Notices
!
1.2 .1 Location
Install the amplier in a well-ventilated location where it will not
be exposed to high temperature or humidity.
Do not install the amplier in a location that is exposed to direct
sun rays, or near hot appliances or radiators. Excessive heat can
adversely affect the cabinet and internal components. Installation
of the amplier in a damp or dusty environment may result in
malfunction or accident.
1.2.2 Precautions Regarding Installation
Placing and using the amplier for long periods of time on heat
generating sources will affect its performance. Avoid placing the
amplier on heat generating sources. Install this amplier as far as
possible from tuners and T V sets. An amplier installed in close
proximity of such equipment may experience noise or generic
performance degradation.
WARNING. To prevent re or electric shock:
▶
The ventilation openings must not be impeded by any item
such as newspapers, tablecloths, curtains etc; keep a distance
of at least 50cm from the front and rear ventilation openings
of the amplier.
▶
Do not expose this amplier to rain or moisture.
▶
This equipment must not be exposed to dripping or splashing
liquids: objects lled with liquids, such as vases, must not be
placed on the amplier.
Page 6

▶
6
Ottocanali 4K4/8K4/12K4 User Guide
1.3 Safety Rules
!
▶
This device must be powered exclusively by earth connected
mains sockets in electrical networks compliant to the IEC 364
or similar rules.
▶
It is absolutely necessary to verify this fundamental
requirement of safety and, in case of doubt, require an
accurate check by qualied personnel.
▶
The manufacturer cannot be held responsible for damages
caused to persons, things or data due to an improper or
missing ground connection.
▶
Before powering this amplier, verify that the correct voltage
rating is being used.
▶
Verify that your mains connection is capable of satisfying the
power ratings of the device.
▶
Do not spill water or other liquids into or on the amplier.
▶
Do not use this ampliler if the electrical power cord is frayed
or broken.
▶
Do not remove the cover. Failing to do so will expose you to
potentially dangerous voltage.
▶
No naked ame sources such as lighted candles should be
placed on the amplier.
▶
Provide a sectioning breaker between the mains connections
and the amplier. The suggested device is a 16A/250V AC, C
or D curve, 10K A.
▶
Contact the authorized service center for ordinary and
extraordinary maintenance.
1.4 Speaker Damage
!
Powersof t Class D ampliers are among the most power ful
professional ampliers available and are capable of producing
much more power than many loudspeakers can handle. It is the
user’s responsibility to use speakers suitable to the amplier and
to use them in a sensible way that will not cause damage.
Powersof t will not be held responsible for damaged speakers.
Consult the speaker manufacturer for power handling
recommendations.
Even if you reduce the gain using the amplier’s front panel
attenuation controls, it is still possible to reach full output power if
the input signal level is high enough.
A single high-power tone can damage high frequency drivers
almost instantaneously, while low frequency drivers can usually
withstand very high, continuous power levels for a few seconds
before they fail. Reduce power immediately if you hear any
speaker “bottoming out” - harsh pops or cracking distor tion that
indicate that the speaker voice coil or diaphragm is striking the
magnet assembly.
Powersof t recommends that you use ampliers of this power
range for more headroom (cleaner sound) rather than for
increased volume.
1.5 Speaker Output Shock Hazard
A Class D amplier is capable of producing hazardous output
voltages. To avoid electrical shock, do not touch any exposed
speaker wiring while the amplier is operating.
This manual contains important information on operating your
Powersoft amplier correctly and safely. Please read it carefully
before operating your amplier. If you have any questions,
contact your Powersoft dealer.
Page 7
▶
7
Ottocanali 1204 User Guide
2 Front and Rear Panel Reference Figures
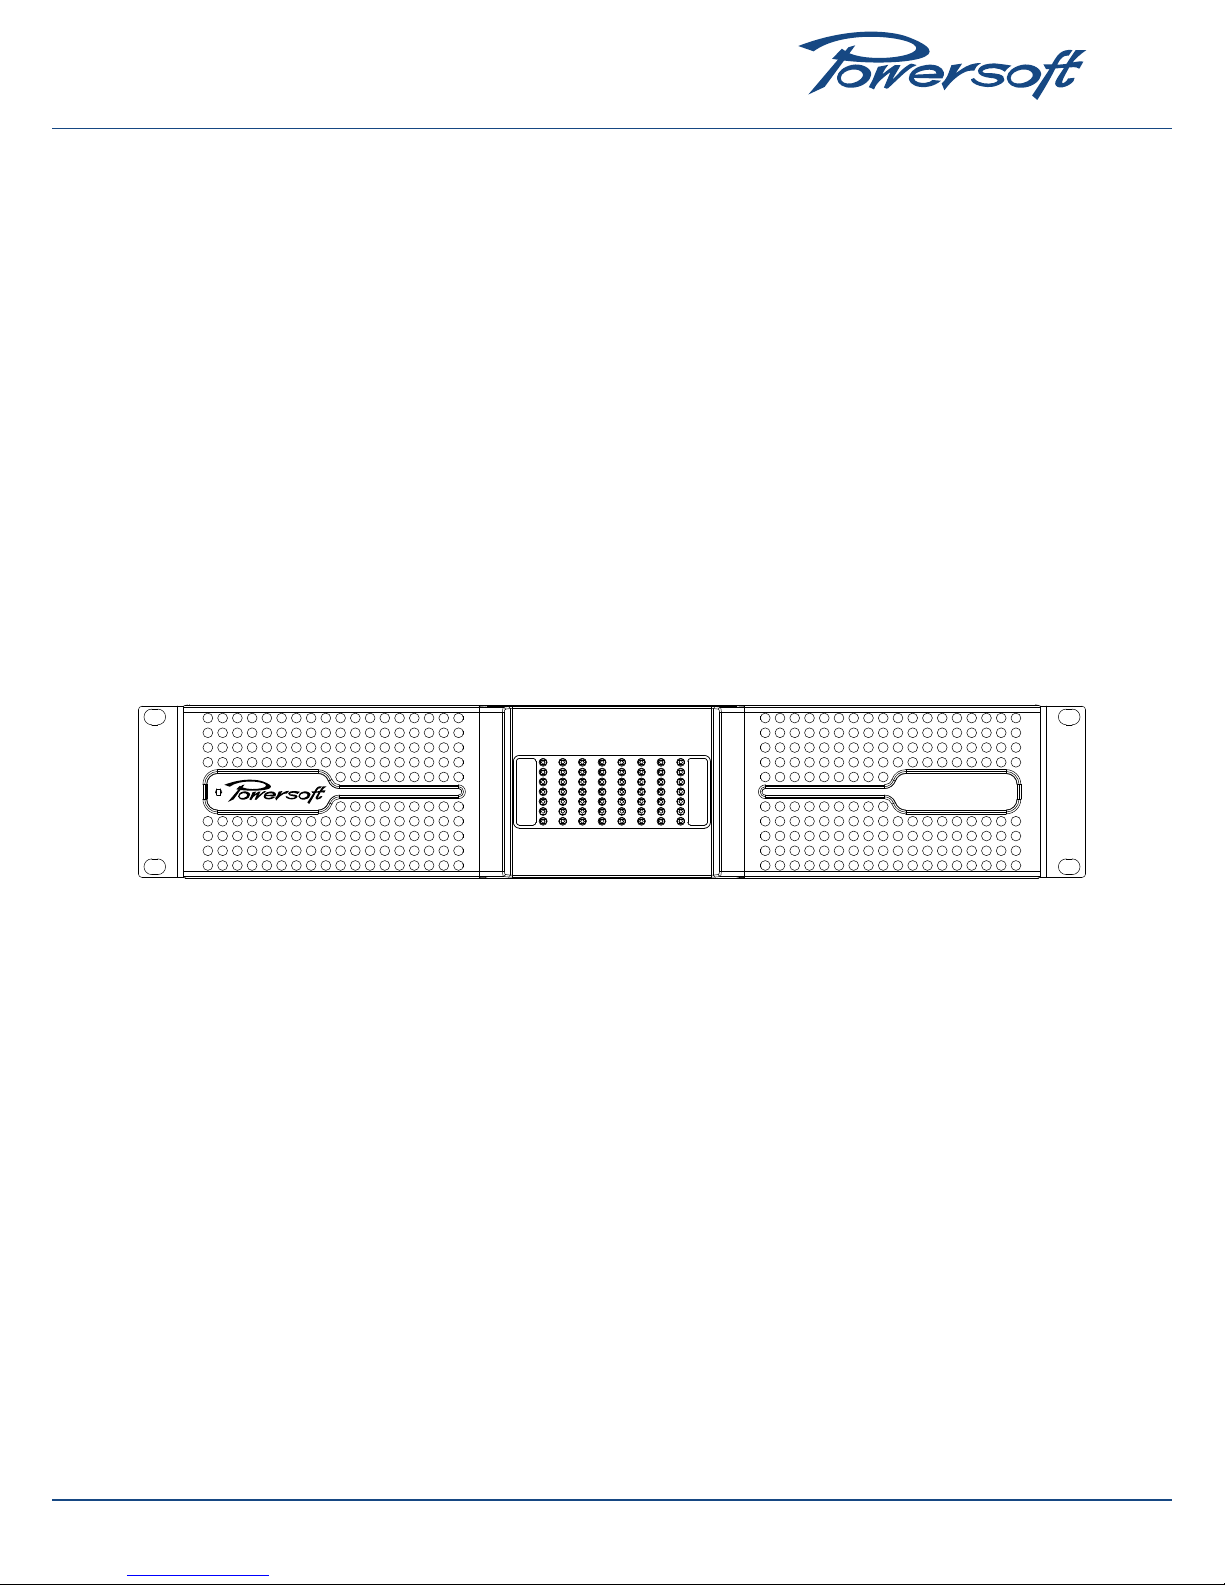
REF. FIGURE 1: Front panel view with closed side panels
Ottocanali
8K4
Page 8
▶
8
Ottocanali 4K4/8K4/12K4 User Guide
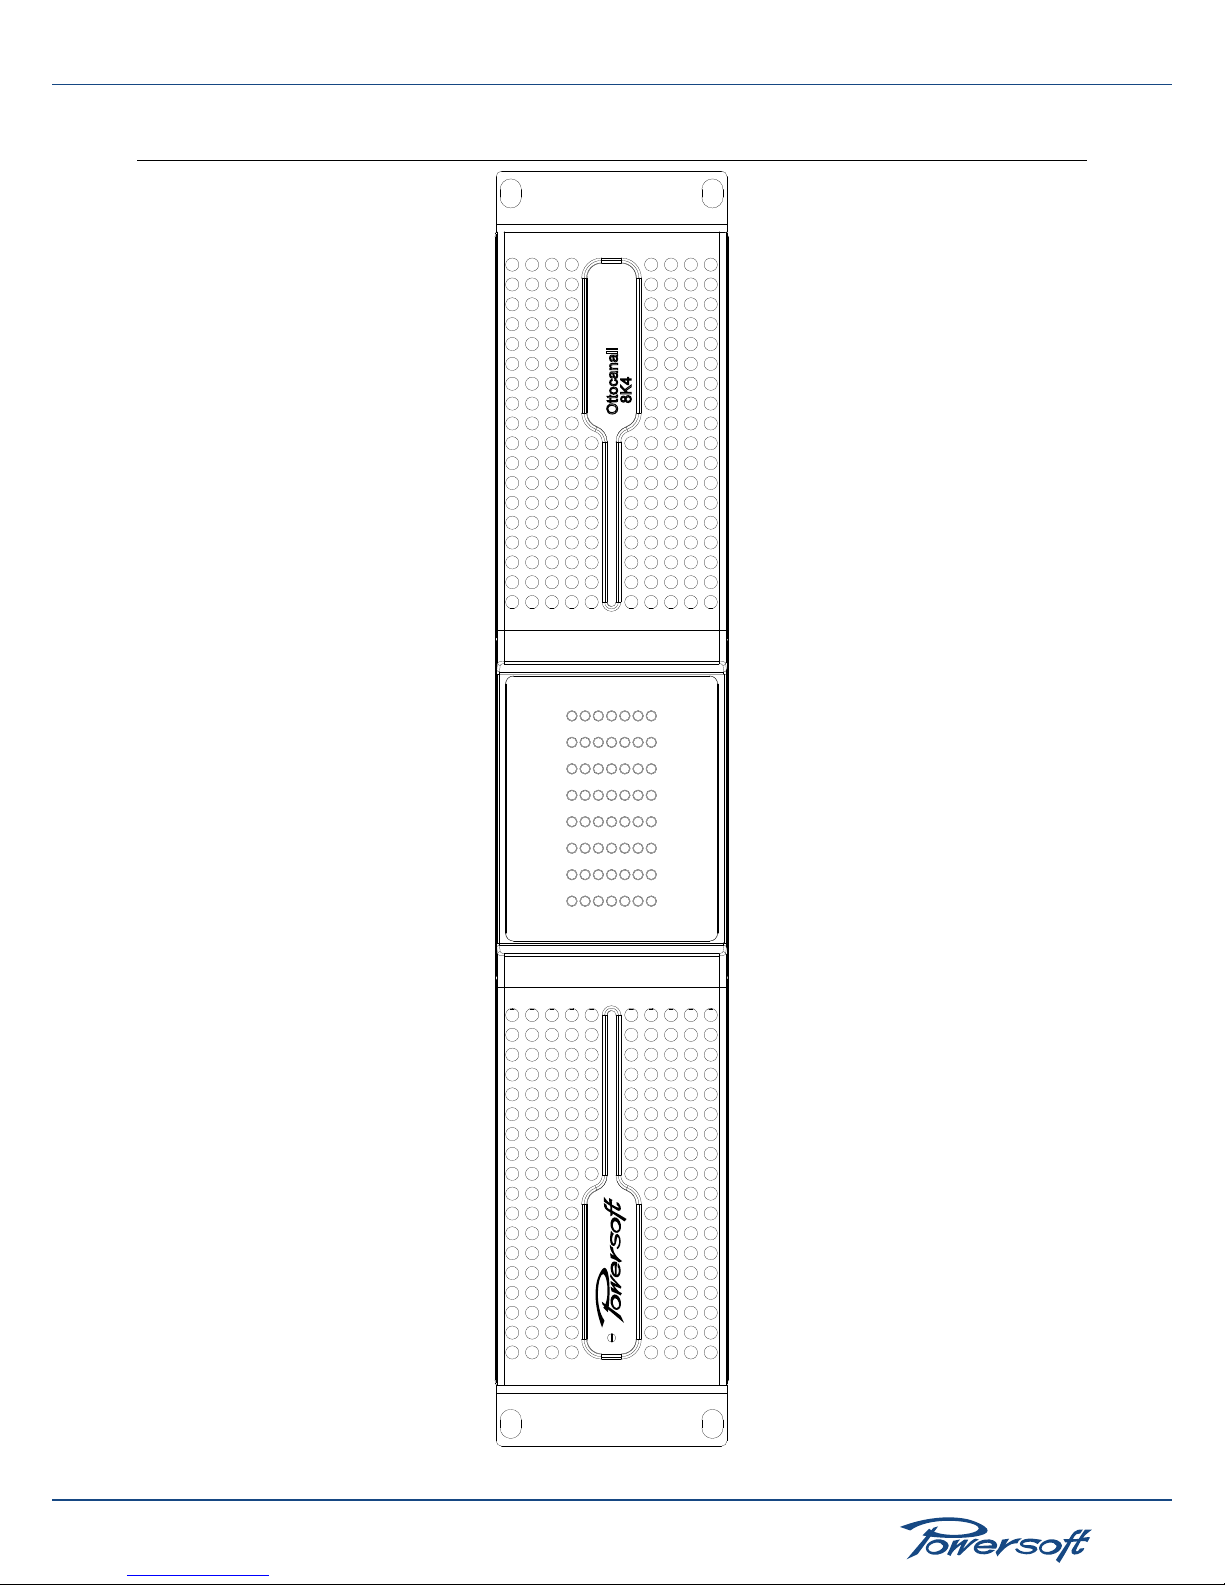
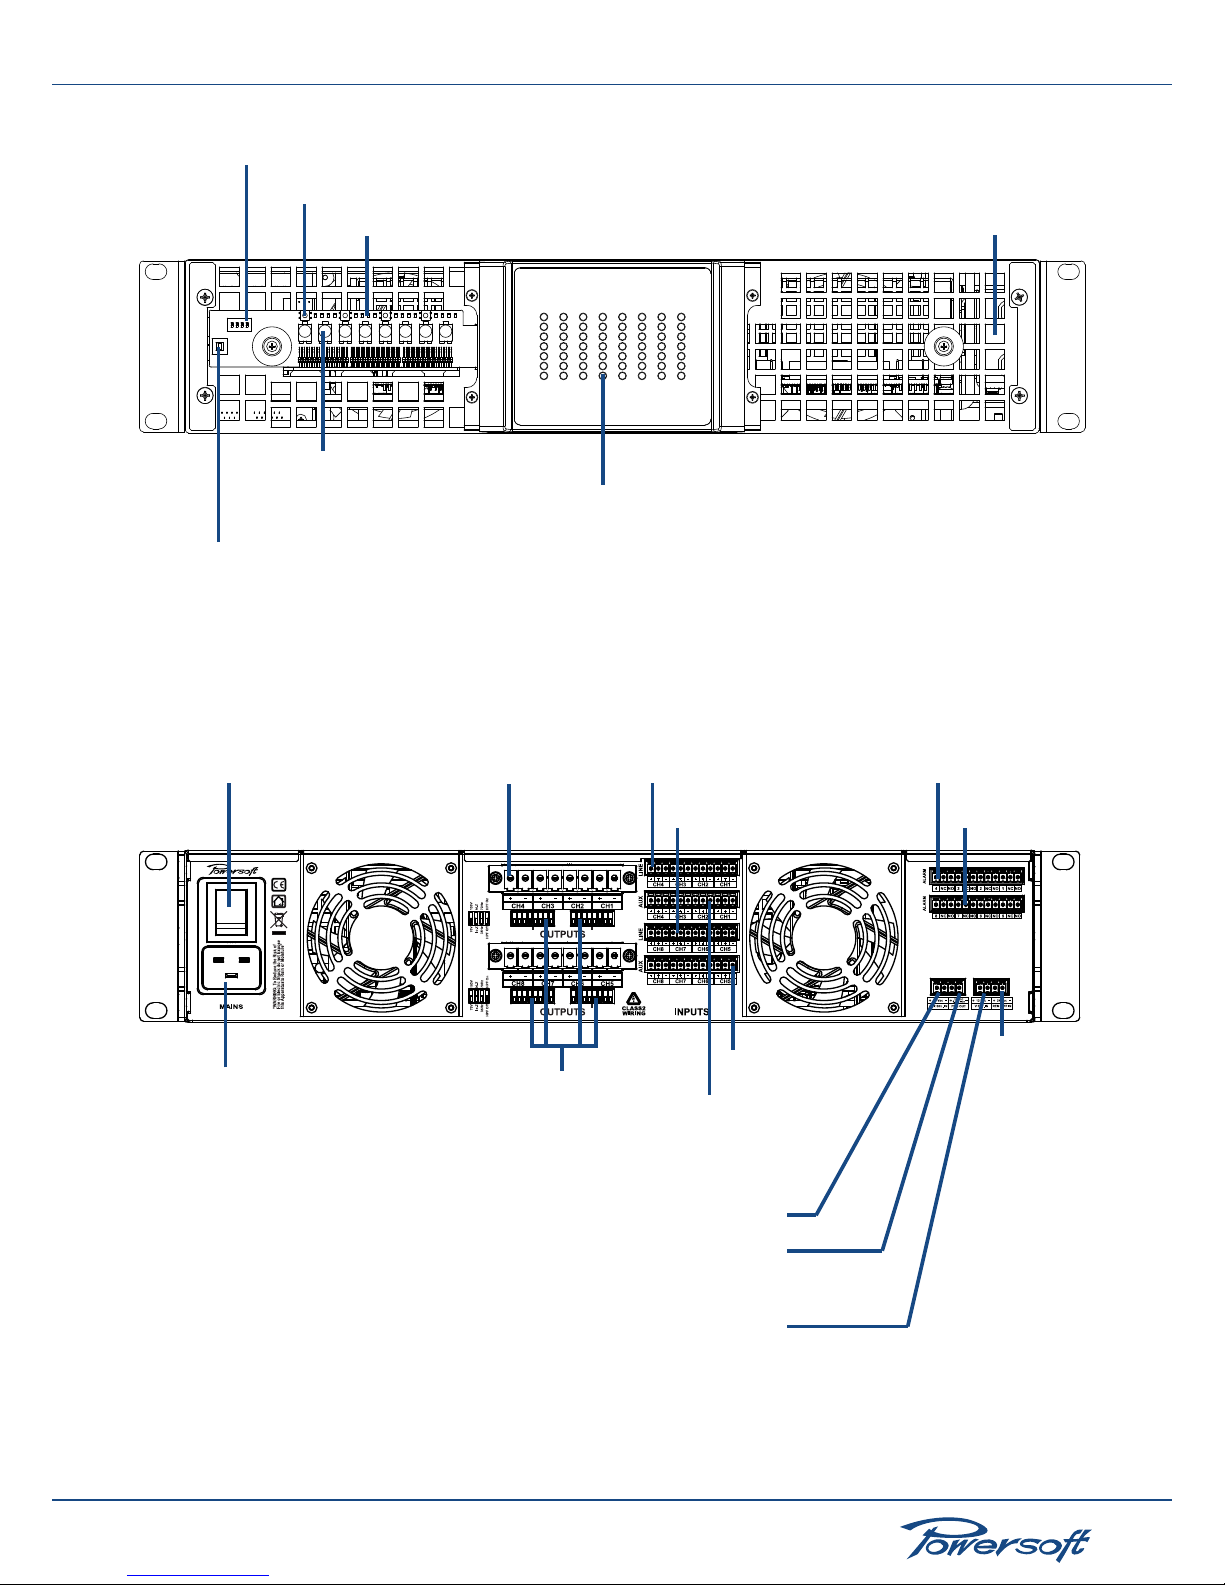
REF. FIGURE 2: Front panel view with opened side panels
REF. FIGURE 3: Back panel view
Energy save switch (per channel pair)
Preset selection switches (DSP version only)
DSP LEDs (DSP version only)
24V DC back panel PWS OUT voltage
source enable pushbutton switch
Output attenuators
(Ch1-Ch8)
Multifunction LEDs (Ch1-Ch8)
Air vents
On/OFF switch
AC mains power plug
70V/100V options
DIP switches
Audio outputs Line inputs
(Channels 1 to 4)
Line inputs
(Channels 5 to 8)
AUX inputs
(Channels 5 to 8)
AUX inputs
(Channels 1 to 4)
Alarm outputs
(Channels 1 to 4)
Alarm outputs
(Channels 5 to 8)
AUX input selection
Remote
ON/OFF
switch
Remote AUX supply
(DSP version only)
24V DC output enabled by
front panel switch
Page 9

▶
9
Ottocanali 4K4/8K4/12K4 User Guide
3 Welcome
3.1 Introduction
Congratulations on buying a Powersoft Ottocanali amplier!
Powersof t is a leading company in the eld of high efciency
audio power management. The Powersof t Class D technology
has changed the way the world looks at professional audio
amplication: no other amplier’s performance comes close for
applications demanding high power and long term reliability.
Thanks to amazing reductions in heat output and weight, without
sacricing output powers, Powersoft ampliers can be used in an
unlimited range of PA applications such as opera houses, theaters,
churches, cinema, and theme parks.
3.2 The Ottocanali Series
The Ottocanali series of ampliers are specically designed for
installation applications. The ampliers in this series offer smaller
dimensions, lighter weight and the traditionally amazing sound
quality and reliability of all Powersoft products. The PFC (Power
Factor Correction) feature allows awless worldwide operation
with any AC mains voltage, including 100, 110, 115, 220, 230 and
240V.
More Sound and Less Weight Class D technology based
ampliers are highly efcient, delivering greater power to speakers
with reduced heat dissipation: typical running efciency of output
stages is 95%, with only 5% of input energy dissipated as heat. This
allows for smaller dimensions, weight and power consumptions.
Contrary to conventional ampliers which achieve highest
efciency only at full rated power output, Class D efciency is
almost independent of output level. Music has an average power
density of 40% of its peak value; this means that other (non-class D)
ampliers can easily generate 10 times more heat than Powersof t
products for the same sound pressure level. This unit is designed
to work with lo-Z (from 2 Ω) and with 70V/100V distrib uted lines.
Powersof t ampliers deliver crystal-clear highs, and a tight, welldened low end: the most accurate reproduction of an audio
signal. Solid time proven design features ensure ex tremely high
performance in terms of super low total harmonic distortion,
optimal frequency response, high power bandwidth and damping
factor across a vast number of application scenarios. Powersoft’s
multi patented application of Pulse Width Modulation (PWM)
high frequency sampling techniques is just one of the many factors
contributing to the Ottocanali’s high performance ratings across
the audio bandwidth.
Patented SRM (Smart Rails Management) technology allows
to maximize the efciency of the system and drastically reduce
power consumption at any load and usage condition. This system
automatically alters the rails working level according to the
instaneous power requirements of the system. Low power output
requires a lower rails voltage value which in turn yields lower
power consumption while at the same time guaranteeing lightning
fast switching to full rails voltage when the system requires full
power. This Powersoft exclusive technology is the key to the
incredibly low power consumtption of the Ottocanali ampliers.
The Show Always Goes On
The Ottocanali series offer s complete protection against any
possible operation error. Every amplier in this series is designed
to work under a large range of possible conditions, delivering
maximum power with maximum safety and an outstanding long
term reliability. Two universal switch mode power supplies with
PFC (Power Factor Correction) each independently powering a
set of 4 channels. Anticipating potential problems at the design
stage means your show always goes on!
4 Installation
4.1 Unpacking
Carefully open the shipping car ton and check for any noticeable
damage; the gure below (FIGURE 1) shows the packing view.
Every Powersoft amplier is completely tested and inspected
before leaving the factory and should arrive in pristine condition.
In the unlikely event that you should encounter any damage,
please notify the shipping company immediately. Be sure to save
all packing materials for the carrier’s inspection.
The Ottocanali box contains the following:
▶
1 Ottocanali amplier
▶
1 x AC Mains cord with 3-pin plug 20 A for US, IEC ‘Schuko’
16 A for every other nation.
▶
2 x 8 pin DFK-PC 4/8-G-7.62 1861219
▶
6 x 12 pin Phoenix MC 1.5/12-ST-3.81 1803675 connectors
▶
2 x 4 pin Phoenix MC 1.5/4-ST-3.81 1803594 connectors
▶
1 x 16 pin Phoenix MSTB 2.5/16-ST-5.08 1757158 connectors
FIGURE 1: Ottocanali box
4.2 Mounting
Page 10

▶
10
Ottocanali 4K4/8K4/12K4 User Guide
All Powersof t ampliers are designed for standard 19” rack
mounting; there are four front panel holes and two rear-lateral
holes. In order to limit the risk of mechanical damages, ampliers
must be xed to the rack using both frontal as well as rear
mounting holes (FIGURE 2).
FIGURE 2: Amplier rack mounting holes, front and back
4.3 Cooling
All Powersoft ampliers implement a forced-air cooling system to
maintain low and constant operating temperatures. Drawn by an
internal fan, air enters through the slots in the front panel and is
forced over all components, exiting at the back of the amplier.
The amplier’s cooling system features an “intelligent” variable-
speed DC fan which is controlled by heat sink temperature sensing
circuits: the fan speed will increase only when the temperature
recorded by the sensors rises over carefully predetermined values.
This ensures that fan noise and internal dust accumulation are kept
to a strict minimum. Should however the amplier be subject to
an extreme thermal load, the fan will force a very large volume
of air through the heat sink. In the ex tremely rare event that the
amplier should dangerously overheat, sensing circuits shut down
all channels until the amplier cools down to a safe operating
temperature. Normal operation is resumed automatically without
the need for user intervention.
When mounting Ottocanali ampliers, the exhaust heat should
be taken into consideration. Exhaust cooling air is forced out
through the rear of the chassis (FIGURE 3); make sure there
is enough space around the back of the amplier for this air to
escape. Ottocanali ampliers can be stacked one on top of the
other due to the efcient cooling system they are equipped with.
There is however a safety limit to be obser ved: in case a rack with
closed back panels is used, leave one rack unit empty ever y four
Ottocanali ampliers installed to guarantee adequate air ow.
FIGURE 3: Forced air cooling: front to back airow
4.4 Operating Precautions
Make sure the power switch is off before attempting to make any
input or output connections.
Make sure the AC mains voltage used is within the acceptable
operating voltage range specied in the Ottocanali documentation
(100V-240V ±10%). Damage caused by connecting the amplier
to an improper AC mains voltage is not covered by the warranty.
By using good quality input and speaker cables, the likelihood of
erratic signal behavior is reduced to a minimum. Whether you
make them or buy them, look for good quality wires, connectors
and soldering techniques.
4.5 Grounding
There is no ground switch or terminal on the Ottocanali Series
ampliers. All shield terminals of input connections are directly
connec ted to the chassis. This means that the unit’s signal grounding
system is automatic. In order to limit hum and/or interference
entering the signal path, use balanced input connections.
In the interests of safety, the unit MUST always operate with
electrical safety ear th connected to the chassis via the dedicated
wire in the 3-wire cable. Never disconnect the ground pin on the
AC mains power cord.
4.6 AC Mains Connection
The AC Mains connection is made via the IEC type connector on
the back of the amplier. The PFC feature allows the Ottocanali
to work within a range of different AC mains voltages without the
need to adjust any settings; however, make sure your AC mains
power source operates within the voltage limits indicated on this
manual (100V-240V ±10%). Two 15A 6,3x32mm mains fuses are
located directly on the amplier boards.
Page 11

▶
11
Ottocanali 4K4/8K4/12K4 User Guide
FIGURE 4: Mains connector and on/off switch
SAFETY WARNING! Ground wires must be connected! Do not
use adapters that disable grounding.
5 Connections and Operation
5.1 Introduction
This section provides information on amplier connection and
operation. For optimal amplier performance, it is important to
understand the meaning of the information that the Ottocanali
amplier can provide regarding its status and conguration.
This information is available to the user both via front panel
indicators as well as through specic alarm signals broadcasted
from dedicated connectors on the back of the unit. This chapter
will break down all the front panel operations and monitoring
functions the Ottocanali is capable of. The remaining par t of
the chapter will explain how to correctly connect the amplier’s
inputs and outputs.
5.2 Front Panel Controls Access
A number of impor tant controls can be accessed by removing
the front left hand side protective panel bearing the Powersof t
logo. Both silver colored metal panels are at tached to the chassis
magnetically and can therefore be removed quickly without the
aid of any specic tool.
The following procedure can be used to remove both the left as
well as the right hand front panels. Removing the right hand panel,
however, does not grant access to any controls and is useful only
for air lter access (see Section 7. 3).
To remove the left hand side front panel bearing the Powersof t
logo:
1. Firmly grip the outermost lef t hand side of the silver colored
panel and pull outwards at an angle, as if opening a door
hinged on the right hand side
2. Carefully slide the metal panel away from the chassis. When
the front panel is removed, the air lter (looking like a shiny
black plastic sponge) will be exposed.
FIGURE 5: Magnetic side panel removal
To reposition the left hand side silver panel:
1. Secure the air lter to the amplier chassis by placing it in its
designated area and press lightly, so that the lter’s central cut
hole can brace the magnetic snap mechanism
2. Align the silver panel’s right hand side to the chassis at the
same angle used to remove it
3. When correctly positioned, the magnetic snap mechanism
will automatically secure the metal panel in place.
The controls positioned behind the left hand side silver colored
Powersof t logo panel allow access to a series of important features:
▶
Output channel attenuation adjustment (see Section 5.3.1)
▶
AUX Input/Line Input toggle (see Section “5.5 Connecting
Audio Inputs”)
▶
GPIO operations (see Section 5.9)
▶
Channel pair energy save mode selection (see Section 5.3.2)
5.3 Front Panel Adjustments
There are two types of adjustments that are possible from the
Ottocanali front panel: output level attenuation and energy save
mode.
5.3.1 Output Level Adjustments
Removing the lef t hand side metallic panel exposes one attenuator
knob for each channel, numbered one through eight starting from
the left hand side. Each channel’s output attenuation level can
be set to any value from 0 to ∞. Attenuation level decreases by
rotating the blue knob clock wise.
Page 12

▶
12
Ottocanali 4K4/8K4/12K4 User Guide
FIGURE 6: Front panel left hand side output attenuators
5.3.2 Energy Save
Energy save capabilities can be activated for each channel pair.
When the energy save mode is activated on a channel pair, the
Ottocanali enters a low power consumption idle state when
no signal activity is detected for more than 4 seconds. Normal
operation is resumed in a mat ter of milliseconds when an incoming
signal is detected on the channel pair.
Idle Power Consumption Energy Save Mode OFF
AC Mains
Voltage ( V)
Current (A) Real Power
(W)
Apparent
Power (VA)
Power
Factor
115 0.90 52 103. 5 0.5
230 0.84 58 193 0.3
Idle Power Consumption Energy Save Mode ON
AC Mains
Voltage ( V)
Current (A) Real Power
(W)
Apparent
Power (VA)
Power
Factor
115 0.65 30 75 0.4
230 0.76 35 175 0.2
FIGURE 7: Energy save mode on/off: idle power consumption chart for
the Ottocanali 4K4, 8K4,12K4
In order to enable energy saving mode for a channel pair, the DIP
switch on the left hand side of the front panel must be set to OFF
(down). The rst switch to the left is relative to channels 1 and 2,
the second to channels 3 and 4 and so on.
FIGURE 8: DIP switch for energy save mode
5.4 Front Panel Monitoring
The Ottocanali front panel provides important information on the
state of the amplier. It is important to know and understand the
meaning of every front panel indicator in order to have crucial
information on the operational state of the amplier.
On the central portion of the front panel of the Ottocanali are 8
columns of 7 LEDs each, one column for each channel.
FIGURE 9: Front panel LEDs
Some of these LEDs have multiple signaling modes, e.g. metering
or alarm modes. Their function is summarized in the following
chart:
LED Color Solid ON Blinking
Red Channel output level has
reached clipping limits
OR
Channel has been muted
due to heat sink temperature
rising above 80°C
1)
Yellow Channel output level is
above -6dB of max output
level
OR
Thermal warning: heat sink
temperature is above 70°C
2)
Green Channel output level is
above -12dB of max output
level
Green Channel output level is
above -24dB of max output
level
Green Input signal presence:
Input signal is above -60dBV
Green Channel is ready
Green -- AUX inputs
are selected
1)
Even if only one channel causes thermal overload, all channels are muted
and all red LEDs are on.
2)
Even if only one channel causes thermal warning, all yellow LEDs are on.
FIGURE 10: Front panel LEDs chart
Page 13

▶
13
Ottocanali 4K4/8K4/12K4 User Guide
5.5 Connecting Audio Inputs
Audio input connections are made via two 12-pin Phoenix MC
1.5/12-ST-3.81 terminal block connectors:
FIGURE 11: Audio input terminal block connector
Input connectors are placed on the back of the Ottocanali and
grouped in four rows:
FIGURE 12: Rows of input connectors
▶
The rst row is for line inputs for channels 1 through 4
▶
The second row of connectors is for auxiliary inputs for
channels 1 through 4
▶
The third row is for line inputs for channels 5 through 8
▶
The four th row of connectors is for auxiliary inputs for
channels 5 through 8
Line Input/Aux Input toggle:
The amplier switches from line inputs to auxiliary inputs when a
constant voltage in the 12V to 30V range is applied to the “AUX
SEL” connector. When this voltage is removed from the “AUX
SEL” connector, the unit switches back from auxiliary inputs to
line inputs.
FIGURE 13: AUX SEL connector
The Ottocanali amplier provides an additional procedure to
switch from line inputs to auxiliary inputs. The “PWS OUT”
connector can provide a 24V DC (0.2 A max, symmetrical with
respect to ground) when enabled by the left hand front panel
toggle switch.
FIGURE 14: AUX SEL and PWS OUT connection
FIGURE 15: Front panel “PWS OUT” toggle switch
FIGURE 16: PWS OUT port on the back of the Ottocanali amp
By connecting the “PWS OUT” connector to the “AUX SEL”
(see F IGU R E 13) the front panel switch will toggle between line
inputs and auxiliary inputs. The following diagram explains the
relationship between the front panel toggle switch and the PWS
OUT port.
FIGURE 17: PWS OUT por t vs front panel switch diagram
5.6 Connecting Audio Outputs
Warning! Lethal voltage levels may be present at the loudspeaker
connectors when the amp is turned on!
Two 8 pin DFK-PC 4/8-G -7.62 1861219 terminal block connectors
are provided for the amplier’s output connections. The + pin of
Page 14

▶
14
Ottocanali 4K4/8K4/12K4 User Guide
the connector corresponds to the positive output of the channel.
Ensure that the speakers are connected to the Ottocanali output
with the correct polarity.
FIGURE 18: Audio output terminal block connector
Both bridge as well as single end output connection modes are
possible and can be mixed: for example, channels 1 and 2 can
be connected in bridge mode, while channels 3 and 4 can be
connected single end.
REF. FIGURE 5 summarizes common connection modes with
corresponding connection polarities. Speaker cables are labeled
as spk X _+ and spkX _-, where X represents the speaker number.
5.7 Hi-Z 70V/100V Operations
Any channel of the Ottocanali amplier can drive a 70V/100V (hiZ) line. In order to connect any channel’s output to a 70V/100V
line, the rear panel DIP switch corresponding to the channel
must be correctly set. Powersoft recommends using a HPF
(High Pass Filter) when the amplier is set to drive a distributed
line to prevent loudspeaker transformer saturation which can
considerably degrade sound performance. Please see Section 5 .7.1
for a detailed explanation of the channel specic options that can
be set via the DIP switches.
5.7.1 Rear panel DIP switches
The rear of the Ottocanali has 4 slide-style DIP switches for
each channel, yielindg a total of 32 switches. These DIP switches
allow the selection of channel specic parameters which must be
properly set when using the amplier to drive, for example, a 70
V/100 V distributed line.
The rst switch form the left hand side allows to select whether
the channel will drive a 70 V or 100V line.
The second switch from the lef t allows to select the lo-Z or hi-Z
mode of the amplier. If the amplier is set to work in lo-Z mode,
the settings of all the other three DIP switches are ignored.
The third switch from the left allows to select the cut off frequency
of the input high pass lter. The two options are 35 Hz or 70 Hz.
The last switch allows to turn on or turn off the aforementioned
high pass lter. If the HPF is set to off, the 35Hz/70Hz setting is
ignored.
FIGURE 19: DIP switches for 70V/100V modes position
DIP switches for
Channel 2
DIP switches for
Channel 1
FIGURE 20: Rear panel DIP switch detail for channels one and two
5.8 Bridge Mode Connection
Bridge mode connection of outputs is possible only in lo-Z
operational mode. Bridging of adjacent channels is allowed for the
following pairs: channels 1 with 2, 3 with 4, 5 with 6, 7 with 8.
Bridiging is NOT possible for other pairs, for example channels
4 and 5. In order to obtain a bridge connection of the outputs,
inputs must be connected in parallel and outputs in series on
a minimum load of 8 Ω . Please refer to REF. FIGURE 4 for a
connection diagram example.
5.9 GPIO Operations
General Purpose Input/Output Operation (GPIO) refers to a
generic two pin contact (balanced or unbalanced) that can control
or can be controlled by another system. The Ottocanali’s GPIO
system implements digital trigger signals to broadcast alarms or
allow remote unit on/off switching.
5.9.1 Alarms
To ensure problem-free and efcient interaction with external
devices, the Ottocanali provides two 12-pin Phoenix MC 1.5/12ST-3.81 connectors on the back panel.
FIGURE 21: Back panel alarm output connectors
Page 15

▶
15
Ottocanali 4K4/8K4/12K4 User Guide
REF. FIGURE 4: Bridge mode output connection of channel 1 and channel 2, lo-Z only
Output
CH8-
Spk8_-
Spk4_ -
Output
CH8 +
Spk 8_+
NC
Output
CH7-
Sp k7_ -
NC
Output
CH7 +
Sp k7_+
Spk 4_+
Output
CH 6 -
Spk6_-
Spk3_-
Output
CH6 +
Spk 6_+
NC
Output
CH5-
Spk5_-
NC
Output
CH5 +
Spk 5_+
Spk 3_+
Output
CH4 -
Spk4_ -
Spk2_-
Output CH
4 +
Spk 4_+
NC
Output
CH3-
Spk3_-
NC
Output
CH3 +
Spk 3_+
Spk 2_+
Output
CH2-
Spk2_-
Spk1_ -
Output
CH2 +
Spk 2_+
NC
Output
CH1-
Spk1_ -
NC
Output
CH1 +
Spk1 _+
Spk1 _+
Connection type
Singl e end
Lo-Z 70V/100V
Bri dge Lo-Z
REF. FIGURE 5: Output connection mode char t
Page 16

▶
16
Ottocanali 4K4/8K4/12K4 User Guide
These contacts are used to repor t potentially dangerous faults or
generally unsafe operation conditions by toggling alarm switches
relative to events such as:
▶
DC presence at the output: when a dangerous DC component
is present in the output power signal
▶
Thermal stress: when heat dissipation is not sufcient and
heat sink temperature rises.
For a detailed account of protective measures relative to these
alarms, please see Chapter 6.
5.9. 2 Remote ON/OFF
By applying 24V DC (range from 15V to 30V DC) to the “REM
OFF” connector located at the back of the Ottocanali, the
amplier can be remotely switched on and off. When a 24V DC
voltage is applied to the REM OFF 2-pin Phoenix MC 1.5/4-ST-
3.81 connector, the amplier switches off immediately. When the
24V DC voltage is removed, the amplier switches back on as per
normal boot up operation.
FIGURE 22: REM OFF connector
6 Protection
In order to protect your device and your speakers from accidental
damage, the Ottocanali amplier includes an extensive automatic
protection system. In the following sections, potentially dangerous
scenarios and the amplier’s corresponding protective response
are explained in detail.
6.1 Turn On/Turn Off Muting
Class D amplier may cause severe speaker damage at power up
due to the high voltage levels at the output stage. In order to avoid
this, the outputs are muted for less than 2 seconds after turn on.
Similarly, turning off the amplier can cause the same problem:
outputs are muted immediately at turn off.
6.2 Short Circuit Protection
Shor t circuits or very low impedance loads may destroy the
output stage of any amplier. In order to protect the amplier
from the dangerously high current surges arising from accidental
output shor t circuits or low impedance loads, the Ottocanali
blocks channel activity when the current drawn from the load
rises above a set value.
6.3 Thermal Protection
All Powersoft ampliers have variable speed fans to assist cooling.
If for some reason the cooling system can’t dissipate the produced
heat correctly, a thermal protection system is automatically
activated to avoid permanent damages. Every channel pair of
the Ot tocanali has a temperature sensor on the output stage
heat sink. Two different protection strategies are implemented
depending on the severity of the overheating. In order to protect
internal components, the amplier may automatically reduce
output power until the internal temperature returns to safe levels.
6.3.1 Thermal Warning
If the heat sink temperature reaches 70°C the front panel yellow
LEDs turn on to warn the user of a potentially dangerous thermal
event.
6.3.2 Thermal Shutdown
II the heat sink temperature rises above 80°C , the thermal sensing
circuitry will mute each power section of each channel. All the red
front panel LEDs light on to indicate thermal halt and a thermal
event switch toggles all the alarm outputs at the back of the
amplier. Only after the heat sink has cooled down to below 70°C
the channels will automatically unmute, the LEDs turn off and the
rear switch toggles again.
6.4 DC Fault Protection
In order to protect your speakers from mechanical damage caused
by a DC signal coming from the amplier’s output, a DC detection
circuit is placed between the Ottocanali’s output stage and power
supply. If a DC signal or excessive subsonic energy appears at a
channel output an instantaneous protection circuit will mute the
compromised channel pair.
6.5 Input/Output Protection
Inter ference protection is implemented in the Ottocanali to limit
out of band noise carried by the input lines. Disturbing frequencies
can interact with the output stage, causing unpredictable amplier
behavior. A ltering system is used to stop infrasonic and VHF
signals from entering the signal path.
7 User Maintenance
7.1 Cleaning
Before attempting to clean any part of the amplier, rst
disconnect the AC main source. Use a soft cloth and mild nonabrasive solution to clean the faceplate and chassis.
WARNING! Never let any liquid reach the internal par ts of the
amplier.
Page 17

▶
17
Ottocanali 4K4/8K4/12K4 User Guide
7.2 Service
There are no user-serviceable parts in your amplier. Refer
servicing to qualied technical personnel.
In addition to having an in-house ser vice depar tment, Powersoft
suppor ts a network of authorized service centers. If your amplier
needs repair contact your Powersoft dealer (or distributor). You
can also contact the Powersoft Technical Service depar tment to
obtain the location of the nearest authorized service center.
7.3 Dust Removal
In dusty environments, the front side air lters clog with dust
after prolonged use. The dust gathered in the lters will interfere
with cooling. You may use compressed air to remove the dust
from lters. To remove air lters please refer to the front panel
removal procedure (Section 5.2). Air lter cleaning should be
scheduled according to the dust levels in the amplier’s operating
environment.
8 Warranty
Product Warranty:
POWERSOFT guarantees its manufactured products to be
free from defective components and factory workmanship
for a period of 48 (forty eight) months, starting from the date
of purchase printed on Powersof t’s (or any of its Authorized
Dealer’s) invoice to the end customer. All warranty repairs and
retrots must be performed at POWERSOFT facilities or at an
Authorized Service Center at no cost for the purchaser. Warranty
exclusion: POWERSOFT’s warranty does not cover product
malfunctioning or failure caused by: misuse, abuse, repair work
or alterations performed by non-authorized personnel, incorrect
connections, exposure to harsh weather conditions, mechanical
damages (including shipping accidents), and normal wear and tear.
POWERSOFT will perform warranty services provided that the
product is not damaged during transportation.
Return of Goods:
Goods can be returned to POWERSOF T only after they have
been granted a Return Merchandise Authorization (RMA) number
to be attached to the ex ternal packaging. POWERSOFT (or its
Authorized Service Center) has the right to refuse any returned
good without a RMA number.
Repair or replacement:
POWERSOFT reserves the right to repair or replace any defective
goods covered by product warranty at its sole discretion and as
it deems best.
Cost and responsibility of transport:
The purchaser (or end user/customer) is solely responsible for all
transpor tation costs and risks associated with sending warranty
covered goods to POWERSOF T or its Authorized Service
Center. POWERSOFT will assume full responsibility and cover all
costs incurred to send the goods back to the purchaser (or end
user/customer).
9 Assistance
Even though most product malfunctioning can be solved at your
premises through Powersoft Customer Care or your direct
knowledge, occasionally, due the nature of the failure, it might
be necessary to return defective products to Powersoft for
repair. In the latter case, before shipping, you are kindly asked
to follow step by step the procedure described below: Obtain
the “Defect Repor t Form” by contacting our Customer Care
Depar tment via email: service@powersoft.it or download the
“Defect Report Form”.
Fill out one “Defect Repor t form” for each returned
item (the form is an editable tab guided document) and
save as your name, amp model and serial Number (for
example: distributornamek10sn17345.doc) providing all
required information except the RMA code/s and send it to
service@powersoft.it for Powersoft approval.
In case of defect reports approved by the Powersoft Customer
Service Representative you will receive an RMA authorization
code (one RMA code for each returning device). Upon receiving
the RMA code you must package the unit and attach the RMA
code outside the pack, protected in a waterproof transparent
envelope so it is clearly visible.
All returning items must be shipped to the following address:
Powersof t srl
Via Enrico Conti, 13-15
50018 Scandicci (FI) Italy
In case of shipment from countr ies NOT belonging to the European
Community make sure you have also followed the instructions
described in the document available for download at the
TEMPORARY EXPORTATION / IMPORTATION PROCEDURE
link at http://www.powersoft-audio.com/en/support/service.html
Thank you for your understanding and cooperation and continued
suppor t as we work to improve our par tnership.
Page 18

▶
18
Ottocanali 4K4/8K4/12K4 User Guide
10 Technical specication
10.1 OT TOC ANALI 4K4
Specications
General
Number of channels 8 Mono-bridgeable per channel pair
Max Output power 8-channel mode mono-bridged mode
2 Ω / Ch 4 Ω / Ch 8 Ω / Ch 70 V 10 0 V 4-8 Ω /
Ch pair
16 Ω /
Ch pair
(all channels driven) 450 W 500 W 250 W 500 W 500 W 900-1000 W 500 W
Max ou tput voltage 65 V
peak
100 V
peak
141 V
peak
135 V
peak
Max ou tput current 15 A
peak
10 A
peak
7 A
peak
15 A
peak
AC Mains Power
Power supply Unive rsal, regulated switch mode with PFC ( Power Factor Corr ection)
Operating voltage / Inrush curre nt 100 V - 240 V ±10%, 50/60 Hz
Power factor cos (φ)
> 0.95 @ > 500 W
Consum ption / current draw @ 230 V @ 115 V
Energ y Save on 35 W 0.76 A 30 W 0.65 A
Energ y Save off 58 W 0. 84 A 52 W 0.9 A
I/8 of ma x power @ 4 Ω 750 W 3.2 A 750 W 6.4 A
Thermal
Environmental operating temperature 0° - 45° C / 32° - 113° F
Thermal dissipation
Fan variable speed, te mperature controlled front to rear airow
230 V 115 V
Energ y Save on 119 B T U/ h 30 kcal/h 102 BTU/h 26 kcal/h
Energ y Save off 239 BTU/h 60 kcal/h 187 BTU /h 47 kcal/h
I/8 of ma x output power @ 4 Ω 2559 BTU/ h 645 kcal/h 2559 BTU /h 645 kcal/h
Audio
Gain 32 dB
Frequency response 20 Hz - 20 kHz ( ±0.5 d B) for 1 W @ 4 Ω or 1 W @ 8 Ω
S/N ratio (amplier section) >111 dB (20 Hz - 20 kHz A weighted)
Noise oor -67 dBV (20 Hz - 20 kHz, A weighted)
Crosst alk separation > 70 dB @ 1 kHz (4 Ω)
Input sensit ivit y @ 8 Ω 1.94 V
RMS
/ +8 dBu for max ou t power – 1.6 V
RMS
/ +6.3 d Bu for 10 00 W power
Maximum input level 6 V
RMS
/ +17.8dBu
Input impedance 10 kΩ balanced
THD+N / SMPTE IM D < 0.05% (typically <0.02%) @ 8 Ω
Slew rate 50 V/μs @ 8 Ω, input lter bypassed
Damping factor > 1000 0 @ 100 Hz (lo-Z )
Front Panel
Indicators 7 multifunction LEDs per channel: 4 x green, 2 x yellow, 1 x red
Controls Pushb utton enables 24 V DC at back P WS OU T connector (can also toggle LIN E/AUX inputs). 8 output
atte nuators , energy save mode act ivation (per channel pair) DI P swi tch
Maintenance Dust lter foam behind front al sil ver colored panels
Rear Panel
Controls
4 DIP swi tches for each channel (allows selc tion of 70 V/100 V modes, hi-Z/lo-Z mode s, 35 Hz/70 Hz LPF, HPF on/off )
Input / Output connectors 4 x 12 pin Phoenix MC 1.5/12-ST-3.81 1803675 / 2 x 8 pin DFK- PC 4/8-G-7.62 1861219
Fault alarm connectors 2 x 12 pin Phoenix M C 1.5/12-ST-3.81 1803675
Aux command (trigger ing aux inputs) and aux
voltage for remote on/off swit ching
4 pin Phoenix M C 1.5/4-ST-3.81 1803594
Aux front swi tch enabling and extern al 24 V
DC (0.2 A) auxiliary supply
4 pin Phoenix M C 1.5/4-ST-3.81 1803594
AC mains IEC C19/22. 2 20 A, AC mains cord wi th 20 A 3-pin plug 20 A for U S, IEC Schu ko 16 A for ever y other nation
Construction
Dimensions W 483 mm / 19”, H 89 mm / 3.5” / 2 RU, D 360 mm / 14.2”
Weig ht 14 kg / 30.8 lb
Page 19

▶
19
Ottocanali 4K4/8K4/12K4 User Guide
10.2 OTTOCANALI 8K4
Specications
General
Number of channels 8 Mono-bridgeable per channel pair
Max Output power 8-channel mode mono-bridged mode
2 Ω / Ch 4 Ω / Ch 8 Ω / Ch 70 V 10 0 V 4-8 Ω /
Ch pair
16 Ω /
Ch pair
(all channels driven) 900 W 1000 W 500 W 1000 W 1000 W 1800-2000 W 1000 W
Max ou tput voltage 90 V
peak
100 V
peak
141 V
peak
180 V
peak
Max ou tput current 23 A
peak
20 A
peak
14 A
peak
23 A
peak
AC Mains Power
Power supply Unive rsal, regulated switch mode with PFC ( Power Factor Corr ection)
Operating voltage / Inrush curre nt 100 V - 240 V ±10%, 50/60 Hz
Power factor cos (φ)
> 0.95 @ > 500 W
Consum ption / current draw @ 230 V @ 115 V
Energ y Save on 35 W 0.76 A 30 W 0.65 A
Energ y Save off 58 W 0. 84 A 52 W 0.9 A
I/8 of ma x power @ 4 Ω 150 0 W 6.4 A 150 0 W 13 A
Thermal
Environmental operating temperature 0° - 45° C / 32° - 113° F
Thermal dissipation
Fan variable speed, te mperature controlled front to rear airow
230 V 115 V
Energ y Save on 119 B T U/ h 30 kcal/h 102 BTU/h 26 kcal/h
Energ y Save off 239 BTU/h 60 kcal/h 187 BTU /h 47 kcal/h
I/8 of ma x output power @ 4 Ω 5118 BT U / h 1290 kcal/h 5118 B T U/ h 1290 kcal/h
Audio
Gain 32 dB
Frequency response 20 Hz - 20 kHz ( ±0.5 dB) for 1 W @ 4 Ω or 1 W @ 8 Ω
S/N ratio (amplier section) >111 dB (20 Hz - 20 kHz A weighted)
Noise oor -67 dBV (20 Hz - 20 kHz, A weighted)
Crosst alk separation > 70 dB @ 1 kHz (4 Ω)
Input sensit ivit y @ 8 Ω 1.94 V
RMS
/ +8 dBu for max ou t power – 1.6 V
RMS
/ +6.3 d Bu for 10 00 W power
Maximum input level 6 V
RMS
/ +17.8dBu
Input impedance 10 kΩ balanced
THD+N / SMPTE IM D < 0.05% (typically <0.02%) @ 8 Ω
Slew rate 50 V/μs @ 8 Ω, input lter bypassed
Damping factor > 1000 0 @ 100 Hz (lo-Z )
Front Panel
Indicators 7 multifunction LEDs per channel: 4 x green, 2 x yellow, 1 x red
Controls Pushb utton enables 24 V DC at back P WS OU T connector (can also toggle LIN E/AUX inputs). 8 output
atte nuators , energy save mode act ivation (per channel pair) DI P swi tch
Maintenance Dust lter foam behind front al sil ver colored panels
Rear Panel
Controls
4 DIP swi tches for each channel (allows selc tion of 70 V/100 V modes, hi-Z/lo-Z mode s, 35 Hz/70 Hz LPF, HPF on/off )
Input / Output connectors 4 x 12 pin Phoenix MC 1.5/12-ST-3.81 1803675 / 2 x 8 pin DFK- PC 4/8-G-7.62 1861219
Fault alarm connectors 2 x 12 pin Phoenix M C 1.5/12-ST-3.81 1803675
Aux command (trigger ing aux inputs) and aux
voltage for remote on/off swit ching
4 pin Phoenix M C 1.5/4-ST-3.81 1803594
Aux front swi tch enabling and extern al 24 V
DC (0.2 A) auxiliary supply
4 pin Phoenix M C 1.5/4-ST-3.81 1803594
AC mains IEC C19/22. 2 20 A, AC mains cord wi th 20 A 3-pin plug 20 A for U S, IEC Schu ko 16 A for ever y other nation
Construction
Dimensions W 483 mm / 19”, H 89 mm / 3.5” / 2 RU, D 360 mm / 14.2”
Weig ht 14 kg / 30.8 lb
Page 20

▶
20
Ottocanali 4K4/8K4/12K4 User Guide
10.3 OTTOCANALI 8K4 DSP+AVB
Specications
General
Numbe r of channels 8 Mono-bridgeable per channel pair
Max Output power 8-channel mode mono-bridged mode
2 Ω / Ch 4 Ω / Ch 8 Ω / Ch 70 V 100 V 4- 8 Ω /
Ch pair
16 Ω /
Ch pair
(all channels d riven) 900 W 1000 W 50 0 W 1000 W 1000 W 1800-2000 W 1000 W
Max ou tput voltage 90 V
peak
100 V
peak
141 V
peak
180 V
peak
Max ou tput c urren t 23 A
peak
20 A
peak
14 A
peak
23 A
peak
AC Mains Power
Power supply Unive rsal, re gulated sw itch mode wi th PFC ( Power Fa ctor Correction)
Operating vo ltag e / Inrush curre nt 100 V - 240 V ±10%, 50/60 Hz
Power fac tor cos (φ)
> 0.95 @ > 50 0 W
Consumption / current draw @ 230 V @ 115 V
Energ y Save on 35 W 0 .76 A 30 W 0.65 A
Energ y Save off 58 W 0.84 A 52 W 0.9 A
I/8 of ma x power @ 4 Ω 150 0 W 6.4 A 1500 W 13 A
Thermal
Environment al operating tempe rature 0° - 45° C / 32° - 113° F
Thermal dissipation
Fan variab le spe ed, te mperatu re controlled fr ont to r ear airow
230 V 115 V
Energ y Save on 11 9 B T U / h 30 kcal/h 102 BTU /h 26 kcal/h
Energ y Save off 239 BTU/h 60 kcal/h 187 B TU /h 47 kcal /h
I/8 of ma x out put powe r @ 4 Ω 5118 B T U/ h 129 0 k cal /h 5118 BT U / h 129 0 k c al / h
Audio
Gain 32 dB
Frequency response 20 Hz - 20 kHz ( ±0.5 d B) for 1 W @ 4 Ω or 1 W @ 8 Ω
S/N ratio (amplier s ecti on) >111 dB (20 H z - 20 kHz A weighted )
Noise oor -67 dBV (20 Hz - 20 kHz , A weighted)
Crosst alk se para tion > 70 dB @ 1 kHz (4 Ω)
Input sensitivit y @ 8 Ω
1.94 V
RMS
/ +8 dBu for max ou t power – 1.6 V
RMS
/ +6.3 d Bu for 10 00 W power
Maximum input level
6 V
RMS
/ +17.8 dBu
Input impedance 10 kΩ balanced
THD+N / SM PTE IM D < 0.05% (typi call y <0.02%) @ 8 Ω
Slew rate 50 V/μs @ 8 Ω, inpu t lte r bypa ssed
Dampi ng fac tor > 1000 0 @ 100 Hz (lo-Z )
DSP
A/D converter
Dual 24bi t 96 kHz Tandem® archi tecture wi th 127 dBA of dynamic range and THD <0.00 5% (20 Hz - 20 kHz)
D/A converter
Dual 24bi t 96 kHz Tandem® archi tecture wi th 122 dBA of dyna mic range and THD <0.0 03% (20 Hz - 20 kHz)
Presets 50 stored lo cally + 150 stor ed on a sm ar tcar d
Delay fo r time al ignme nt up to 4 s on the input s ect ion, u p to 32 ms pe r output, sample-by-sample s tepp ing
Crossover lters But ter wor th, Linkwit z-R iley, Be ssel , Arb itr ar y Asy mmet ric , 6dB /oct to 48dB/oct (I IR), li near p hase ( FIR), hybr id (FI R+IIR)
Output equalizer 16 fully parametric lters per chan nel, IIR : peak ing, hi/lo shel ving , hi/l o pass e q, ban d pass , band stop, all pass. Cu stom FIR up
to 384 t aps @ 48 or 96 kHz
Input e qualizer Thre e layer s (PE Q, rai sed cosine, s helv ing), 32 lte rs ea ch + group lt ers , up to 256 lte rs total
Cable compen sation network up to 2 Ω negative/positive wire compensation (Active DampingControl
TM
)
Limiters
Power limiter (True Power™, RM S volt age, RMS cu rrent) + Peak Limi ter
AVB+Ethernet
AVB Stack 100 Mbps int er face, auto M DIX
Master Cloc k Low Ji tte r clock s ynch ronized to the PTP word clock
AVB Stack IEEE 802.1as, IEEE 1722, IEEE 802.1Qav
Front Pa nel
Indicators 7 mul tifunct ion LE Ds per c hann el: 4 x gr een, 2 x yellow, 1 x red
Controls P ushb utton ena bles 24 V DC at back P WS OU T conne cto r (can also toggle LINE/AUX inpu ts). 8 out put attenuato rs,
ener gy save mode a cti vati on (pe r chan nel pair) DIP swit ch, 4 pu shbu tto n for pr eset selec tion (one per ch . pair)
Data
USB 2. 0 for backup and rmware update
Rear Panel
Controls
4 DIP switches for each cha nnel : 70V/100V mod es, hi-Z/ lo-Z modes , 35 Hz/70 Hz L PF, HPF on /off
Input / O utpu t conne ctor s 4 x 12 pin Phoe nix MC 1. 5/12-ST-3.81 1803675 / 2 x 8 pin DFK- PC 4/8 -G -7.62 1861219
Fault alarm co nnectors 2 x 12 pin Phoeni x MC 1.5/12-ST-3.81 1803675
Aux comman d (trigge ring aux input s) and aux
volta ge for remote on/off switching
4 pin Pho enix M C 1.5/4 -ST-3.81 1803594
Aux front switch enabling and exter nal 24 V
DC (0.2 A) auxiliar y supply
4 pin Pho enix M C 1.5/4 -ST-3.81 1803594
Network data incl. AVB
2 x RJ45 ports with activi ty LE Ds
AC mains IEC C19/22.2 20 A , AC mains cord w ith 20 A 3 -pin plug 20 A for US, I EC Schuko 16 A for every ot her na tion
Construction
Dimensions W 483 mm / 19”, H 89 mm / 3.5” / 2 RU, D 360 m m / 14.2”
Weig ht 14 kg / 30.8 lb
Page 21

▶
21
10.4 OTTOCANALI 12K4
Specications
General
Number of channels 8 Mono-bridgeable per channel pair
Max Output power 8-channel mode mono-bridged mode
2 Ω / Ch 4 Ω / Ch 8 Ω / Ch 70 V 10 0 V 4-8 Ω /
Ch pair
16 Ω /
Ch pair
(all channels driven) 1000 w 1500 W 750 W 1500 W 15 00 W 2000-3000 W 150 0 W
Max ou tput voltage 150 V
peak
100 V
peak
141 V
peak
300 V
peak
Max ou tput current 54 A
peak
30 A
peak
21 A
peak
54 A
peak
AC Mains Power
Power supply Unive rsal, regulated switch mode with PFC ( Power Factor Corr ection)
Operating voltage / Inrush curre nt 100 V - 240 V ±10%, 50/60 Hz
Power factor cos (φ)
> 0.95 @ > 500 W
Consum ption / current draw @ 230 V @ 115 V
Energ y Save on 35 W 0.76 A 30 W 0.65 A
Energ y Save off 58 W 0. 84 A 52 W 0.9 A
I/8 of ma x power @ 4 Ω 210 0 W 10 A 210 0 W 16 A
Thermal
Environmental operating temperature 0° - 45° C / 32° - 113° F
Thermal dissipation
Fan variable speed, te mperature controlled front to rear airow
230 V 115 V
Energ y Save on 119 B T U/ h 30 kcal/h 102 BTU/h 26 kcal/h
Energ y Save off 239 BTU/h 60 kcal/h 187 BTU /h 47 kcal/h
I/8 of ma x output power @ 4 Ω 7165 BTU / h 1805 kcal/h 7165 BT U /h 1805 kcal/h
Audio
Gain 32 dB
Frequency response 20 Hz - 20 kHz ( ±0.5 dB) for 1 W @ 4 Ω or 1 W @ 8 Ω
S/N ratio (amplier section) >111 dB (20 Hz - 20 kHz A weighted)
Noise oor -67 dBV (20 Hz - 20 kHz, A weighted)
Crosst alk separation > 70 dB @ 1 kHz (4 Ω)
Input sensit ivit y @ 8 Ω 1.94 V
RMS
/ +8 dBu for max ou t power – 1.6 V
RMS
/ +6.3 d Bu for 10 00 W power
Maximum input level 6 V
RMS
/ +17.8dBu
Input impedance 10 kΩ balanced
THD+N / SMPTE IM D < 0.05% (typically <0.02%) @ 8 Ω
Slew rate 50 V/μs @ 8 Ω, input lter bypassed
Damping factor > 1000 0 @ 100 Hz (lo-Z )
Front Panel
Indicators 7 multifunction LEDs per channel: 4 x green, 2 x yellow, 1 x red
Controls Pushb utton enables 24 V DC at back P WS OU T connector (can also toggle LIN E/AUX inputs). 8 output
atte nuators , energy save mode act ivation (per channel pair) DI P swi tch
Maintenance Dust lter foam behind front al sil ver colored panels
Rear Panel
Controls
4 DIP swi tches for each channel (allows selc tion of 70 V/100 V modes, hi-Z/lo-Z mode s, 35 Hz/70 Hz LPF, HPF on/off )
Input / Output connectors 4 x 12 pin Phoenix MC 1.5/12-ST-3.81 1803675 / 2 x 8 pin DFK- PC 4/8-G-7.62 1861219
Fault alarm connectors 2 x 12 pin Phoenix M C 1.5/12-ST-3.81 1803675
Aux command (trigger ing aux inputs) and aux
voltage for remote on/off swit ching
4 pin Phoenix M C 1.5/4-ST-3.81 1803594
Aux front swi tch enabling and extern al 24 V
DC (0.2 A) auxiliary supply
4 pin Phoenix M C 1.5/4-ST-3.81 1803594
AC mains IEC C19/22. 2 20 A, AC mains cord wi th 20 A 3-pin plug 20 A for U S, IEC Schu ko 16 A for ever y other nation
Construction
Dimensions W 483 mm / 19”, H 89 mm / 3.5” / 2 RU, D 360 mm / 14.2”
Weig ht 14 kg / 30.8 lb
Page 22

▶
22
This page intentionally left blank
Page 23

▶
23
This page intentionally left blank
Page 24

▶
24
This page intentionally left blank
Page 25

▶
25
This page intentionally left blank
Page 26

 Loading...