

Page 1
The following instructions explain how to retrofit your existing
427/428 HydroGuard to the new, enhanced version which utilizes
wax elements. The combination of these design concepts results
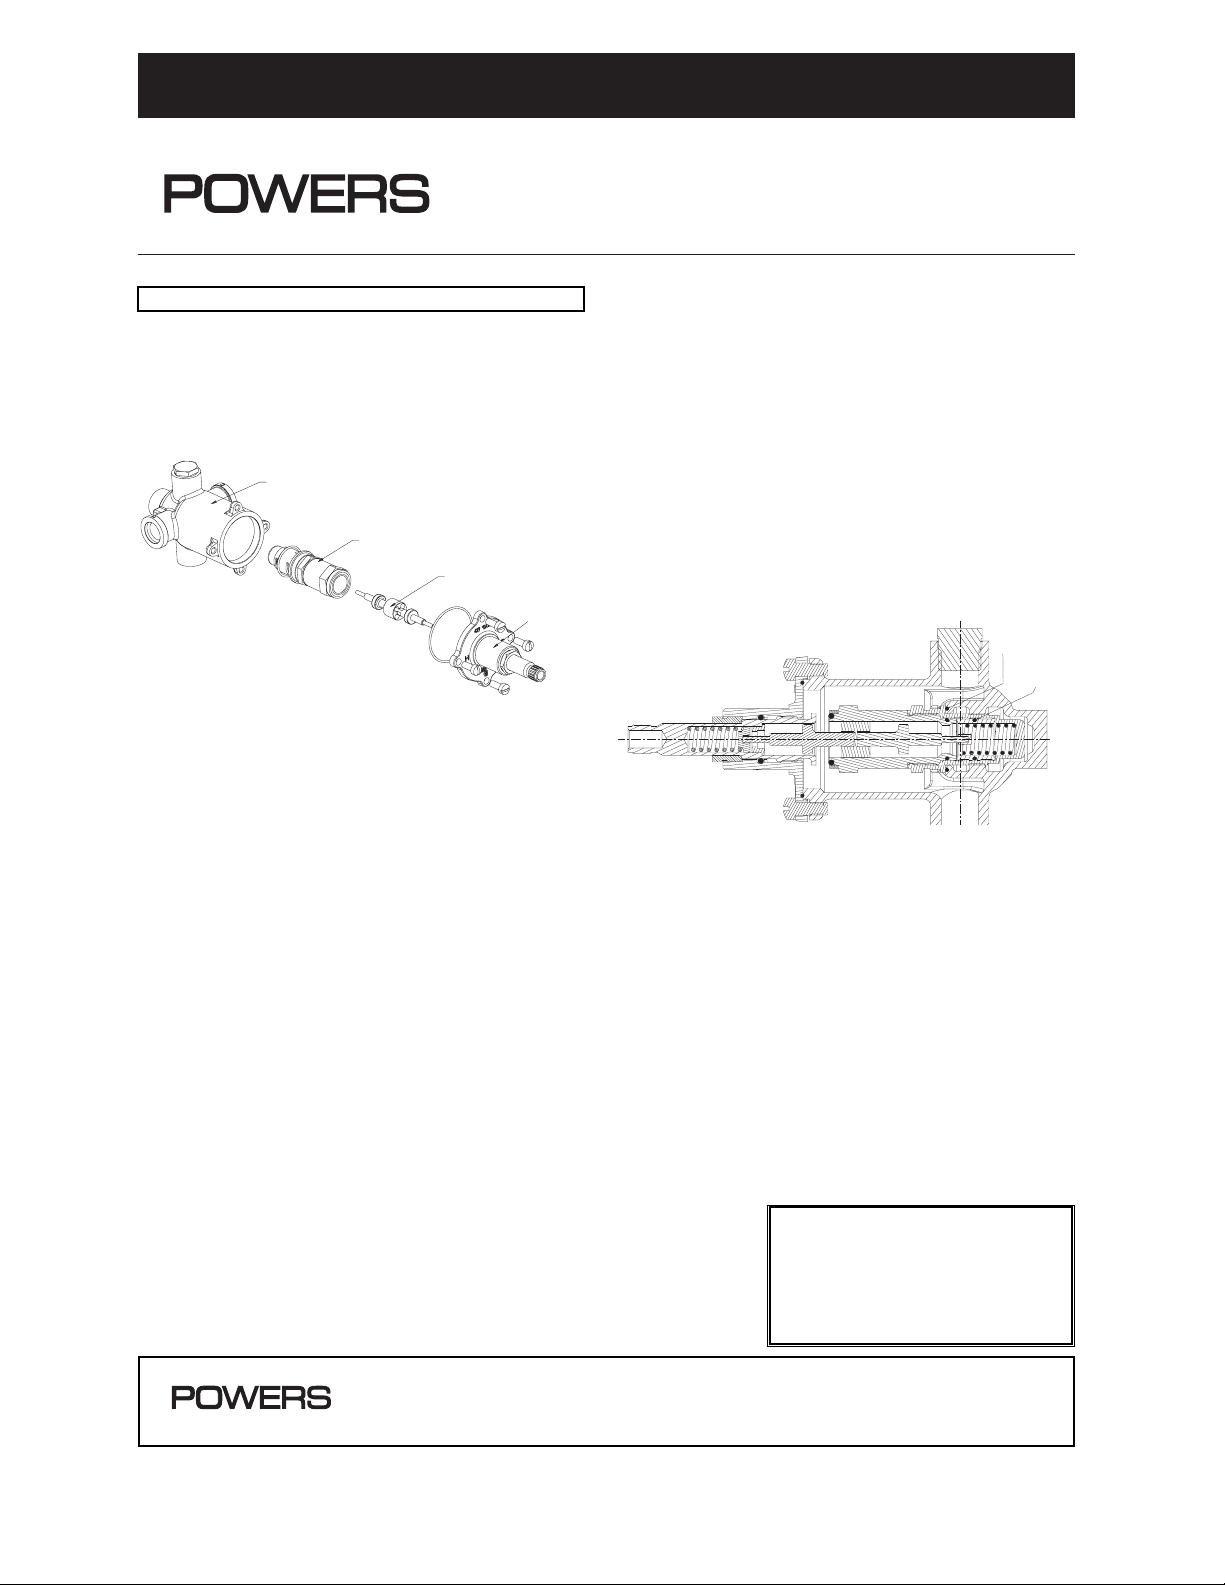
in a valve with enhanced performance. See the exploded view of
this new assembly below:
Before you begin your upgrade, take the time to ensure you have
all the necessary pieces. Your retrofit kit, for each valve, consists of the
following (refer to above diagram when taking inventory):
1. Cartridge Assembly (with one loose “O” ring).
2. Motor Assembly.
3. Bonnet Assembly (with one loose “O” ring).
4. Wrench (not shown).
5. Lubricant.
After you verify that you have everything needed to complete the
retrofit, proceed with the next section.
Retrofit:
Follow the instructions below to perform your retrofit. Save all
components until you have successfully completed your retrofit.
Disassembly:
1. Remove the handle and trim plate.
2. Turn off hot & cold water supply-stops (required for this retrofit).
3. Remove 4 bonnet screws and bonnet assembly.
4. Remove internal components from valve body.
5. Using wrench (225 350), remove cylinder.
6. At this point you should have an empty valve body.
You are now ready to put the new components into your
existing valve.
Reassembly:
1. Ensure the inside of the valve body is free of deposits
and debris. Clean as necessary.
2. Look inside the body. If there are two grooves then install
the smaller “O” ring on the cartridge as shown in Figure 2
(model 3 or earlier). Otherwise, install larger “O” ring on to
the “O” ring groove in the body.
3. Screw cartridge assembly into the body. Installation
torque 150 in/lbs. (Caution: Do not overtighten, it will
effect performance).
4. Assemble two motor with motor adapter and place it
in the body.
5. Install bonnet assembly using four screws.
6. With handle, rotate the stem assembly clock-wise, until
it bottoms out on the cartridge. At this point your valve
is in the “OFF” position.
See cut-away above to see how everything goes together.
7. Turn the hot and cold water supplies back on and verify
there is no leakage.
8. Maximum temperature setting adjustment must be set on
the job based on application. For point-of-use applications,
we recommend 110
°F (43°C).
The high temperature limit stop is located on the bonnet.
Rotate handle to the maximum desired outlet temperature.
With an open-end wrench, screw high temperature limit stop
into bonnet until it touches stem’s shoulder. Close valve and
open it to full hot to verify settings.
9. Install trim and handle.
10. Your retrofit is complete.
If you have any problems, comments, or suggestions, please
contact your Powers representative. We are interested in
feedback from the field.
INSTALLATION INSTRUCTIONS
Upgrade Kit HydroGuard®e427/e428
Kit # 427-200/201/202
H427-200/201/202
Form II 427R v2
EXISTING VALVE BODY
KIT, CARTRIDGE ASSEMBLY
KIT, MOTOR ASSEMBLY
KIT,
BONNET ASSEMBLY
Figure 1
Figure 2
RETROFIT INSTRUCTIONS
CALIFORNIA PROPOSITION 65 WARNING
WARNING: This product contains chemicals
known to the State of California to cause cancer
and birth defects or other reproductive harm.
(California law requires this warning to be given
to customers in the State of California.)
For more information: www.wattsind.com/prop65
© 2003 Powers, a division of Watts Water Technologies, Inc.
USA Phone: 1.800.669.5430 • Fax 1.847.824.0627
Canada Phone: 1.888.208.8927 • Fax 1.888.882.1979
www.powerscontrols.com
Form II 427R v2 0347 EDP# 6512251 Printed in U.S.A.
LARGER
"O" RING
SMALLER
"O" RING
 Loading...